My take on the perfect road going FD

 05-06-14, 04:15 PM
#202
Its an auto dimmer from a mk6 VW Golf. The electrics we're really simple. Power with ignition, earth & reverse signal (Optional). The main issue was the mount as the mk6 mirror mount is huge & contains a rain sensor.
I cut the mount off the stock mirror and the mk6 mirror and fitted the stock FD mount onto the mk6 mirror using a finger joint with two flush bolts passing through. A little filler and some black paint and it looks stock .
.
I cut the mount off the stock mirror and the mk6 mirror and fitted the stock FD mount onto the mk6 mirror using a finger joint with two flush bolts passing through. A little filler and some black paint and it looks stock
.
05-07-14, 11:30 AM
#203
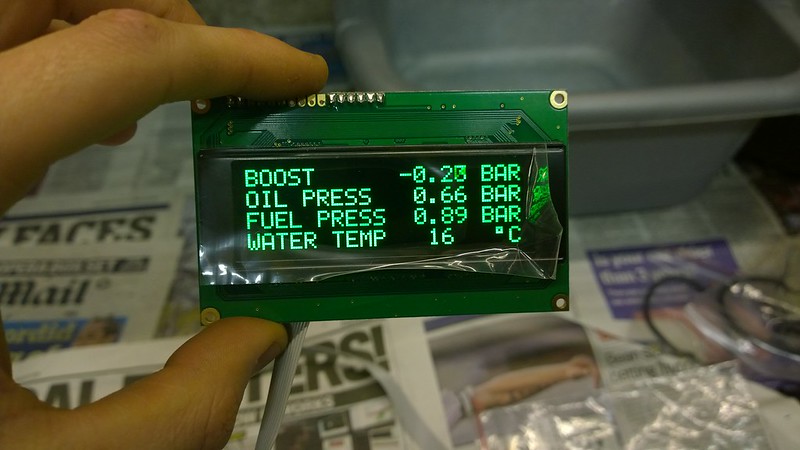
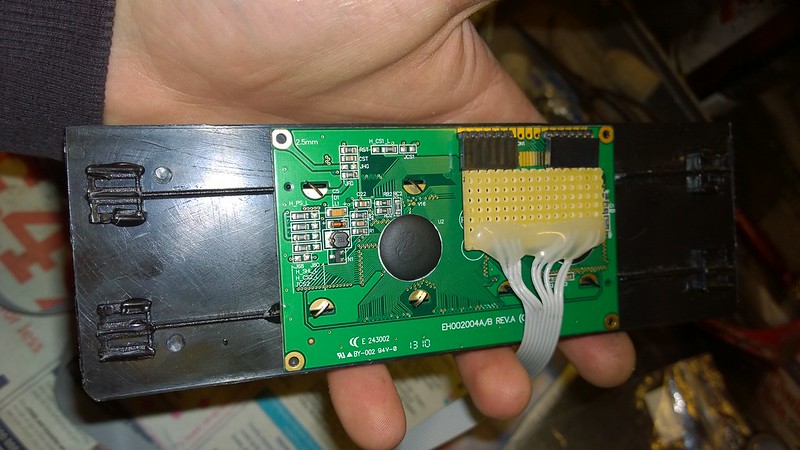
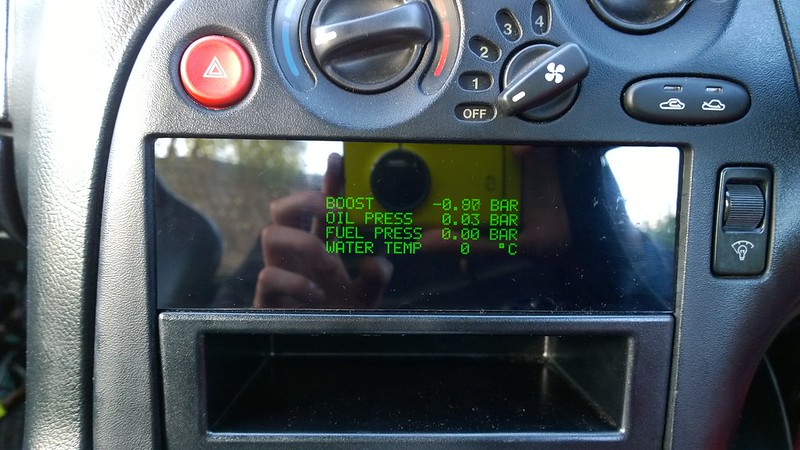
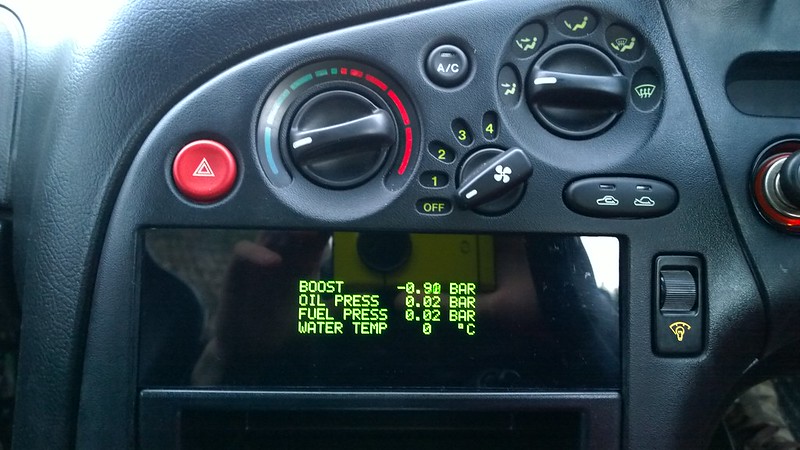
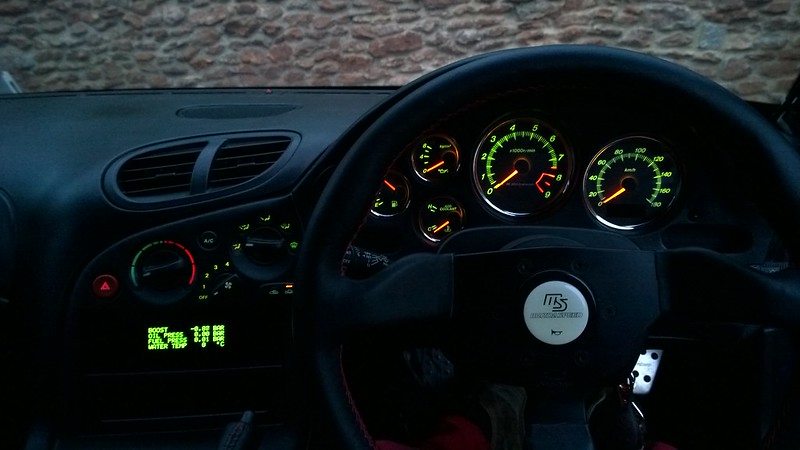
Will be mounting this in a din blank plate. Only the water temp sensor was plugged in, hence the random readings on the others .
 WP_20140507_17_22_15_Pro by Tom Kinsman, on Flickr
Its nice and bright being OLED.
.WP_20140507_17_22_15_Pro by Tom Kinsman, on FlickrIts nice and bright being OLED.
 05-09-14, 01:28 PM
#206
Thanks guys .
Thanks, slowly getting there - If I decide to sell the cluster I'll drop you a pm  .
.
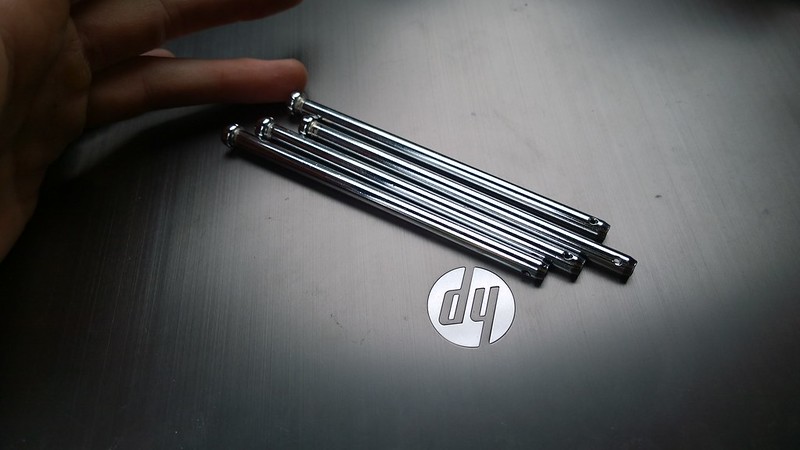
Did a bit of chroming after work today - I'm getting addicted to chrome .
.
Bonnet catch & stay:
 WP_20140509_18_34_09_Pro by Tom Kinsman, on Flickr
 WP_20140509_18_38_07_Pro by Tom Kinsman, on Flickr
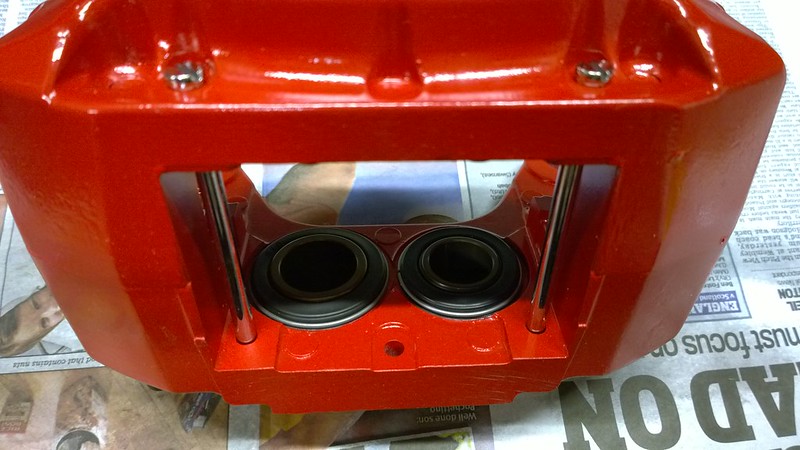
Caliper pad retaining pins:
 WP_20140509_18_40_38_Pro by Tom Kinsman, on Flickr
 WP_20140509_19_03_26_Pro by Tom Kinsman, on Flickr
Hatch/fuel door release lever mech:
 WP_20140509_18_41_50_Pro by Tom Kinsman, on Flickr
I know you can only see a bit of it when the covers on...But I don't like the stock green coating, it just doesn't match the rest of the interior.
. - If I decide to sell the cluster I'll drop you a pm .Did a bit of chroming after work today - I'm getting addicted to chrome
.Bonnet catch & stay:
WP_20140509_18_34_09_Pro by Tom Kinsman, on FlickrWP_20140509_18_38_07_Pro by Tom Kinsman, on FlickrCaliper pad retaining pins:
WP_20140509_18_40_38_Pro by Tom Kinsman, on FlickrWP_20140509_19_03_26_Pro by Tom Kinsman, on FlickrHatch/fuel door release lever mech:
WP_20140509_18_41_50_Pro by Tom Kinsman, on FlickrI know you can only see a bit of it when the covers on...But I don't like the stock green coating, it just doesn't match the rest of the interior.
05-10-14, 02:25 PM
#207
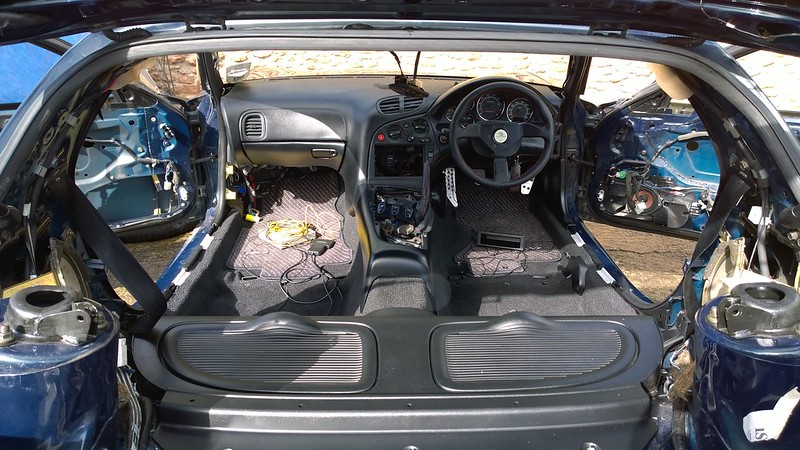
Got the battery relocation finished today, fitted remote central locking to the passenger door (Why it only had drivers central locking...Who knows!) & other misc stuffs.
 WP_20140510_10_45_45_Pro by Tom Kinsman, on Flickr
 WP_20140510_16_49_47_Pro by Tom Kinsman, on Flickr
Sprayed the bins to match the dash, much tidier now.
 WP_20140510_17_16_06_Pro by Tom Kinsman, on Flickr
WP_20140510_10_45_45_Pro by Tom Kinsman, on FlickrWP_20140510_16_49_47_Pro by Tom Kinsman, on FlickrSprayed the bins to match the dash, much tidier now
.WP_20140510_17_16_06_Pro by Tom Kinsman, on Flickr
05-10-14, 04:13 PM
#208
Update on the gauge, Made half the enclosure for it, will finish it off tomorrow:
 WP_20140510_21_59_44_Pro by Tom Kinsman, on Flickr
 WP_20140510_21_59_48_Pro by Tom Kinsman, on Flickr
Vid of it in action:
WP_20140510_21_59_44_Pro by Tom Kinsman, on FlickrWP_20140510_21_59_48_Pro by Tom Kinsman, on FlickrVid of it in action:
05-11-14, 03:30 PM
#209
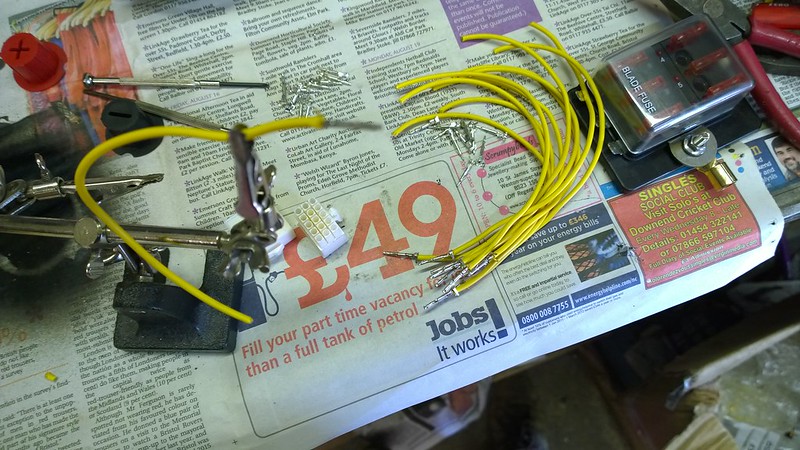
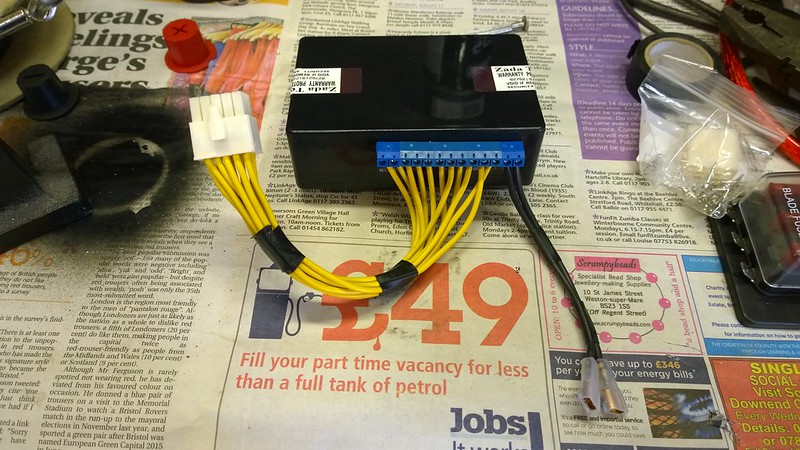
Lazy day today, but got the gauge finished.
Wired the sensors into a plug for ease of disconnection, all terminals crimped and soldered etc.
 WP_20140511_13_44_08_Pro by Tom Kinsman, on Flickr
 WP_20140511_14_07_59_Pro by Tom Kinsman, on Flickr
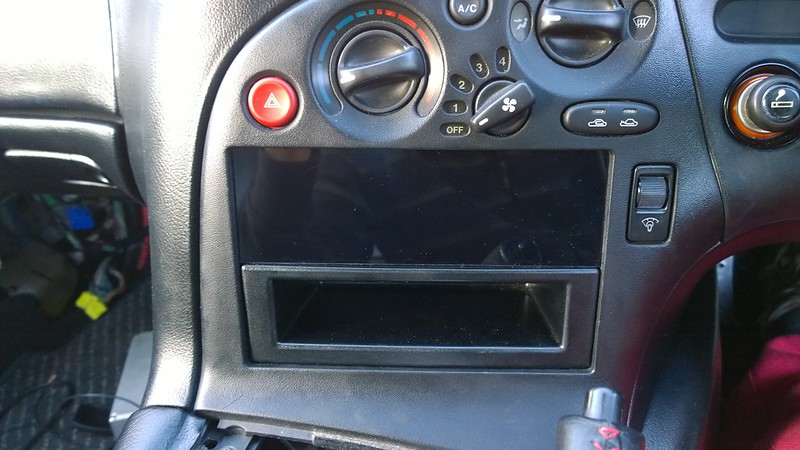
The screen is made to be a tolerance fit, it snaps in with a bit of force and doesn't move, easy to remove and no mods to the radio area.
Its hard to capture how it looks being oled, my camera either goes too bright or too dark!
Daytime pics on a bright day (Excuse the acrylic dust on the screen, I'd just finished sanding the edges):
 WP_20140511_18_48_59_Pro by Tom Kinsman, on Flickr
 WP_20140511_18_49_31_Pro by Tom Kinsman, on Flickr
 WP_20140511_20_39_00_Pro by Tom Kinsman, on Flickr
Night pics:
 WP_20140511_21_06_37_Pro by Tom Kinsman, on Flickr
The dimmer switch was some tint I was trying to replicate the green on my other interior lights that didn't work...I've got some different stuff now & will be addressing that.
 WP_20140511_21_06_01_Pro by Tom Kinsman, on Flickr
Wired the sensors into a plug for ease of disconnection, all terminals crimped and soldered etc.
WP_20140511_13_44_08_Pro by Tom Kinsman, on FlickrWP_20140511_14_07_59_Pro by Tom Kinsman, on FlickrThe screen is made to be a tolerance fit, it snaps in with a bit of force and doesn't move, easy to remove and no mods to the radio area.
Its hard to capture how it looks being oled, my camera either goes too bright or too dark!
Daytime pics on a bright day (Excuse the acrylic dust on the screen, I'd just finished sanding the edges):
WP_20140511_18_48_59_Pro by Tom Kinsman, on FlickrWP_20140511_18_49_31_Pro by Tom Kinsman, on FlickrWP_20140511_20_39_00_Pro by Tom Kinsman, on FlickrNight pics:
WP_20140511_21_06_37_Pro by Tom Kinsman, on FlickrThe dimmer switch was some tint I was trying to replicate the green on my other interior lights that didn't work...I've got some different stuff now & will be addressing that
.WP_20140511_21_06_01_Pro by Tom Kinsman, on Flickr

 05-12-14, 02:46 AM
#213
Thanks all, quite pleased with how it turned out.
I know what you mean. For that reason I've connected up a peak warning light and buzzer in my cluster, so I don't have to look at it constantly. The light is in the stock location for the ABS light, as I have no ABS  .
.
Vinyl dye.
Vinyl dye
05-13-14, 02:21 AM
#215
^Thanks .
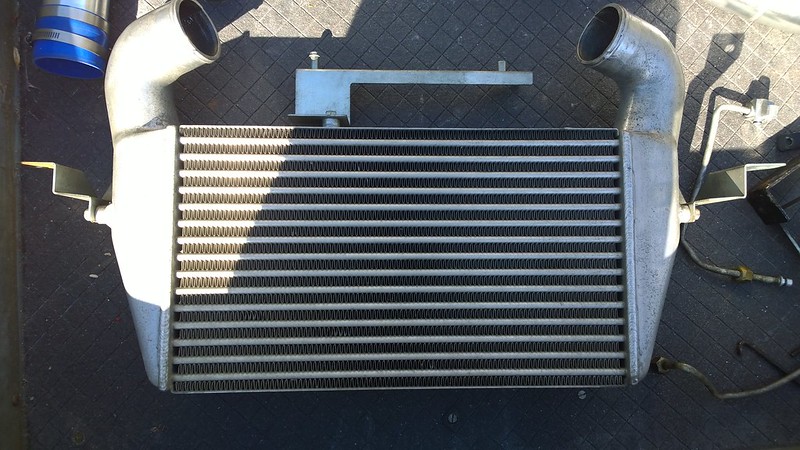
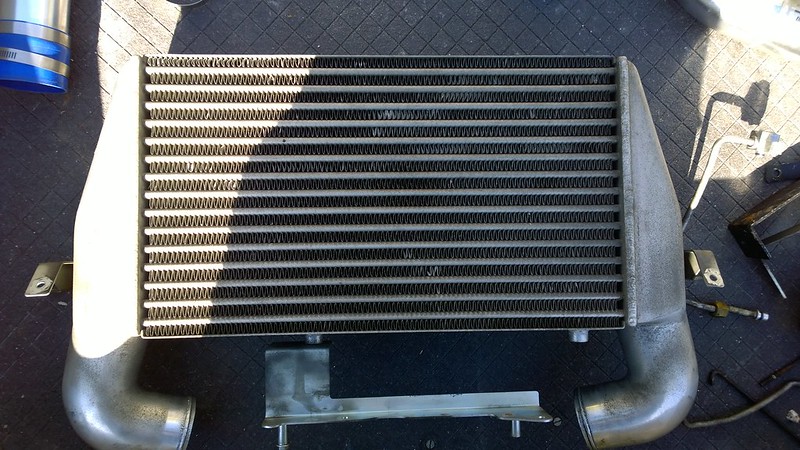
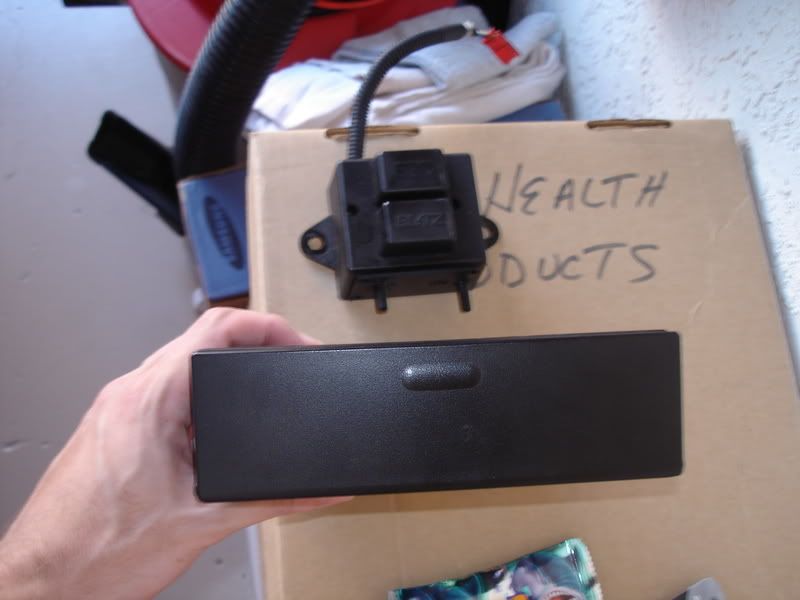
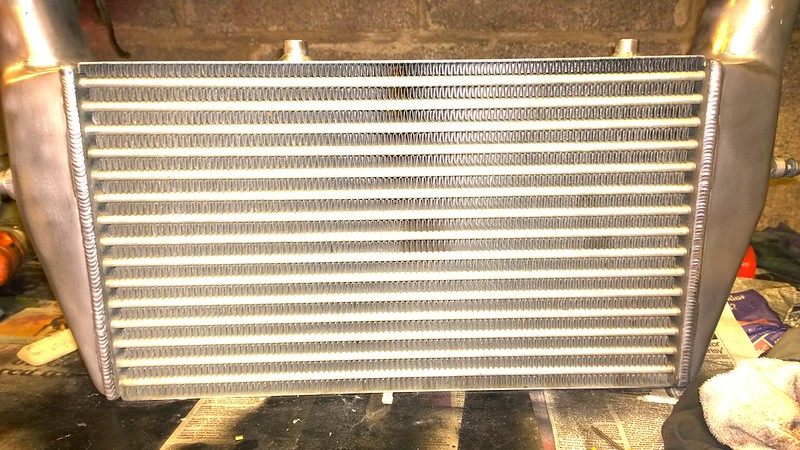
Picked up a Blitz fmic, needs a good clean/polish, otherwise its in great shape. Only bracket its missing is the intercooler to radiator bracket, so I'll have to make or buy that one.
 WP_20140512_16_28_20_Pro by Tom Kinsman, on Flickr
 WP_20140512_16_28_34_Pro by Tom Kinsman, on Flickr
 WP_20140512_16_43_22_Pro by Tom Kinsman, on Flickr
Had a good suggestion regarding the gauge from Si on the UK forums, going to put a headunit surround on it to make it more in-keeping with the rest of the interior.
.Picked up a Blitz fmic, needs a good clean/polish, otherwise its in great shape. Only bracket its missing is the intercooler to radiator bracket, so I'll have to make or buy that one.
WP_20140512_16_28_20_Pro by Tom Kinsman, on FlickrWP_20140512_16_28_34_Pro by Tom Kinsman, on FlickrWP_20140512_16_43_22_Pro by Tom Kinsman, on FlickrHad a good suggestion regarding the gauge from Si on the UK forums, going to put a headunit surround on it to make it more in-keeping with the rest of the interior
 05-13-14, 10:50 AM
#218
Are you not going to install a radio in this car? No tunes while cruising is just....well, no fun.
Unless you love your exhaust tone that much, then I can understand it's music to your ears, lol
Still love the build, I might beat you getting mine back on the road. The race is on my friend!
I was cutting my carpet and used your fuel door/hatch release as a reference, still put a larger hole than I would have wanted but still looks good.
05-13-14, 12:55 PM
#219
Cheers guys .
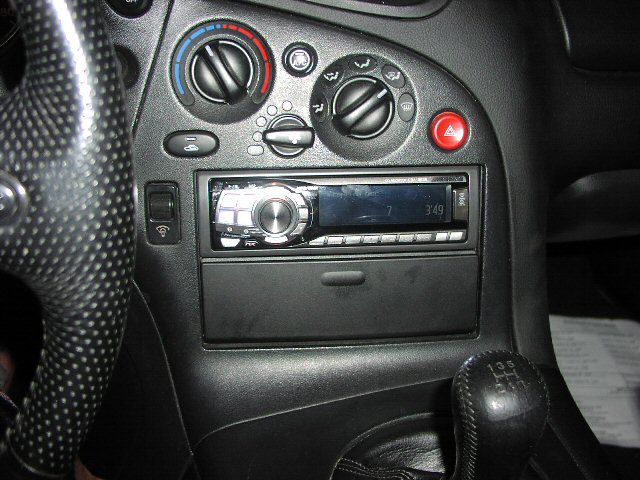
Yeah, It'll have audio (I'll need it to keep me entertained during the break-in miles ), I was just using the cubby as a size guide while making the gauge fascia. The speakers actually arrived today in the post . Nothing crazy, just some 6.5" components for the front & some 5x7" rears with a small amp driving the 4 speakers.
I think you will beat me, this car wont run until late summer . Glad the carpet pic was of help
  .
.
Are you not going to install a radio in this car? No tunes while cruising is just....well, no fun.
Unless you love your exhaust tone that much, then I can understand it's music to your ears, lol
Still love the build, I might beat you getting mine back on the road. The race is on my friend!
I was cutting my carpet and used your fuel door/hatch release as a reference, still put a larger hole than I would have wanted but still looks good.
Unless you love your exhaust tone that much, then I can understand it's music to your ears, lol
Still love the build, I might beat you getting mine back on the road. The race is on my friend!
I was cutting my carpet and used your fuel door/hatch release as a reference, still put a larger hole than I would have wanted but still looks good.
), I was just using the cubby as a size guide while making the gauge fascia. The speakers actually arrived today in the post . Nothing crazy, just some 6.5" components for the front & some 5x7" rears with a small amp driving the 4 speakers.I think you will beat me, this car wont run until late summer
. Glad the carpet pic was of help .
 05-13-14, 09:17 PM
#221
I'm enjoying the photos. I have the same 30th anniversary gauge cluster so I like to see what my interior lights will look like. I'm going with an iPad mini install in my dash though so I think I've one up'd you on the audio/display category. Awesome build! Amazing attention to detail. It takes one to know one so I know the quality time you've invested into this car. One of the better build threads I've read lately.
05-14-14, 02:13 AM
#222
.I'm enjoying the photos. I have the same 30th anniversary gauge cluster so I like to see what my interior lights will look like. I'm going with an iPad mini install in my dash though so I think I've one up'd you on the audio/display category. Awesome build! Amazing attention to detail. It takes one to know one so I know the quality time you've invested into this car. One of the better build threads I've read lately.
. The 30th anny is definitely one of the cooler looking clusters imo  . I've been taking apart all my console switches and using adhesive green tint film to get the same colour for the rest of my lights, it works quite well .
 I'm kinda anti Apple due to the industry I work in
 . I'm just using an Alpine headunit from my previous car and going to test out an Alpine KTP-445A for driving the speakers. If it works, It'll be a nice compact/hidden solution as the amp will fit behind the head unit.
05-18-14, 11:51 AM
. I'm just using an Alpine headunit from my previous car and going to test out an Alpine KTP-445A for driving the speakers. If it works, It'll be a nice compact/hidden solution as the amp will fit behind the head unit.
05-18-14, 11:51 AM
#223
Not a big update, been enjoying the sun, great weather this weekend.
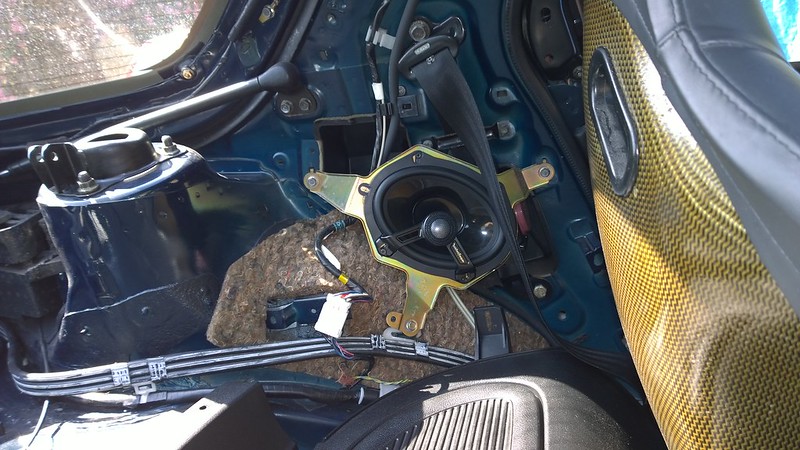
Ran all new speaker cables, the rears took about 10 minutes, the fronts we're a bit of a pain in the **** due to the bulkhead connectors, more so because my drivers one was ruined by the alarm installer back in 2002... Will be swapping it out for another one soon.
Old rear speakers in pretty poor shape:
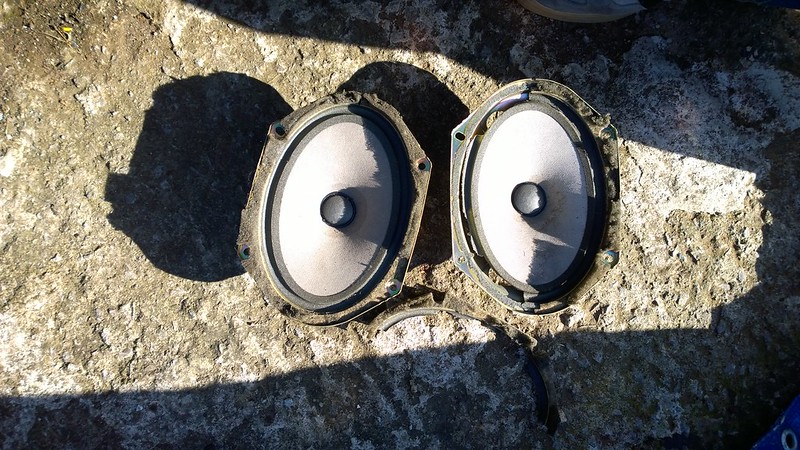 WP_20140513_18_05_45_Pro by Tom Kinsman, on Flickr
New ones in:
 WP_20140518_15_45_06_Pro by Tom Kinsman, on Flickr
New fronts:
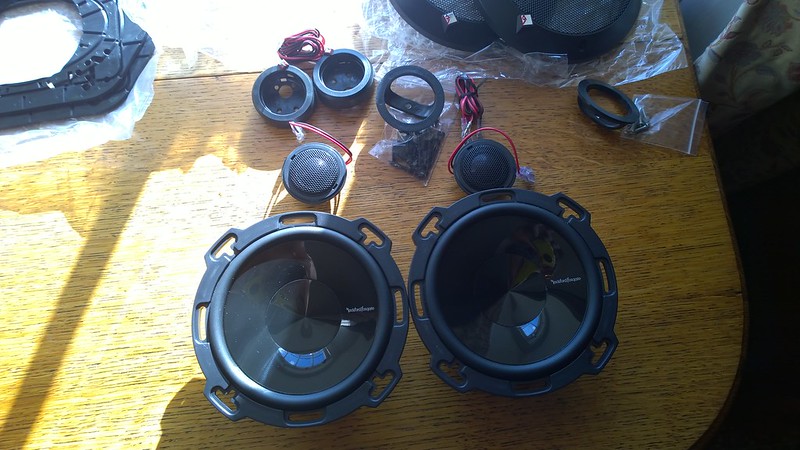 WP_20140513_18_23_34_Pro by Tom Kinsman, on Flickr
Cant fit them yet, I decided to go the lazy route and bought some 6.5" rx-7 specific front enclosures. Wired all the speakers in to test & they're not as good as I'd hoped....Mid & high is excellent, but decidedly lacking bass. Quite tempted to turn my drivers side bin into a small sub enclosure....We shall see......
Fitted these in the stock location, nice & loud, definitely better than the stockers.
 WP_20140514_16_24_54_Pro by Tom Kinsman, on Flickr
Straitened any bent IC fins:
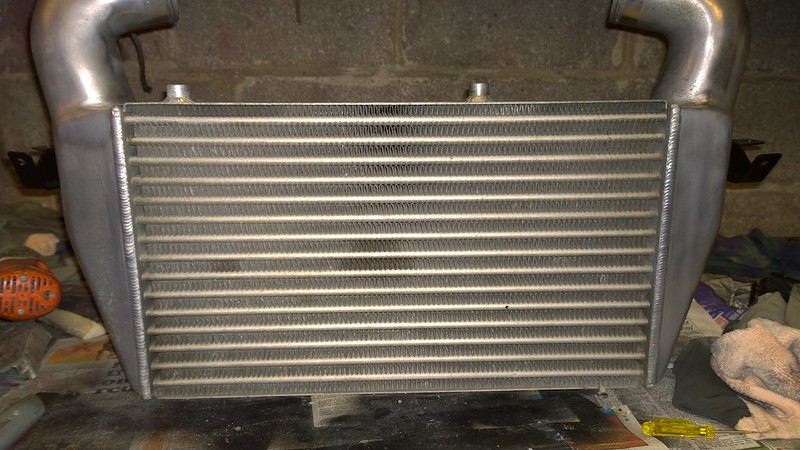 WP_20140517_11_06_20_Pro by Tom Kinsman, on Flickr
 WP_20140517_10_55_42_Pro by Tom Kinsman, on Flickr
This cooler really is in great shape for second hand.
I decided not to polish it, instead I went for the new aluminium look. Much easier to maintain & I already have a lot of shiny bits on the bay, didn't want there to be too much!
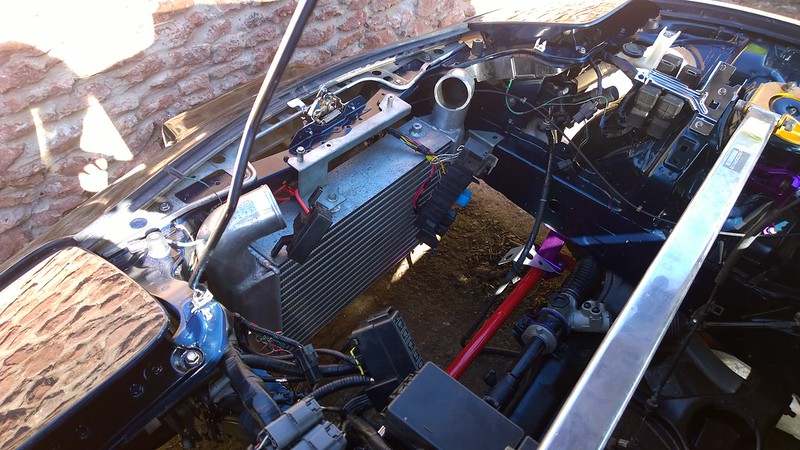
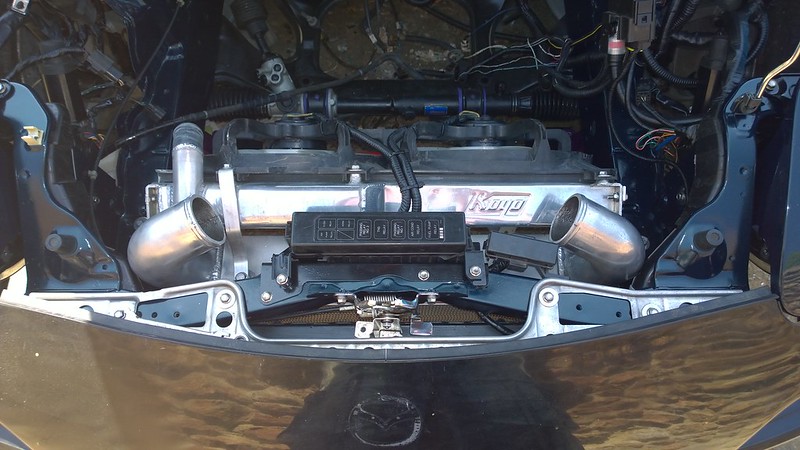
Painted all the galvanised intercooler brackets black so they don't stand out as much. Swapped the SuperNow lower rad mounts out for the Blitz ones.
Made my own radiator mounting brackets as the Blitz ones we're not included with the intercooler. They likely wouldn't have fitted work with the SuperNow anti-roll bar mounts anyway.
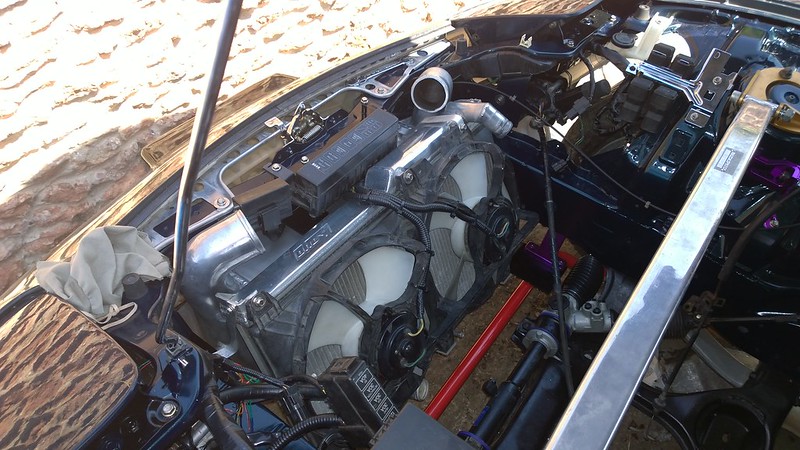
Also rewired the fans to hide the connectors under the front relay box, the cables are 8 or so inches longer than stock.
 WP_20140518_14_35_43_Pro by Tom Kinsman, on Flickr
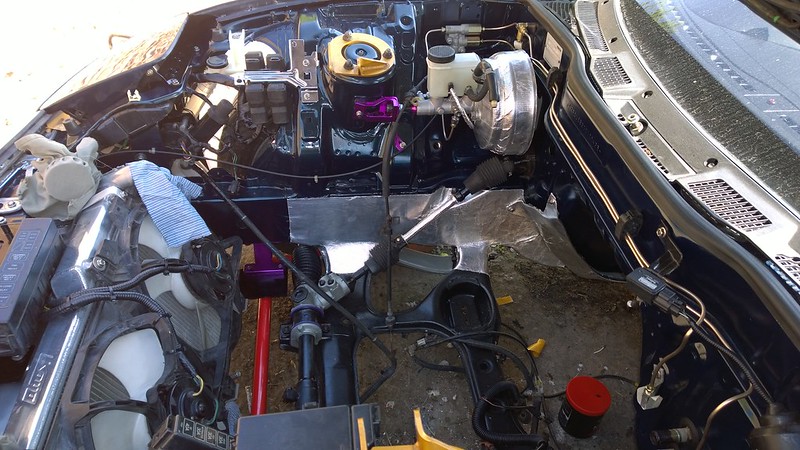
Ignore the un-loomed wiring, not decided how I want to wire my lights/levellers yet... The rest is the power harness, which I haven't touched yet.
 WP_20140518_14_35_22_Pro by Tom Kinsman, on Flickr
A bit of heat management.
 WP_20140518_15_42_55_Pro by Tom Kinsman, on Flickr
Ran all new speaker cables, the rears took about 10 minutes, the fronts we're a bit of a pain in the **** due to the bulkhead connectors, more so because my drivers one was ruined by the alarm installer back in 2002... Will be swapping it out for another one soon.
Old rear speakers in pretty poor shape:
WP_20140513_18_05_45_Pro by Tom Kinsman, on FlickrNew ones in:
WP_20140518_15_45_06_Pro by Tom Kinsman, on FlickrNew fronts:
WP_20140513_18_23_34_Pro by Tom Kinsman, on FlickrCant fit them yet, I decided to go the lazy route and bought some 6.5" rx-7 specific front enclosures. Wired all the speakers in to test & they're not as good as I'd hoped....Mid & high is excellent, but decidedly lacking bass
. Quite tempted to turn my drivers side bin into a small sub enclosure....We shall see......Fitted these in the stock location, nice & loud, definitely better than the stockers.
WP_20140514_16_24_54_Pro by Tom Kinsman, on FlickrStraitened any bent IC fins:
WP_20140517_11_06_20_Pro by Tom Kinsman, on FlickrWP_20140517_10_55_42_Pro by Tom Kinsman, on FlickrThis cooler really is in great shape for second hand.
I decided not to polish it, instead I went for the new aluminium look. Much easier to maintain & I already have a lot of shiny bits on the bay, didn't want there to be too much!
Painted all the galvanised intercooler brackets black so they don't stand out as much. Swapped the SuperNow lower rad mounts out for the Blitz ones.
Made my own radiator mounting brackets as the Blitz ones we're not included with the intercooler. They likely wouldn't have fitted work with the SuperNow anti-roll bar mounts anyway.
Also rewired the fans to hide the connectors under the front relay box, the cables are 8 or so inches longer than stock.
WP_20140518_14_35_43_Pro by Tom Kinsman, on FlickrIgnore the un-loomed wiring, not decided how I want to wire my lights/levellers yet... The rest is the power harness, which I haven't touched yet
.WP_20140518_14_35_22_Pro by Tom Kinsman, on FlickrA bit of heat management
.WP_20140518_15_42_55_Pro by Tom Kinsman, on Flickr