
My take on the perfect road going FD

Thread Starter


Joined: Mar 2008
Posts: 2,213
Likes: 283
From: Somerset, England

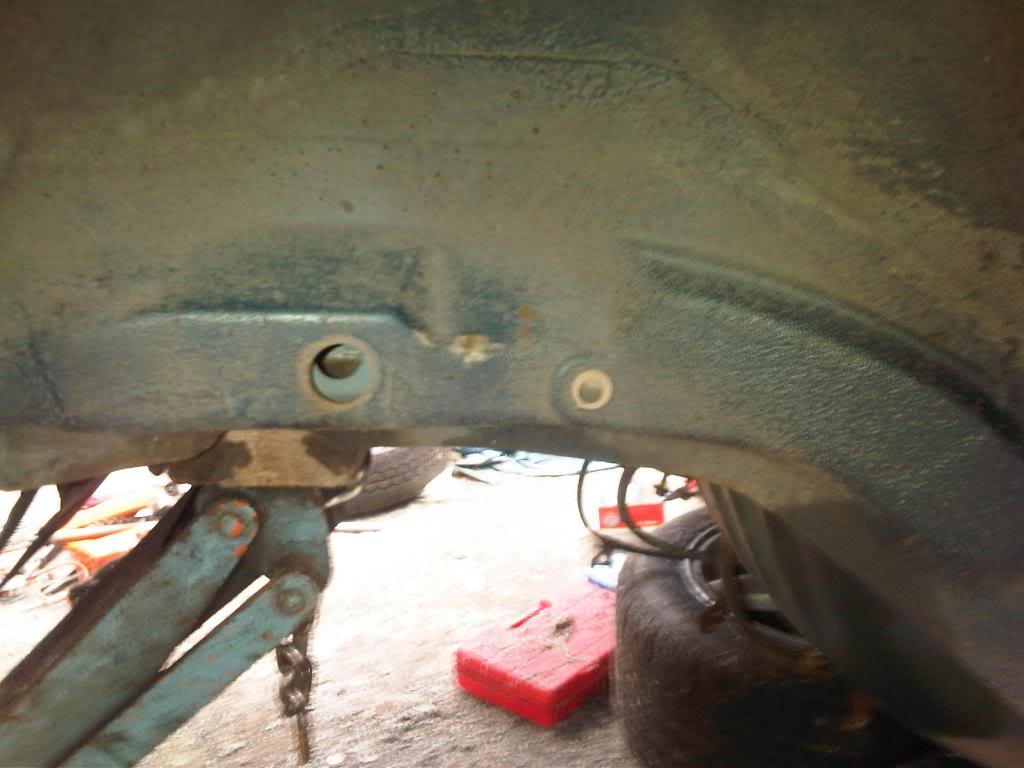
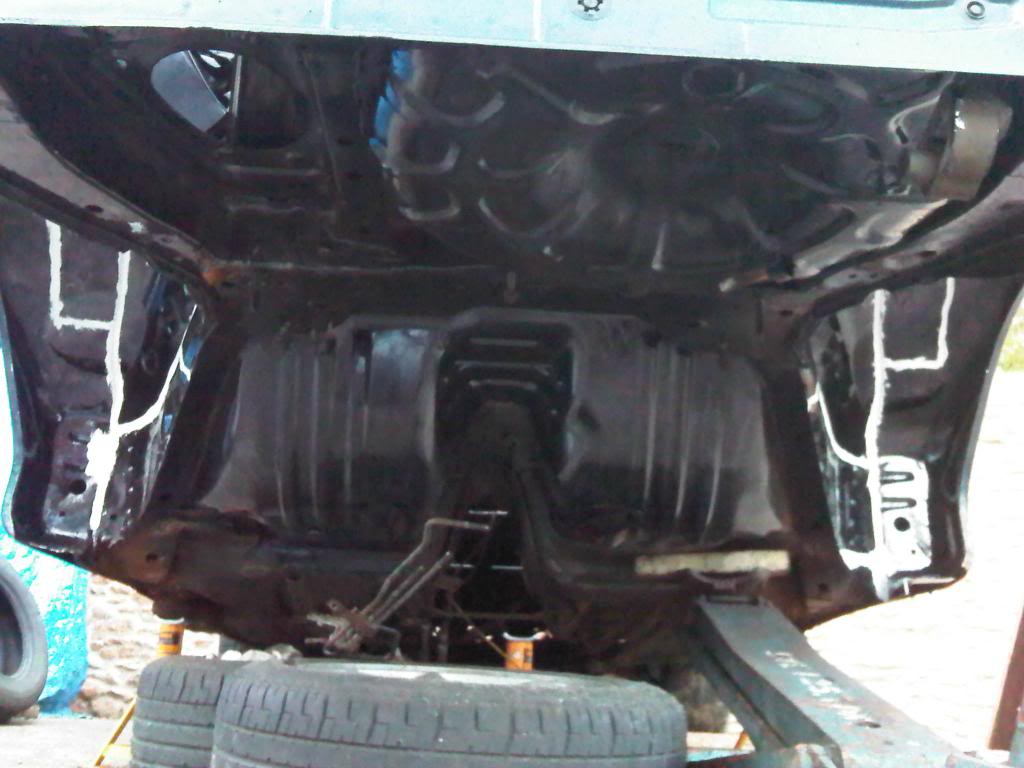
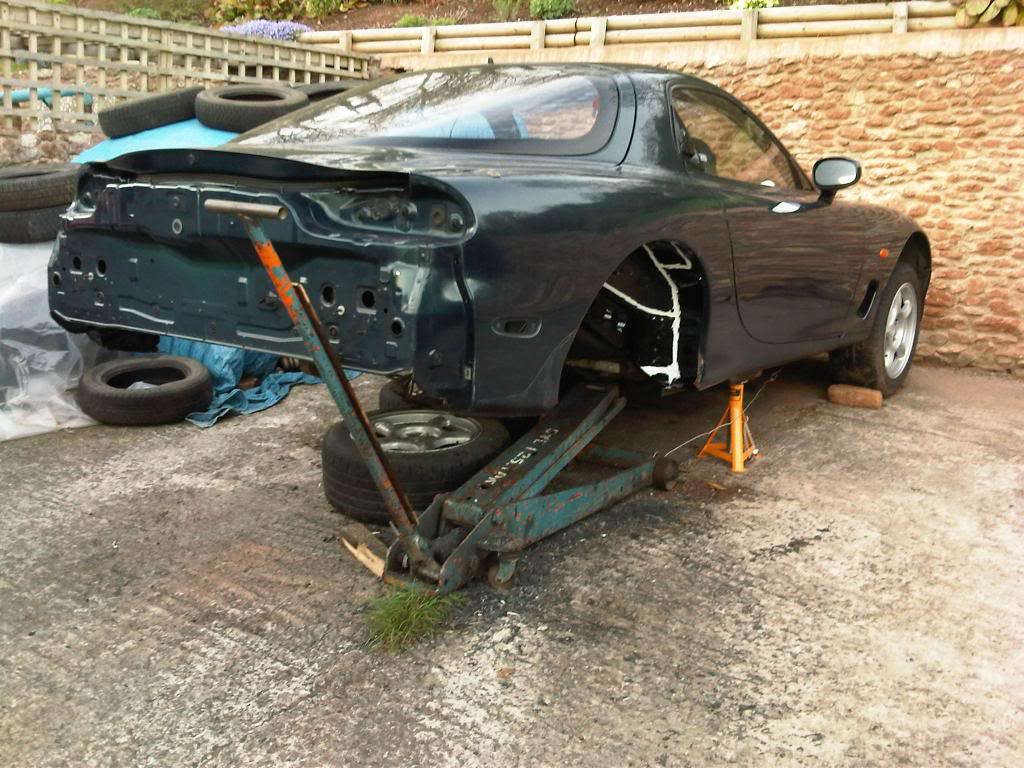
Rear end out!

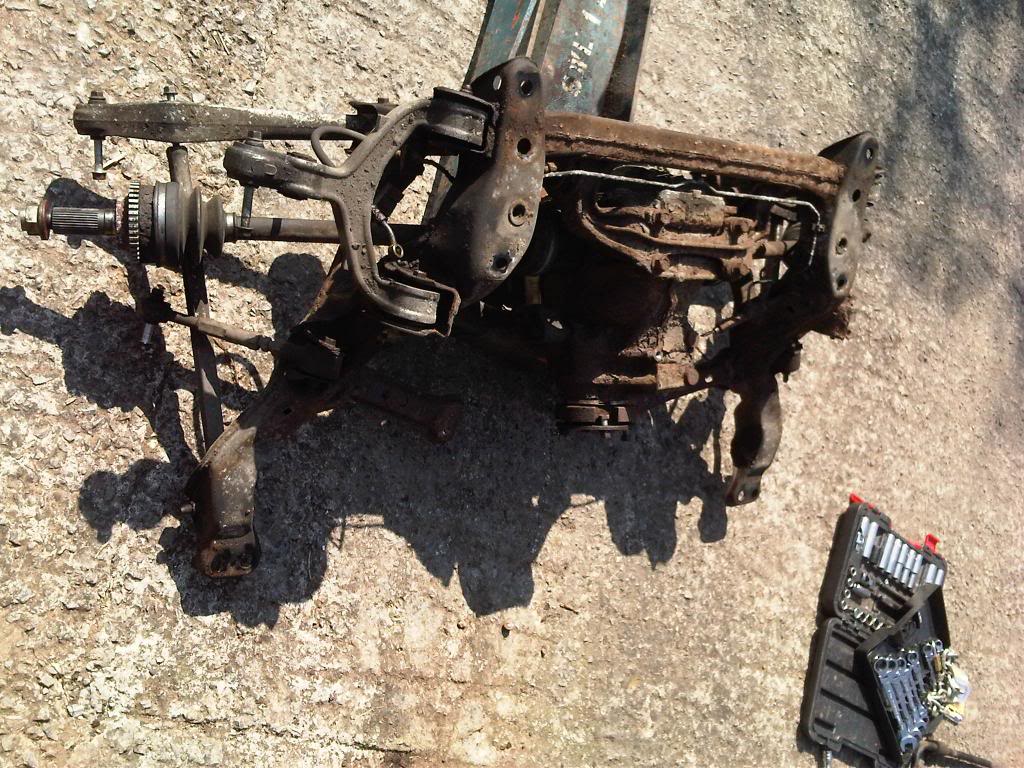
Stocking up on all I need to refurbish the rear end:
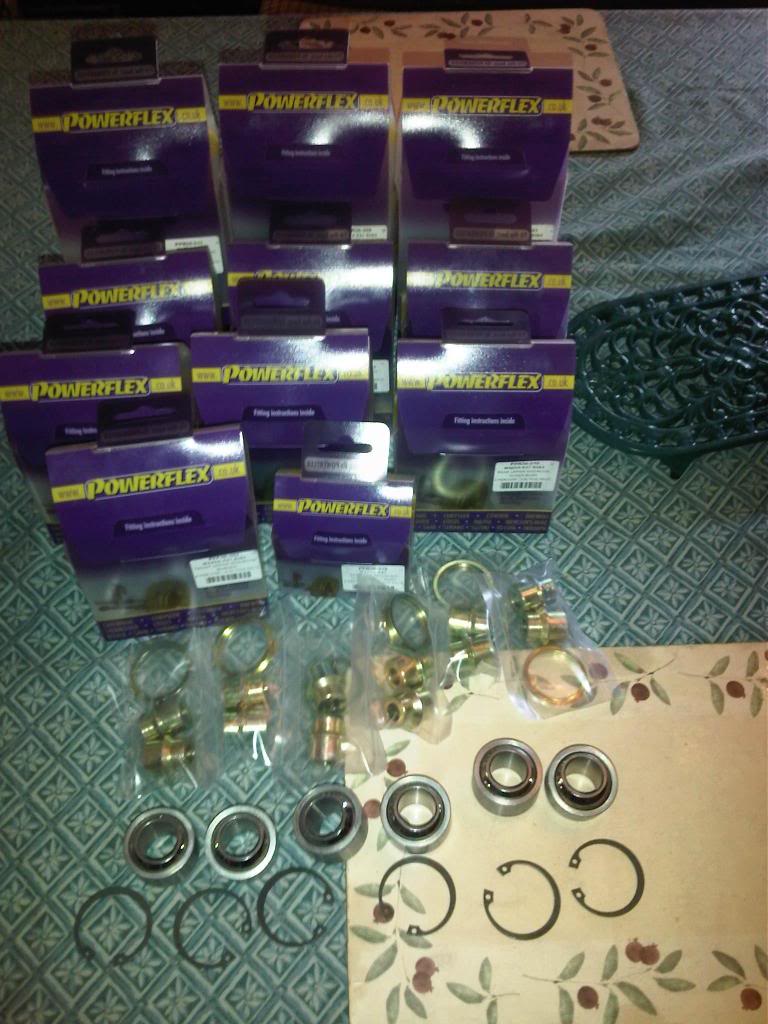
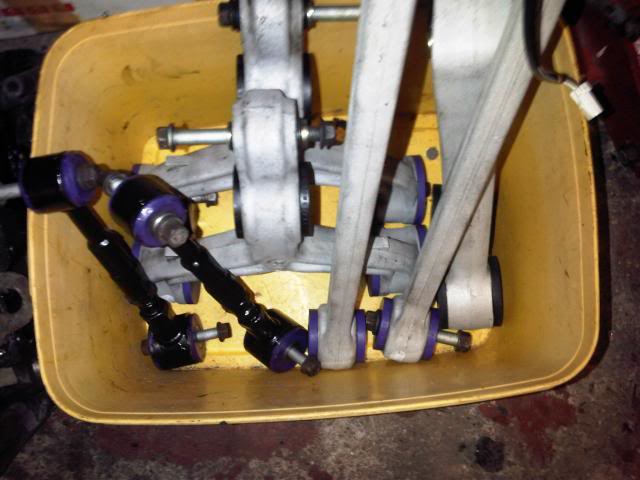
New Powerflex polybushes for all four corners:
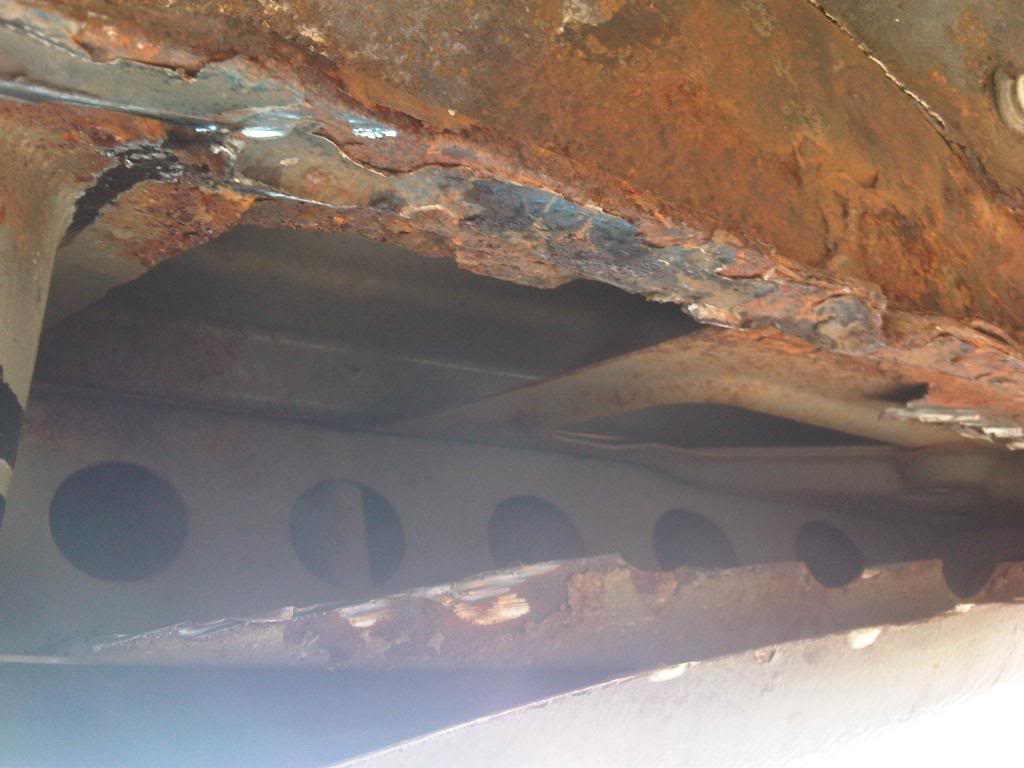
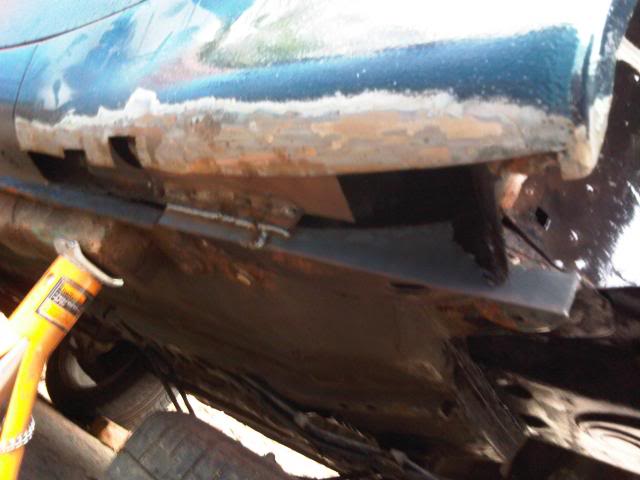
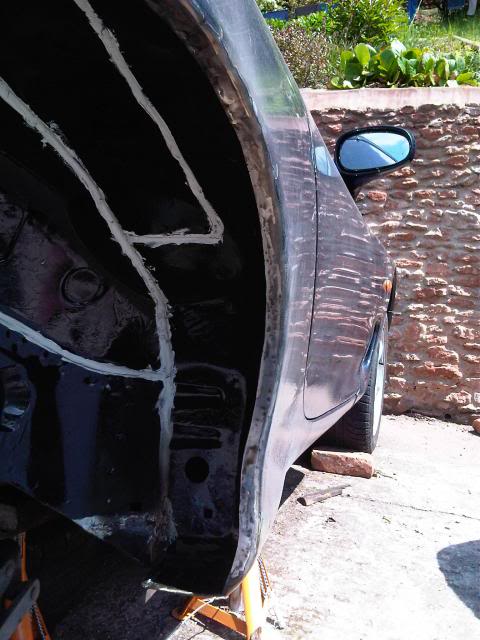
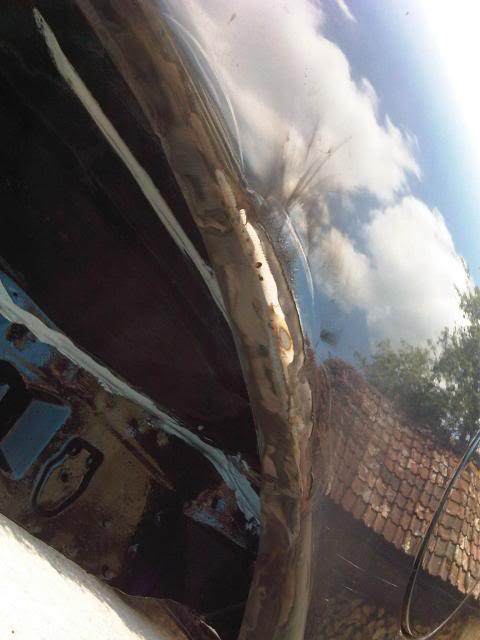
Having spent 20 years in the UK, yep...Shes rusty alright.


Thread Starter
Joined: Mar 2008
Posts: 2,213
Likes: 283
From: Somerset, England
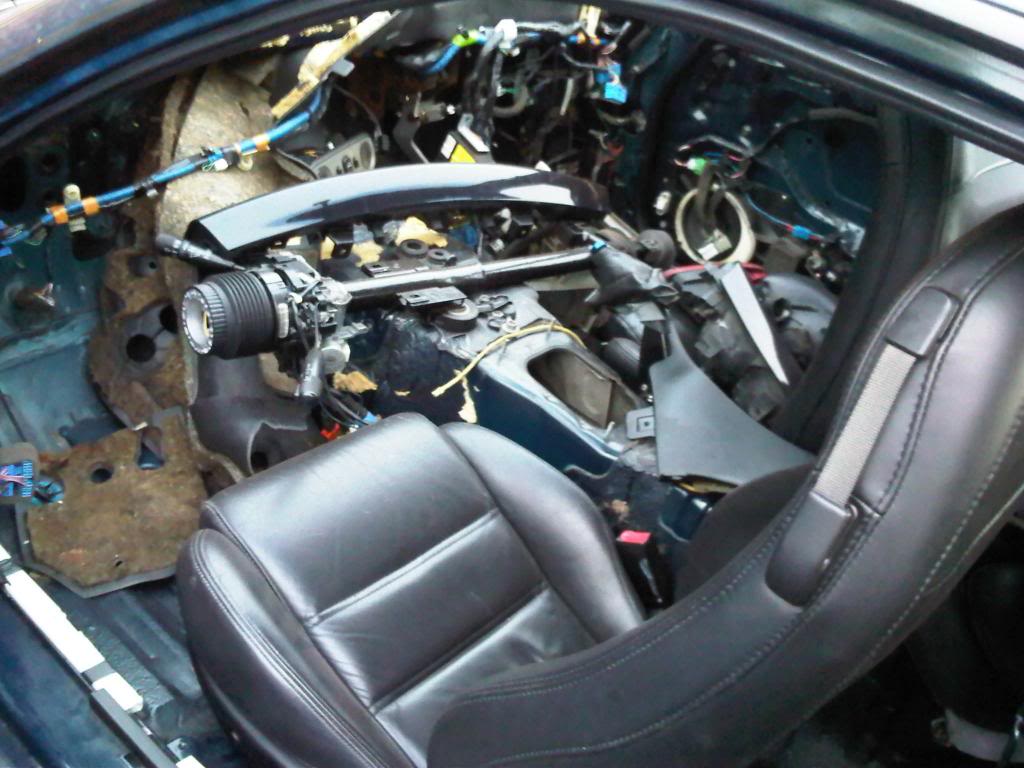
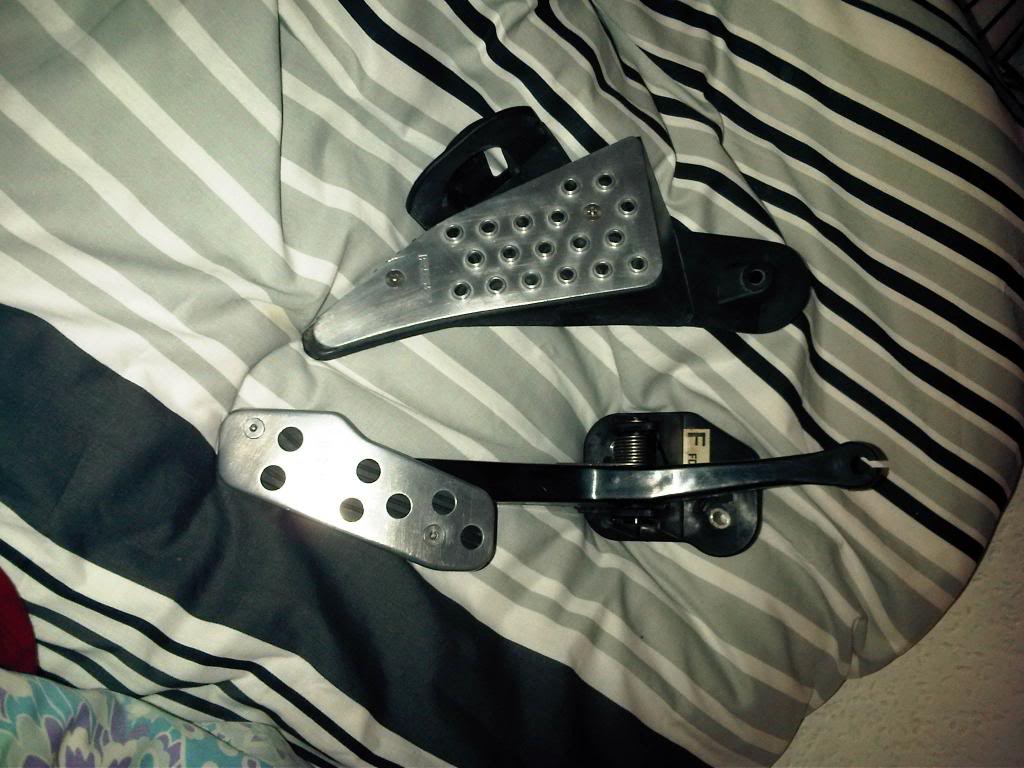
Picked up a few oem bits I think are cool...
Glass sunroof (Can just make it out on the right....I need more storage space ):
):
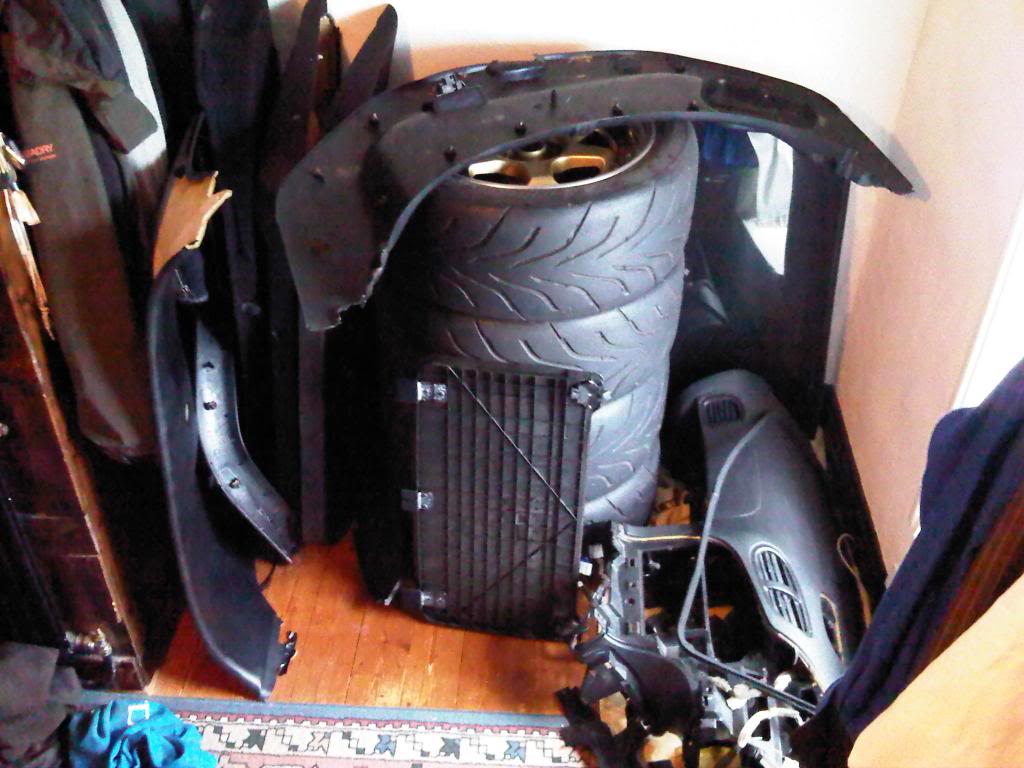
Oem ally pedals:
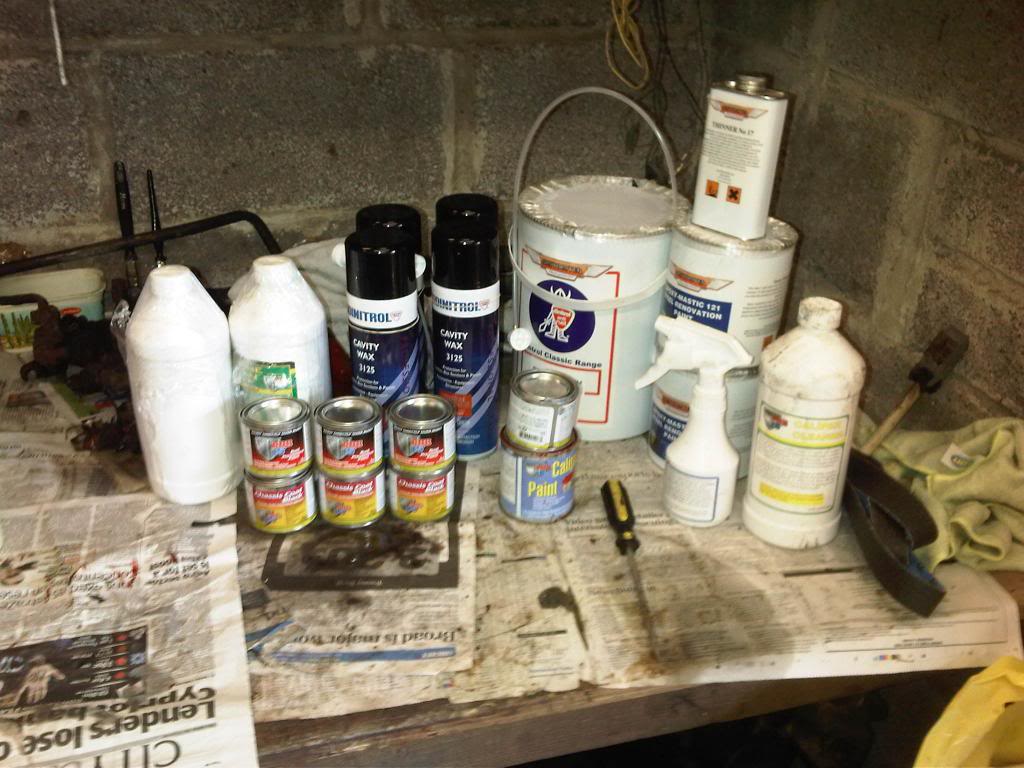
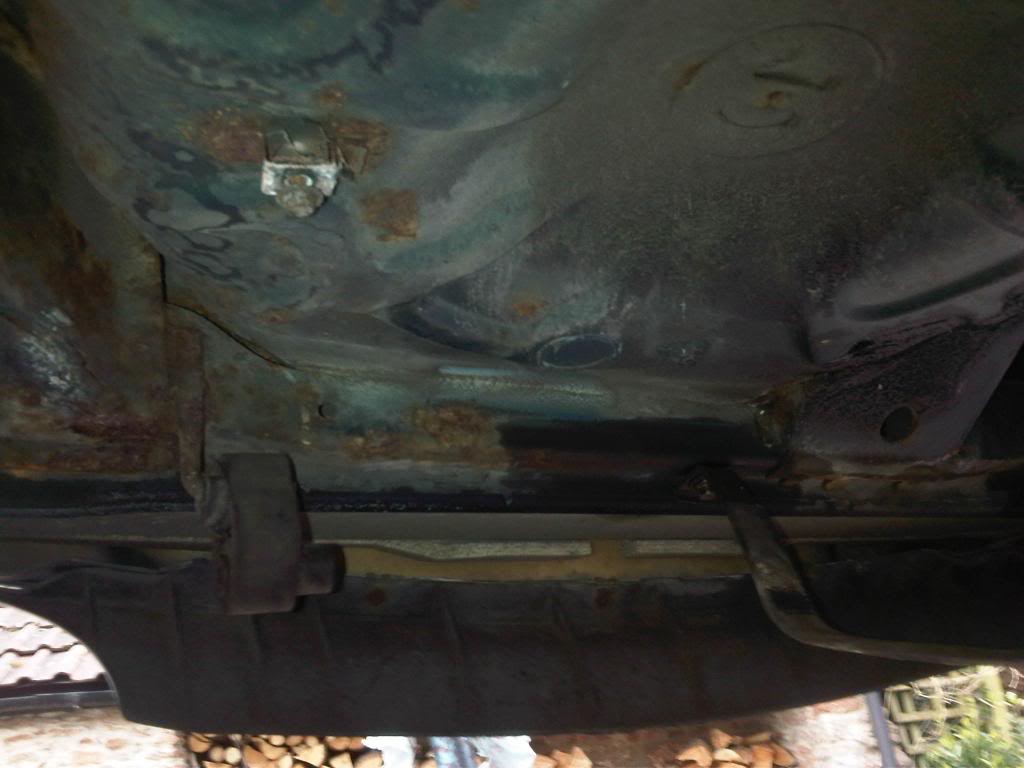
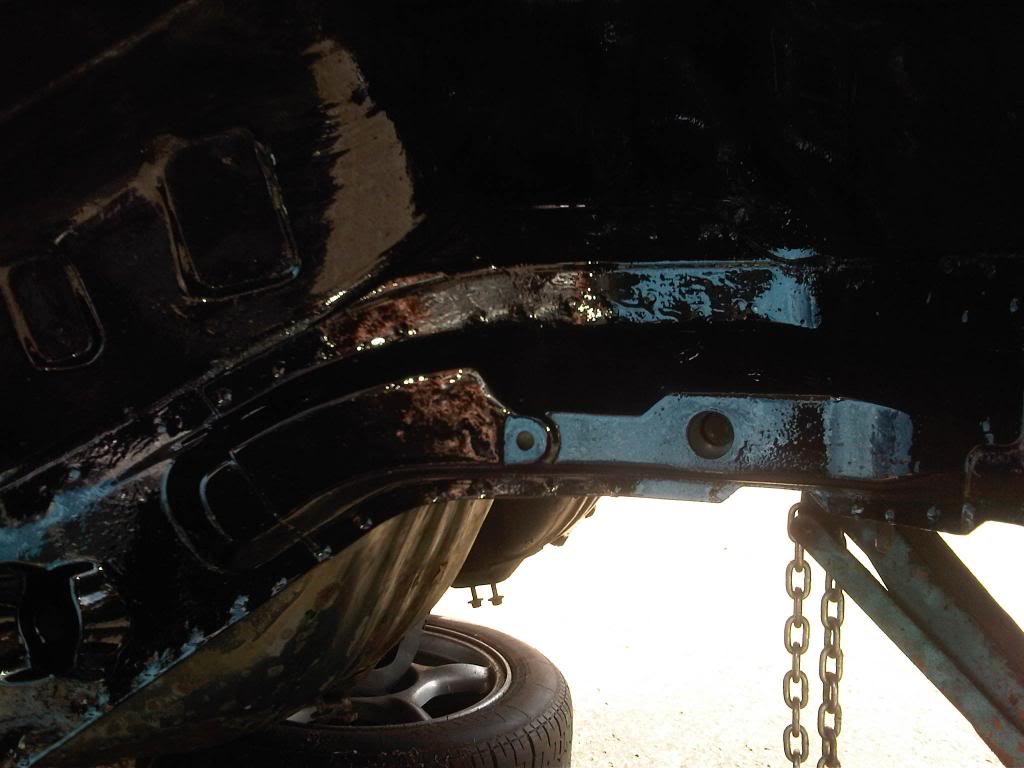
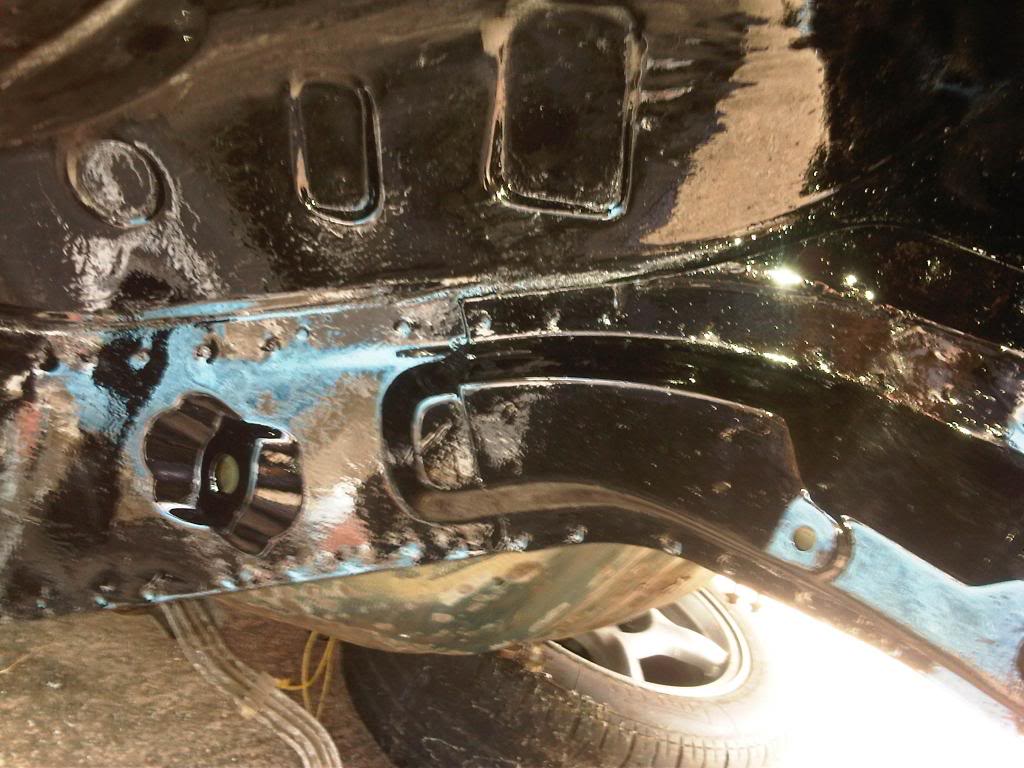
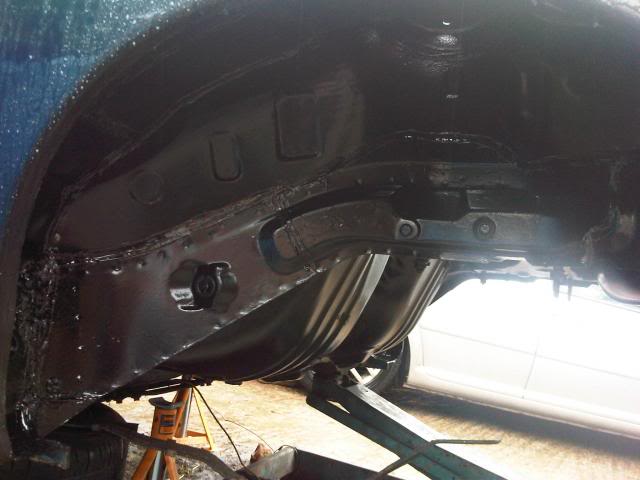
All the underside bodywork & fuel tank are being painted with POR15 after taking it back to bare metal. Sikaflex 521 seam sealer for any joins, then POR15 chassis black, with dintrol 4941 underseal for where extra protection from stone chips etc is required.
All the cavities can be accessed with the rear bumper off. I've been attaching a brush to a very long stick and treating these with fe-123 rust converter, then dintrol cavity wax.
The subframes, drive shafts, diff, prop etc are being done in epoxy mastic 121.
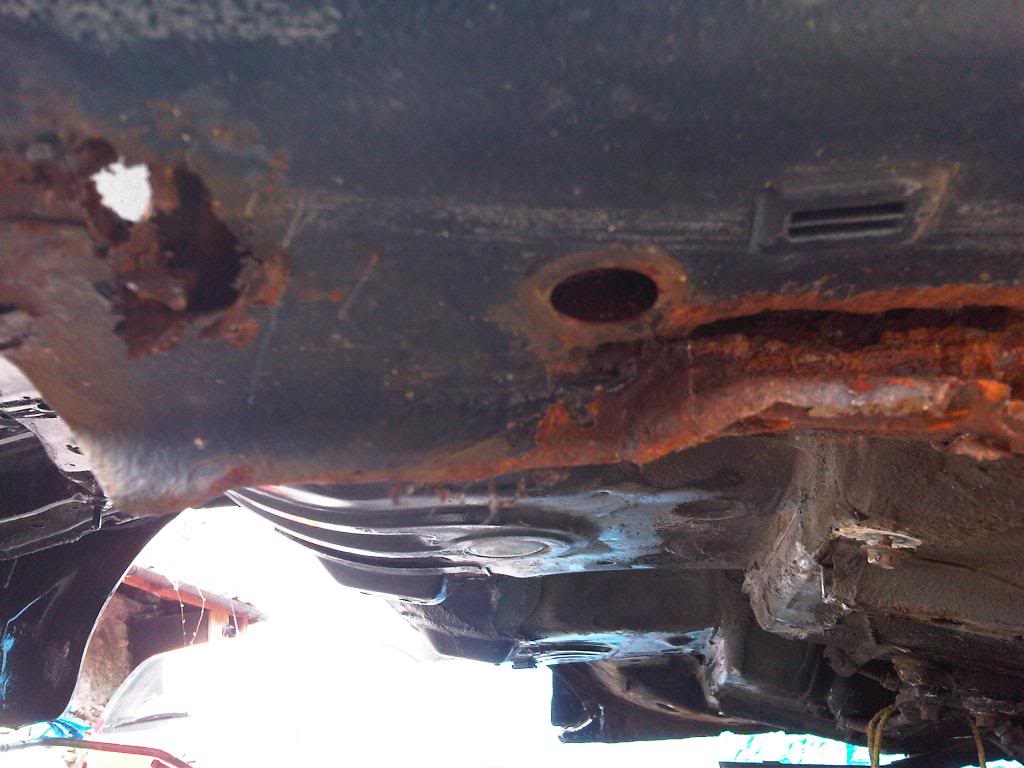
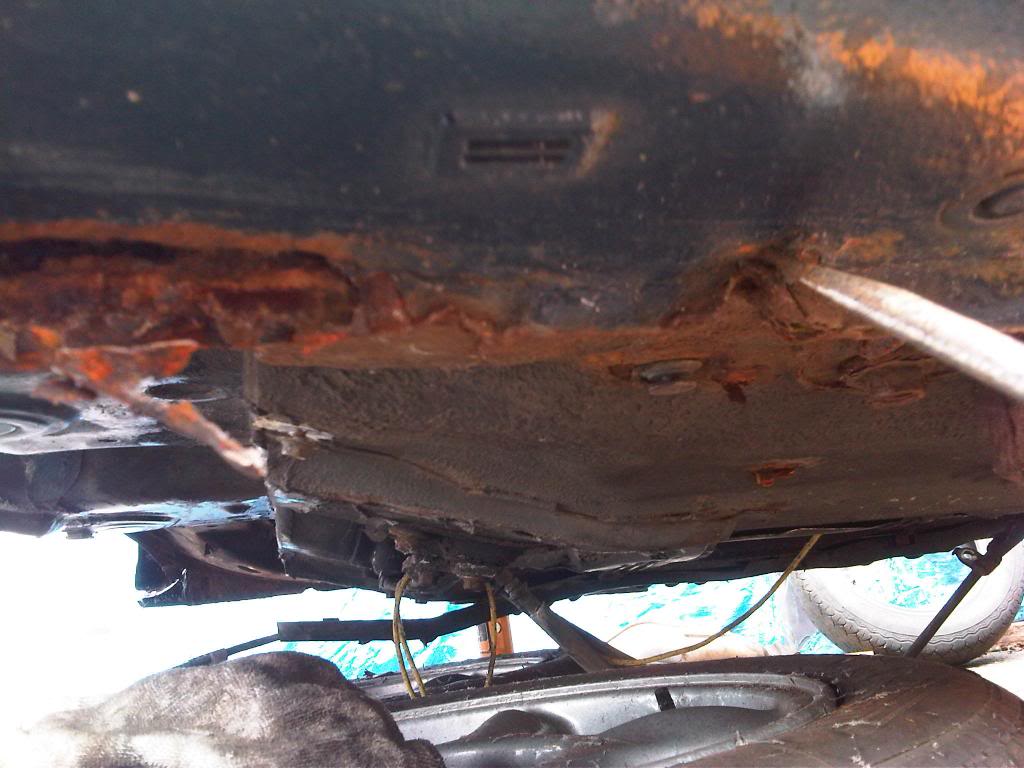
The rear 2 feet of the sills are rusted out on this FD, I've cut them out and am half way through welding new inner supports & sills on. Will post pictures of this later
Glass sunroof (Can just make it out on the right....I need more storage space
):Oem ally pedals:
All the underside bodywork & fuel tank are being painted with POR15 after taking it back to bare metal. Sikaflex 521 seam sealer for any joins, then POR15 chassis black, with dintrol 4941 underseal for where extra protection from stone chips etc is required.
All the cavities can be accessed with the rear bumper off. I've been attaching a brush to a very long stick and treating these with fe-123 rust converter, then dintrol cavity wax.
The subframes, drive shafts, diff, prop etc are being done in epoxy mastic 121.
The rear 2 feet of the sills are rusted out on this FD, I've cut them out and am half way through welding new inner supports & sills on. Will post pictures of this later
Thread Starter
Joined: Mar 2008
Posts: 2,213
Likes: 283
From: Somerset, England
Getting there slowly... The rear is couple of weeks from being finished now. It's taken longer than expected as I'm having to make and weld in new sills etc. Next is the front end resto using the same products, then she'll be ready for a respray  .
.
I'm going to miss my original deadline of June by around 3 months I imagine.
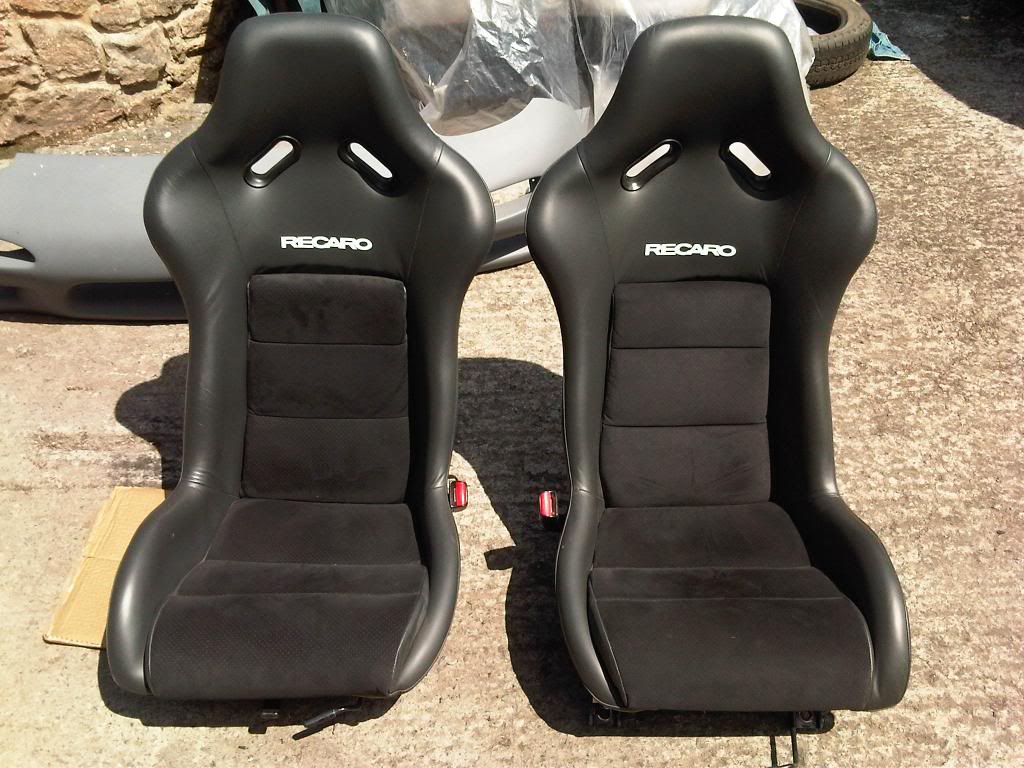
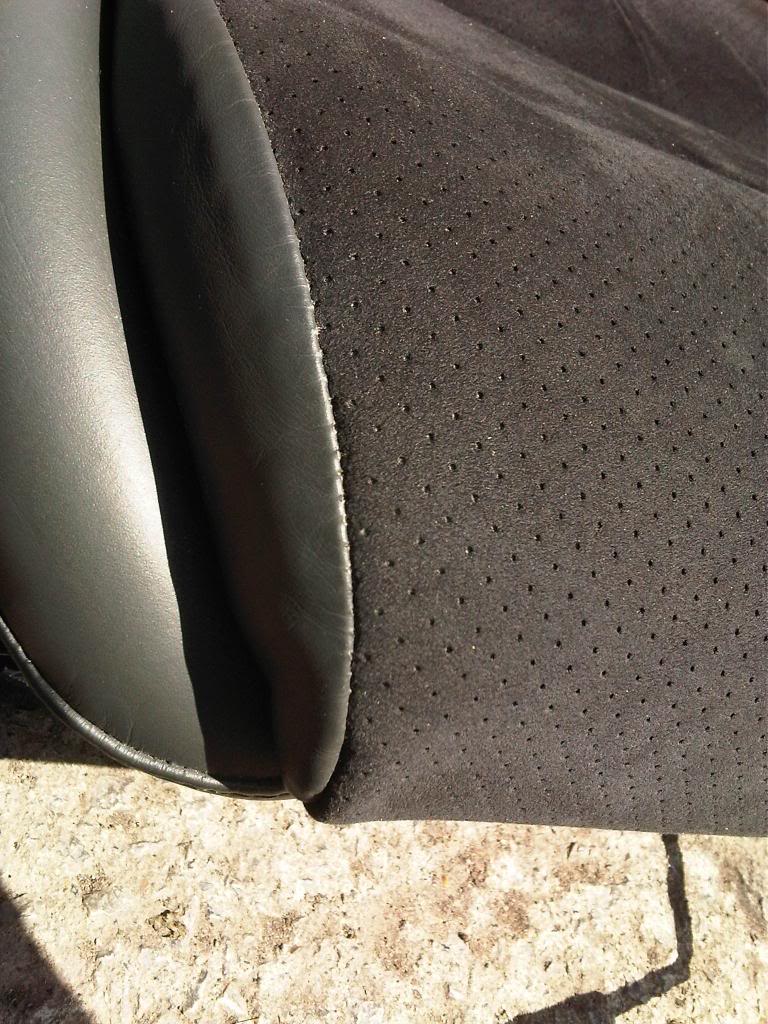
Thanks! . The seats are not actually staying now, they're getting replaced by some oem RZ recaros recovered in leather & suede two tone black.
.I'm going to miss my original deadline of June by around 3 months I imagine.
. The seats are not actually staying now, they're getting replaced by some oem RZ recaros recovered in leather & suede two tone black.


Thread Starter
Joined: Mar 2008
Posts: 2,213
Likes: 283
From: Somerset, England
Thread Starter
Joined: Mar 2008
Posts: 2,213
Likes: 283
From: Somerset, England
Ceylon... Love those Racing Beat wheels. I think cool period wheels related to the Rx7 are a really nice touch. Its great you are using the original front bumper. Fits with the body design better, imho. (99 bumper smiles like late 90's Ferrari grilles. Original has a tougher frowning look due to the bottom of the opening being wider than the top. The smiley face thing was dictated by marketing wanting the "new" Rx7 look to be like that of the other Mazda front grilles.) I did the same thing on the RZ seats and think they are the best replacement seats you can get, because they are so small and light. And, its all Mazda, which I like. (That's the main reason I went with the 2000+ Mazda bigger brakes instead of going with a more aggressive BBK.)
G
G
I feel the same way about the '99 bumper, it doesn't flow as well with the rest of the cars shape.
Yeah I'm quite pleased with the RZ seats. The drivers seat is on a tilt rail, but the passengers is fixed. May source a tilt rail for the passenger side to match, but having never used the tilt function I'm not sure how useful it is?
I'd like to go with larger brakes.. But I doubt they'd fit in my current rims...Maybe in the future
Thread Starter
Joined: Mar 2008
Posts: 2,213
Likes: 283
From: Somerset, England
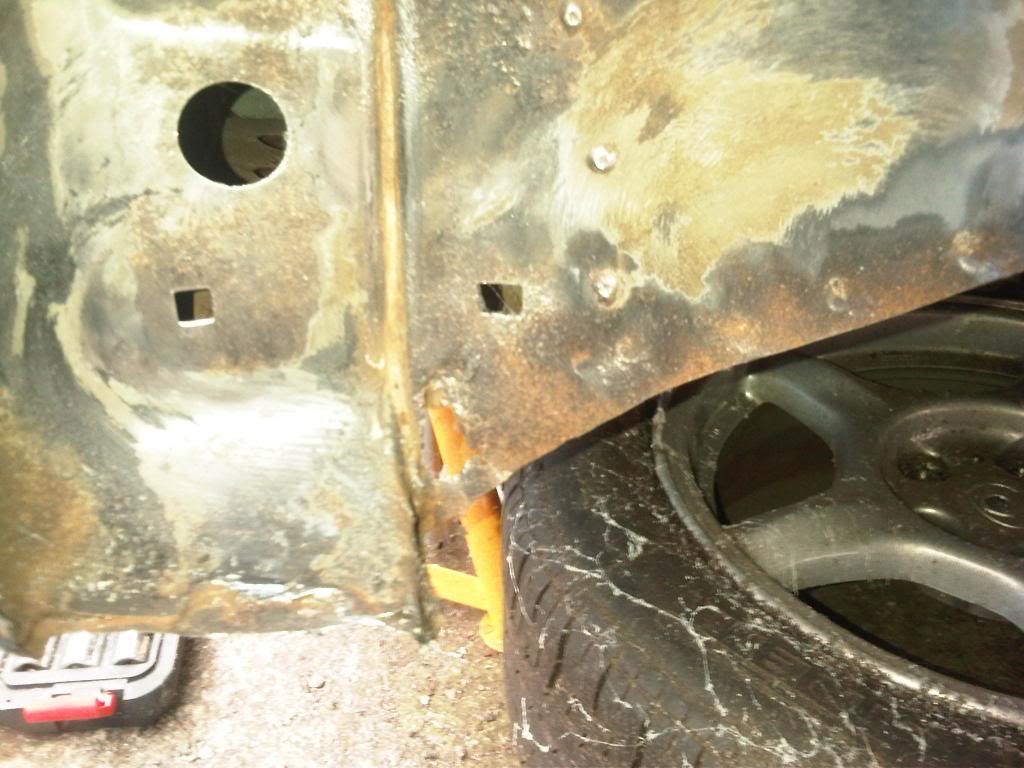
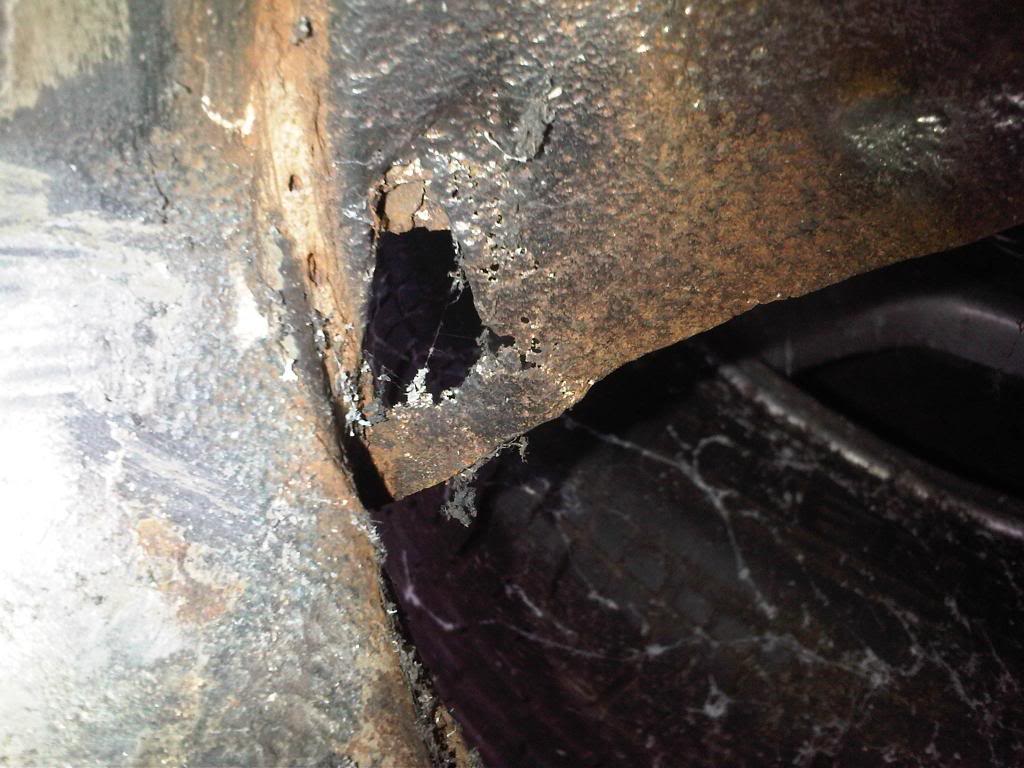
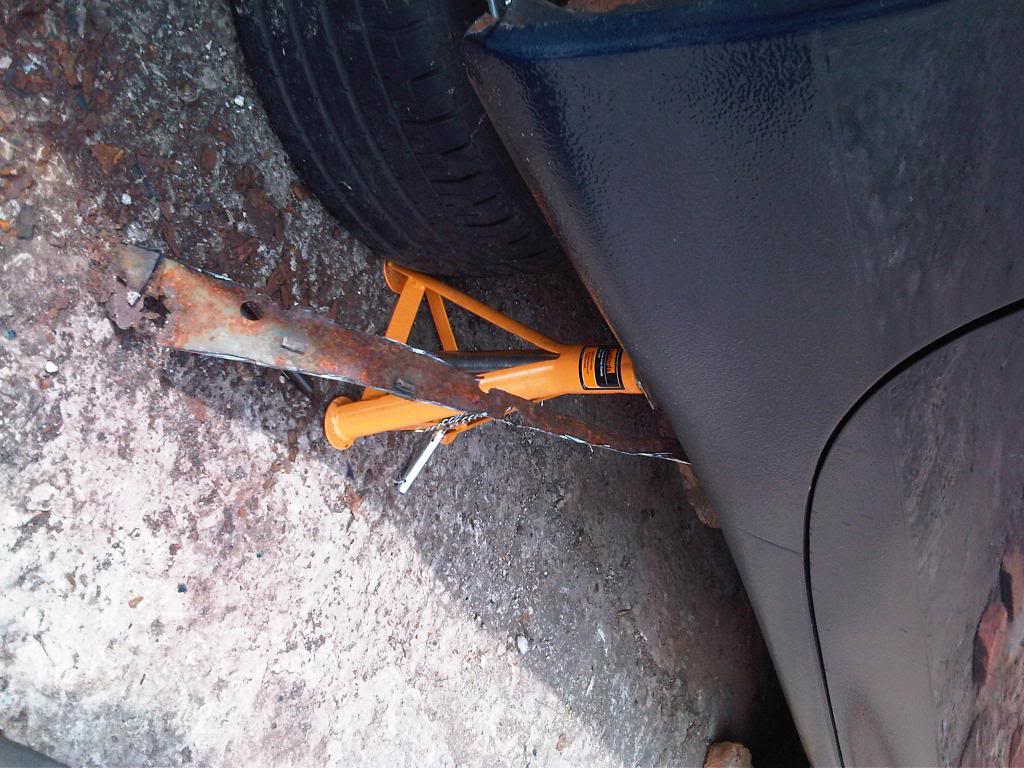
Okay, this bit isn't quite so pretty.....I expected to find rot as its a UKDM FD...Well...I found it
The rear 2ft of the sills looked fine..Until I gave it a tap with my knuckle, sounded very thin...Yep..All rotted out...
After attacking the sill with a screwdriver for 15 mins, they looked like this:
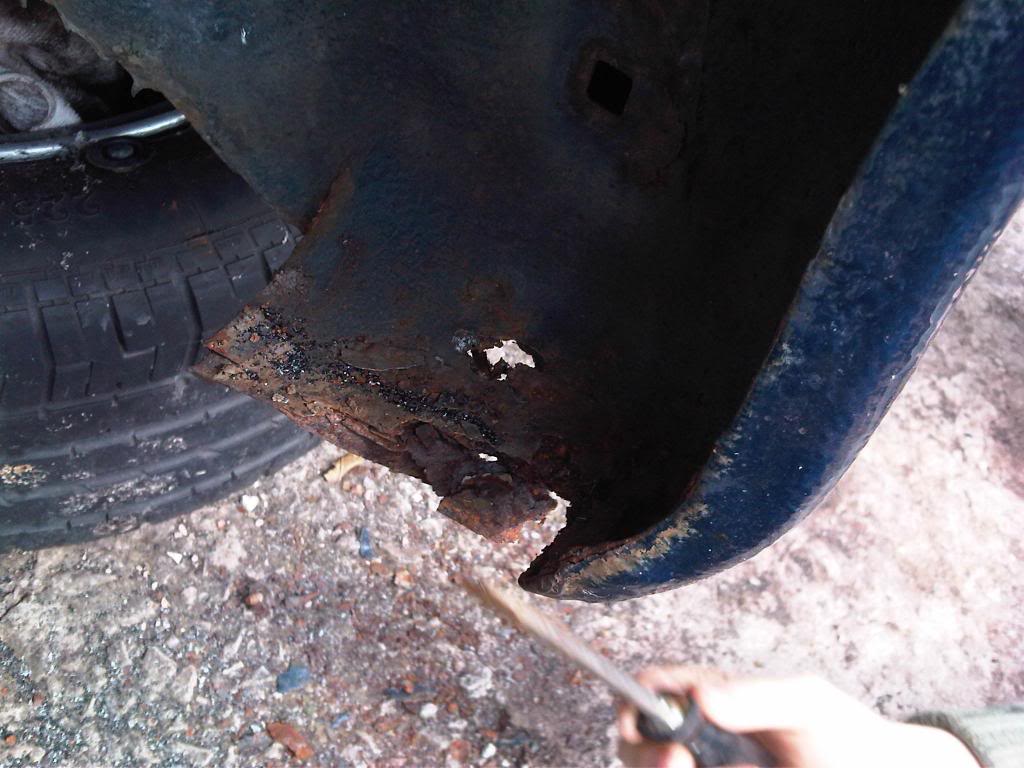

Time to get cutting...
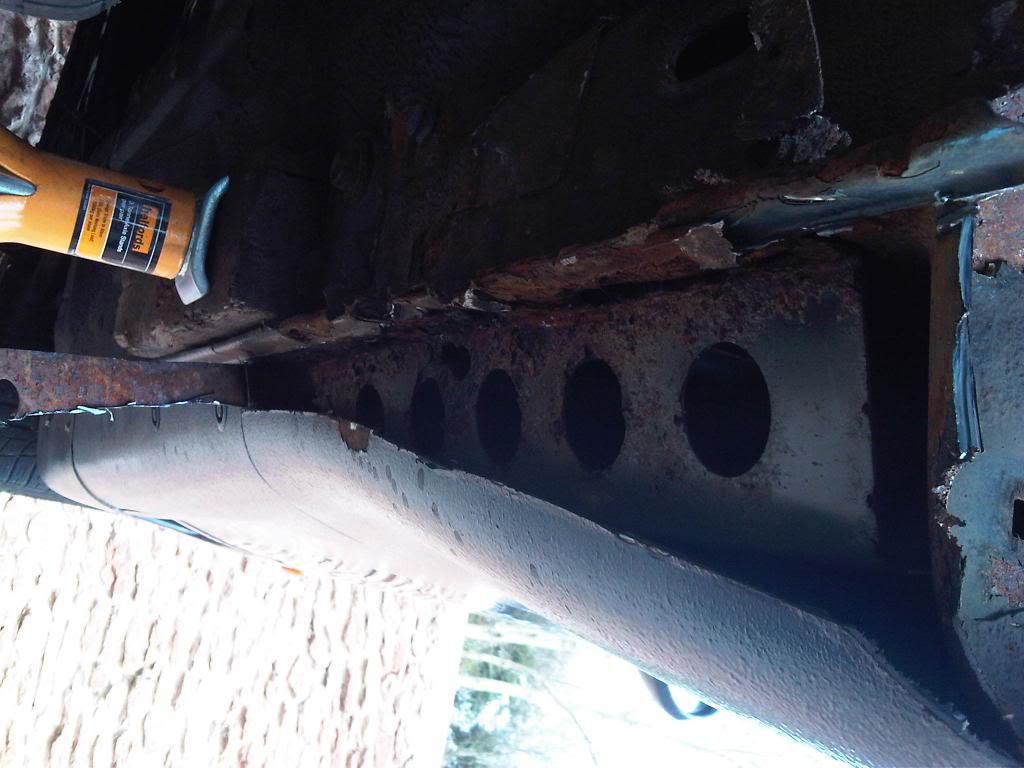
My phone battery died, so I have no pictures of the fabrication of the new sill & inner support..
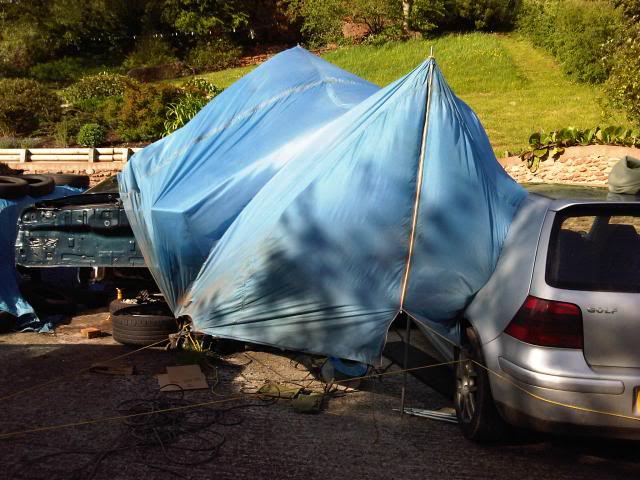
It was rather windy out, blowing my welding gas away..so the tent went up
Passenger sill - Part way through its makeover:
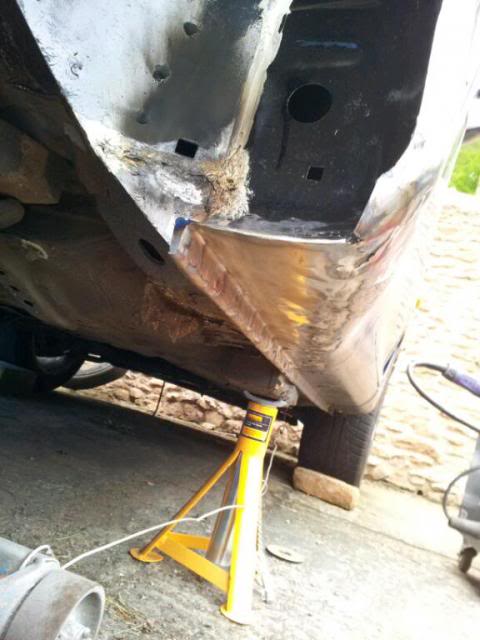
Drivers side sill more or less done:
The rear 2ft of the sills looked fine..Until I gave it a tap with my knuckle, sounded very thin...Yep..All rotted out...
After attacking the sill with a screwdriver for 15 mins, they looked like this:
Time to get cutting...
My phone battery died, so I have no pictures of the fabrication of the new sill & inner support..
It was rather windy out, blowing my welding gas away..so the tent went up
Passenger sill - Part way through its makeover:
Drivers side sill more or less done:
Thread Starter
Joined: Mar 2008
Posts: 2,213
Likes: 283
From: Somerset, England
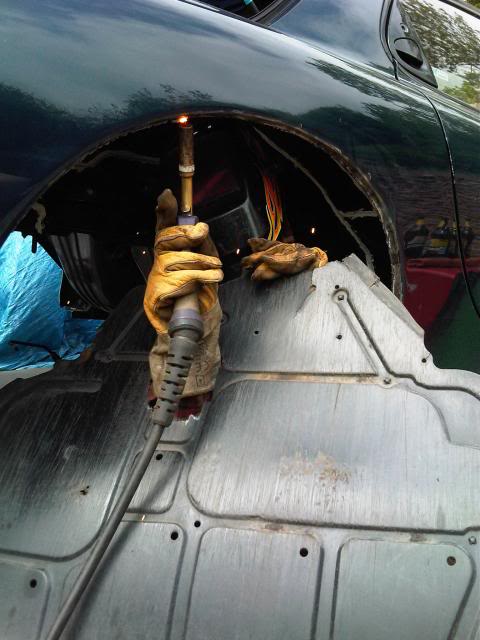
I noticed a little rot on the rear passengers arch, so that had to be cut out:

They seem to rot as the two skins are only spot welded together, allowing moisture to get stuck between the two skins.....Well...We cant have that
All spots drilled out, skins separated and cleaned up then seam welded back together:
The undertray was kindly donated by my golf....I got some serious welding burns welding those arches! The undertray worked well at deflecting most of it
After the first stage of flap disking:
Repaired section:
Arches finished, I feel happier now they're seam welded & I know they're solid. I seam sealed the entire inside lip after coating it with epoxy mastic 121, Should be good for at least another 20 years
Aches top coated with chassis black, then coated with Dinitrol 445 stone chip for arches:
Thread Starter
Joined: Mar 2008
Posts: 2,213
Likes: 283
From: Somerset, England
Ran out of gas by this point, welded in pics to follow later!
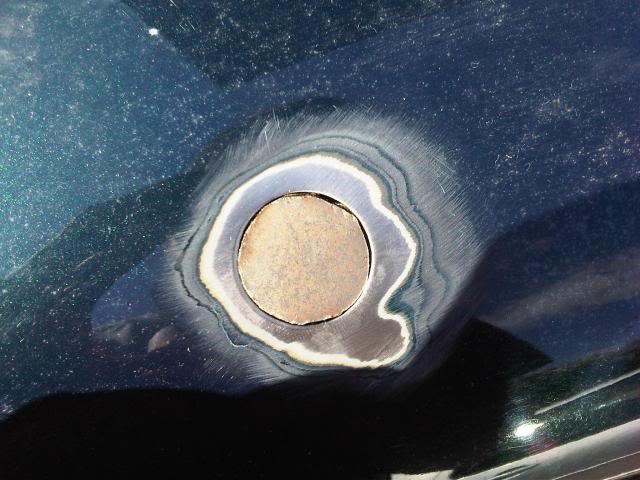
Ariel hole:
Rear wiper deleted:

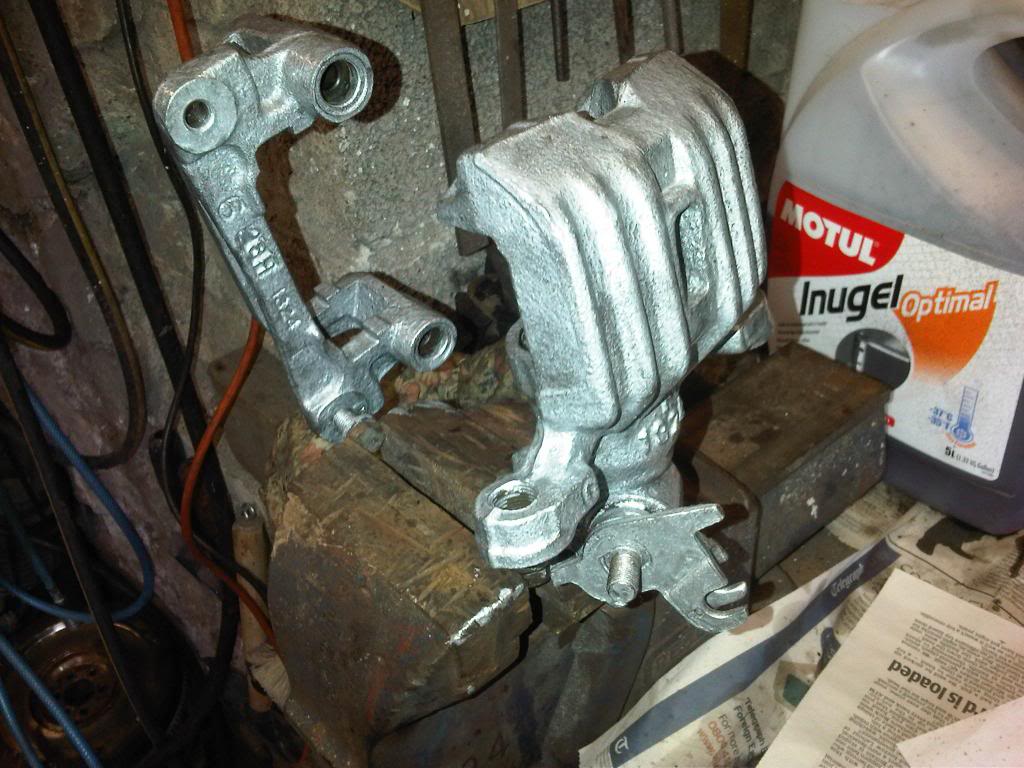
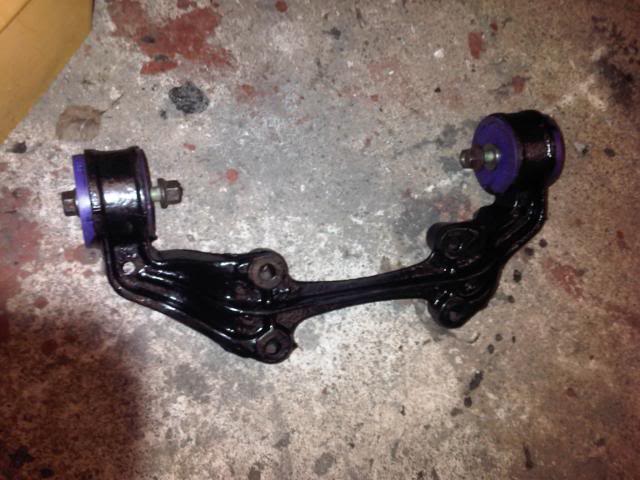
Pressed all the old bushes out & new ones in - Also changed the 6 pillowballs:
Had to get quite inventive to get the larger ones out
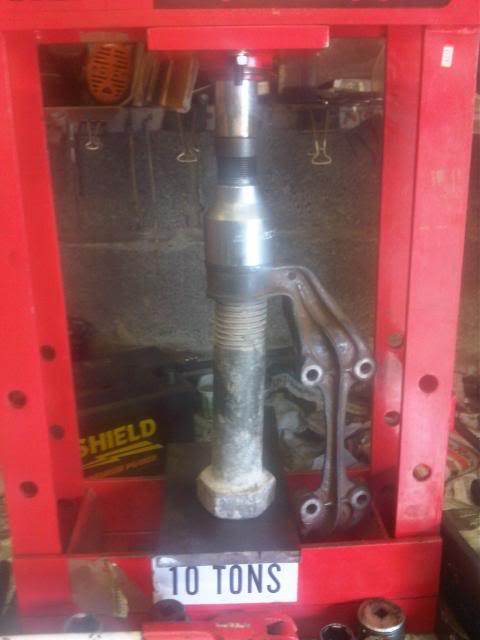
All ally arms shot blasted & steel painted with por15.
Nice & shiny
Ariel hole:
Rear wiper deleted:
Pressed all the old bushes out & new ones in - Also changed the 6 pillowballs:
Had to get quite inventive to get the larger ones out
All ally arms shot blasted & steel painted with por15.
Nice & shiny
Thread Starter
Joined: Mar 2008
Posts: 2,213
Likes: 283
From: Somerset, England
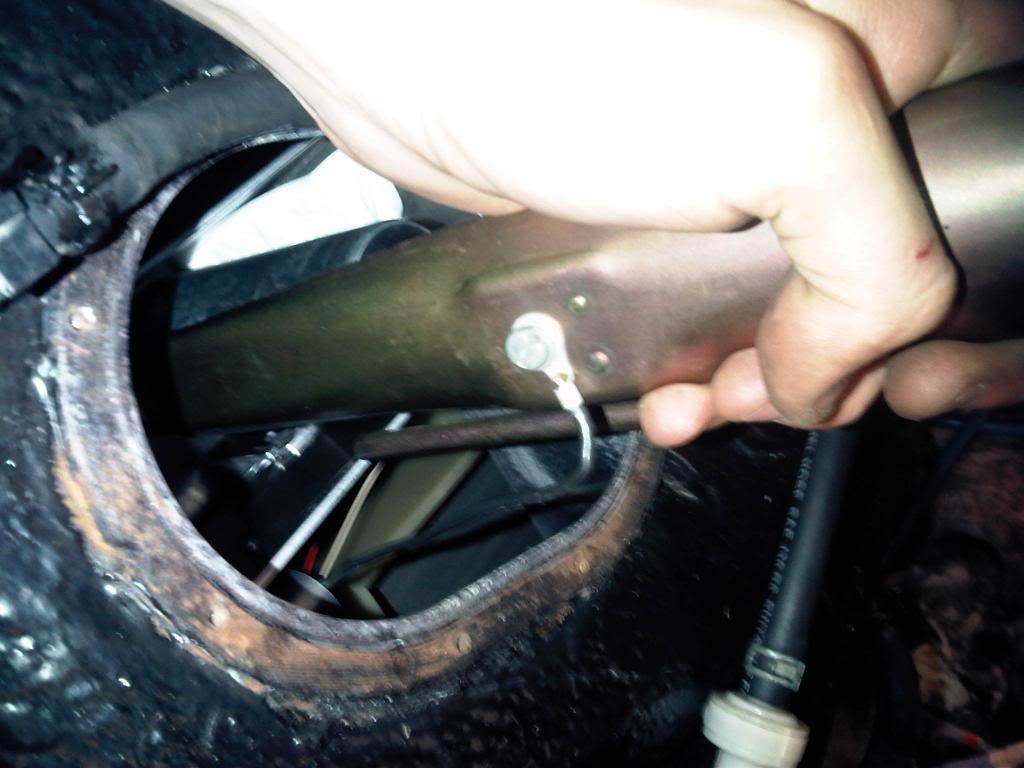
Been working on bits and bobs today.
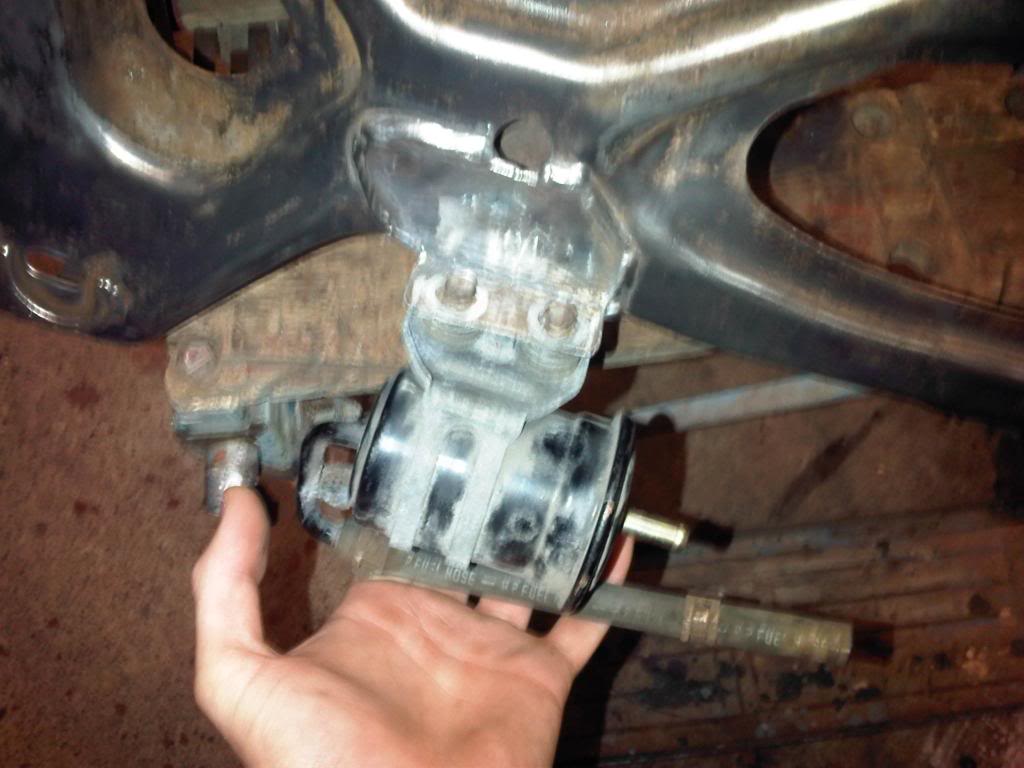
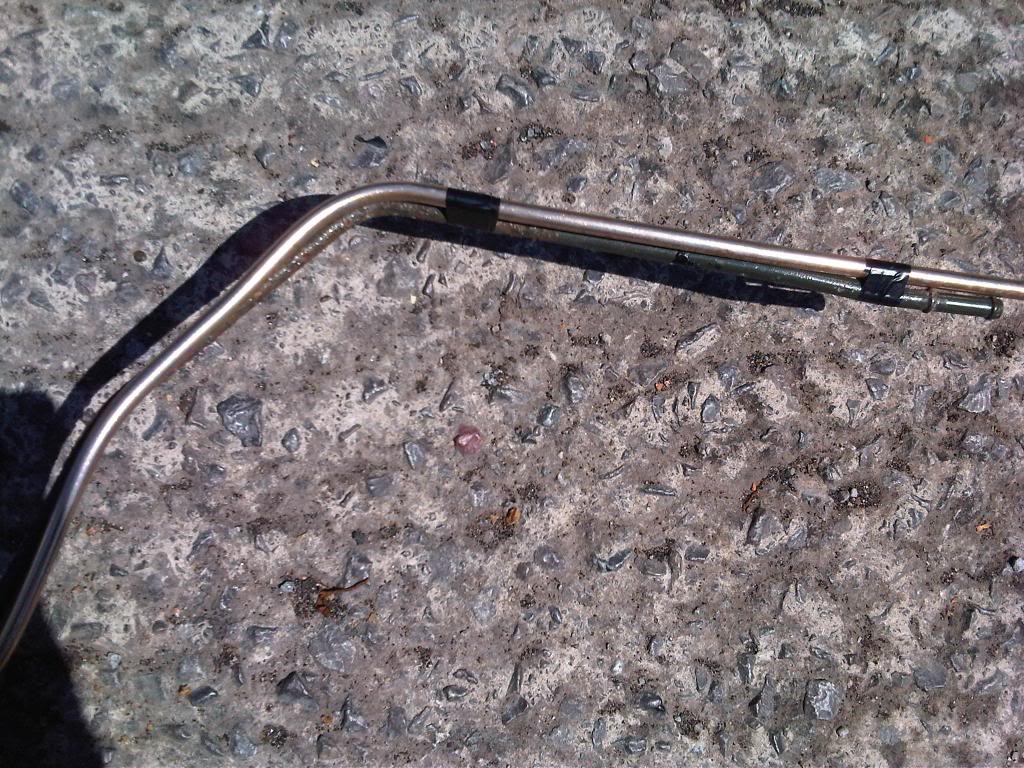
Removed the fuel lines & rear brake line.
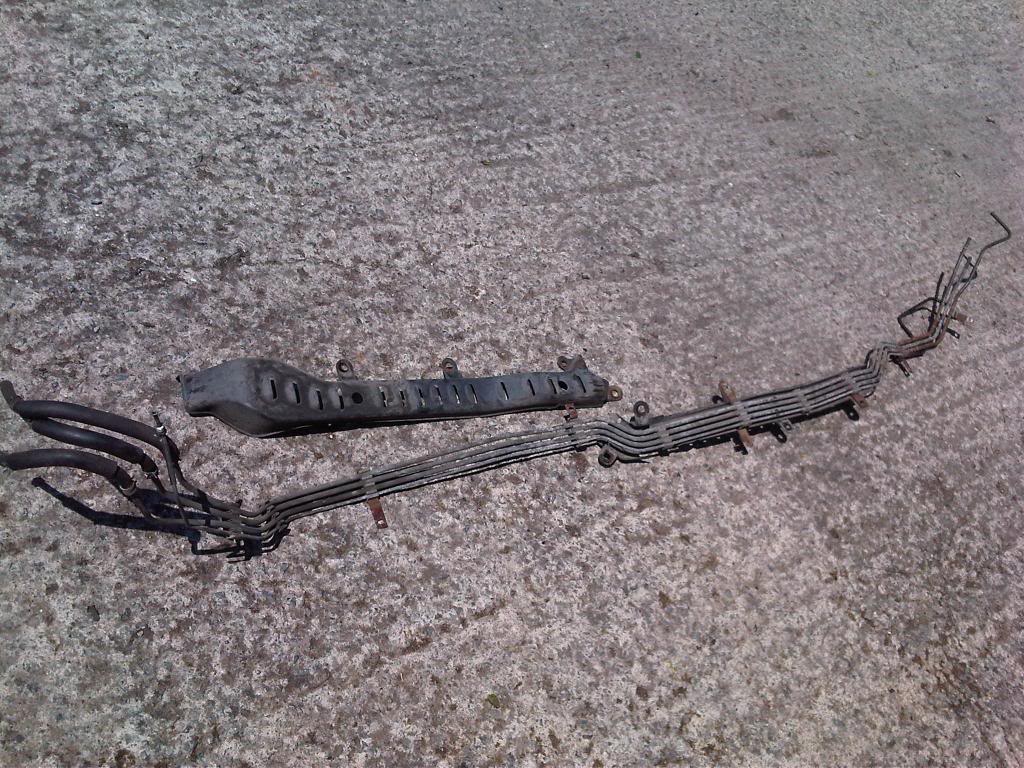
Going to replace them as they're rusty in one spot.
Going to use copper for the brake line, but would welcome any suggestions as what's best to use for the fuel lines. I may run larger fuel lines incase I go for more power later on..
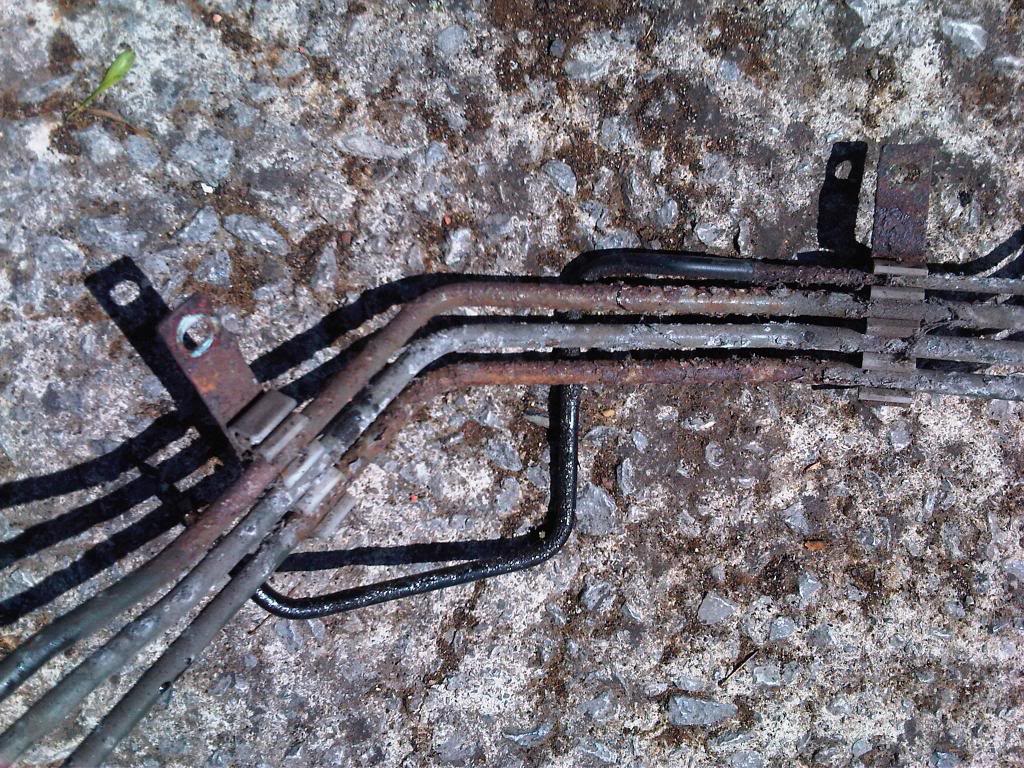
Ground all the rust/paint off the diff and painted on a few coats of epoxy mastic:
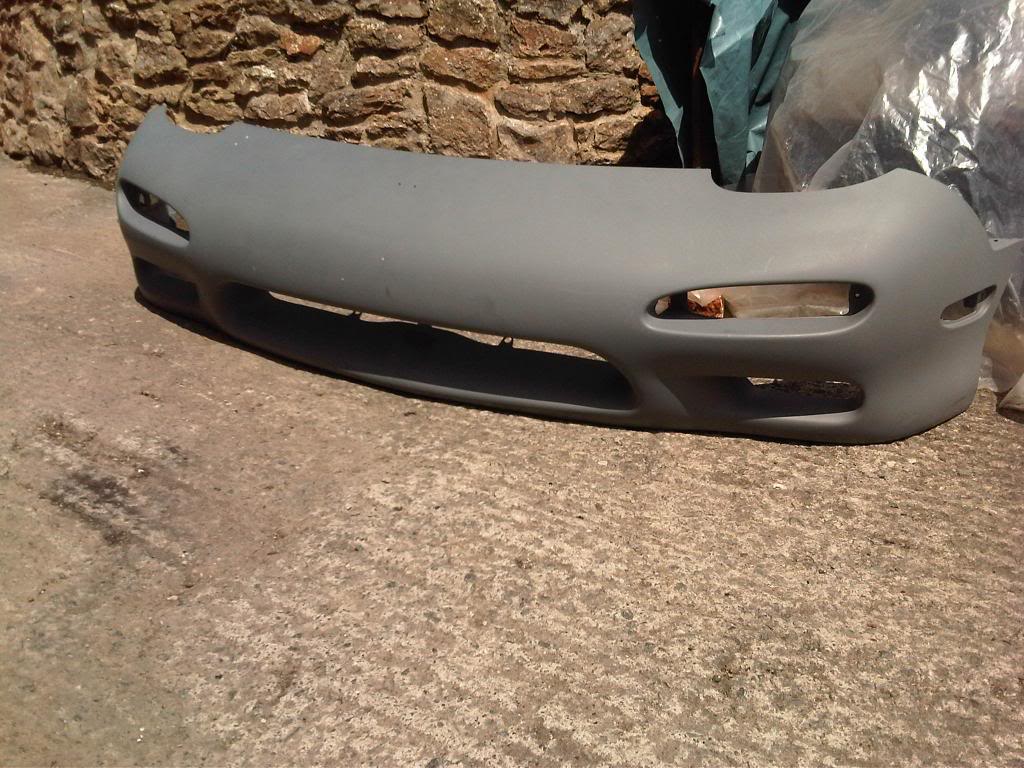
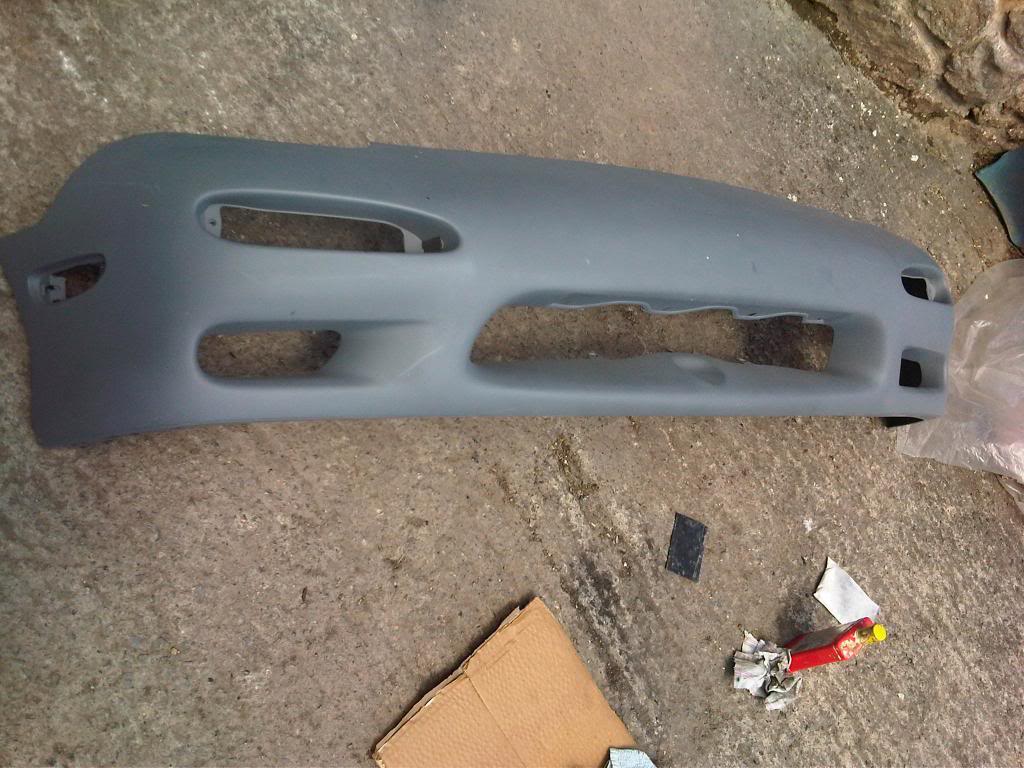
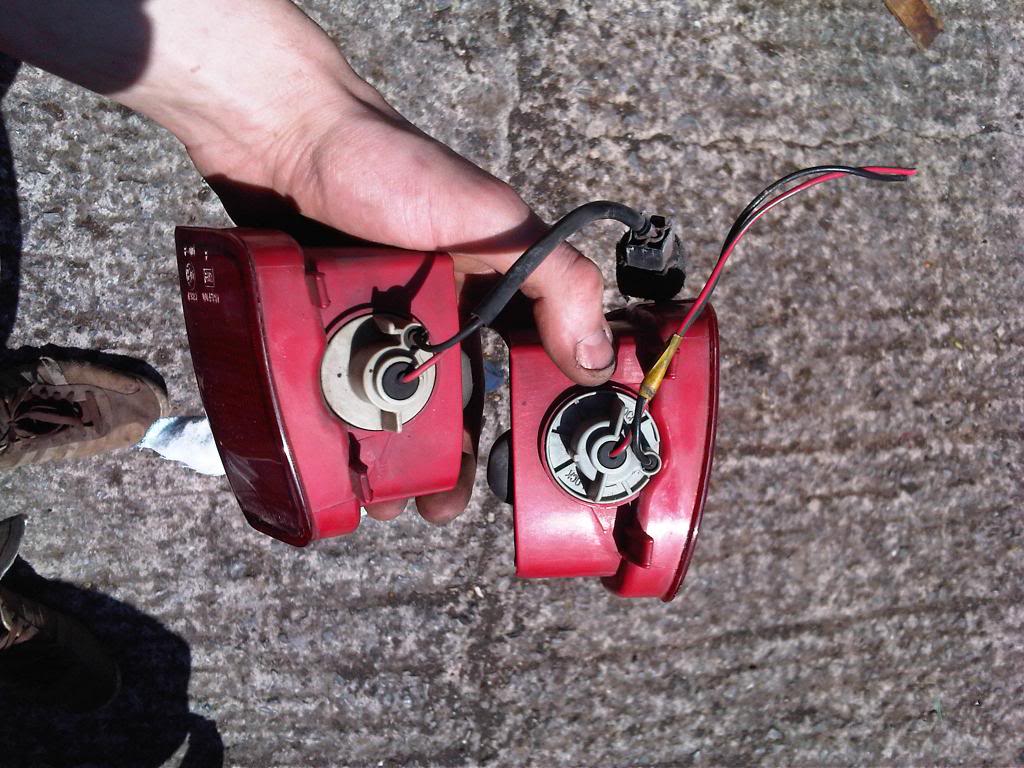
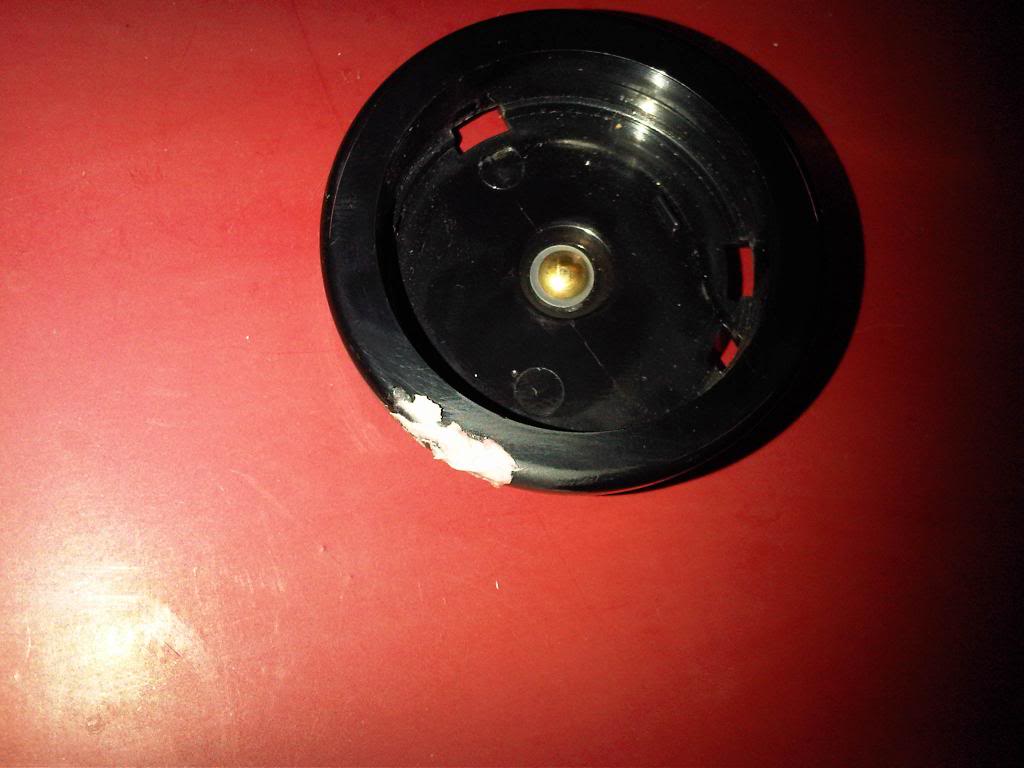
The UK rear bumper has two fog lights...But only one is wired up! Seems strange as they bothered to fit the reflector etc inside, just no hole for a bulb.
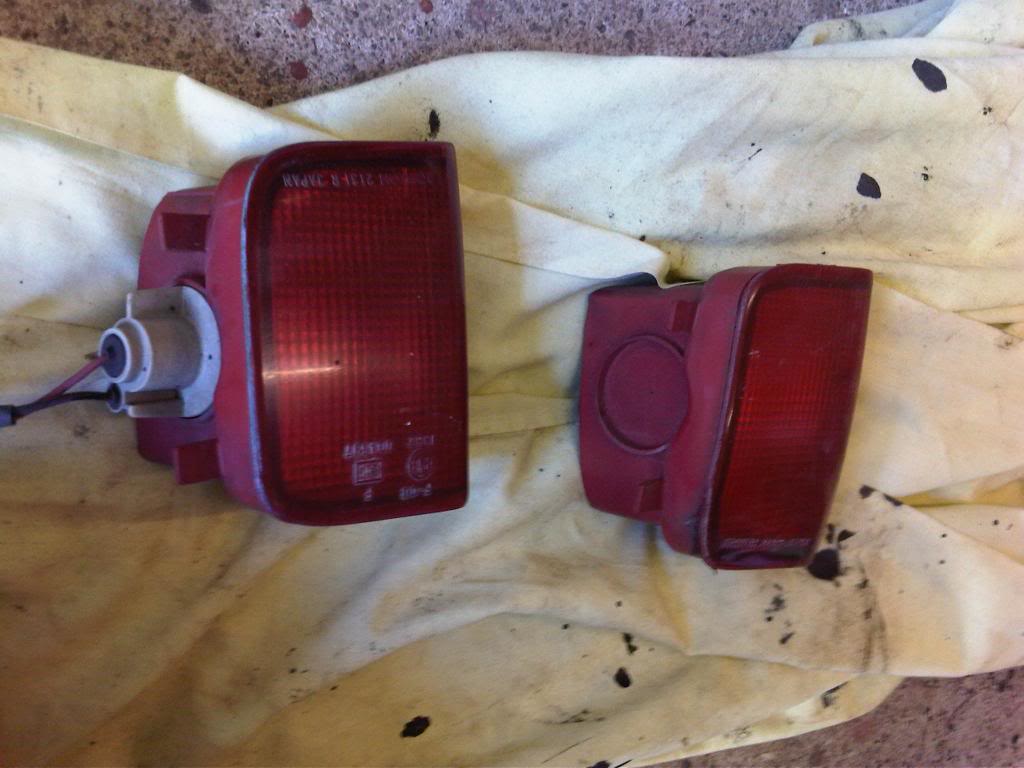
Nothing a little work with the dremel & a spare bulb holder cannot resolve
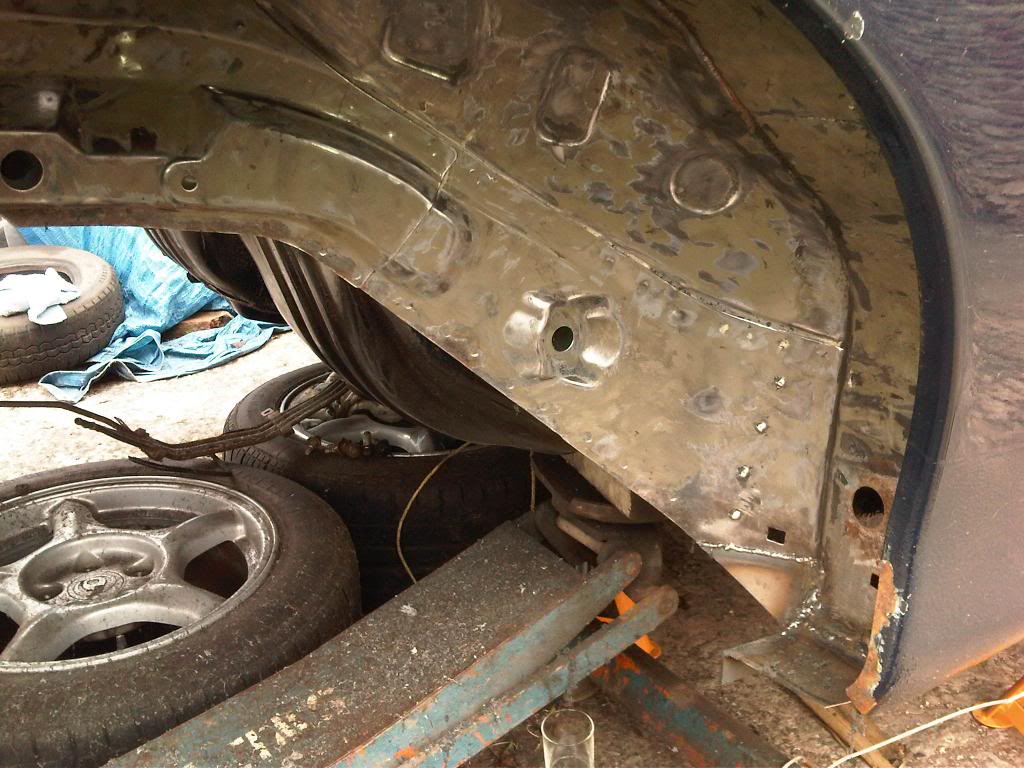
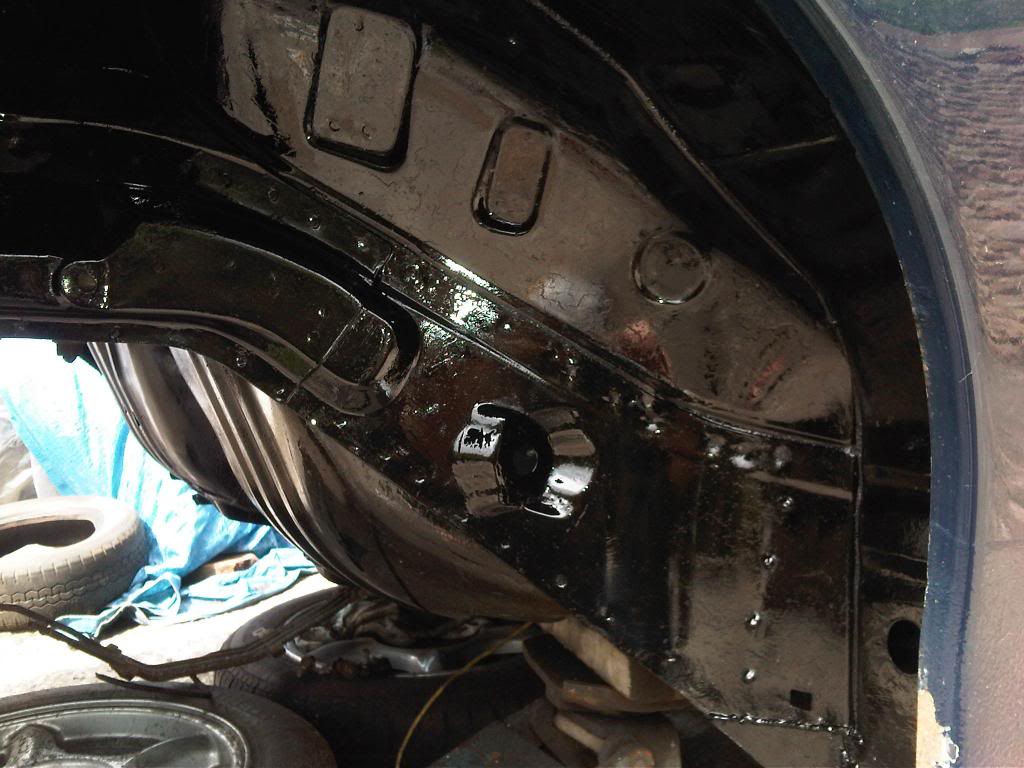
Done more prep work and painting on the underside, mainly in the tunnel, would post some pics, but its all black and doesn't really show up!
Removed the fuel lines & rear brake line.
Going to replace them as they're rusty in one spot.
Going to use copper for the brake line, but would welcome any suggestions as what's best to use for the fuel lines
. I may run larger fuel lines incase I go for more power later on..Ground all the rust/paint off the diff and painted on a few coats of epoxy mastic:
The UK rear bumper has two fog lights...But only one is wired up! Seems strange as they bothered to fit the reflector etc inside, just no hole for a bulb.
Nothing a little work with the dremel & a spare bulb holder cannot resolve
Done more prep work and painting on the underside, mainly in the tunnel, would post some pics, but its all black and doesn't really show up!
Thread Starter
Joined: Mar 2008
Posts: 2,213
Likes: 283
From: Somerset, England

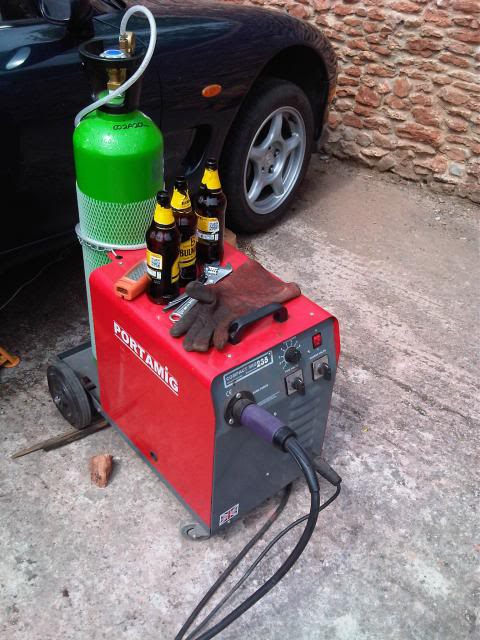
PPF Seam welded, strengthened & painted. Had the welder nearly maxed out laying those slugs, serial penetration - Love the noise of it on high power, its got that satisfying almost liquid noise to it

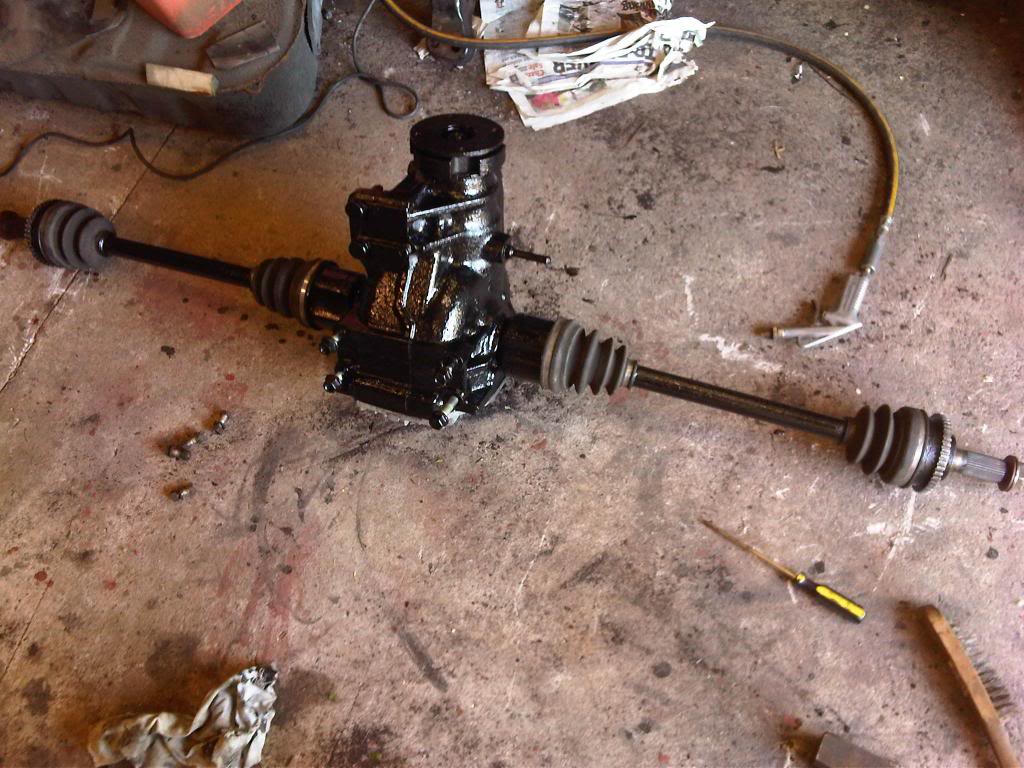
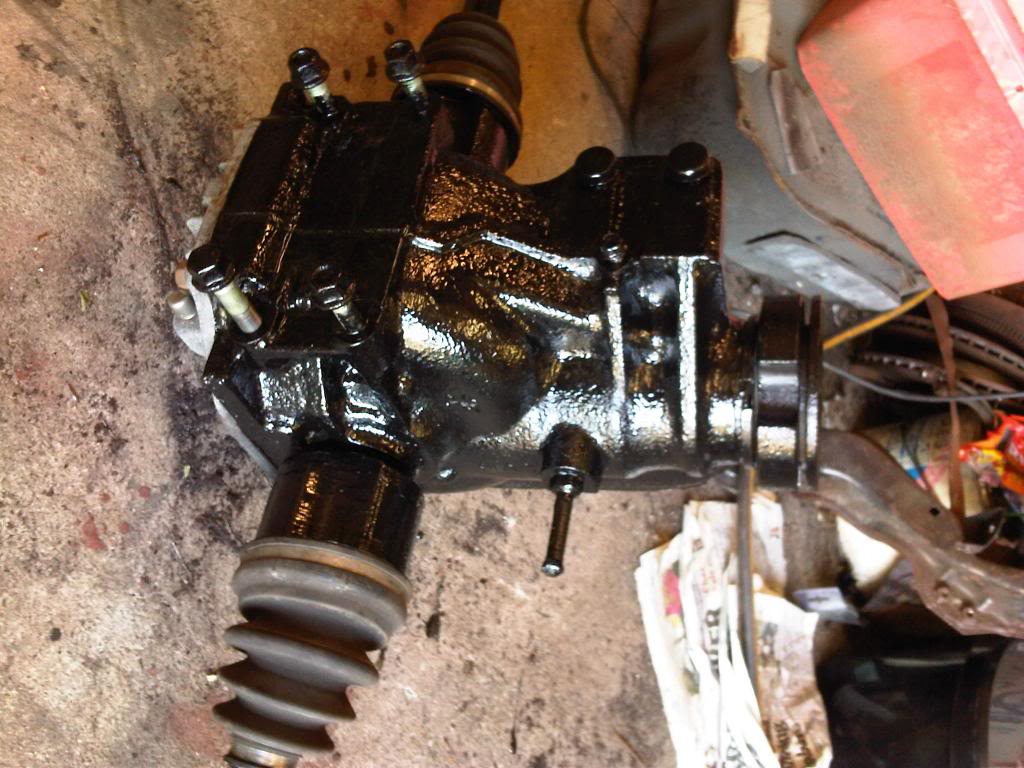
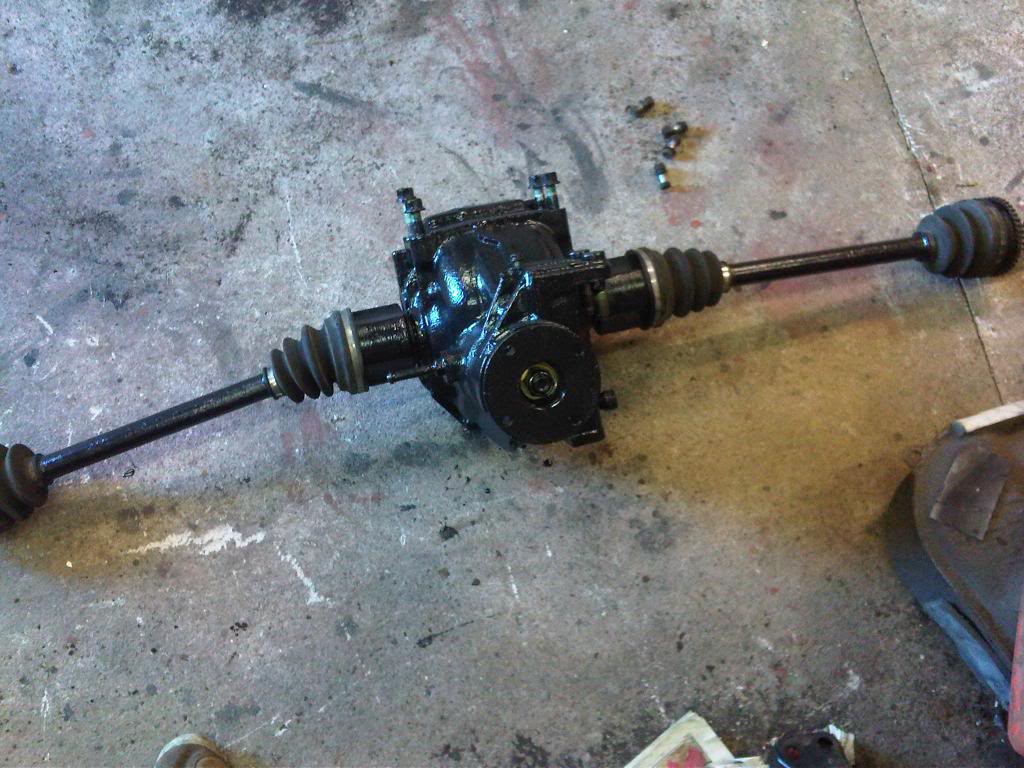
Also stripped & painted the drive shaft & the front cross member.
Slowly getting there...

Thread Starter
Joined: Mar 2008
Posts: 2,213
Likes: 283
From: Somerset, England
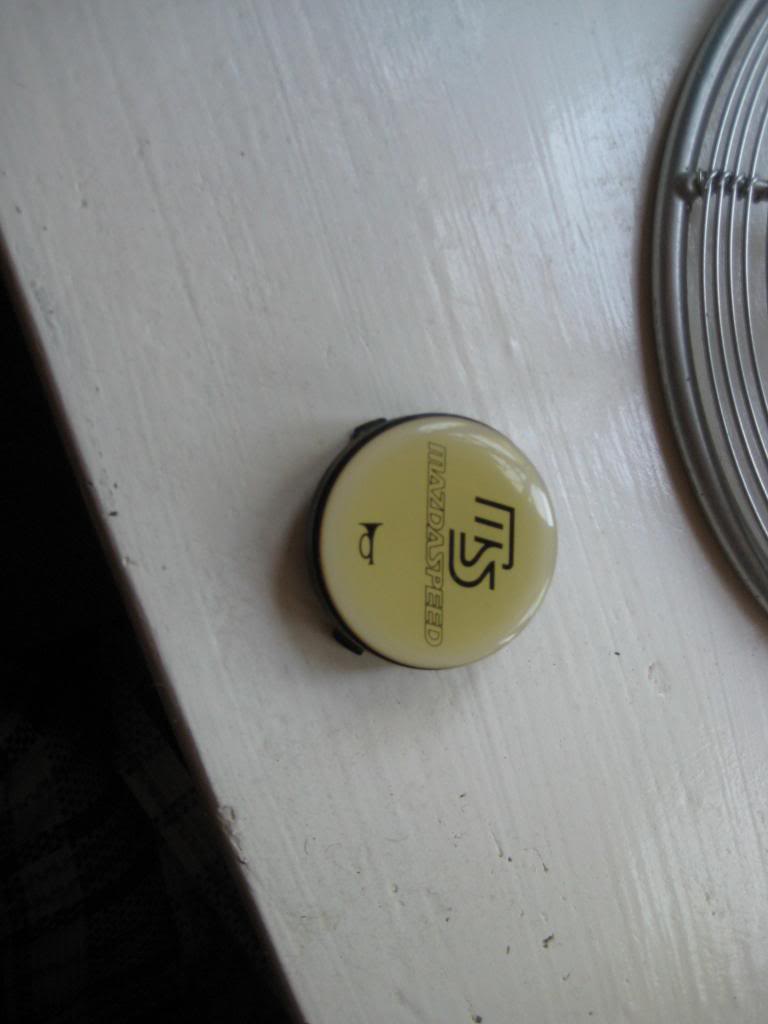
Picked up a Mazdaspeed horn that was a bit damaged, looks retro but I think it looks cool

Filled:
Sprayed:

Horn button:
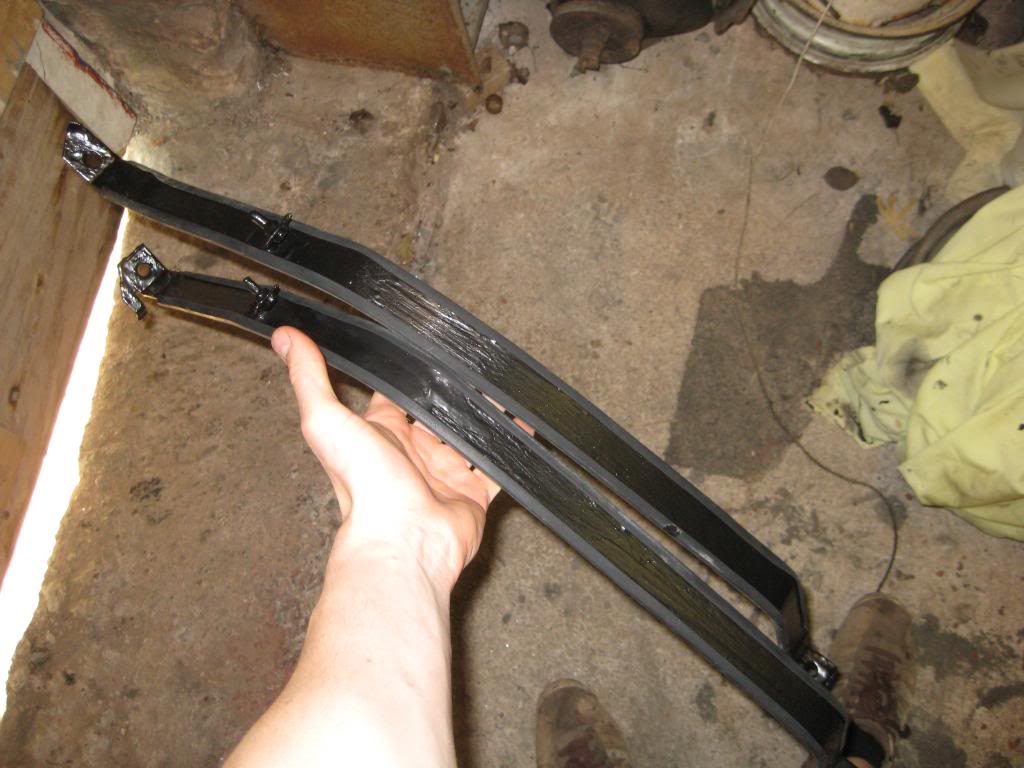
Made some new fuel tank straps as mine we're pitted, excuse the massive brush marks in the paint
 :
:
My fuel tank had grounded out in a few places, making is rust and generally look bad, if you remember from earlier in the thread, it looked like this:
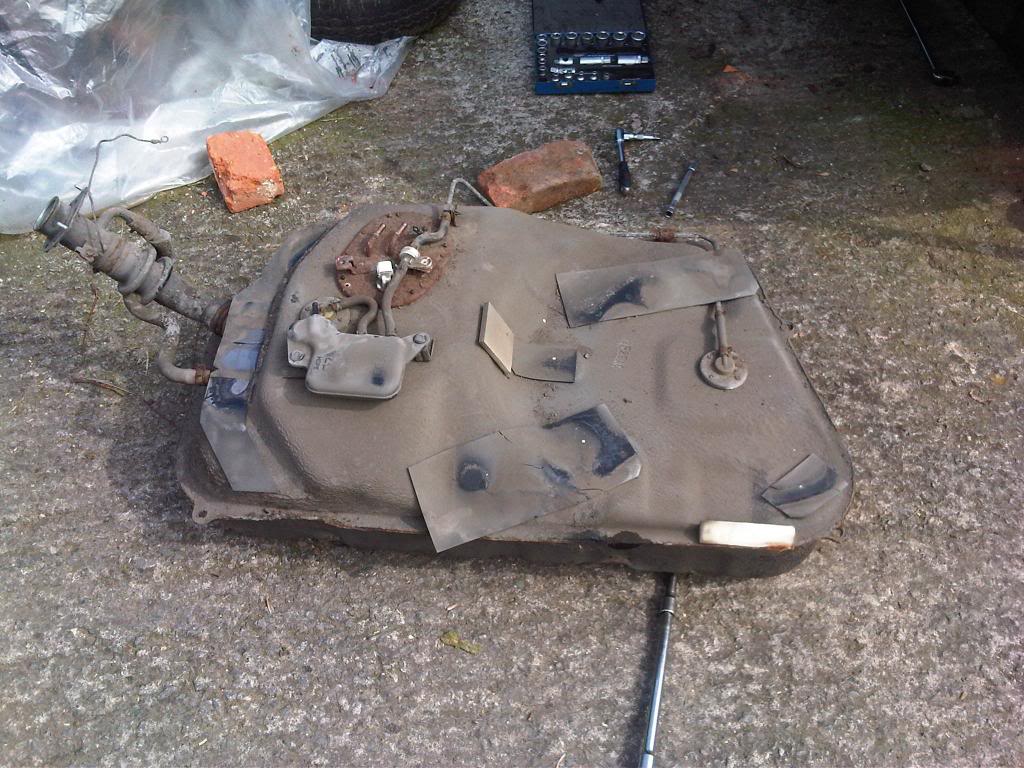
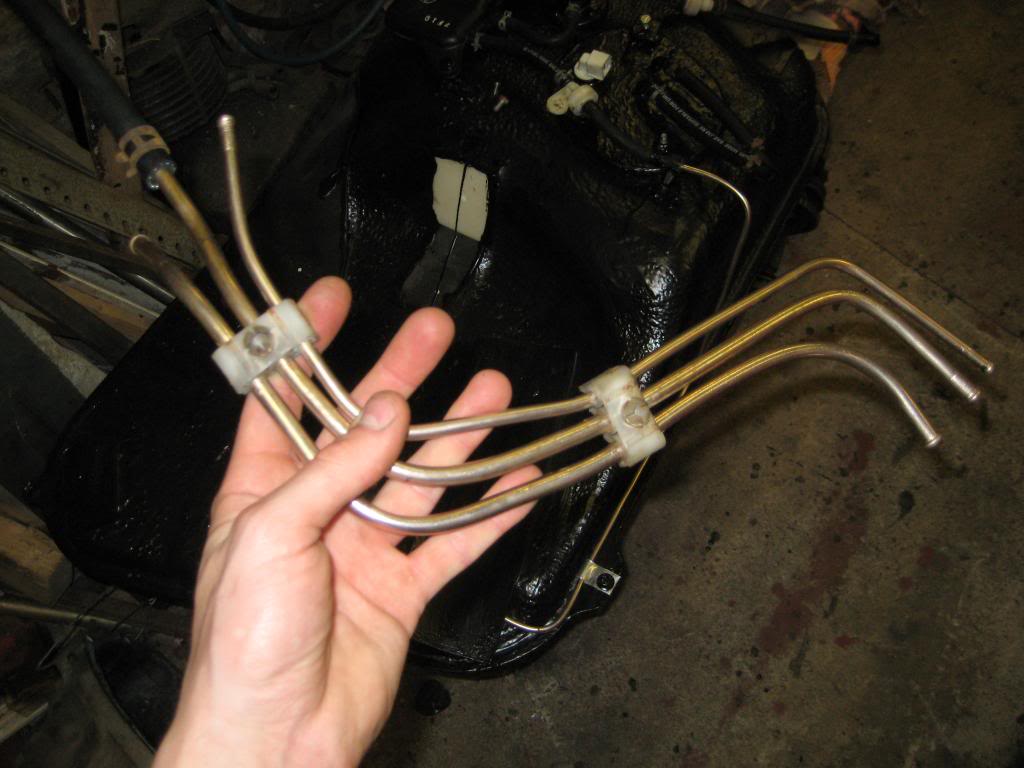
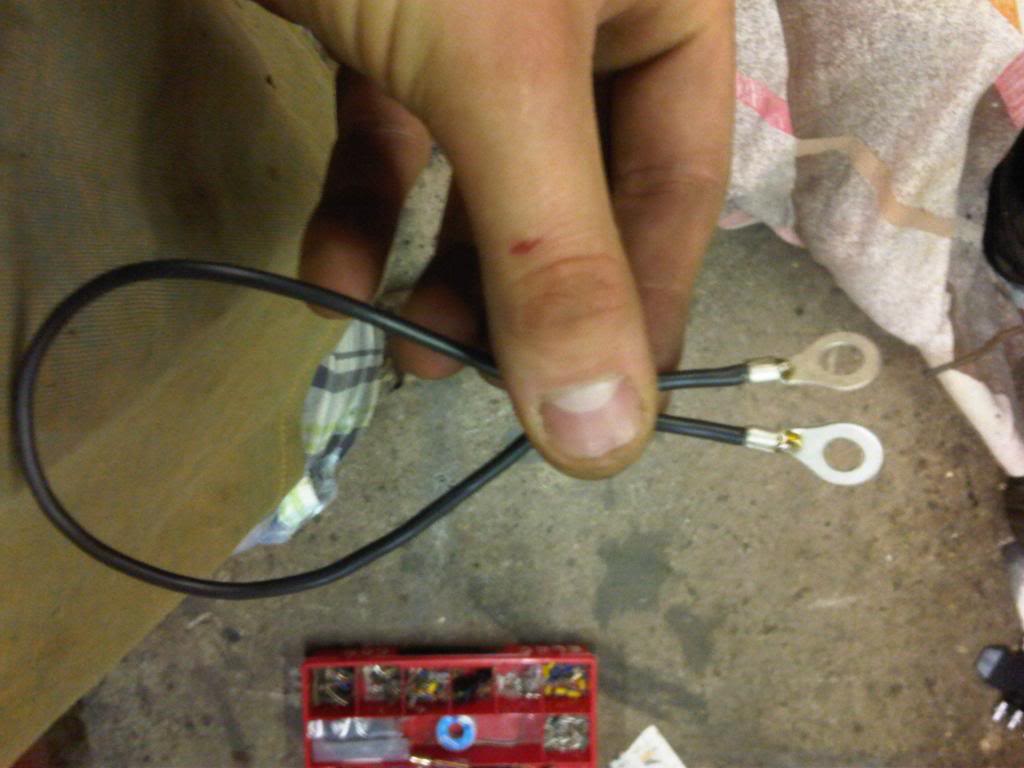
Well, I stripped it back to bare metal & seam welded the tanks together. For protection I used stone chip & epoxy mastic 121. All rubber hoses replaced. Hardline replaced with Kunifer line. All plastic fitting have been replaced with bolts & rivnuts.
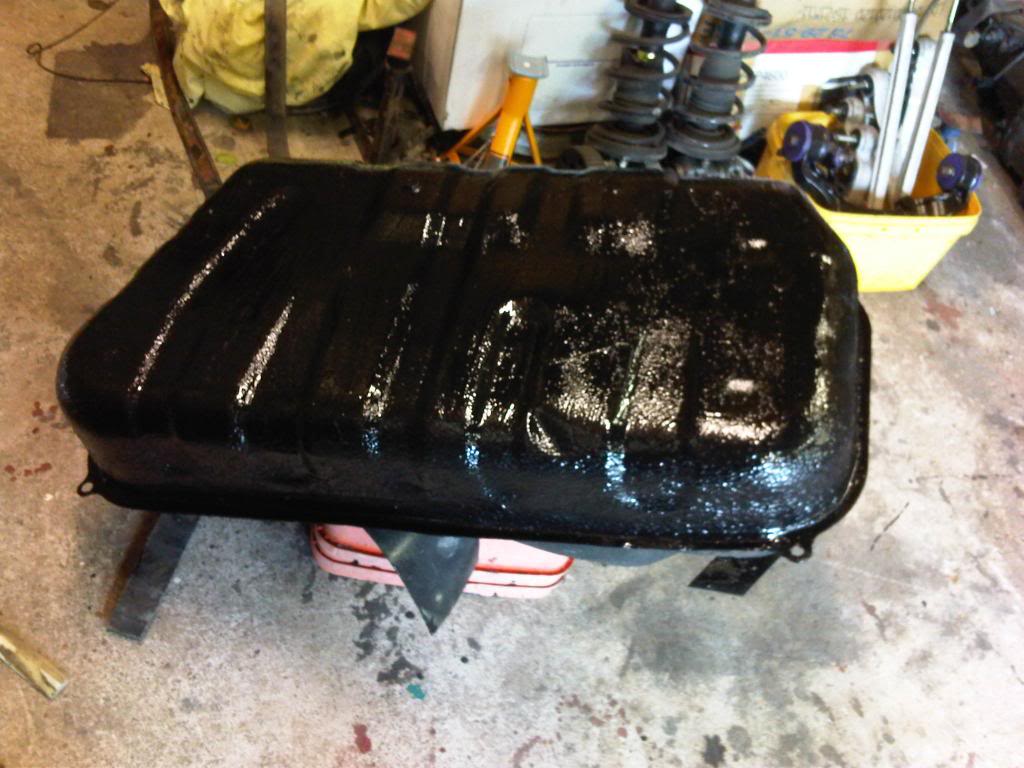
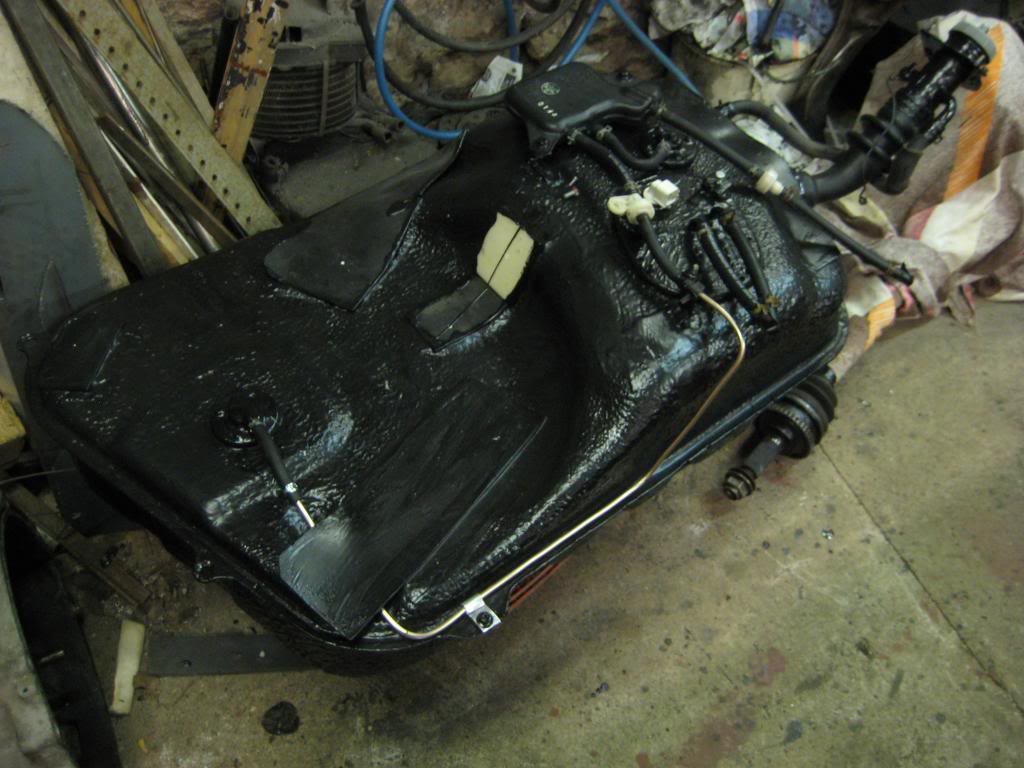
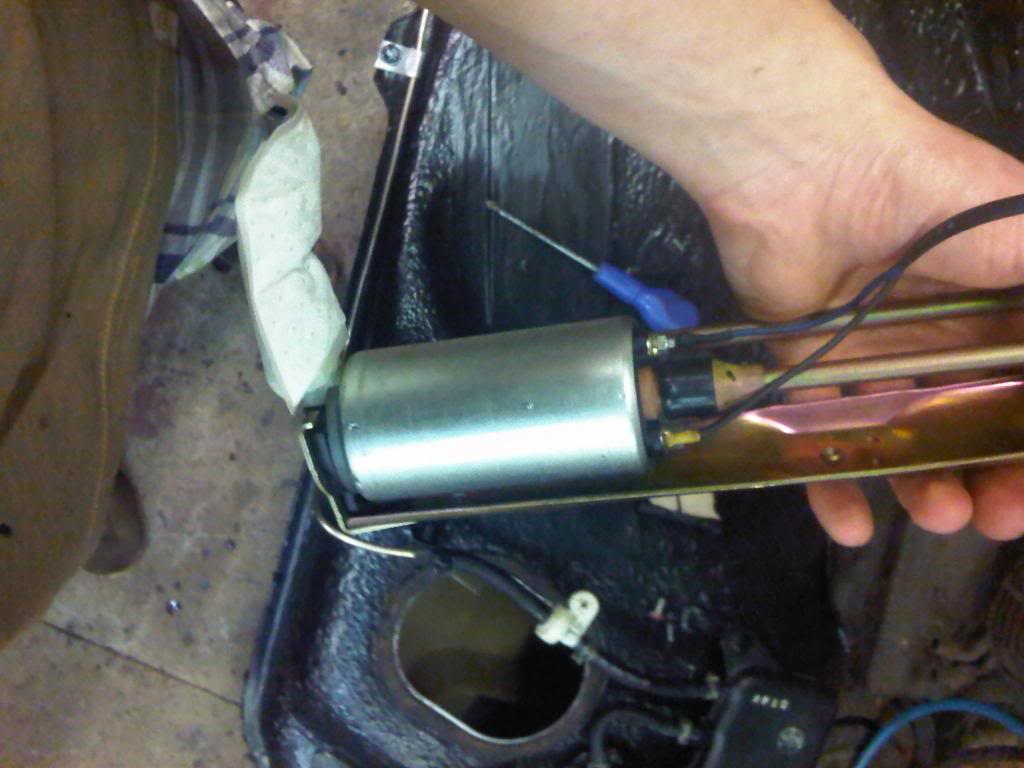
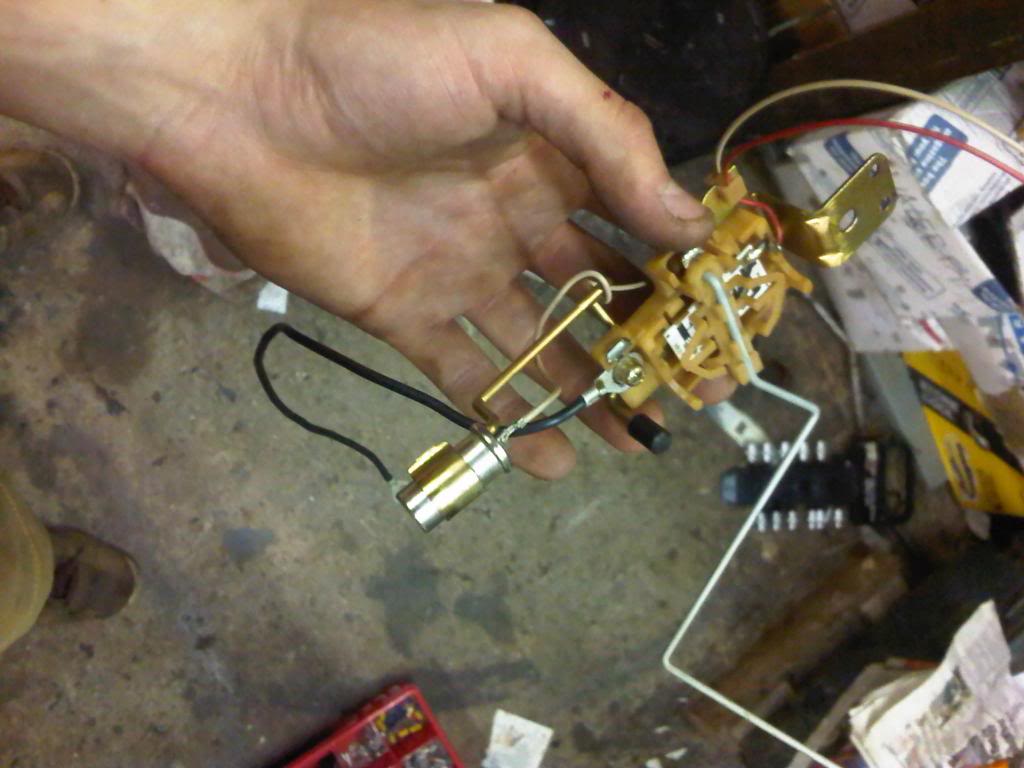
Supra TT pump fitted:
Thread Starter
Joined: Mar 2008
Posts: 2,213
Likes: 283
From: Somerset, England
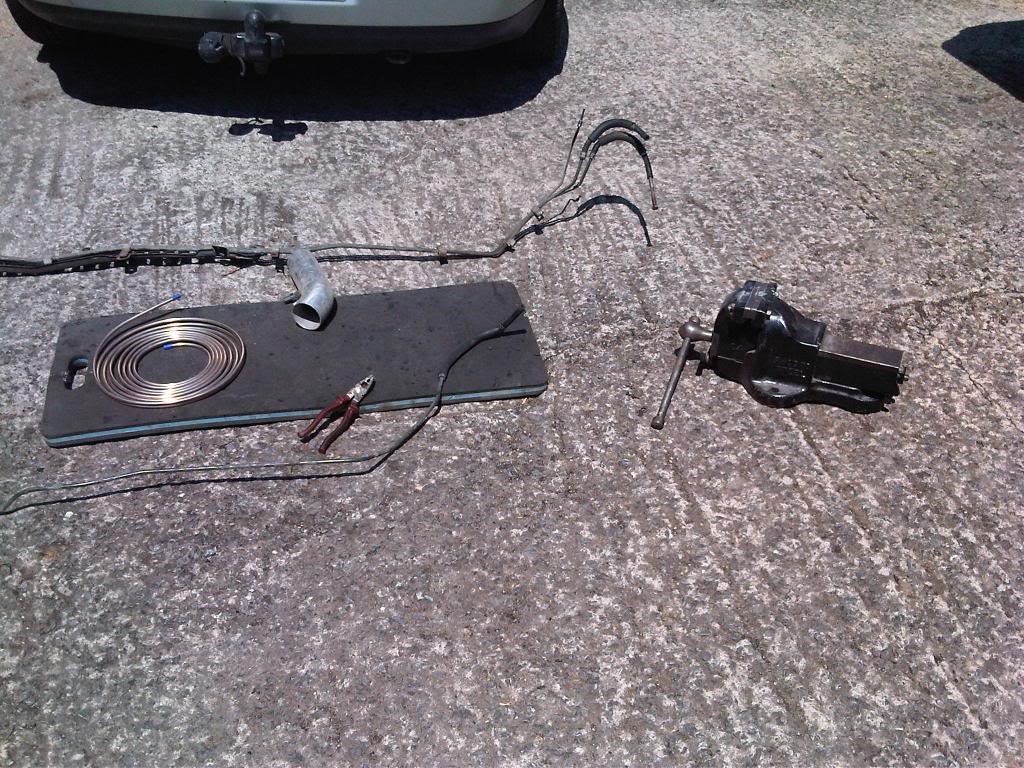
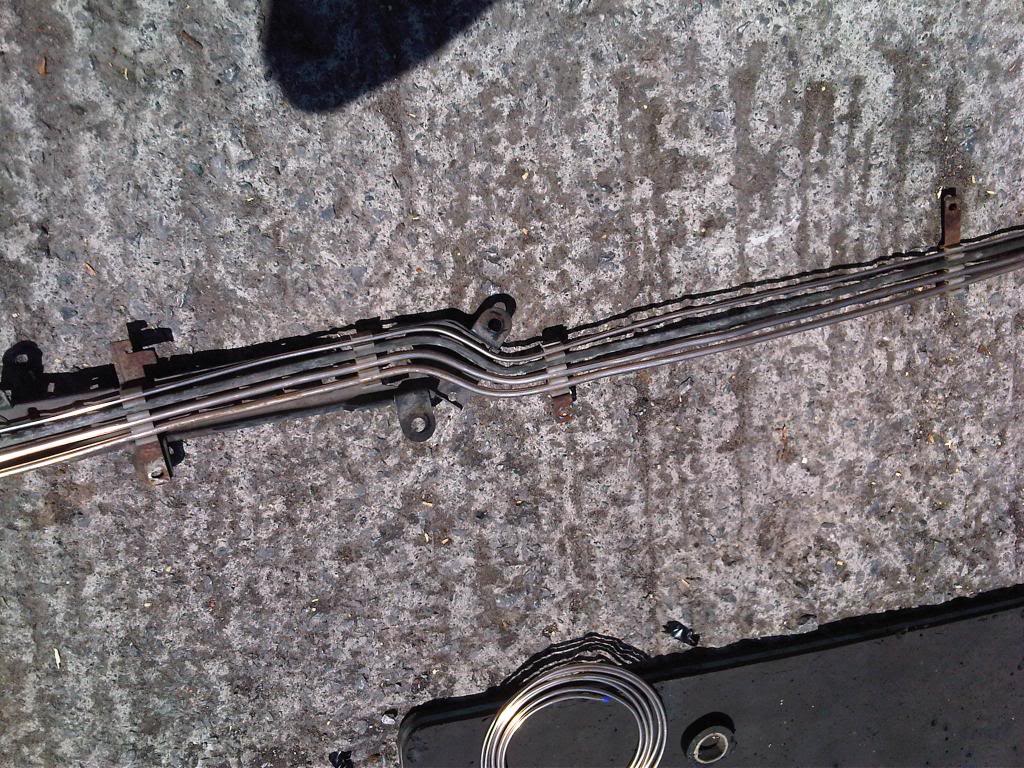
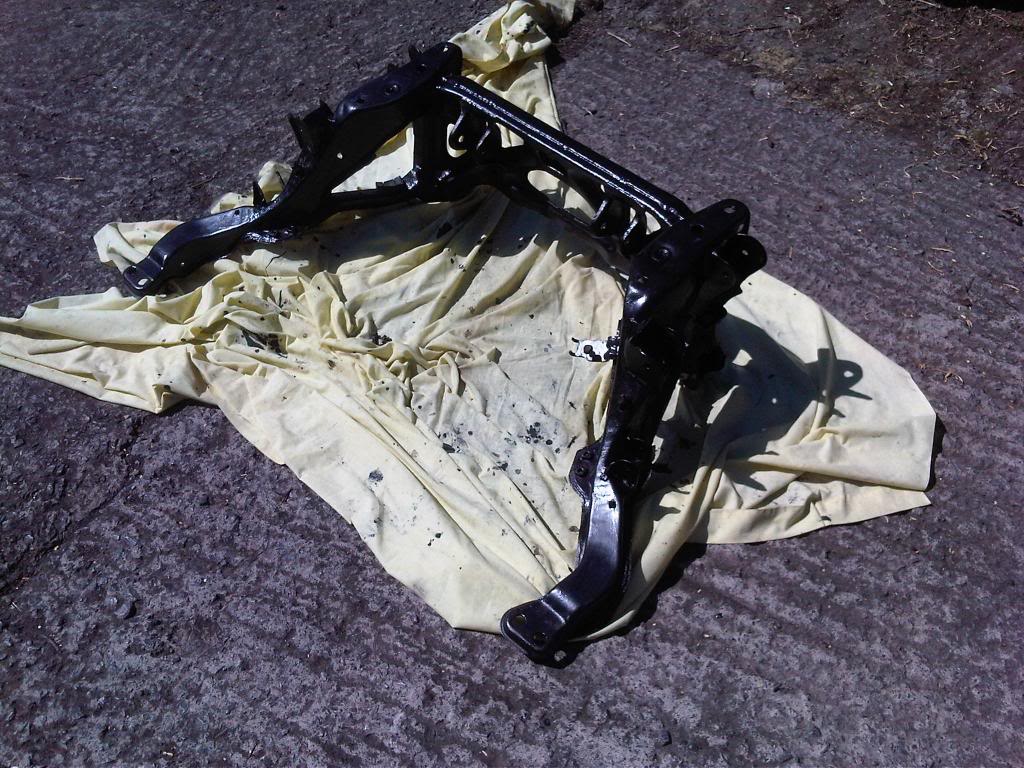
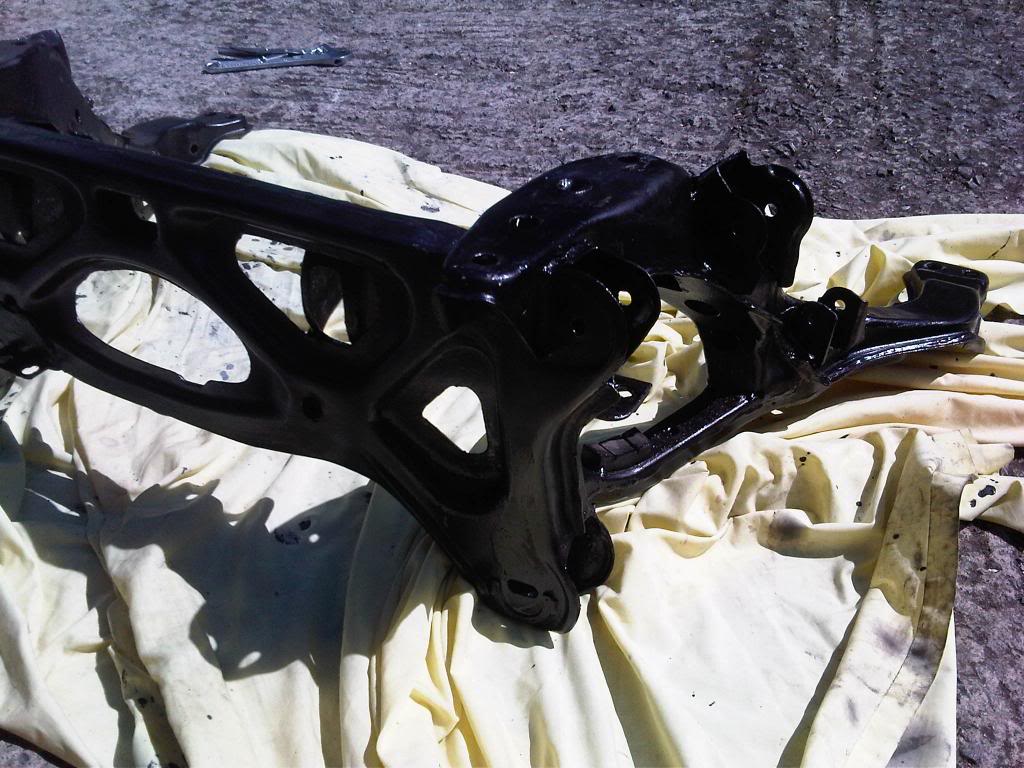
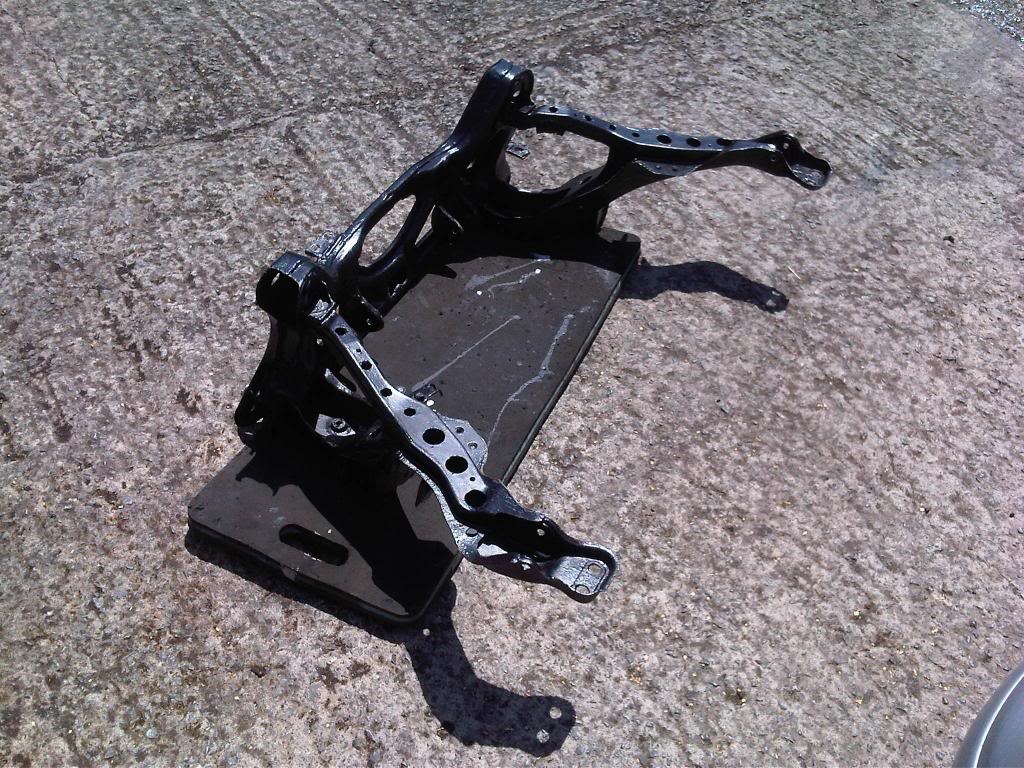
Redoing all fuel/brake lines in Kunifer on the car. Only compelted the rear subframe and fuel tank lines so far.
Welded the fuel filter mount to the rear subframe:
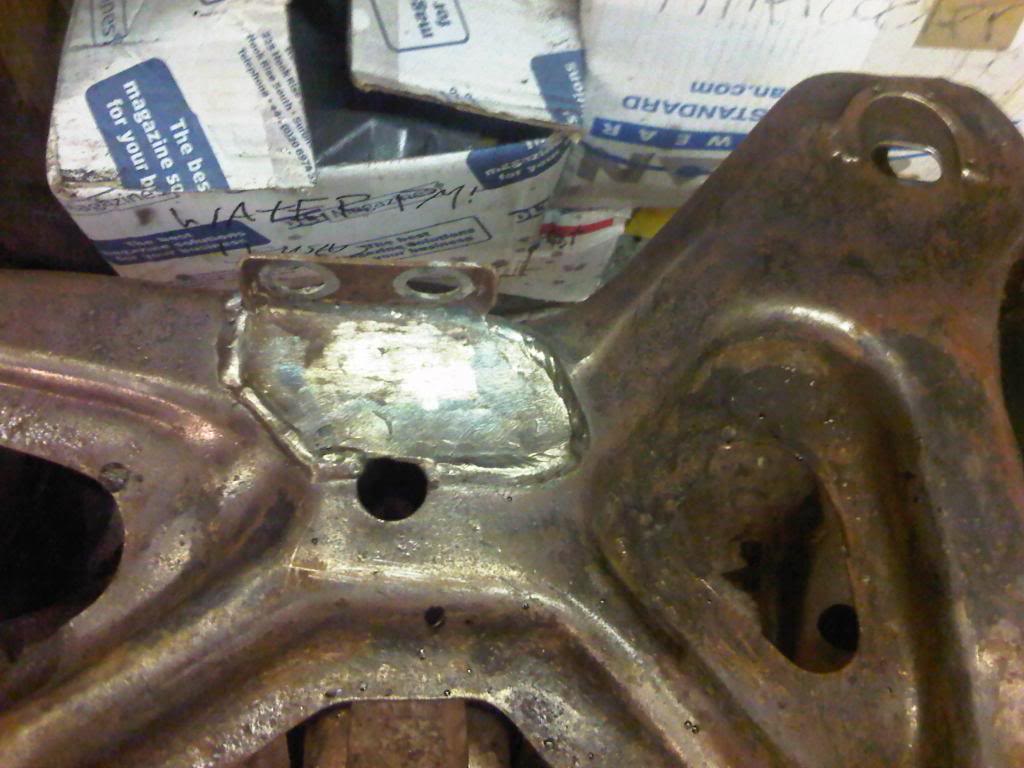
The rear subframe is off to get acid dipped tomorrow, then galvanised - Going to paint the galv with epoxy mastic 121, just for safe measure
Welded the fuel filter mount to the rear subframe:
The rear subframe is off to get acid dipped tomorrow, then galvanised - Going to paint the galv with epoxy mastic 121, just for safe measure
Thread Starter
Joined: Mar 2008
Posts: 2,213
Likes: 283
From: Somerset, England
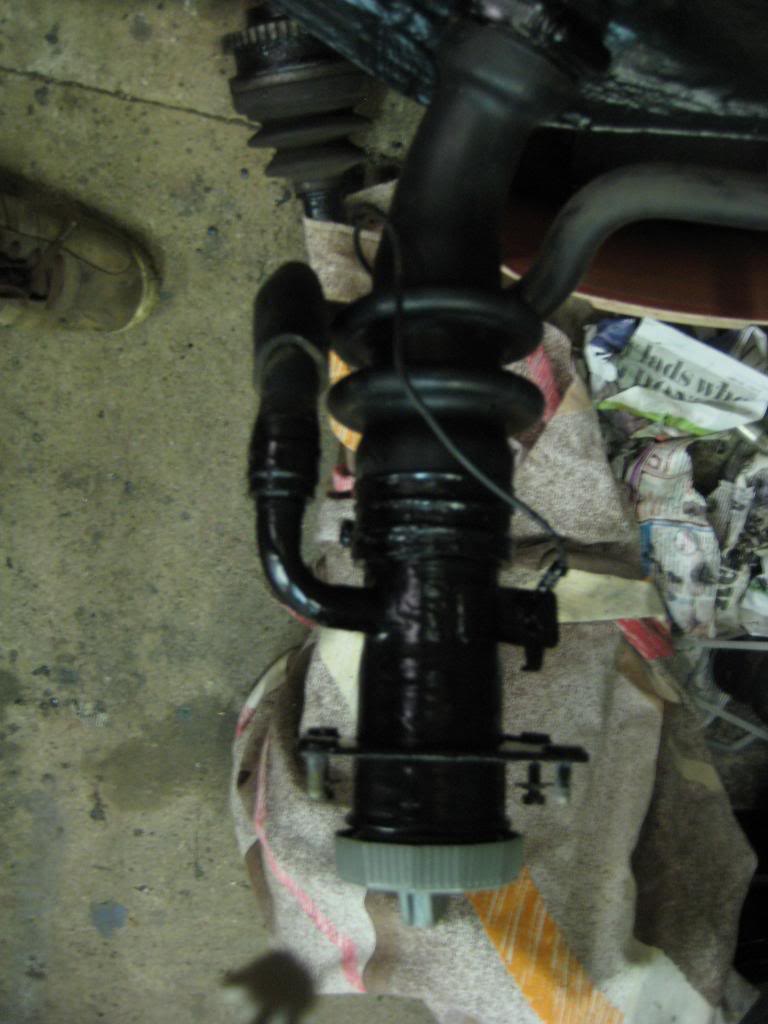
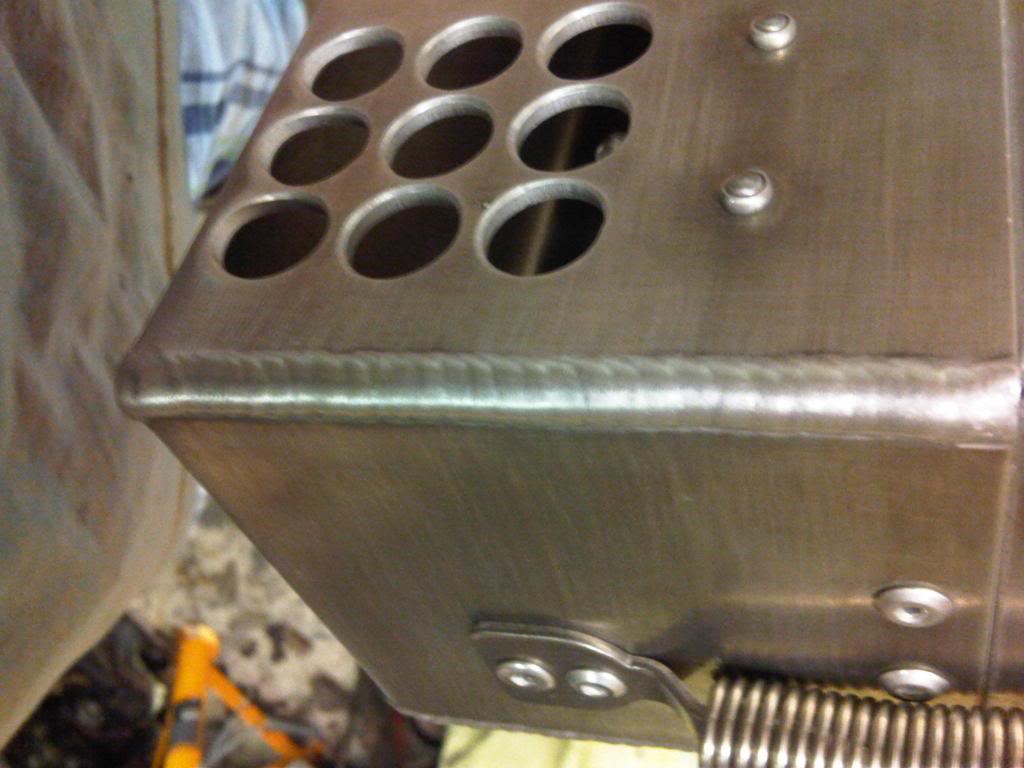
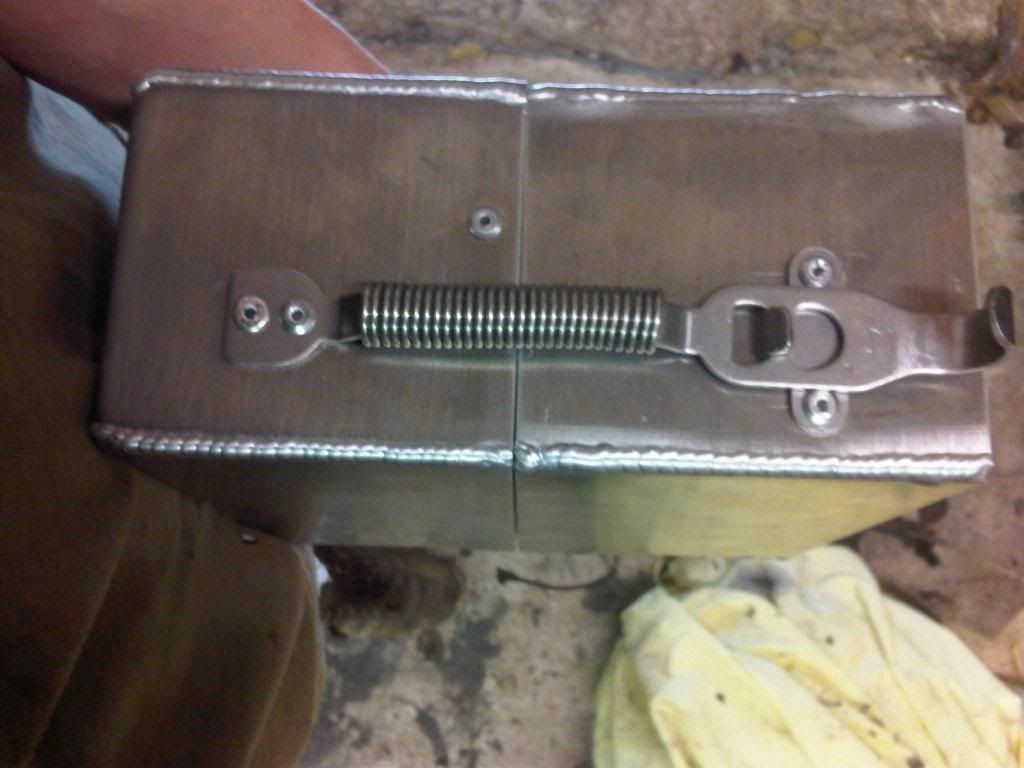
Fitted an aluminium FEED style (But better ) baffle tank.
Pics of install:
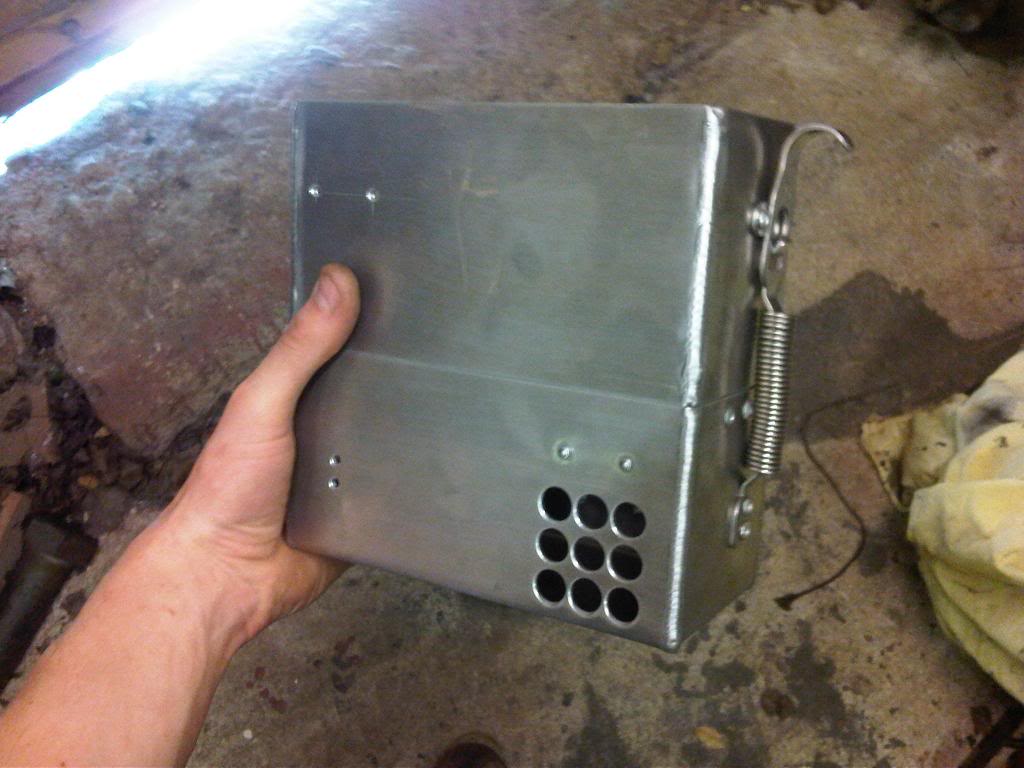
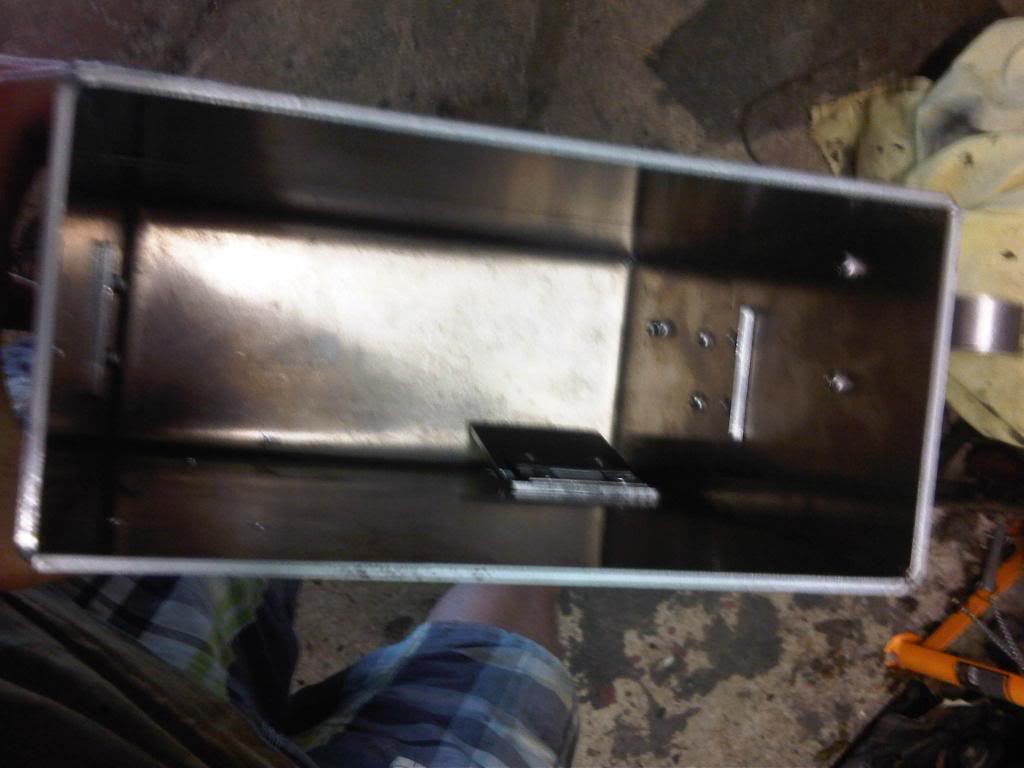
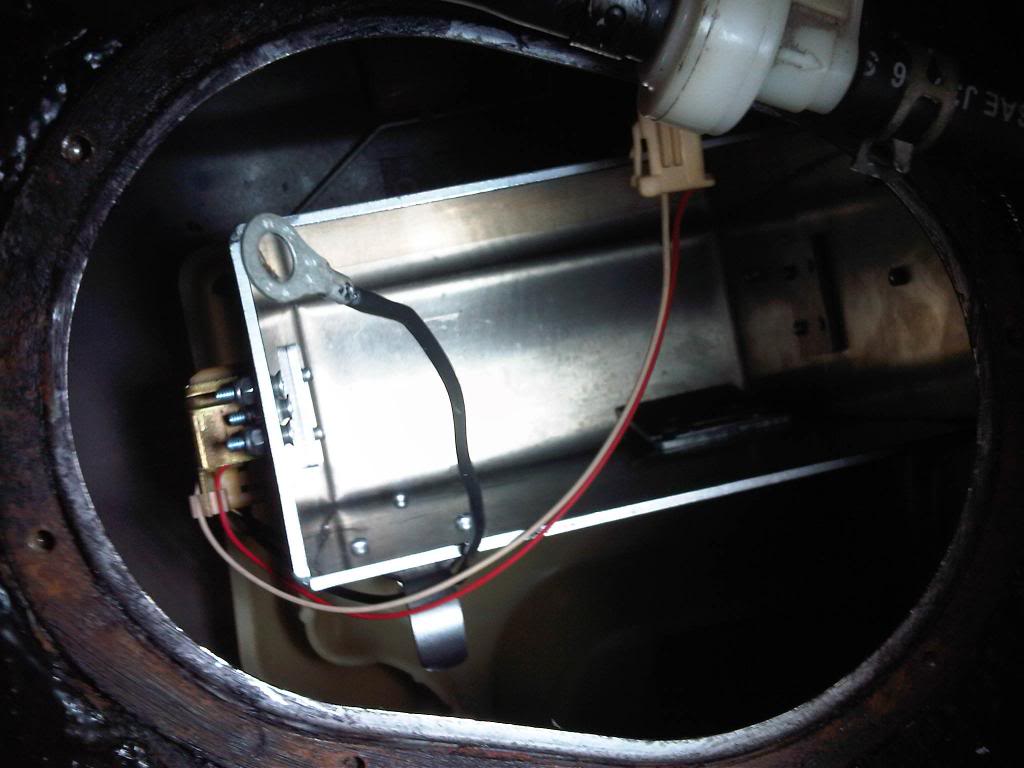
Cut my hand to pieces, but it's in!
Fuel tank is now finished and ready to go back in.
) baffle tank.Pics of install:
Cut my hand to pieces, but it's in!
Fuel tank is now finished and ready to go back in.

GREAT work here! You are taking care of that rust properly.
I have been eye balling RZ seats for a few years, and I can say that I like your style!! The upholstery work looks excellent and a great touch to pretty much the best seats for an FD. Well done Sir.
I have been eye balling RZ seats for a few years, and I can say that I like your style!! The upholstery work looks excellent and a great touch to pretty much the best seats for an FD. Well done Sir.
Thread Starter
Joined: Mar 2008
Posts: 2,213
Likes: 283
From: Somerset, England
- I've been following your build thread closely - It was actually yours and evot23's FD's that convinced me to get a montego blue as my second FD Didn't get too much done today as it was really too warm to be working on the car.
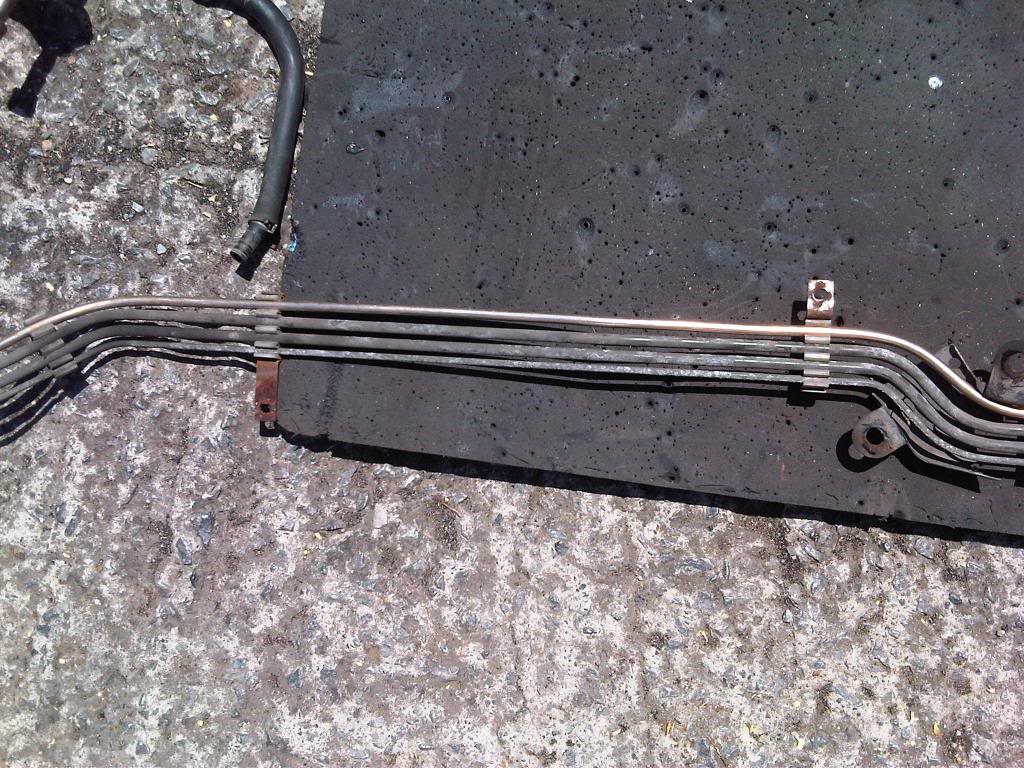
Started on the main fuel lines and rear brake line - A spare bench vice always comes in handy
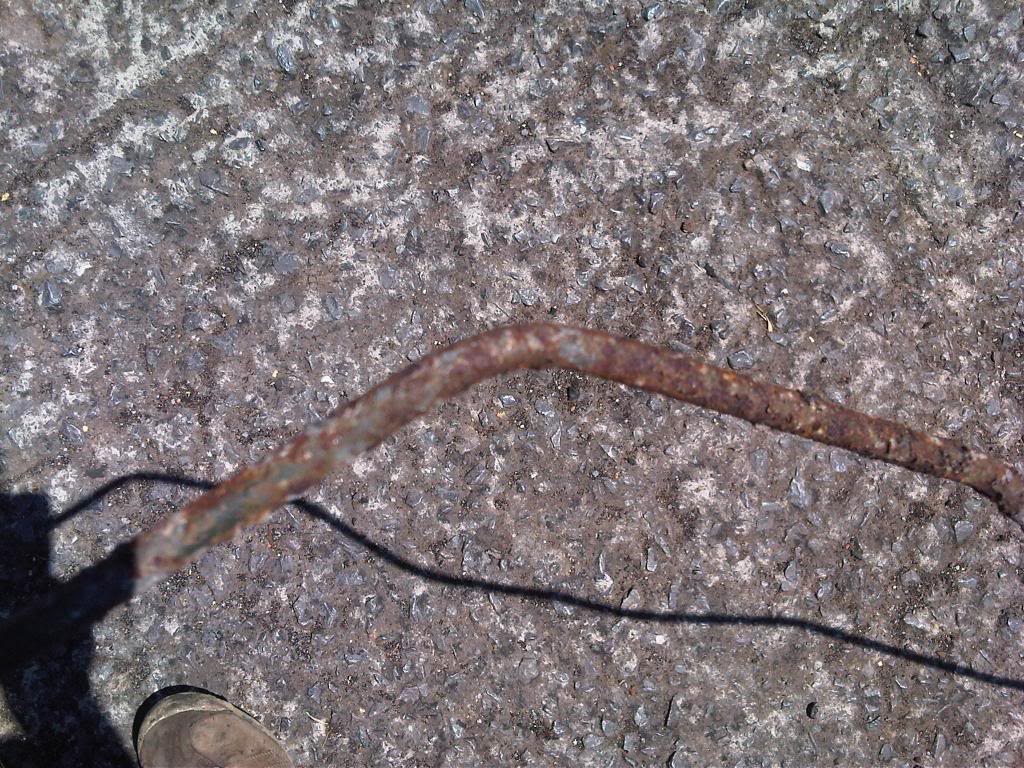
The lines we're fine for all but the rear foot, which looked like this:
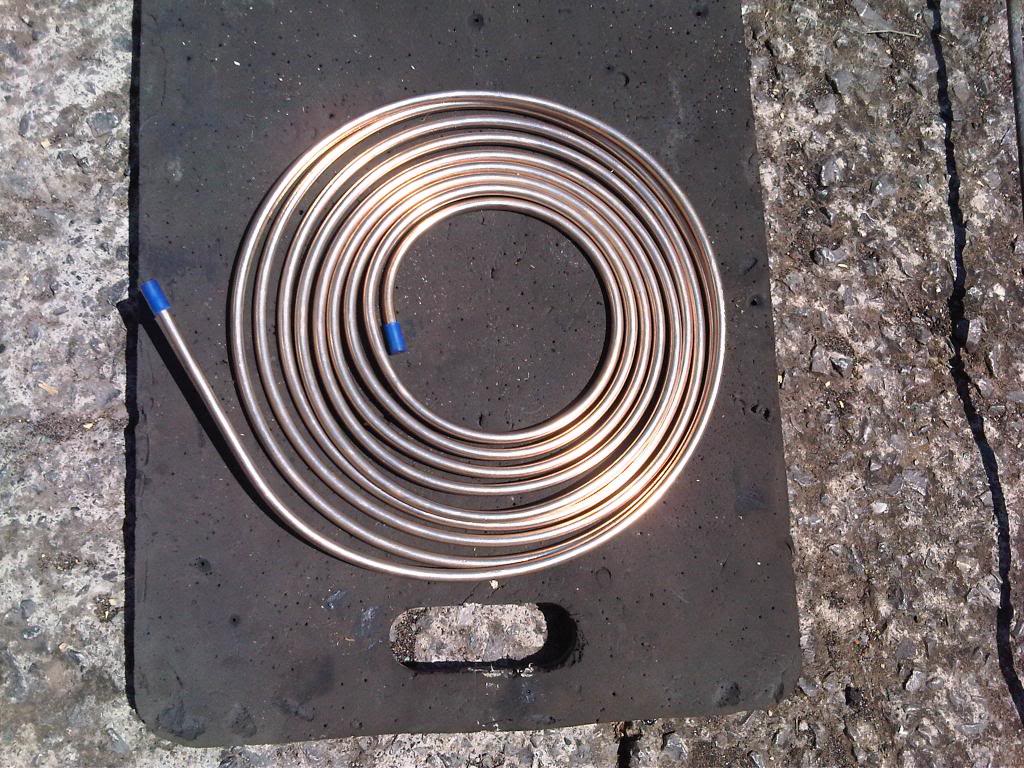
Kunifer fuel line.
Thread Starter
Joined: Mar 2008
Posts: 2,213
Likes: 283
From: Somerset, England
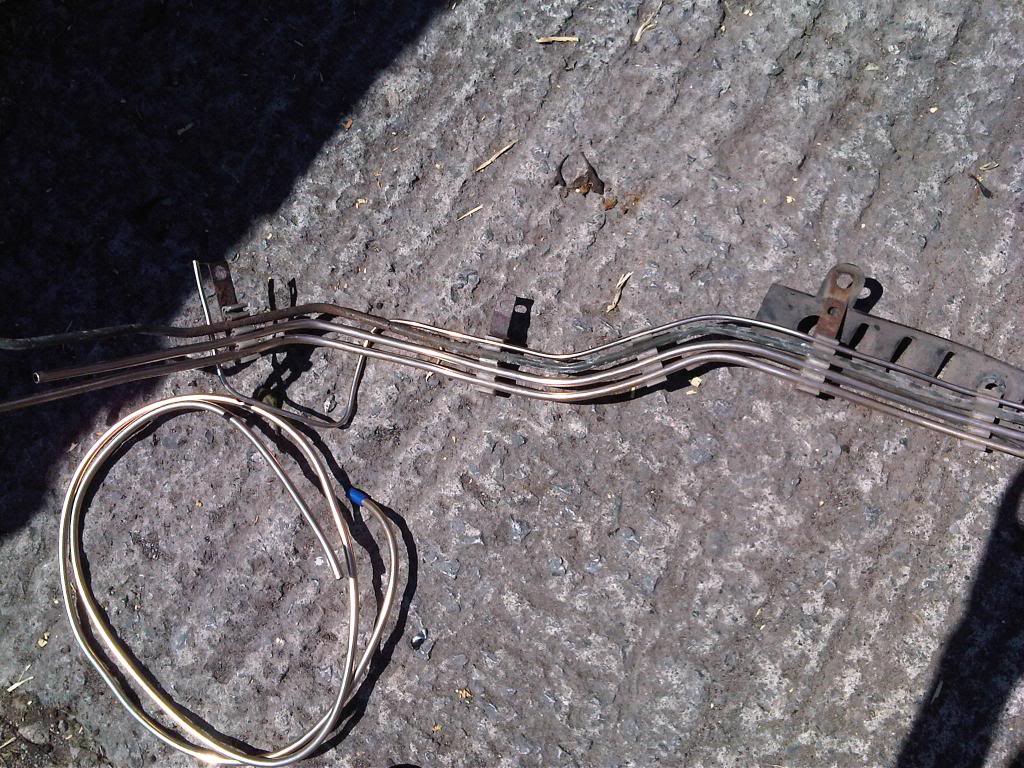
The pipes are roughly bent to shape, I'll make them line up nicer later. Shamefully I ran out of fuel line so had to stop
 - More arriving Thursday .
 Brackets for fuel lines:
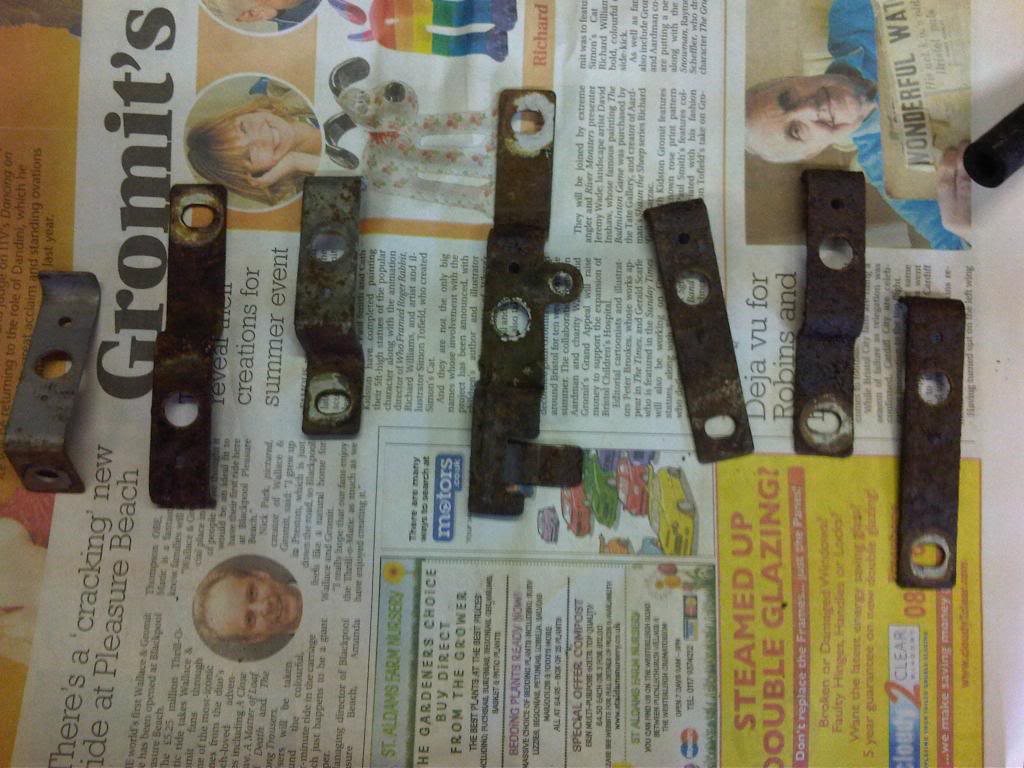
Only two of them are slightly pitted and they carry little to no weight, so I'm going to reuse them.
Cleaned up:
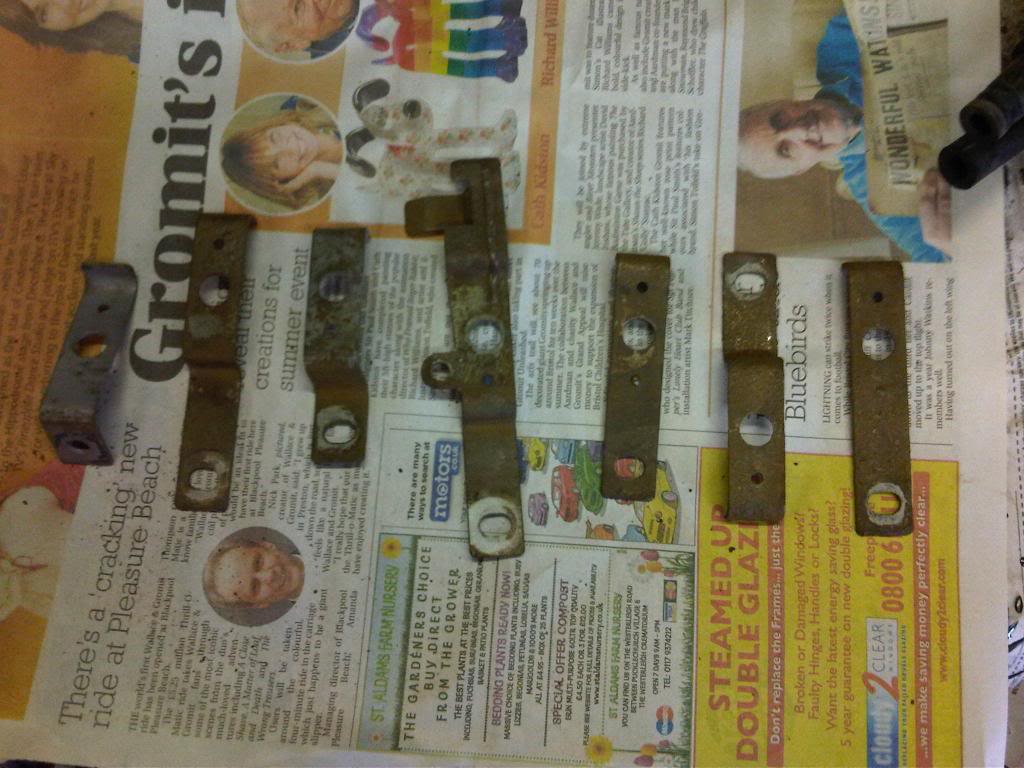
Will rust convert then epoxy mastic them for protection.
Thread Starter
Joined: Mar 2008
Posts: 2,213
Likes: 283
From: Somerset, England
Been working on the subframe. I was advised against galvanising it, apparently it would likely buckle/twist the subframe.
So instead, I've cleaned it up with a wire brush on the angle grinder & a shot blaster for areas I couldn't reach.
Pics after application of FE-123 (To get the cavities covered I used a Schultz gun & cavity nozzle) :
Just needs to be left to properly cure, then I'll paint it in epoxy mastic
So instead, I've cleaned it up with a wire brush on the angle grinder & a shot blaster for areas I couldn't reach.
Pics after application of FE-123 (To get the cavities covered I used a Schultz gun & cavity nozzle) :
Just needs to be left to properly cure, then I'll paint it in epoxy mastic
