
My Black FD Track spec build up - 56k stay away =P

Thread Starter
The wankel way!!
Joined: May 2008
Posts: 462
Likes: 0
From: New Zealand
Made a new filler neck with breather fitting today. God I SUCK at welding lol. Just need to find a glue that will bond aloy to plastic or find a screw on top for it. =S.
Completly stole the baffle idea from Damians thread about his catch can. Cheers for the write up Damian.


Your "wiring panel" you made. Is that all the stock relays as well as everything Microtech related? It's very well done (as is the rest of the car) and gives me some ideas.
Very nice work.
Very nice work.
Thread Starter
The wankel way!!
Joined: May 2008
Posts: 462
Likes: 0
From: New Zealand

Yeah thats every relay and fuse that was under the bonnet. The only relays that arnt on the board are the two feed pump relays that are in the boot near the pumps.
It makes fault finding MUCH easier as everything is in one place, and for the ultimate immobiliser, the whole pannel unplugs and comes out with one 10mm bolt. ECU and all gone. Try start that car now farkn theives!

Thread Starter
The wankel way!!
Joined: May 2008
Posts: 462
Likes: 0
From: New Zealand
Yeah let me know what you want pics of and ill take some.
This is what the board looks like:

I spent a good few months on the wireing and be prepared to read a LOT of wireing diagrams lol.
Firstly I unwrapped the whole thing and cable tied it all together. I then went through and took out every wire that wasnt needed, one by one from start to finish (you would be amazed how many wires go around the front of the bonnet just to get from one side of the dash to the other lol). I then found out what was left and made the fuse/relay board and moved each relay and fuse one by one. Continuity checking ALL the time.
I then extended some wires where needed and re wraped the loom after testing it all about 5 times, then fixed it out of sight. All those recent pics of the engine bay (braided lines and filler neck etc) are all with the completed loom installed. Ya cant even see it. =D
This is the mess that was during lol:


This is what the board looks like:
I spent a good few months on the wireing and be prepared to read a LOT of wireing diagrams lol.
Firstly I unwrapped the whole thing and cable tied it all together. I then went through and took out every wire that wasnt needed, one by one from start to finish (you would be amazed how many wires go around the front of the bonnet just to get from one side of the dash to the other lol). I then found out what was left and made the fuse/relay board and moved each relay and fuse one by one. Continuity checking ALL the time.
I then extended some wires where needed and re wraped the loom after testing it all about 5 times, then fixed it out of sight. All those recent pics of the engine bay (braided lines and filler neck etc) are all with the completed loom installed. Ya cant even see it. =D
This is the mess that was during lol:
Yeah, I have it out and am going through the remove this and that part. I have as many diagrams, both hand drawn and printed, as I think I could ever need. My main concern is to keep from getting lost. What all did you remove? I think the most of the relays I'm removing come from the front relay box near the radiator, and of course the one fuel pump relay in the main fuse box.
Thread Starter
The wankel way!!
Joined: May 2008
Posts: 462
Likes: 0
From: New Zealand
I removed pretty much everything apart from lighting, ABS, heater and wipers. Other then that, all the air con, emissions, the entire factory engine harness, etc etc was all take out. I think the fuel pump and maybe the TNS relay were the only ones retained from that front fuse box, and the main two relays from the other box under the bonnet.
When I get home, ill post up what I have kept and what the relays/fuses on the board are for (because thats all thats left haha).
When I get home, ill post up what I have kept and what the relays/fuses on the board are for (because thats all thats left haha).
Thanks. I think my list includes all the ones you just mentioned, except for the radio and horn. Obviously you don't need them in a track car. Thanks for the info. If you have any of how the harness looked after you completed it, and any under dash shots as well, that would be awesome.
Oh, what did you do with the fan relays?
Oh, what did you do with the fan relays?
Thread Starter
The wankel way!!
Joined: May 2008
Posts: 462
Likes: 0
From: New Zealand
Sorry, I did retain the horn relay, but not the radio. The fans are controlled by the Microtech, so there is a relay on that board to look after the fans, but I ran new wires for these as ones a slim fan and the other a factory fan wired to come on at full speed.
Here is a pic of the new engine harnes. It just has injectors, water and air temp, TPS in the main engine harness, and a lower engine harness with alternator, starter, gearbox and oil pressure and water temp for the dash.

Here is the wireing behind the dash, Its all been cleaned up and wrapped, but you get the idea of whats behind there.

And this is a pic of the harness installed in the engine bay, The rest of the motor looks a bit different now, but the harness is still the same. ya can even really tell its there.

Here is a pic of the new engine harnes. It just has injectors, water and air temp, TPS in the main engine harness, and a lower engine harness with alternator, starter, gearbox and oil pressure and water temp for the dash.
Here is the wireing behind the dash, Its all been cleaned up and wrapped, but you get the idea of whats behind there.
And this is a pic of the harness installed in the engine bay, The rest of the motor looks a bit different now, but the harness is still the same. ya can even really tell its there.
Very nice. Mine had to be rewired. I found several bad wires in it, and I figured it was a good time to take it out and clean it up. I like how clean you have made your harnesses. Any pics of the new harness under the hood?
Thread Starter
The wankel way!!
Joined: May 2008
Posts: 462
Likes: 0
From: New Zealand

That pic about is of the harness under the hood. All the wires run under the inner guards, then around the headlights and under the hood latch. Theres just so little wires that its hard to see any of them.
Ill take some better pics of where its all hiding tonight and post them up for ya.

i also tried using a coupler with hose clamps, but that doesn't work very well either.
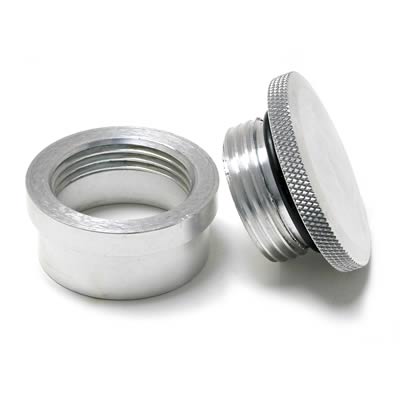
your best bet is to get a weld-in screw cap kit, like this:
http://www.summitracing.com/parts/SD...2075/?rtype=10

Thread Starter
The wankel way!!
Joined: May 2008
Posts: 462
Likes: 0
From: New Zealand
Thanks for the link. I spent a good few weeks looking for a weld in top like that over here and couldn't find one anywhere. I forgot Summit ships internationaly
On the update note - I spent lastnight cutting the crap out of the front of the car and modifying the intercooler tanks. It now sits WAY further foward and at the perfect height for the bumper. This now allows the radiator to have a good rake foward. Enough for it to get ducted to the intercooler in the front and straight out the bonnet at the back. Should hopefully act like a bit of a wing as well if I do the ducting right.
Senior Member
Joined: Nov 2007
Posts: 343
Likes: 0
From: Australia
http://www.mscn.com.au/scripts/prodV...?idproduct=125
love your build too.
Thread Starter
The wankel way!!
Joined: May 2008
Posts: 462
Likes: 0
From: New Zealand
your local speedflow dealer mate:
http://www.mscn.com.au/scripts/prodV...?idproduct=125
love your build too.
http://www.mscn.com.au/scripts/prodV...?idproduct=125
love your build too.
Fark sake. I just went down and got one.
Ya say "i want a weld on oil cap" and get "ohr we dont sell these"......give them the part number and "ohr yeah we have one of those out back"

Where do they find these people lol
Thread Starter
The wankel way!!
Joined: May 2008
Posts: 462
Likes: 0
From: New Zealand
Remounted the oil coolers and intercooler over the last few days. Had to cut the inlet and outlet for the intercooler off and reweld them on a bit lower to clear the radiator. This now allows the radiator to rake foward a LOT more to the point it is now the same height as the intercooler and has the room to make ducting out the bonnet and .......the best part.......room for a cold air box 


The intercooler is also high enough to clear the front splitter I will be making

In this one you can see how close the oil coolers are to the bumper. Along with ducting, this should help air flow a lot.

The intercooler is also high enough to clear the front splitter I will be making
In this one you can see how close the oil coolers are to the bumper. Along with ducting, this should help air flow a lot.
Thread Starter
The wankel way!!
Joined: May 2008
Posts: 462
Likes: 0
From: New Zealand
Just a quick update - I havent done anything photo worthy over the last few days, but have spent the time fixing a few issues here and there that I found
-Fixed wireing fault in ACC wireing
-Finished wireing in wideband
-Made a flange with the oil temp sensor in place of the factory oil level sensor
-Installed the scatter blanket
-Chassis sealed the underside of the car where the roll cage feet are - it had melted all the underseal off when they did the cage
-Mounted the radiator in the position of the above photos
-Got the last fitting for the oil cooler lines so they are all complete
-Got intercooler pressure tested and found 2 or 3 pin hole leaks so will need to fix that
I am currently waiting on some parts that are slowing me down.
-Radiator hoses
-Reflective sleving for lines around the turbo (this is stopping me installing the turbo)
-Paint for the throttle body (Its all primed and waiting for the paint which should be done today)
-ECU and heater hoseing (this should have arrived back from Microtech today so should be with me this week)
Ill get some more pics up when the throttle body is painted, the turbo/intake is installed etc.
Thread Starter
The wankel way!!
Joined: May 2008
Posts: 462
Likes: 0
From: New Zealand
Painted the throttle body and made some plates to pressure test my crappy welding today. Turns out its not to bad. Just two or 3 pin hole leaks. Will check properly tomorrow with soapy water and repair the leaks


Full Member
Joined: Jul 2009
Posts: 181
Likes: 0
From: Markham, ON, Canada
wow...this is coming along nicely!
just a quick question...how come you went with the front-mount instead of v-mount for your intercooler set-up? I mean to say that, isn' the v-mount much more efficient and provides better cooling? At least, that is what I've always thought.
Educate me! lol
just a quick question...how come you went with the front-mount instead of v-mount for your intercooler set-up? I mean to say that, isn' the v-mount much more efficient and provides better cooling? At least, that is what I've always thought.
Educate me! lol