
Knee-deep in my current build

Thread Starter


Joined: Mar 2001
Posts: 30,814
Likes: 655
From: FL-->NJ/NYC again!
So I made the trek out to Thomas' Taillight Factory in Brooklyn last night for some pizza, beers, and sweatshop action. I met his commander-in-chief of the operation Katie, who introduced me to his line bosses Castro and Tara. Most impressive I must say...... Katie is very sharp, one day I can see her taking over the business when Tom decides to retire to the Cayman Islands 
It's a little-known fact that the Red Baron is sponsored by Griot's Garage, so I used some of their wondrous products to shine up the lights pre-install:

Also, I'm honored to own what is essentially the Numba One Limited Edition set of Thomas' Tails: the originals belong to the Creator himself.

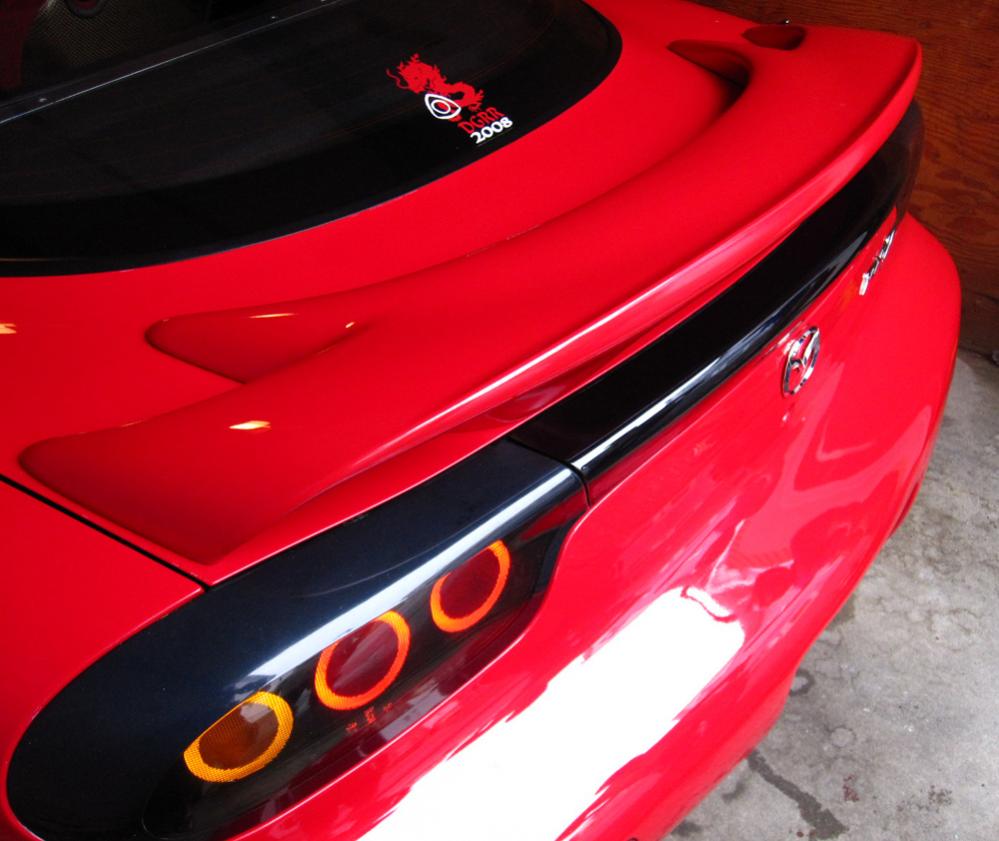
The install is pretty straight forward, but the pics will give you an idea. It's a good idea to clean the recess in the body where the light sits while you're in there--I couldn't believe the amount of dirt and gunk hiding back there.
One note, be aware when buying used tails sight unseen: your idea of 'perfect condition' and the seller's idea may be extremely divergent. I'm going to have to get some new lenses, as these ones are faded with small cracks in them.


It's a little-known fact that the Red Baron is sponsored by Griot's Garage, so I used some of their wondrous products to shine up the lights pre-install:
Also, I'm honored to own what is essentially the Numba One Limited Edition set of Thomas' Tails: the originals belong to the Creator himself.
The install is pretty straight forward, but the pics will give you an idea. It's a good idea to clean the recess in the body where the light sits while you're in there--I couldn't believe the amount of dirt and gunk hiding back there.
One note, be aware when buying used tails sight unseen: your idea of 'perfect condition' and the seller's idea may be extremely divergent. I'm going to have to get some new lenses, as these ones are faded with small cracks in them.
Last edited by GoodfellaFD3S; Jun 9, 2011 at 05:33 PM.
Thread Starter
Joined: Mar 2001
Posts: 30,814
Likes: 655
From: FL-->NJ/NYC again!
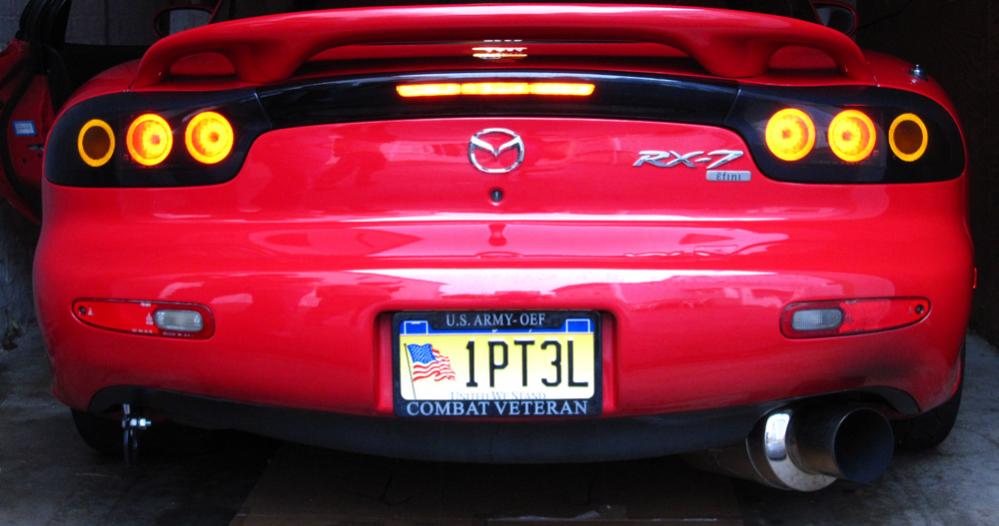
The finished product: superb craftsmanship, assembled with the precision, devotion and care of a Hattori Hanzo Sword 
P.S. Sorry no brake light pics, I am rollin' solo this morning and the ol' dumbbell-on-brake pedal trick didn't work too well


P.S. Sorry no brake light pics, I am rollin' solo this morning and the ol' dumbbell-on-brake pedal trick didn't work too well
Last edited by GoodfellaFD3S; Jun 9, 2011 at 05:33 PM.


Joined: Oct 2001
Posts: 4,772
Likes: 2
From: My 350Z Roadster kicks my RX7's butt
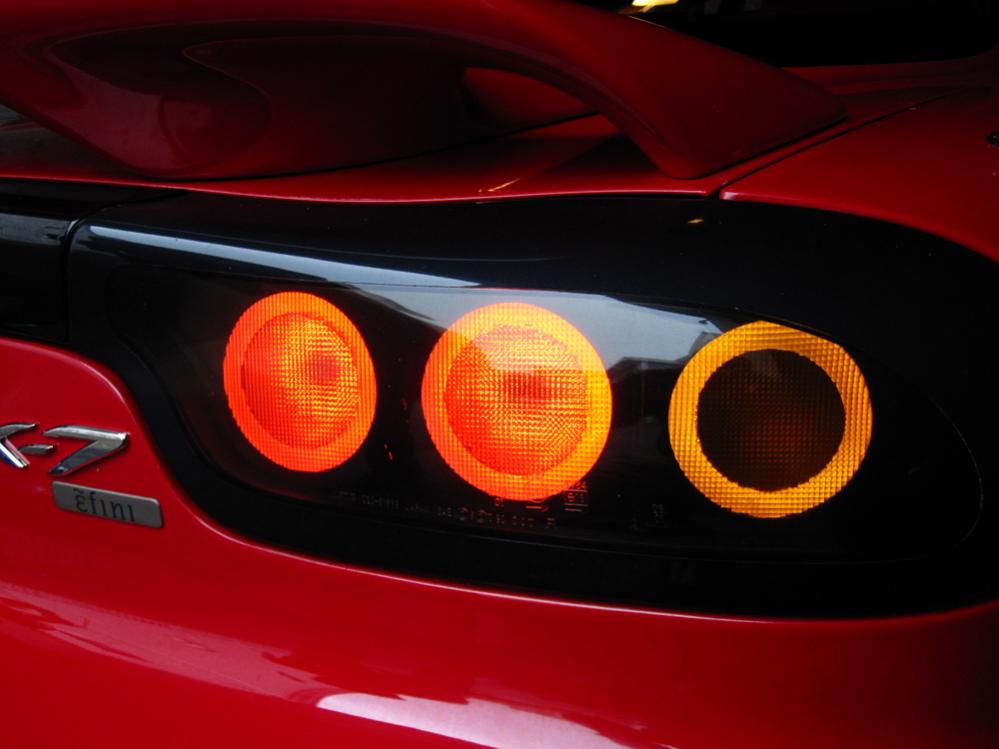
It looks very good. Nice finishing polish touch. The turn signal rings like up along withe the brake rings and centers? Why do they look like they change to amber in brake mode?
Thread Starter
Joined: Mar 2001
Posts: 30,814
Likes: 655
From: FL-->NJ/NYC again!
I had my hazards on while taking pics, and we timed the pic to show the turn signal as well. More "bang for your picture buck" I suppose. They're yellow, it's just the way they look in the picture


So Rich, to confirm what you are saying, the only time the outer rings come on is when you activate the turn signals? Not under barking right?

It was probably done like this so it would work worldwide, rather than just in the states. In most of the EU they're used for indicators (signal) only.
EDIT: Thinking on it...They will do whatever they've always have done as they're plugged in to the bulb sockets of your existing bulbs. So if they're used as "side markers" normally, they should still work
.
 Isn't that the limited edition $1.5 million One77
-Dan
That is perfect. I am heading down today to Orlando to check in on the car and am going to install the taillights so I will take pics and a video.

yes you are right, i thought about doing this when the cx-7 first came out., but im just not sure id like how it looks because its much thicker than the original
I love the way it looks, I've been meaning to call ray or the to local mazda dealership and find out the prices, I don't really wanna spend an arm and a leg just for updated rx7 badges. I do love the way it looks.
Thread Starter
Joined: Mar 2001
Posts: 30,814
Likes: 655
From: FL-->NJ/NYC again!
So a few quick updates:
I was experiencing an intermittent clutch issue that worsened after extended driving. Once I got off the highway and onto local roads, the clutch would grab very low off the floor, causing the car to stall. I had to pump the clutch to build up pressure..... my first thought was that my original master cylinder had failed, and that ended up being the problem. I ordered a brand new master and slave cylinder from Ray and after about 300 million clutch pumps the system is purged of air and feels better than it ever has
To properly bleed the new master cylinder of air we connected it to the reservoir, and used a spare clutch hardline on the outlet side coupled with a long hose back into the reservoir and under the brake fluid. This created a loop in the system, making it much easier to bleed the air. Thanks to Ihor for the idea and thanks to my friend Bryan for the aforementioned 300 million clutch pumps
I also heat wrapped my downpipe with DEI Titanium heat wrap. This stuff rocks--- I recently wrapped a customer's dp in the old style stuff and there's no comparison. No need to wet it, and you can use it with a T-shirt and no gloves on..... ie, you're not inhaling and hacking on stray fibers, and getting them all over your skin. I was able to do it with the downpipe on the car, no easy task with a 4 incher and not much room on either side. No pictures of this, I'll have to snap some next time the car's out of the garage.
Lastly, I picked up a steering hub for my brother's car. Thanks to Scrubby for his recommendation, the piece found here: http://www.finishlineperformance.com...2&cat=0&page=1
It came with *everything* needed, which is a huge change from any of the other hubs out there I've encountered (with the exception of Works Bell). I'm talking plug-in connectors to disable the airbag light and for the horn button, as well as all the hardware needed and different snap rings for each horn size (momo/nardi). It's meant for a Miata but works perfectly for the FD, even comes with English instructions
Last edited by GoodfellaFD3S; Jun 9, 2011 at 05:33 PM.

Full Member
Joined: Jul 2009
Posts: 181
Likes: 0
From: Markham, ON, Canada
You should definitely get a snap of that titanium wrap next time!
As for the steering hub...that thing looks amazing! :O I can't wait to see how it'll look like on your brother's car! Snap a pic next time while you're at it will ya?
Cheers,
Chris
As for the steering hub...that thing looks amazing! :O I can't wait to see how it'll look like on your brother's car! Snap a pic next time while you're at it will ya?
Cheers,
Chris
Thread Starter
Joined: Mar 2001
Posts: 30,814
Likes: 655
From: FL-->NJ/NYC again!
Johnny boy, it most certainly will. Works with both the Nardi/Personal and the Momo/Sparco/etc patterns. Thomas'es Bagels is rocking one on his FD right now
Time to order
The MuscleMilk sometimes clouds his judgement.