
Finally Going Single! Part 2

wow i hate you. LOVE the fabricating skills... i just got a mig welder for xmas, never even used it (i was scared lol) and now that im taking welding classes and seeing this thread i already want to sell it to get a tig welder...
Thread Starter
Joined: Aug 2002
Posts: 610
Likes: 6
From: Erie, Colorado
I've done some searches on the power steering deletion, but I haven't found any that talk about what people usually do about not having the pulley on the pump. Without the pump there, tensioner is useless unless you try to run the belt over the top of it instead of under it. What are other people doing on this? (Don't tell me to get rid of the AC, I don't want to hear it again)
The other one
Joined: Aug 2009
Posts: 263
Likes: 1
From: Cols., OH
I've done some searches on the power steering deletion, but I haven't found any that talk about what people usually do about not having the pulley on the pump. Without the pump there, tensioner is useless unless you try to run the belt over the top of it instead of under it. What are other people doing on this? (Don't tell me to get rid of the AC, I don't want to hear it again)
Good luck.

Thread Starter
Joined: Aug 2002
Posts: 610
Likes: 6
From: Erie, Colorado
I found a pulley but I will have to come up with a bushing to get the spacing right. I will let you know when I have all of the details worked out KKMpunkrock2011.
Thread Starter
Joined: Aug 2002
Posts: 610
Likes: 6
From: Erie, Colorado
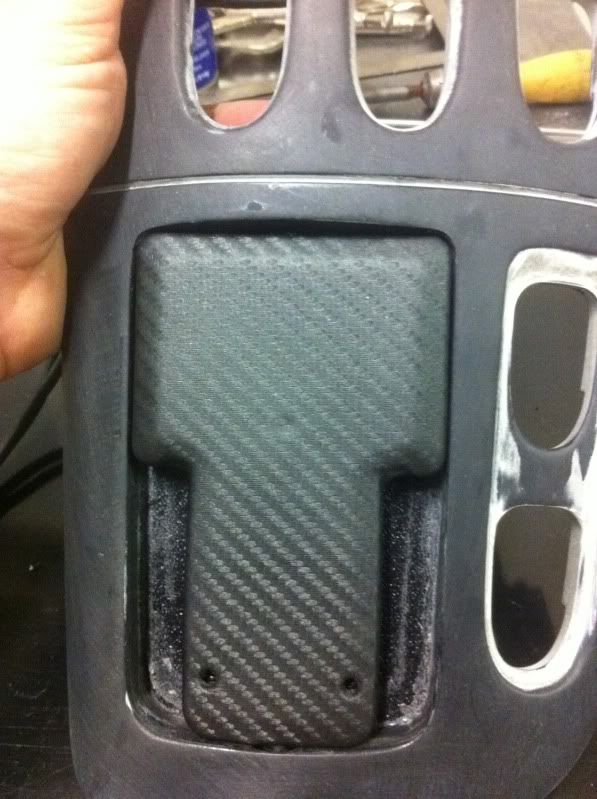
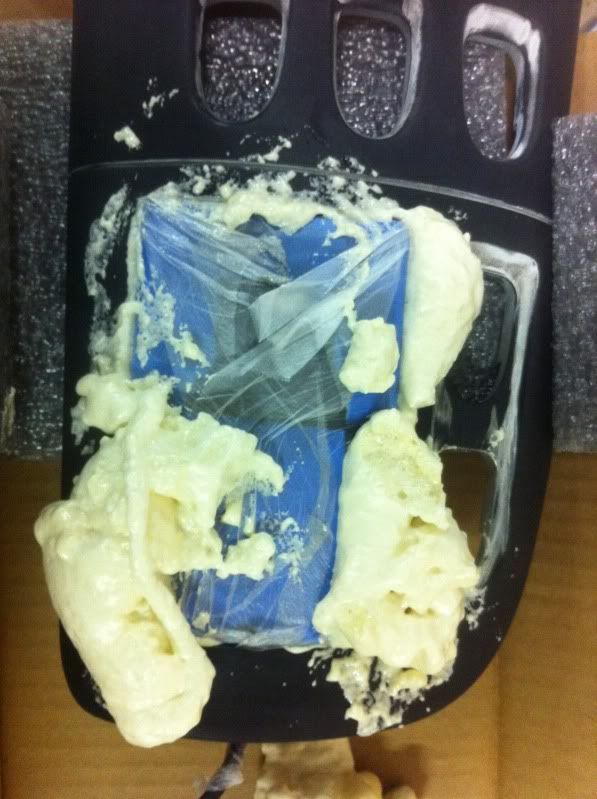
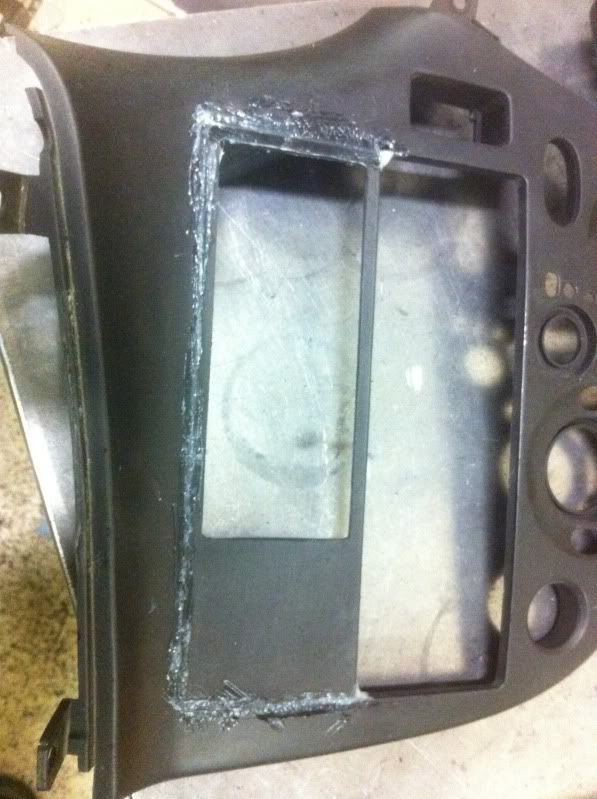
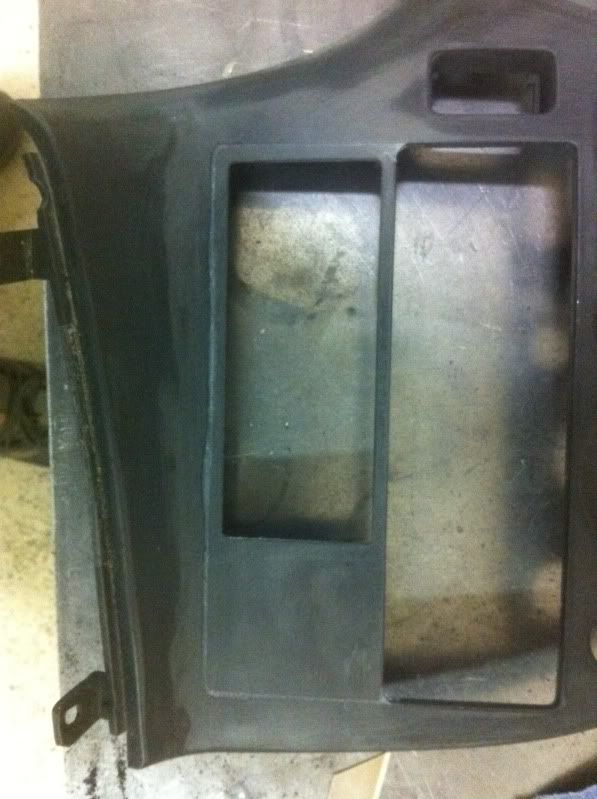
I went back to working on a few interior pieces tonight. Here's more pics if you haven't seen enough yet.


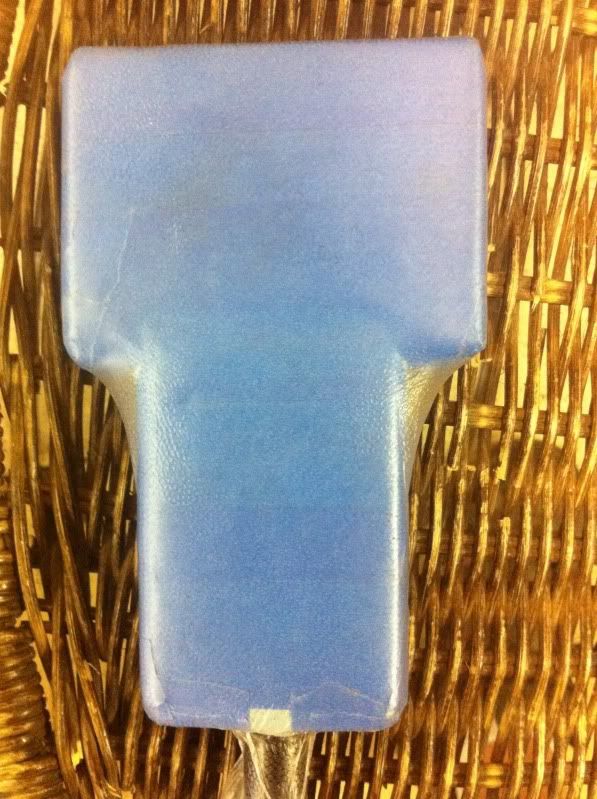
I'll have to finish the rest tomorrow when the foam is fully cured.
I'll have to finish the rest tomorrow when the foam is fully cured.


I really hate you. I like that carbon fiber wrap. I'm thinking of doing it to mine, but I just spent a LOT of time refinishing my to where all match and looks new.
How much of the vinyl did you used? would a 4'x2' sheet do?
How much of the vinyl did you used? would a 4'x2' sheet do?
Thread Starter
Joined: Aug 2002
Posts: 610
Likes: 6
From: Erie, Colorado
Thanks for all of the hatin' comments guys, I'll take them as compliments based on the quote in muibubbles signature.
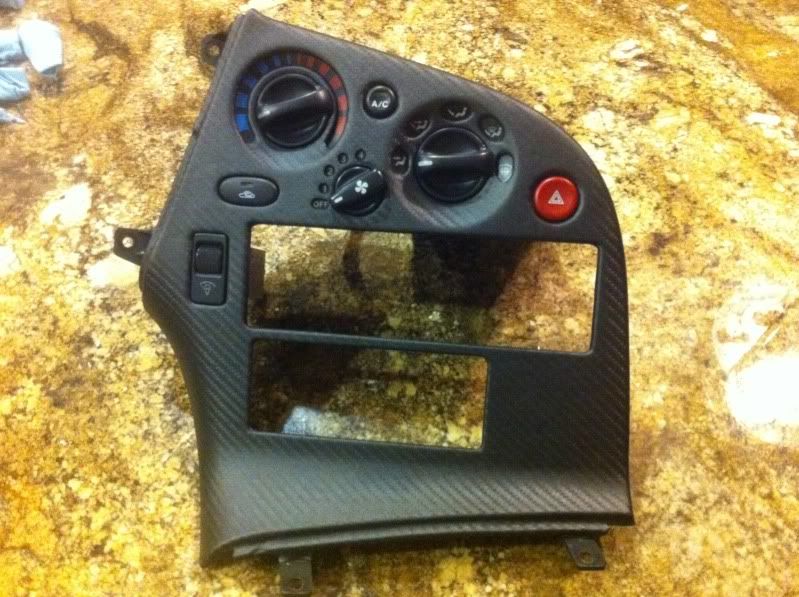
The wrap is actually a fabric that I got at www.pyspeed.com. I normally don't care for 'fake' carbon fiber stuff, but this stuff is very nice and has a great feel to it. I chose the matte charcoal because it is basically the same as the OEM interior on the M3 which I also like a lot. This fabric comes by the yard which is 55" wide and it is enough (if your careful) to do the center console, ac/radio panel, instrument cluster, and the plastic sections on both doors. The prices are also quite reasonable.
Let me know if you decide to do your interior with it. I've figured out a few tricks over the last few days that I wish I would have known before I did my first piece.

Did you come up with a way to run a belt without the PS pump but the A/C compressor? I'm talking myself into keeping A/C haha....you can't get a shorter belt and run it over the top of the tensioner pulley?
Thread Starter
Joined: Aug 2002
Posts: 610
Likes: 6
From: Erie, Colorado
That's what I'm doing, but I wanted a pulley that was ribbed since it would be on the inside of the belt. I had to leave town this week but I should have some details on it when I get home this weekend.
I'll be doing my interior in that carbon fabric over the next few days. I'd love to see some more pics and maybe some tips as well..
If i may make a suggestion, JB weld is the best epoxy I've used, and is great for sanding/molding. its kind of like they mixed the strongest epoxy on earth with body filler.
If i may make a suggestion, JB weld is the best epoxy I've used, and is great for sanding/molding. its kind of like they mixed the strongest epoxy on earth with body filler.

Your setup is coming along very nicely! Can you describe the way you ran your fuel system or have any more pics? I am running a similar setup it looks like and looking for ideas. Keep up the good work!
Thread Starter
Joined: Aug 2002
Posts: 610
Likes: 6
From: Erie, Colorado
@ Rdodds033 I don't really have any more pics at the moment. I haven't been home for a few weeks so I haven't been able to work on it. As far as tips go, the best tip is to not rush it or skip steps. I actually made a box for some of the more difficult parts that I can seal up the bottom of the part and hook up my shop vac to help form the fabric to the part using a heat gun (very carefully on LOW heat). Also, find objects to fit snugly in any holes on the part and use them to stretch the fabric into the holes and hold it in place while the adhesive cures. For round holes, I've found sockets from a socket set work great, for odd shaped holes, I used folded up paper towels and pulled them in from the front to the back to make a nice tight fit. Work on the front ofthe part only before spraying any adhesive on the back. The holes will take some time to do right so only spray adhesive on the backside of maybe two holes at a time and focus on them before working on any others. On the really small holes where the numbers are for the AC fan speed, I waited for the adhesive to set up completely and then used a very small round file through the hole to actually file the fabric back to the edges of the hole since they were so small that the fabric couldn't be wrapped around to the inside without it blocking off the hole where you couldn't see the numbers. Make sure you take the time to mask everything off each time you go to spray adhesive again. It's a PITA but it keeps you from ruining all of the hard work you've already done. Don't skip this step, that adhesive goes everywhere. Also keep some acetone handy to get adhesive occ of your fingers before handling the parts each time.
As far as the ABS work goes, I used a specific ABS epoxy that sort of melts the plastic together in a way. It works great and dries just as hard as the ABS.
As far as the ABS work goes, I used a specific ABS epoxy that sort of melts the plastic together in a way. It works great and dries just as hard as the ABS.
Thread Starter
Joined: Aug 2002
Posts: 610
Likes: 6
From: Erie, Colorado
I'm not sure what kind of details your looking for, what I can tell you is that it is a parallel system w/850 primaries and 1680 secondaries. I'm using the RX7Store rails and a SARD regulator. The fuel pumps are Walbros and I'm using the CJ Motorsports twin fuel pump bracket. All of my lines and fittings are from Summit Racing and I'm running -8AN for the supply and -6AN on the return. Fuel filter is an aeromotive with a cleanable element.
Let me know if you've got more questions. Here's some pics.
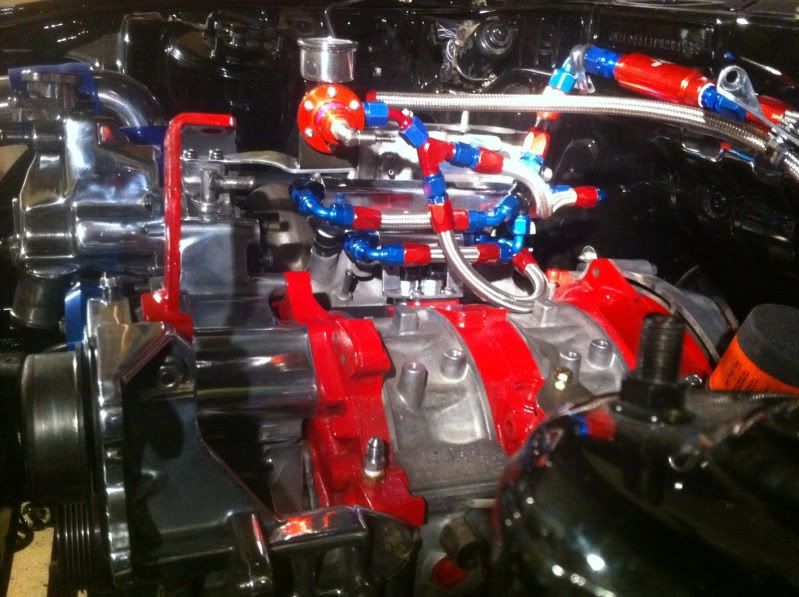

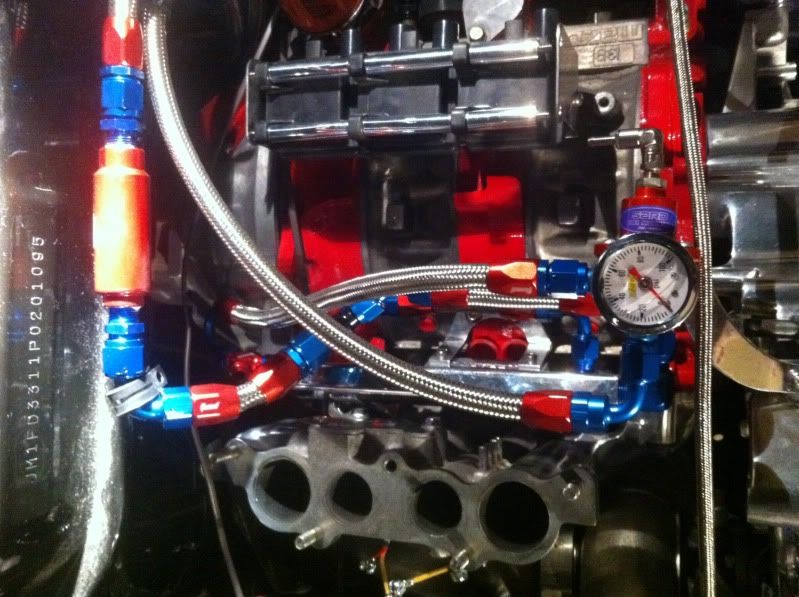
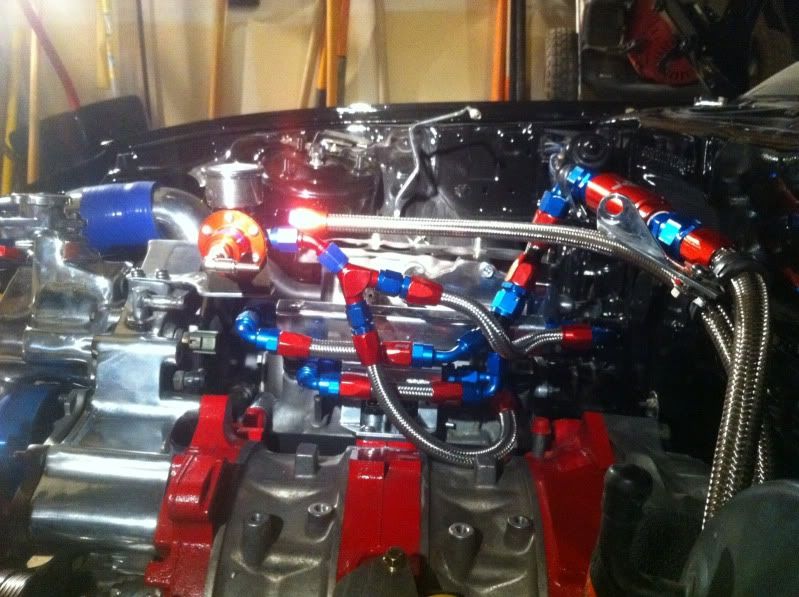
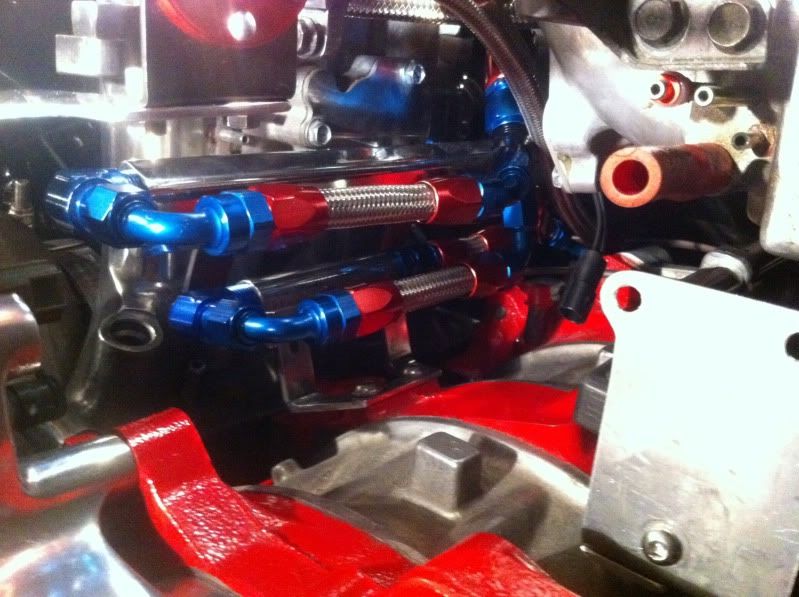
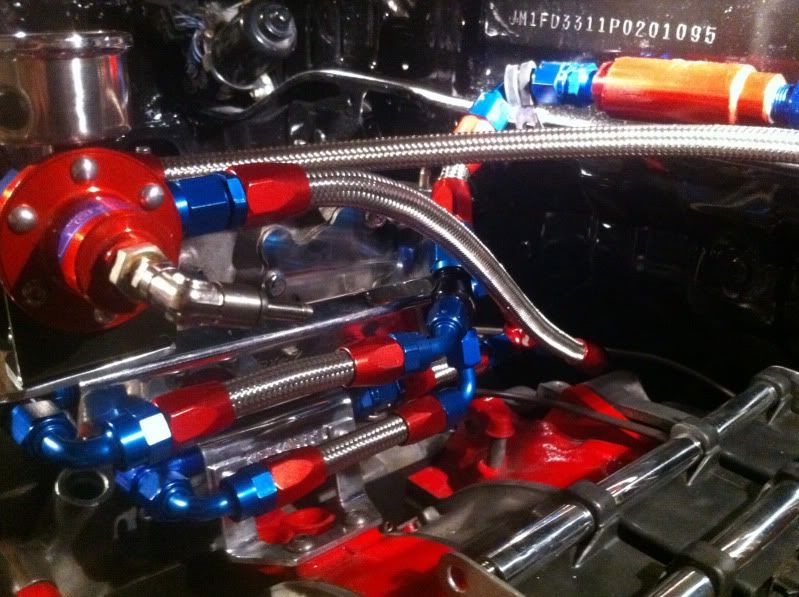
Let me know if you've got more questions. Here's some pics.