
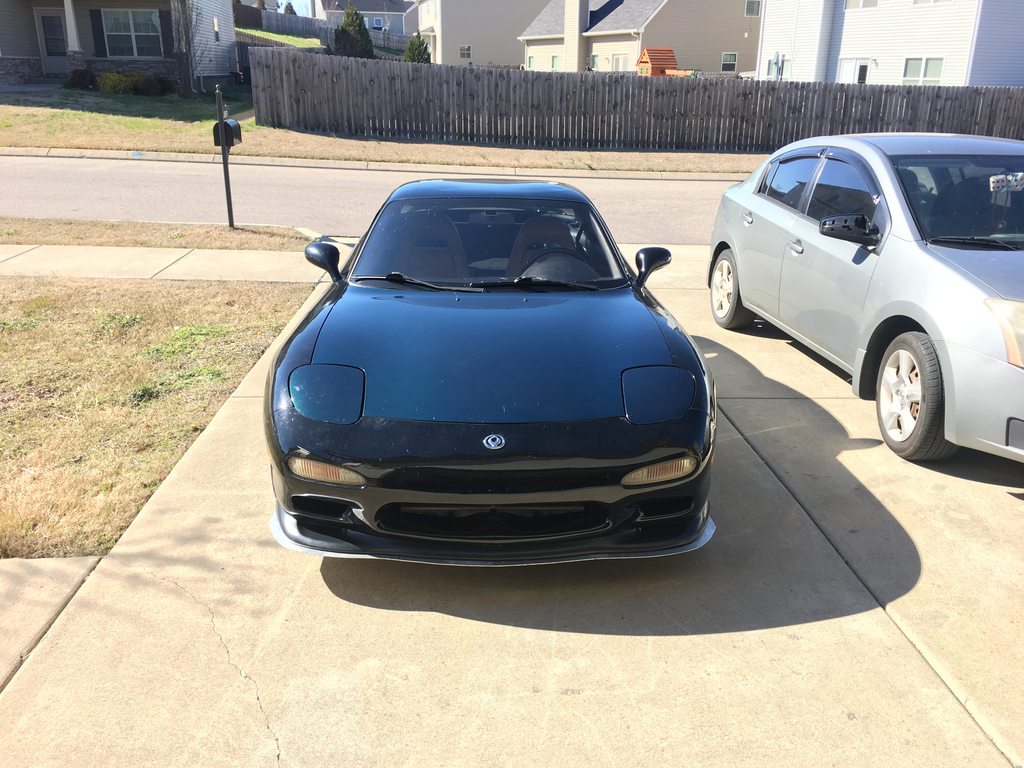
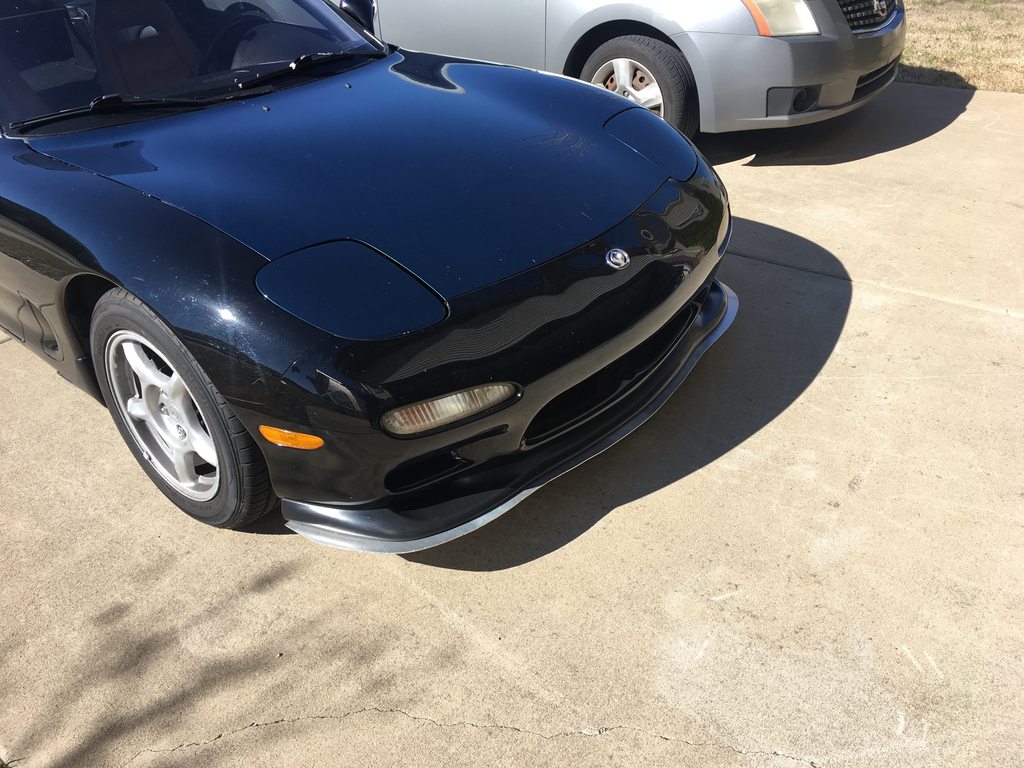
FD #6 "build" - combining two cars into one

Thread Starter
Joined: Jul 2002
Posts: 9,387
Likes: 4
From: Nashville, TN
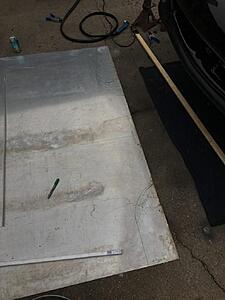
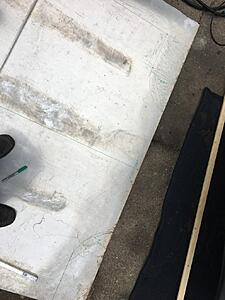
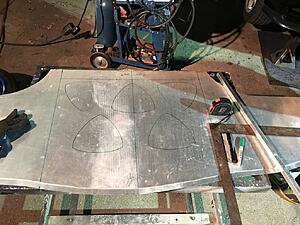
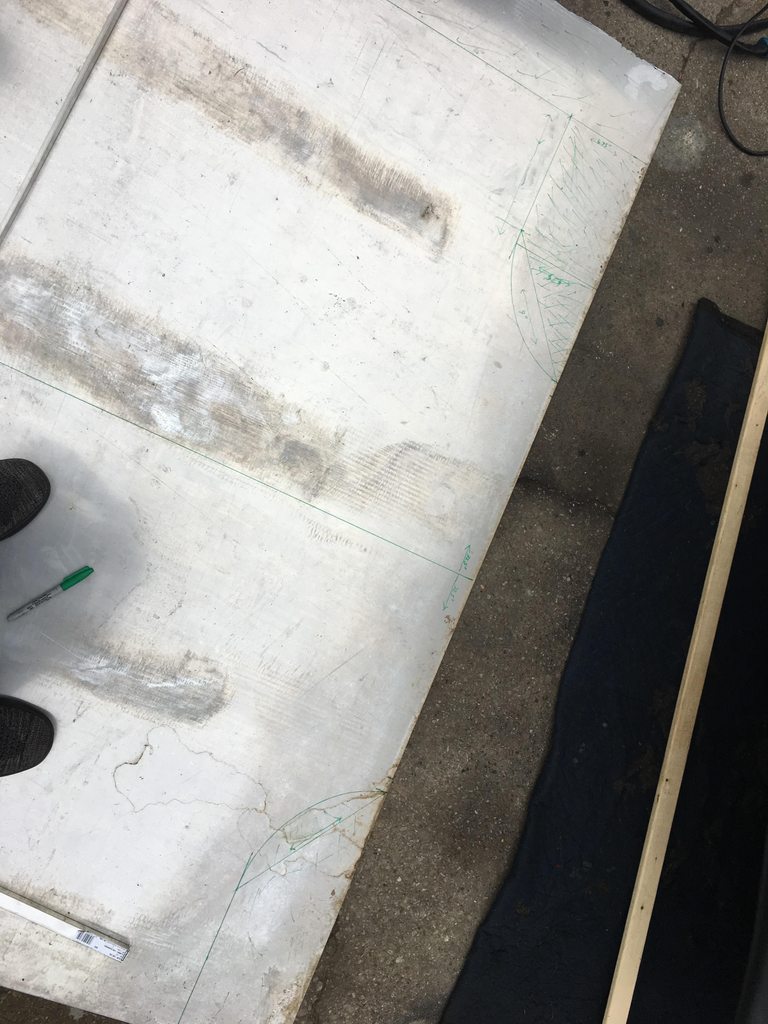
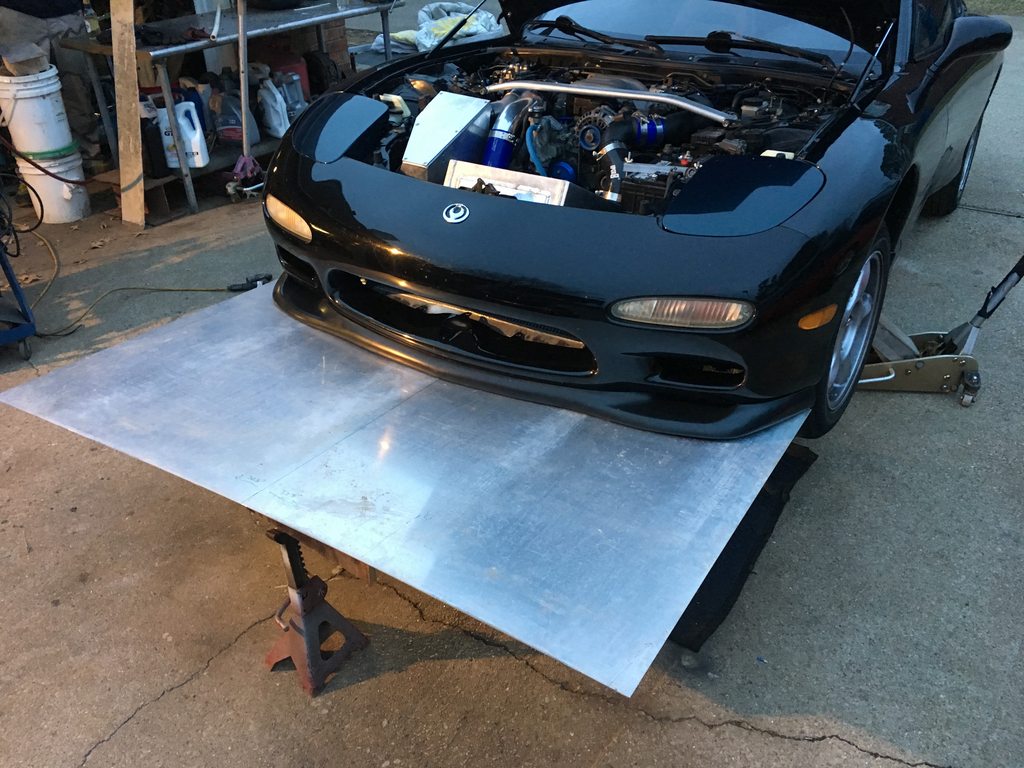
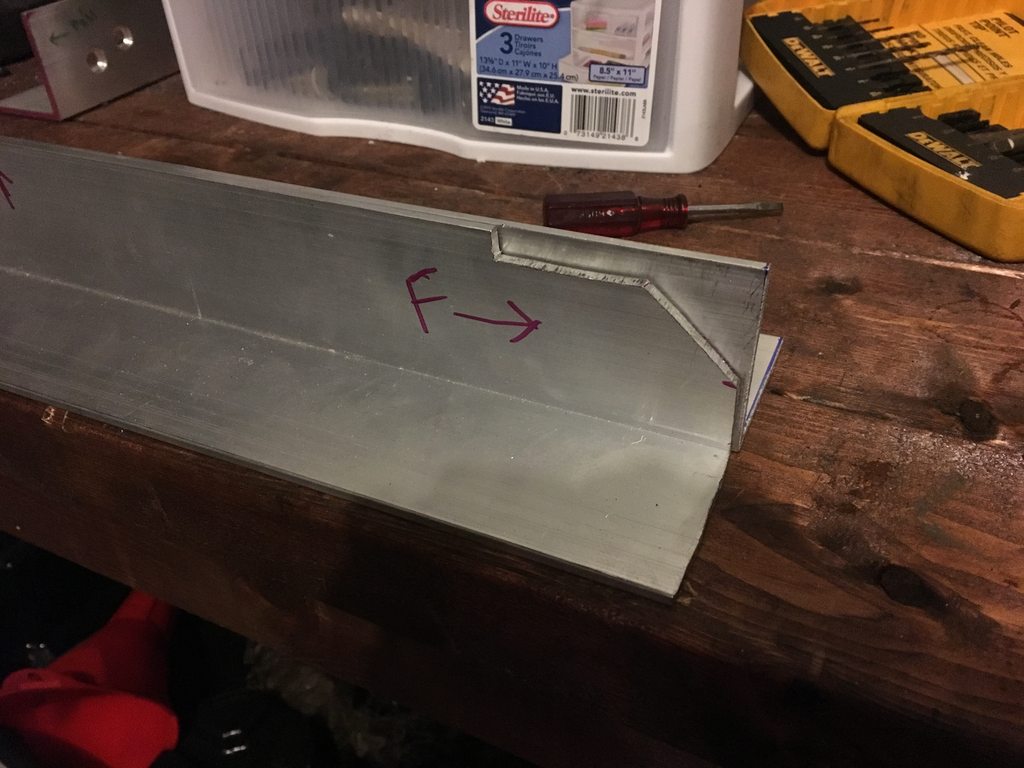
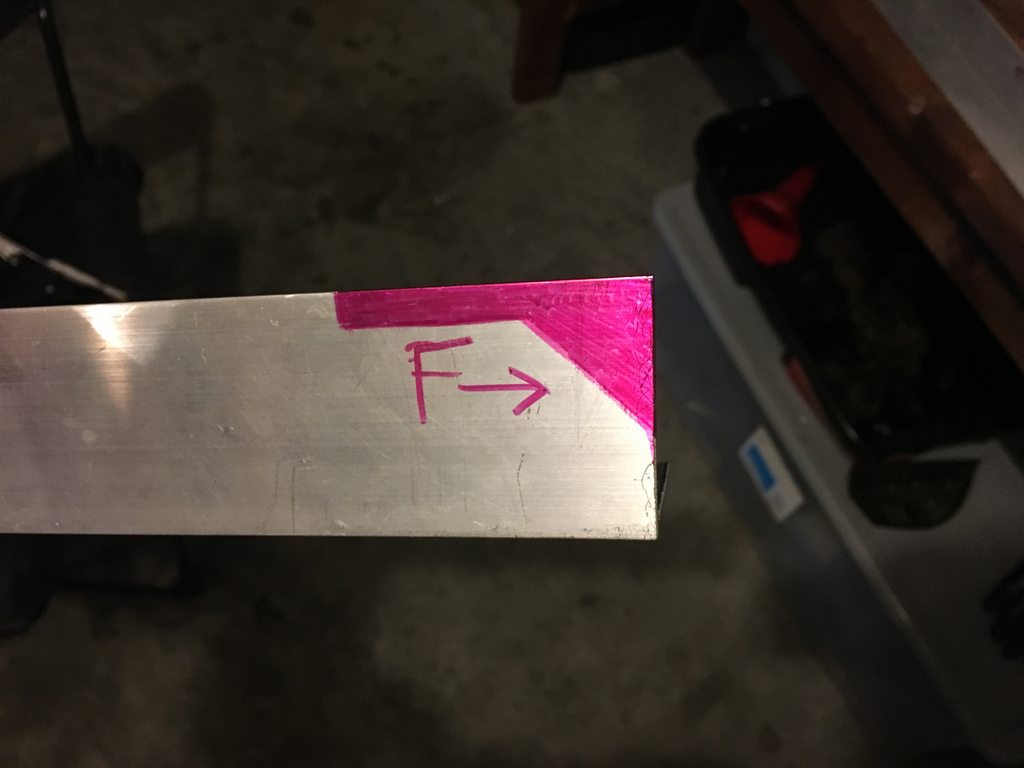
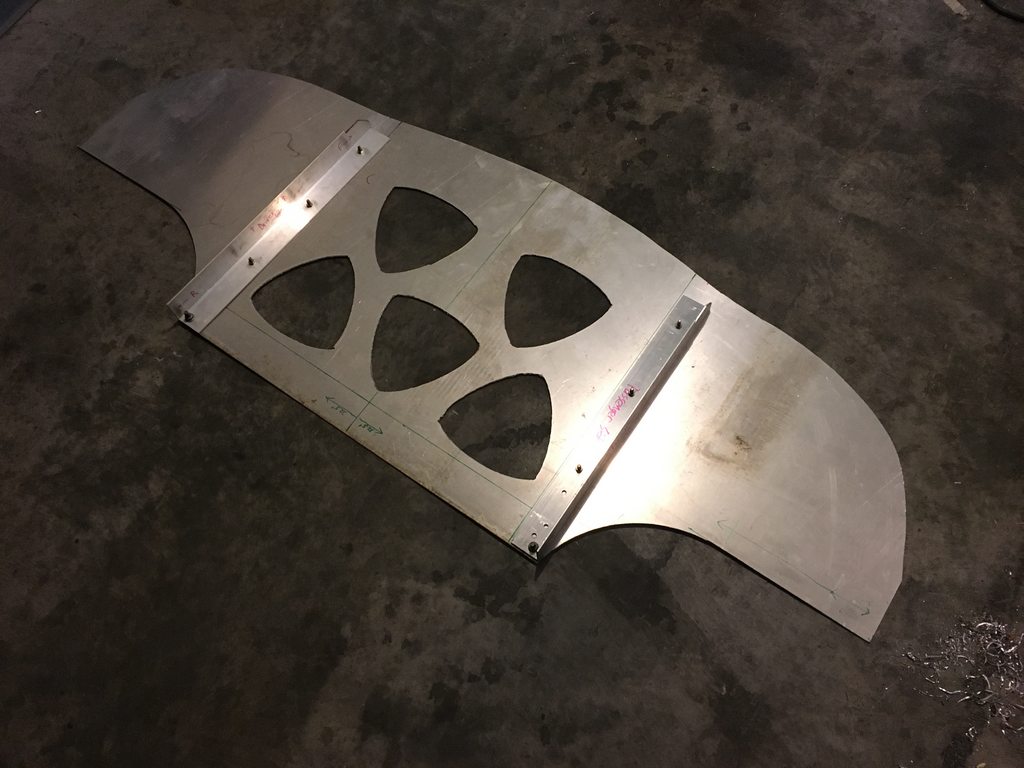
i got a free 4x6' sheet of .090 aluminum from a friend of mine, so i decided to make a front splitter. here are some pics.
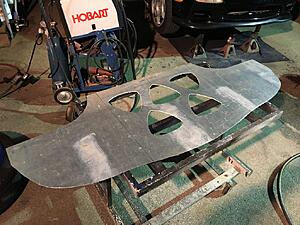
i'm about 1/2 done. i need to make all the mounting for it now.
question: are the rotors dumb? i'm not a rotary fan boy, but this rotor was a good size to make some holes.
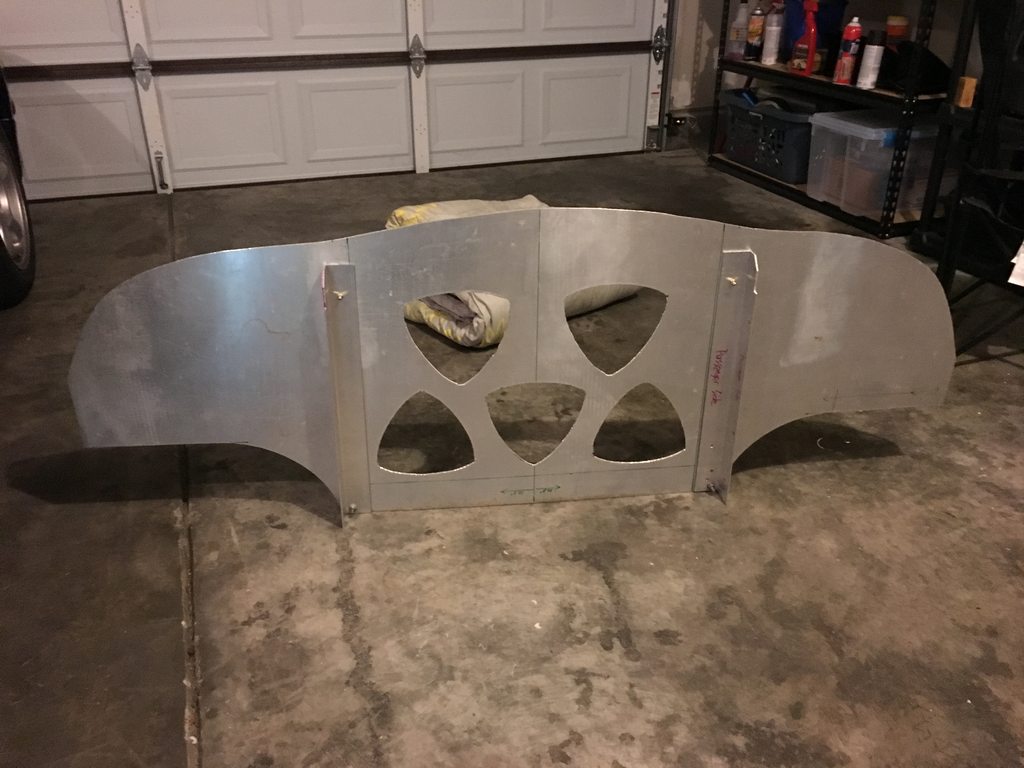
i had enough extra material to make another, so i actually have two of these. one has the rotor holes cut out for my VMIC fans, one is all solid with no holes.
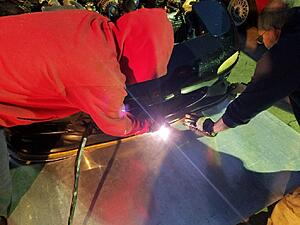
it had been so long since i'd used a plasma cutter that i almost forgot how awesome they are.
my next step is to drill holes to mount the rear of this to the front sway bar bracket bolts, then attach some thick aluminum L brackets to the splitter so i can attach the middle area up to the frame rails and get some real support.
i'm not sure how to attach the front of the splitter. maybe several bolts up through the front lip? also i'm not sure if turn buckles will be necessary (sticking up through the radiator opening).
i'm about 1/2 done. i need to make all the mounting for it now.
question: are the rotors dumb? i'm not a rotary fan boy, but this rotor was a good size to make some holes.
i had enough extra material to make another, so i actually have two of these. one has the rotor holes cut out for my VMIC fans, one is all solid with no holes.
it had been so long since i'd used a plasma cutter that i almost forgot how awesome they are.
my next step is to drill holes to mount the rear of this to the front sway bar bracket bolts, then attach some thick aluminum L brackets to the splitter so i can attach the middle area up to the frame rails and get some real support.
i'm not sure how to attach the front of the splitter. maybe several bolts up through the front lip? also i'm not sure if turn buckles will be necessary (sticking up through the radiator opening).


Last edited by jacobcartmill; Mar 5, 2017 at 10:30 PM.
Thread Starter
Joined: Jul 2002
Posts: 9,387
Likes: 4
From: Nashville, TN
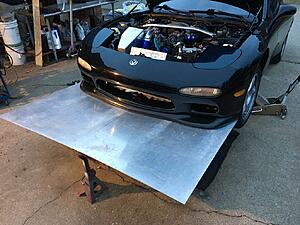
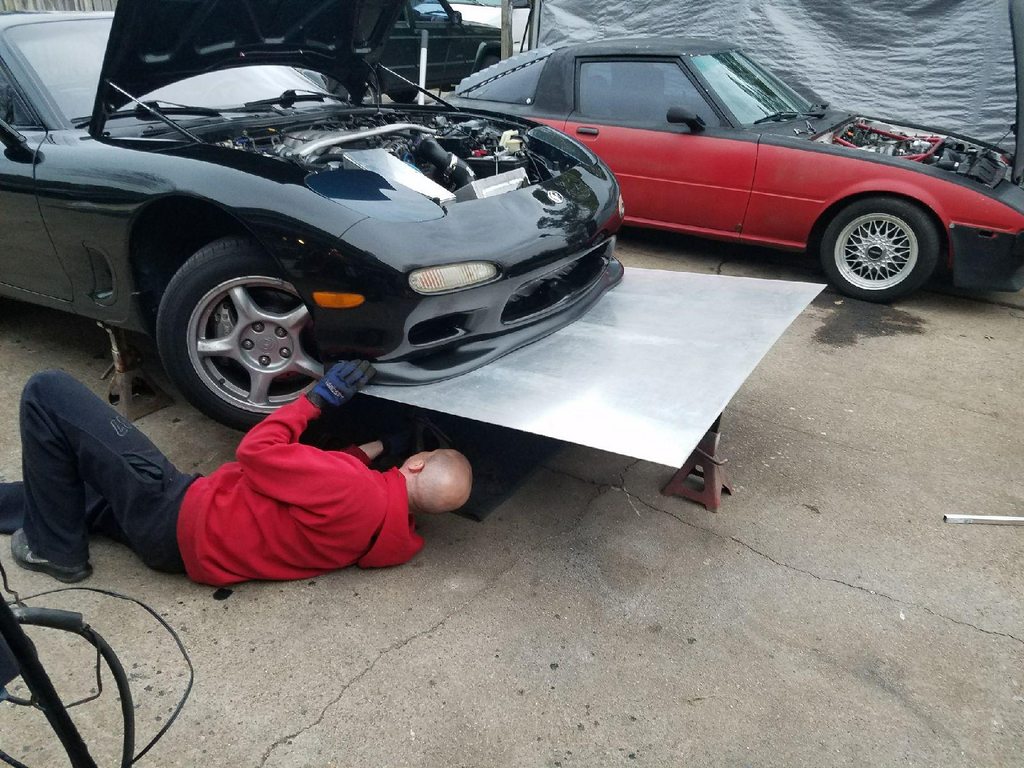
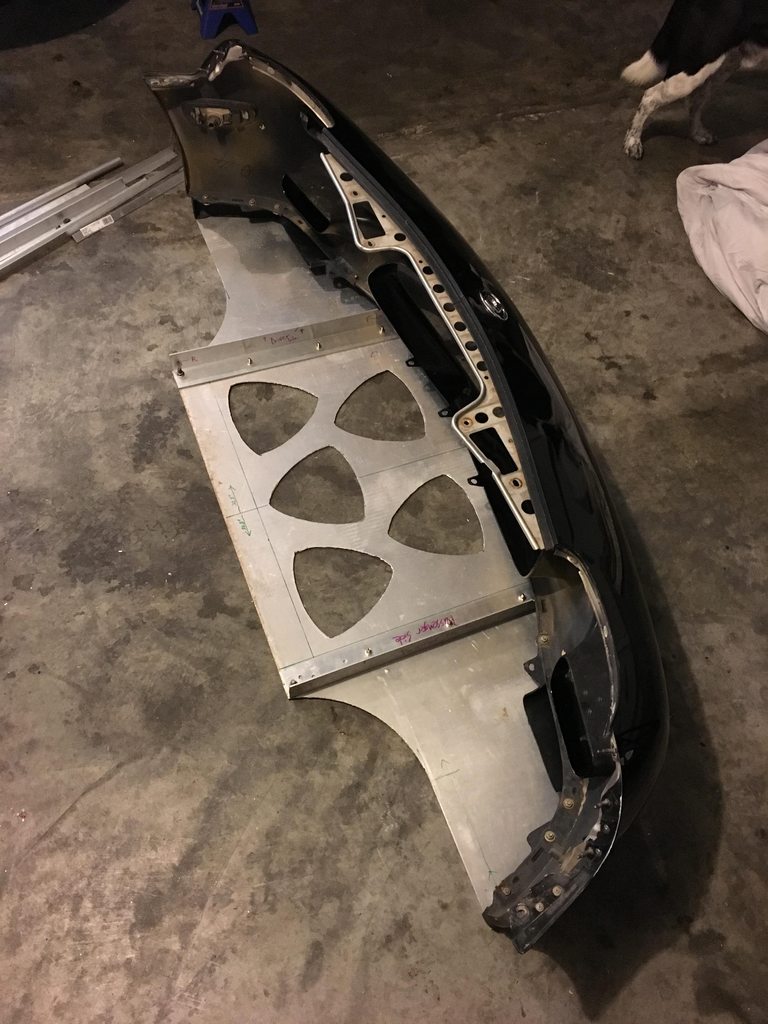
more progress on the front splitter:
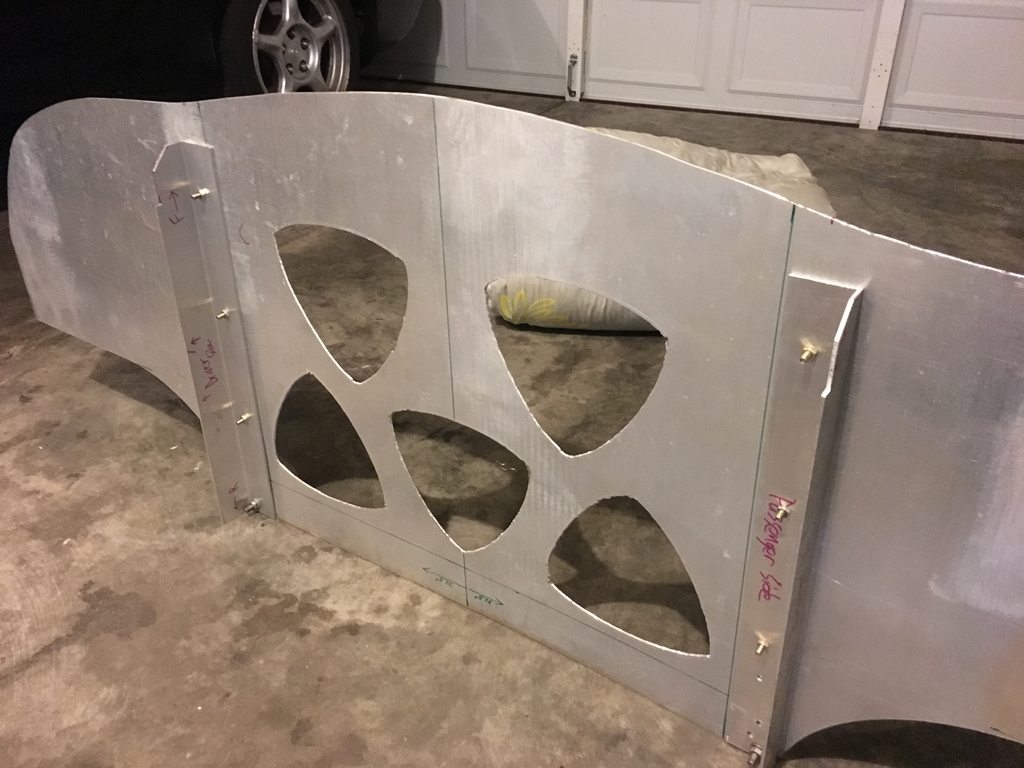
I made some nice L brackets to support the splitter front-to-back, and will use the same rear mounting point (the front sway bar front bolt)
i'm not entirely sure how to support the splitter left-to-right without doing a lot of fancy bending (which isn't feasible) or welding, or both. anyone have any ideas?
also, a little booboo: the two brackets aren't perfectly parallel, and they aren't perpendicular to the rear of the splitter. not much of a problem, but it does bug me slightly
anyway, here are the pics. it is starting to look pretty good.
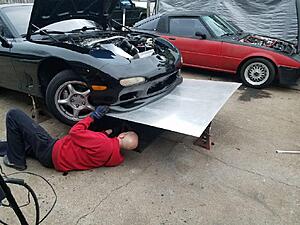
I notched the front of the L brackets to fit nicely inside the OEM front lip.

I copied the driver side bracket cut for the passenger side to keep them similar, and so I didn't have to do all the trial and error cuts again.
brackets attached

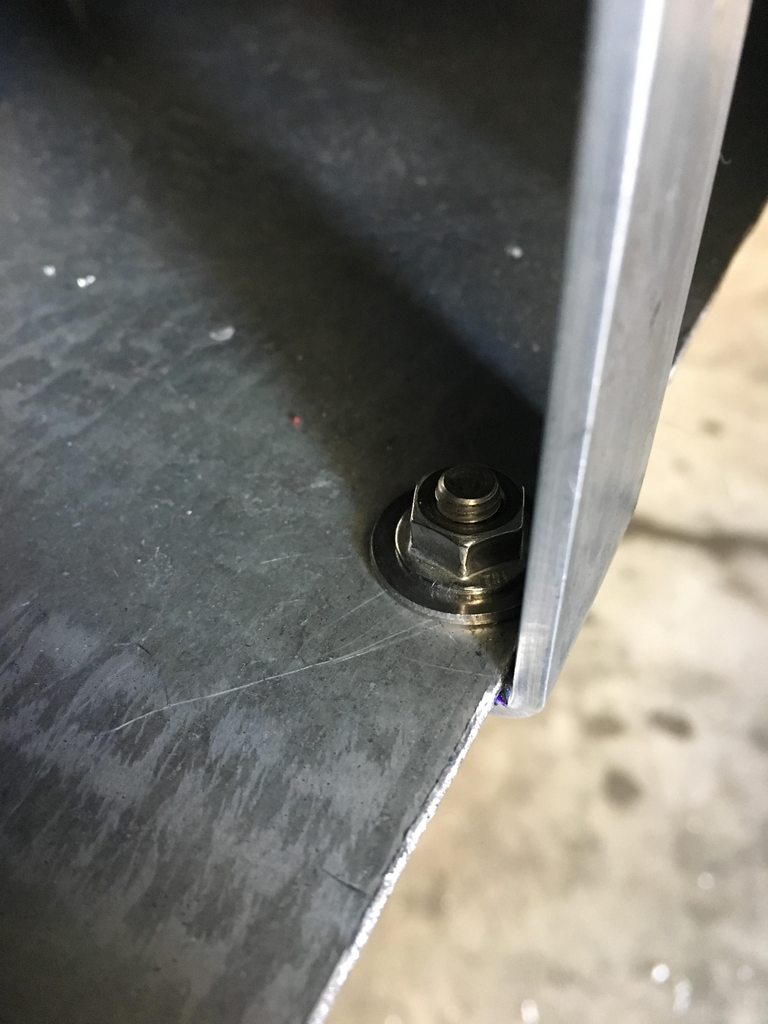
more bolts added for rigidity


I made some nice L brackets to support the splitter front-to-back, and will use the same rear mounting point (the front sway bar front bolt)
i'm not entirely sure how to support the splitter left-to-right without doing a lot of fancy bending (which isn't feasible) or welding, or both. anyone have any ideas?
also, a little booboo: the two brackets aren't perfectly parallel, and they aren't perpendicular to the rear of the splitter. not much of a problem, but it does bug me slightly
anyway, here are the pics. it is starting to look pretty good.
I notched the front of the L brackets to fit nicely inside the OEM front lip.
I copied the driver side bracket cut for the passenger side to keep them similar, and so I didn't have to do all the trial and error cuts again.
brackets attached
more bolts added for rigidity
Last edited by jacobcartmill; Mar 7, 2017 at 12:58 PM.


Looks good, afgmoto1978 did a lot of splitter work a while back. Might have some ideas for you in his build thread.
https://www.rx7club.com/build-thread.../#post11342448
https://www.rx7club.com/build-thread.../#post11342448
Thread Starter
Joined: Jul 2002
Posts: 9,387
Likes: 4
From: Nashville, TN
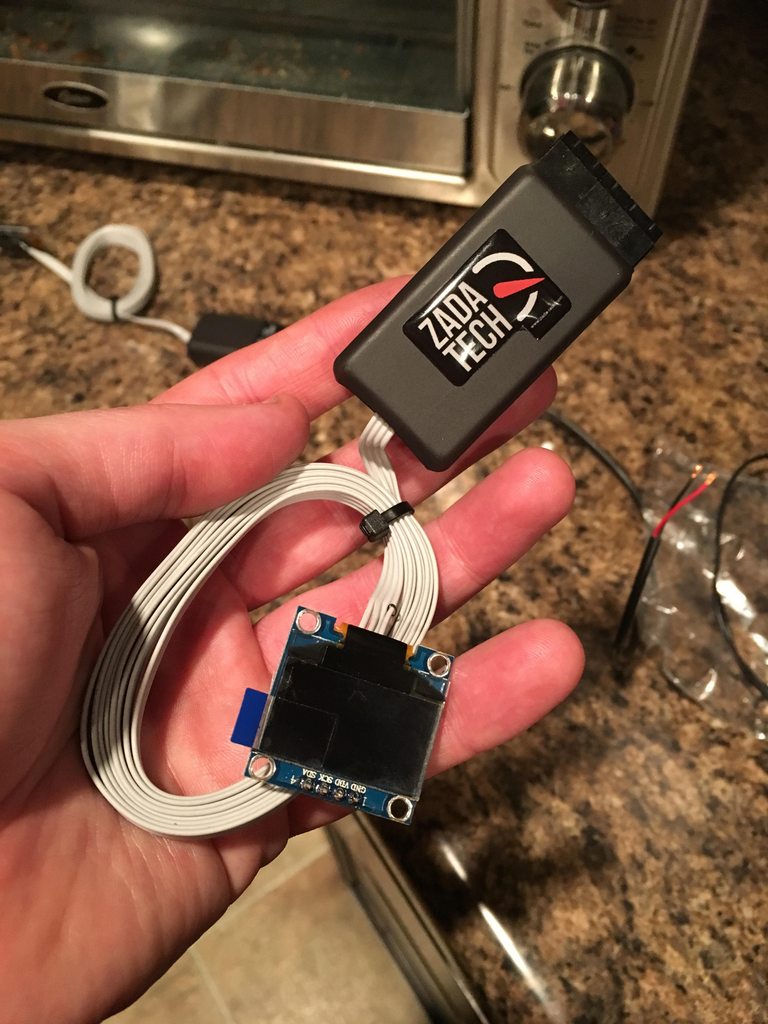
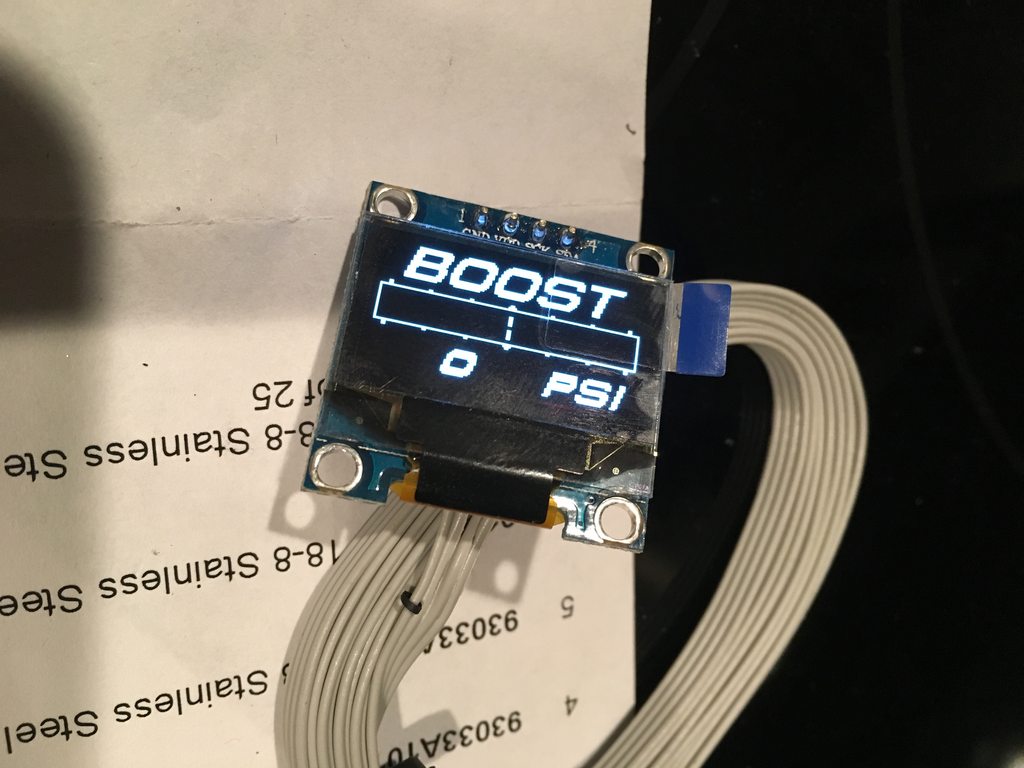
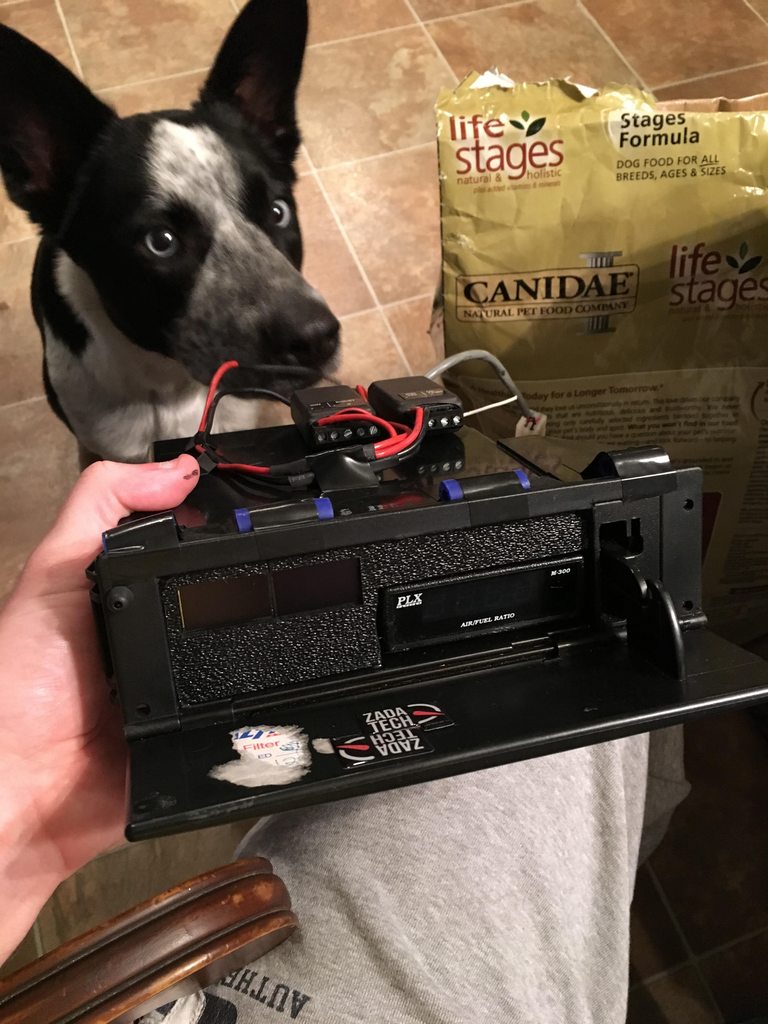
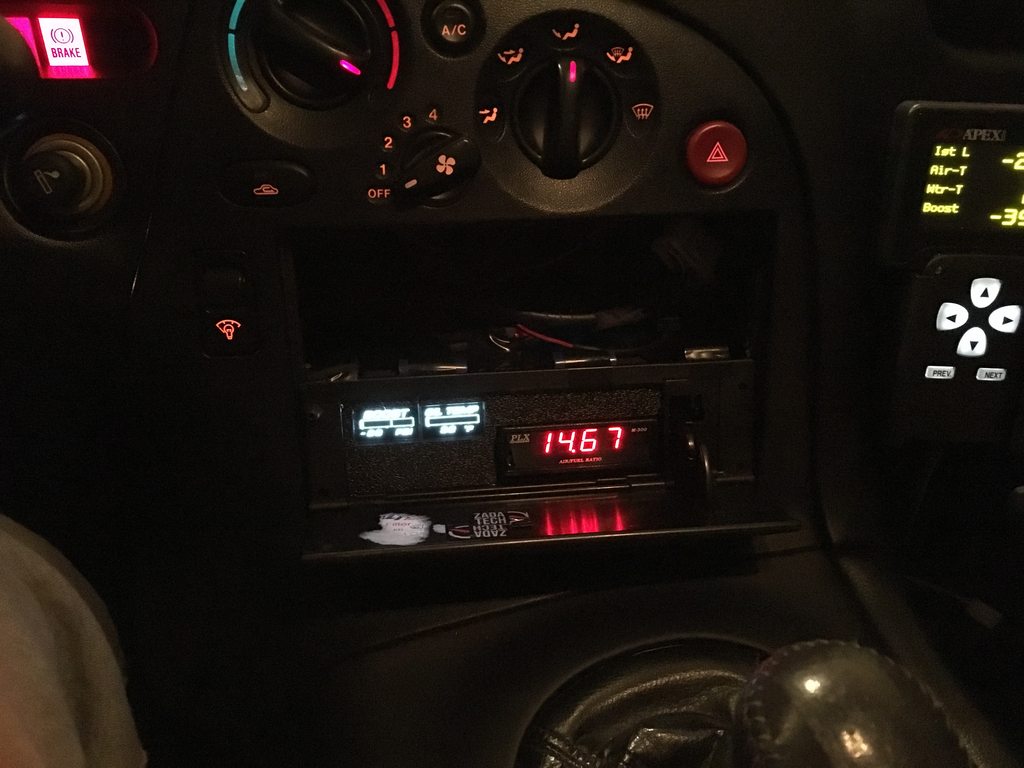
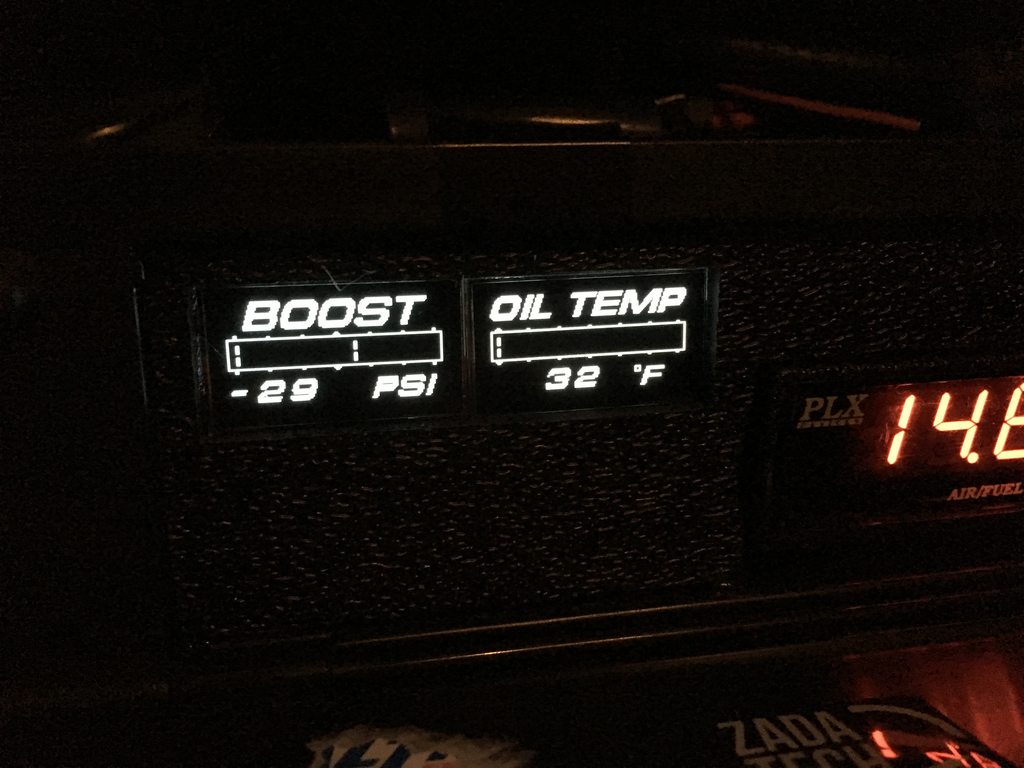
my zada-tech gauges came in finally after a shipping mix-up. they are really cool:
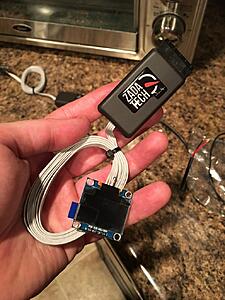
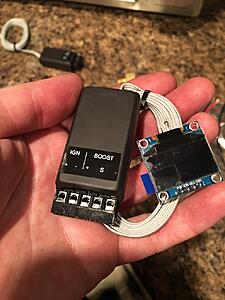
i'm going to install them into my DIN pocket, in this nifty little blank piece I made from some spare plastic:
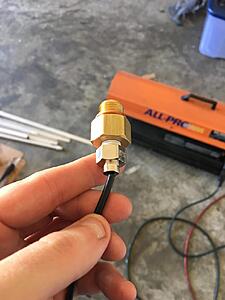
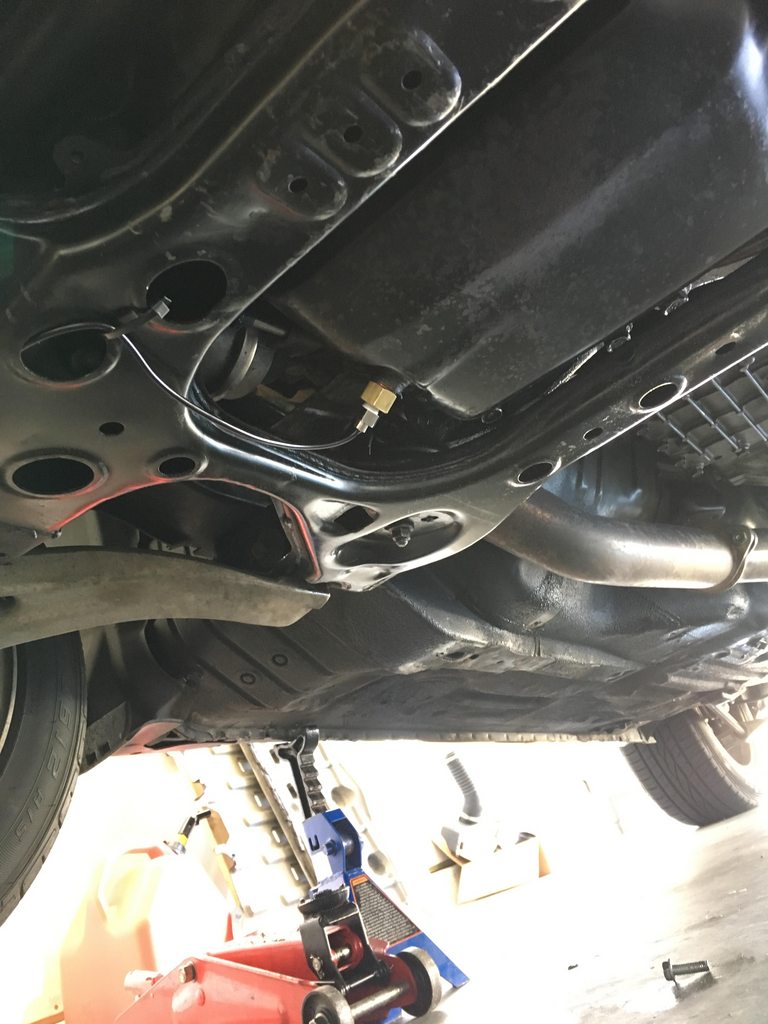
oil temp sensor:

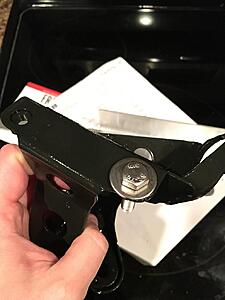
I got some good (not bent) sway bar mounts from that goodfella richy rich, cleaned them up, and painted them:

i'm going to install them into my DIN pocket, in this nifty little blank piece I made from some spare plastic:
oil temp sensor:

I got some good (not bent) sway bar mounts from that goodfella richy rich, cleaned them up, and painted them:


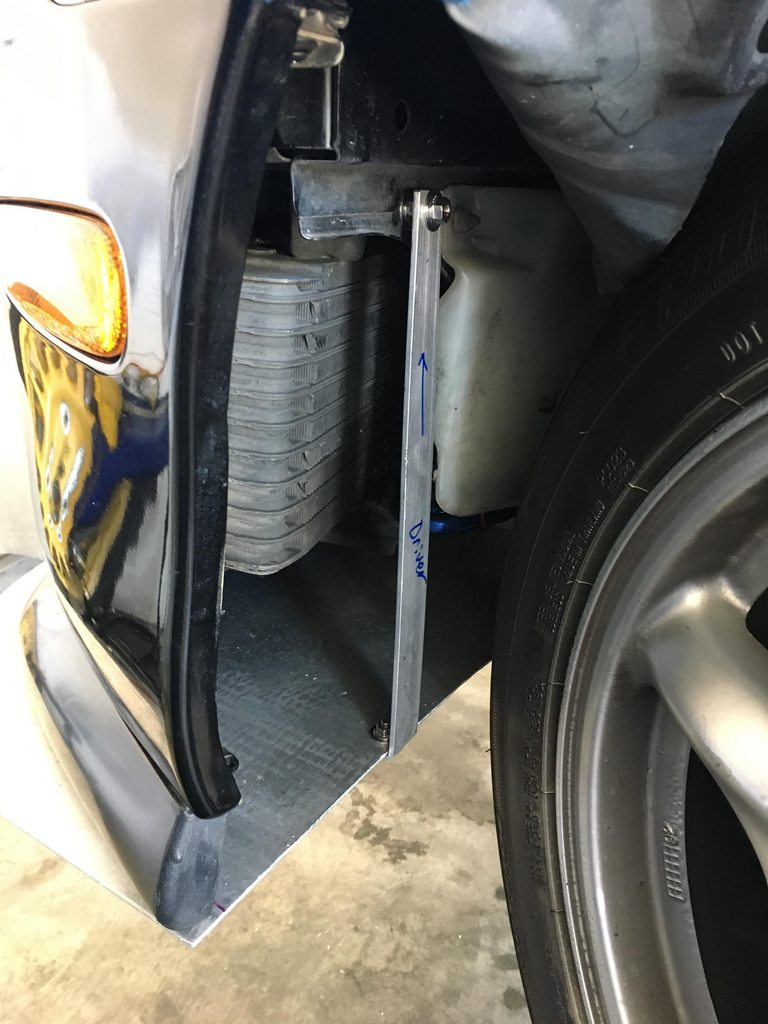
Jacob - Pay close attention to that flat stock bar mount in the wheel well. The OEM wheel/tire combo will be fine, but larger diameter/wider tires may end up rubbing that that spot. I don't think it would cause much damage ... just providing some cautionary advice.
Thread Starter
Joined: Jul 2002
Posts: 9,387
Likes: 4
From: Nashville, TN
I did take that into account, leaving a little over 1" of clearance for this wheel and tire setup at its closest (nearly full lock), assuming any future wheel/tire upgrade in the future should be ~1% of stock diameter.
a 265/35/18 is +1.6% in diameter, which is +0.4" --- this would be worst case scenario
a 285/30/18 is -0.8% in diameter, which is -0.2"
regardless, thanks for looking out. if I end up with tires that are +2% or larger I will move the bracket forward to get some more clearance.
Nice work man!
Question on the splitter: Does it sit flat/level? The issue i've always had thinking about this is that the bottom of the lip isn't flat (it's lower at the outer/back edges than at the center, so there was always the question of what to do with the gap. Did you trim the lip?
P
Question on the splitter: Does it sit flat/level? The issue i've always had thinking about this is that the bottom of the lip isn't flat (it's lower at the outer/back edges than at the center, so there was always the question of what to do with the gap. Did you trim the lip?
P
Thread Starter
Joined: Jul 2002
Posts: 9,387
Likes: 4
From: Nashville, TN
hey peter man, turn on channel 9, breast exams!
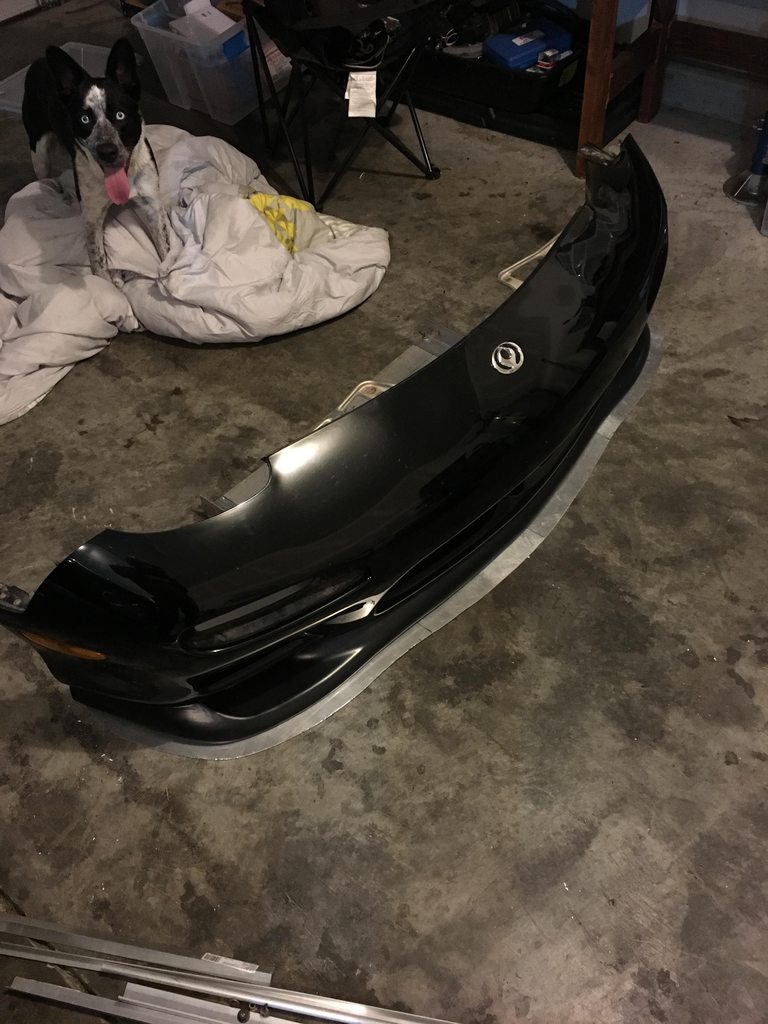
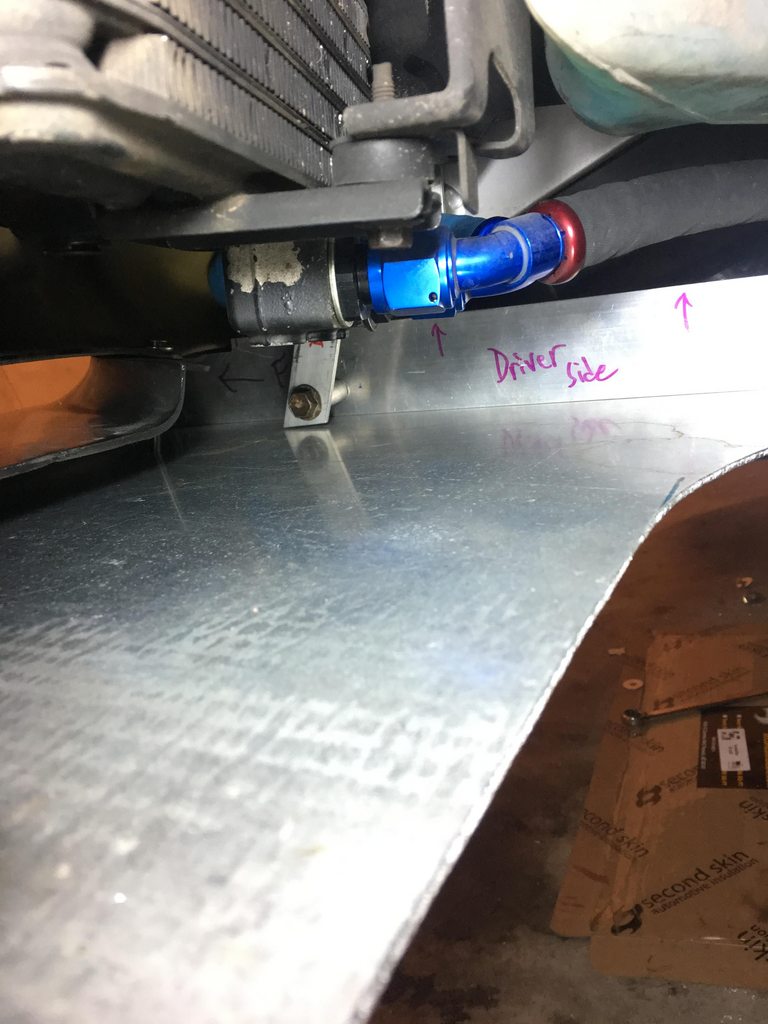
about the splitter being flat/level, the lip is indeed not flat across the front left-to-right, as the sides near the fenders are thicker. the .090 aluminum I used is thin enough to barely flex and meet the slight contour of the front lip, so it has a very slight bow effect... now, for all the armchair aerodynamics engineers out there, i'm aware this is not totally ideal.
i used every mounting point for the front lip as the front attachment point for the front of the splitter. when you think of that concept initially you may think it's not ideal, but there are 14 bolts, which is a lot. the urethane bumper isn't the most solid structure on the car, but 14 of these bolts in a "bow" pattern supporting the splitter makes it pretty damn rigid.
if i were using thicker 1/8" aluminum (or something equally rigid) it would have left a ~1/4" gap in the center section between the splitter and the lip, and i would have to use some urethane or vinyl to seal that gap top-to-bottom, if that makes sense. (that is what most people do). my material was simply thin enough to mend slightly to the shape without smashing the front lip.
about the splitter being level, it's not perfect, but it's close (front-to-back) using the sway bar bolts as the rear splitter mounting point. to change the angle of attack on this splitter i would have to drill additional main "mid" mount holes and simply adjust the 14 "front" bolts to lower the front down -- this would create a slight gap that i mentioned above, which i would have to seal up as well. i will take some measurements of it with the car on the ground later, to make sure it's not actually creating lift instead, but when only looking at it, it looks pretty close to level front-to-back, so overall it may actually produce a little downforce.
my main objective was to collect a little more air for the radiator/IC/oilcoolers, and a little more downforce as my secondary objective. hopefully this does a little of both, but i don't have anything quantitative to actually determine its effectiveness.
maybe at least it will cut the ankles of a few of the random-question-askers at the gas station:
"hey man, is that thing twin turbo??? my uncle had one of these in 1764!"
*steps closer to look at the mis-matched hood*
"my ankles!!! they're bleeding! oh my god!!!!!"
Last edited by jacobcartmill; Mar 13, 2017 at 02:43 PM.
Thread Starter
Joined: Jul 2002
Posts: 9,387
Likes: 4
From: Nashville, TN
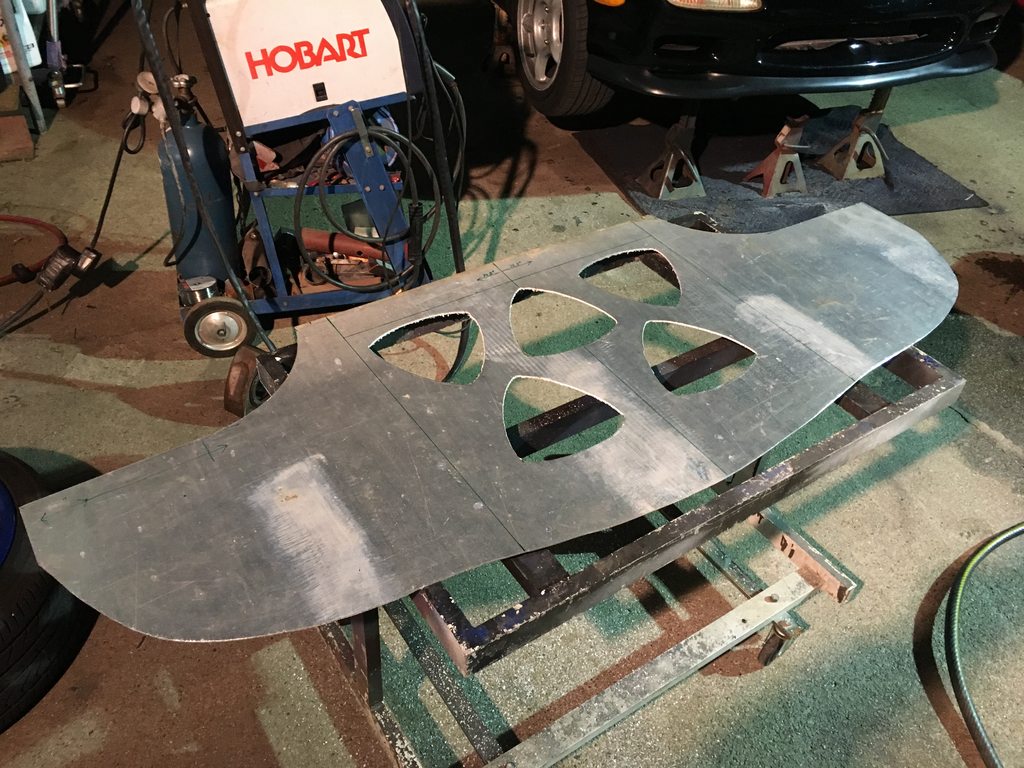
another update i forgot to post prior to the front splitter:
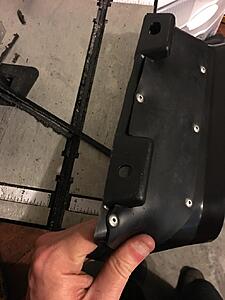
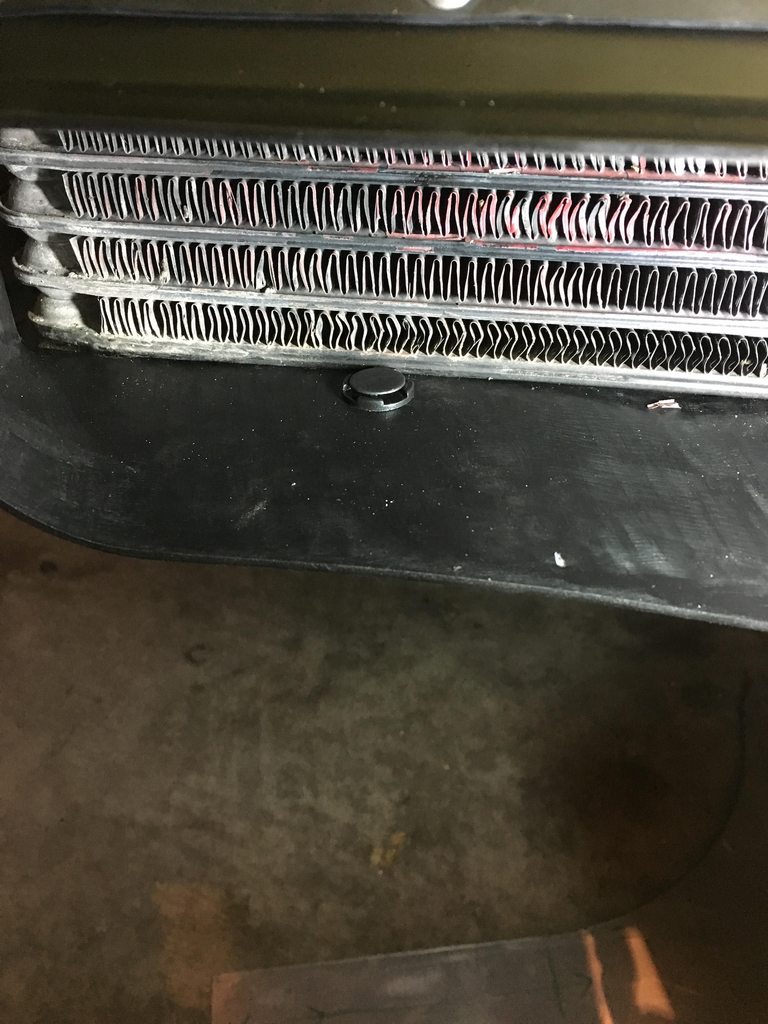
i installed new OEM oil cooler ducts. the RX8 cooler on the passenger side is 2 rows taller, so the duct didn't quite fit, but i modified it a little and got it to work as well as it can.
pretty new ducts
driver side bottom
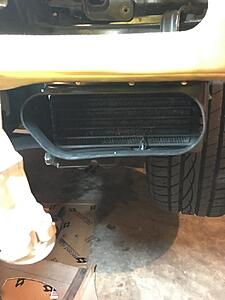
driver side top
taller RX8 cooler on passenger side
passenger side bottom

passenger side top (i re-did this one after the pic to raise it slightly, but it looks almost the same)
i installed new OEM oil cooler ducts. the RX8 cooler on the passenger side is 2 rows taller, so the duct didn't quite fit, but i modified it a little and got it to work as well as it can.
pretty new ducts

driver side bottom

driver side top
taller RX8 cooler on passenger side

passenger side bottom
passenger side top (i re-did this one after the pic to raise it slightly, but it looks almost the same)

regardless, thanks for looking out. if I end up with tires that are +2% or larger I will move the bracket forward to get some more clearance.
Yeah, I think the issue is worse when you have wide wheels or low offset so more outer barrel is sticking out past the steering axis.
I just did the quick maths using a right triangle calculator and my 18x11 +45 are like a 32" tall tire if you measure diagonally through the steering axis to an outer tread block.
Stock with 24.9" tall tire is like 28.6" tall tire through steering axis to an outer tread block.
So 1.7" closer on my set-up by my calculations.
Stock with 24.9" tall tire is like 28.6" tall tire through steering axis to an outer tread block.
So 1.7" closer on my set-up by my calculations.
Last edited by BLUE TII; Mar 13, 2017 at 03:39 PM.
I have a nice rub spot developing in that area where the bracket is. Rocking 18x10.5 +43 with 285/30. The fender liner has some flex so it will move, but that bracket probably doesn't.
I like the execution though. I am using the Shine Auto undertray, which is a three piece CF unit. It has the similar shape you have with yours. I wanted to "tie up" the portion of the trays near the oil coolers just the way you have them, but I feared the tire rub. I may revisit and use brackets more inward. Thanks for the idea.
I like the execution though. I am using the Shine Auto undertray, which is a three piece CF unit. It has the similar shape you have with yours. I wanted to "tie up" the portion of the trays near the oil coolers just the way you have them, but I feared the tire rub. I may revisit and use brackets more inward. Thanks for the idea.
Thread Starter
Joined: Jul 2002
Posts: 9,387
Likes: 4
From: Nashville, TN
I just did the quick maths using a right triangle calculator and my 18x11 +45 are like a 32" tall tire if you measure diagonally through the steering axis to an outer tread block.
Stock with 24.9" tall tire is like 28.6" tall tire through steering axis to an outer tread block.
So 1.7" closer on my set-up by my calculations.
Stock with 24.9" tall tire is like 28.6" tall tire through steering axis to an outer tread block.
So 1.7" closer on my set-up by my calculations.
that is good info. i measured my ~1" gap with the tire at its closest point to the support bracket. i wouldn't be able to run an 11" wheel... are you running like 305s on that?
can you even steer yours without hitting the washer bottle? the radius curve on mine has about the same clearance for the bracket as the washer bottle does.
18x11 +45 and 295/30-18.
No, it doesn't rub anything on stock rolled fenders except on a big bump that top outside part of the fender liner between 11 O-clock to 1 O-clock that just hangs now that the fender lip that it used to bolt to is rolled under.
No, it doesn't rub anything on stock rolled fenders except on a big bump that top outside part of the fender liner between 11 O-clock to 1 O-clock that just hangs now that the fender lip that it used to bolt to is rolled under.
Thread Starter
Joined: Jul 2002
Posts: 9,387
Likes: 4
From: Nashville, TN
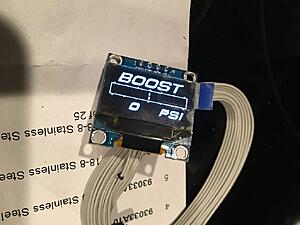
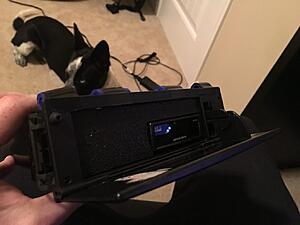
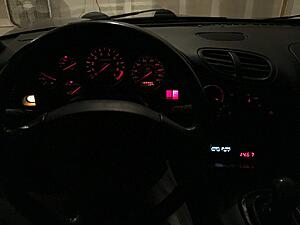
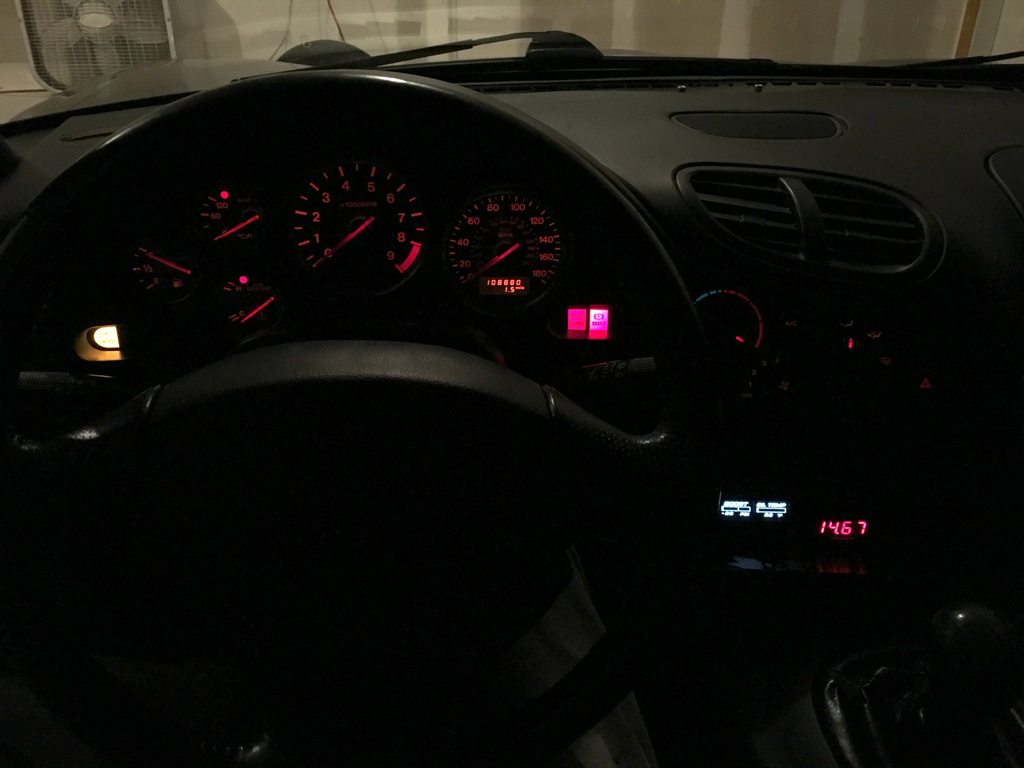
the zada tech gauges are installed into my DIN pocket.
the sensors aren't hooked up yet. i will do that in the next few days. i need to find a way to cleanly get them through the firewall.


the sensors aren't hooked up yet. i will do that in the next few days. i need to find a way to cleanly get them through the firewall.

Rotary Enthusiast
Joined: Jan 2005
Posts: 846
Likes: 14
From: hsv al
Those gauges are tiny! I guess they are perfect for your stealth install.
I think a row of these would go perfect along the bottom of the gauge cluster if someone wanted to actually monitor and drive at the same time.
I think a row of these would go perfect along the bottom of the gauge cluster if someone wanted to actually monitor and drive at the same time.
Thread Starter
Joined: Jul 2002
Posts: 9,387
Likes: 4
From: Nashville, TN
I also like being able to close the little door on the DIN pocket. the gauges are bright, so it will be nice to close them of when I don't need to watch them.
Thread Starter
Joined: Jul 2002
Posts: 9,387
Likes: 4
From: Nashville, TN
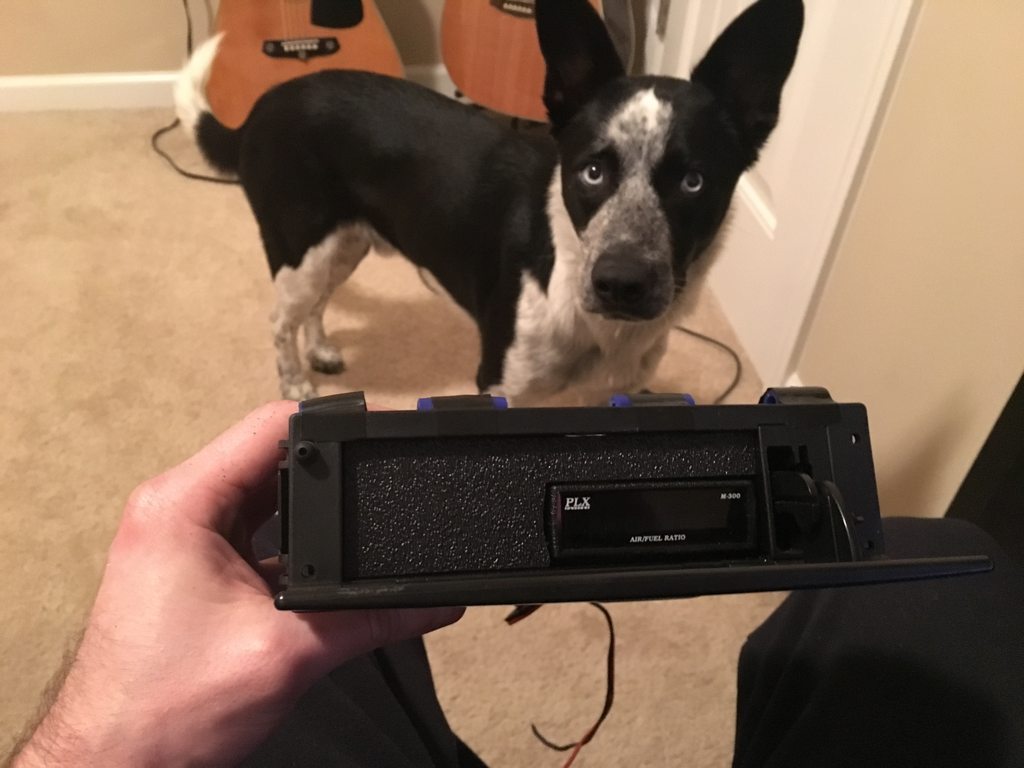
I also have boost readout on my PFC commander, but it's in Kg/cm2, which is annoying, and the refresh rate isn't super fast. the refresh rate of the zada-tech gauges is super fast. the boost is consistent on this car, so my main concern is being able to watch oil temps.
Last edited by jacobcartmill; Mar 16, 2017 at 12:15 PM.
Thread Starter
Joined: Jul 2002
Posts: 9,387
Likes: 4
From: Nashville, TN
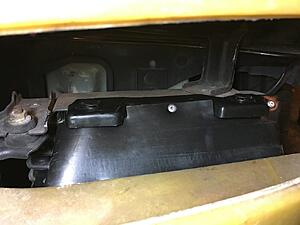
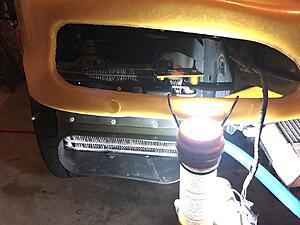
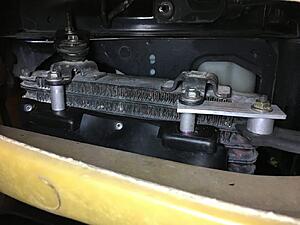
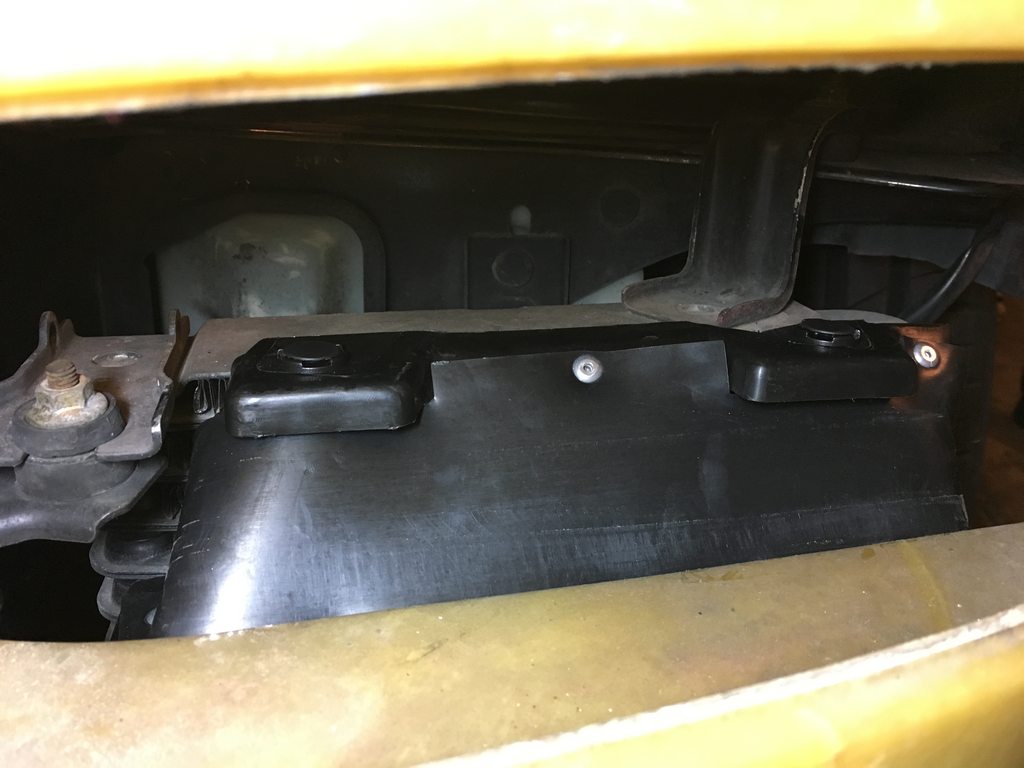
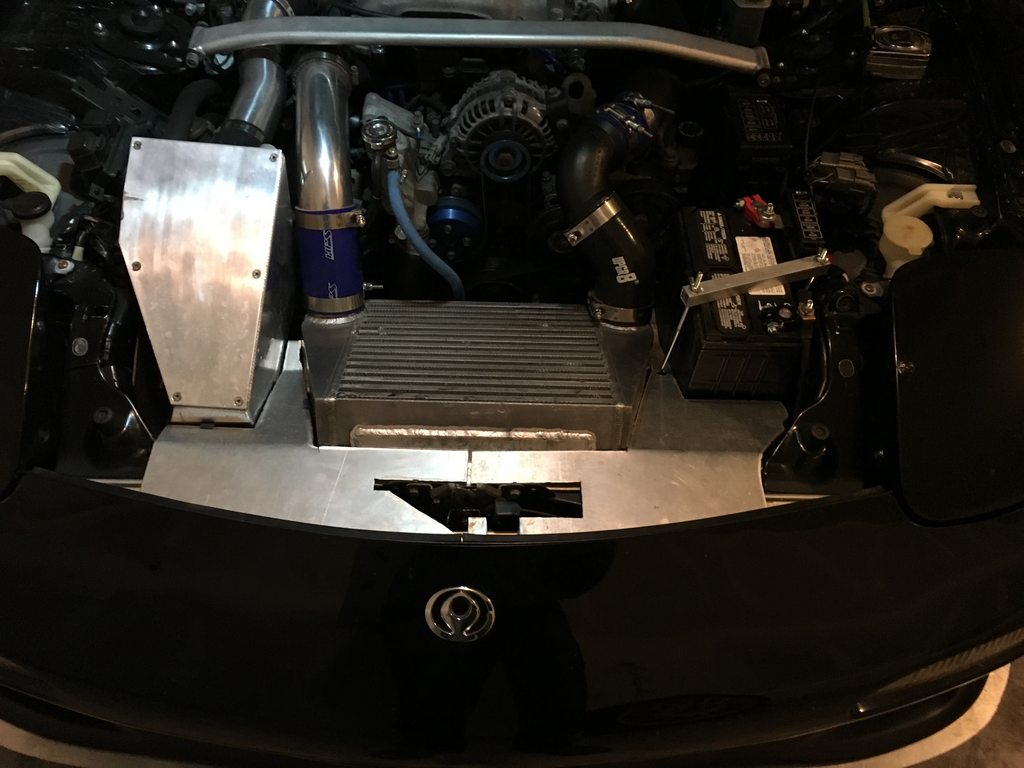
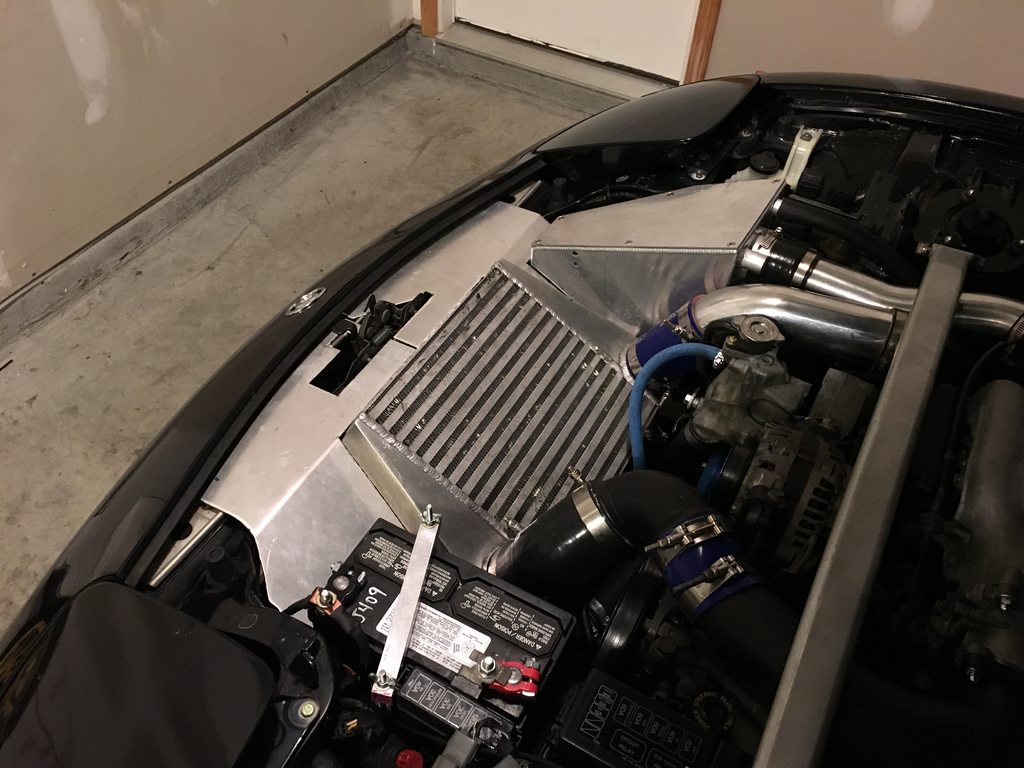
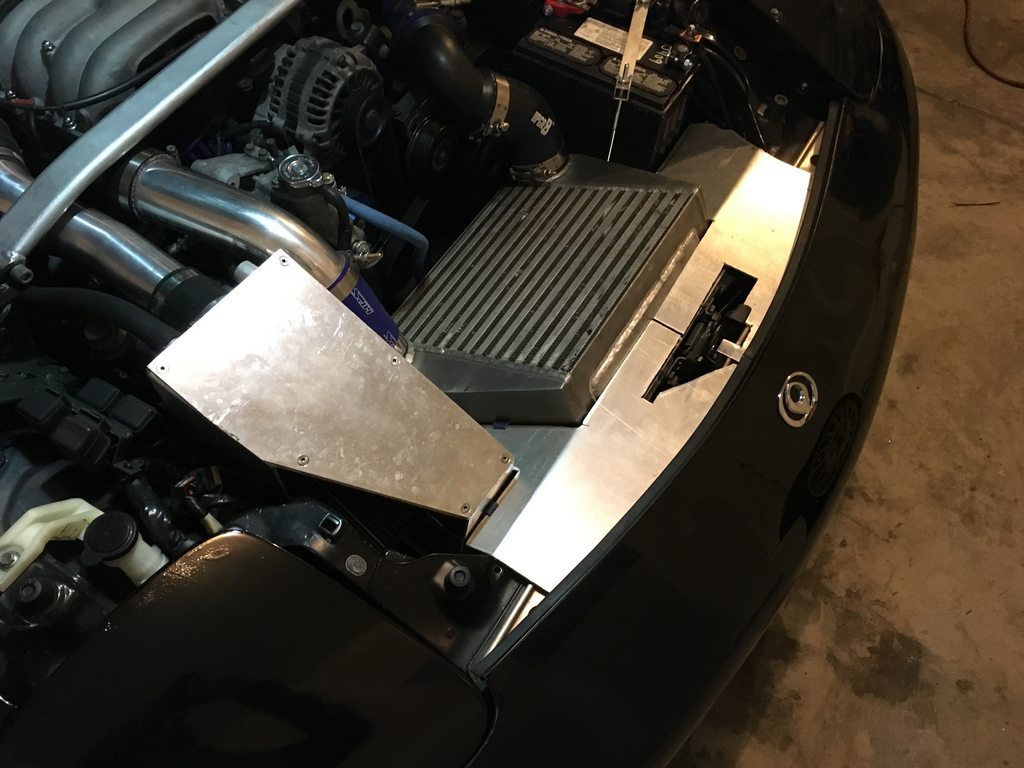
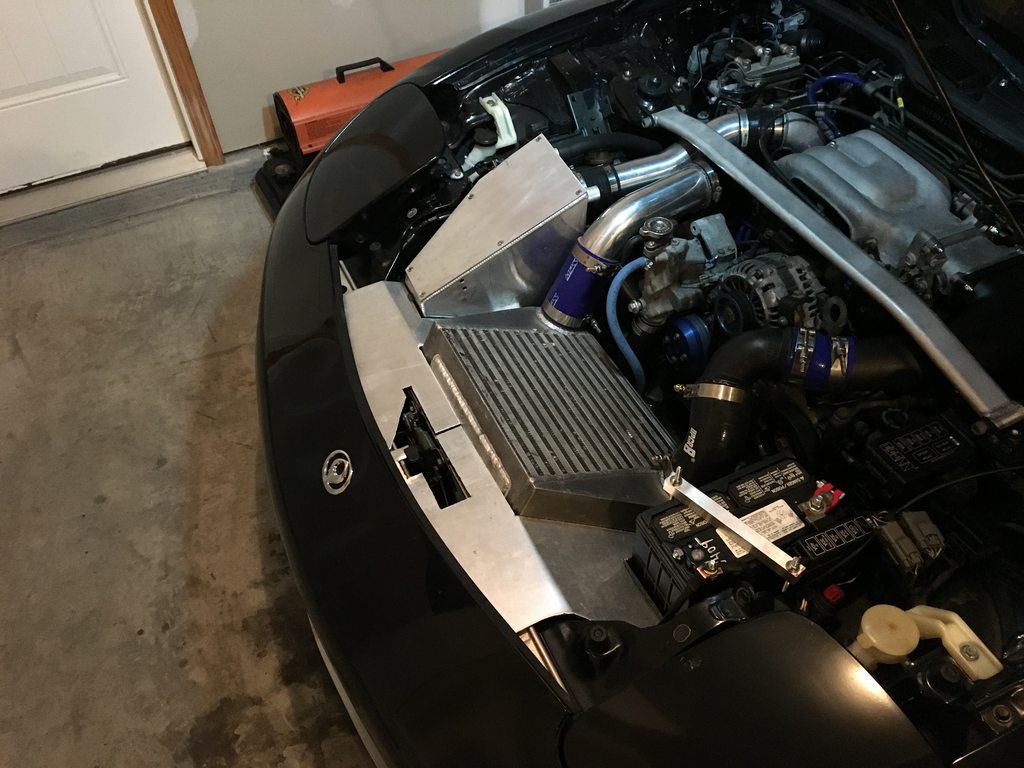
I got back to work sunday with johnny's/charles' plasma cutter.
I've needed to block off the open space between the intake/IC/battery, so I made some cardboard templates and cut them out of my spare .090 aluminum. I haven't mounted the plates yet (they are just laying in there) but I will use the 4 front bumper mounting bolt holes with some standoffs and some countersunk allens. hopefully it will end up pretty nice. the plates aren't perfect, but they turned out decent.
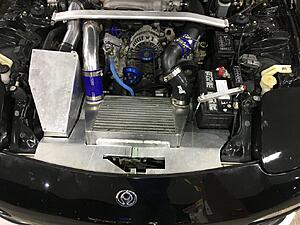


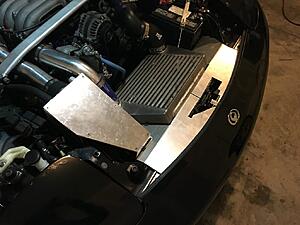

I've needed to block off the open space between the intake/IC/battery, so I made some cardboard templates and cut them out of my spare .090 aluminum. I haven't mounted the plates yet (they are just laying in there) but I will use the 4 front bumper mounting bolt holes with some standoffs and some countersunk allens. hopefully it will end up pretty nice. the plates aren't perfect, but they turned out decent.

Looks awesome! Will you try to block off the open section near the passenger headlight of the cxracing intake and cut out the bottom to match the vmount opening? Sorry if I missed a beat about it.
Also, did you refurb the oil cooler ducts with new rivets and covers? If so, what material did you use and where did you get it?
Also, did you refurb the oil cooler ducts with new rivets and covers? If so, what material did you use and where did you get it?