
FD #6 "build" - combining two cars into one

Thread Starter
Joined: Jul 2002
Posts: 9,387
Likes: 4
From: Nashville, TN
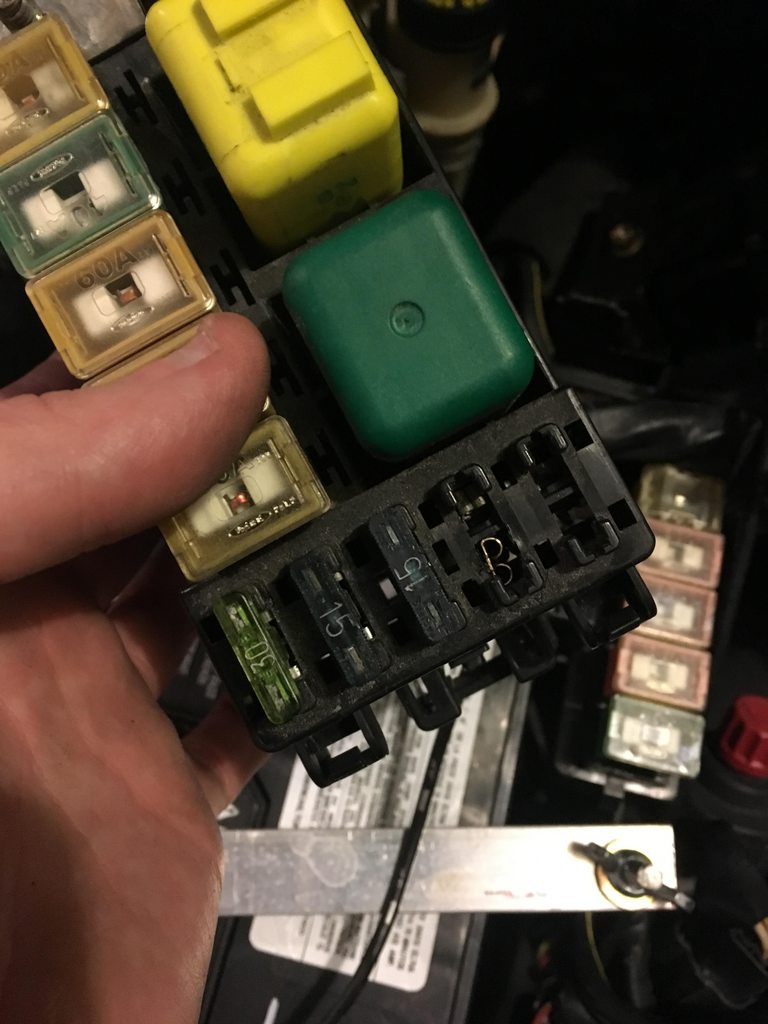
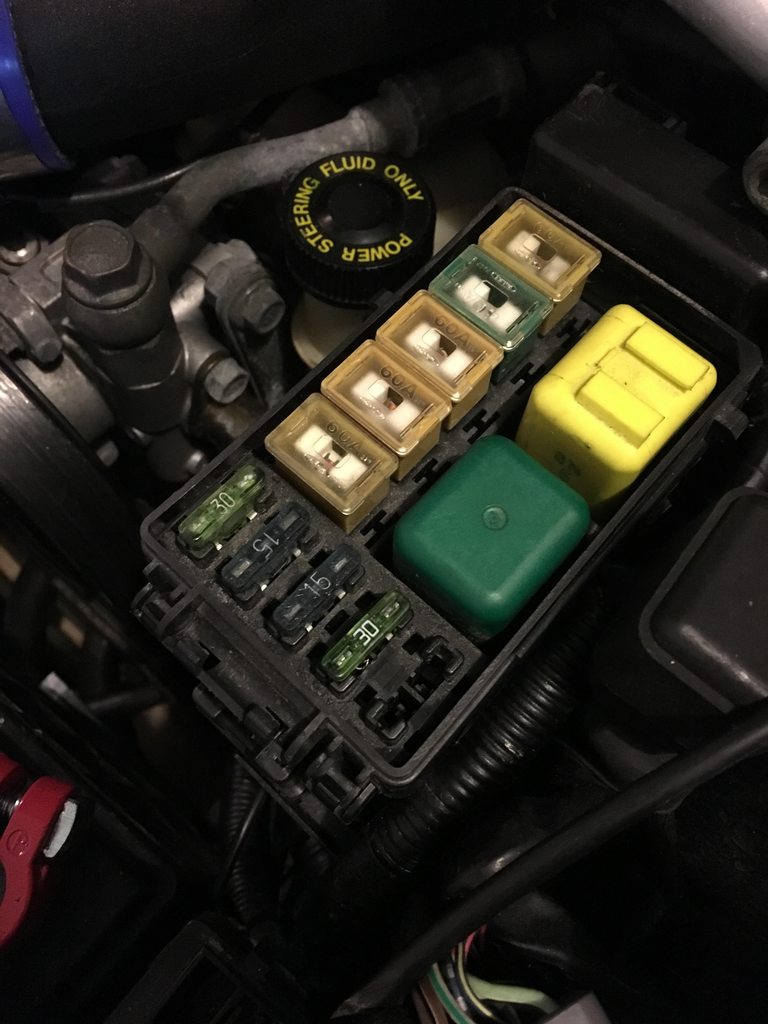
so I went out with a friend and street tuned the power FC for ~10.5psi, and all went well, but the next day the AFRs went super lean in boost (like 13.5:1) and would sporadically go rich (as tuned). fast forward a few more days, and the AFRs will no longer go rich, and remain blow-up lean in boost.
so I checked the voltage at the fuel pump. surely the pressure was dropping in boost...
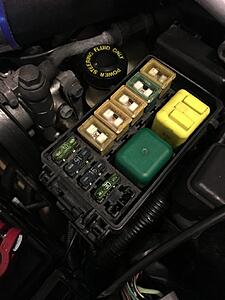
^ and apparently it would no longer change voltage via the stock voltage switching circuit, so I re-powered the relays via the spare 12v battery fuse in the main fuse box, and bypassed the fuel pump resistor.
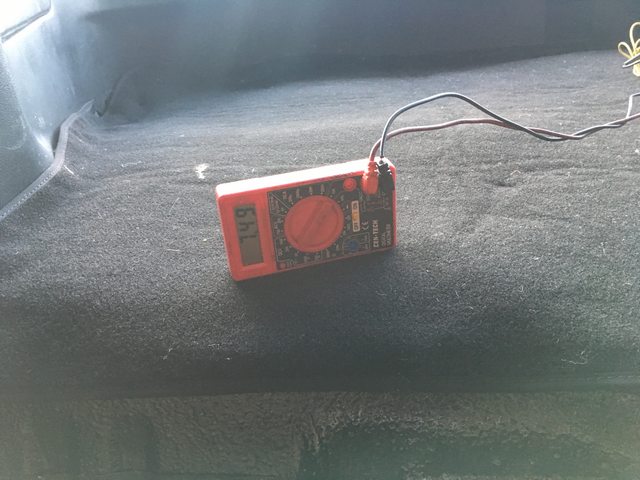
the voltage is now ~11.8-11.9v, which is not full battery voltage, but 4.5v higher than it was!
i'm considering running fresh wiring back to the pump with a new relay, but i'm not sure it's worth the effort to get from 12v to 13v... anyone have any thoughts on this?
so I checked the voltage at the fuel pump. surely the pressure was dropping in boost...
^ and apparently it would no longer change voltage via the stock voltage switching circuit, so I re-powered the relays via the spare 12v battery fuse in the main fuse box, and bypassed the fuel pump resistor.
the voltage is now ~11.8-11.9v, which is not full battery voltage, but 4.5v higher than it was!
i'm considering running fresh wiring back to the pump with a new relay, but i'm not sure it's worth the effort to get from 12v to 13v... anyone have any thoughts on this?
Last edited by jacobcartmill; Jan 29, 2017 at 03:12 PM.

the voltage is now ~11.8-11.9v, which is not full battery voltage, but 4.5v higher than it was!
i'm considering running fresh wiring back to the pump with a new relay, but i'm not sure it's worth the effort to get from 12v to 13v... anyone have any thoughts on this?
i'm considering running fresh wiring back to the pump with a new relay, but i'm not sure it's worth the effort to get from 12v to 13v... anyone have any thoughts on this?
Thread Starter
Joined: Jul 2002
Posts: 9,387
Likes: 4
From: Nashville, TN
Quick update: leading ignition coil is dead, and one of the trailing coils is on its last leg.
I drove the car to work Monday and it started running on one rotor intermittently, so i suspected ignition.
upon further review yesterday, the leading coil is dead, and it's been running on the trailing coils only, probably since Sunday night when I noticed some slightly sluggish response and random misfires.
scary. It's also confusing how well the car can run on trailing ignition only, with the plugs sparking through those tiny holes in the housings...
anyway, my guy Jim Thompson is hooking me up with some good condition used coils (this guy has so many good condition parts for sale, and he always includes the nuts/bolts/screws!)
so hopefully I'll be back in action this weekend

Rotary Enthusiast
Joined: Jan 2005
Posts: 846
Likes: 14
From: hsv al
Quick update: leading ignition coil is dead, and one of the trailing coils is on its last leg.
I drove the car to work Monday and it started running on one rotor intermittently, so i suspected ignition.
upon further review yesterday, the leading coil is dead, and it's been running on the trailing coils only, probably since Sunday night when I noticed some slightly sluggish response and random misfires.
scary. It's also confusing how well the car can run on trailing ignition only, with the plugs sparking through those tiny holes in the housings...
anyway, my guy Jim Thompson is hooking me up with some good condition used coils (this guy has so many good condition parts for sale, and he always includes the nuts/bolts/screws!)
so hopefully I'll be back in action this weekend
I drove the car to work Monday and it started running on one rotor intermittently, so i suspected ignition.
upon further review yesterday, the leading coil is dead, and it's been running on the trailing coils only, probably since Sunday night when I noticed some slightly sluggish response and random misfires.
scary. It's also confusing how well the car can run on trailing ignition only, with the plugs sparking through those tiny holes in the housings...
anyway, my guy Jim Thompson is hooking me up with some good condition used coils (this guy has so many good condition parts for sale, and he always includes the nuts/bolts/screws!)
so hopefully I'll be back in action this weekend
Glad you got it figured out.


Thread Starter
Joined: Jul 2002
Posts: 9,387
Likes: 4
From: Nashville, TN
well I installed the new coils, and same issue 
I verified power going to the coils via the body harness. I need to check continuity for the signal wires, and then start swapping parts I guess.
the leading coil isn't sparking at all, and one of the rear trailing coil fires and dies randomly while the engine is running, and eventually gives up, so the engine is running on one trailing spark plug on the front rotor..
WTF is going on here.
frustration setting in!
Check the coils per the FSM just to verify they are good. Also, is your bracket painted? I've heard it acts as a ground. Not sure about that, but I sanded mine down just in case.
Thread Starter
Joined: Jul 2002
Posts: 9,387
Likes: 4
From: Nashville, TN
update:
my bottom plug at the ECU wasn't fully plugged in, so only a few pins on that plug were making contact.
I plugged it in and it's perfect now.
i'm feeling dumb! but at least I fixed it.
my bottom plug at the ECU wasn't fully plugged in, so only a few pins on that plug were making contact.
I plugged it in and it's perfect now.
i'm feeling dumb! but at least I fixed it.
Thread Starter
Joined: Jul 2002
Posts: 9,387
Likes: 4
From: Nashville, TN
Thread Starter
Joined: Jul 2002
Posts: 9,387
Likes: 4
From: Nashville, TN
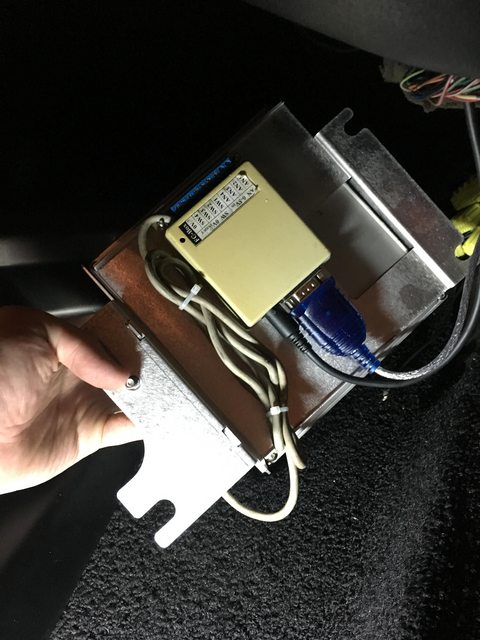
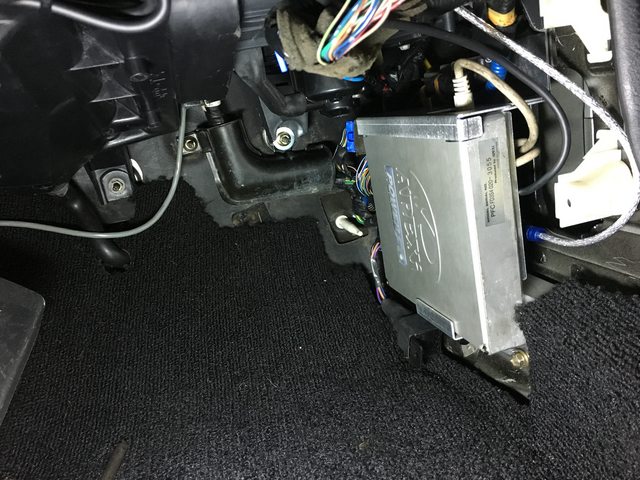
update:
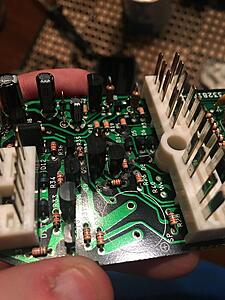
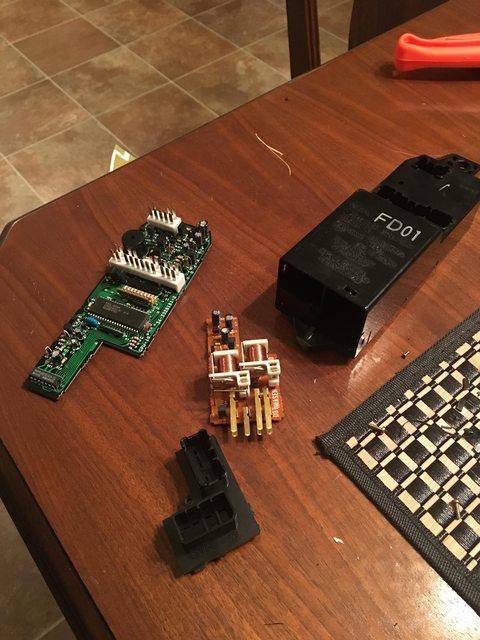
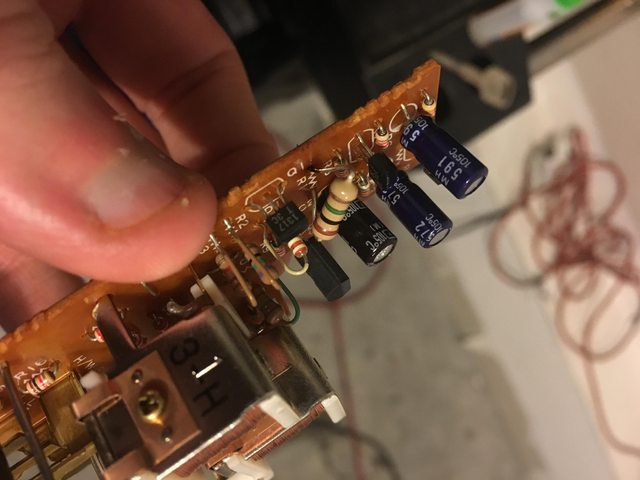
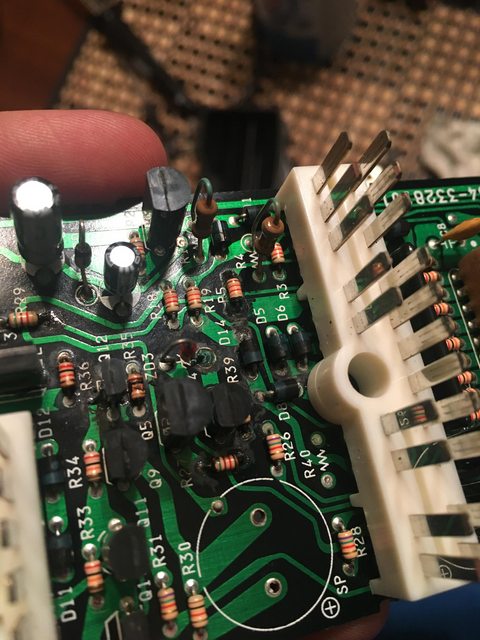
i opened up my CPU#2 in an attempt to do two things:
1. replace the resistor in the flasher unit at the bottom with the 1 megohm 1/2 watt resistor so i can use LED turn signal bulbs and not have hyperblinkers (per the dale clark thread). this is something i've wanted to do for a long time
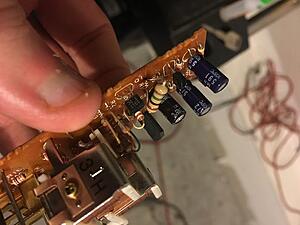
2. replace capacitors on the main CPU#2 board to get rid of my annoying flashing seatbelt light.
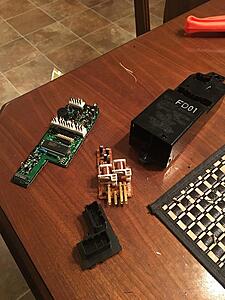
so, task #1 went very well:

task #2 did not go so well:
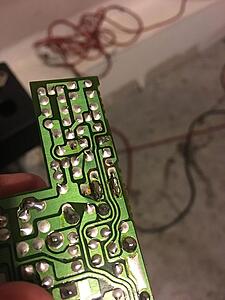
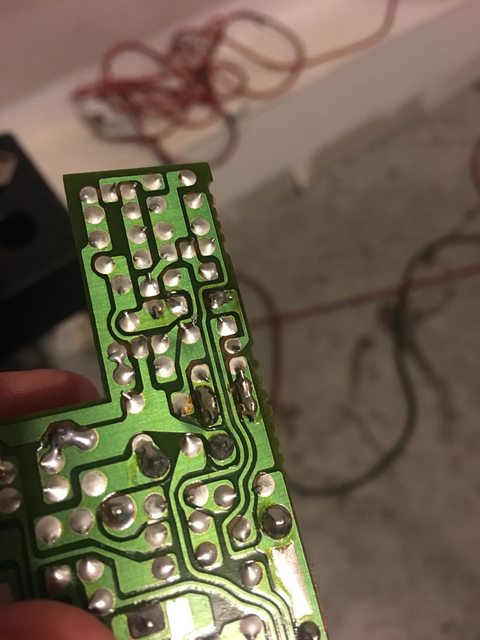
primarily, i noticed a lot of corrosion on the top of the board:
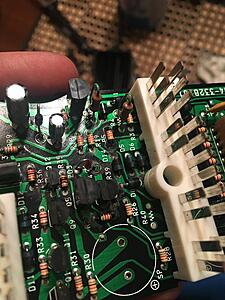
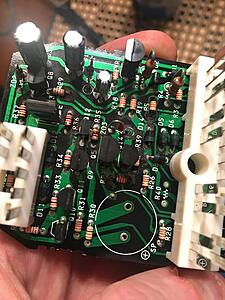
secondarily, i removed the beeper/speaker unit from the board, but put it back in after i discovered you can simply unplug the airbag ECU to get rid of the beeps on startup (pics shown are with the speaker removed)
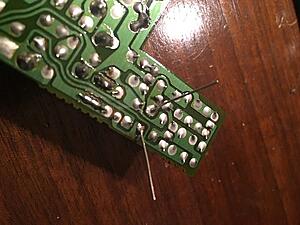
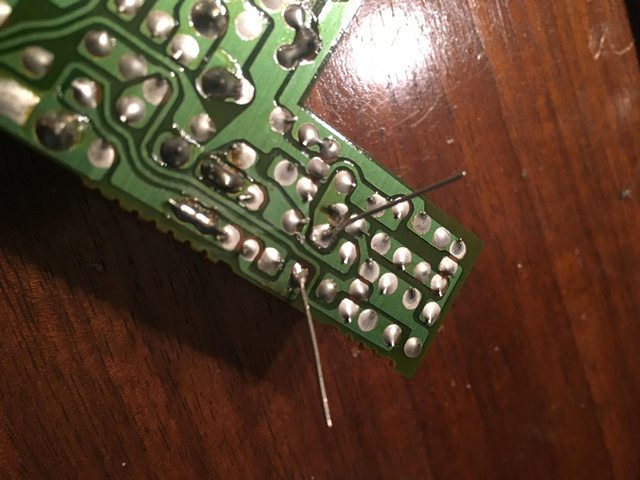
so, when i desoldered the first capacitor i apparently got the board too hot in that spot, and it will no longer accept solder (which i didn't take pictures of)... so i'm screwed and i need to buy a new CPU#2. so, unfortunately, i'm going to need to buy another CPU#2
at least my flasher unit work should be good!
also on the bright side, i can sell kits of capacitors for anyone who wants to replace the capacitors in the CPU#2. i have lots of them...
i opened up my CPU#2 in an attempt to do two things:
1. replace the resistor in the flasher unit at the bottom with the 1 megohm 1/2 watt resistor so i can use LED turn signal bulbs and not have hyperblinkers (per the dale clark thread). this is something i've wanted to do for a long time
2. replace capacitors on the main CPU#2 board to get rid of my annoying flashing seatbelt light.
so, task #1 went very well:

task #2 did not go so well:
primarily, i noticed a lot of corrosion on the top of the board:


secondarily, i removed the beeper/speaker unit from the board, but put it back in after i discovered you can simply unplug the airbag ECU to get rid of the beeps on startup (pics shown are with the speaker removed)
so, when i desoldered the first capacitor i apparently got the board too hot in that spot, and it will no longer accept solder (which i didn't take pictures of)... so i'm screwed and i need to buy a new CPU#2. so, unfortunately, i'm going to need to buy another CPU#2
at least my flasher unit work should be good!
also on the bright side, i can sell kits of capacitors for anyone who wants to replace the capacitors in the CPU#2. i have lots of them...
Last edited by jacobcartmill; Feb 15, 2017 at 11:26 AM.

All may not be lost with your CPU 2 board.
If you can lightly sand down to a healthy section of the copper trace you can solder a wire to it and then solder the wire to the resistor lead. It's not the prettiest option but it works the same as soldering the lead to the trace.
If you can lightly sand down to a healthy section of the copper trace you can solder a wire to it and then solder the wire to the resistor lead. It's not the prettiest option but it works the same as soldering the lead to the trace.
Jacob, did you resolve the voltage issue to the fuel pump? Was it part of the ECU plug that wasn't plugged in all the way. Now I'm worried because I just rewired my fuel pump more or less the same way.
Thread Starter
Joined: Jul 2002
Posts: 9,387
Likes: 4
From: Nashville, TN
yes the fuel pump issue is resolved.
no, I only noticed the ECU plug being unplugged because it stopped sparking. that was unrelated to the fuel. the re-wire fixed the low voltage.
Sorry to hear about the CPU #2. I'm sure they shouldn't be hard to find. Fritz might have several since he parted so many FD's.
Thread Starter
Joined: Jul 2002
Posts: 9,387
Likes: 4
From: Nashville, TN
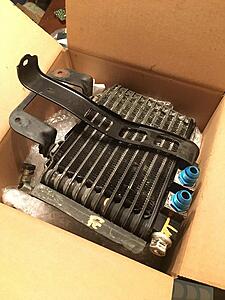
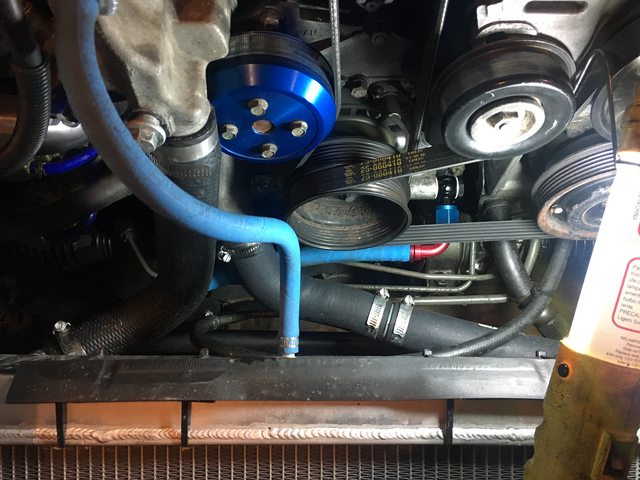
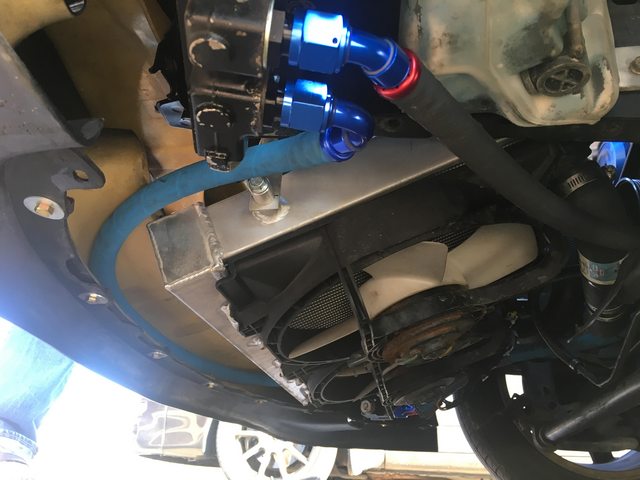
rx8 oil cooler installed.
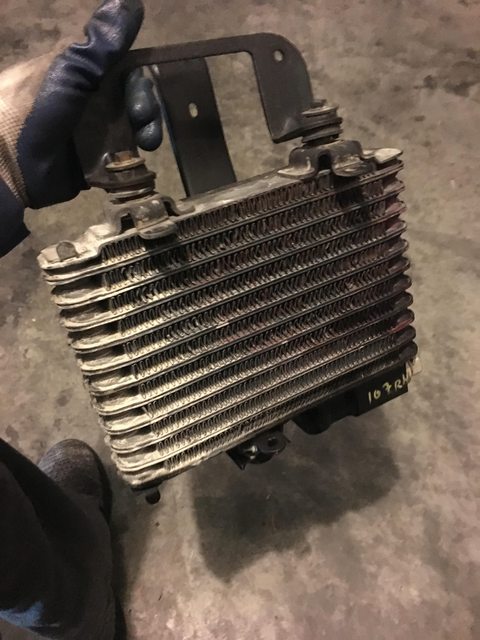
a second oil cooler has been on my list for awhile, so I finally went for it this weekend. I had a lot of 10AN aeroquip socketless hose left over from my SC300 project, and due to the low price of the RX8 oil coolers (which are very similar to the FD coolers, but +3 rows and smaller fittings) I decided to go for it.
I got a used RX8 oil cooler in good condition off ebay for $70, and spent about $250 on fittings. I also bought some dowty seals to use for the adapters on the oil coolers (this is how mazda did the RX7 coolers, and it works well)
now you may think "well I could just get a set of R1 oil coolers for ~$350" which isn't much more (and way less work), and if you can find that deal (the R1 dual coolers are hard to come by) then go for it. this was a lot of work.
work involved:
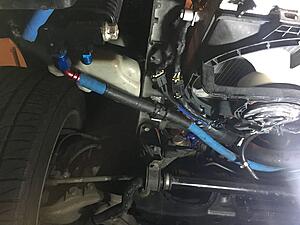
mount the passenger side cooler (requiring two custom brackets)
remove the AC and power steering bracket to remove the stock hard line (there's no way to get it out without taking off the huge AC/PS bracket)
--- this could be avoided if you wanted to re-use the stock hardline, and it would also save you about $50.
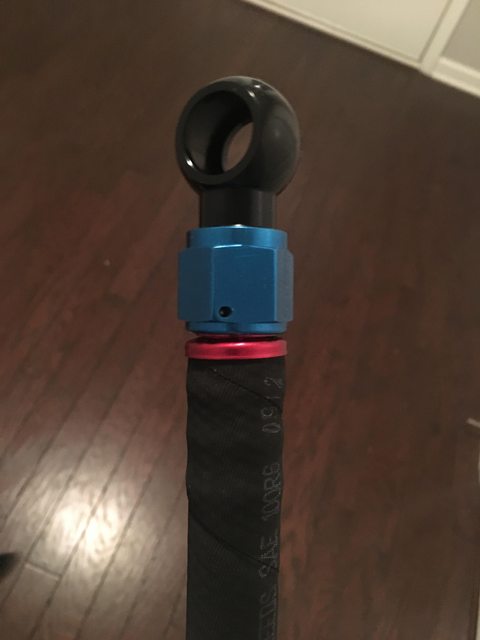
measure and cut all the socketless hose with the fittings in place
build all the socketless lines (I like to put the fitting in the freezer, and put the hose in boiling water for a minute or two)
install and check for leaks
create and install some sort of ducting. I think the stock RX7 oil cooler ducts will work well for this, even though the rx8 cooler is about 2" taller.
the generic parts list is this:
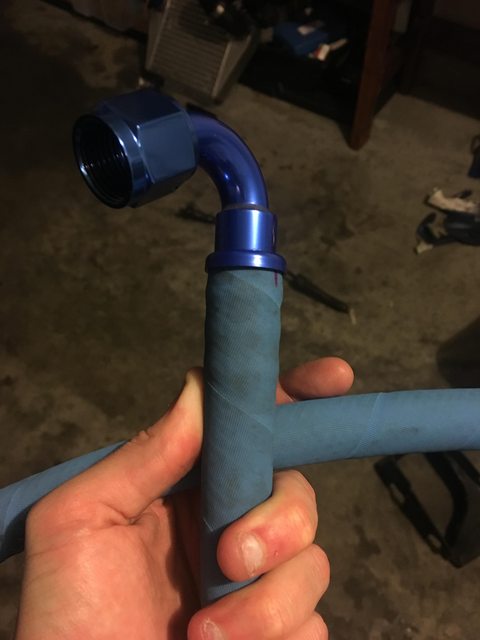
about 15 feet of 10an aeroquip socketless hose (I don't trust other brands with this hose, but the push lock fittings I will - only if I inspect each fitting closely though)
2x banjo 10an fittings (1 for front cover, 1 for rear iron)
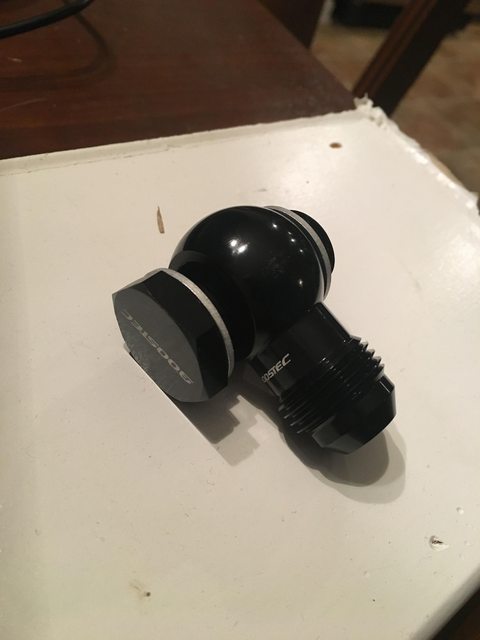
2x 120* 10an fittings (1 for each oil cooler)
2x 45* 10an fittings (1 for each oil cooler)
1x straight 10an fitting (for rear iron banjo bolt mentioned above) -- this one could be done a few different ways. I chose to run my line from the rear iron to come out in the same place the stock one did.
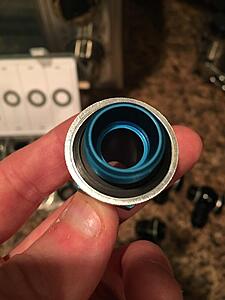
copper crush washers (or dowty washers)
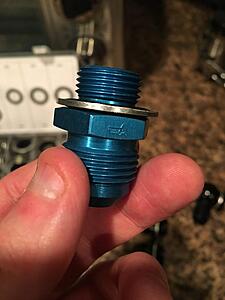
2x M22x1.5 10an adapters (for rx7 oil cooler)
2x M18x1.5 10an adapters (for rx8 oil cooler)
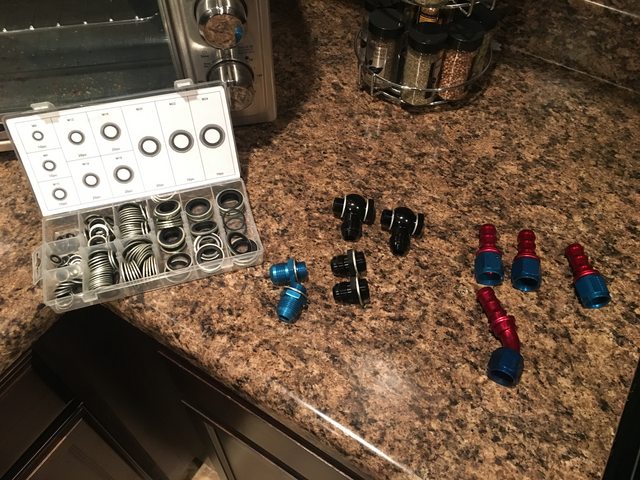
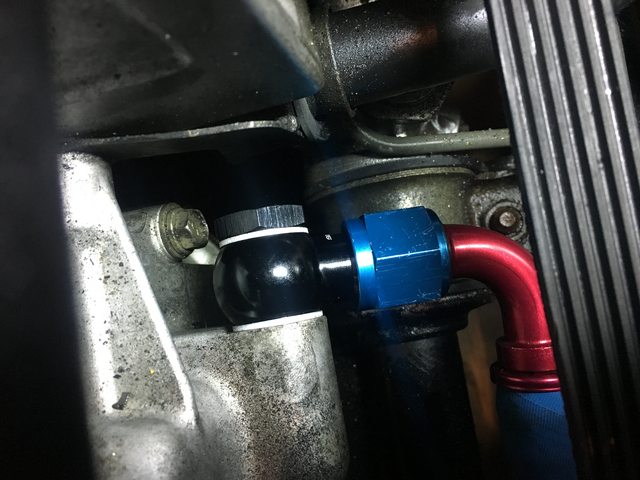
RX8 cooler used and dirty, prior to cleaning it (those are my adapters I had just threaded in to check fitment)

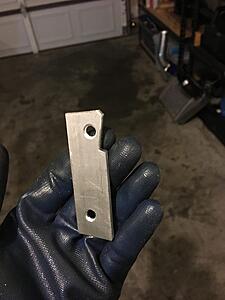
the bracket I had to create to mount the cooler (the other one was the stock rx8 bracket hacked in half) -- sorry, I didn't take pics of the mounting.
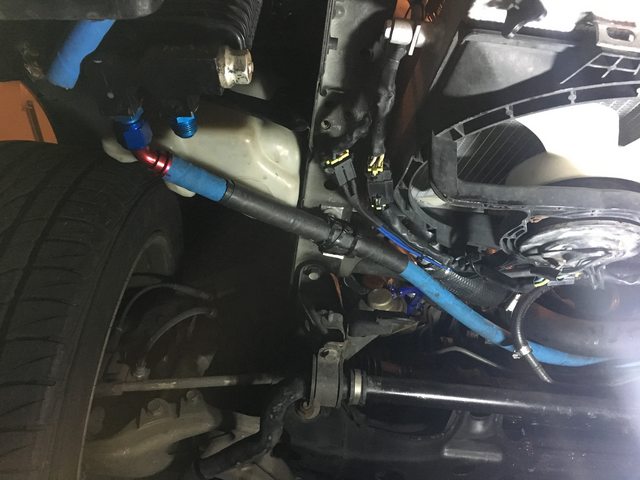
cooler mounted
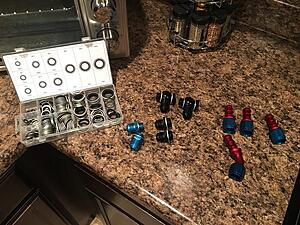
some of the fittings and dowty seals (there are two 120* fittings not pictured here, and two of those straight fittings I had to swap for 45*s)
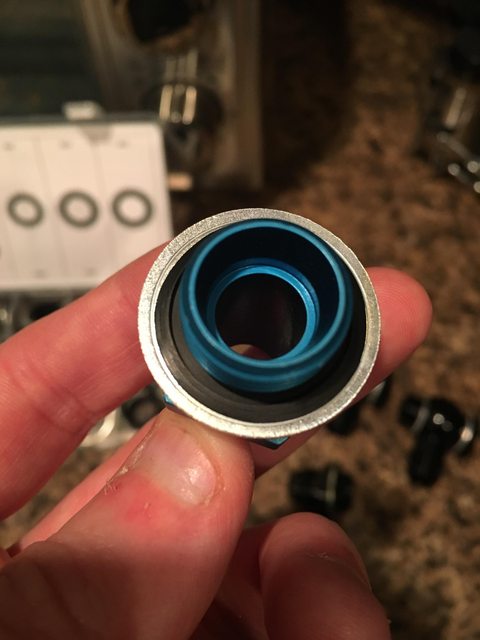
dowty seal on the smaller adapters for the rx8 cooler
assembling one of the lines

first line finished
a second oil cooler has been on my list for awhile, so I finally went for it this weekend. I had a lot of 10AN aeroquip socketless hose left over from my SC300 project, and due to the low price of the RX8 oil coolers (which are very similar to the FD coolers, but +3 rows and smaller fittings) I decided to go for it.
I got a used RX8 oil cooler in good condition off ebay for $70, and spent about $250 on fittings. I also bought some dowty seals to use for the adapters on the oil coolers (this is how mazda did the RX7 coolers, and it works well)
now you may think "well I could just get a set of R1 oil coolers for ~$350" which isn't much more (and way less work), and if you can find that deal (the R1 dual coolers are hard to come by) then go for it. this was a lot of work.
work involved:
mount the passenger side cooler (requiring two custom brackets)
remove the AC and power steering bracket to remove the stock hard line (there's no way to get it out without taking off the huge AC/PS bracket)
--- this could be avoided if you wanted to re-use the stock hardline, and it would also save you about $50.
measure and cut all the socketless hose with the fittings in place
build all the socketless lines (I like to put the fitting in the freezer, and put the hose in boiling water for a minute or two)
install and check for leaks
create and install some sort of ducting. I think the stock RX7 oil cooler ducts will work well for this, even though the rx8 cooler is about 2" taller.
the generic parts list is this:
about 15 feet of 10an aeroquip socketless hose (I don't trust other brands with this hose, but the push lock fittings I will - only if I inspect each fitting closely though)
2x banjo 10an fittings (1 for front cover, 1 for rear iron)
2x 120* 10an fittings (1 for each oil cooler)
2x 45* 10an fittings (1 for each oil cooler)
1x straight 10an fitting (for rear iron banjo bolt mentioned above) -- this one could be done a few different ways. I chose to run my line from the rear iron to come out in the same place the stock one did.
copper crush washers (or dowty washers)
2x M22x1.5 10an adapters (for rx7 oil cooler)
2x M18x1.5 10an adapters (for rx8 oil cooler)
RX8 cooler used and dirty, prior to cleaning it (those are my adapters I had just threaded in to check fitment)

the bracket I had to create to mount the cooler (the other one was the stock rx8 bracket hacked in half) -- sorry, I didn't take pics of the mounting.

cooler mounted

some of the fittings and dowty seals (there are two 120* fittings not pictured here, and two of those straight fittings I had to swap for 45*s)
dowty seal on the smaller adapters for the rx8 cooler

assembling one of the lines

first line finished
Thread Starter
Joined: Jul 2002
Posts: 9,387
Likes: 4
From: Nashville, TN
I don't yet have my oil temp gauge yet (see zada-tech mention a few lines down), but I will be able to verify the lower oil temps maybe two weeks from now when my gauges get here.
this week i'll be installing:
front strut tops on my good condition stock shocks I got from big JEROME DOG djseven
racing beat sway bar brace
new front sway bar end links
tein h-tech springs
j-auto pillow ball bushings
J-AUTO - Bushings, Suspension, Parts for Mazdas
the following week i'll be installing my zada-tech boost and oil temp gauges
Single gauges