When you click on links to various merchants on this site and make a purchase, this can result in this site earning a commission. Affiliate programs and affiliations include, but are not limited to, the eBay Partner Network.
1 of them is not realistically obtainable.
1 of them is realistically obtainable.
The unobtainable car is a Koenigsegg, any Koenigsegg
The other is a 3rd Generation Mazda RX7 FD3S.
For the past 5 years I have been searching local and regional areas and states for RX7s for sale. Some would pop up, wrecked interiors, wrecked paint and body, or poorly modified rice.
Often nice, but automatics, or RHD models. Then one random day in February of 2019 after randomly searching on the local market, I find this black 1993 R1 that was for sale.
I messaged the owner, we met up, and I checked out the car, a month went buy, through texts, a compression test and no test drive due to some suspension damage and other issues.
I pulled the trigger. I was now a PROUD OWNER of what was my obtainable dream car.
My whole life I have been passionate about cars, nice cars, fast cars, American muscle, European supercars, JDM cars, I love and respect all cars.
But what has ultimately always drawn me to the RX7 is their engine. Their SOUND! The Wankel Rotary engine is unlike any other engine on the planet. And the performance they make for their size and design is unparalleled. And out of all options for a rotary powered vehicle, I could have gotten a GSL, I could have gotten an FC.
But I didn’t want to make a compromise. I wanted the best there was that Mazda has ever had to offer.
I wanted the sports car built off of crowning achievement and success of the 1991 Le Mans winning Mazda 787B.
I wanted the pinnacle of organic, analog, mechanical rawness.
I wanted the sexy, sleek, gorgeous lines and timeless body of an FD.
I wanted one of the most beautiful cars of all time.
Jeremy Clarkson once referenced the FD when it first came out, commenting on its aesthetics as the E-Type of Japan.
A fitting analogy I think, being the Jaguar E-Type is considered by many automotive historians and enthusiast as being one of the most beautiful automobiles in history. Enzo Ferrari himself said it himself, that the Jaguar E-Type was the most beautiful car in the world.
To this day the FD will still turn heads on the roads, regardless whether or not if the viewer knows what kind of car it is.
The RX7 is a legendary outcome from the 90's automotive sports car industry.
It is a historically significant and culturally important car in the world of automotive motorsports and ownership. __________________________________________________ __________________________________________________ __
My first goal with the car is to clean, inspect and get it up to fit mechanical operation. This includes focusing on repairs, asses any safety issues, and improve the overall functionality of the car as it is right now
The second goal is to eliminate the color in, and do an overall cleanup of the engine bay.
The third goal is to work on the interior and give it a refresh and restoration.
The fourth goal is to fine tune and further upgrade the suspension to a more modern platform
The fifth and final goal is to repaint the car and add any body modifications that I choose to do.
After that stage the car will be essentially complete and anything else will be additional stuff I choose to do for overall improvements to reliability and for the purpose of modernizing specific functions.
Mainly fuel system, and ECU/power/and wiring systems.
Let it be known, I am starting this thread late. I will be posting here on a weekly basis, including a lot of pictures.
As the car sits right now, in just 3 years, I have completed all 5 goals with the car. I didn’t cut any corners, I didn’t deliberately try to save money.
As for the actual build I did my best to do my research and only use high quality parts and take my time doing things right, and replacing all hardware where needed with new.
I will consciously choose Stainless steel hardware where it makes sense and 10.9 hardware everywhere else. I took my time, I planned and thought everything out. I had a vision, I know what I want with the car, want for the car, and want from the car. And I pursued it with passion, obsession, enjoyment, some stress, and a lot of pride. I fully intend to and am committed to keep this car for as long as I can. To preserve it and maintain it as my own. Forever rotary.
I could not have done any of this without the help from my father, a huge amount of gratitude goes out to him if he ever finds this thread.
Also, a huge thank you to this website, the forum creators, and moderators, track junkies with all their technical information, inspiring me and helping me be able to find answers to my many questions along the way.
The amount of wealth in the information here is truly a blessing to our community of all rotary owners.
Also, I would like to thank all the Rotary shops and vendors online that keep this car alive and thriving with new aftermarket parts as well as direct OEM replacement parts that are No Longer Available from Mazda.
I and many others could not do what we do to our cars without you.
Please feel free to comment, like, subscribe to this thread and ENJOY!!
I am equally thankful for the help I have had from those who have had their part in the car up to this point, mainly Anthony, Adan, and first and foremost, my father.
It feels amazing to finally have it how I've envisioned it for so long
It took me 3 years, with a lot of planning, consuming my life as a passionate hobby / obsession.
The whole thing has been so much fun. And Im not going to lie, it was a little bit stressful at times too.
These are the results of the countless hours spent, and a great amount of care put into this car.
It has been a very personal experience. And it has been my attempt at building a dream car.
Every single one of these cars is special. These cars are functional art in the manner that they evoke emotion and inspiration to many people all around the world. Not to mention they are one of the most exceptional sports cars in history.
It is my opinion that it is all of our responsibility as owners to preserve, maintain and most importantly, enjoy these unique machines to the best of our ability.
So, here is some somewhat interesting history of the car as it is at the time of my ownership.
Chassis currently has 139,000 miles on the
Transmission has 30,000 miles on it - put on over the last 17 years (Complete Overhaul at 106,000 miles by Master Mazda Technician Joe Koch in 2003, owner of The Performance Advantage, in Clarksville, Indiana.)
Engine has about 24,000 miles on it - put on over the last 15 years (Rebuilt by Pineapple Racing in 2004 at 114,000 miles)
Pineapple Racing - Stage 3 Oil Modified
Pineapple Racing - Large Street Port
Pineapple Racing - Water Seals.
Pineapple Racing - Cryogenically Treatment (I actually called Rob and he said, based on memory, at that time it is most likely that the whole engine and all of its components would have been Cryogenically Treated at the same time) He does not do this anymore.
ACT Clutch
Exedy Flywheel
99-Spec Twins and a Power FC with Datalogit and a PLX Wideband/O2 Sensor and Module (PLX SM-AFR) with AFR Gauge (DM-5)
The car was tuned by Christian Krahenbuhl with COBB back in 2009
The previous owner blew a fully built Pettit Racing motor somewhere around 113,000 – 114,000 miles back in 2004 almost exactly 1 year after he bought it in Kentucky.
And he spent December 2004 - May 2005 having the car be rebuilt with the Pineapple Racing motor that is now currently in the car.
Before this engine, there was a Pettit Racing built and Pettit ECU setup with Pettit blueprinted and balanced twin turbos that made 440hp & 384ft.lbs of torque to the wheels
The car was used for drag racing and auto cross.
I have information that the car ran 11 second quarter mile times. This would have been between 1999-2003 in the Kentucky Area
The car as it is now has many parts installed from this owner (Previous, previous owner)
Here is a list of items that this owner had installed back between 1999-2003 and that were/are still in the car at the time I bought it:
•3” Pettit Downpipe, Midpipe and Cat Back Carbon Fiber Exhaust
•Custom valved KONI shocks and Eibach ground control springs set up for drag racing
•ASP racing Large SMIC Intercooler
•Relocated Battery (Behind driver seat in rear bin)
•M2 Cold Air Intake Box
•Kirk Racing Roll Cage
•CRANE Hi-6 Fireball Ignition
•Fluidyne Radiator
•Mazdaspeed Short Shift kit
•RE-Amemiya Aluminum Underdrive Pulleys
•Line Lock
•Racing Beat Front and rear Sway Bars
•KAAZ 1.5 LSD (Unknown if it has a 4:30 Final Drive Ring and Pinion Set or not)
I have information and receipts that the car was brought in for a fuel leak in 2006, a new fuel pulsation damper was installed.
In January 2009, a small engine fire happened. The car was brought in to repair all the damages. The car had 128,000 mile on it at the time.
$6,000 worth of new parts were installed, $3,000 in labor = over $9,000 in total costs.
All work was done by a guy who was an ex-Mazda dealership technician.
Here is a list of items that were replaced and installed after the fire with 128,000 miles on the car
Some of the major new parts included:
• A complete Engine wiring harness
• Fuel pulsation damper
• All 4 new injectors
• Silicone hoses
• Gaskets
• Check valves, 3-way valves, bypass valves
• Solenoids
• O-rings
• Air-control valve
• Fuel pressure regulator
• Vacuum lines
• As well as another Power FC
This means that all of these parts have only 10,000 miles on them. (From 2009)
This is when the last tune was done, after all this work was done.
Dyno was done in December 2009 at COBB tuning with Christian Krahenbuhl.
This was with the new PLX wideband and brand new Bosch O2 sensor, Power FC, and Primary 850cc injectors.
I believe on this dyno the car made 360hp and this is the current tune that is still on the car.
__________________________________________________ ______________
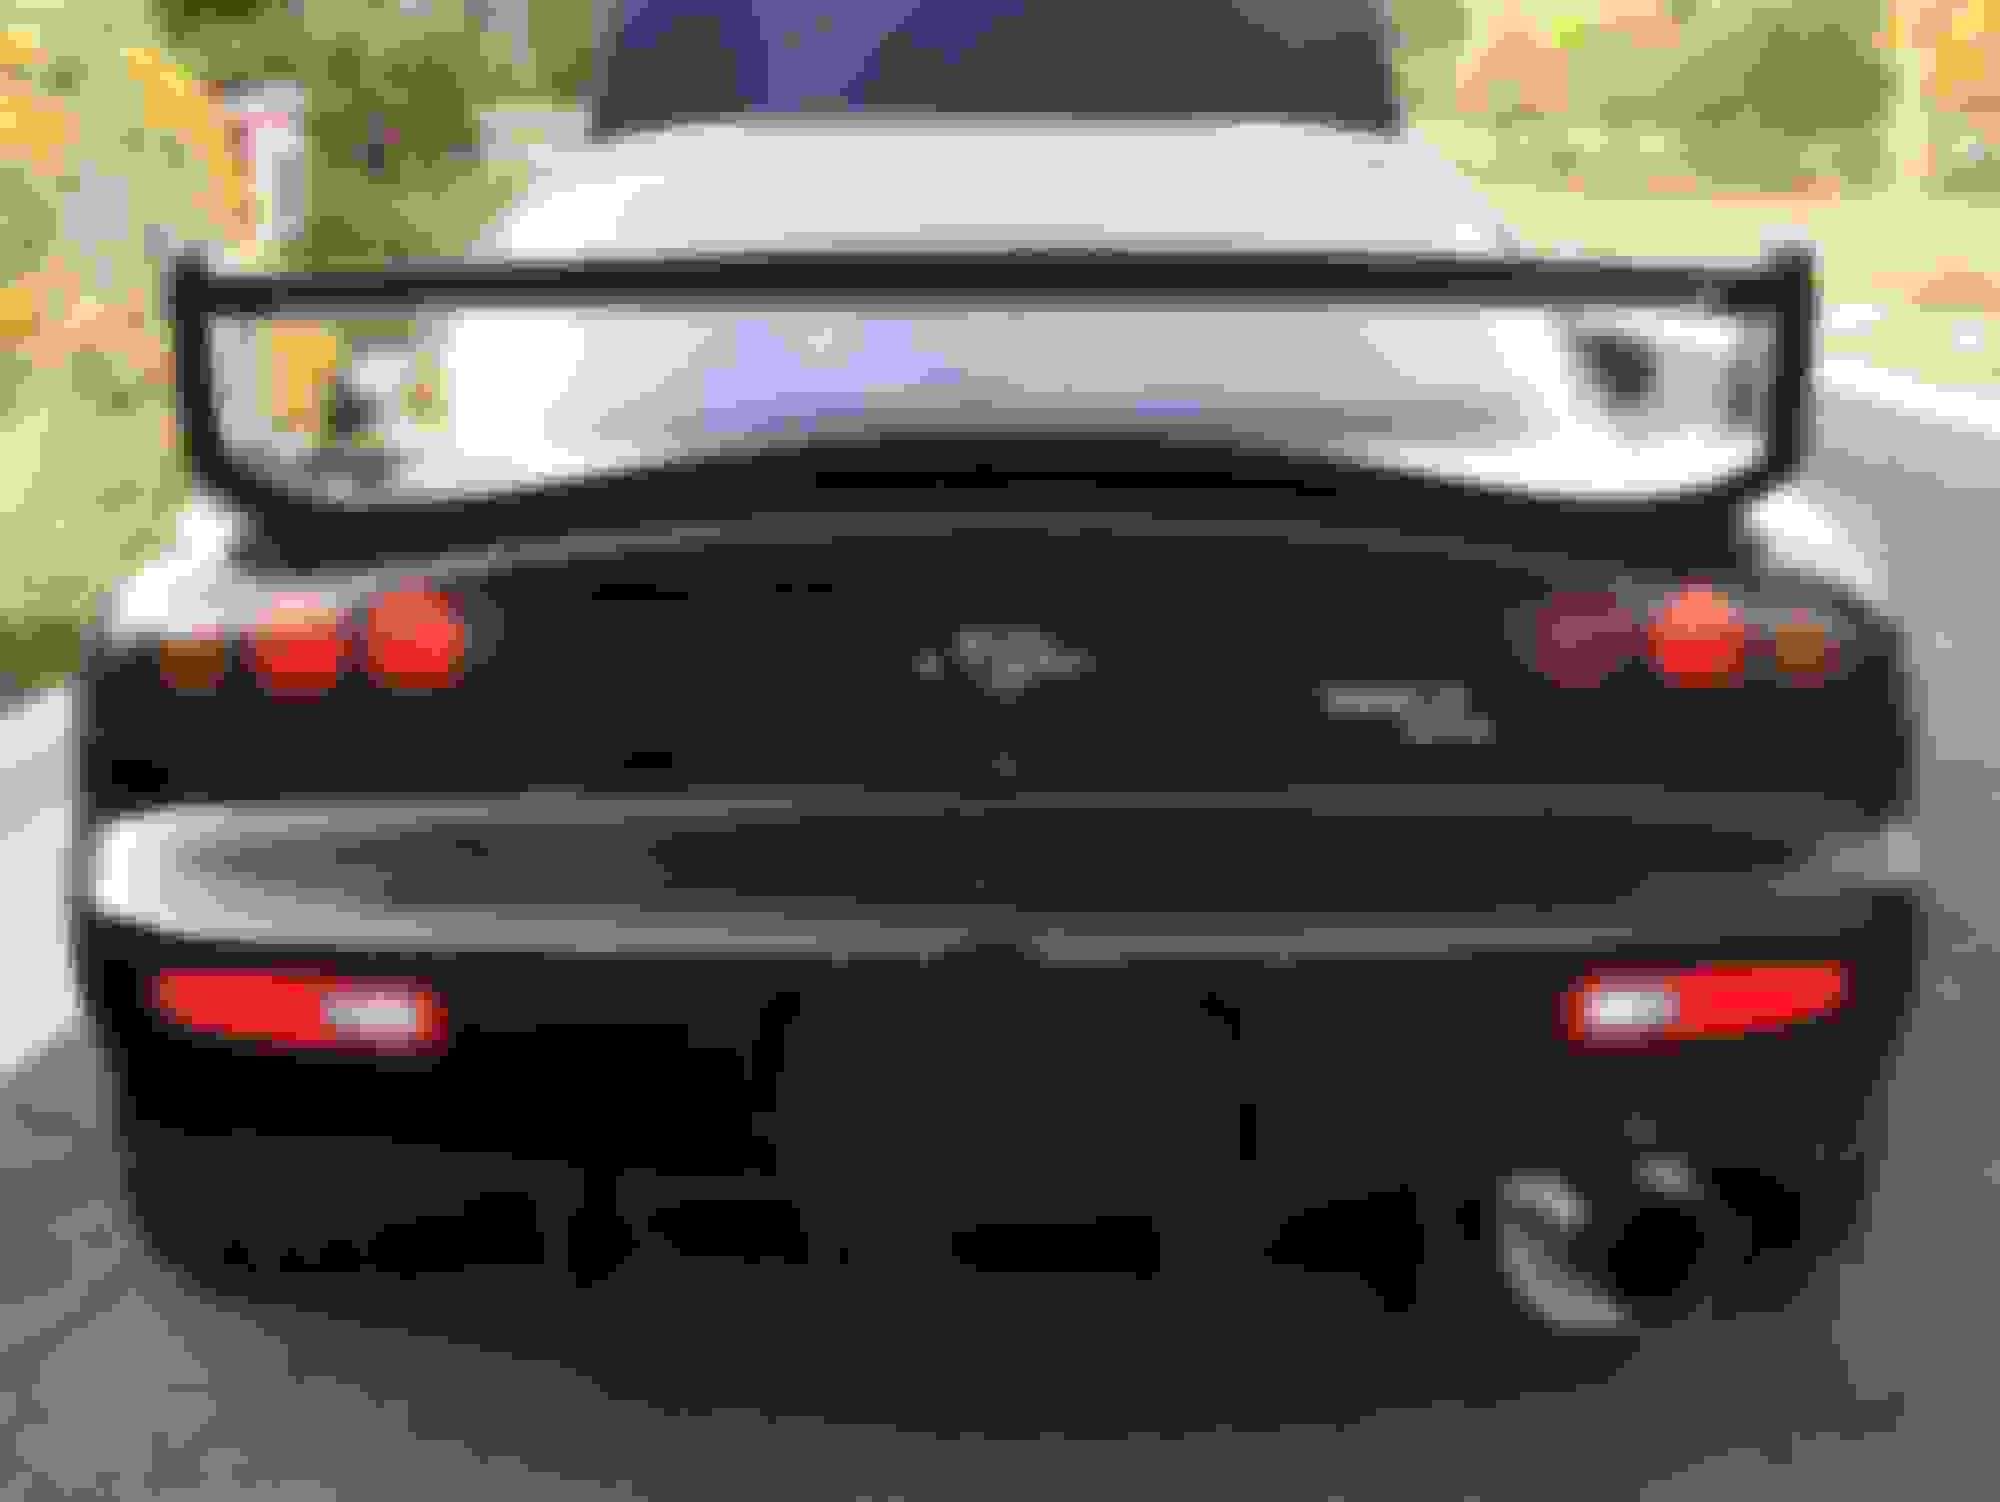
Here are some pictures of the car from the online ad, and at the time of purchasing it
The first step with the car was to get it to start. And fix some immediate issues that are present upon the purchase.
The passenger window was stuck rolled all the way down.
The driver door handle was broken
When you put the key in the ignition and turned the key. The car would just click once and nothing
The car had been sitting in the previous owner's garage for 3 years after he lost control on bald track tires going to fast on an icy winter day...(not smart).
He explained that he spun out and hit a curb directly head on and went into the boulevard. Luckily missing trees and large rocks.
Because of this, the front suspension had been bent up and damaged, the wheels dented and damaged, and the intercooler SPAL fan became dismounted when the clips broke from the impact.
This was the reason why I was unable to test drive the car.
Due to the window being left open, and the hood being left open for 3 years, the car was FILTHY. Dust, pollen, grime were everywhere...
I got to cleaning, DEEP cleaning every inch of the interior. Every inch of the engine bay. Degreaser, hot soapy water, a small detailing soft bristled brush to agitate. Little by little the engine bay got cleaner.
For the interior, Windex and warm water mixed together. A soft bristled hand brush to agitate and then a nice clean dry wash cloth wipe dry.
It took nearly 2 whole days for the interior.
And the engine bay was an on and off process for over a month.
Once the interior was done with being cleaned, I started digging into the car not starting.
Ok, new battery. But wait. I can’t get the battery out of the storage bin behind the driver seat because the roll cage is right above it.
I literally can’t lift it out without completely removing the roll cage. I decided to cut the plastic with the plan of putting it back together. So I carefully made my cuts and made a side door for the battery removal and install.
Ok try to turn the car back on...Nothing... What the heck.
Starter motor? It looks like it’s from 1993...
New Starter - Installed. I try again! ... And again, nothing!
Ok, what is going on here? I go to the forums and find that there is a bypass you can wire in on one of the relays behind the driver side kick panel. I make the little jumper and try to start the car again. ...STILL nothing..
So I do more research, I decide to buy a 50A Banzai Starter Relay kit. It comes, I go back under the car and install it to the starter motor.
I try to start the car again ....IT STARTS RIGHT UP!! STARTS QUICKLY! IT SOUNDS HEALTHY!
I let it idle and fully warm up. The exhaust gas is nauseating and very strong and lingering, I assume this is normal?
I pull the car out of the garage for the first time and give it a nice wash
Next thing to do was figure out what to do with the damaged wheels that came with the car.
They are very nice and uncommon NLA Gram Lights
17x8.5 front and 17x9.5 rears
All while I was waiting for shipping for starters and relay kits, I found a local shop that did custom wheel repairs and powder coating.
I take the wheels in to this specialty wheel shop. They rebent them back into shape, rebalanced them, and powder coated them gloss black for me. I was amazed at how well they were able to salvage them.
Although I also paid alot for the service, I would do it again. I love these wheels, and I think they look amazing on the car. And the fact that they are NLA and now customized, makes them even more special.
Next was to pick up 4 new tires. All old rubber went in to be recycled. I went with Yokohama S-Drive 45/225/17 for the fronts and 40/275/17 in the rears.
I also had this arranged during the time the wheels were in the shop being repaired and worked on.
Also picked up some nice looking RAYS hub wheel caps for the wheels!
Looking back at this decision, I would have gone with something else, but these are good enough for street use only I think.
Also the price was right, and tires are consumables.
At this point I also took apart the driver door panel and installed a new window switch in the door plastics. A simple clip clip wire disconnect and reconnect and your done.
I put the door panel back together and just like that the passenger window is now in operation again!
That same night I took off the door handle trim and dissassemled it using information on this forum, and put in an aluminum handle. Cleaned and greased some moving parts and reinstalled the whole thing.
I now have working doors and windows!
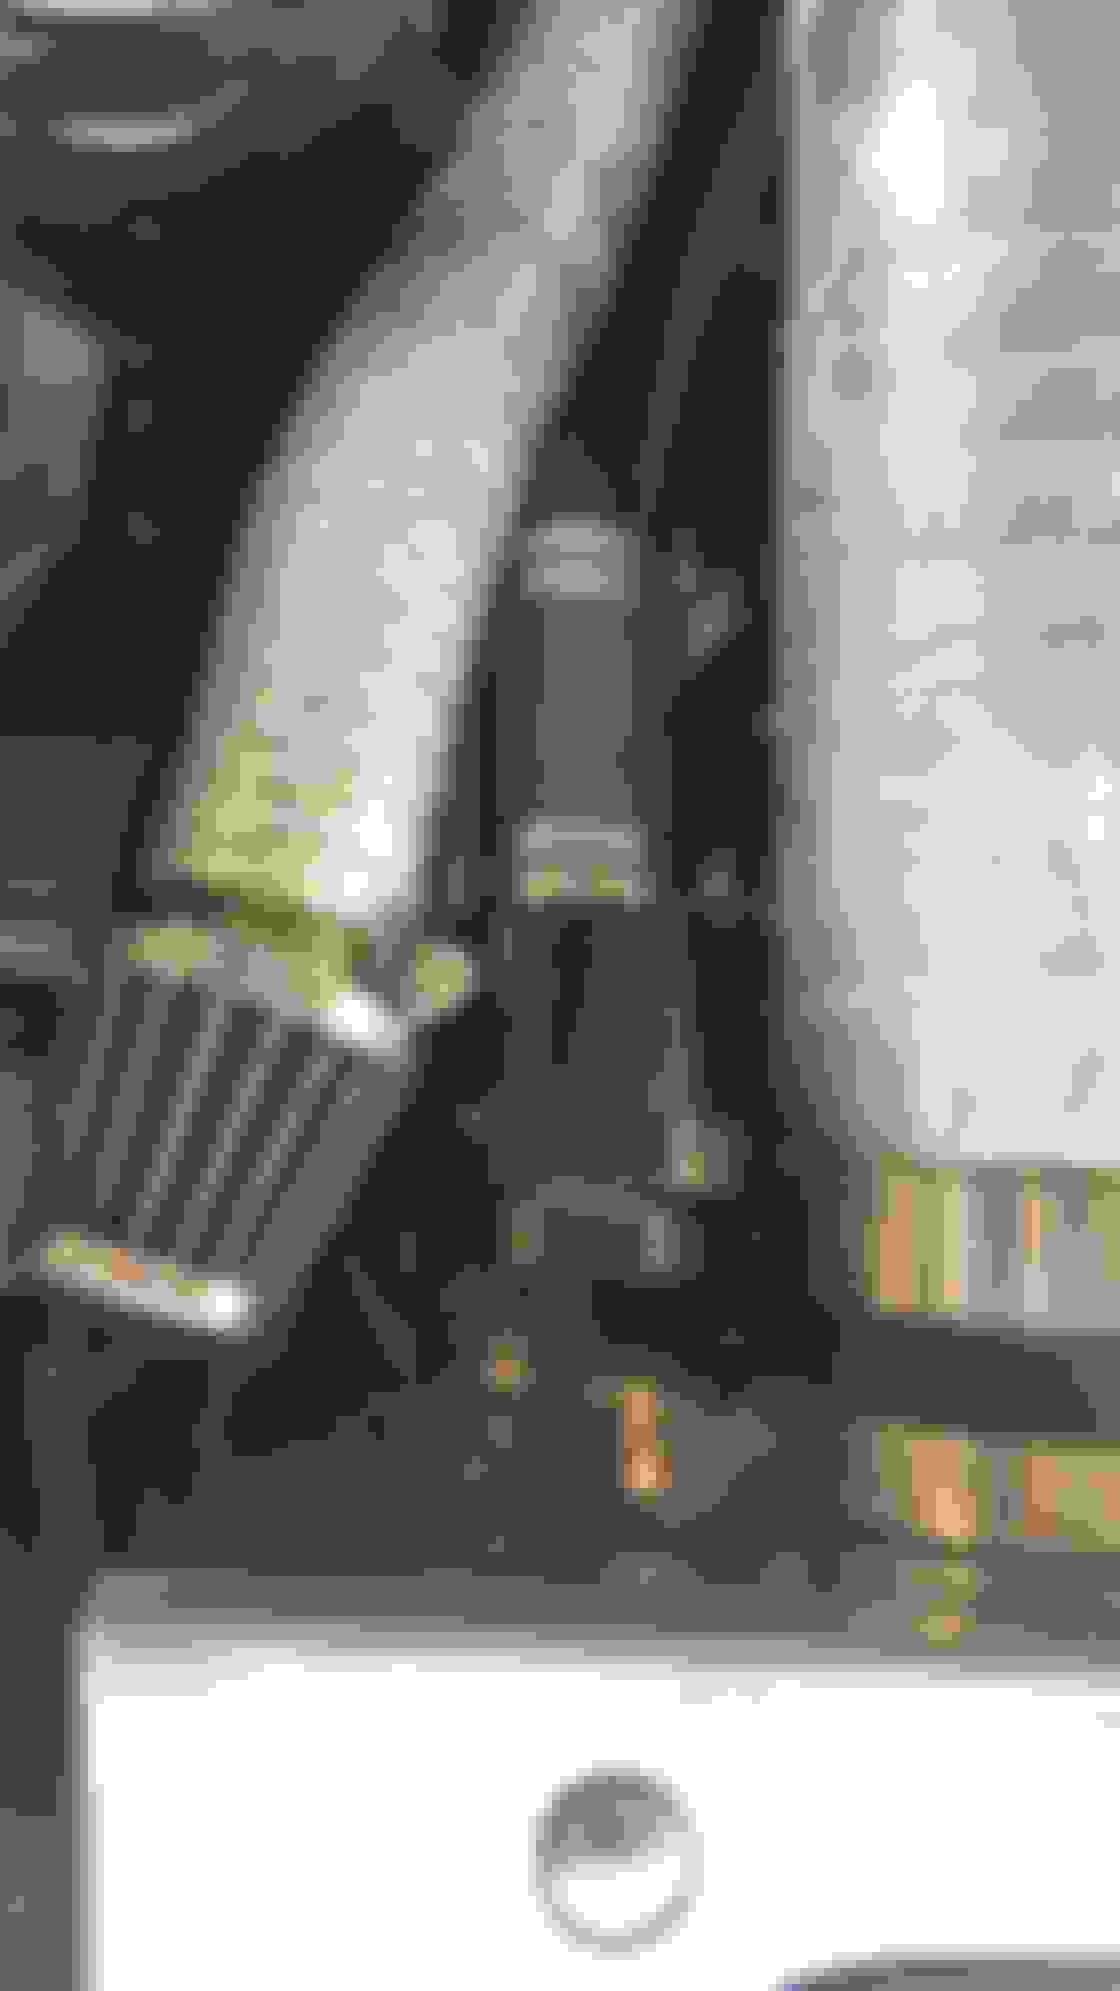
A few other things needed to be done immediately, the airbox was in need of some adjustments, the old intake pipe insulation was falling apart, the brakes needed service, and the suspension was still damaged.
So I got after it. I bought new suspension parts that were damaged, I took apart the airbox and made some improvements to everything, I also installed a new BOV from Pettit while I was at it.
The amount of dust everywhere is unreal…
The airbox after being polished and lined with heat shielding
The air box came with a lid, but how it wanted to sit in the car, it wouldn’t fit with the air filters on.
So I cut out a little window for the filter to comfortably stick out of to be able to fully seat the air box lid back on
I know a lot of people don’t run air boxes under their hoods, but I am a firm believer in science. And the science says they make a big different in Air intake temps.
Someday if I go single turbo, I will probably make a cold air intake airbox for that setup too
The new BOV from Pettit Racing.
I like that it’s a direct OEM replacement for the Twins
QUESTION: Can I buy another one and use it to replace the other brown CRV valve in the back!?
So awesome to see that you got your dream car and immediately started making it the best representation of your dream you could. Can't wait to follow your progress!
Next on the list was to clean up the brake calipers. I went with a high temperature brake caliper paint. It went on thick and I used a brush. But first I needed to hammer everything with a wire brush.
I did all 4 calipers and had enough paint left over to wire brush and paint the wheel hubs and brake disc guards as well! This really improved the aesthetics of that whole area after the wheels go on.
I chose black
Around this time, I also picked up some OEM brilliant black touch up paint and painted some of the areas next to the fenders inside the engine bay.
As well as adding silver paint to a few other components that looked like they needed it.
I also took the hood off, painted the underside of it in OEM Brilliant Black and adding my own little flair with heat shielding.
While the hood was off I decided to also throw some black nylon cable sleeve around some of the ugly red vacuum hoses.
This really helped dress up the engine bay
At this time I also bought Improved Racing's Adjustable Front Sway Bar End Links and AWR Reinforced Sway bar brackets to address the suspension damage.
Now that the car has new tires, repaired wheels and starts with the turn of the key, it is time to bring it in to a nearby mechanic shop to have them replace the new suspension parts and do some much needed maintenance items.
I schedule to bring the car in and bring in a haul of stuff for them to replace.
The list of items I made up for the shop looked like this
-Change motor Oil/filter
-New Sparkplugs (All 4)
-Coolant flush / burp - Add new coolant
-Fix the SPAL fan and re-mount to intercooler
-Replace all silicone couplers on intercooler plumbing
-Replace the damaged FRONT left and right sway bar end links
-Remove and replace new pulley kit and associated serpentine belts
-Replace trailing and leading spark plugs on both front and rear rotor housings
-Install front and rear brake pads and bleed/flush lines and add new brake fluid DOT-4
This shop is a V8 specialty shop and the dudes who work there are just all around phenomenal technicians. However, they don’t know anything about rotaries and the reason for bringing the car there was because they are good, affordable, and very very close by. They completed all the work as requested and did an overall and thorough inspection on the car. Some of the things they noted were:
-Oil drip pan gasket is leaking - Recommended a engine pan brace and new gasket maker.
-Manual Transmission Oil – Good
-Rear Differential Oil – Good
-Rack & Pinion assembly & boots – Boots are worn and need replacing
-Wheel Hubs – Good
-Inspect front suspension assembly for any major damage - Visual inspection looks ok
The Power plant frame is cracked and needs replacement, Fuel filter was located up high above the rear differential. And it was decided to be replaced at the same time as the replacement of the power plant frame.
The intercooler was not mounted properly and just floating. They mounted the intercooler and secured it more professionally. Also the intercooler piping is not ideal, the fitment was not perfect. Could have been done better.
Rear End Toe links are loose, and the alignment was held off for another time.
The emissions equipment was pretty much all removed. The ERG sensor (removed) which gets wired up to the air pump (removed) and the PCV sensor is also missing.
Along with the Catalytic Converter on the downpipe and the Catalytic Converter in the exhaust system.
Coolant was found leaking off the front passenger side of the engine. As well as leaking from the radiator hose.
The oil leak coming off the drip pan was identified as minor. They recommended doing all this work all at once, preferably at a more rotary oriented shop.
Under a guy who knows more about them…This is genuine hard to find HONESTY folks.
They also mentioned that the tune is suspected to be a little bit off. And was recommended to be looked at by someone who knows how to use the FC-Datalogit platform.
Front calipers were not able to be taken apart enough to replace the new brake pads, the pistons were stuck closed, and new calipers were recommended.
The belts had to be specially ordered, a unique belt is used on the water pump to alternator. A bulk order of them was recommended.
Rear toe links - identified as completely shot
Wheel bearings were identified as being loose, but there was no follow up on this….
So with that, its time to take the car home.
I let my dad drive the car home. It’s about a 2 mile drive. Very close
On the way home the car had an alarm go off and started overheating. And I smelt the smell of hot coolant.
We baby it home, the water temps went over 250F on the gauge, and oil temps were ok.
We get it home and pop the hood and let the radiator fans run.
Once the car has cooled down enough, I opened the radiator cap and notice there is no coolant to be seen.
My guess is that they didn’t burp the coolant and there wasn’t enough in the car to be cycled once the thermostat opened.
We continue to pour in another entire gallon of coolant in the car and let it cycle.
The car at idle sounds and runs better than ever now.
My dad joked and said it probably helped the car burn out all the carbon built up haha.
I think it’s just the new spark plugs and oil.
Overall, I’m not sure how much consequence this overheating had on the car. But it was for very short period of time and we did not beat on the car. And looking back at it now, I think it had very little effect on the engine. Although, it should have and could have been avoided all together if we pulled over immediately once the low coolant alarm went off. My dad even asked what the noise was, and I had no idea. We didn’t figure it out until after we got home. This was an event that was the result of pure Ignorance all around. From the mechanic who did the work, to my dad not seeing the alarm light up on the dash, to my own fault of not checking the coolant levels before leaving the shop on our short journey home.
So...Time to shop around for a few parts, and time to find a rotary competent shop to bring the car to, to do more in depth work on the car.
The next day I took the car out for a short drive. It is so fast. Makes you feel weightless when you get into the throttle.
While driving the car back home it completely stalled when I pushed in the clutch and shifted into neutral. I had to pull over by coasting and restart the car on the side of the road.
Strange.
Also the alignment was waaaay out of whack. The steering wheel was turned hard to the right when you were going straight down the road.
And the car pulls hard to the right when you let go of the wheel, as well as under braking.
After getting the car back home, I continue to clean and paint more engine bay parts.
Here is a picture of the water/coolant filler neck after being painted black with some high temp paint.
My goal is to eliminate all colors. I only want to see Silver or Black.
I started on cleaning the underside of the car, including cleaning and painting all front and rear, upper and lower suspension control arms, tie rods, wheel hubs, wheel wells, and the Racing Beat sway bar.
I also sanded and painted the OEM front strut bar, the results turned out soooo good. But for now it will stay off the car.
Here is a shot of the rear lower control arms, Left side is cleaned and painted, right side is not.
While I was around the area, I checked out the springs on it.
FRONTS are 12.5kg (700lbs)
REARS are 6.8kg (380lbs)
No wonder this thing SQUATS!
QUESTION: Is it common for the spring ratios between the front and rear to have that drastic of difference in stiffness?
The cracked PPF...
Not exactly a small crack, this thing is basically completely split in two!
Fortunately, I was able to find a seller in Canada who had a RE-Amemiya PPF for sale.
This piece is much more reinforced over the OEM PPF!
It arrived yellow, and was a little rusty in a few locations.
I brought it in to get sand blasted and powder coated in aluminum silver.
I also to pick up the Banzai Racing Transmission cross brace and their Rear Differential brace, as well as a Oil Pan brace kit from them.
Bought some SPL Titanium Series Adjustable Rear Toe Links and some Himni Racing Polyurethane motor mounts.
And decided on getting SakeBomb Garage's dual 25 row oil cooler kit - Which will add 50 Rows of oil cooling goodness.
Its hard not to notice how the OEM oil coolers are all bent and beat up.
Oh yeah, and 2 refurbished front brake calipers, pistons, and a rebuilt kit from Atkins Rotary, which I immediately sanded and painted and rebuilt once all received.
And with that, the car is getting close to being scheduled to be brought into a local rotary shop for some major work!!!I
Was that PPF always missing the bottom bolt? If yes, that may have been what caused it to crack in the area it did.
Yeah, that bottom bolt was gone when I got the car.
Also, the car had wheel hop, when I went to test drive it right after getting it home from the shop. Even under low speed acceleration.
After calling around to a few places and asking for a recommendation on the local Rotary Facebook page, it was finally time to bring the car in to a local rotary expert.
I scheduled a date and a tow.
Here was a list of work to be done on the car.
� Install new Dual Oil Coolers
� Repair Oil Drip Pan Leak
� Install Oil pan brace kit
� Install New Polyurethane Engine Mounts & Steel driver side engine mount arm
� Install new Oil Filter pedestal (Banzai Racing)
� Replace Power Plant Frame
� Replace Fuel Filter (N3A1-13-480)
� Install Transmission Cross Member
� Install Differential Brace
� Replace main radiator coolant hoses
� Install Left & Right Rack & Pinion boots (FD02-32-125A)
� Replace Rear End Toe Links
� Install new Left & Right front brake Calipers and brake pads
_____________________________________________
-Inspect car for power steering leak
-Inspect car for oil leak
-Inspect car for any coolant leak
-Inspect car vacuum lines
-Inspect car for any boost or exhaust leaks
-Perform a Rotary Compression Test
Anthony was the man, the myth and the legend who did all the work.
Massive shout-out to him on all the information he gave me. As well as the highly qualified and quality work he did.
I stopped by the shop a few times and was fortunate enough to get some good pictures of some progress and some underneath the car shots.
Turns out my car has SOLID REAR DIFFERENTIAL MOUNTS?? Nice nice!
NEW PPF, Banzai Differential brace installed
New Permatex gasket maker, oil pan brace and studs installed
New polyurethane motor mounts, transmission cross member brace installed
Old vacuum lines pulled out and replaced
As well as some old check valves
Old dual oil coolers, and more useless emissions junk deleted.
The Banzai Racing block off plates came in handy in more than a few places!!
FD gang gang!
While everything was apart I decided to stop by the shop to clean and polish up the Intercooler and I ended up taking the AST home and give it a good sanding and polishing before reassembly. The results turned out good!
I brought it back the next day for the car to get all put back together.
A day later, I got a text to come pick up the car and go through the spot test on the dyno.
Overall, I was told by the shop owner that Anthony spent close to 80 hours on the car, combing through everything he could.
He said that he went through every vacuum line one by one thoroughly to make sure everything was solid and in good condition.
_____________________________________________
ROTARY COMPRESSION TEST Results:
- Test done with a RotaryCompressionTester.com Meter - All numbers where adjusted & corrected for temperature & elevation
Compression Test Results - 10/2019
Bank 1:
a. - 8.8 (124psi)
b. - 8.8 (124psi)
c. - 8.7 (122psi)
Cranked @ 250 RPM
Bank 2:
a. - 8.4 (119psi)
b. - 8.8 (125psi)
c. - 7.4 (105psi) < Anthony said this reading might just be a stuck side seal or something.
Cranked @ 203 RPM
_____________________________________________
-Power steering leak - none found
-Oil leak - At Pan - Fixed - Cleaned, resurfaced and resealed pan
-Coolant leak – small leak on passenger side - bottom of radiator
_____________________________________________
Additional Work Performed:
� Replacement of PCV Valve (Positive Crank Case Ventilation Valve) (N3A1-13-890)
� Replacement of Gaskets for the Turbo Oil lines
OEM Mazda oil drain tube gasket (x1)
OEM Mazda oil drain tube gasket (x4)
� Replacement of missing bolts as needed
� Clean and remove rust from all bolts as needed
� Clean and degrease the sub-frame
� Tapping and rethreading of any needed bolt holes
� Bleed the clutch lines
� Bleed brake lines
Motul RBF600 Brake Fluid Synthetic DOT 4
� Re-route and replace fuel lines going to fuel filter (Slight Fuel Filter Relocation)
� Removal of, and sealing of all Air Pump accessories
� Removal of and sealing of the twin throttle, its actuator and vacuum line
� Removal of unneeded vacuum lines
� Replacement of (two or three) broken, cracked vacuum lines (with Vibram silicone hoses)
� Replacement of old or worn coolant hoses going to AST
� Replacement of Passenger side brake line
OEM Mazda Tie Rod End Dust Boots (x2) (B455-32-279)
OEM Mazda Front Right Brake Caliper Pipe (x1) (FD01-43-710A)
� Replacement of Upper Intake manifold with custom PTFE Teflon gasket
� Replacement of upper throttle body O-ring & Gasket
� Replacement of Acorn nuts on Upper intake Manifold, Throttle Body
� Rolled all 4 Fenders
� Smoke Test for boost leaks – Found a few small boost leaks at TPS side of throttle body and one at the Primary (Rear) Turbo inlet pipe Gasket
-Found a major exhaust leak at the gasket in the catback exhaust (This was why the cars exhaust smell was so bad, that and old gas, he said)
During the spot test on the dyno, I was the most nervous and excited in my life that I have been in a very long time.
A mix of fear and joy at the same time.
HERE WE GOOOO
The first pull the car blew the O2 sensor off the mount and we had to stop to reattach it. This car is LOUD when she is at full throttle
The tuner got out of the car to fix the O2 sensor mount and commented �Dude, this thing rips!!�
We paused for a moment to reset the dyno for a second pull. We all agreed to take bets on how what numbers we would see from the car based on its modifications.
Anthony said 325hp
The tuner of the dyno said 380hp
My bet was 350hp (The previous owner advertised the car as being 360hp)
Second Attempt!!!
The car made 392 to the wheels at 7000 RPM and 330ft. lbs of torque at 5600 RPM on a mix of fresh 100 octane SUNOCO race gas and 3 year old pump gas.
These results are from a Mustang dyno with adjusted numbers for corrected altitude and temperature.
I was one happy dude. I am the owner of a 400hp FD RX7.
We were all very impressed with the numbers as it was higher than everyone�s guess.
Anthony said the car is most definitely ported.
I wondered how much of the dyno results are directly related to the stiffness and additional reinforcement added to the drivetrain with all the recent bracing, new PFF and motor mounts. Reducing drivetrain loss to gain numbers on the dyno by creating a more direct transfer of power to the wheels might explain something.
AFRs were in the 11�s at first but then jumped up to mid 12�s at the higher RPM range.
The max boost made was 11.8 psi
The tuner and Anthony both said I was on a little bit of the lean side.
But at the same time, the tuner knew the guy who created the maps on the car and said that he knew what he was doing.
We talked about if there may have been voltage being cut to the pump, or if I ran out of injector or if it was a combination of both
Maybe it was just the tune.
The tuner recommended that I run the car with 100 Octane only to be on the safe side.
And Anthony said to watch my fuel tank levels if I am out driving aggressive.
Bringing her back home
I feel much more confident in the car now, and I know alot more about the car now than I did before.
Congratulations! Man that was a good read, and loved your comparison to the E-type.
Looks like you got yourself a solid car that was built correctly. The small repairs you're doing will go a very long way since the core of the car, the most important part, is solid.
With the car back home, it was about this same time I had finally had figured out and decided on what body aesthetics I wanted for my car.
About $2500 later and a several months of waiting on the order, I get this huge box from Shine Auto
I cannot say enough about Shine Auto. It was nothing but a good experience doing business with them. I highly recommend their products.
Loving the look of the new dual oil coolers.
As well as their greatly improved function over the factory ones that were close to 30 years old.
After thinking about the AFRs from the dyno earlier, I figured it was maybe time to read about fuel and voltages.
Turns out it seemed like an easy little task but to this day, it was probably the most difficult thing I struggled with. All half bent over and super tight working conditions, trying not to damage any of the 30 year old brittle plastics and wires... It was super stressful!
While doing this mod, I noticed that my yellow 80 amp main relay (JE16-18-811) and the green main relay (NF02-18-821A) were flip flopped!??
I wondered if this had any effect on the AFRs on the dyno, as well as how long it had been like this. Could have been close to a decade if not longer.
Of course, I flipped them around before closing everything back up. Fingers crossed.
Also around this time I tried the old cheap bastard trick with the clutch switch, as it may be one of the reasons why the car was stalling sometimes on deceleration.
Good god look at this spring!! It is in like 6 pieces! hahahaha
Not too sure if it fixed the problem or not, but at least the spring wasn�t in 6 pieces anymore!
One of the last things I did before putting the car in for winter storage was invest in some fire protection.
I liked the idea of a non-mess gas that can be safely used.
I drilled and tapped the holes for the mount directly into the roll cage.
It turned out pretty solid and I think it looks cool to be visible through the windshield like it is.
I also cut and added some black foam rolls to the roll cage with some zip-ties for a little safer interior
My first goal with the car is complete.
And all just in time
The weather is getting colder and colder, the days are getting shorter and shorter.
The time has come to bring the sleep for 6 months
It�s been about 6 and a half months since the car was put into storage for the winter months.
We are in the middle of a global pandemic
I have been temporarily furloughed from my work. They say it will be about 3 months.
That means only one thing..
TIME TO GET TO WORK ON THE RX7!!
Headlights up!
She�s awake�and very dusty
A Nice spring time wash right after getting the car back home
Goals for this year are fix the small boost leak on the rear secondary turbo inlet tube as well as the exhaust leak at the catback.
But the main focus is going to be on getting the interior all restored and refurbished.
As well as installing a few extra goodies that I picked up over the winter months. (Mostly interior bits)
The interior as it is on the car when I bought it is actually one of the main reasons why I ended up buying this car in particular.
I wanted a black car with black interior. I also wanted a mostly complete interior. I knew about how expensive and impossible to find some of the interior bits have become on these cars. And I have seen how common it is for most interiors in FDs to be somewhat if not completely trashed.
I was very lucky to have found this car with the interior as it is. The only thing it was missing was the rear plastic covers that go over the toolkit and spare tire jack in the back. The reason I suspect is due to the Kirk roll cage in the back that took up that space.
As you can see here.
Other than those pieces, the seats are sweat stained and turning purple as they have faded over the past 30 years.
The carpet was brand new from when the Previous, previous owner sold the car, to make it more presentable.
Whoever did it, did a great job and it is still in great condition.
All the plastics in the hatch and accessories are in great shape and scratches are minor.
The biggest eyesores are the front dash plastics and the door panel plastics.
I found this thread and bought a bunch of products to help me do it right
Here are some pictures of the interior as it is now, before we start.
A few small things I picked up in the previous year were the Power FC holder from Banzai Racing and the Arm Rest cubby insert to replace the ash tray that came with the car.
As you can see from a glance it doesn�t look too bad. But once you get in the car and it�s staring at you right in the face, you can tell there are some pretty severe scratches on the front center AC bezel, and the paint is peeling off the center shift console plastics as well.
Also the boost gauge is probably from 1995. Super crusty, and faded. And it stares you right in the face. It needs to go
I took this picture right after I installed the JDM arm rest/flap in replacement of the nasty old cigarette coin holder ash tray slider thing
LRB! Perfect fitment. A very nice product.
I put some trim foam around the edges of it on the bottom to reduce some metal on metal vibration.
I also rattle canned black the spare tire area to freshen it up a little
Here are some Japanese good luck charms from Japan.
The wooden one is a "Safe Travels Prayer" that was bought and blessed at a temple in Kyoto and given to me by a very close friend who visited Japan.
The black one is a Omamori amulet that was hand made in Japan, I bought it at Tokyo Hanada Airport at a gift shop specifically for the car.
Before we get too far into the interior restoration, I�m going to fix the boost leak in the turbo inlet tube the exhaust leak in the catback.
As well as a few other bits in the engine bay here and there while things are apart
Let�s get started!
Starting with an easy one. A nice new silver FEED Radiator cap from Japan
Intake bits removed.
Inlet tube removed, old gasket out, new OEM gasket in! Bolt everything back up to torque specs and we are good to go!
I also did a search on the serial number stamped on the twins in this picture, Authentic Hitachi N3G1 99-spec twins
I am unsure if these turbos are a direct bolt on or were ported at the wastegate.
Once that was done, I decided to take advantage of that area while everything was apartThis included the new Full Function Engineering Idler Pulley
This installed pretty easy with everything taken out of that area. The hardest part was finding a new belt that fits the set up correctly
So awesome to see that you got your dream car and immediately started making it the best representation of your dream you could. Can't wait to follow your progress!
Little by little, everything all adds up and with enough money, determination and time, you can make any vision become a reality.
The center console jiggles and wiggles around pretty freely
I take it off
Oh�
It looks that we have some broken plastic tabs. That explains the wiggly jiggly center console I guess..
QUESTION: Why is my fuel pressure gauge always and forever at 98 PSI!?
Passenger Door Panel removed!
Here is going to be my new audio selection. Nothing crazy.
But definitely an improvement over what is currently in the car.
BubbleTech to the rescue again! I chose the handle with the leather stitching
The original handle was at some point in time broken, and at some point some previous owner tried to hot glue it back together?
I have no idea. You can literally see the yellow glue stuck all over the handle
This thing was a hideous hack job of a repair and it is going in the trash.
The new one from BubbleTech is beautiful and is super solid.
I sanded off the old glue that was stuck to the trim and very carefully used a razor knife to clean up the last little bit. (Right below the window switch)
The denatured Alcohol and green scrub pads really work well on this stupid black goo stuff!!!
For anyone who is going to be doing this, I would not use anything else.
Also for anyone else going to be doing this, make sure you buy plenty and i mean PLENTY of thee green scrubbing pads.
Once they are all gunked up, they will just smear the goo around and spread it around, losing their effectiveness.
I tried to often clean them off with a rag, to get a little more life out of them, but that only works so well.
Here is a side by side of the old plastic door cup vs the new aluminum one
Fixing some broken tabs, clips, and cracks on all needed parts throughout
This is essentially what the raw plastic looks like after you scrub all the black goop stuff off. Its very dull looking.
All pieces were sanded with 800 sandpaper before the primer.
SEM Flexible Primer is on.
Did about 2-3 coats per piece
After fully dried, another wet sanding with 800 sandpaper to get everything smooth as possible.
then it is time to clean with rubbing alcohol and hit it with the Landau Black color coat.
Again, 2-3 coats
Steering wheel is gone now too? Sheesh
Getting this piece out was scary you guys. I don’t recommend it.
And if you ever have to. Make sure you aren’t stupid like me and replace all the little light bulbs behind there with LED. (I didn’t, and everything is very dim and still looks like its all 30 years old lol.)
While I was at it, I decided that I might as well also do the cigarette ash tray/coin holder that originally came with the car as well.
Just in case I ever want to swap it back into the car someday
Turned out great. I also greased all the sliding parts
OMG
Brand new OEM Mazda Shift boot installed in my freshly refurbished and repaired center console.
Removed the seats, found some ooooold old receipts from the early 2000’s, a few old coins from the 90s and some petrified french fries, as well as a small MADE IN JAPAN crescent wrench! WIN!
Vacuumed, scrubbed and washed all the carpets
New door speakers installed. The old ones that were in the car were aftermarket infinity speakers from about 2008
New rear speakers installed
Deleting some wiring, rewiring, and rerouting a few things for the new single DIN dash stereo and amplifier.
Before pushing the front gauge cluster plastic back into its place (It was scary AF to take off�) I put some grease on the big metal clips before snapping it all back into its place. This should help make the removal process a little easier if I ever have to remove it again in the future.
I must note that I also tightened up the screws that hold the ***** in the center dash console. And now the ***** have a nice solid feel to them. A nice click. Before they were all loose and sloppy.
I made my own aluminum brackets to reinforce and fix the center shift console piece. Everything is stiff and very secure now.
50mil Sound deadening material added to the door panels on both sides.
If anyone is wanting to add some weight to your FD, just add this stuff to your car lol
Good lord it is heavy. And I probably made a mistake by adding it
Everything put back together on the drivers side door
I swear there used to be a crack there
I cannot emphasize enough how drastically doing this has changed the appearance and condition of the car.
The pictures speak for themselves
Why do boxes from Japan keep showing up at my doorstep?
Turns out it was just a mint condition 1999-2005 Miata Nardi Steering wheel
Soldering the airbag and horn to retrofit the new steering wheel.
I used the forum for all the instructions on how to do this OEM+ mod.


 lol.)
lol.)