
Build Thread

So, after confirming a bad coolant o-ring I decided to tackle the rebuild.
This is my first time digging into a rotary.
I was excited to learn and get some hands on time with the internals.
My engine was a reman from Atkins and got about 24K on it until the o-rings went.
I don't think it was one major overheat that did it in.
It seemed like it was just getting worse day to day over the last couple of months.
So, below are some pics of the disassembly.
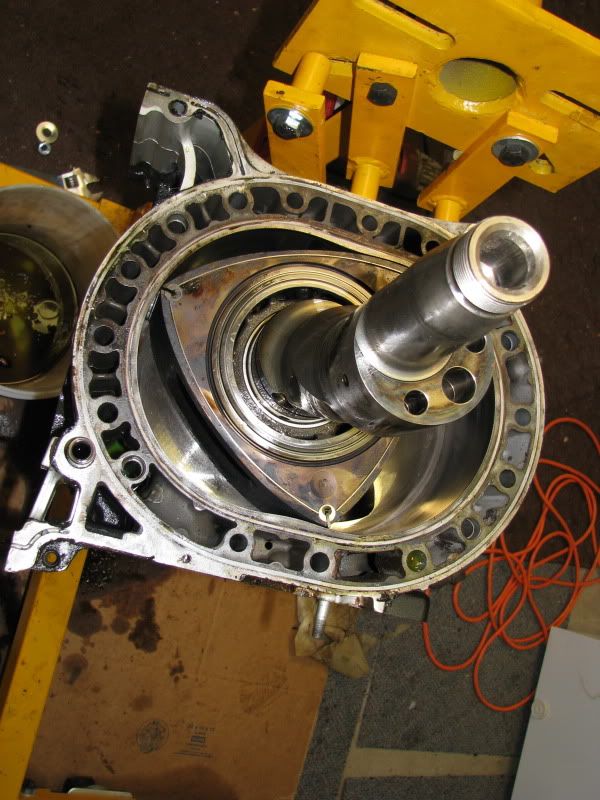
Just cracked it open.

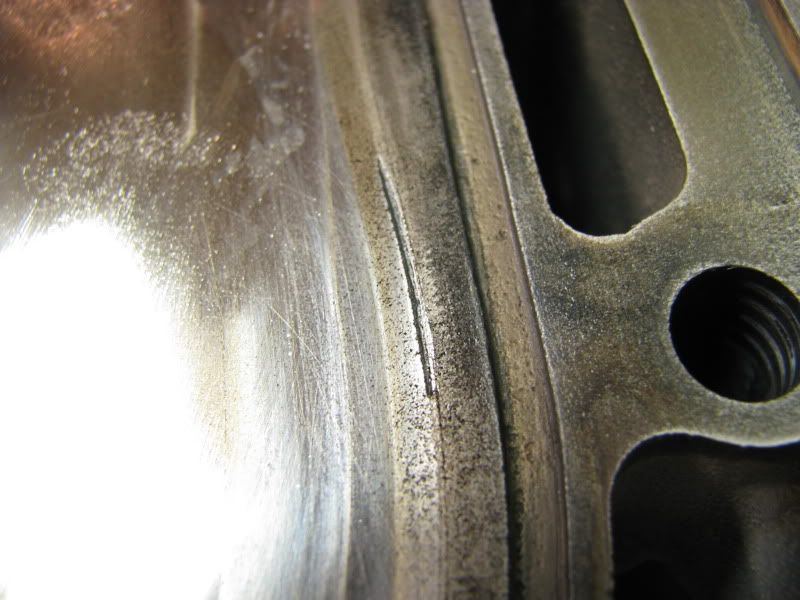
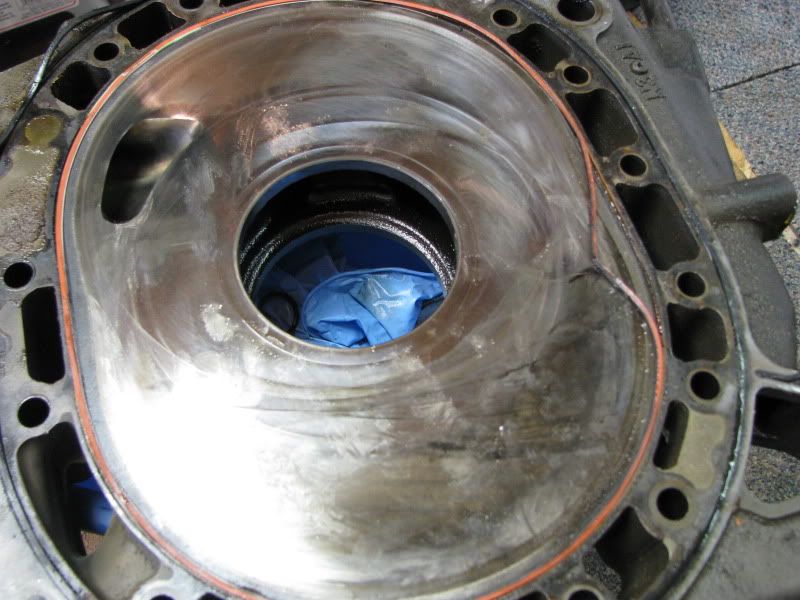
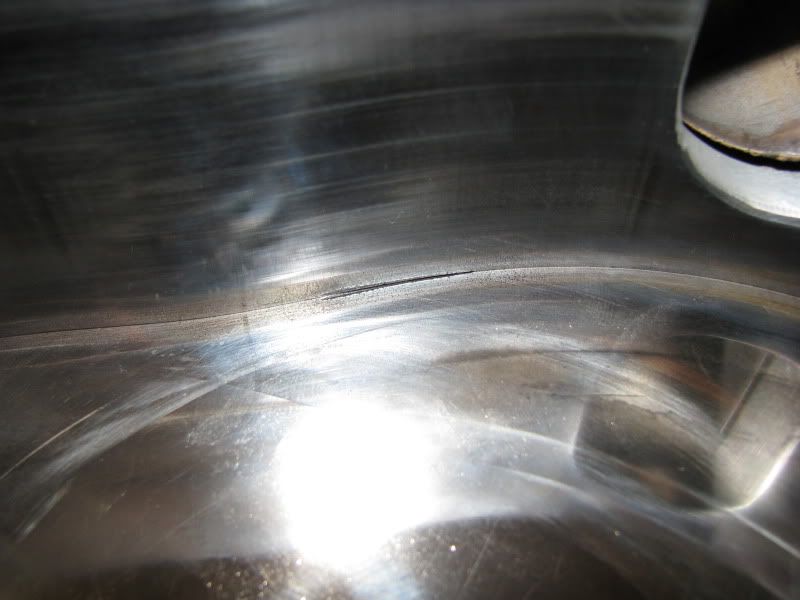
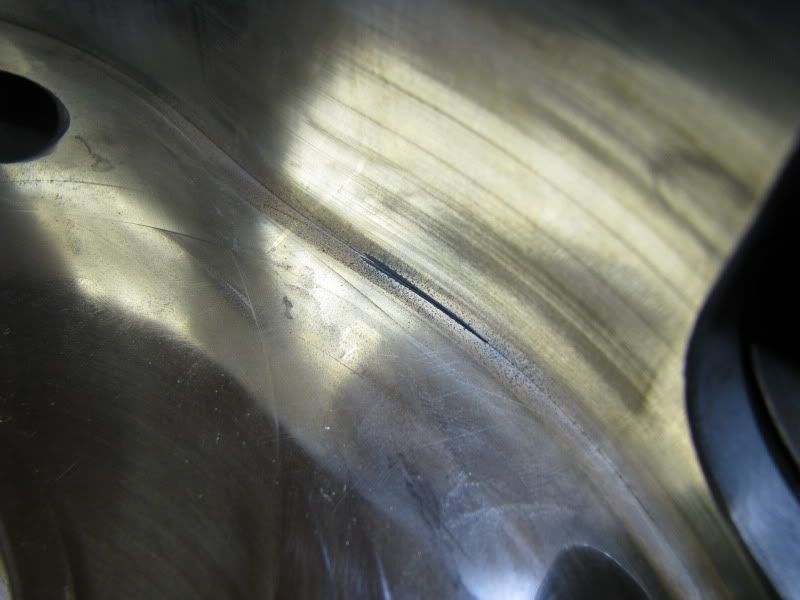
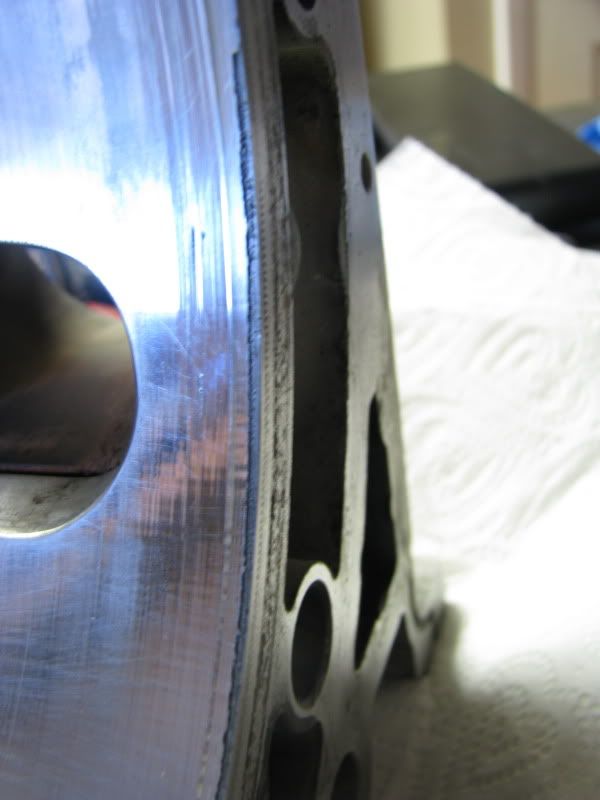
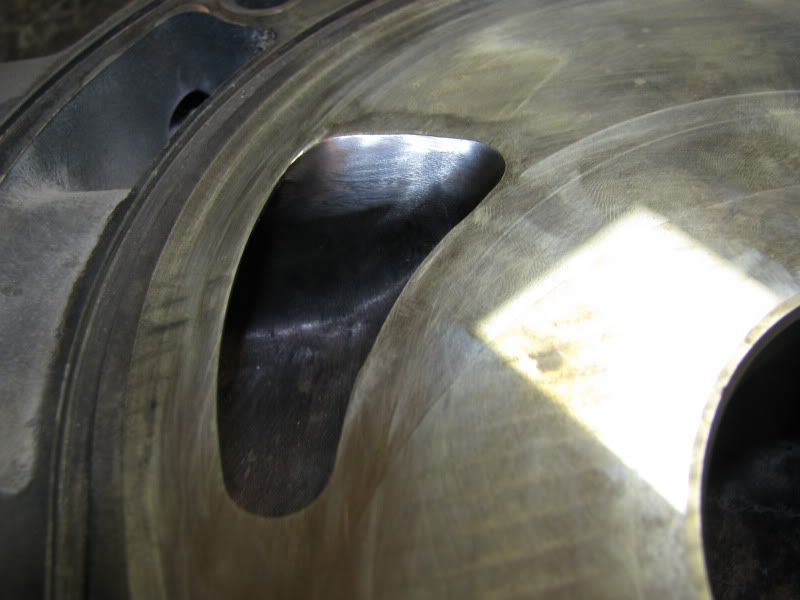
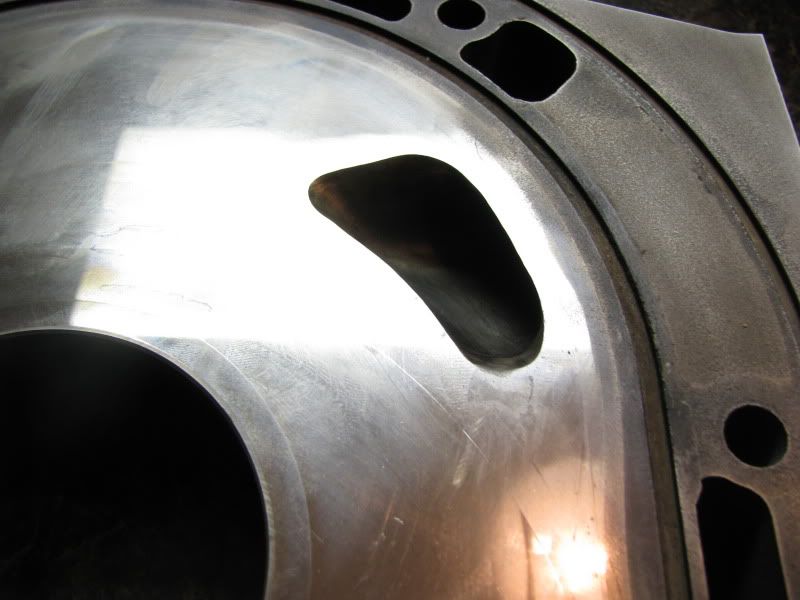
Found a slight cut on the intermediate plate facing the rear rotor.
All the apex seals, side seals, and corner seals looked in great condition in the rear rotor so I don't know where this damage came from. I can't get a measurement on the depth with any type of caliper but it is definitely there.
You can just barely hook your finger nail on it.
I have no idea what caused it. All the corner and side seals looked great on disassembly. One of the apex seals had a little bit of pitting.
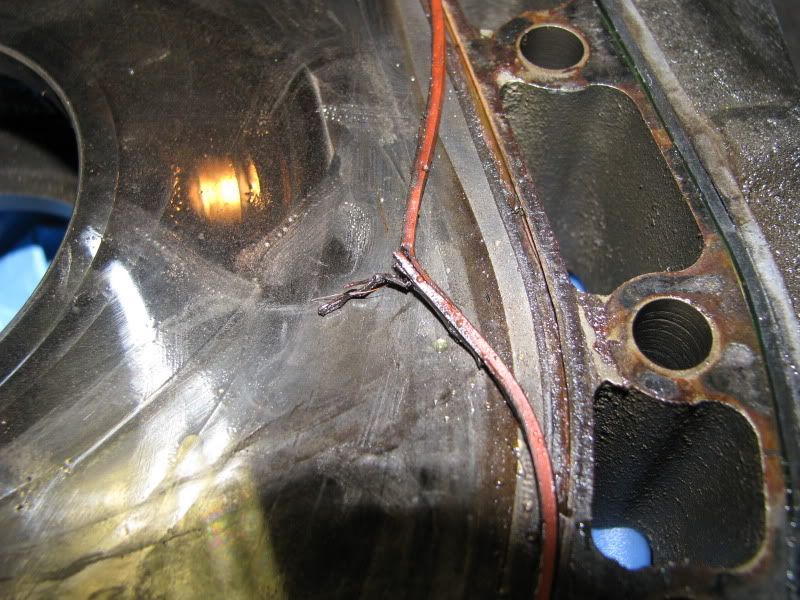
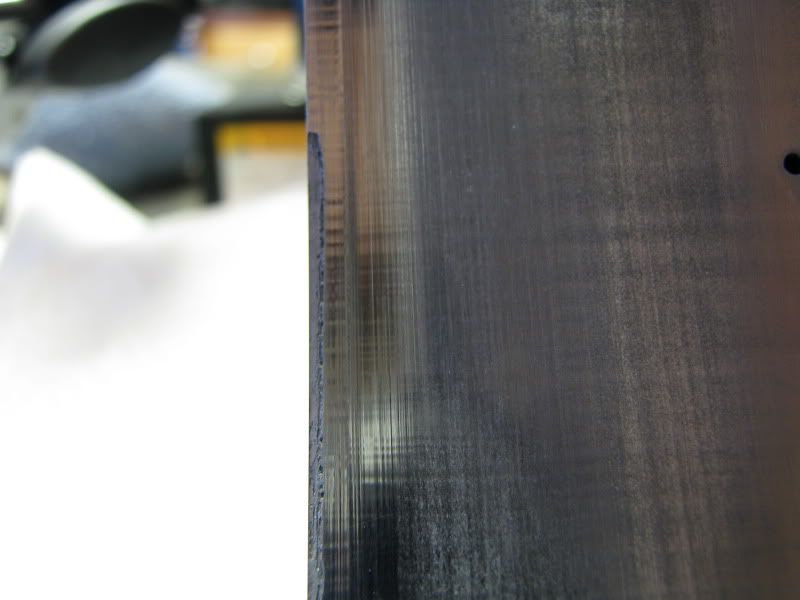
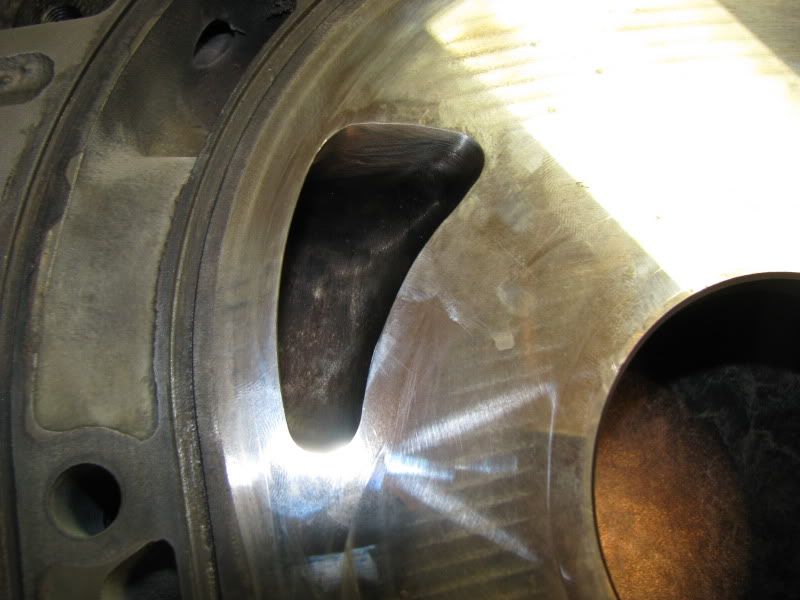
Here is the culprit from the overheating.
This was located on the intermediate housing facing the front rotor.
It wasn't completely torn but in pretty rough shape.
At least the o-ring groove and side walls are in good shape and there wasn't any structural damage because of the overheating.
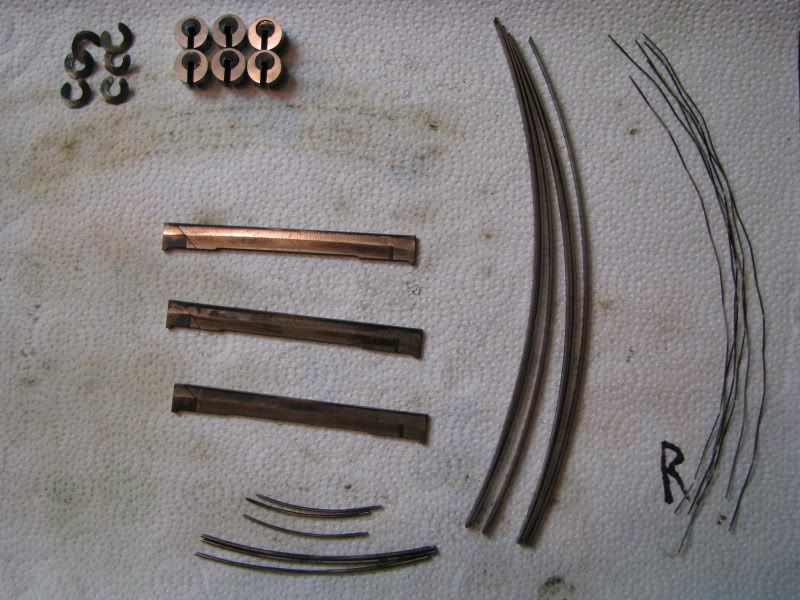
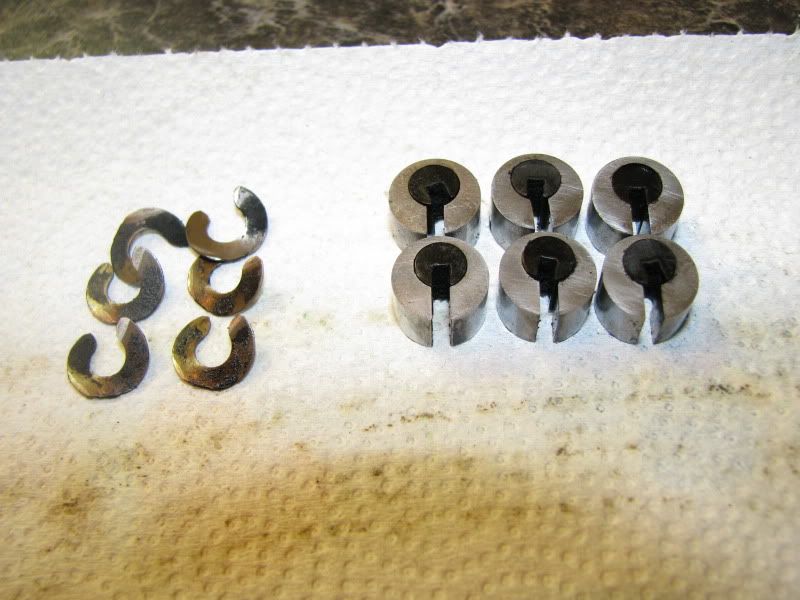
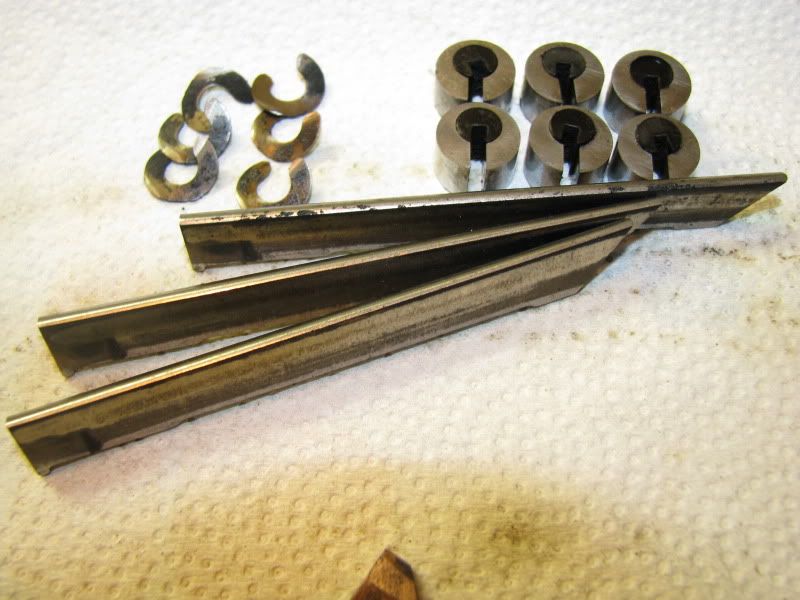
Front rotor, seals, and springs.
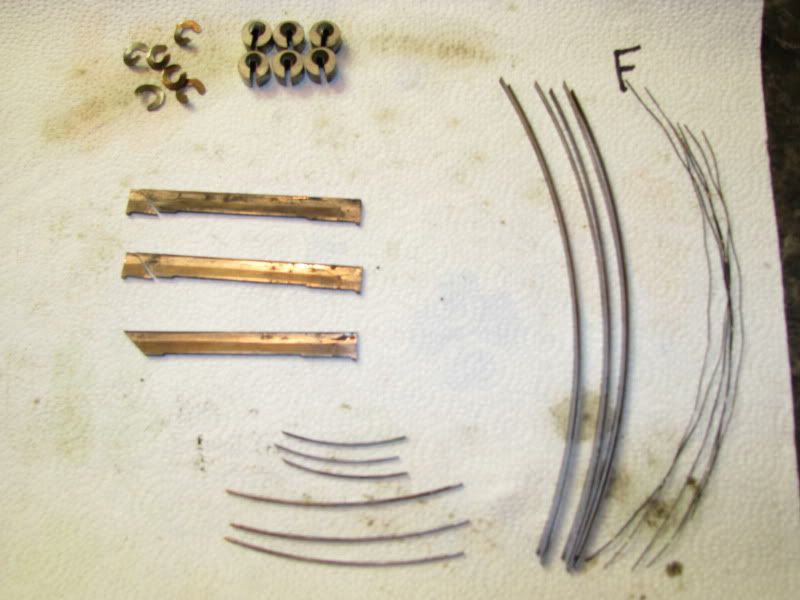
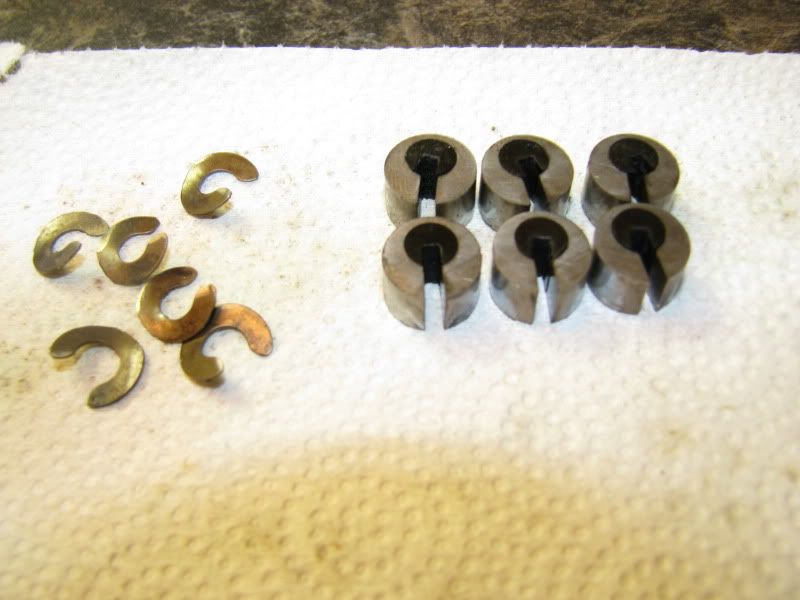
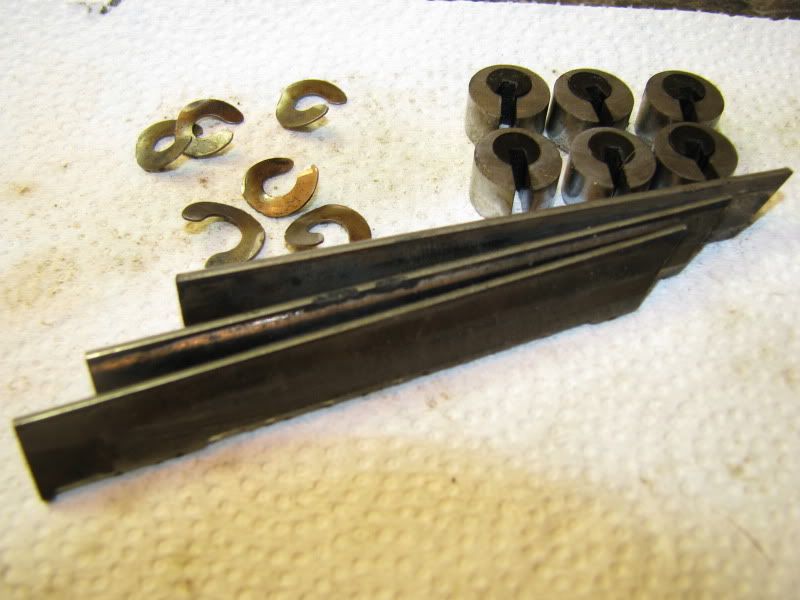
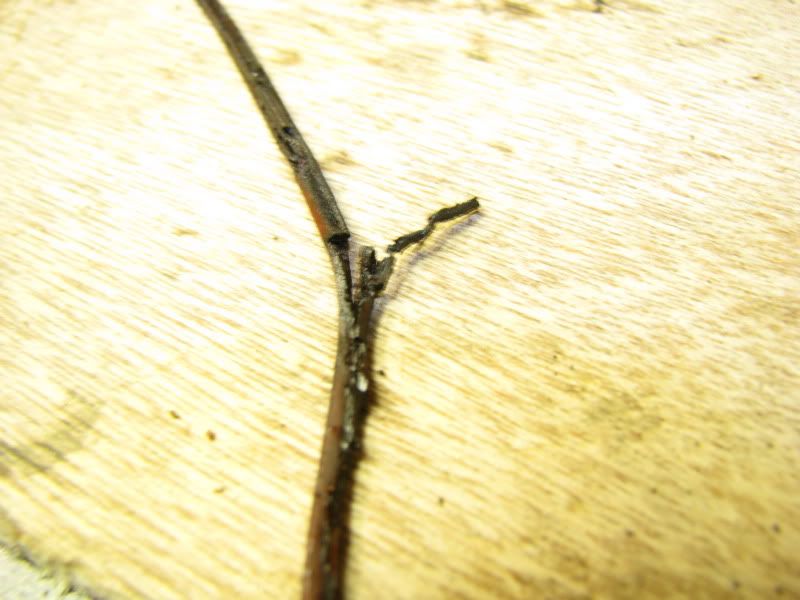
I managed to loose one corner piece of an apex seal during disassembly.
You can see a little pitting on the middle seal.
Of the two apex seals in each housing that are damaged there wasn't any cracking or chipping.
Just pitting which may have been from storing it over the winter with one bad o-ring for sure and maybe a little leak in the rear housing as well.
This is my first time digging into a rotary.
I was excited to learn and get some hands on time with the internals.
My engine was a reman from Atkins and got about 24K on it until the o-rings went.
I don't think it was one major overheat that did it in.
It seemed like it was just getting worse day to day over the last couple of months.
So, below are some pics of the disassembly.
Just cracked it open.
Found a slight cut on the intermediate plate facing the rear rotor.
All the apex seals, side seals, and corner seals looked in great condition in the rear rotor so I don't know where this damage came from. I can't get a measurement on the depth with any type of caliper but it is definitely there.
You can just barely hook your finger nail on it.
I have no idea what caused it. All the corner and side seals looked great on disassembly. One of the apex seals had a little bit of pitting.
Here is the culprit from the overheating.
This was located on the intermediate housing facing the front rotor.
It wasn't completely torn but in pretty rough shape.
At least the o-ring groove and side walls are in good shape and there wasn't any structural damage because of the overheating.
Front rotor, seals, and springs.
I managed to loose one corner piece of an apex seal during disassembly.
You can see a little pitting on the middle seal.
Of the two apex seals in each housing that are damaged there wasn't any cracking or chipping.
Just pitting which may have been from storing it over the winter with one bad o-ring for sure and maybe a little leak in the rear housing as well.
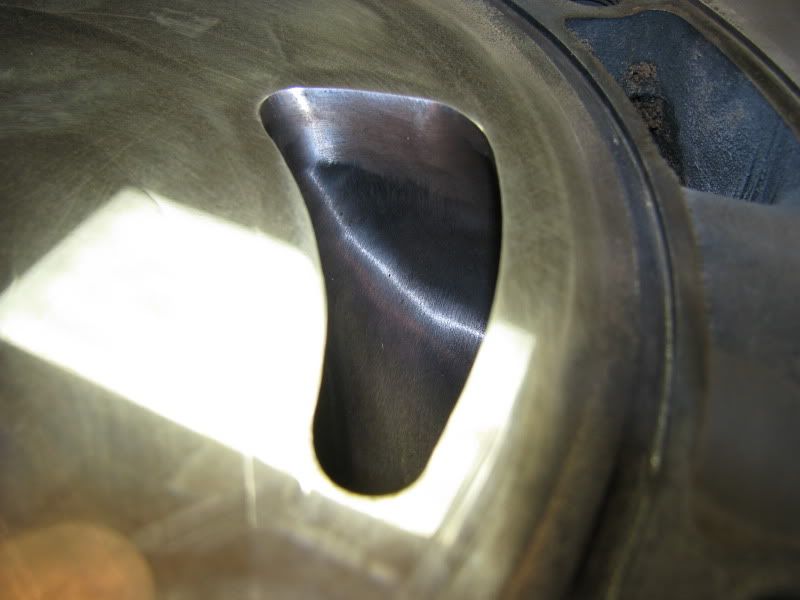
Here is another pic of the cut in the intermediate plate and where it mates up with the rotor housing. What do you guys think would have possibly caused this?
Will this effect compression much?
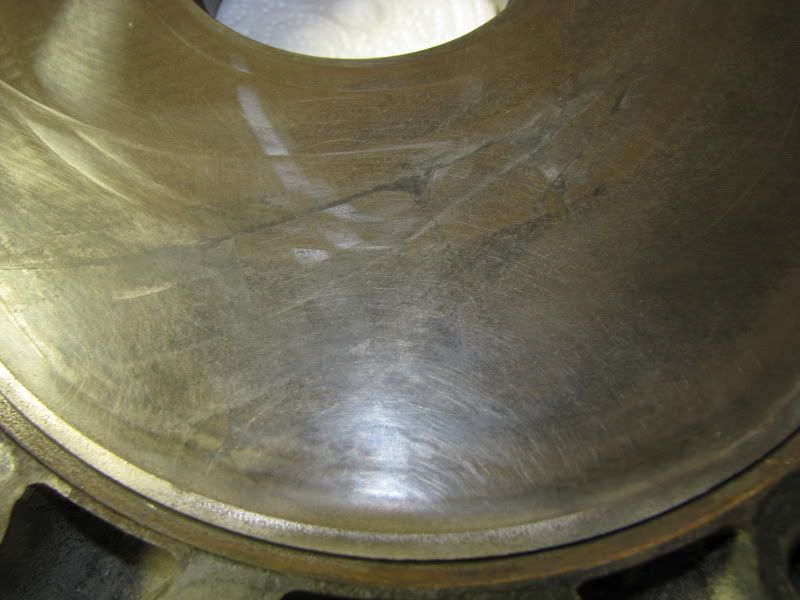
All the plates fell well within spec with minimal step wear and no warpage.
The rear rotor housing is in great shape.
No marks or chrome flaking or warpage.
Water passages on both housings are nice and clean.
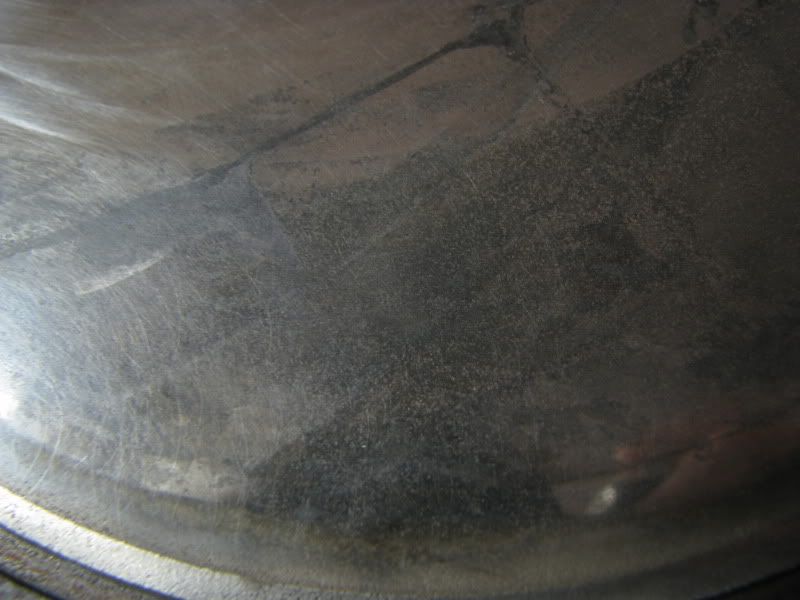
But, the front housing has some chrome flake and one scar that you can catch your finger nail on.
There are also cracks on the leading spark plug hole.
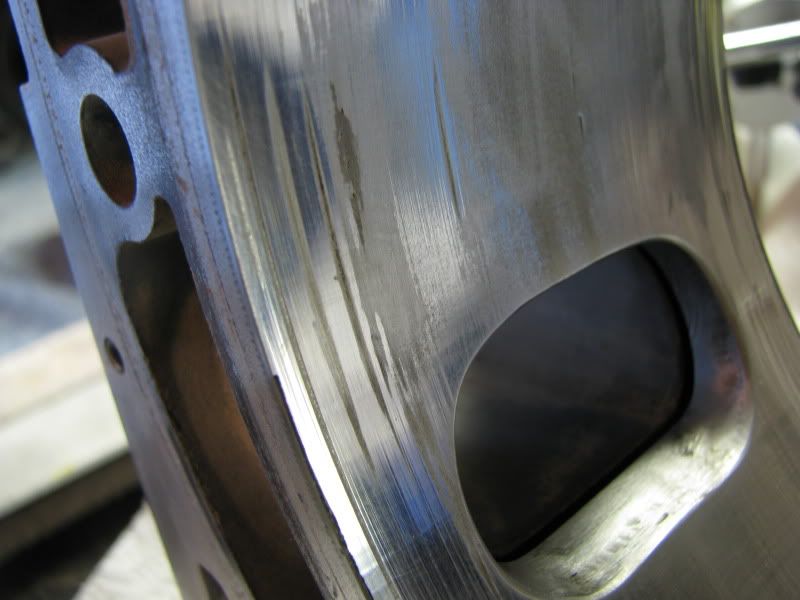
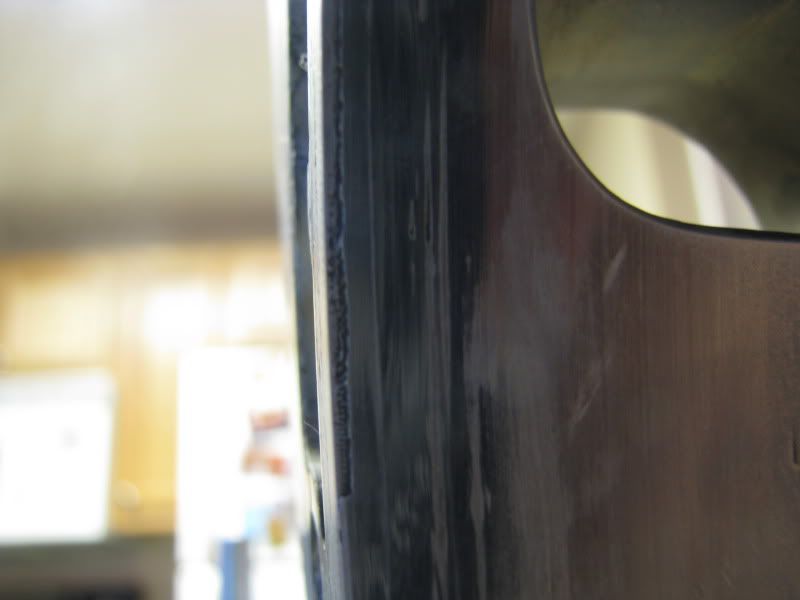
Of the three visible marks on the rotor housing the closest one to the edge is the one that actually grabs a finger nail or pick. The other two almost look worse, but they don't really grab even a pick.
Once again, I don't know where this damage came from.
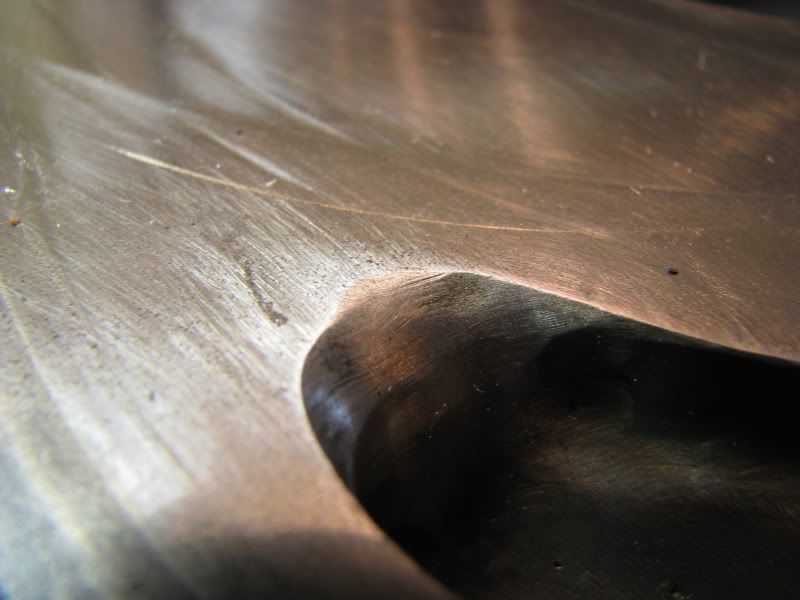
If you look at my previous post on the front rotor housing apex seals, the only pitting occurred in the middle of apex seal, not towards the end.
What's your verdict? What kind of compression numbers do you think I could get out of this rotor housing?
Also, how do the exhaust ports look? The work was done by Atkins a couple of years ago when I purchased the reman.
Would I benefit from an exhaust port like Pineapple's EP3A port which looks to have a lower edge and a more rounded top?
Will this effect compression much?
All the plates fell well within spec with minimal step wear and no warpage.
The rear rotor housing is in great shape.
No marks or chrome flaking or warpage.
Water passages on both housings are nice and clean.
But, the front housing has some chrome flake and one scar that you can catch your finger nail on.
There are also cracks on the leading spark plug hole.
Of the three visible marks on the rotor housing the closest one to the edge is the one that actually grabs a finger nail or pick. The other two almost look worse, but they don't really grab even a pick.
Once again, I don't know where this damage came from.
If you look at my previous post on the front rotor housing apex seals, the only pitting occurred in the middle of apex seal, not towards the end.
What's your verdict? What kind of compression numbers do you think I could get out of this rotor housing?
Also, how do the exhaust ports look? The work was done by Atkins a couple of years ago when I purchased the reman.
Would I benefit from an exhaust port like Pineapple's EP3A port which looks to have a lower edge and a more rounded top?
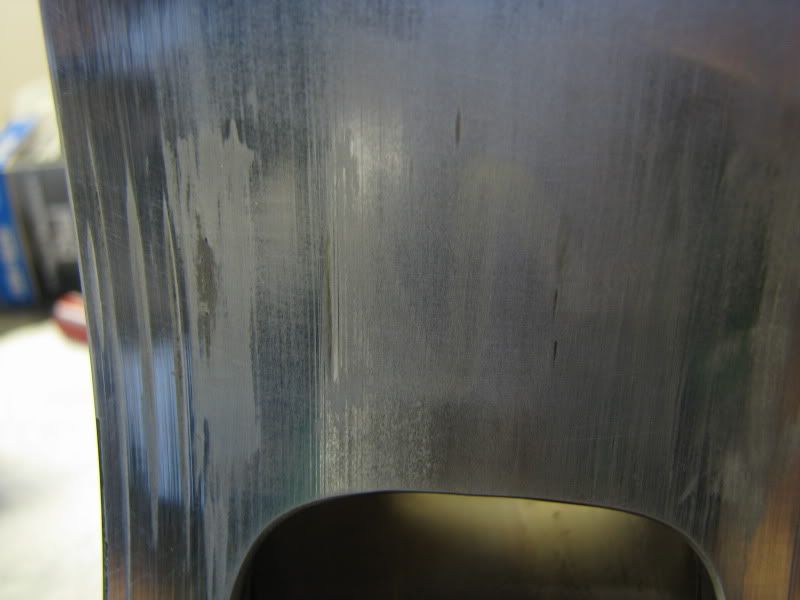
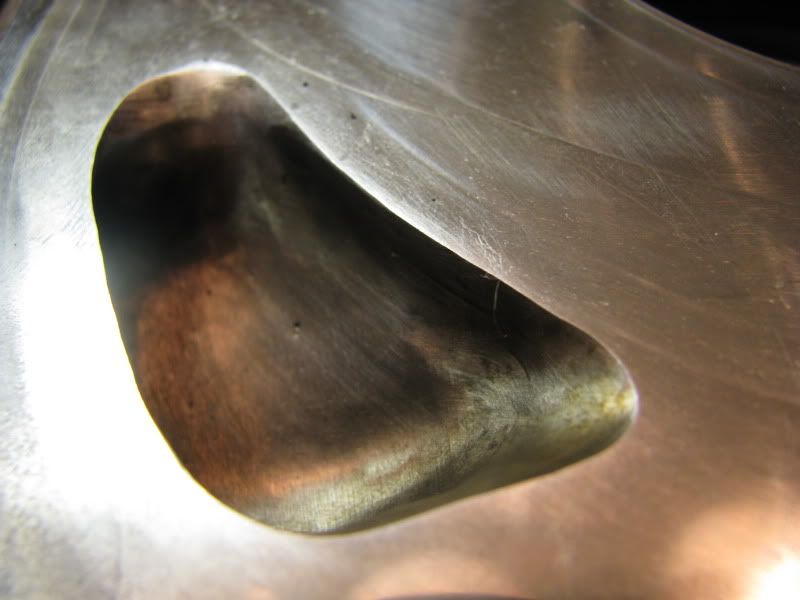
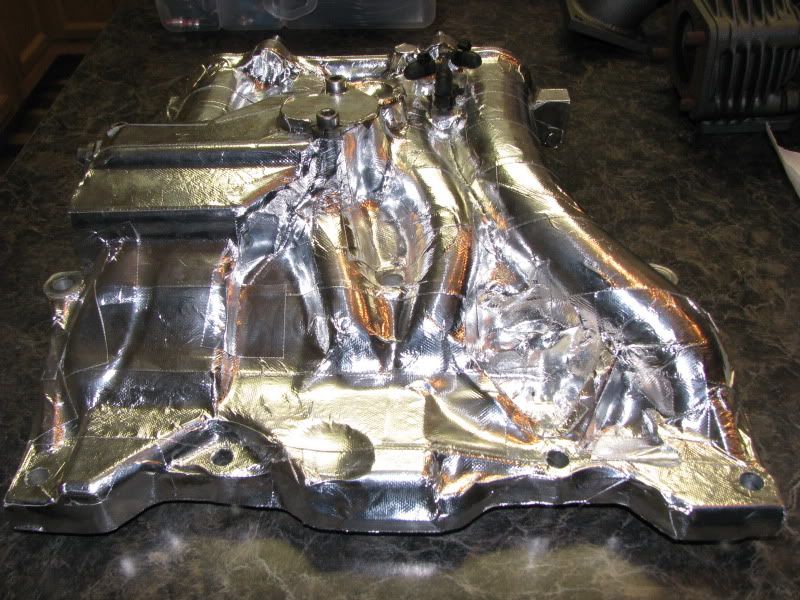
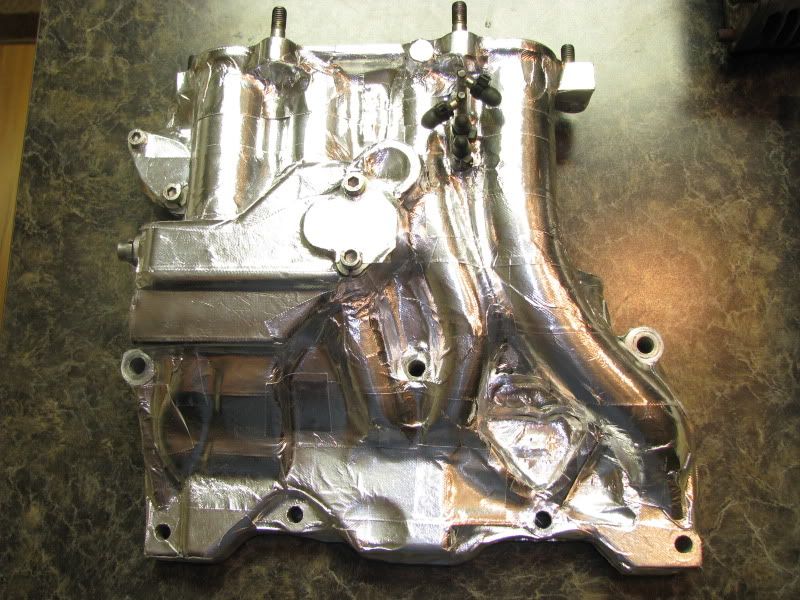
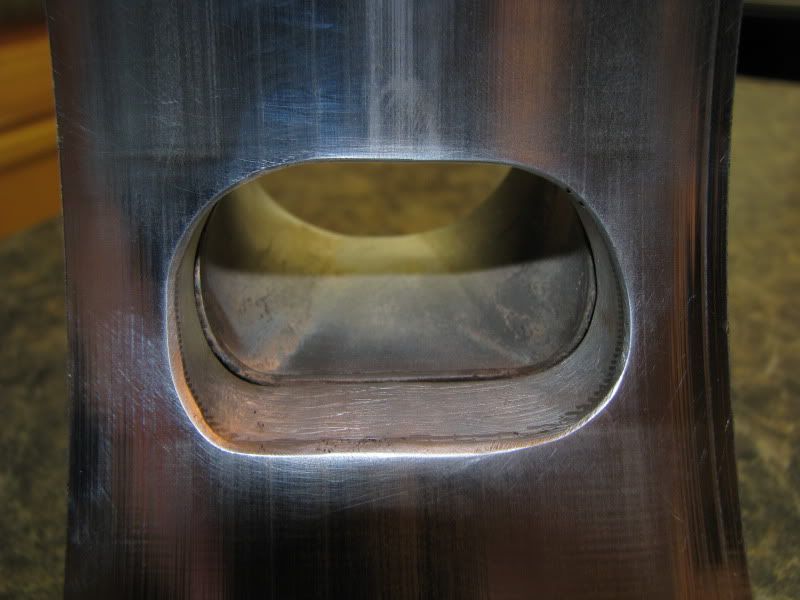
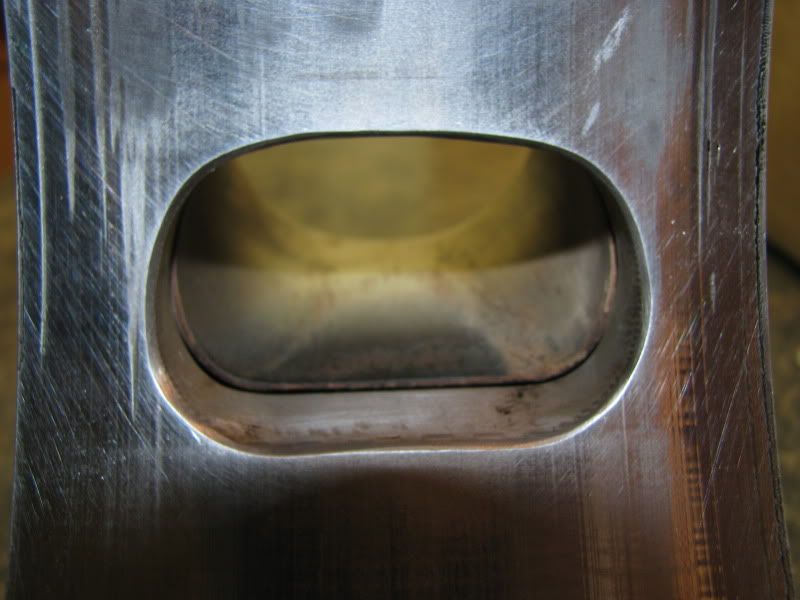
Here are a couple of pics of Atkins intake port work.
How do these look?
Also, there was some dark discoloration on the intermediate plate near the bottom.
There is no step wear, but it looked different.
There isn't any pitting or anything, just a different coloring.
How do these look?
Also, there was some dark discoloration on the intermediate plate near the bottom.
There is no step wear, but it looked different.
There isn't any pitting or anything, just a different coloring.
Trending Topics
can you still put the corner seals and side seals in their original locations in the rotors and check clearances. side seal clearances can make a big difference also. it might give you a clue to whether you can improve what you had if they were running loose.
Yes I can. I actually left the corner seals in place when I removed the rotors and clearances were within spec just to see and kinda learn at the same time.
I'm just gonna replace the front housing.
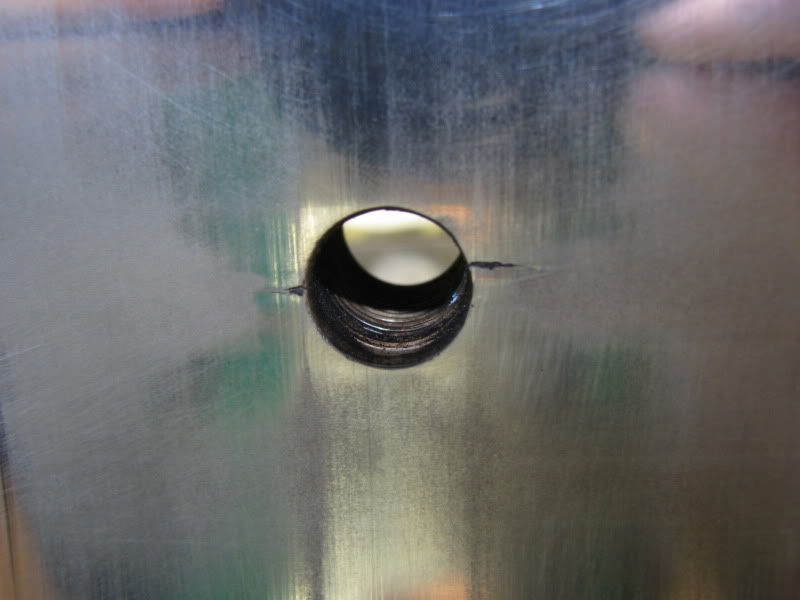
What do you guys think of the scratch in the intermediate plate?
Would getting the plate lapped help at all?
Also, how do the exhaust and intake ports look?
Would I see much of a difference getting a medium port from Pineapple and the EP3A exhaust port?
What do you guys think of the scratch in the intermediate plate?
Would getting the plate lapped help at all?
Also, how do the exhaust and intake ports look?
Would I see much of a difference getting a medium port from Pineapple and the EP3A exhaust port?
A little further along.
Haven't touched the engine yet, still trying to source a front rotor housing with a port close to my existing.
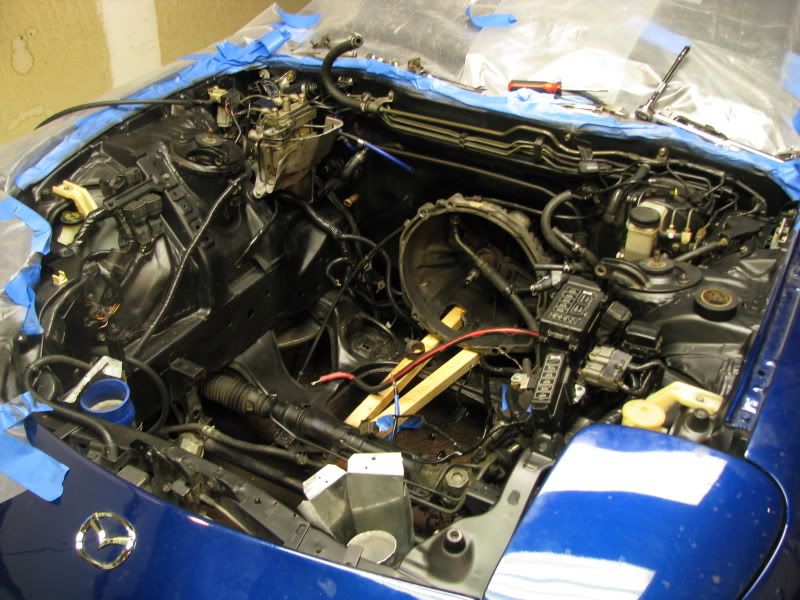
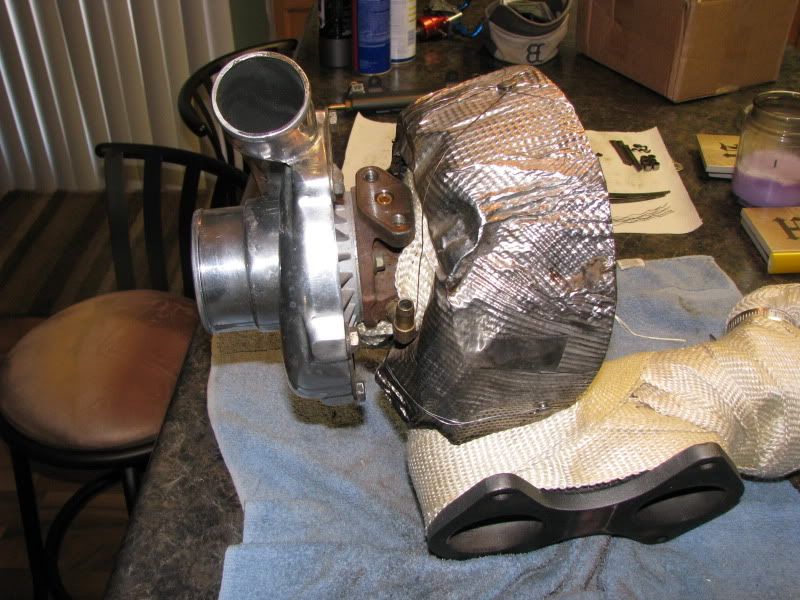
Cleaned up the engine bay and doing some re-wiring, re-wrapping, etc.
Found some aerosol paint at a local speed shop called VHT (Very High Temp).
Its a combination of silica and ceramic coating. Haven't heard of it before but figured it was worth a try.
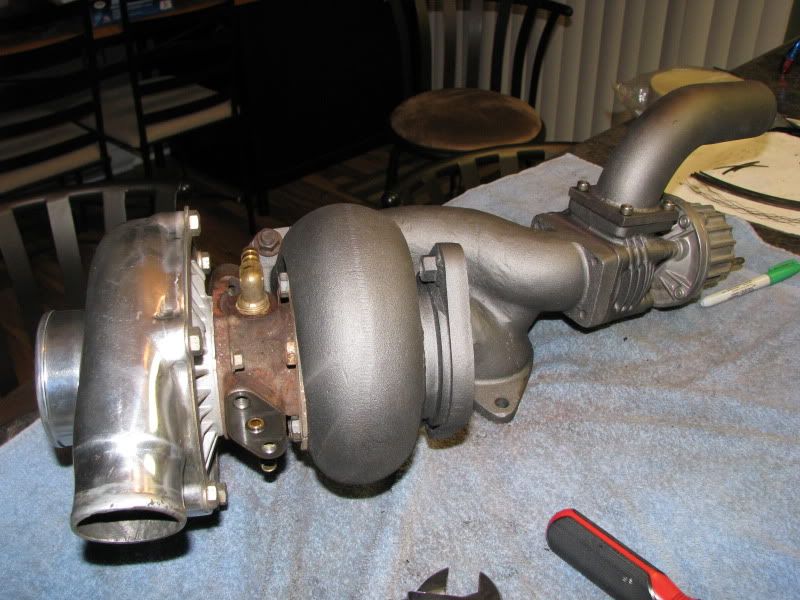
Painted my hot side, cast manifold, wastegate, and dump tube and downpipe.
After drying for 3 hours I baked it at 250 for 30 min, then 400 for 30 min per the instructions. Turned out ok. Don't know for sure how it will hold up but we will see.
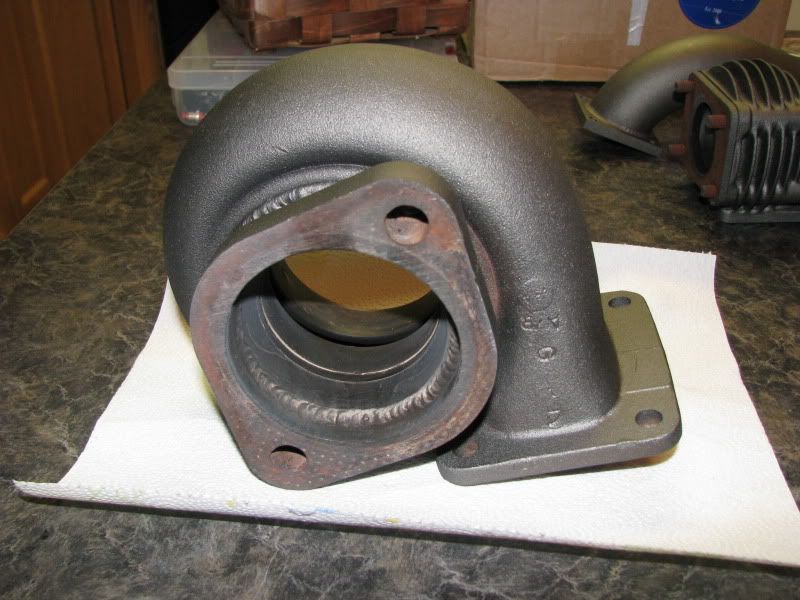
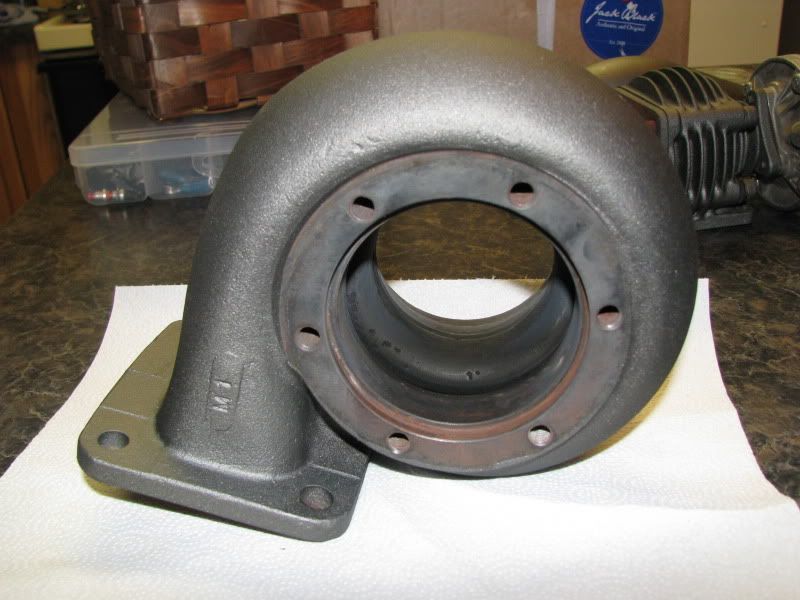
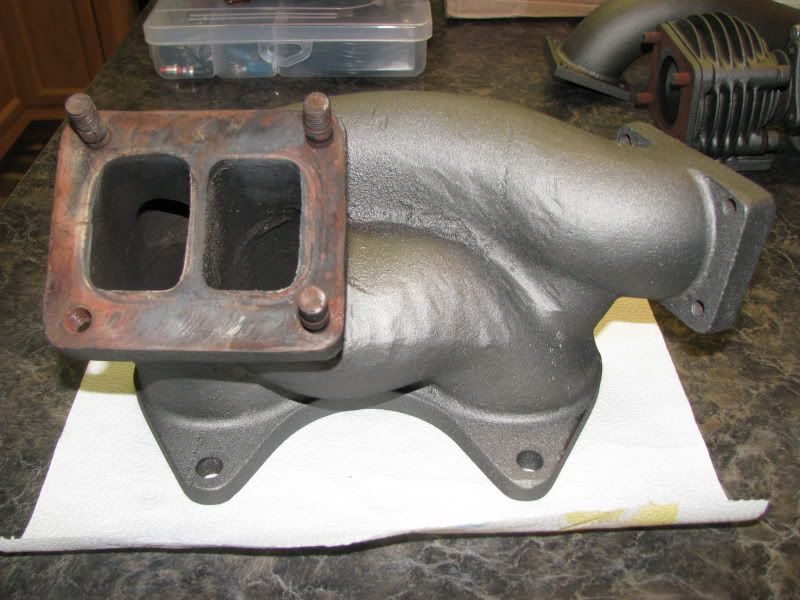
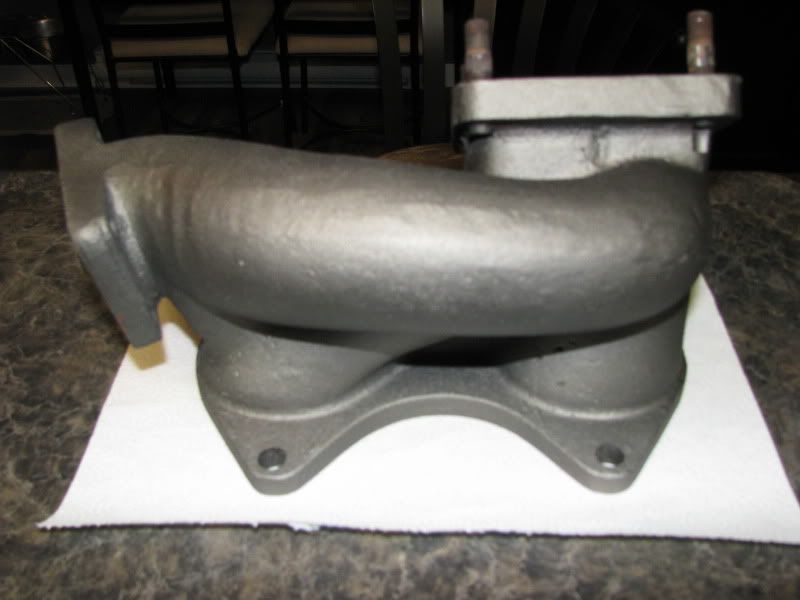
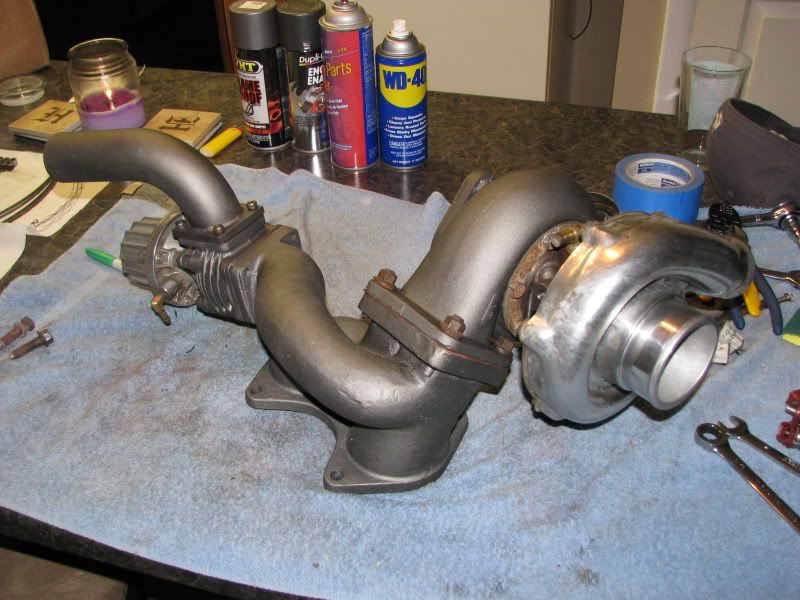
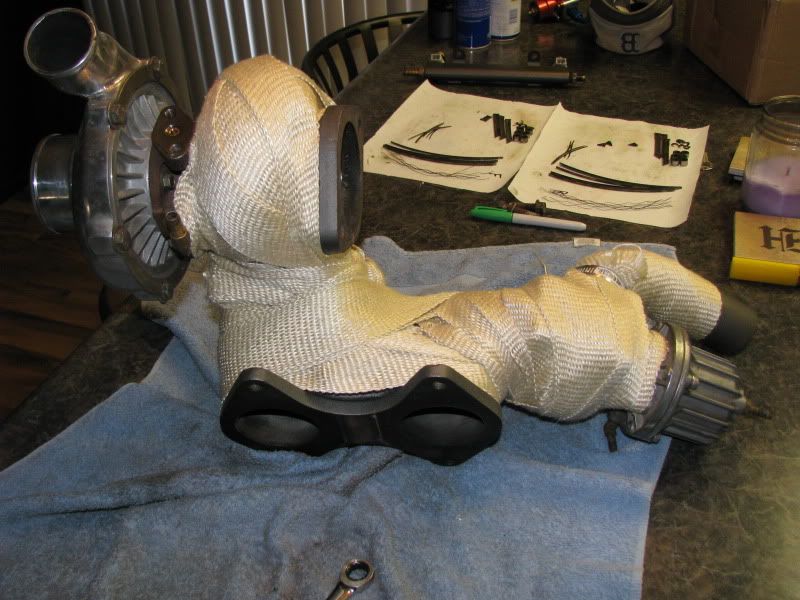
Then I also wrapped the mainfold, hot side, dump tube, and wastegate.
I didn't snap any pics of the downpipe but it will also be wrapped.
Anybody see any problems with this?
I am really trying to limit under hood temps in this build.
Haven't touched the engine yet, still trying to source a front rotor housing with a port close to my existing.
Cleaned up the engine bay and doing some re-wiring, re-wrapping, etc.
Found some aerosol paint at a local speed shop called VHT (Very High Temp).
Its a combination of silica and ceramic coating. Haven't heard of it before but figured it was worth a try.
Painted my hot side, cast manifold, wastegate, and dump tube and downpipe.
After drying for 3 hours I baked it at 250 for 30 min, then 400 for 30 min per the instructions. Turned out ok. Don't know for sure how it will hold up but we will see.
Then I also wrapped the mainfold, hot side, dump tube, and wastegate.
I didn't snap any pics of the downpipe but it will also be wrapped.
Anybody see any problems with this?
I am really trying to limit under hood temps in this build.

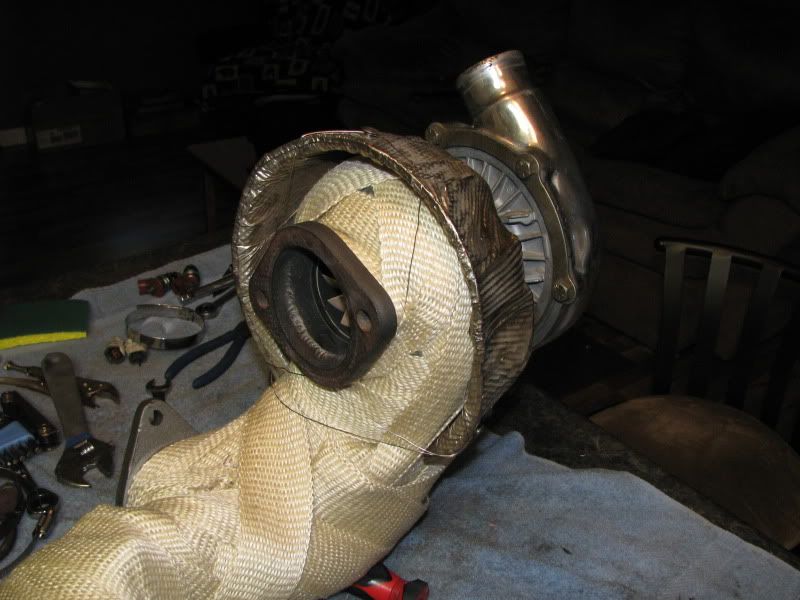
^ the turbo has been mummified !!! I like the LIM too. those can also be ceramic coated... I wouldn't use that VHT paint, that crap will burn off the rotary exhaust, unless you have water injection.... maybe.
I would also replace the front housing, and get both housing's ported. get the plates lapped too.
when you got this reman, did you have it rebuilt, or just drop it in as is? 24k doesn't seem like much mileage.
I cant really speak about the groove on that plate, if your nail or pick gets stuck, then would you want the new seals getting stuck on that?
are you going to upgrade to 3mm seals?
any other mods on the rotors & housings? ceramic coatings, polishing, coolant & oil passage porting?
When I bought the car the engine was toast, so I got a reman right from Atkins with the porting shown.
I am looking into getting the plates lapped?
Any suggestions on who to do the work?
I am going to stick with 2mm RA Super Seals.
No other mods on the housings, plates.

I located a good used housing which will be ported to match my good housing.
Any other opinions on my heat wrap? Anybody see any problems or issues?
I can take it off pretty quick.
Also, how does my fuel set-up look?
See any issues?
Any other opinions on my heat wrap? Anybody see any problems or issues?
I can take it off pretty quick.
Also, how does my fuel set-up look?
See any issues?

so like this guy?
https://www.rx7club.com/single-turbo-rx-7s-23/embarassing-aftermarket-fuel-rails-line-hookup-911989/
I would rather have the feed go to the primary rail, then the secondary, then to the FPR, but that's just me, doesn't really matter. Also it seems overly complicated to have it crossover, but I suppose it fits best that way.
I had something else to say... but I got sidetracked and forgot.
so like this guy?
https://www.rx7club.com/showthread.php?t=911989
I would rather have the feed go to the primary rail, then the secondary, then to the FPR, but that's just me, doesn't really matter. Also it seems overly complicated to have it crossover, but I suppose it fits best that way.
I had something else to say... but I got sidetracked and forgot.
Yes, that is how I was gonna run them. Just like the thread you posted.
Can't believe I didn't see that one earlier when I was searching.
I was thinking of mounting the FPR in the front of my UIM, that's why I came up with this diagram.
I suppose I could come in the rear of the primary, leave the front of the primary, come in the front of the secondary, leave the rear of the secondary, come in the side of the FPR and leave from the bottom of the FPR.
That would work also.
Update:
Got my fuel setup plumbed up so its ready to go.
Should hopefully have a replacement housing within a week or so, just waiting on it to get ported.
Received my RA Super Seals today along with a Banzai OMP block off and new belt for the A/C delete.
Pineapple rebuild kit should be here within a couple of days.
Got my engine bay completely cleaned up and rewired the battery/ignition harness and the main engine harness.
Trying to get my hands on another oil cooler for a twin setup like Howard wrote up.
Still need to rewire my fuel pump.
Debating dropping the tranny to get it looked at.
First and second are getting a little rough. Couldn't hurt to have it looked over.
Also might pick up a oil pan brace. Also looking into putting in a lighter flywheel than stock, but not sure what way to go. Currently have the ACT street/strip clutch setup with the stock flywheel.
Otherwise hopefully next week the engine will start going back together.

Thread
Thread Starter
Forum
Replies
Last Post
Donald Hampton
2nd Generation Specific (1986-1992)
16
Nov 23, 2022 06:38 PM
rx8volks
Canadian Forum
0
Sep 1, 2015 11:02 PM