Black Mamba rebuild.
 02-01-14, 10:14 AM
#101
Mine runs right now, not for long though. lol I can't wait to see the dyno for this thing. I'll hopefully be coming to a close come mid spring. I'll have to make a trip down to palm beach to come meet up. Beautiful area so I definitely don't mind coming.
 02-01-14, 01:45 PM
#103
I'm not coming if yours isn't finished. lol. I want to see that Pro-Jay intake. Pretty envious of it. I'm shooting for about 525 on high boost with water/meth. Are you going to run any kind of meth or alcohol injection?
Sorry for the questions. I'm just excited to see that intake system in action.
Sorry for the questions. I'm just excited to see that intake system in action.
02-01-14, 04:35 PM
#104
I'm not coming if yours isn't finished. lol. I want to see that Pro-Jay intake. Pretty envious of it. I'm shooting for about 525 on high boost with water/meth. Are you going to run any kind of meth or alcohol injection?
Sorry for the questions. I'm just excited to see that intake system in action.
Sorry for the questions. I'm just excited to see that intake system in action.
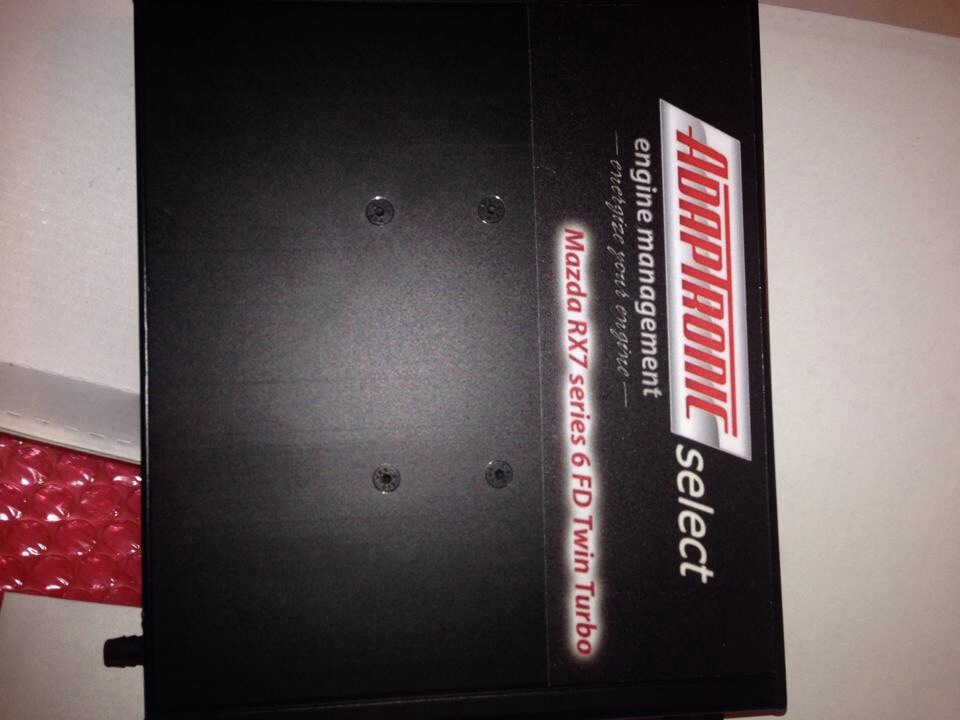
If I get my turbo manifold done next weekend and my ECU back from Adaptronics I will be able to start her up by the 2-3 week of this month, and hopefully running by end of month.
02-01-14, 04:52 PM
#105
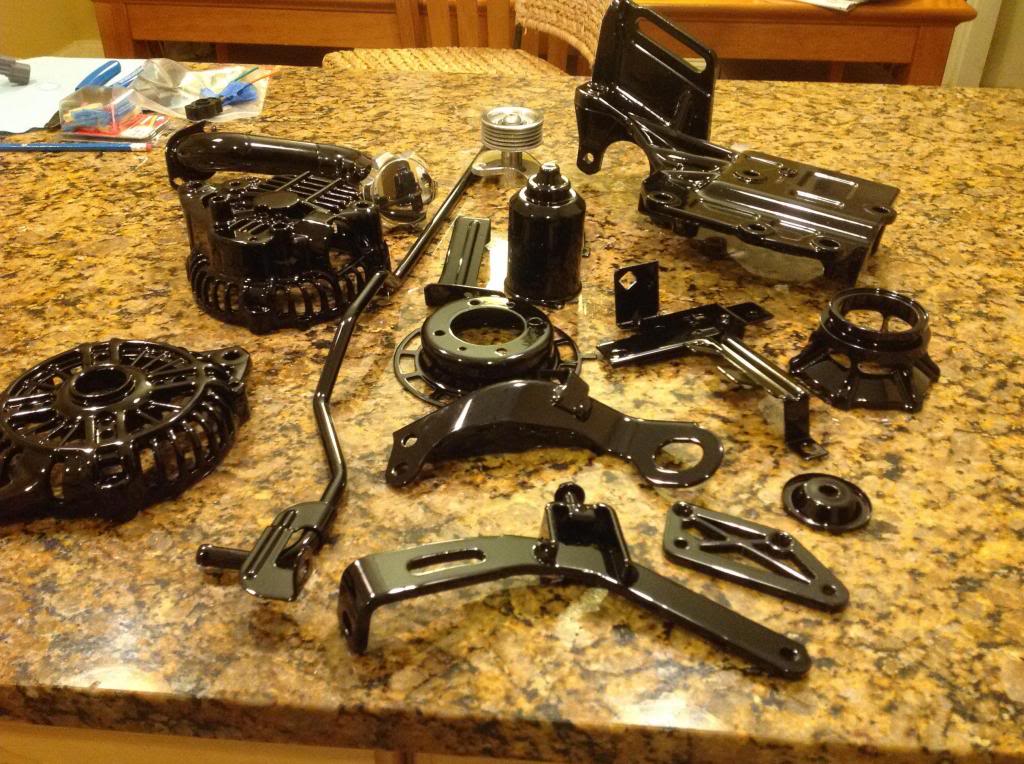
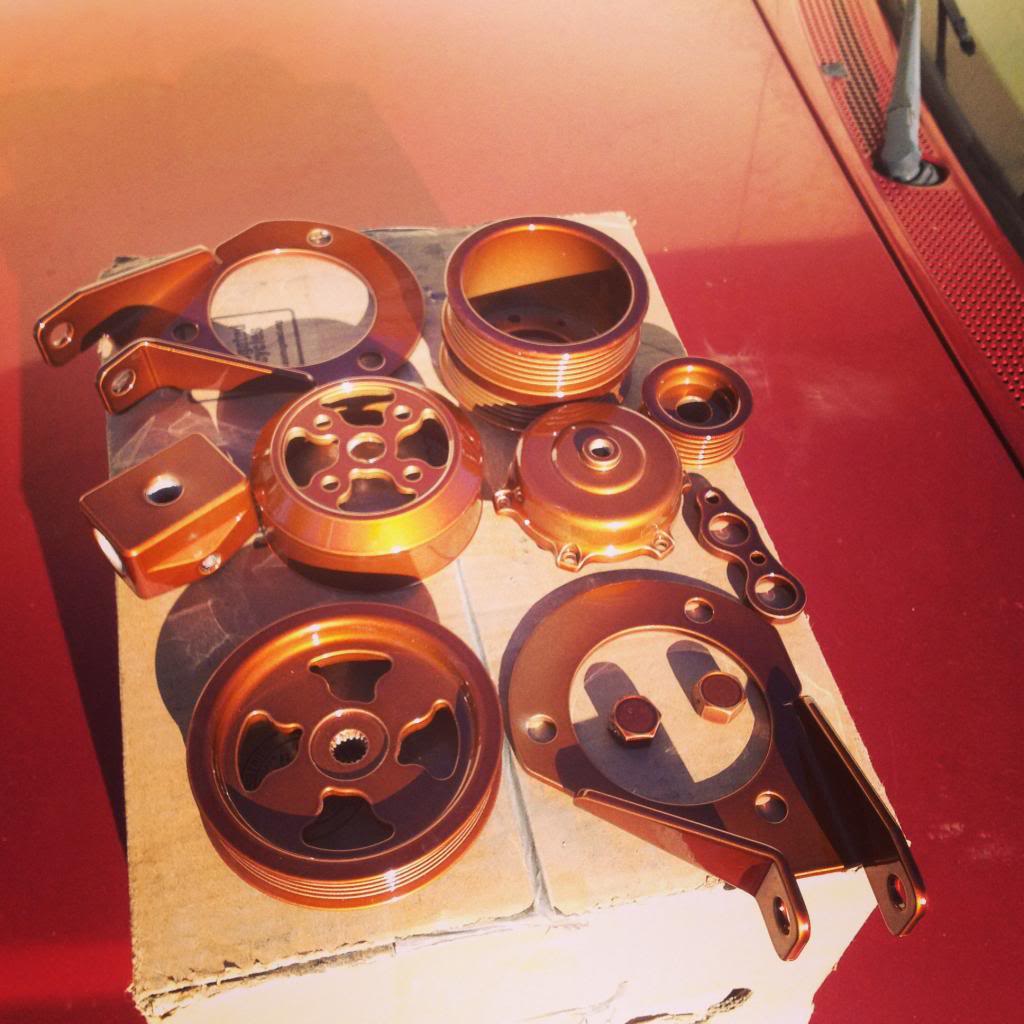
You are moving along much faster than I. I will be dropping off drive train parts to have them rebuilt and my gas tank welded for external pump in 2-3 weeks (hopefully). Also having my AW7's refinished at the same time. Plus having a few things pollished then. Should come along fairly quickly.
I'll be following yours closely!
I'll be following yours closely!
 02-03-14, 12:31 AM
#107
Full Member
iTrader: (3)

Join Date: May 2009
Location: Montreal
Posts: 192
Likes: 0
Received 0 Likes
on
0 Posts
Very nice build!!!
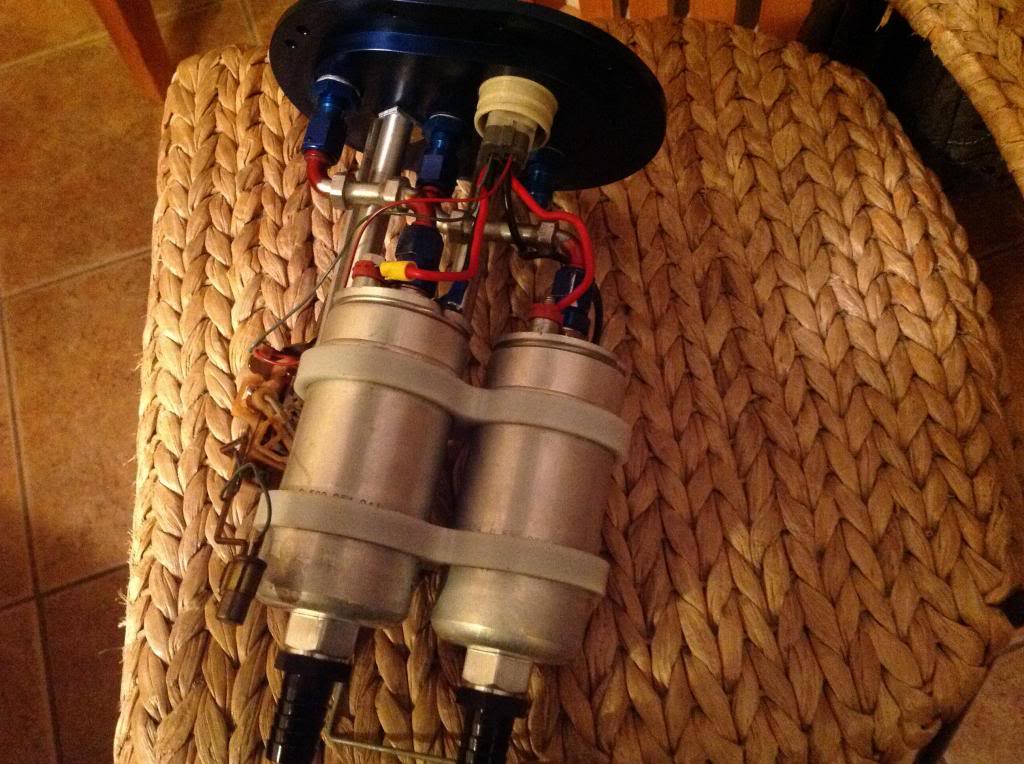
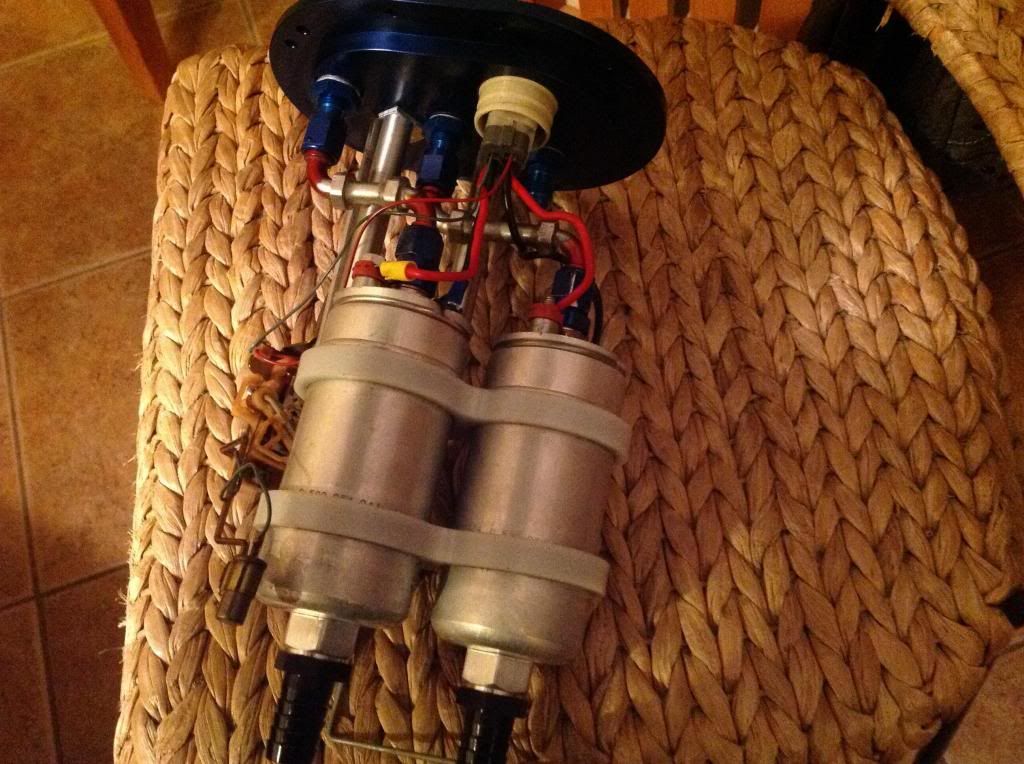
I got some questions for you because I have the same exact setup with my fuel pump BUT I couldn't get the Bosch fuel pump to slide into the plastic rings. The O rings seem too fat and which made the diameter of the opening so small that the pumps don't slide in even with Vaseline, may I know how did you get them in? ALso WHERE DID YOU GET THOSE FUEL FITTINGS 90 degrees on both end connected like that??? Also why did you put those long barb fittings at the bottom of the pump? Aren't you going to have a hight clearance issue? It seemed to me that with the sock connected right at the pump your pretty close to the bottom of your gaz tank.
Something very important you should know (maybe you figured it out already, but I'll tell you anyways) the entire CJ rail assembly is aluminum, the fuel level assembly needs to be grounded of else your level gauge will not work. On the stock fuel assembly there is a black wire from the fuel wiring harness with a plastic end that is sloted and inserts into a spade right on the top plate of the OEM fuel filter. Well it was a metal assembly that conducts. Now your level assembly is held by an aluminum stem which intern is screened on by a long rod that is held against the top plate which again is aluminum and anodized... It doesn't conduct ... So you have to figure out a way to ground that fuel level assembly. Maybe you can put a ring terminal on a wire ebbing the bolt that holds the assembly to the aluminum stem and run it to one of the negative poles on the fuel pump... After all they are grounded.
Let me know I have had sooooo many problems getting it to work
Thank you!
Andrew
02-03-14, 06:28 AM
#108
Very nice build!!!
I got some questions for you because I have the same exact setup with my fuel pump BUT I couldn't get the Bosch fuel pump to slide into the plastic rings. The O rings seem too fat and which made the diameter of the opening so small that the pumps don't slide in even with Vaseline, may I know how did you get them in? ALso WHERE DID YOU GET THOSE FUEL FITTINGS 90 degrees on both end connected like that??? Also why did you put those long barb fittings at the bottom of the pump? Aren't you going to have a hight clearance issue? It seemed to me that with the sock connected right at the pump your pretty close to the bottom of your gaz tank.
Andrew,
I had the same problem trying to get the pumps to slide in, I took the bottom part of the pump assembly apart, grease the pumps and with a small rubber mallet tap the plastic rings into the pump.
As for the fittings I had them made out of two 90 degree push look fittings, we cut the barb side of the fitting on both fittings and welded a 3/8 aluminum line in between.
Also the fittings on the bottom are to make up for the fuel filter sock as I won't be using one since I'm running one, the pumps already have a stainless screen on the inside of the inlet, plus I'm running a inline filter.
Something very important you should know (maybe you figured it out already, but I'll tell you anyways) the entire CJ rail assembly is aluminum, the fuel level assembly needs to be grounded of else your level gauge will not work. On the stock fuel assembly there is a black wire from the fuel wiring harness with a plastic end that is sloted and inserts into a spade right on the top plate of the OEM fuel filter. Well it was a metal assembly that conducts. Now your level assembly is held by an aluminum stem which intern is screened on by a long rod that is held against the top plate which again is aluminum and anodized... It doesn't conduct ... So you have to figure out a way to ground that fuel level assembly. Maybe you can put a ring terminal on a wire ebbing the bolt that holds the assembly to the aluminum stem and run it to one of the negative poles on the fuel pump... After all they are grounded.
Let me know I have had sooooo many problems getting it to work
Thank you
Andrew
I had another CJ housing with aeromotive pumps and my gauge worked fine for over 2 years.


 02-05-14, 06:05 PM
#117


if you dont mind me asking, Why? ( I would like to know that info )
Thanks
also the car is looking pretty sick!
02-05-14, 09:17 PM
#119
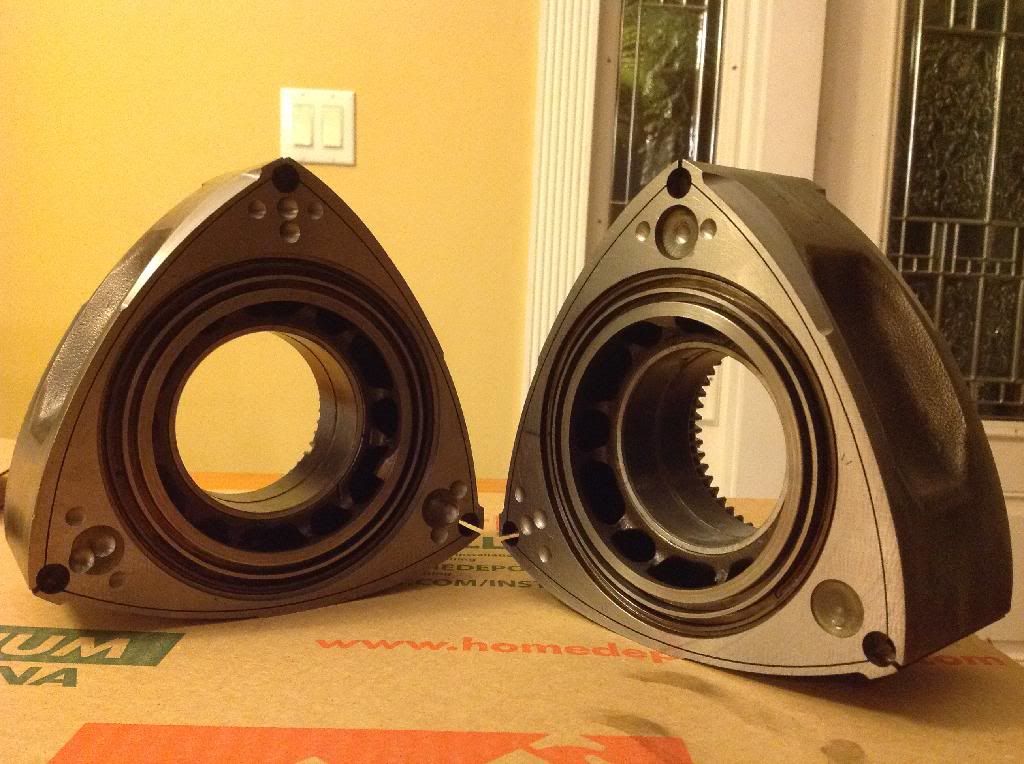
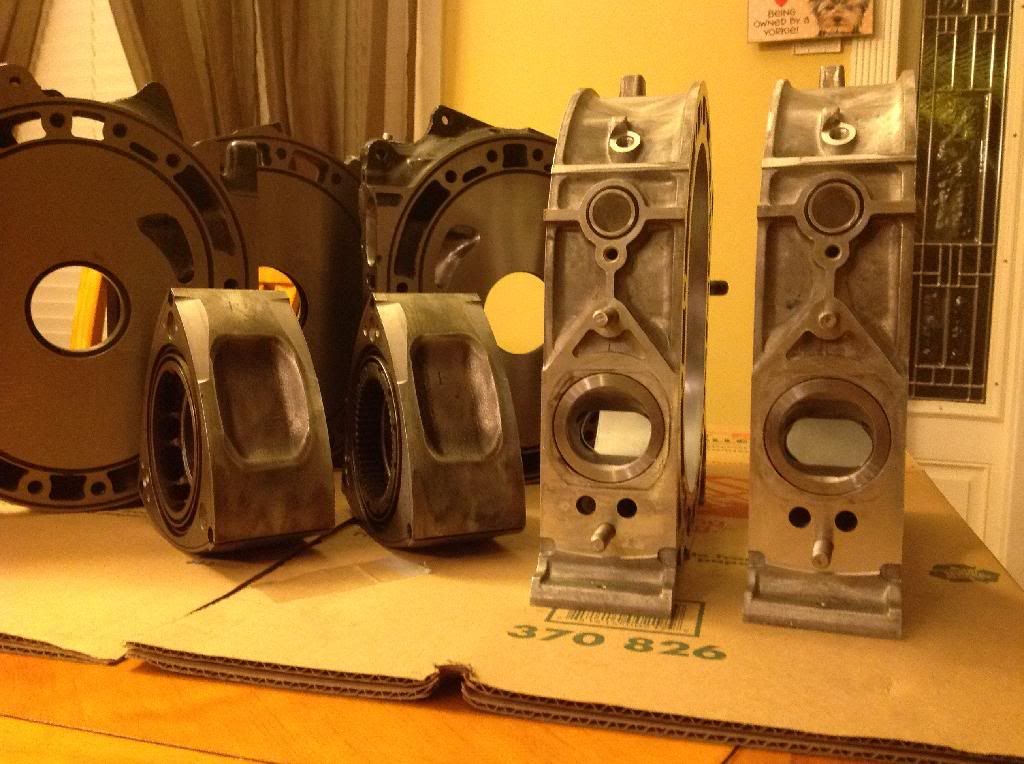
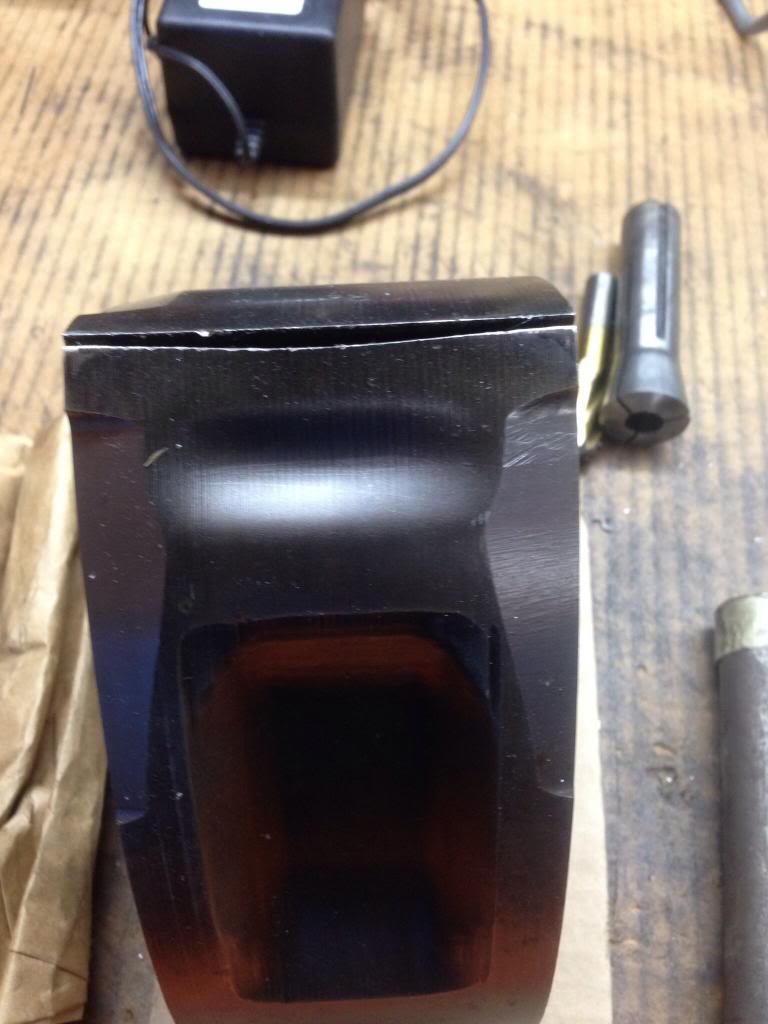
Main reason for using second gen Rotors and only S4 86-88 is due to their casting, after 89 Mazda reduce the thickness of the casting on the rotors to make them lighter, by reducing the casting it made them more prone to get damaged during detonation or dented due to high boost levels.
Cut out picture of S4 and S5 and up rotors, top is FDrotor, bottom S4 turbo
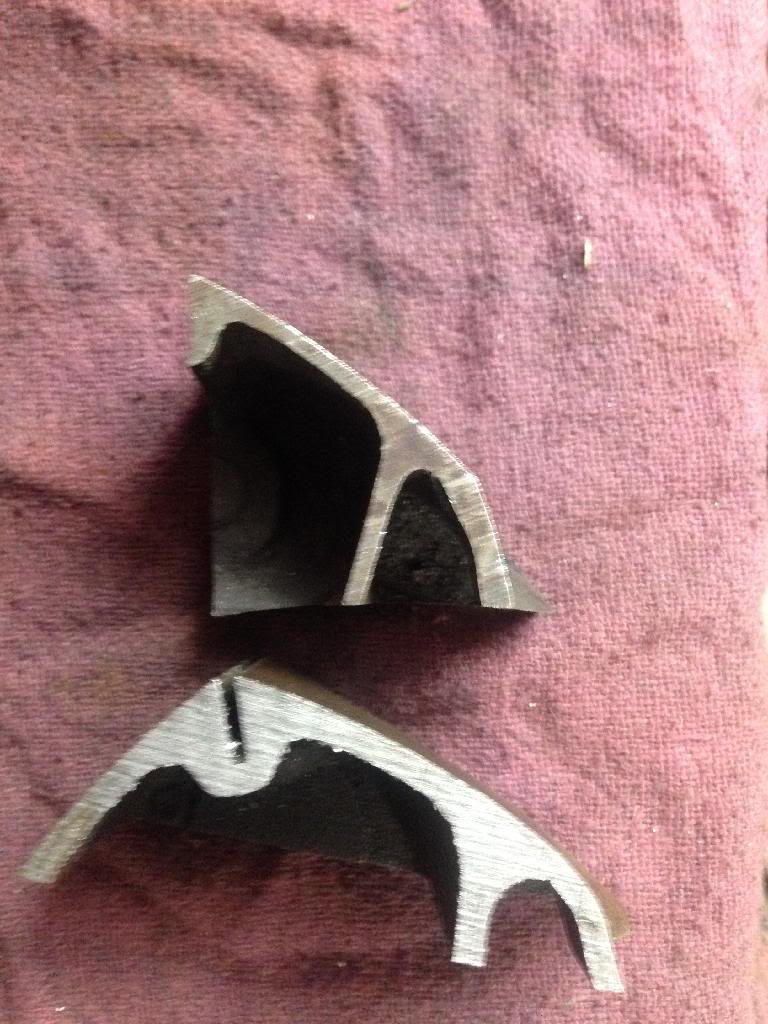
Picture of dented S5-S6 rotor from high boost., look at the dent on the face and the distorted apex seal grove.
 02-06-14, 11:40 AM
#121
Down for a build
iTrader: (10)
Join Date: Dec 2005
Location: KY
Posts: 149
Likes: 0
Received 0 Likes
on
0 Posts
Great build so far... awesome that you took the negative of the fire and turned it into a chance to build bigger and better. I will certainly be watching for updates....