
AFGMOTO1978 Build Thread

Thread Starter
Joined: Jul 2005
Posts: 2,913
Likes: 4
From: Kingman, AZ
1/6/08
Barry,
Sweet, thank you sir, looking forward to getting those items. Is that AFR tuning info your sending an update to what I received from Chuck Westbrook's CD? The excel tables you made definitely make life easier when tuning!
Update:
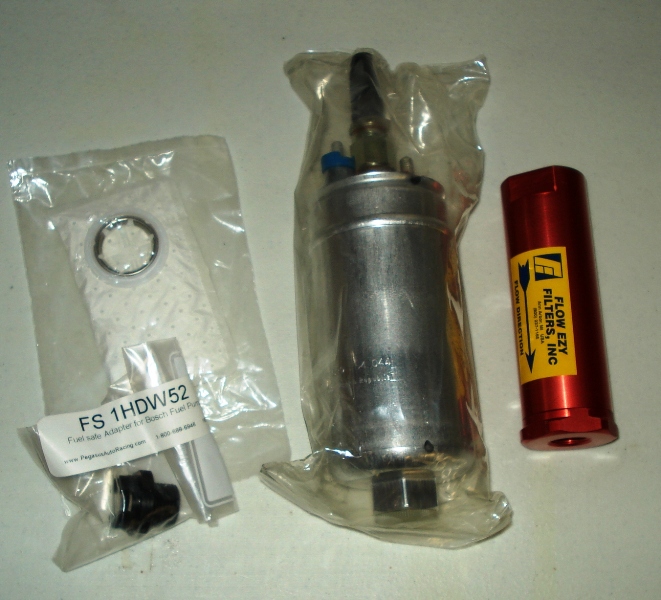
Received my Bosch 044 fuel pump, in tank filter and 10 micron external filter. The Bosch 044 pump is rated at 200 GPH (~757 LPH) at 72 psi, which will be more than adequate. Just need to get fittings and adapter to install.
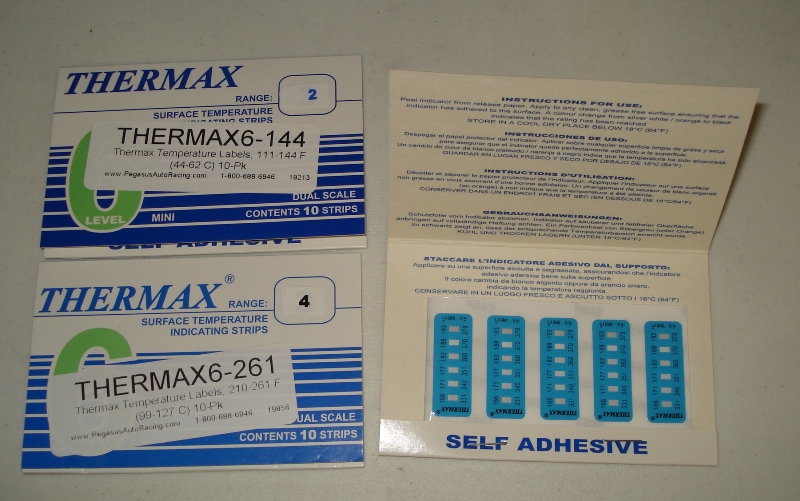
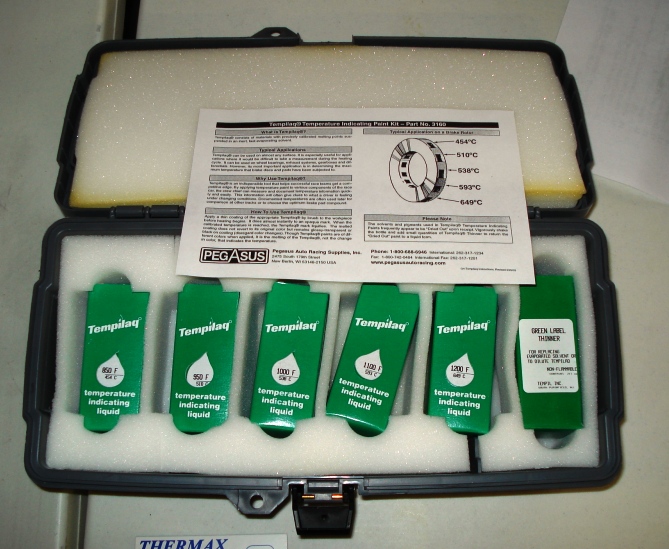
Also received thermo temp strips and paint, plus roll bar padding.
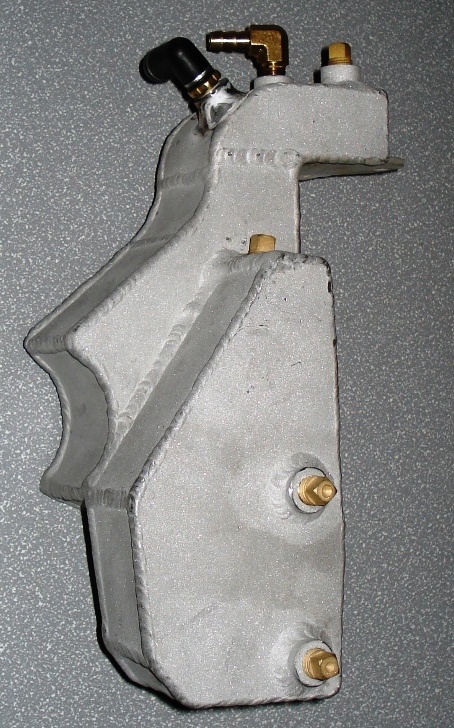
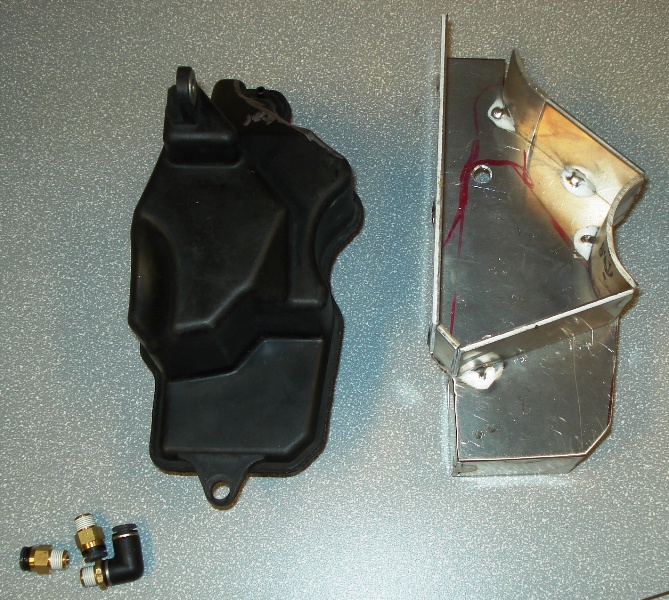
Currently working on my oil catch tank that copies the stock vacuum chamber located in the front of the motor. Pretty ideal location due to it's proximity to all the accessories that it will be attached to, plus allows for a fair amount of volume. Need to finish locating and welding on the mounting tabs.
Sweet, thank you sir, looking forward to getting those items. Is that AFR tuning info your sending an update to what I received from Chuck Westbrook's CD? The excel tables you made definitely make life easier when tuning!
Update:
Received my Bosch 044 fuel pump, in tank filter and 10 micron external filter. The Bosch 044 pump is rated at 200 GPH (~757 LPH) at 72 psi, which will be more than adequate. Just need to get fittings and adapter to install.
Also received thermo temp strips and paint, plus roll bar padding.
Currently working on my oil catch tank that copies the stock vacuum chamber located in the front of the motor. Pretty ideal location due to it's proximity to all the accessories that it will be attached to, plus allows for a fair amount of volume. Need to finish locating and welding on the mounting tabs.
Thread Starter
Joined: Jul 2005
Posts: 2,913
Likes: 4
From: Kingman, AZ
1/6/08
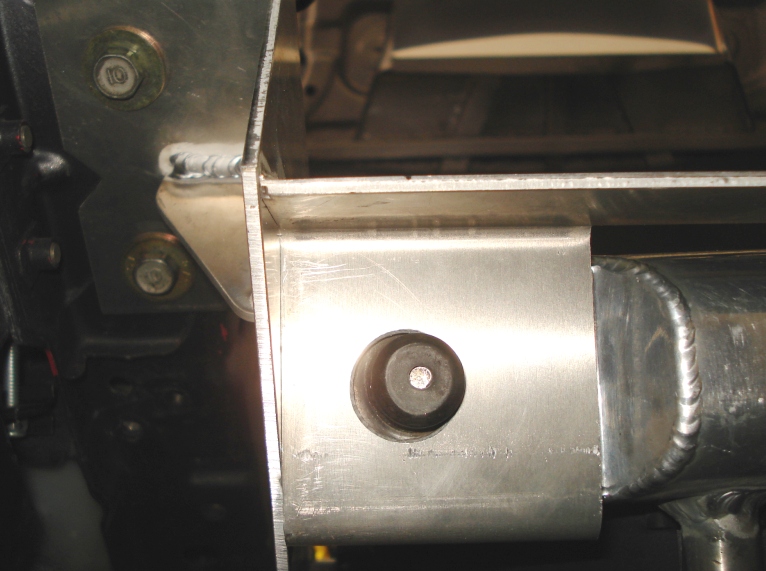
Catch tank done, just need more fittings.
1/10/08
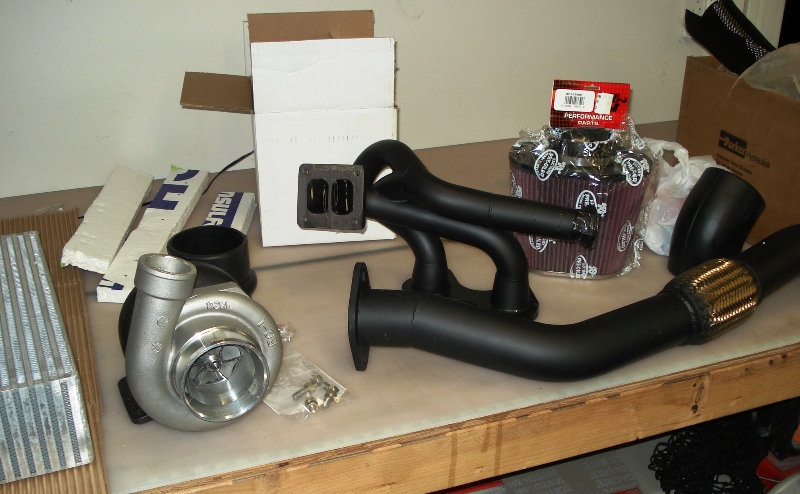
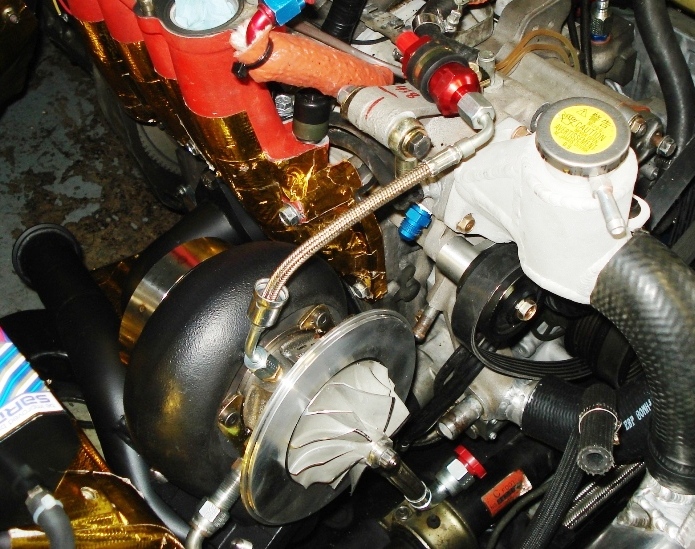
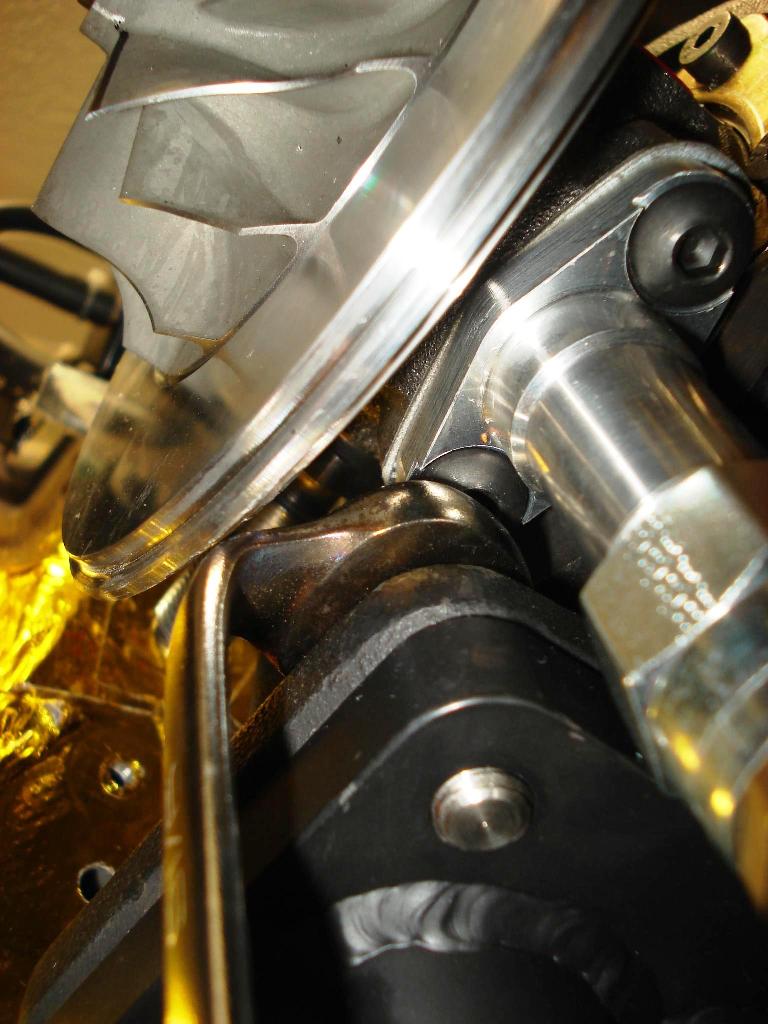
Received the 500R turbo kit yesterday! Very nice kit, but unfortunately have some clearance issues. Will be addressing them with A-Spec soon.
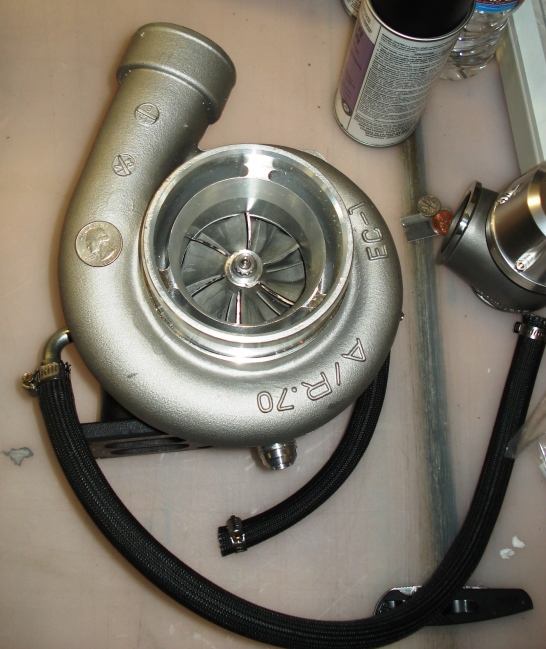
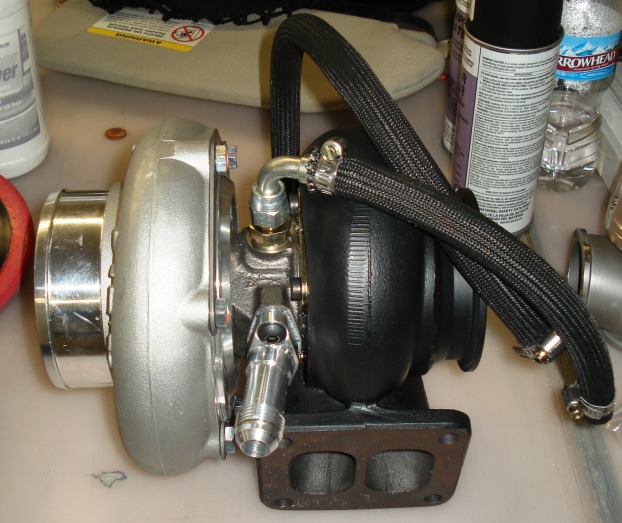
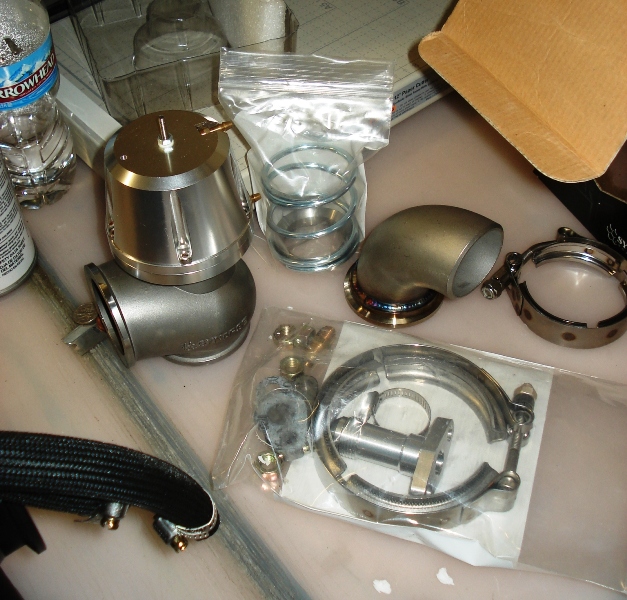

Turbine is interfering with the GZ LIM. Couple of reason caused this, most of them are stemmed from the items I wanted on this kit (Synapse WG & .84 A/R Turbine) which are custom to the A-Spec 500R kit, plus my concerns relayed to Sean about my cooling system and turbo positioning (Right Hand drive headers used) and the GZ LIM. Basically it's mostly my fault. I talked the Sean and he's looking into setting up long runner headers with a R-hand drive header WG location. I will redo my cooling package as well. Which is just as well, because I will be needing a large IC anyways.
Catch tank done, just need more fittings.
1/10/08
Received the 500R turbo kit yesterday! Very nice kit, but unfortunately have some clearance issues. Will be addressing them with A-Spec soon.
Turbine is interfering with the GZ LIM. Couple of reason caused this, most of them are stemmed from the items I wanted on this kit (Synapse WG & .84 A/R Turbine) which are custom to the A-Spec 500R kit, plus my concerns relayed to Sean about my cooling system and turbo positioning (Right Hand drive headers used) and the GZ LIM. Basically it's mostly my fault. I talked the Sean and he's looking into setting up long runner headers with a R-hand drive header WG location. I will redo my cooling package as well. Which is just as well, because I will be needing a large IC anyways.
Thread Starter
Joined: Jul 2005
Posts: 2,913
Likes: 4
From: Kingman, AZ
1/18/08
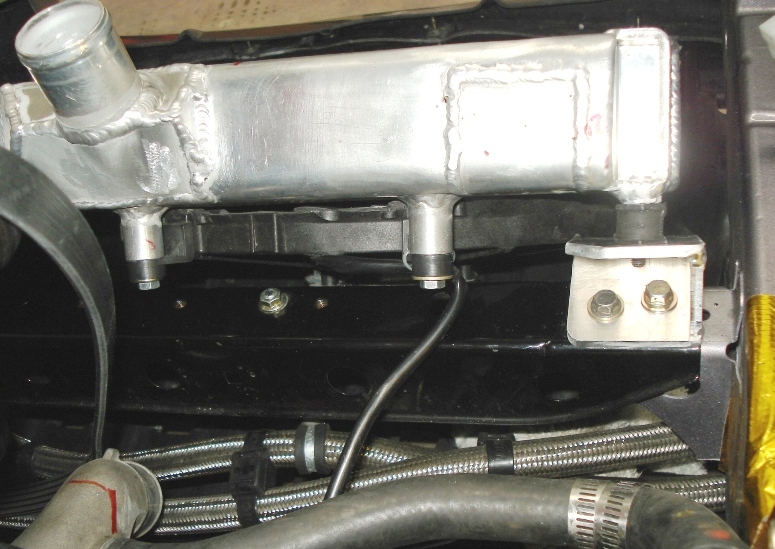
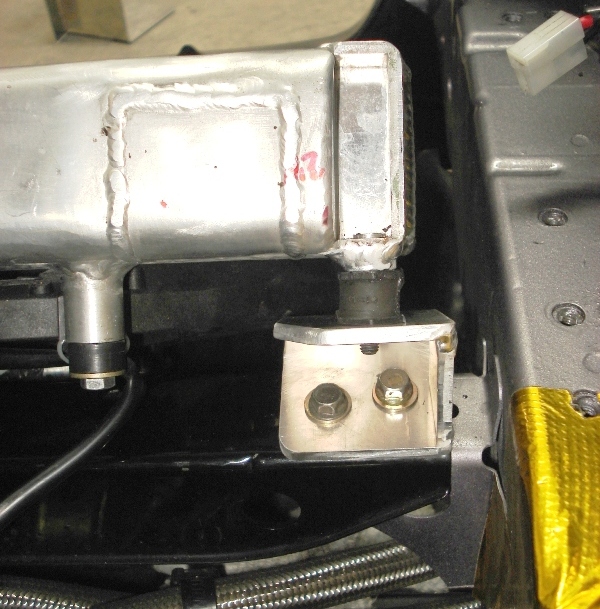
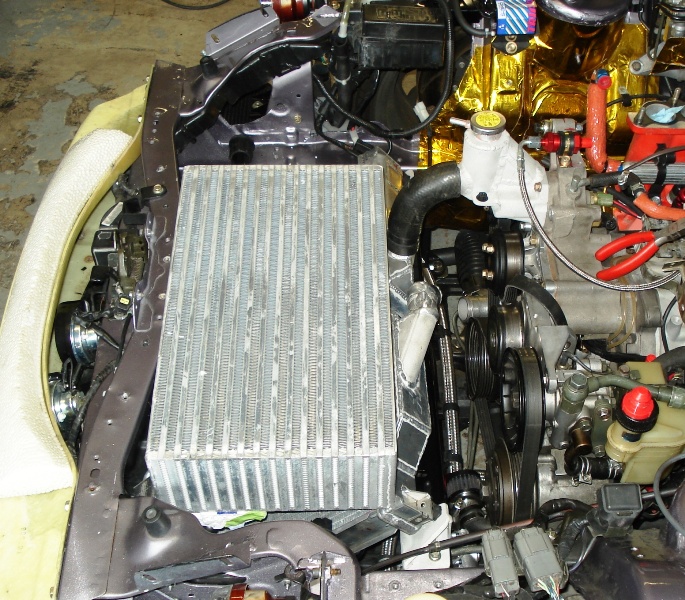
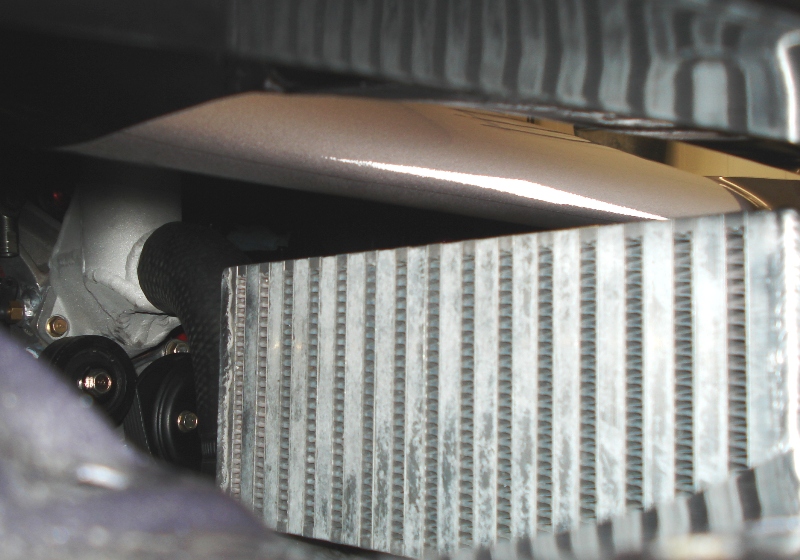
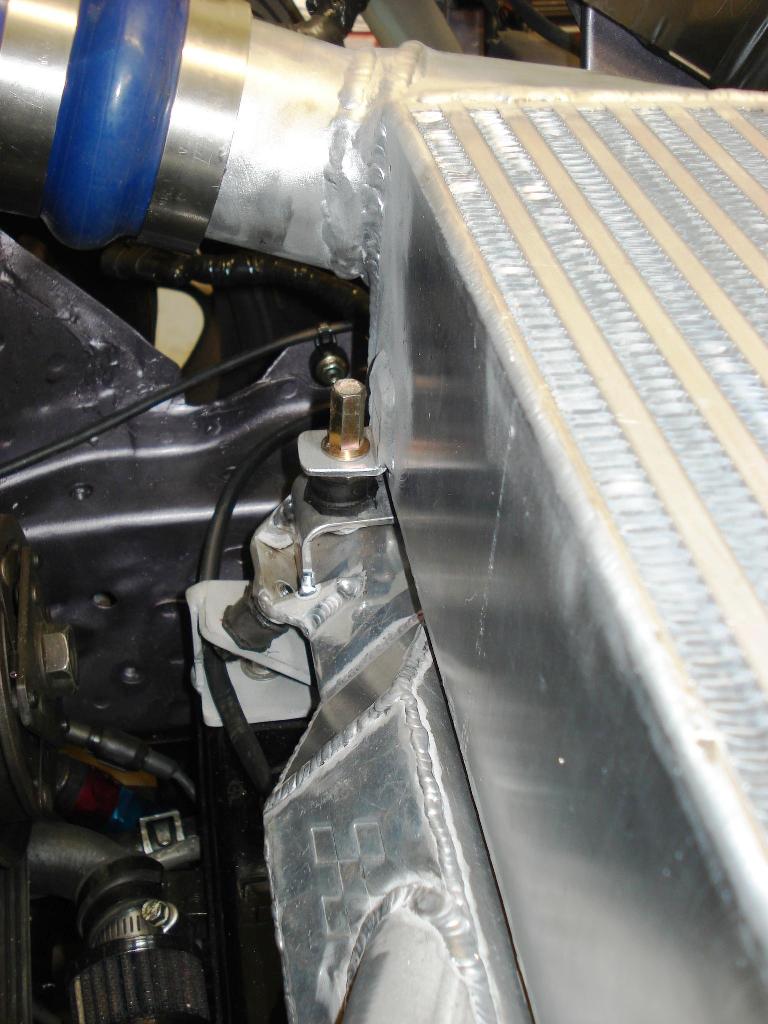
Currently working on the coolant package. Radiator mounts are in process and should be done tomorrow. I got a 4 in hump hose for the turbo inlet and some universal tubing bends for the new turbo ducting I will be making. I was hoping I recieved my new IC core as well, but it didn't. I went with a Bell intercoolers Bar & Plate 4.5" X 10.5" X 18" Core. It was the best compromise to available space, rated flowrate and cooling surface area.
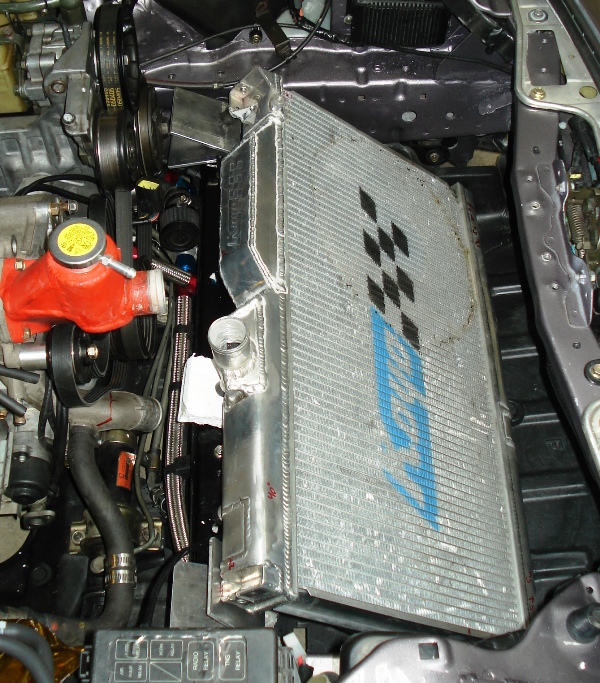

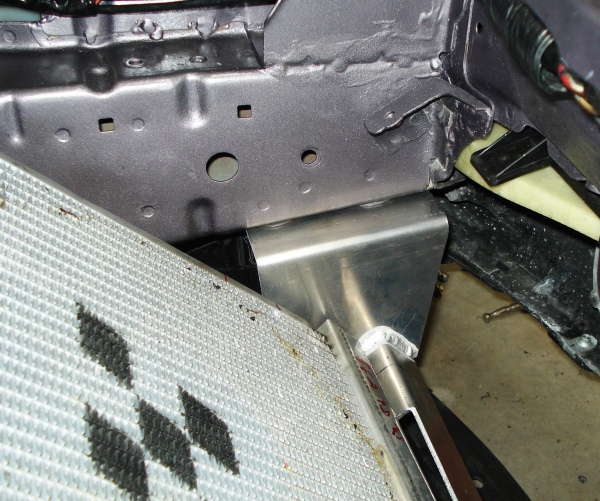
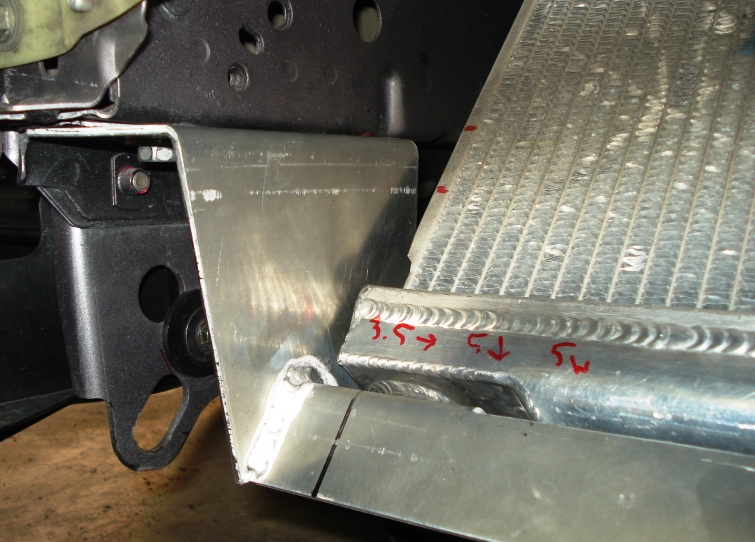
Currently working on the coolant package. Radiator mounts are in process and should be done tomorrow. I got a 4 in hump hose for the turbo inlet and some universal tubing bends for the new turbo ducting I will be making. I was hoping I recieved my new IC core as well, but it didn't. I went with a Bell intercoolers Bar & Plate 4.5" X 10.5" X 18" Core. It was the best compromise to available space, rated flowrate and cooling surface area.
Thread Starter
Joined: Jul 2005
Posts: 2,913
Likes: 4
From: Kingman, AZ
1/28/08
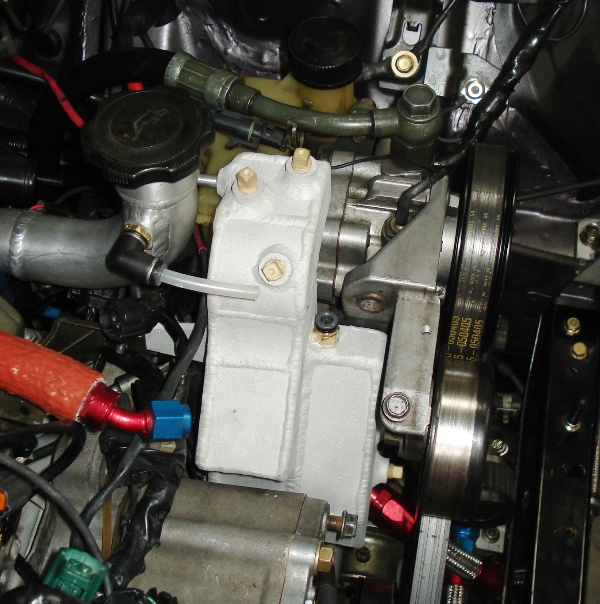
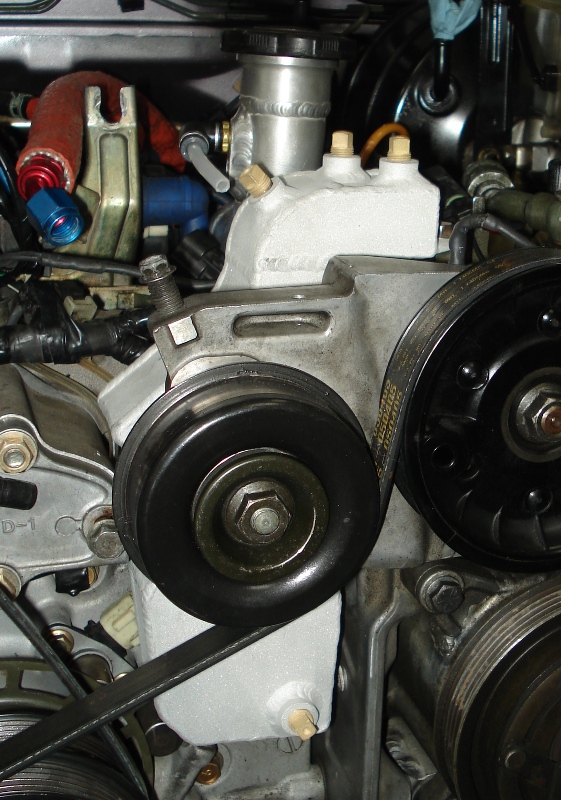
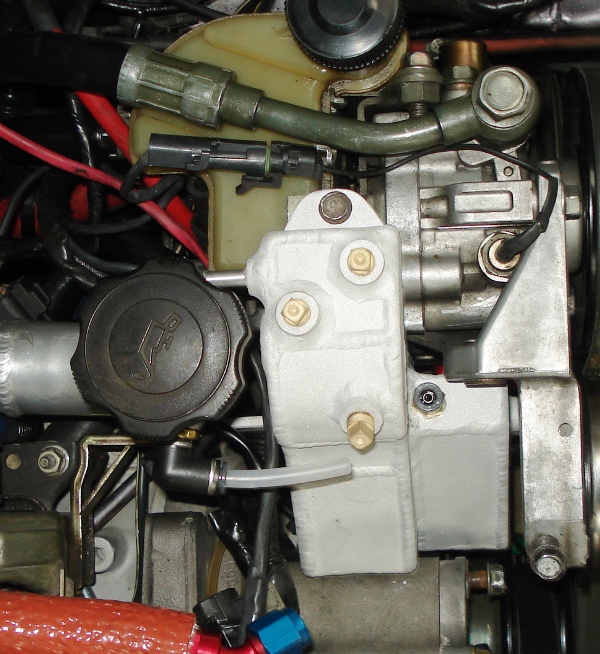
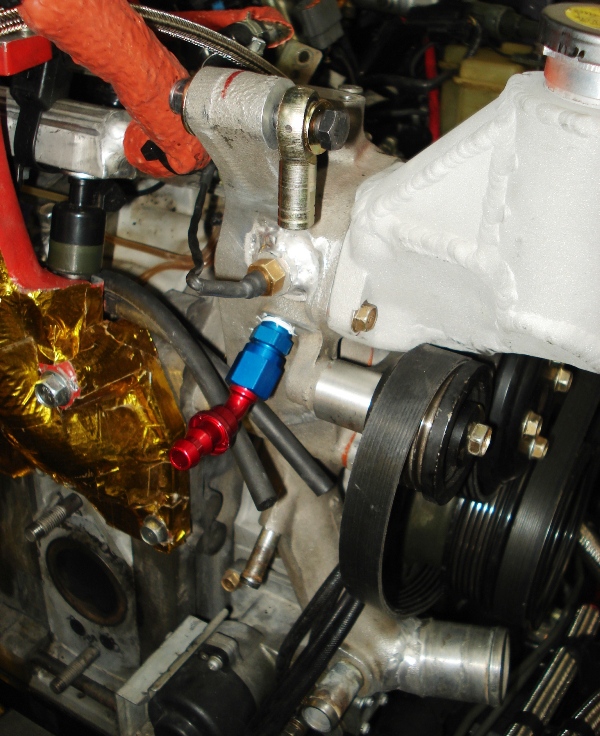
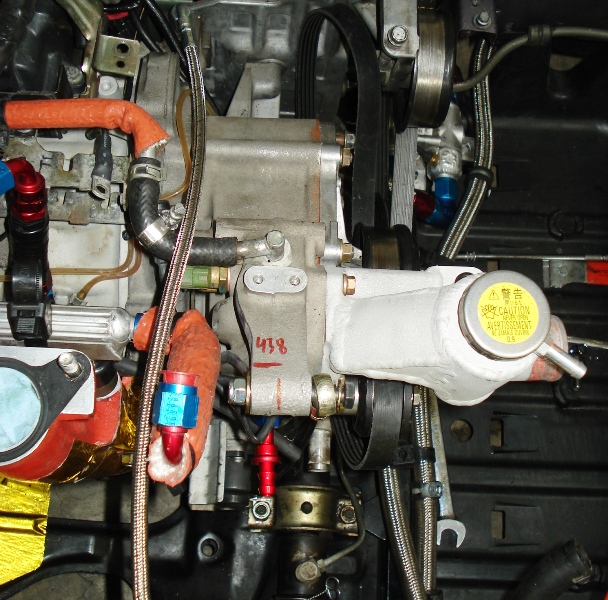
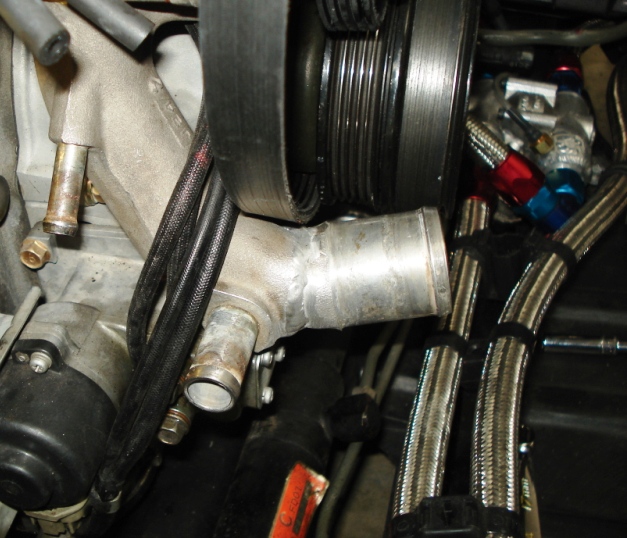
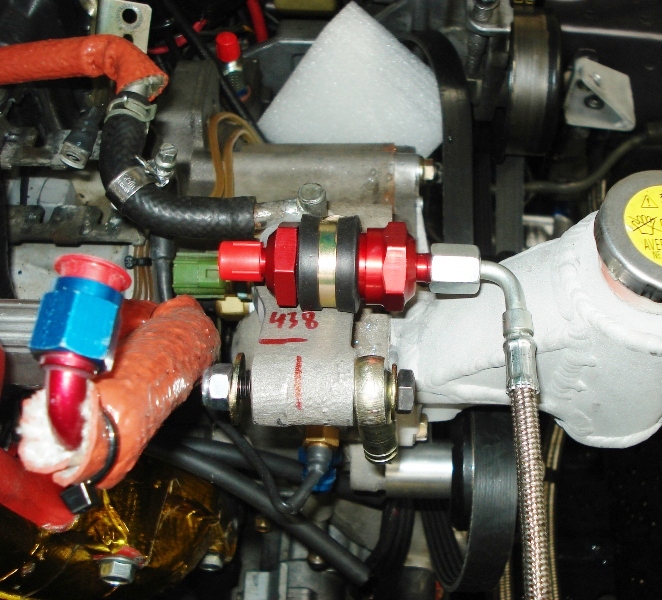
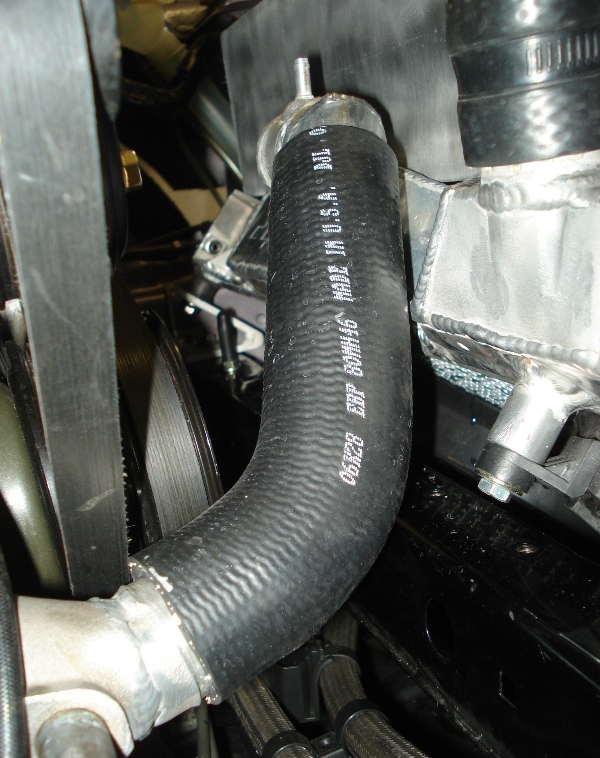
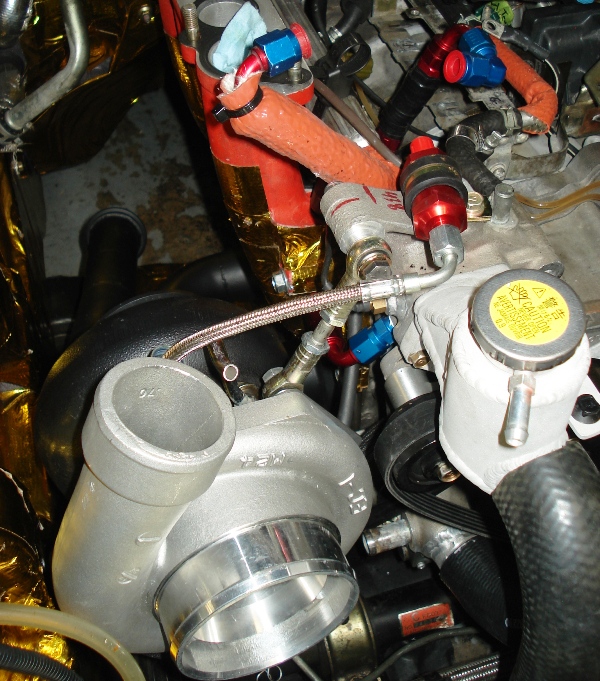
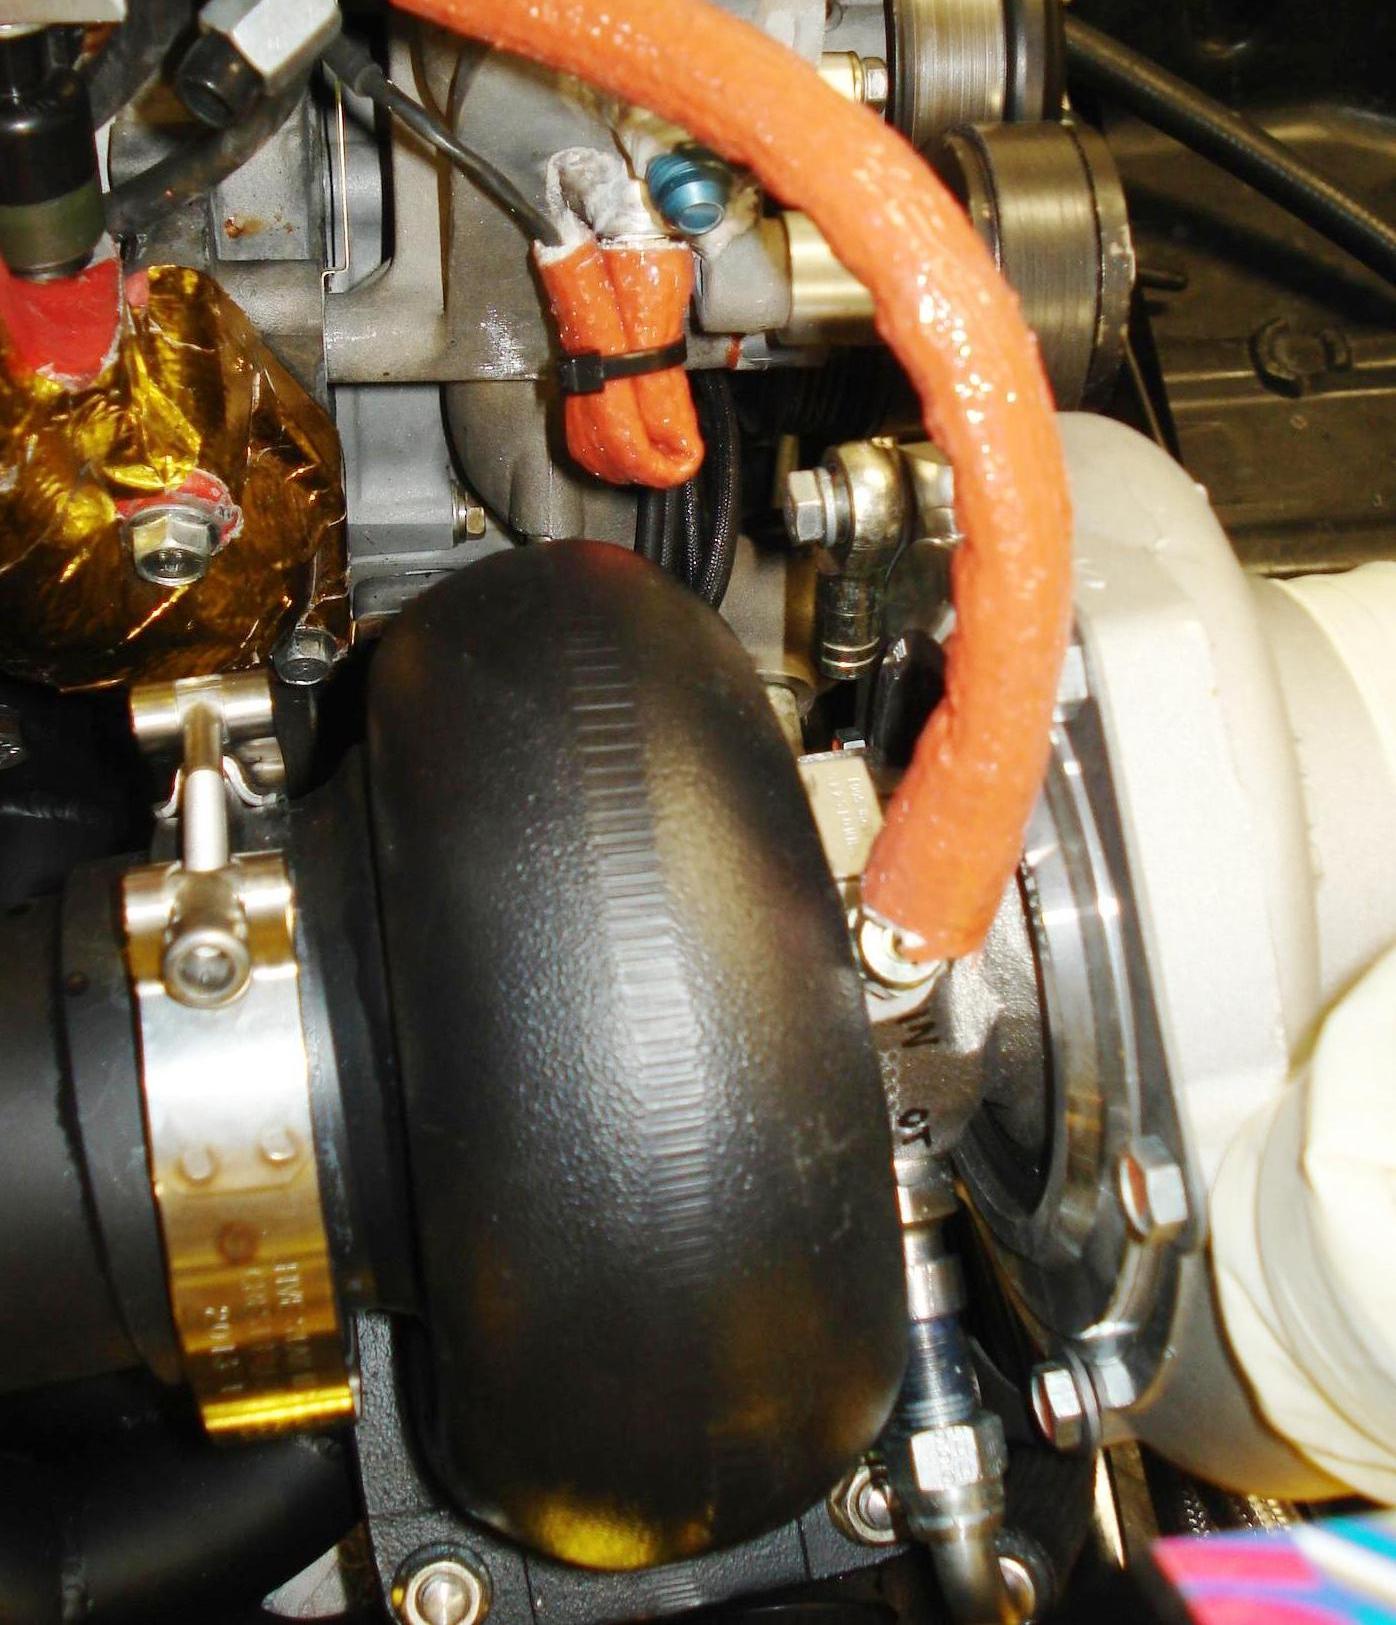
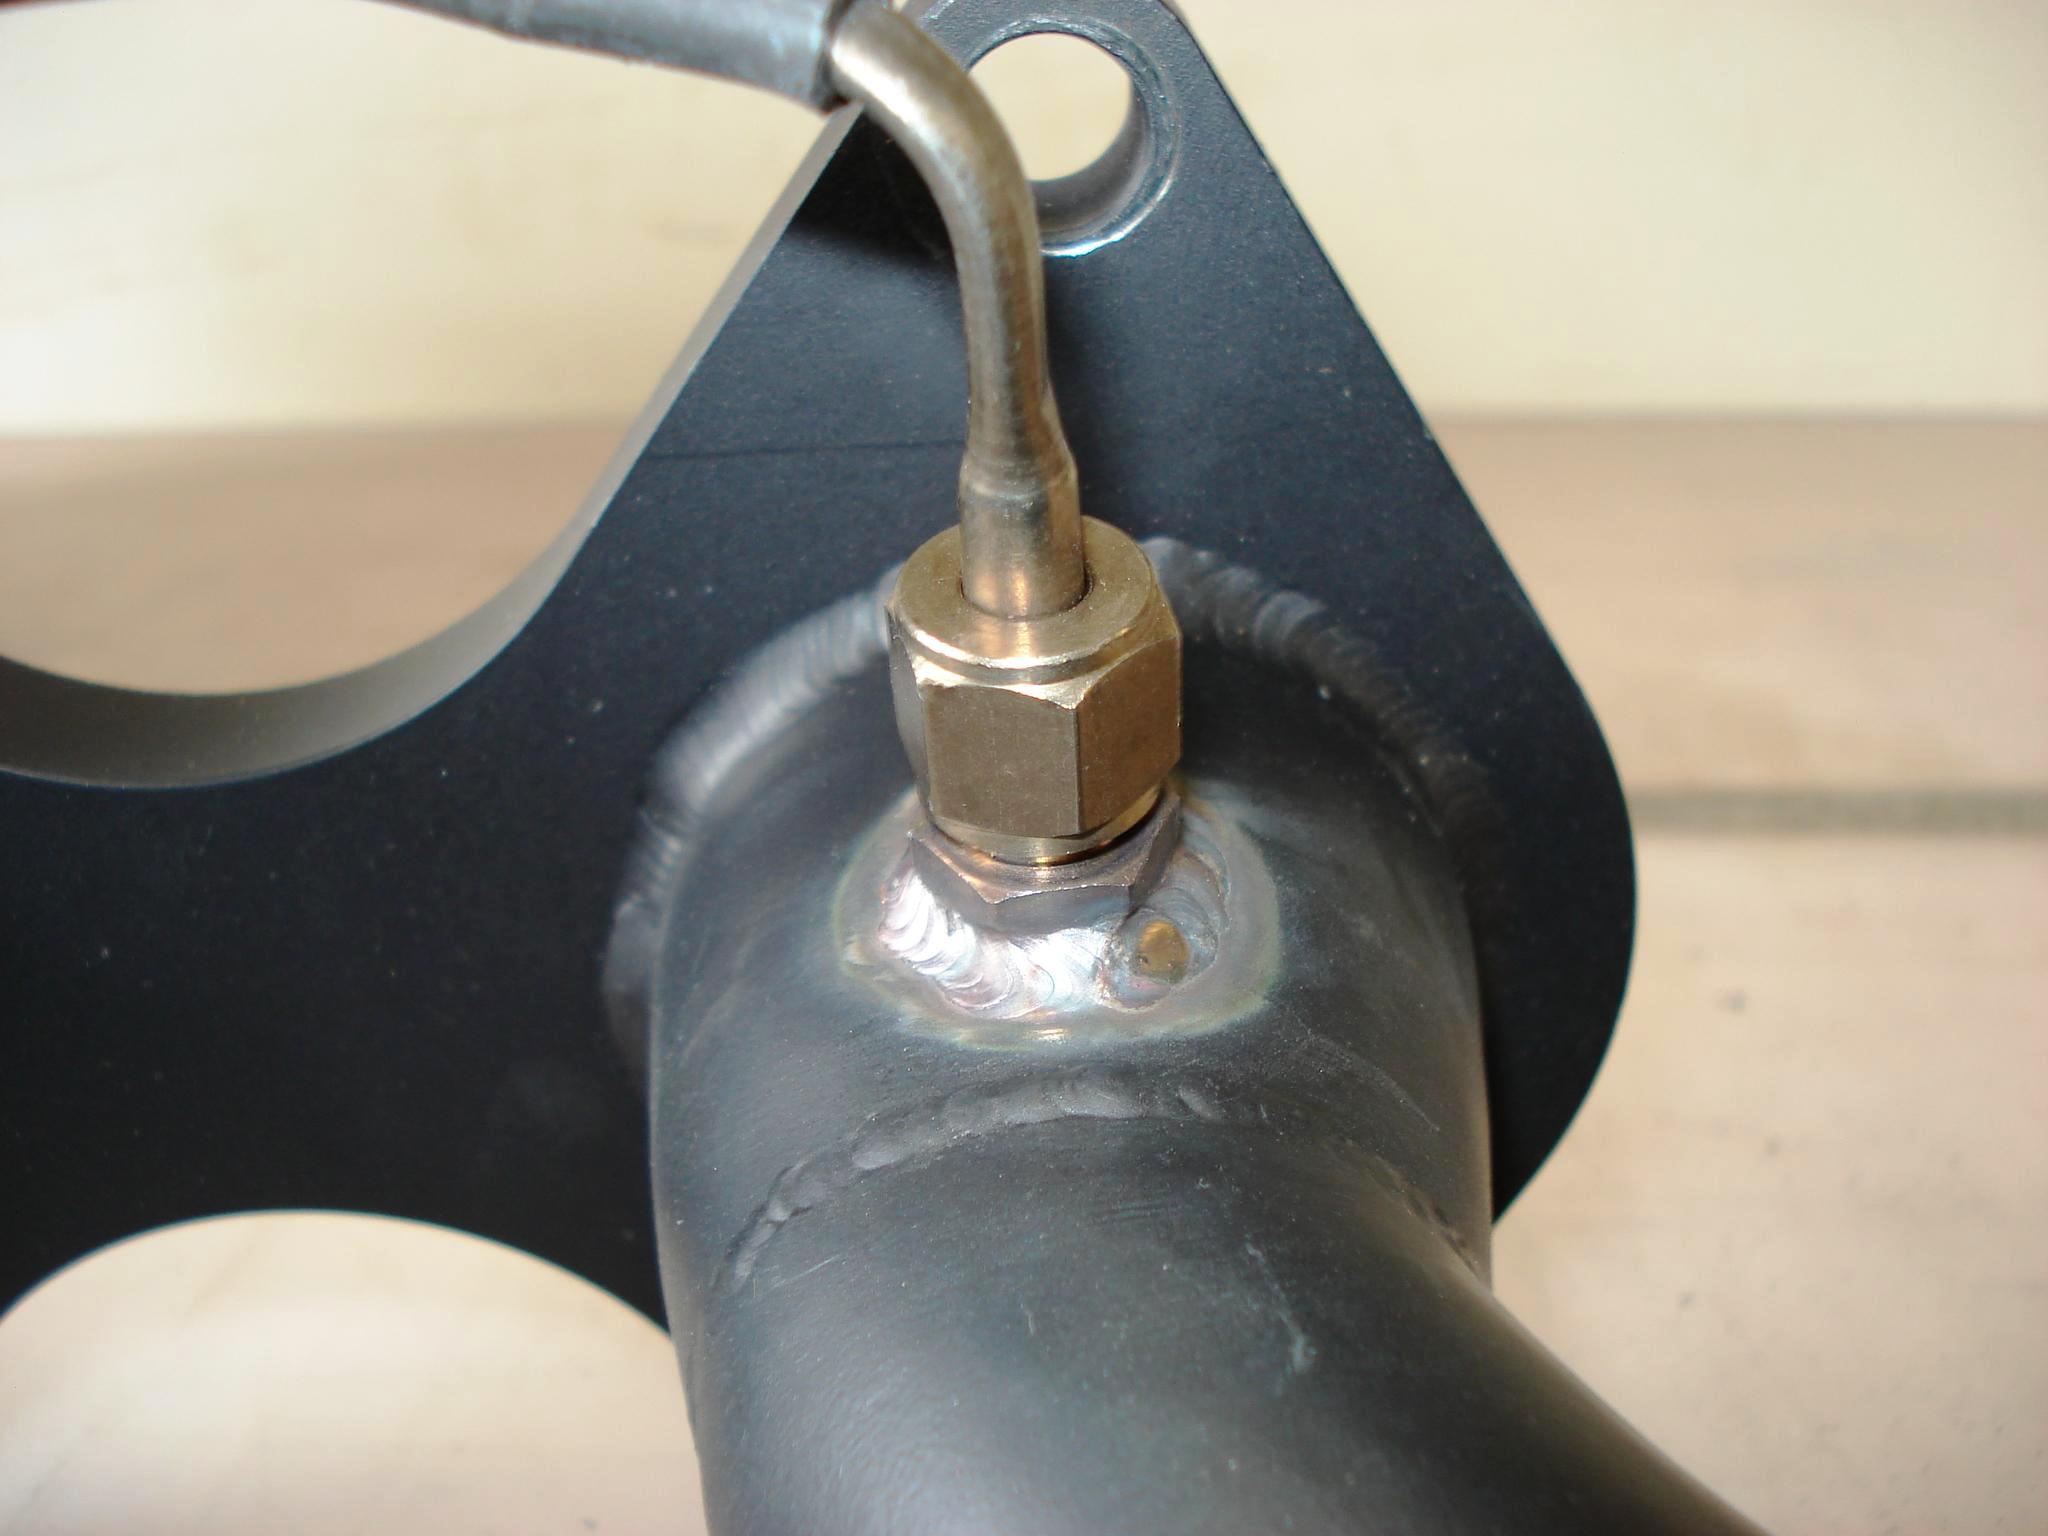
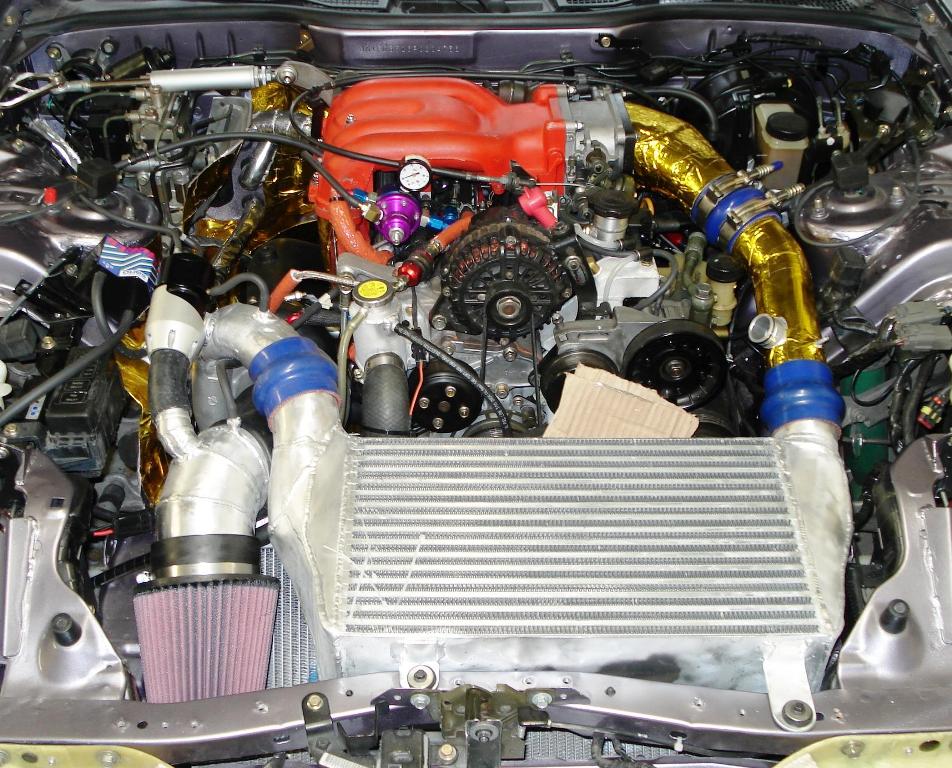
I was able to modified my water pump/thermostat housing, changed the turbo water outlet from stock to a -6AN fitting, relocated my SPA water temp sensor to be more accurate (no other place to put it, so need heat wrap to protect it from the Turbo), changed the location of the water inlet tube to better line up with my now double pass Koyo Rad and trimmed the air pump mounting ear to give more clearance to the secondary fuel rail outlet line and the support rod I will be making for the turbo.
1/30/08
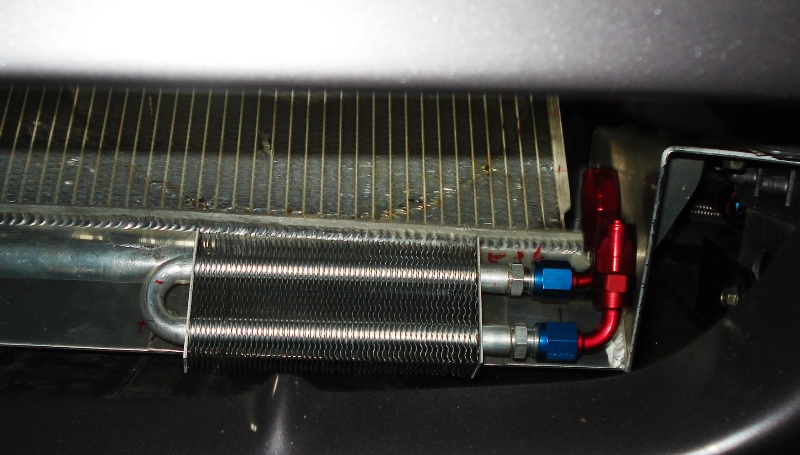
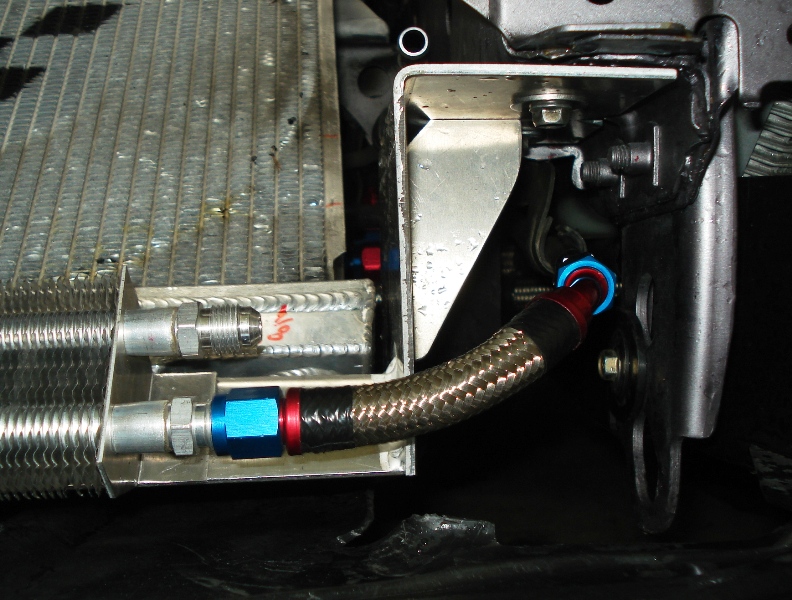
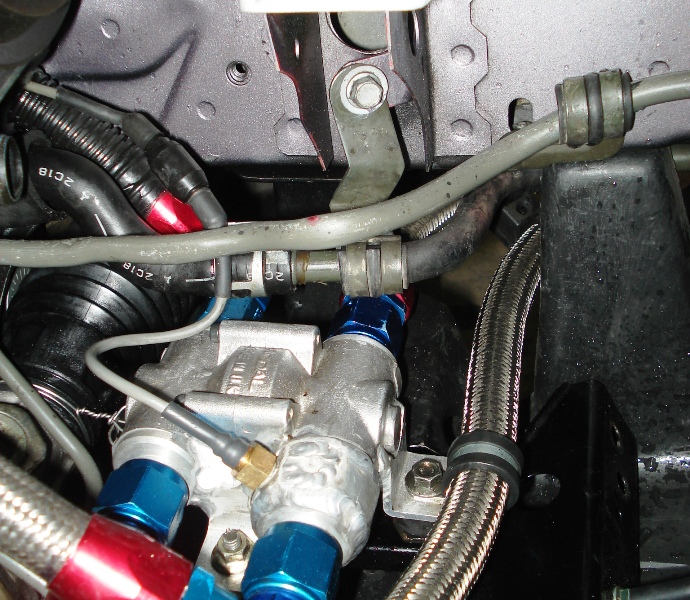
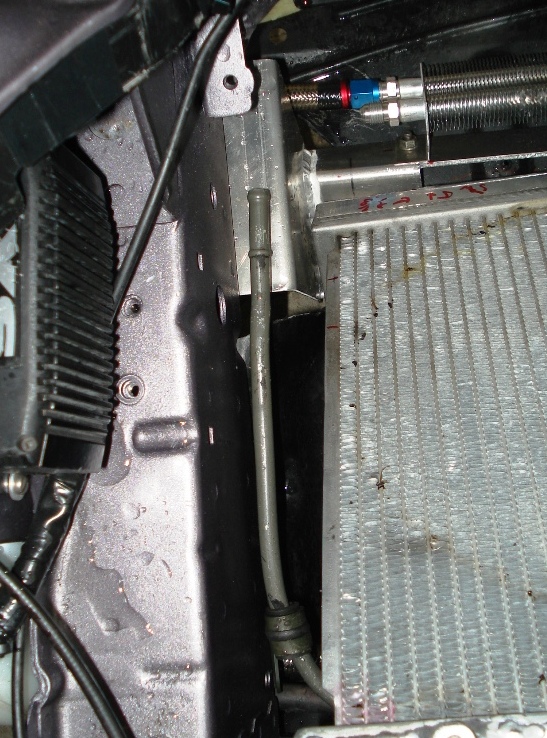
Working on power steering line routing, return line done, need to finish the feed line.
I was able to modified my water pump/thermostat housing, changed the turbo water outlet from stock to a -6AN fitting, relocated my SPA water temp sensor to be more accurate (no other place to put it, so need heat wrap to protect it from the Turbo), changed the location of the water inlet tube to better line up with my now double pass Koyo Rad and trimmed the air pump mounting ear to give more clearance to the secondary fuel rail outlet line and the support rod I will be making for the turbo.
1/30/08
Working on power steering line routing, return line done, need to finish the feed line.
Thread Starter
Joined: Jul 2005
Posts: 2,913
Likes: 4
From: Kingman, AZ
2/1/08
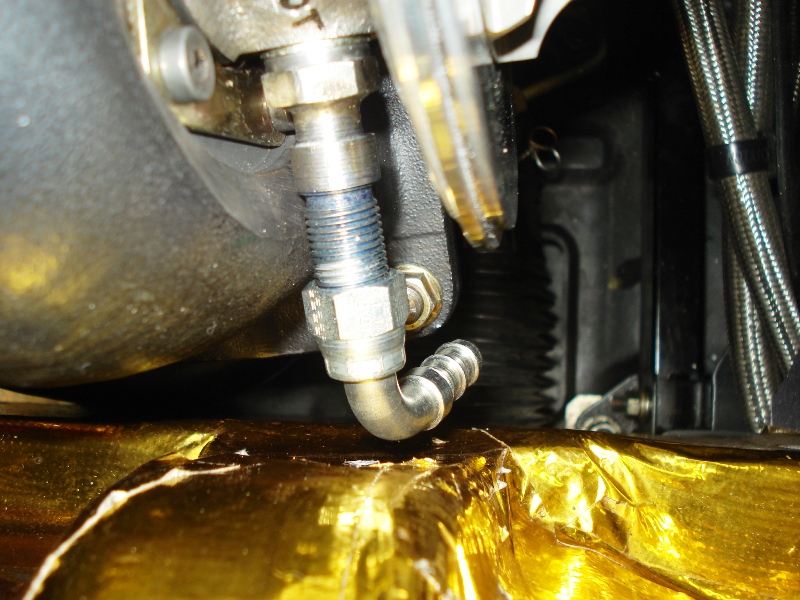
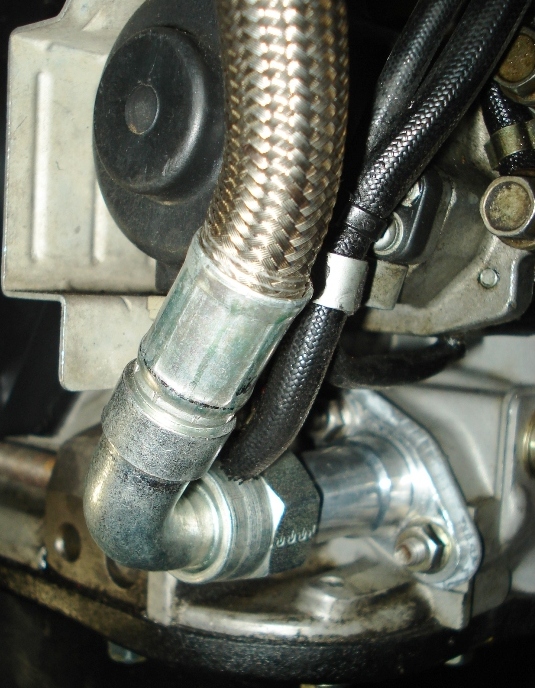
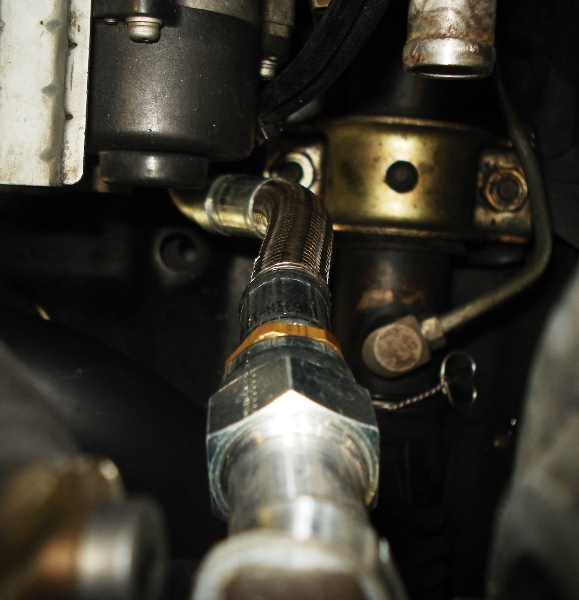
Power steering line done.


2/9/08
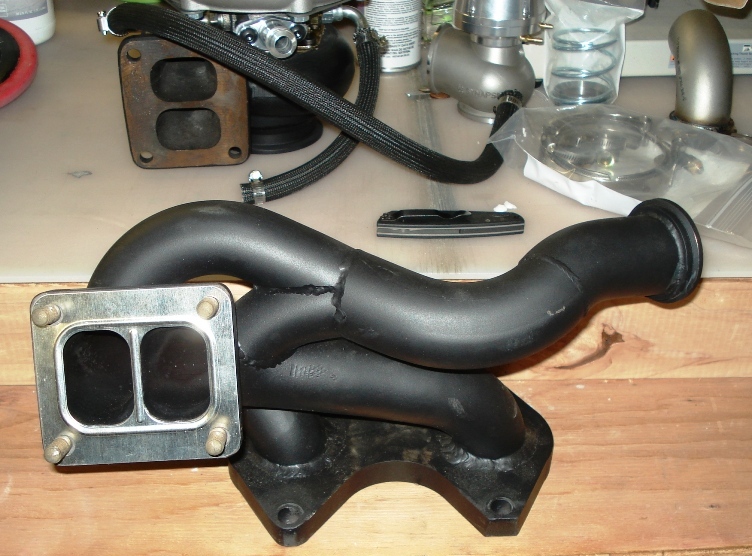
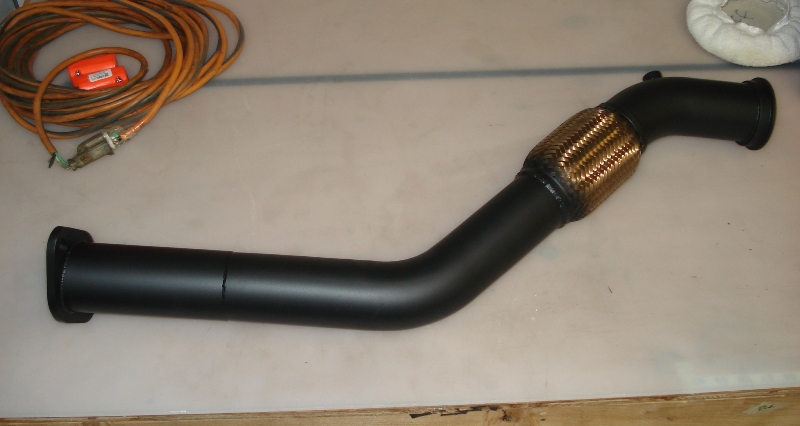
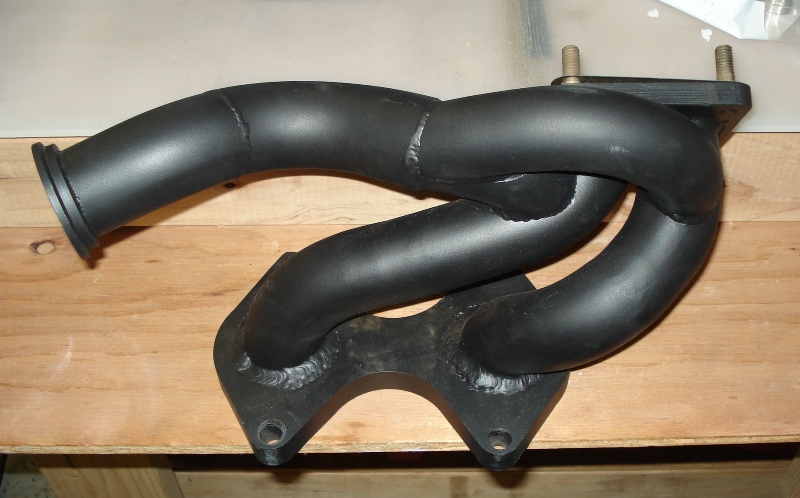
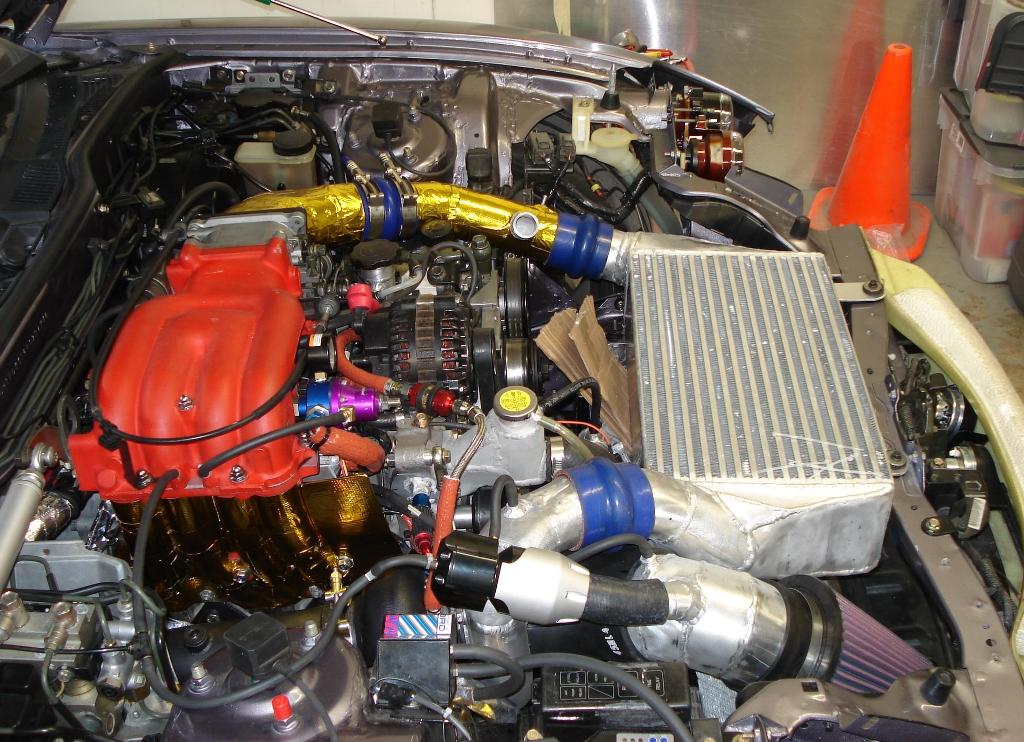
Headers and downpipe came in yesterday. Space is going to be in short supply for everything, the end tanks on the IC will be interesting items to make. Need to modify some fittings and such, but so far making progress.
Power steering line done.
2/9/08
Headers and downpipe came in yesterday. Space is going to be in short supply for everything, the end tanks on the IC will be interesting items to make. Need to modify some fittings and such, but so far making progress.
Thread Starter
Joined: Jul 2005
Posts: 2,913
Likes: 4
From: Kingman, AZ
2/11/08
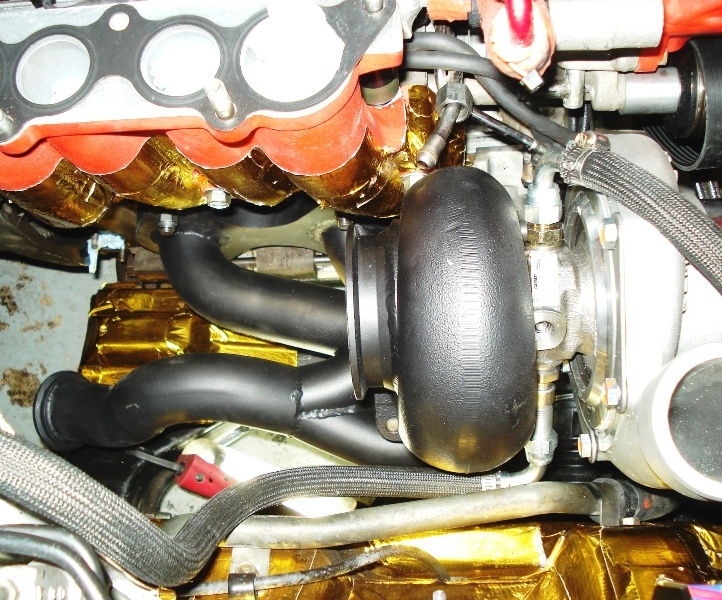
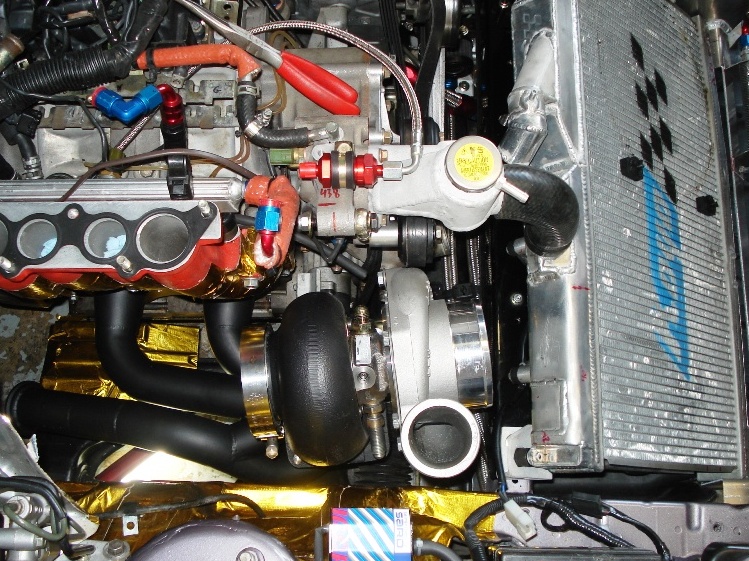
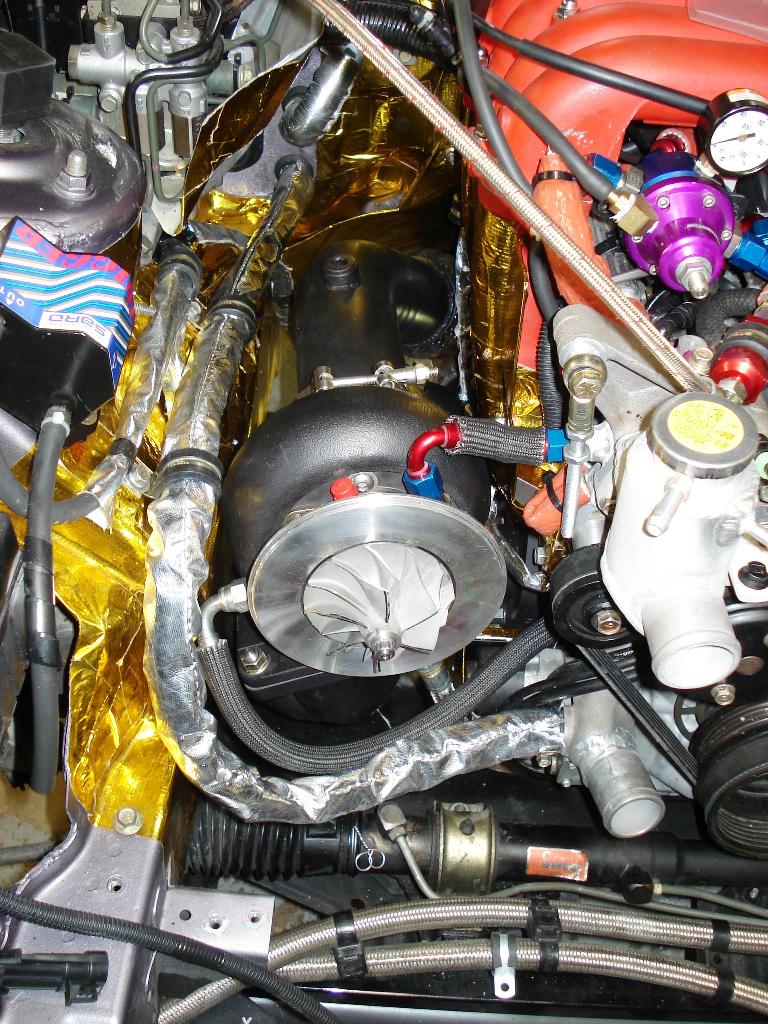
Making progress, got some of my electrical issues addressed and slowly but surely getting all the supporting accessories for the turbo in place.
Making progress, got some of my electrical issues addressed and slowly but surely getting all the supporting accessories for the turbo in place.
Thread Starter
Joined: Jul 2005
Posts: 2,913
Likes: 4
From: Kingman, AZ
2/15/08
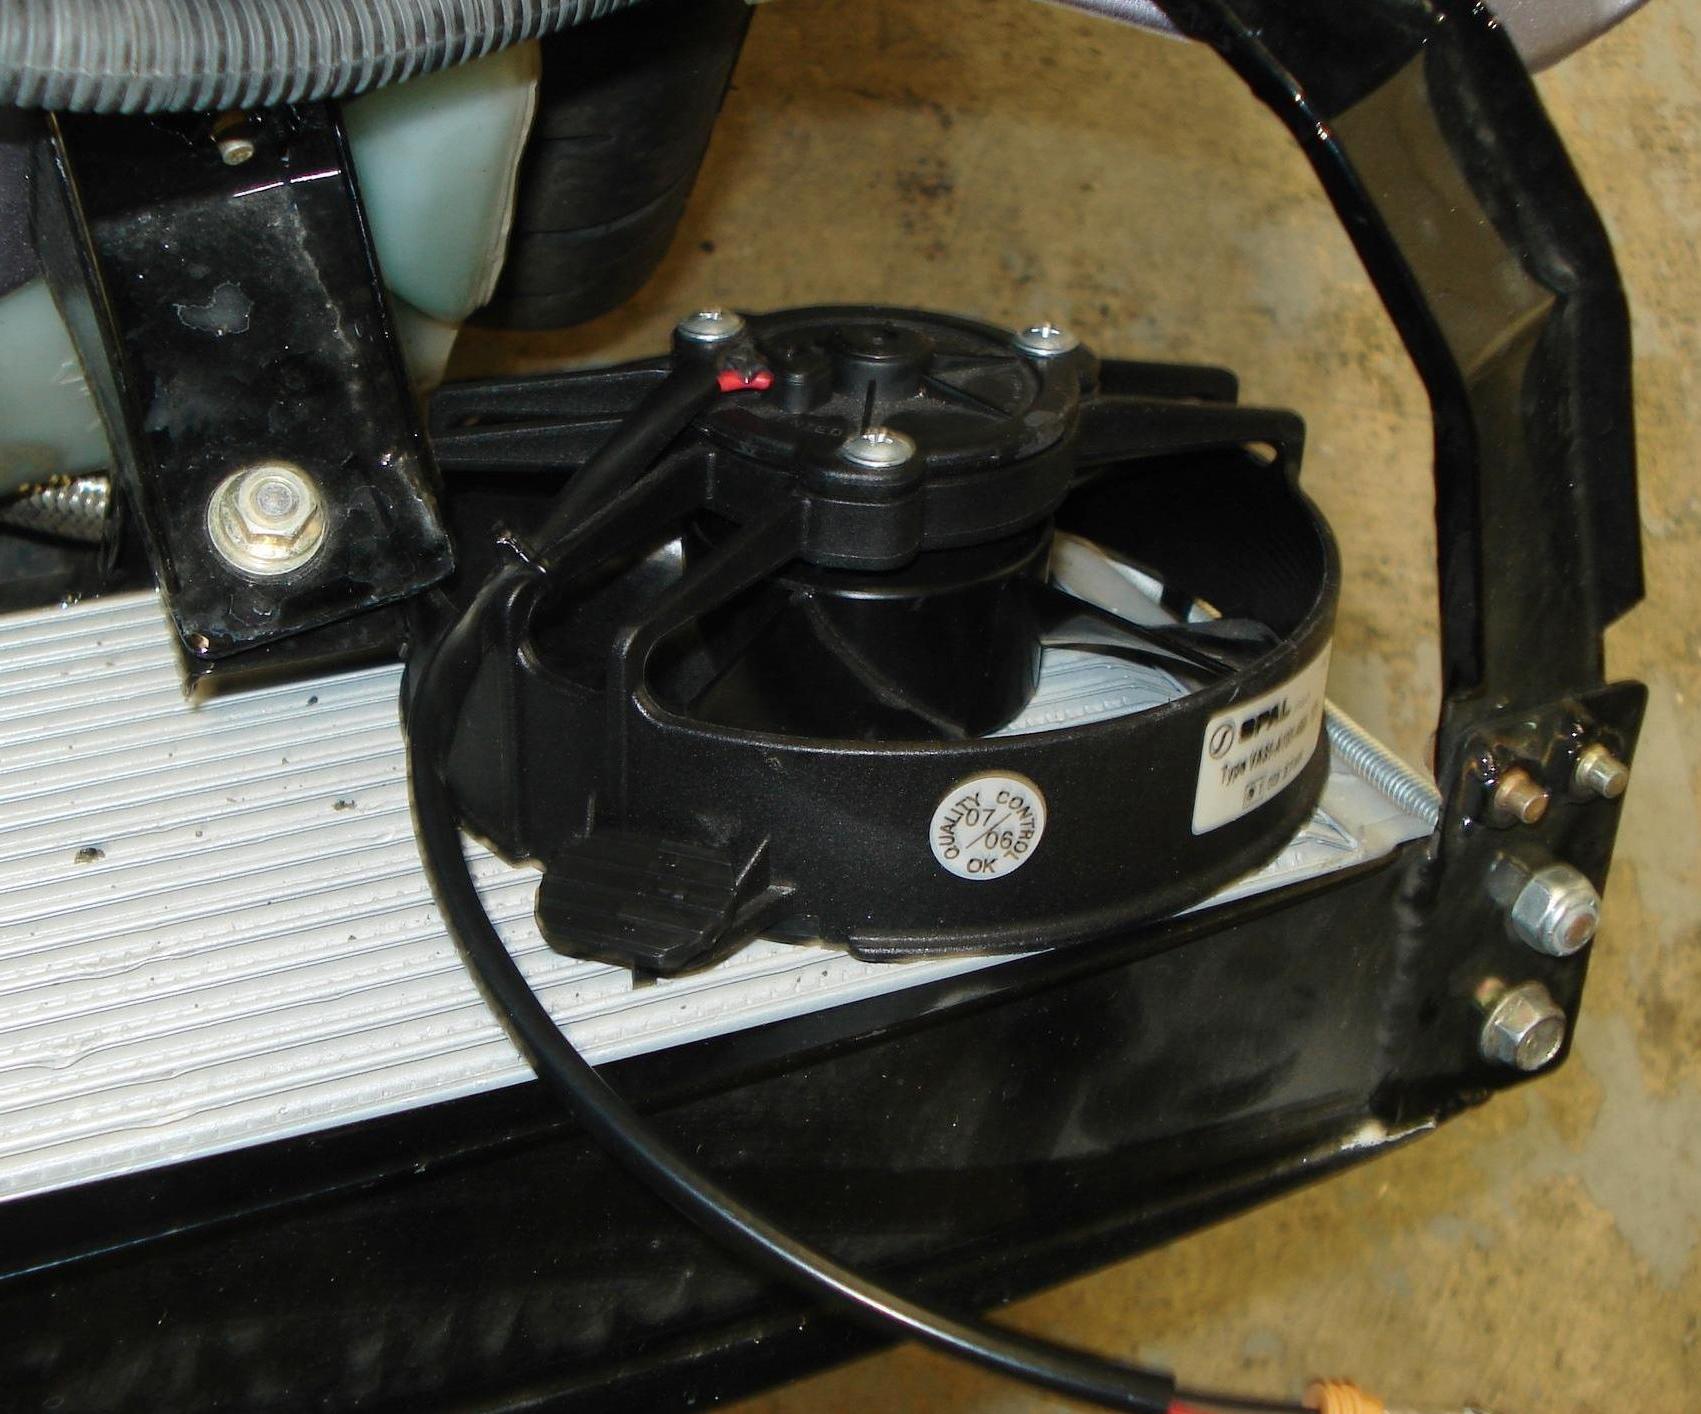
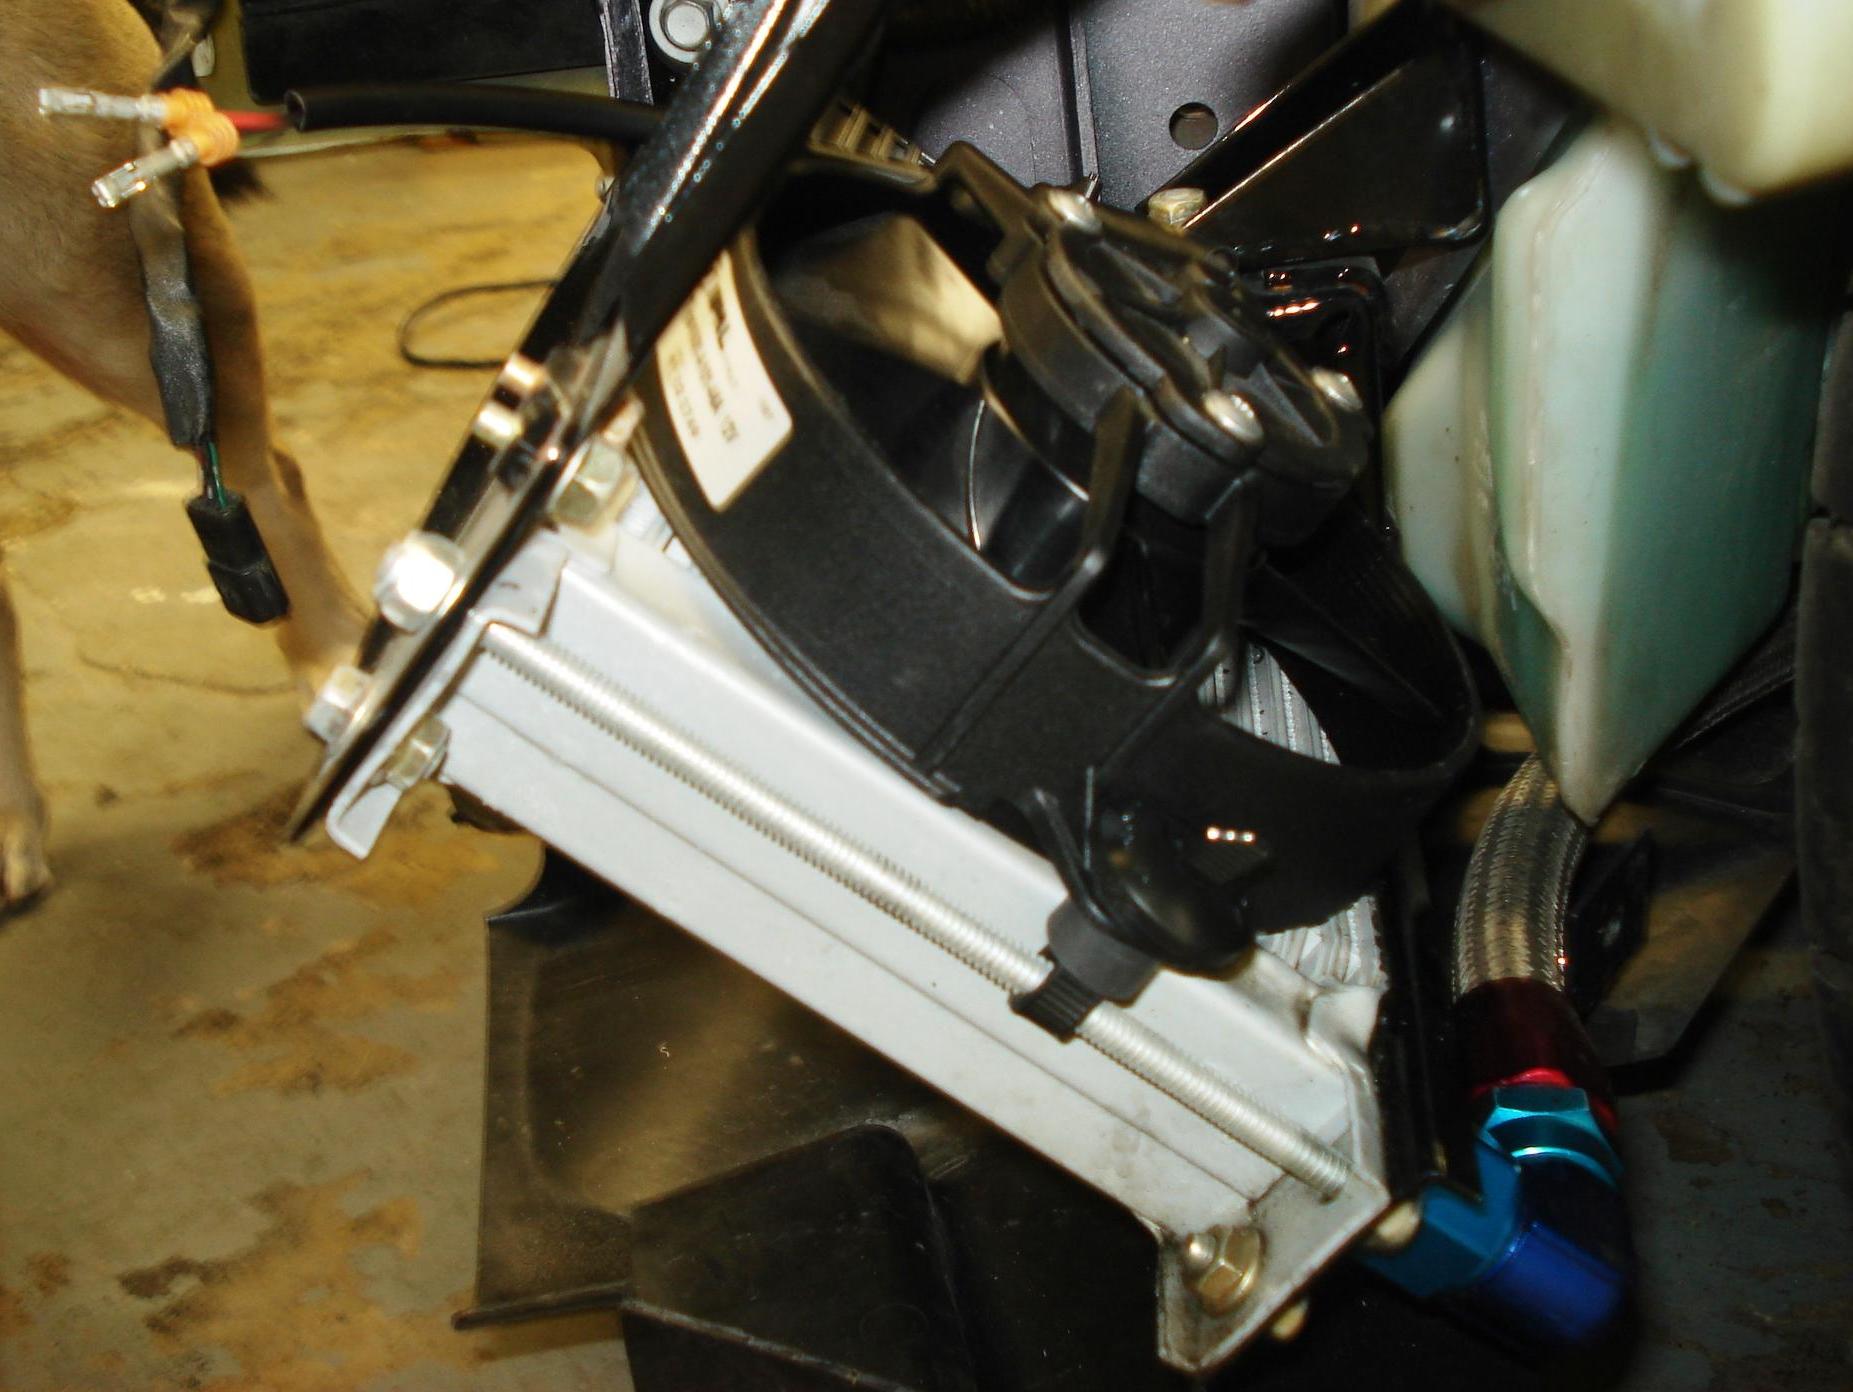
Oil cooler fan in, did a little jerry-rig action at one of the mounting tabs. Next up, weld EGT probe bungs in the headers, remove the stock fuel lines to braze in some -6AN fitting, start laying out the air box, IC arrangement. At first I will be making the air box and ducting out of aluminum, then remake them in CF once I get to that point next month.
2/17/08
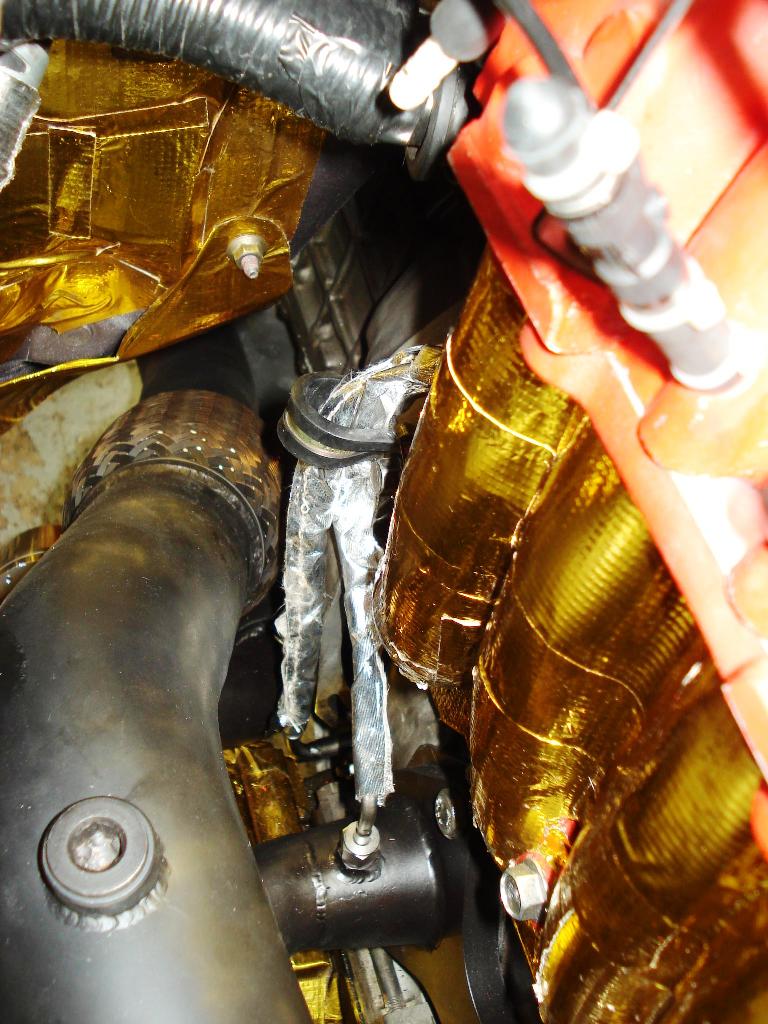
EGT bungs in place and re-ceramic coated. The spray can type, not as good as professionally done, but it will still work.
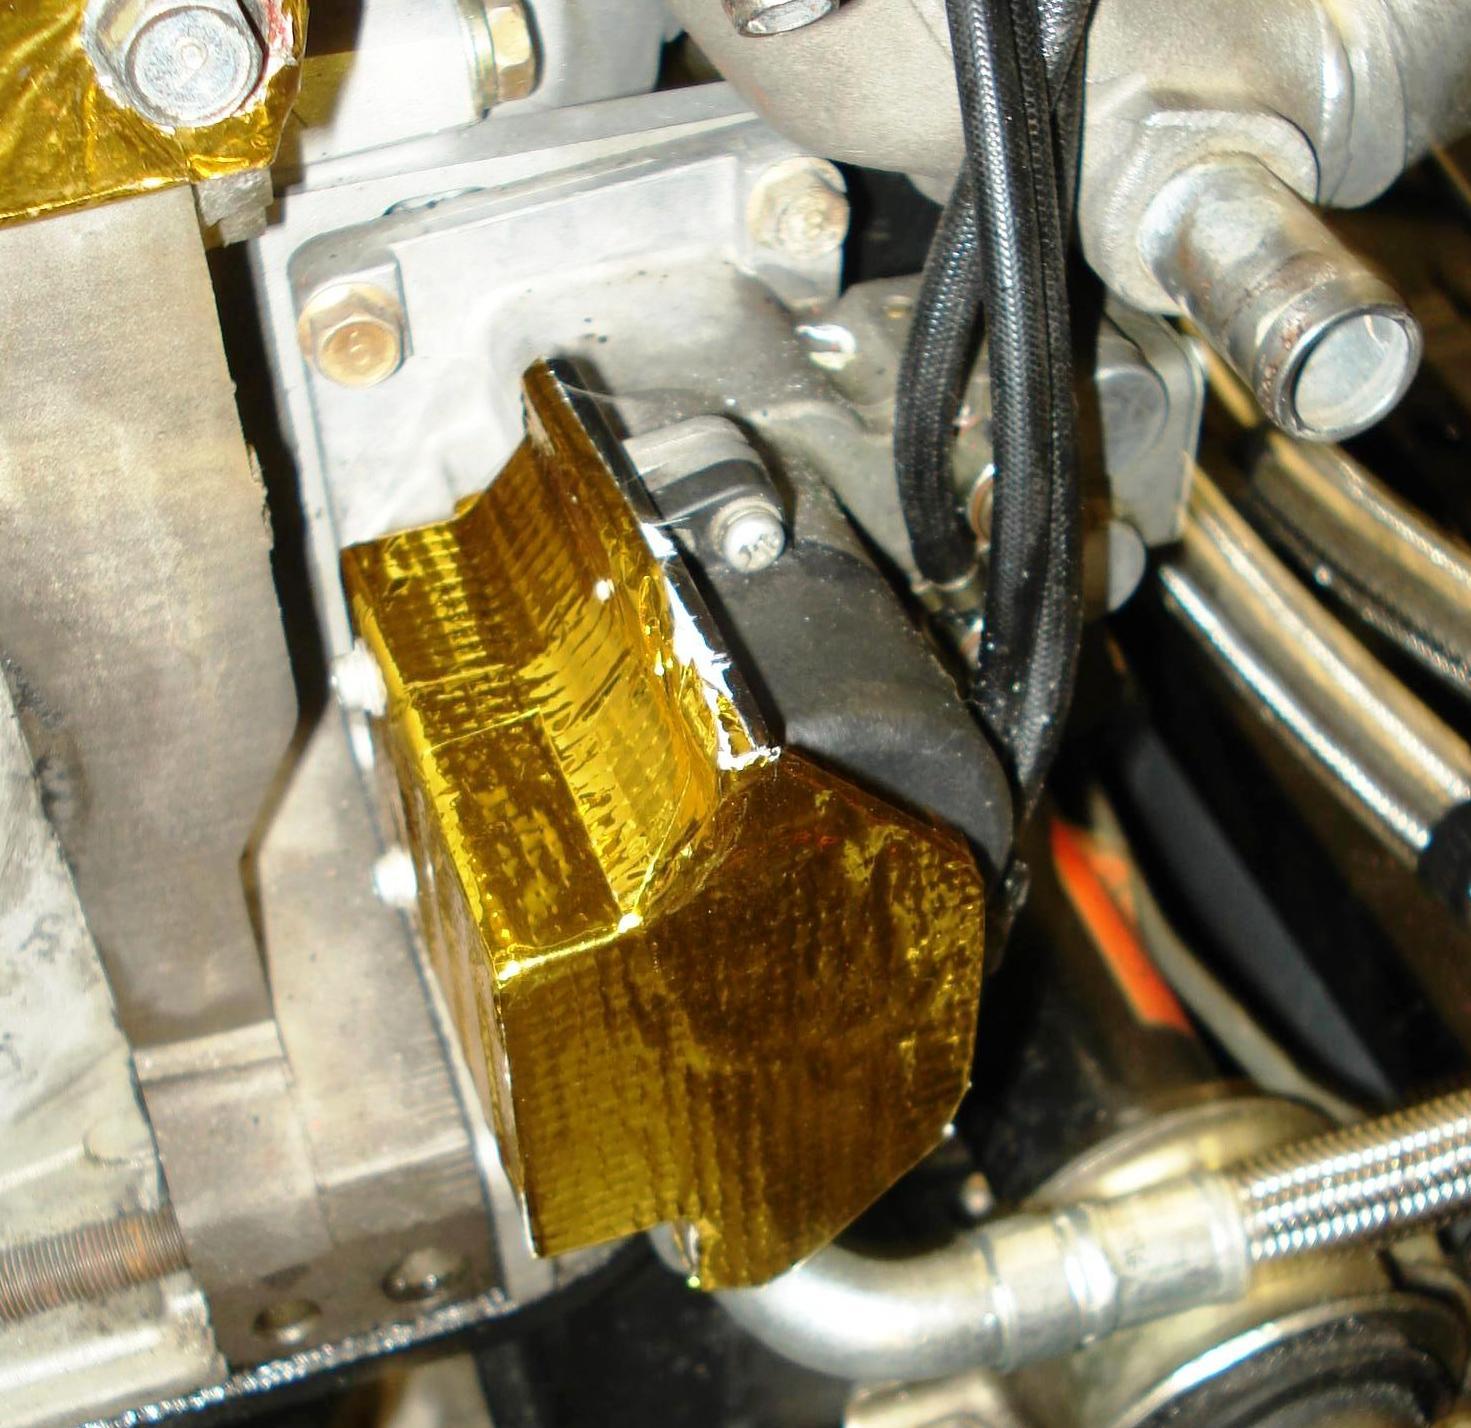
Added a plate the oil injection pump head shield and Bobby wrapped it in the gold stuff. I added this to protect it from the headers.

Oil cooler fan in, did a little jerry-rig action at one of the mounting tabs. Next up, weld EGT probe bungs in the headers, remove the stock fuel lines to braze in some -6AN fitting, start laying out the air box, IC arrangement. At first I will be making the air box and ducting out of aluminum, then remake them in CF once I get to that point next month.
2/17/08
EGT bungs in place and re-ceramic coated. The spray can type, not as good as professionally done, but it will still work.
Added a plate the oil injection pump head shield and Bobby wrapped it in the gold stuff. I added this to protect it from the headers.
Thread Starter
Joined: Jul 2005
Posts: 2,913
Likes: 4
From: Kingman, AZ
2/17/08
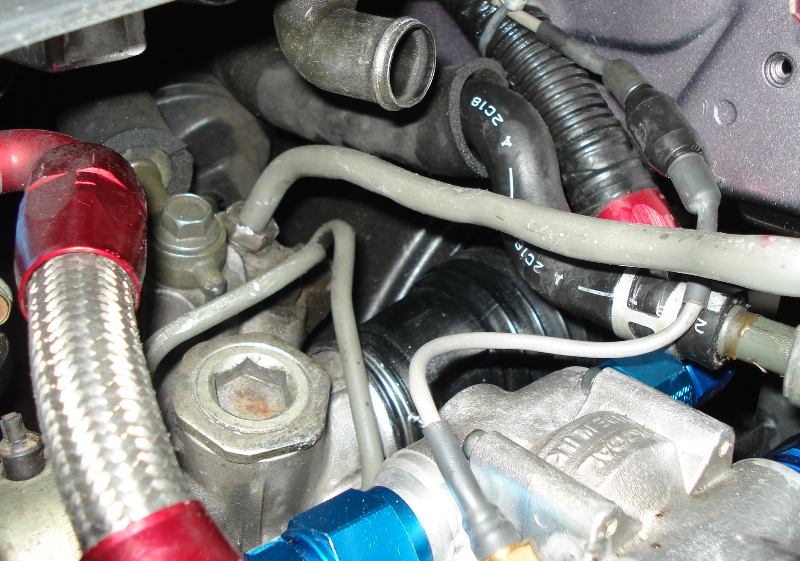
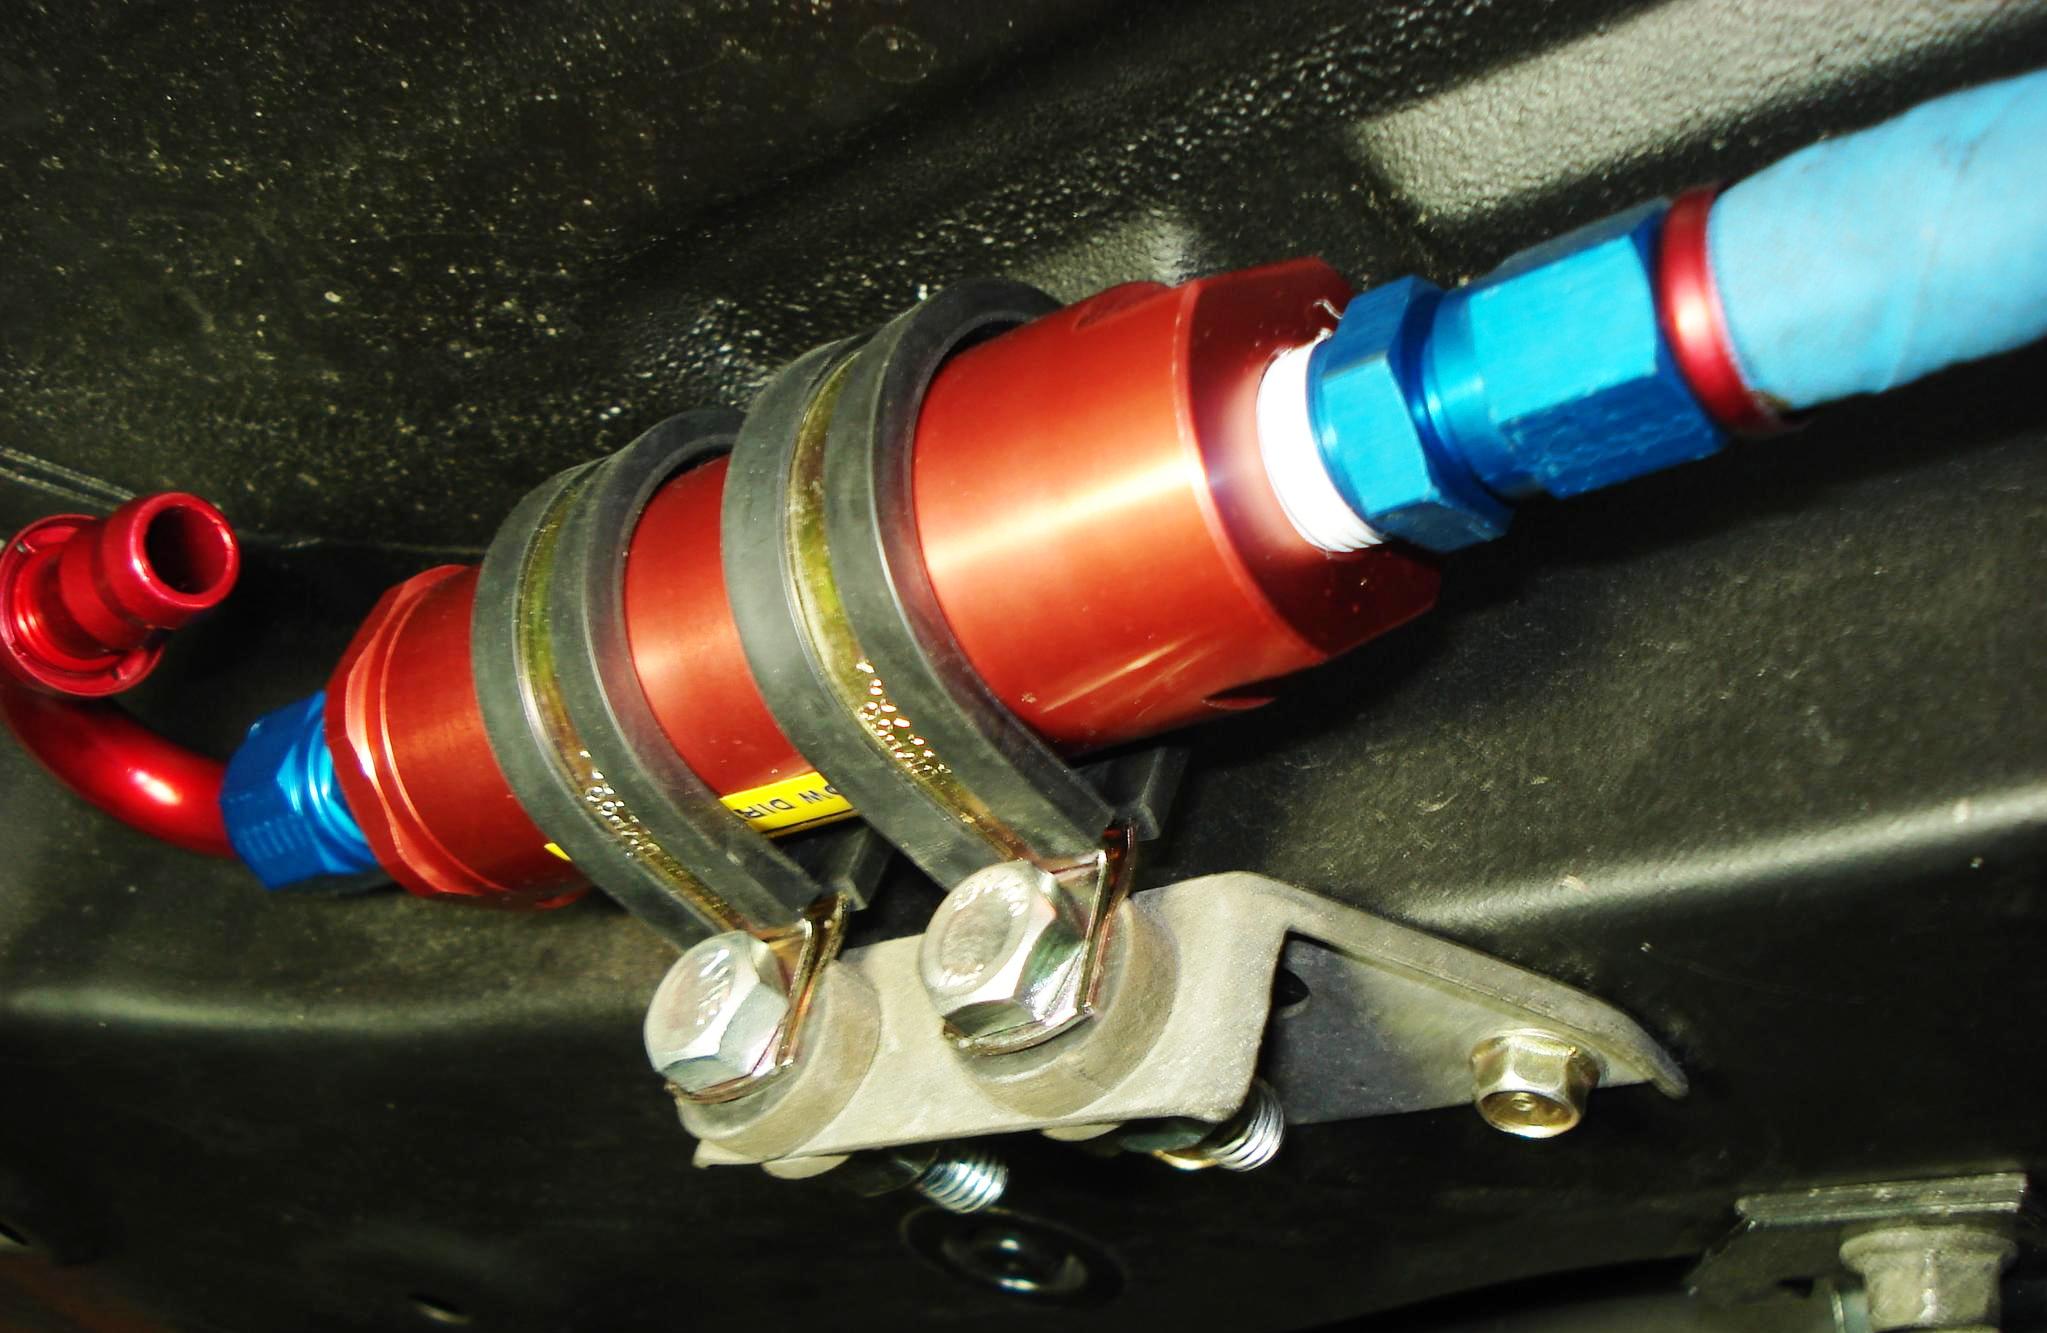
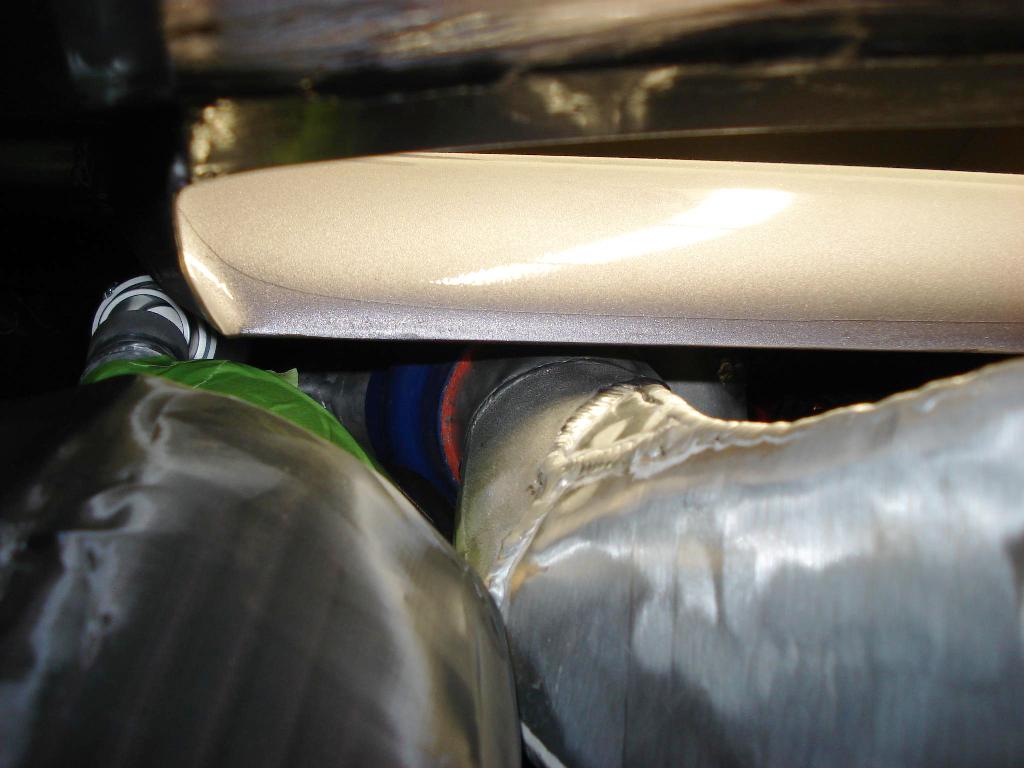
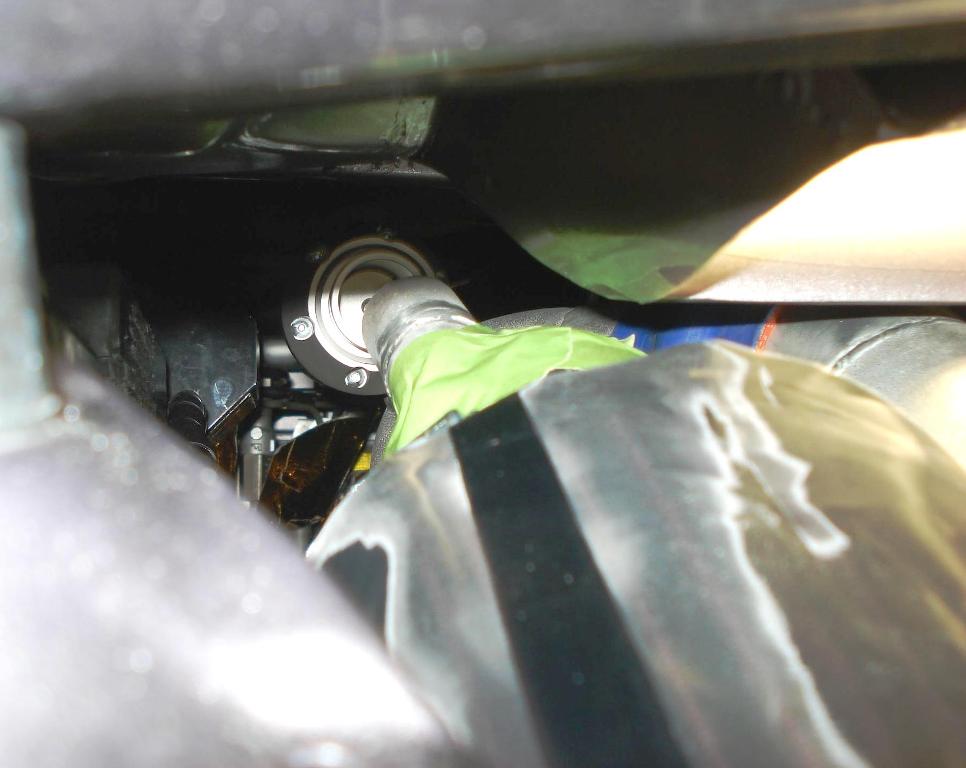
Fuel system upgrades done, it was a bitch, but it's in. The external fuel filter will be difficult to get to like the original, but I like how it protected from the elements. So I compromised.
Next will be adding the new Cat and modifying the midpipe arrangement to mate up well with the catback and downpipe. Then start thinking in earnest on the IC/Air box arrangement.
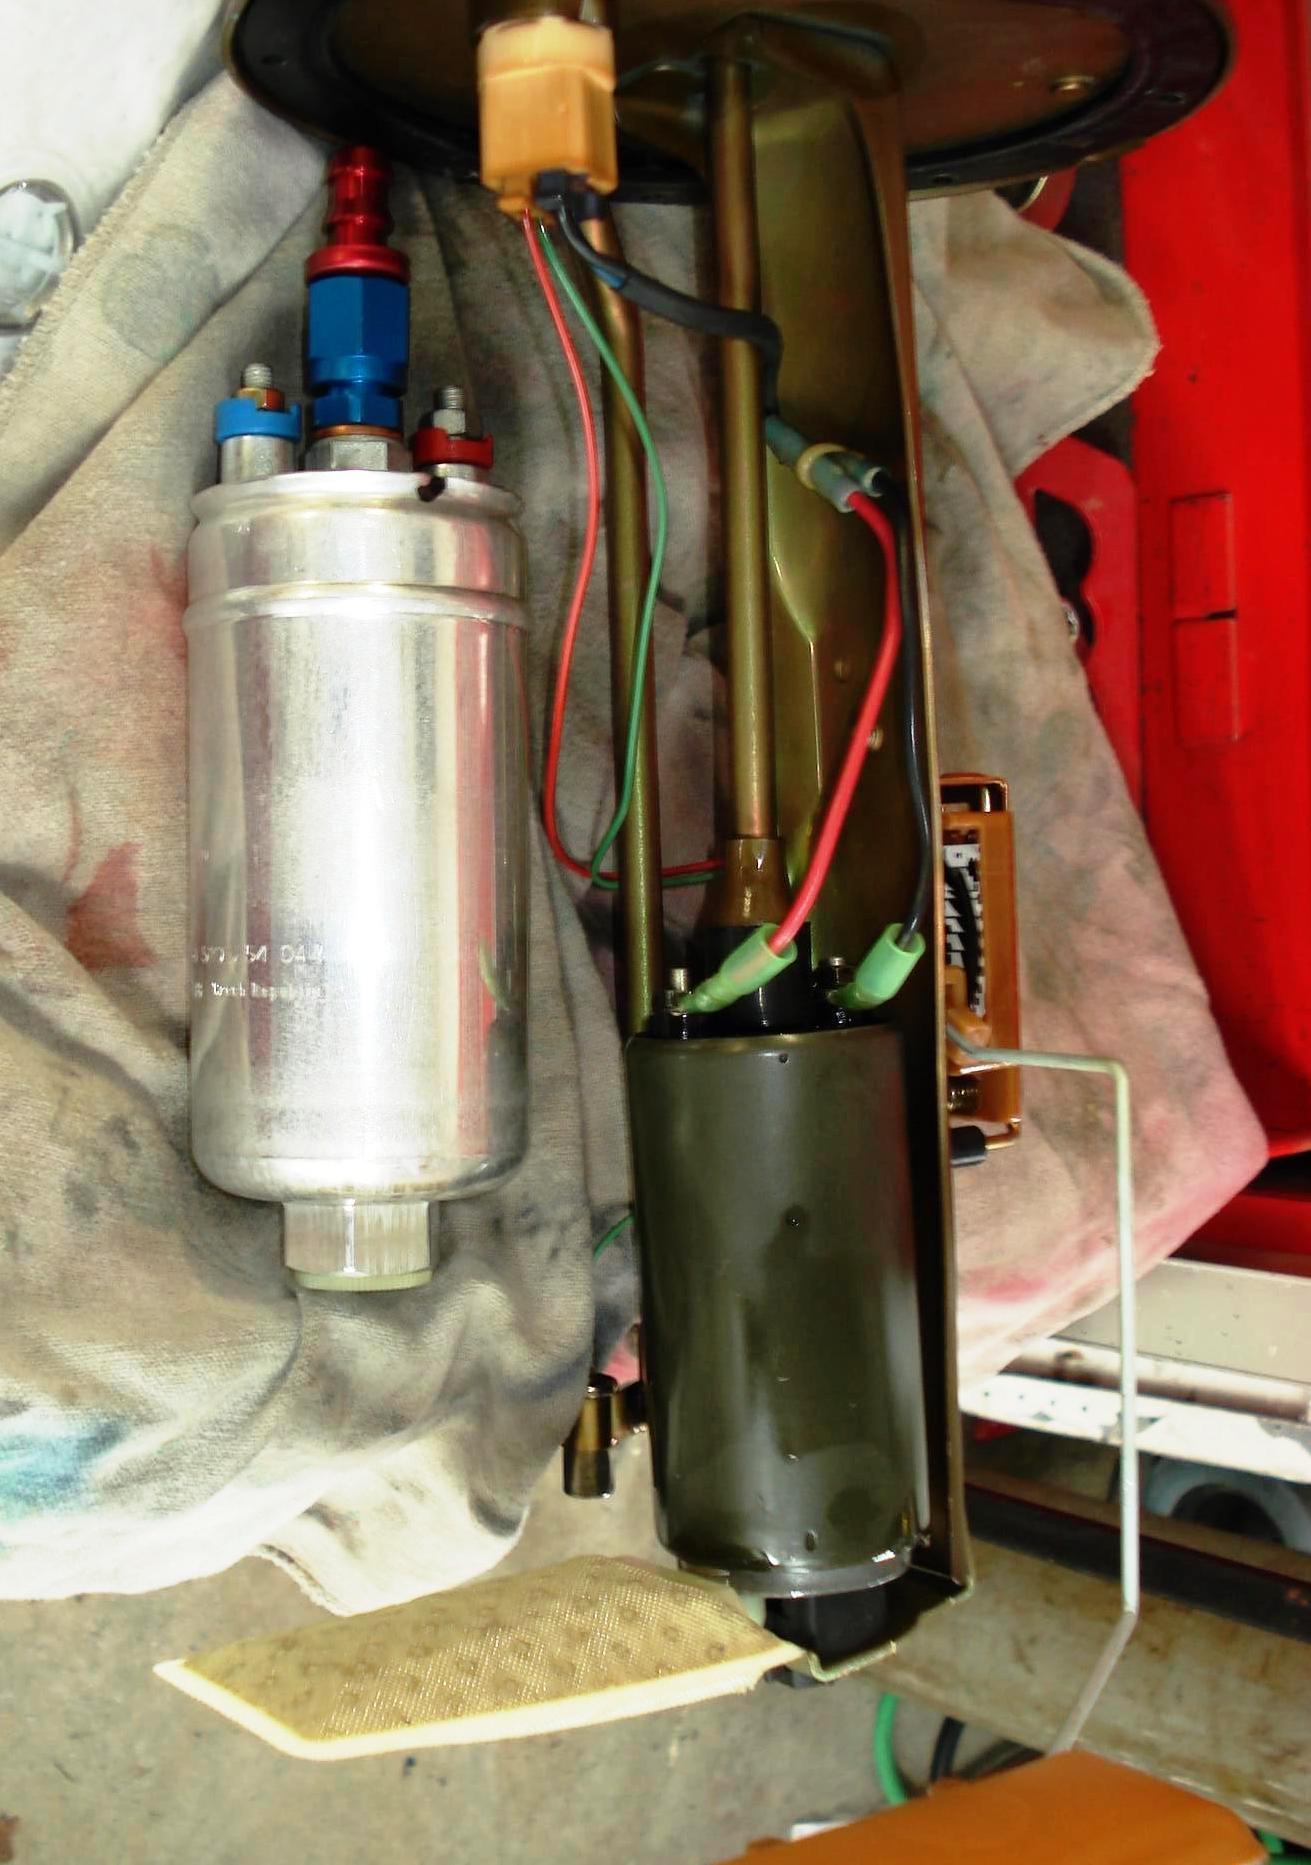
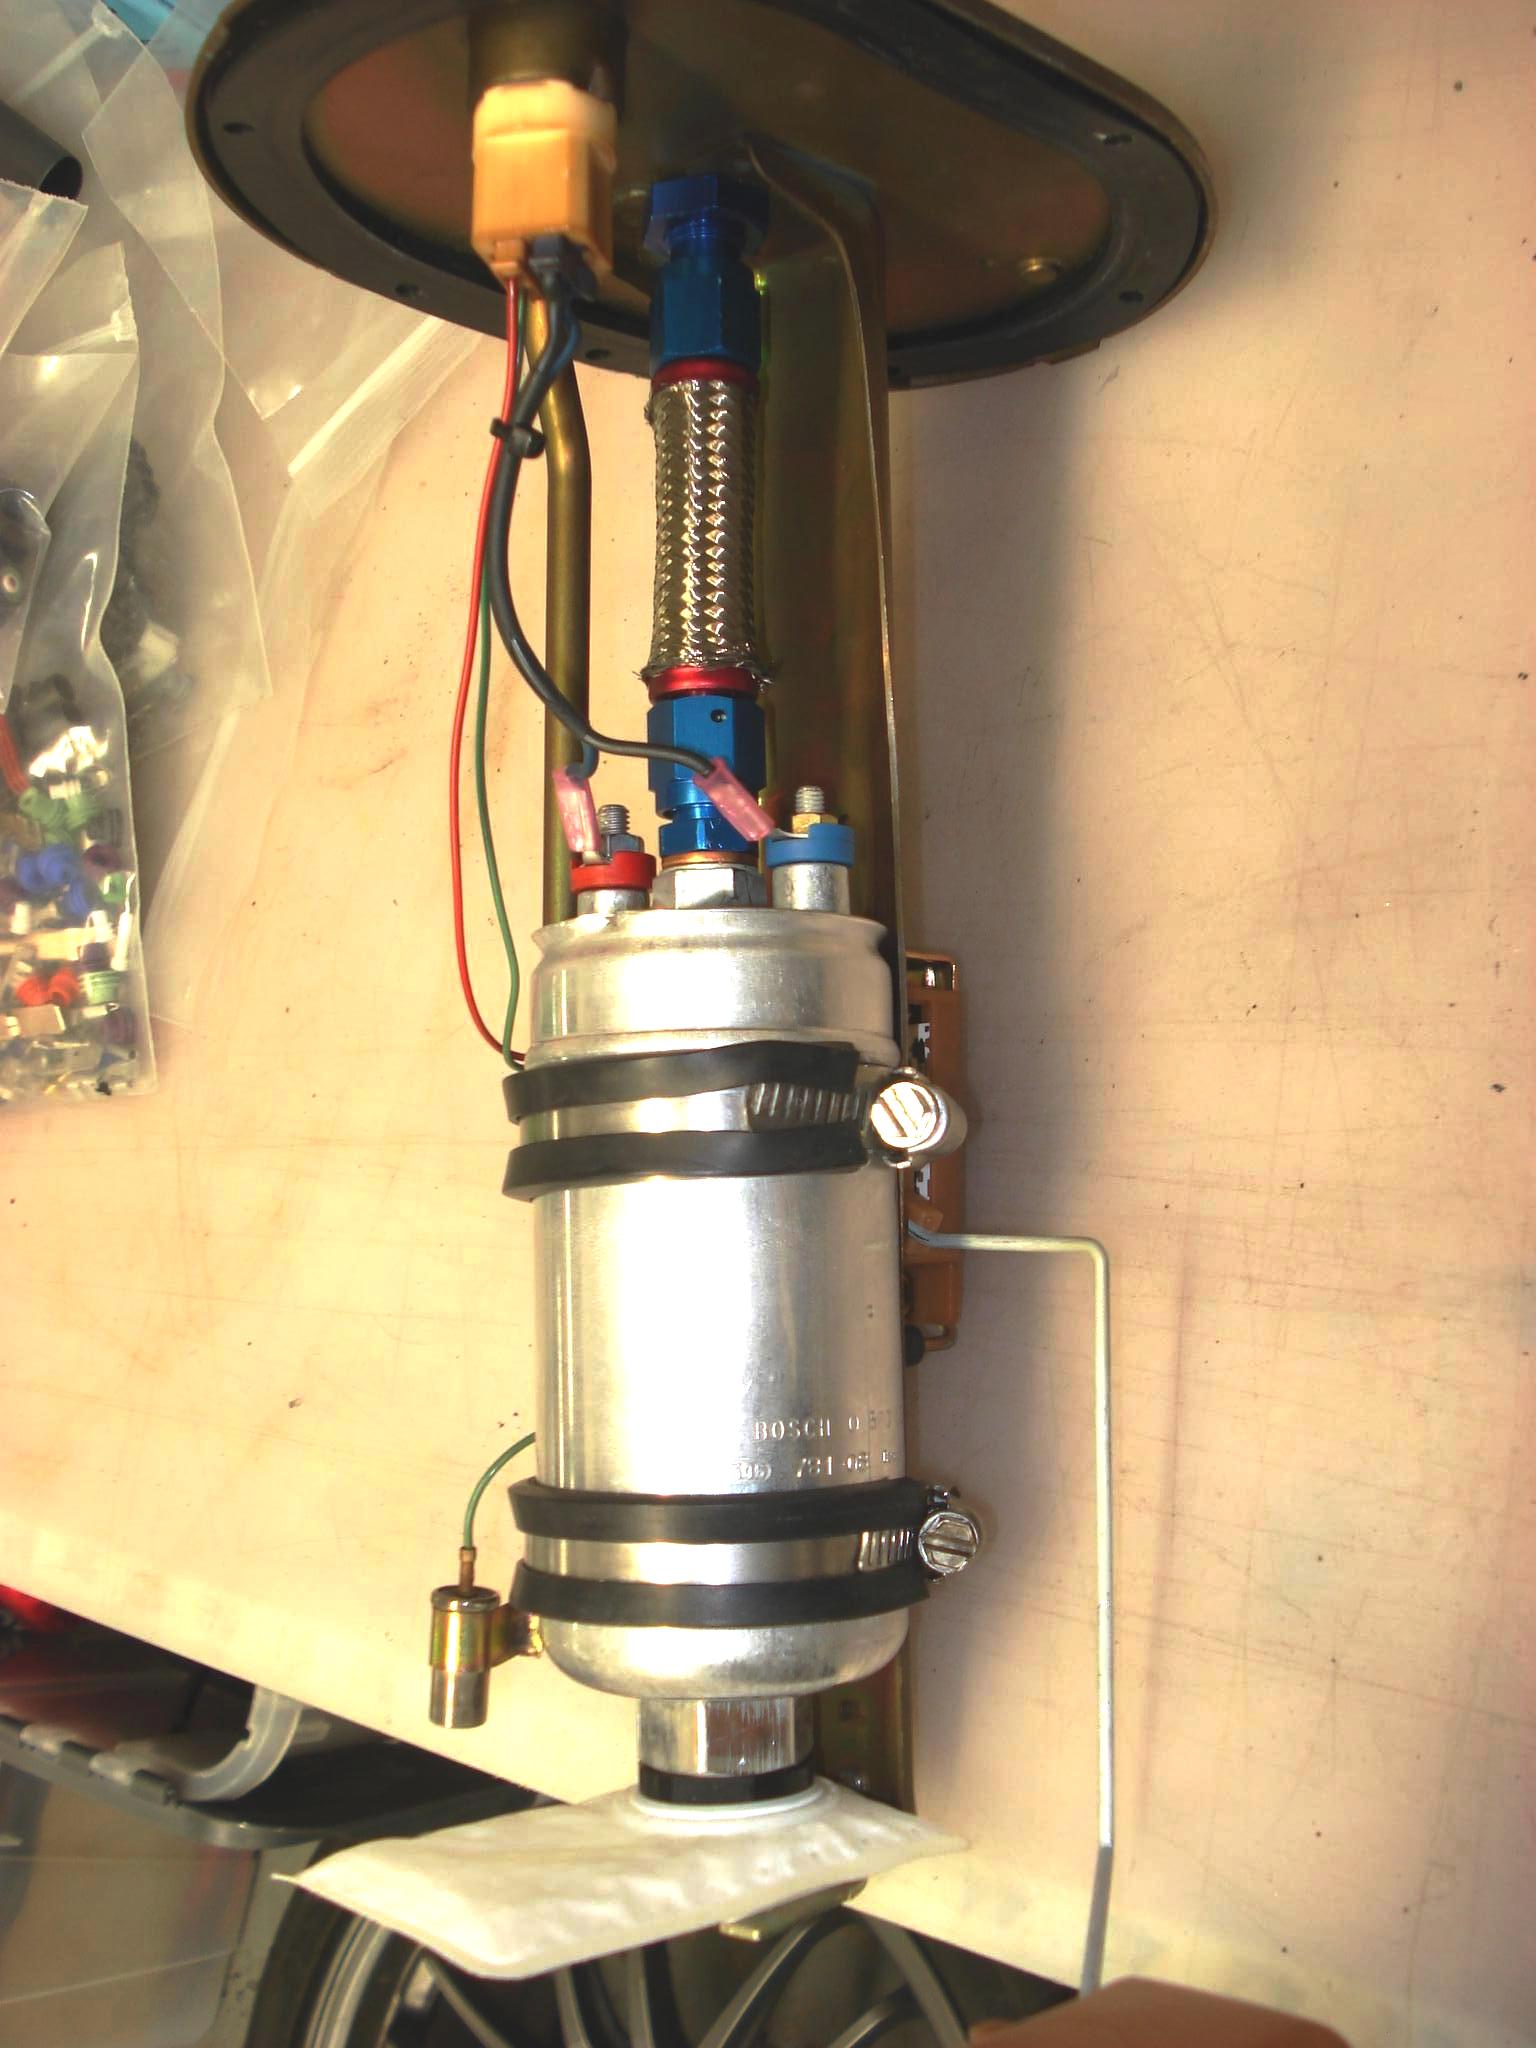
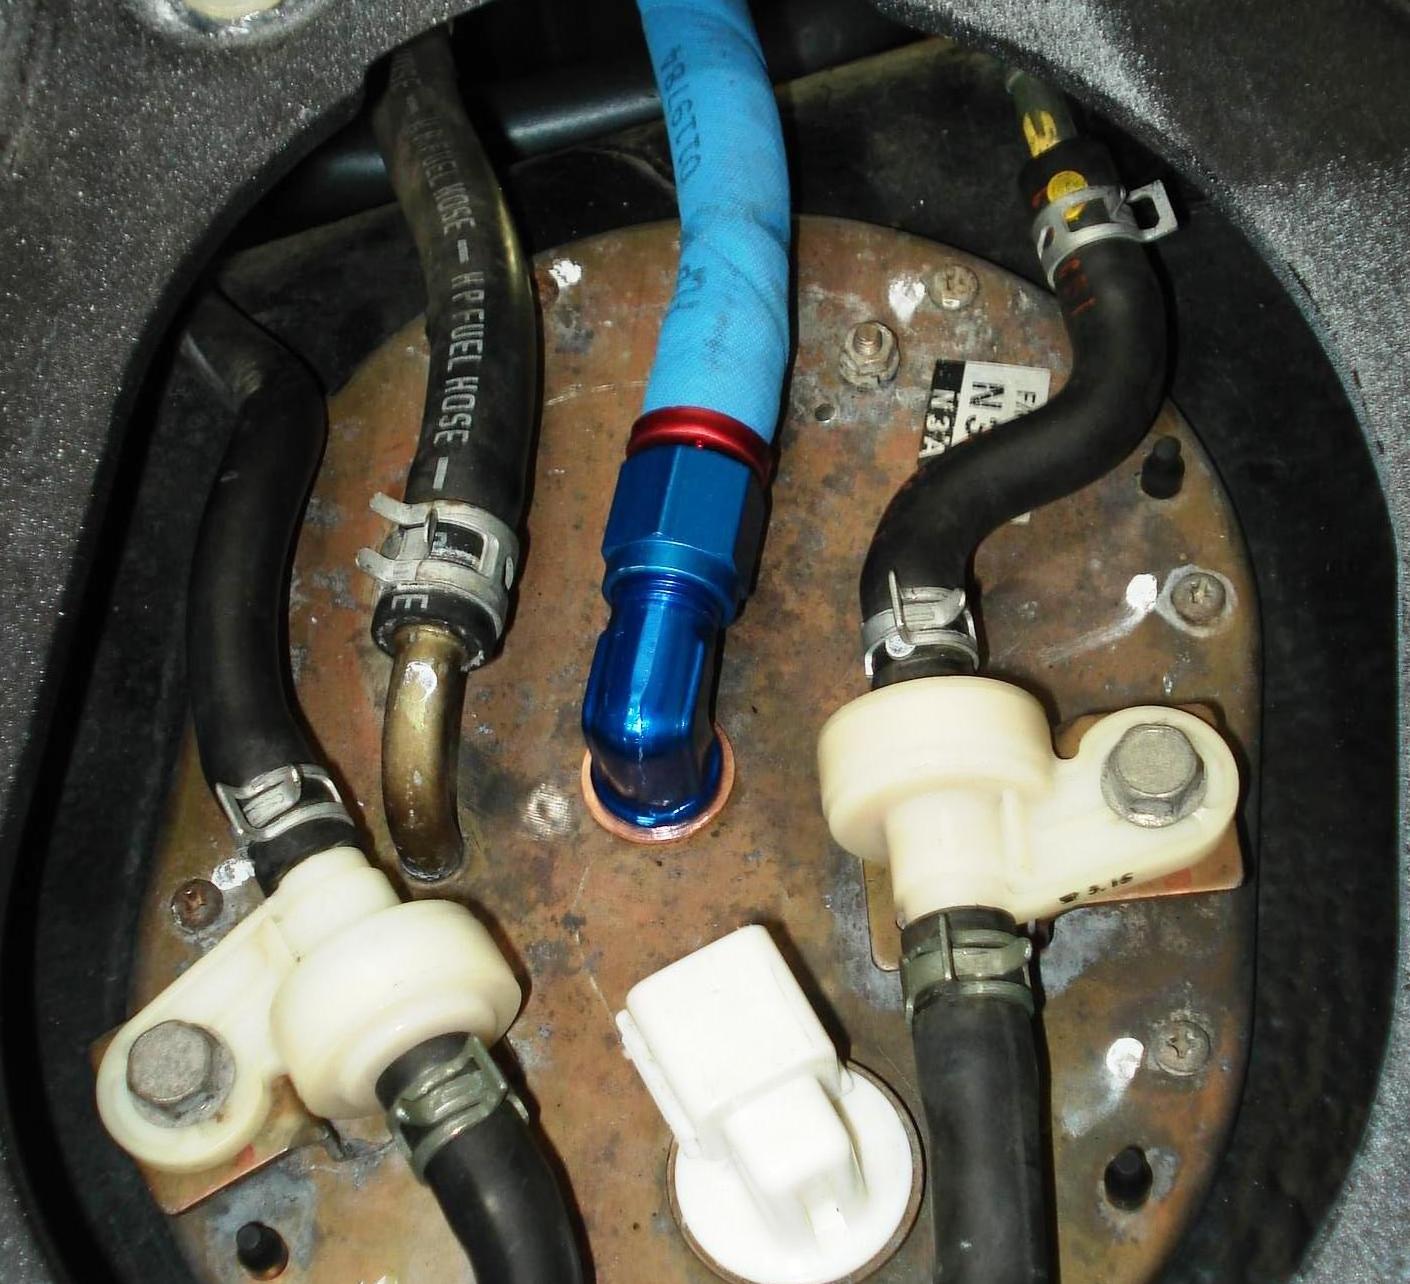
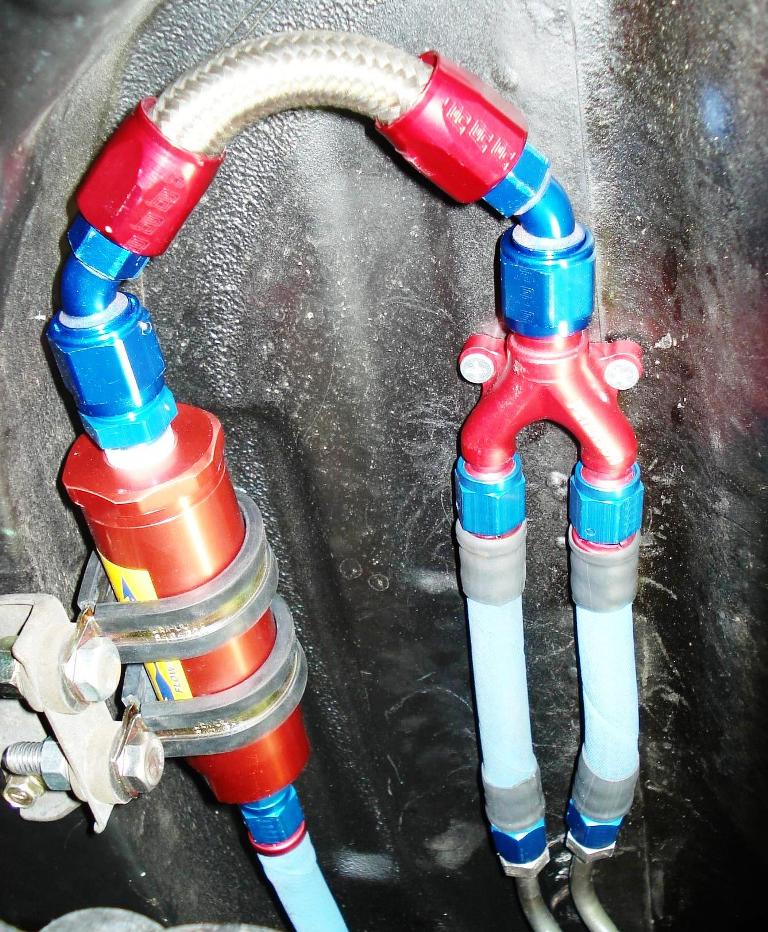
Thread Starter
Joined: Jul 2005
Posts: 2,913
Likes: 4
From: Kingman, AZ
2/18/08
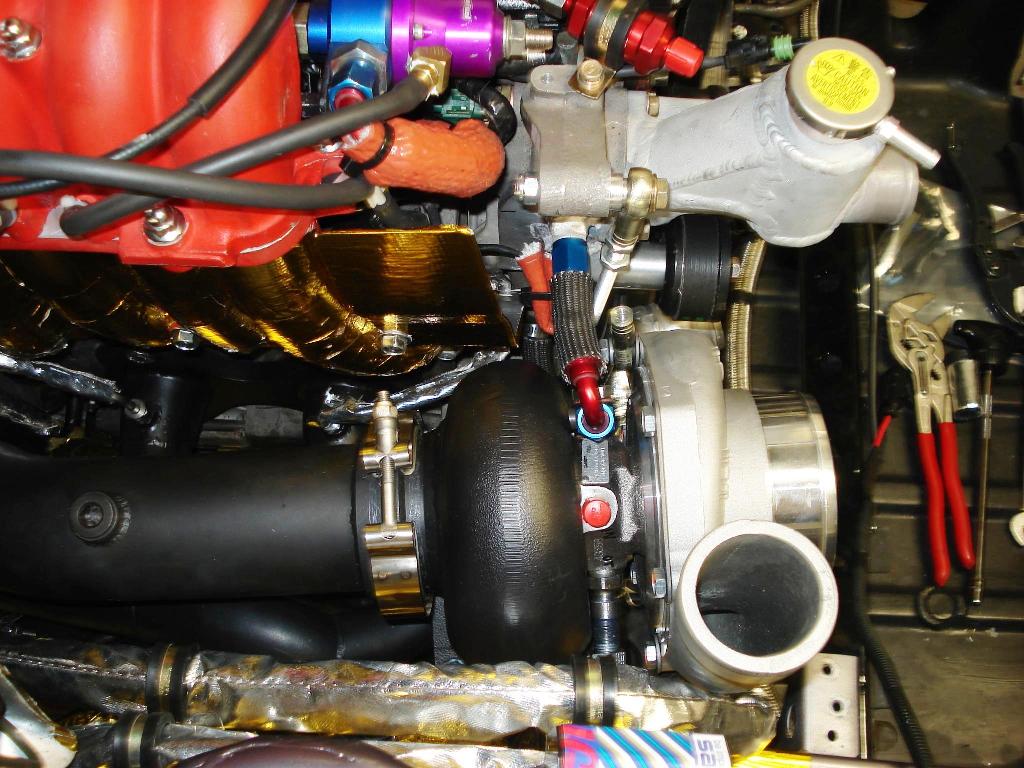
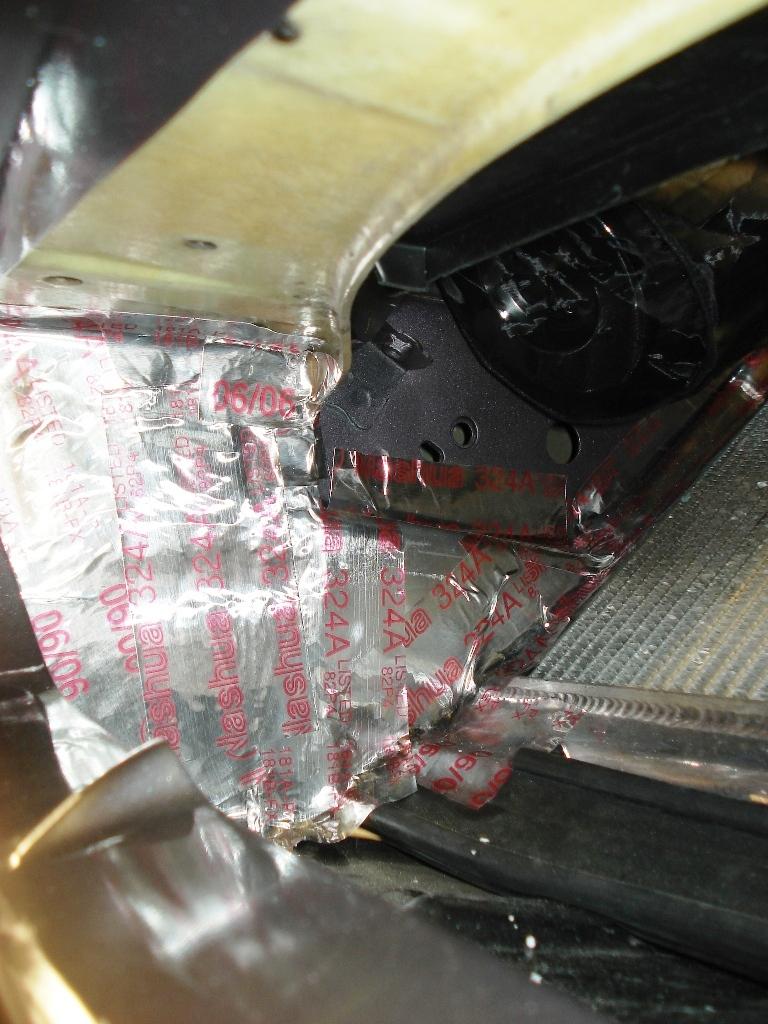
Mid-pipe finished and lastly need to extend the WG outlet tube. I'm going to add some shielding to the WG body to help it out on the temp side. Bobby added louvers to my wheel well plastics to improve air evacuation on the oil coolers. In person they look pretty good.
2/19/08
WG outlet done and in, the pipe is the lowest point of the chassis. Bobby also fab'd up a heat shield to protect the secondary injector and electrical wiring. IC and Airbox next.
Thread Starter
Joined: Jul 2005
Posts: 2,913
Likes: 4
From: Kingman, AZ
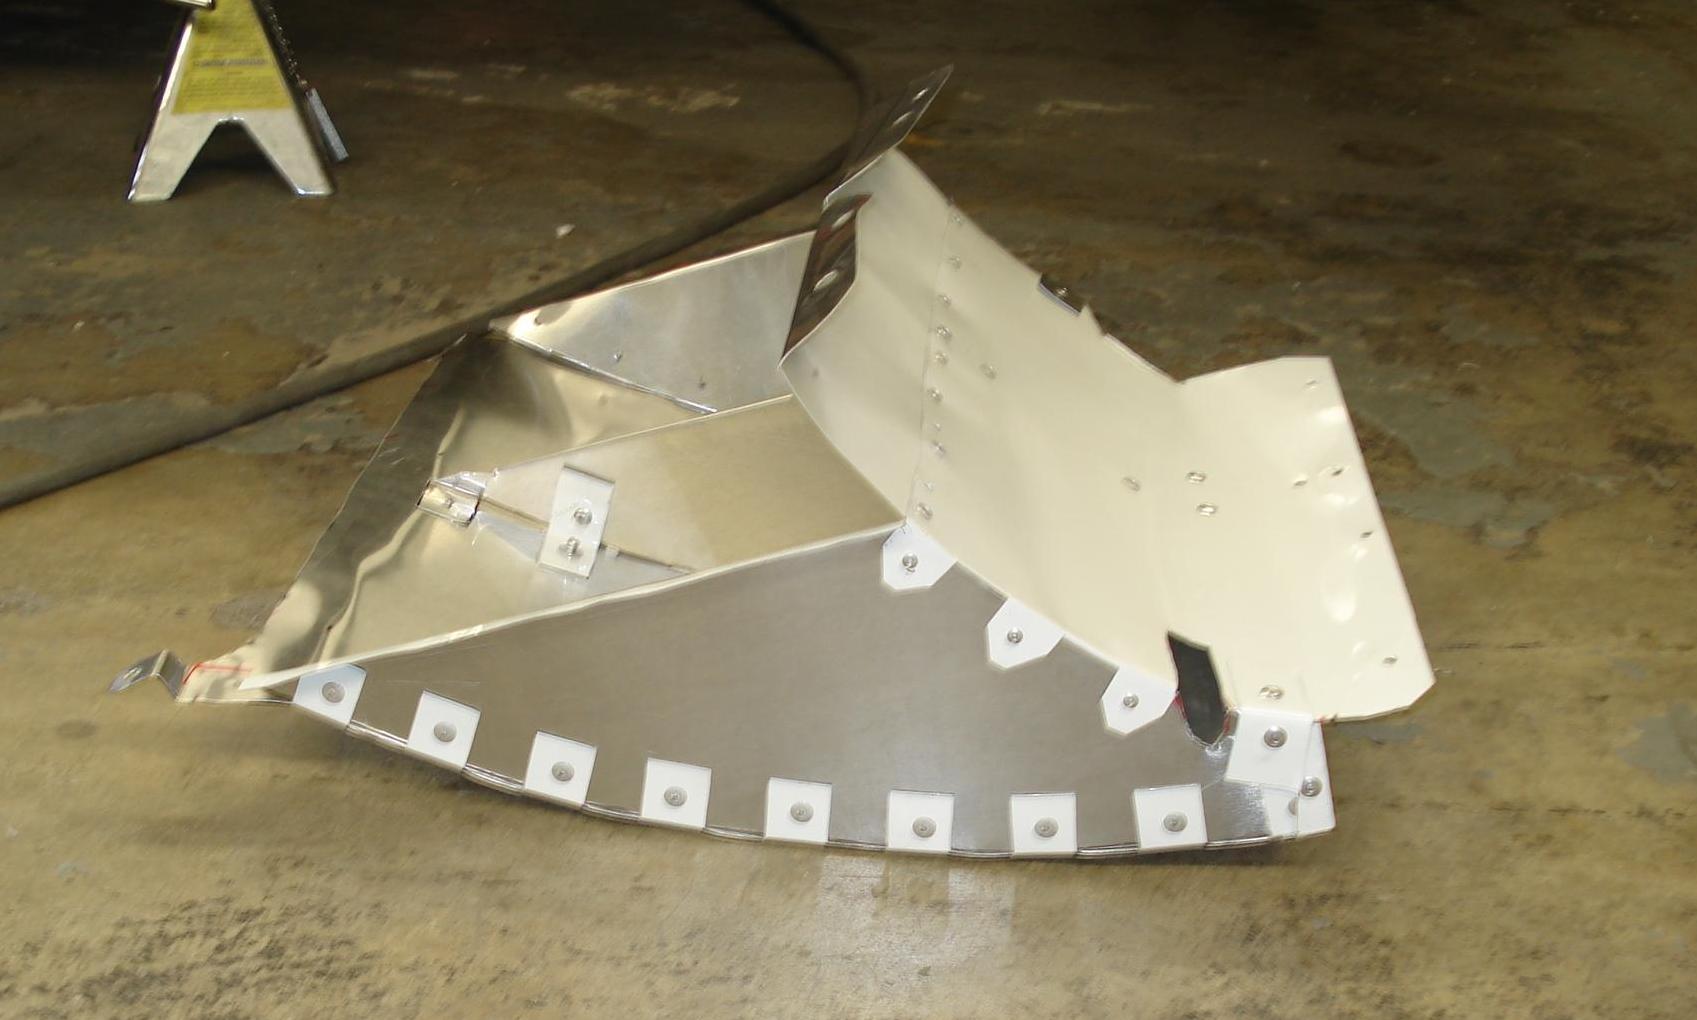
2/22/08
Well progress being made, the long task of making an aluminum Airbox and IC end tanks has arrived. Going to seals unlimited today to get some specialty seals.
As discussed by other 500R owner a sacrificial 9/16" wrench is needed in order to tighten one of the nuts.
2/24/08
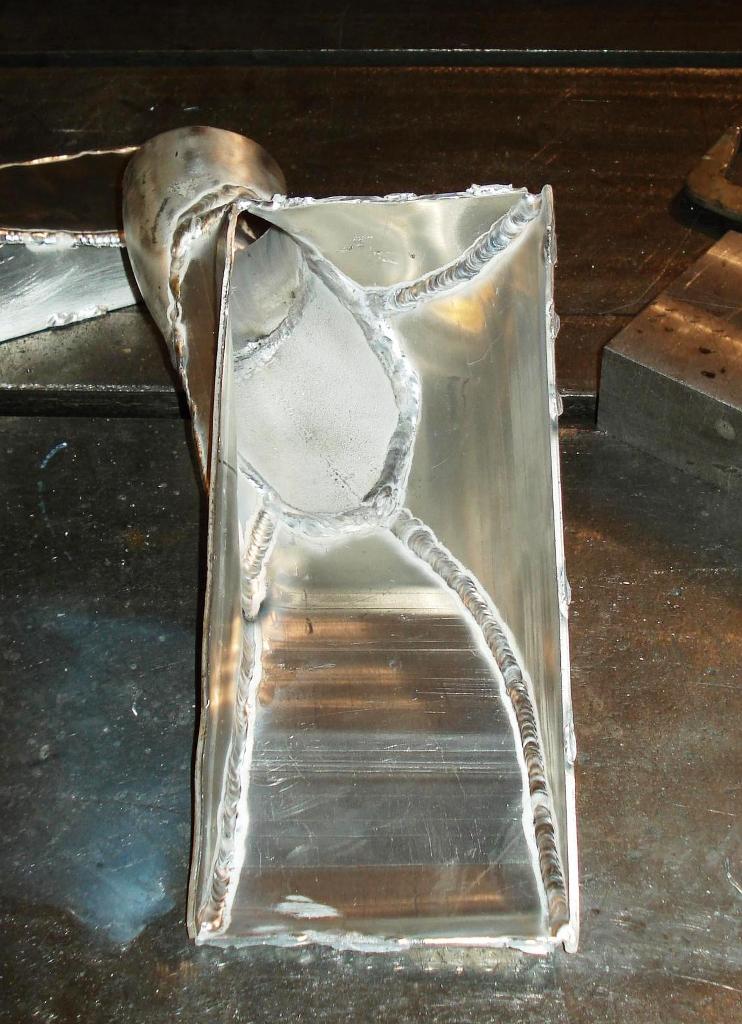
Slowly but surely. Need to finish the end tanks, weld in the Second BOV flange and start cutting up the 4" tubing for the air box. Will be redoing the end tanks later to clean up the shape.
Well progress being made, the long task of making an aluminum Airbox and IC end tanks has arrived. Going to seals unlimited today to get some specialty seals.
As discussed by other 500R owner a sacrificial 9/16" wrench is needed in order to tighten one of the nuts.
2/24/08
Slowly but surely. Need to finish the end tanks, weld in the Second BOV flange and start cutting up the 4" tubing for the air box. Will be redoing the end tanks later to clean up the shape.
Thread Starter
Joined: Jul 2005
Posts: 2,913
Likes: 4
From: Kingman, AZ
2/25/08
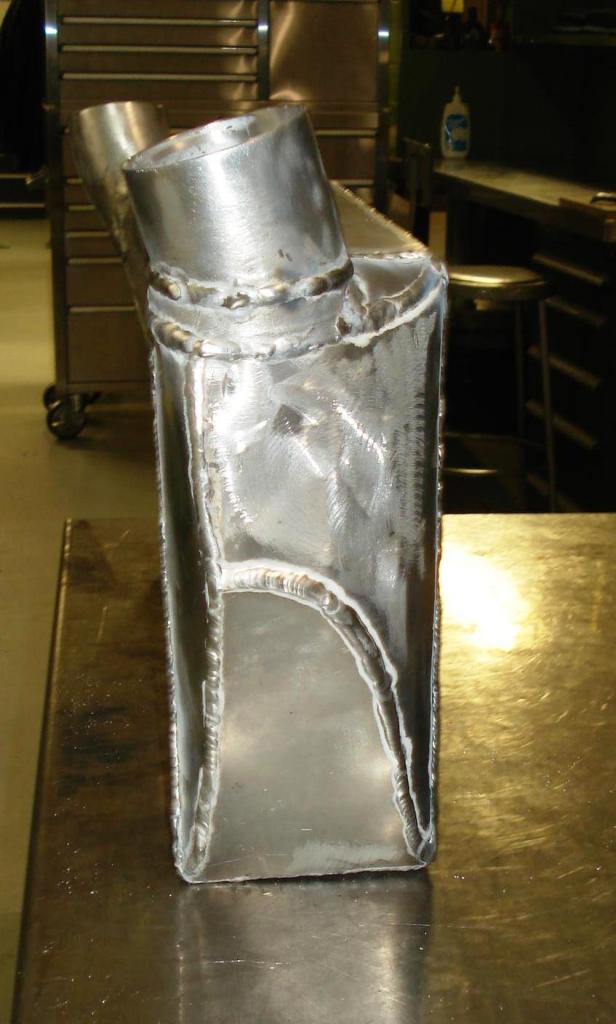
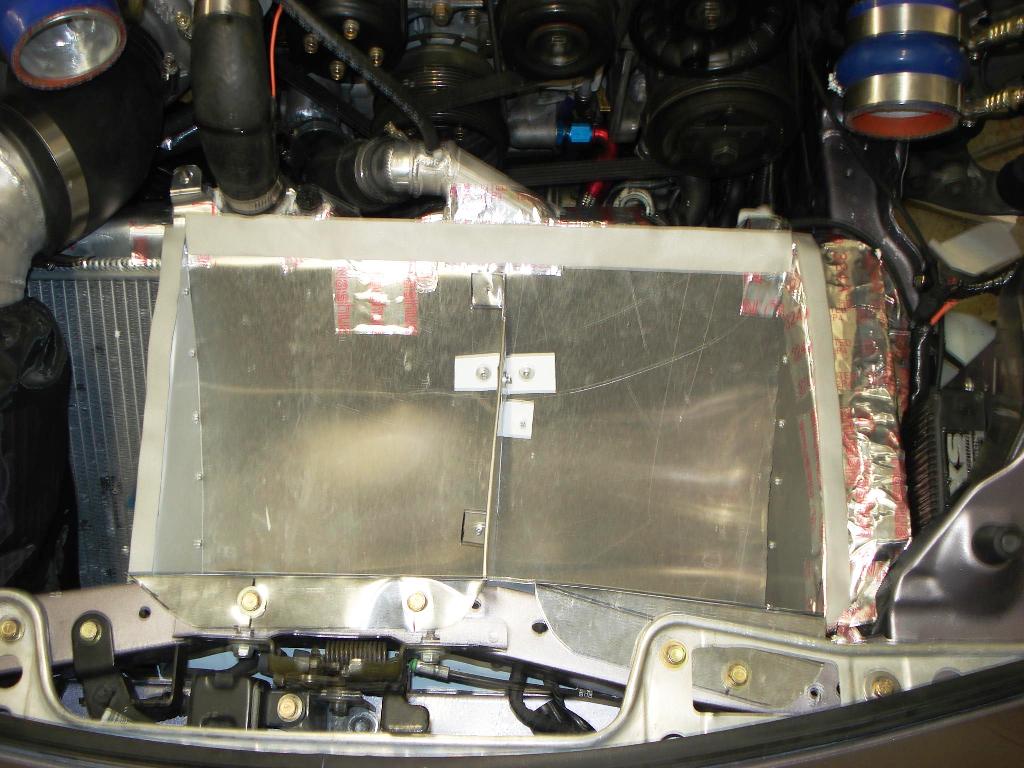
IC end tanks done, not totally happy with how they turned out so these will be classified as version 1.0. Will see how they perform and make new ones down the road if needed. Space limitations were a real limiting factor. Need to setup and finish the mounting arrangement of the IC and work on the air box setup.

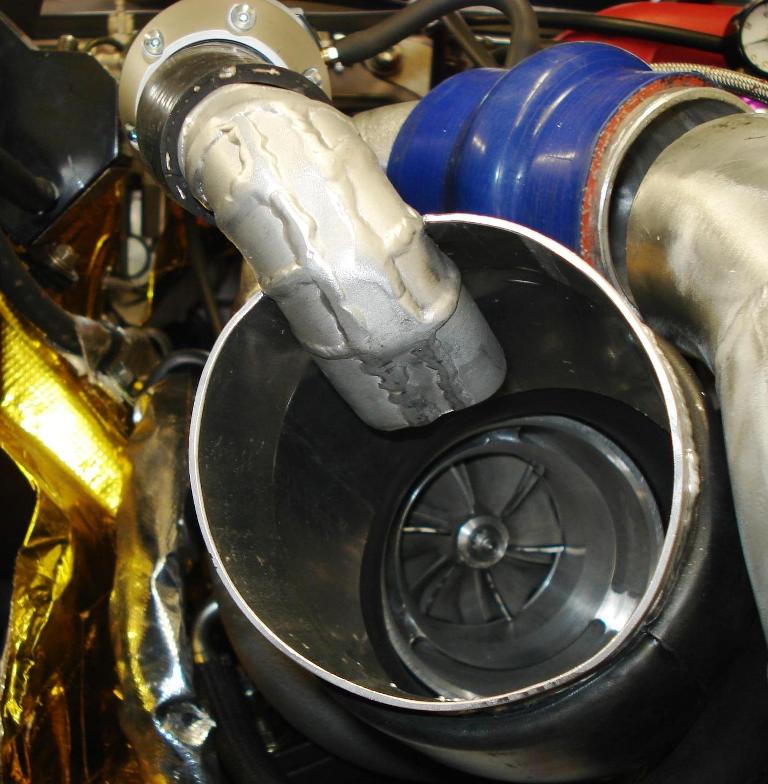
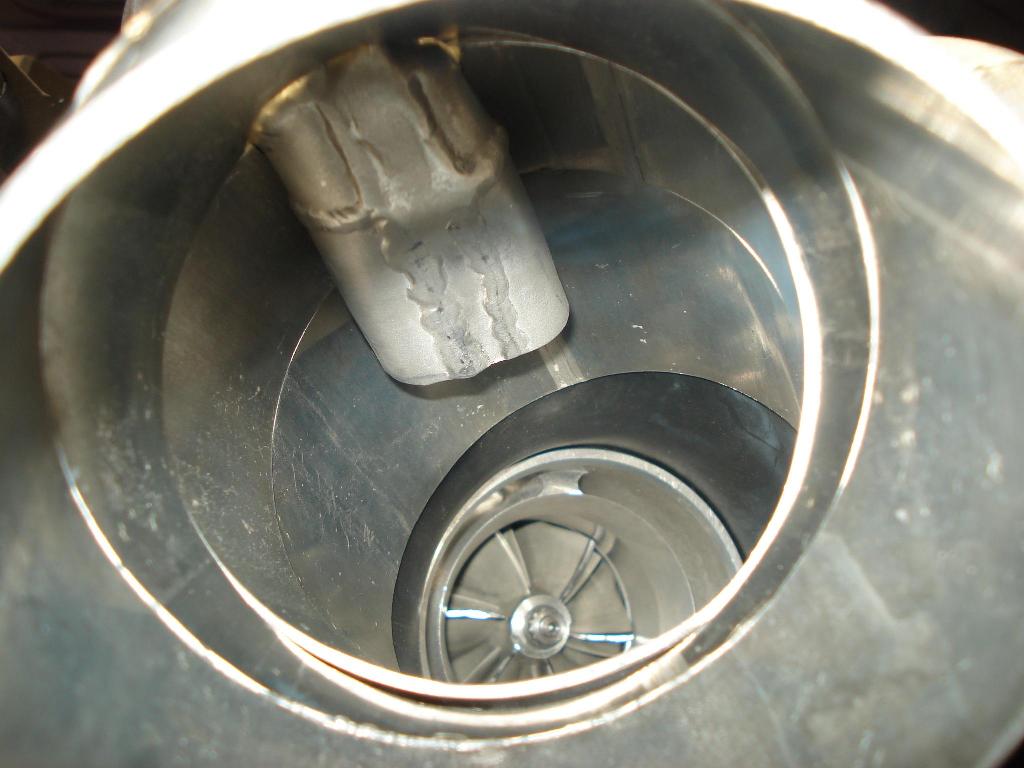
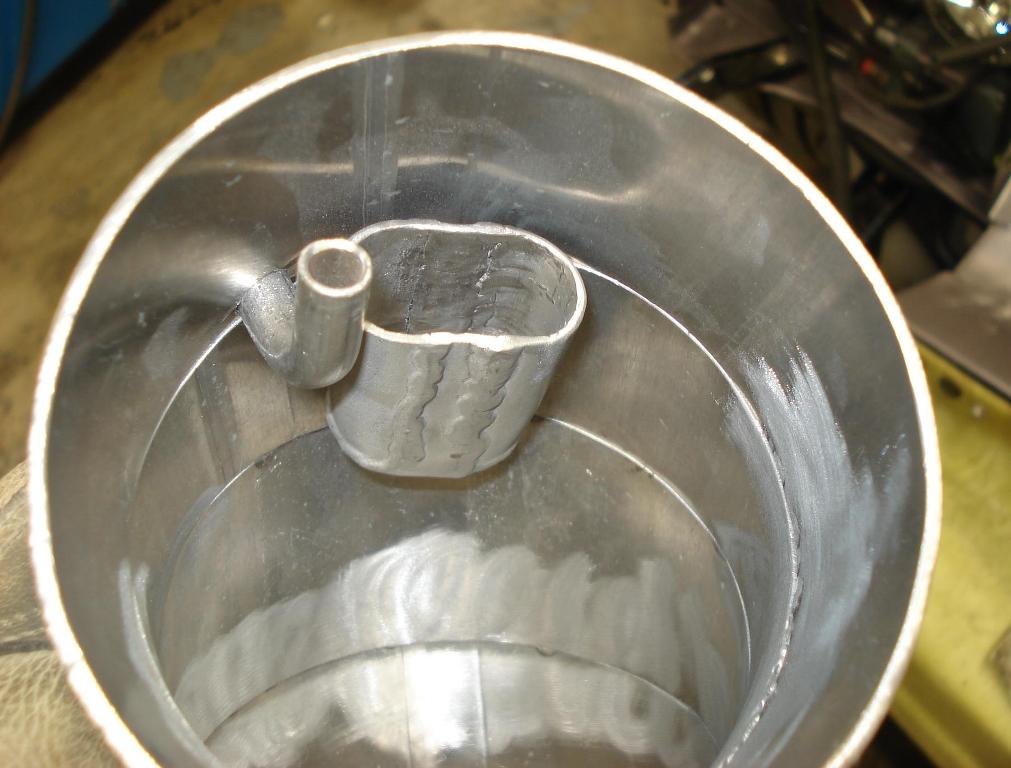
2/26/08
This will give you a better idea on the recirc.
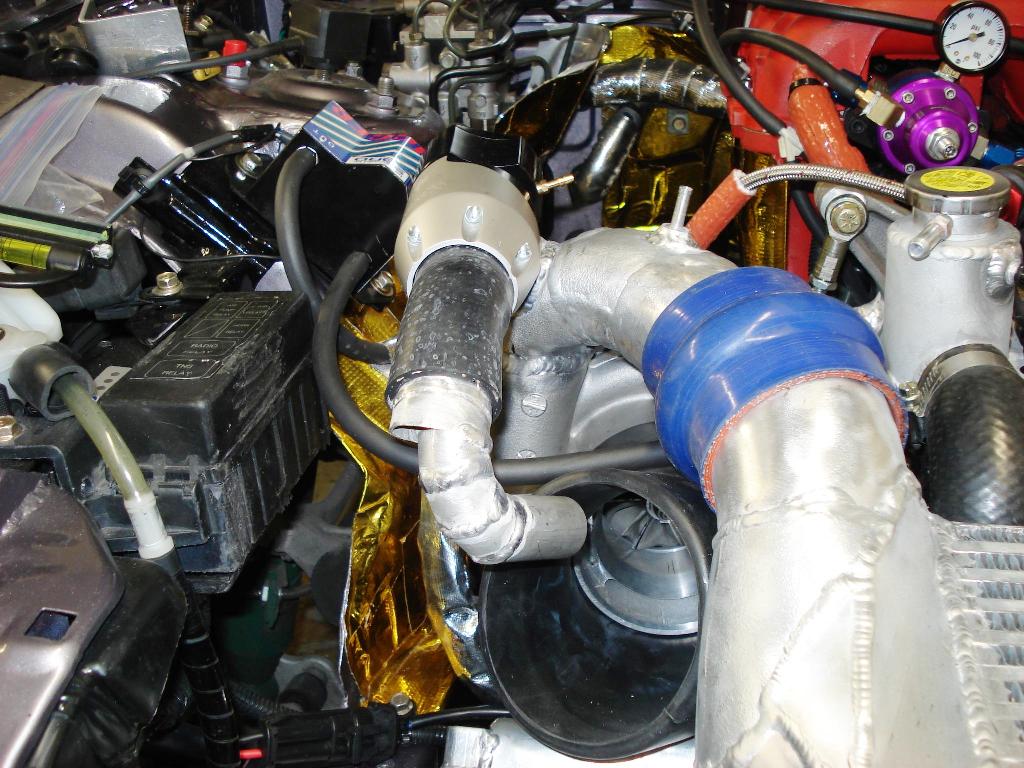
2/27/08
es, when the BOV discharges, it blows pressurized air at the compressor and if done right makes it spin faster for a short period. The byproduct is it improves turbo response between shifts.
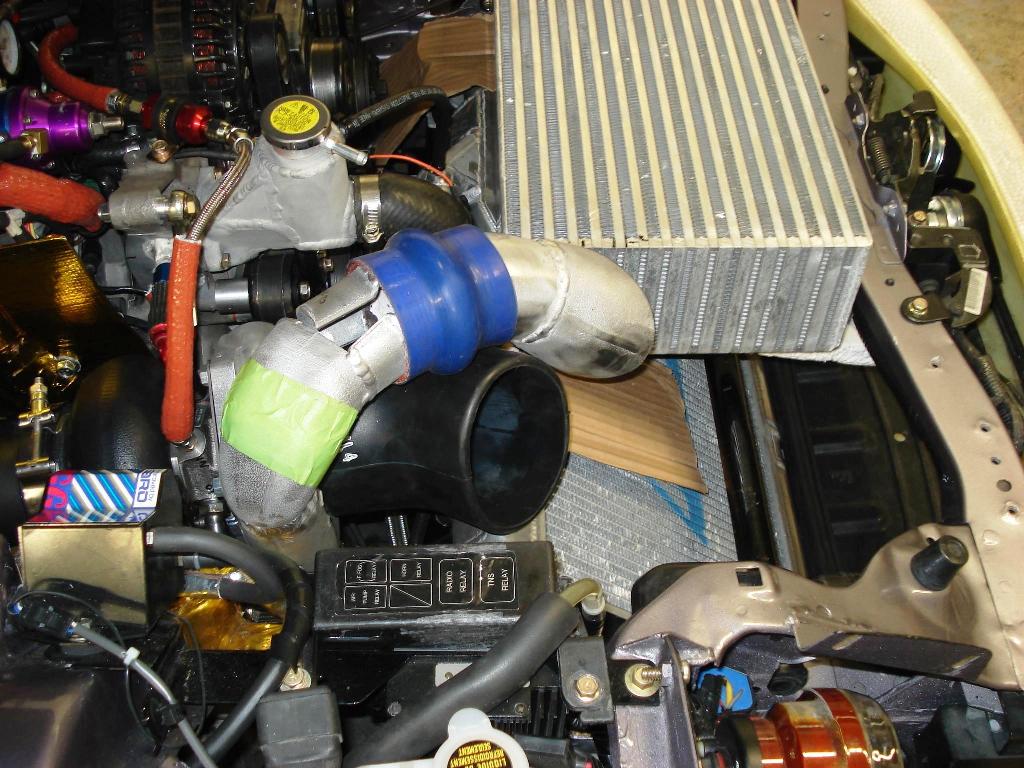
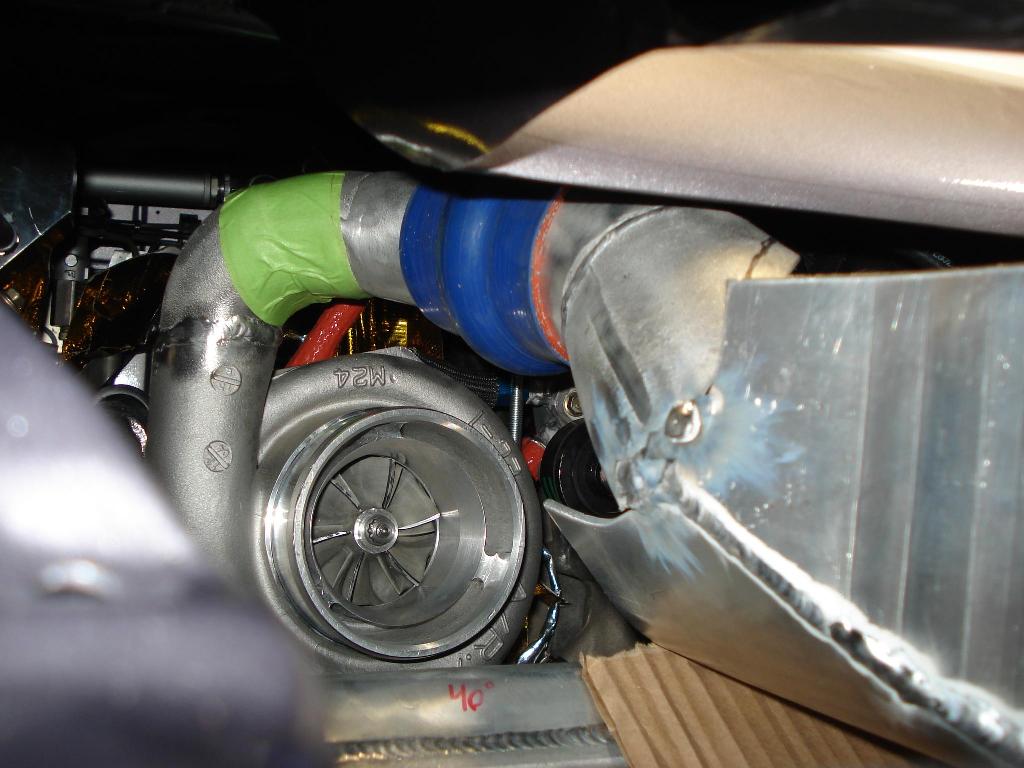
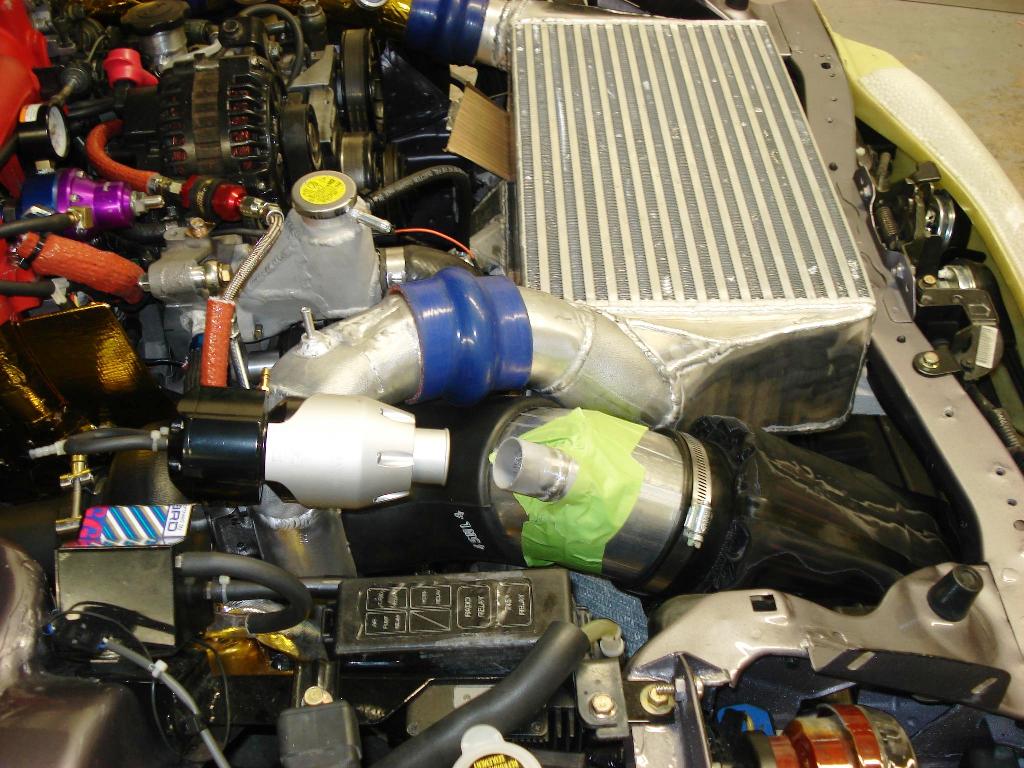
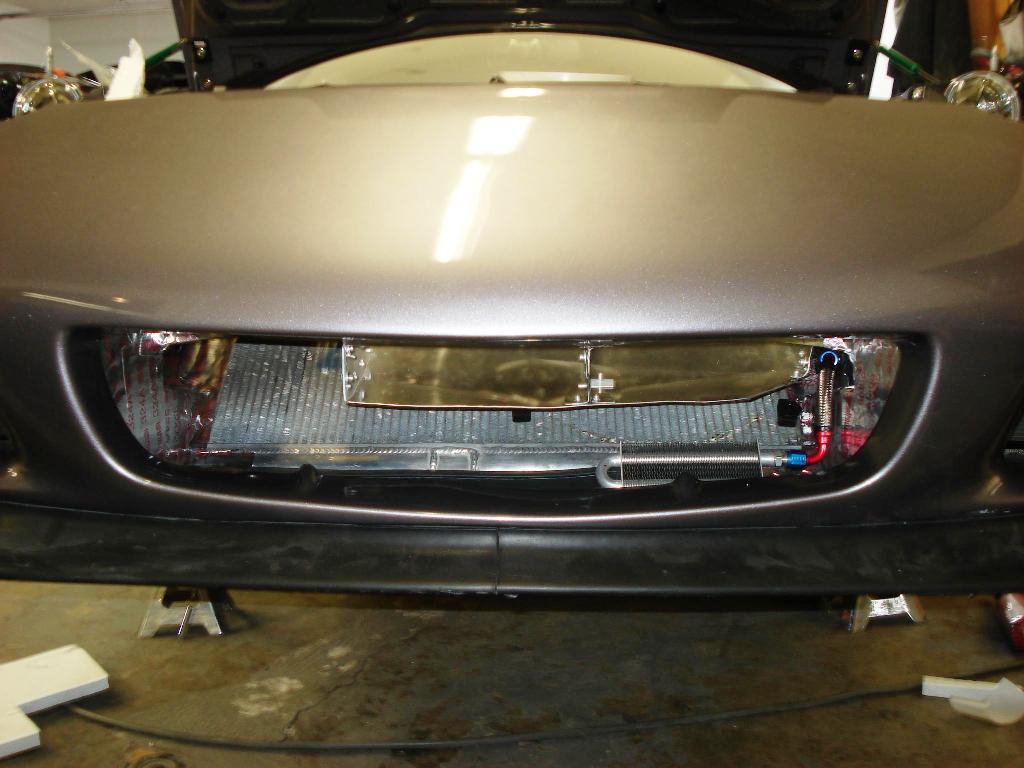
Intake tube done, next up final IC mounting, IC ducting, temporary air box/rad block-off, fluids and start her up.
IC end tanks done, not totally happy with how they turned out so these will be classified as version 1.0. Will see how they perform and make new ones down the road if needed. Space limitations were a real limiting factor. Need to setup and finish the mounting arrangement of the IC and work on the air box setup.
2/26/08
This will give you a better idea on the recirc.
2/27/08
Intake tube done, next up final IC mounting, IC ducting, temporary air box/rad block-off, fluids and start her up.


Great build, love all the custom fabrication. Especially the oil catch can & vacuum chamber  . Given me few ideas for mine
Only thing I would say is that the engine bay would look a lot tidier if you ground off some of the welds.
Only thing I would say is that the engine bay would look a lot tidier if you ground off some of the welds
.
Thread Starter
Joined: Jul 2005
Posts: 2,913
Likes: 4
From: Kingman, AZ
https://www.rx7club.com/3rd-generati...dness-1018399/
Adam

Thread Starter
Joined: Jul 2005
Posts: 2,913
Likes: 4
From: Kingman, AZ
Actually I have about a dozen big items I'm going to be installing/fabricating/modifying over the winter. Your tranny spacer being one of them, shopping for a diff/tranny cooler pump right now.
I need to add more content to this thread to get it up to date.

?????????????
Joined: Sep 2003
Posts: 512
Likes: 1
From: Greece
Nice build man.Somewhere you say that "The passenger rear fender well has a plastic liner in place now to get rid of the aero drag pocket the Re street diffuser would have caused".Are you sure about it?I have the same diffuser and by looking at the fender well i have the same feeling with you but i am no so sure....
Thread Starter
Joined: Jul 2005
Posts: 2,913
Likes: 4
From: Kingman, AZ
Yes it does create drag, think of it as a parachute made out of metal and fiberglass. However, if your wheels are a low offset and protrude out of the fender well this condition is somewhat negated.
Thread Starter
Joined: Jul 2005
Posts: 2,913
Likes: 4
From: Kingman, AZ
2/28/08
Well, Bobby and I went to the wee hours of 3am last night, but didn't quite get done. Bobby is still working on the temporary aluminum duct for the IC. So tonight finish that, check fluid's, finish block-offs and start tuning.
3/1/08
In my sleep deprived delirium I didn't install the boosted side of the boost source line to the correct location on my synapse wastegate. What happened next was a permanently close wastegate. Engine Go boom, Sand Panda
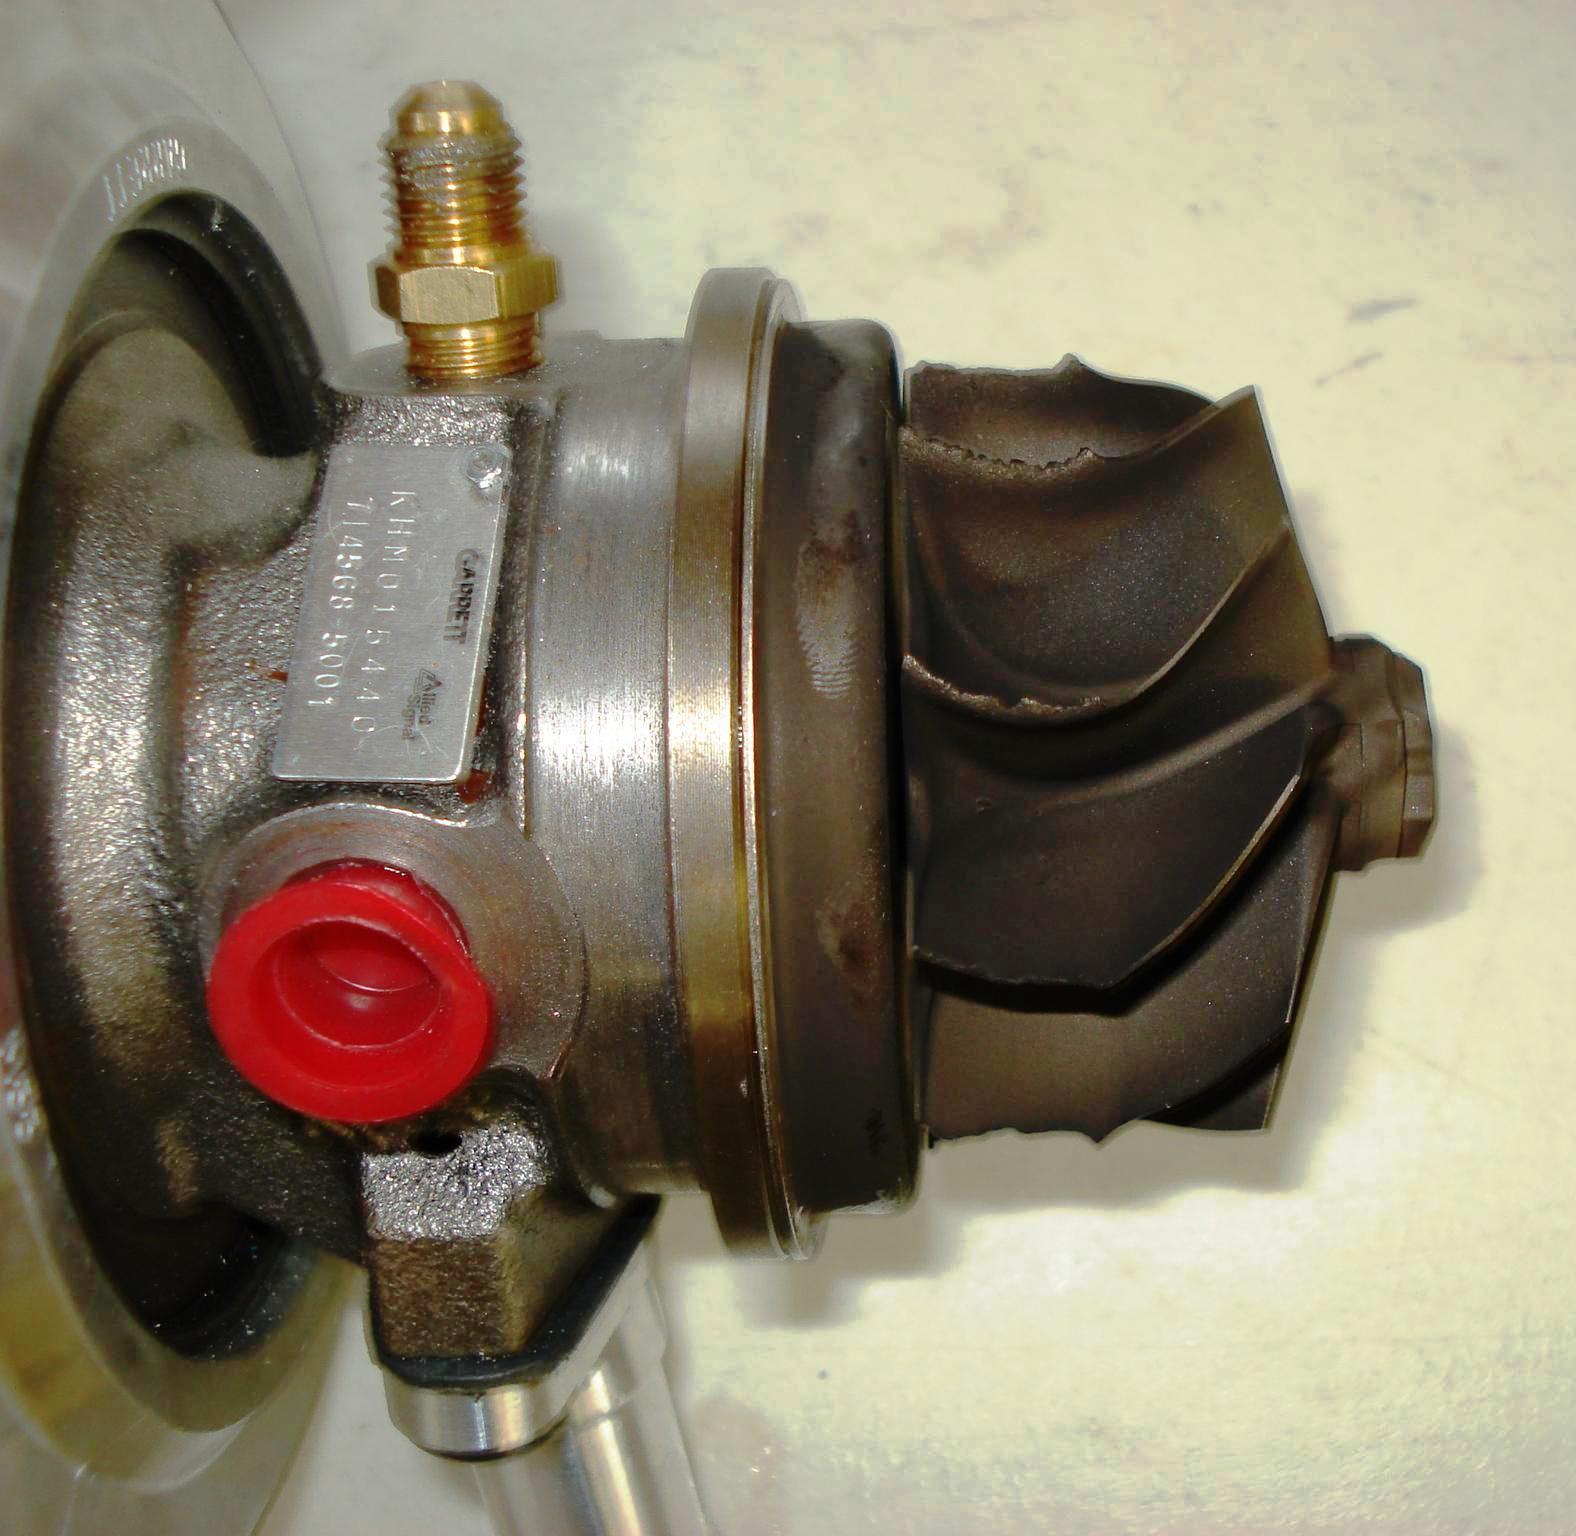
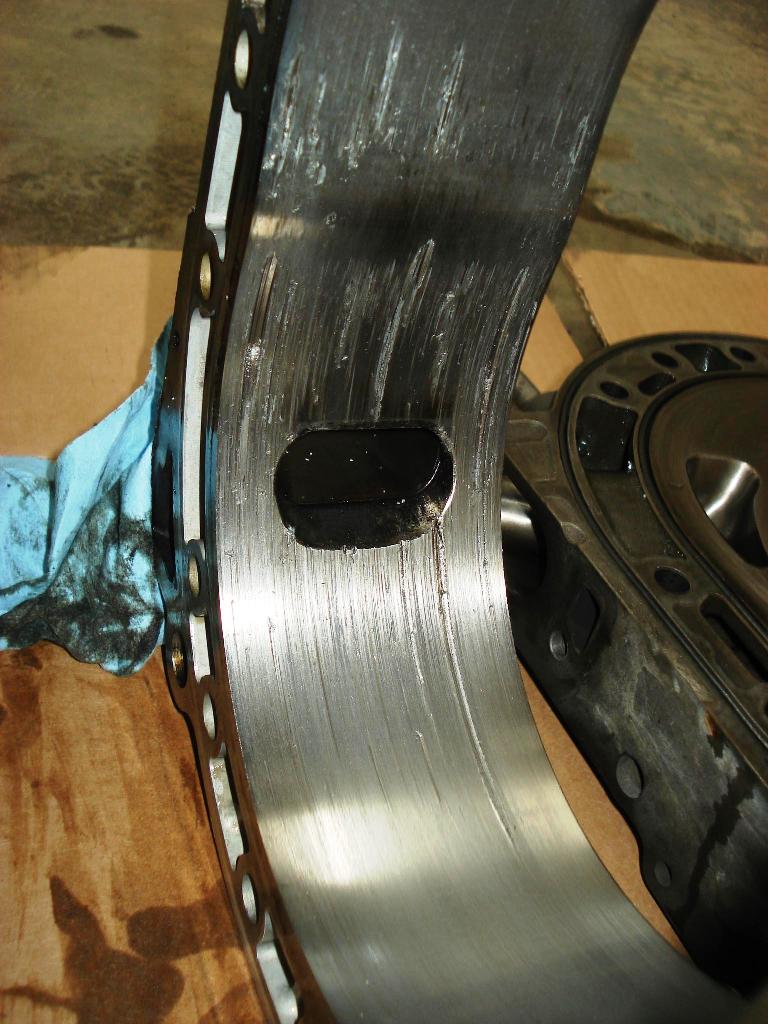
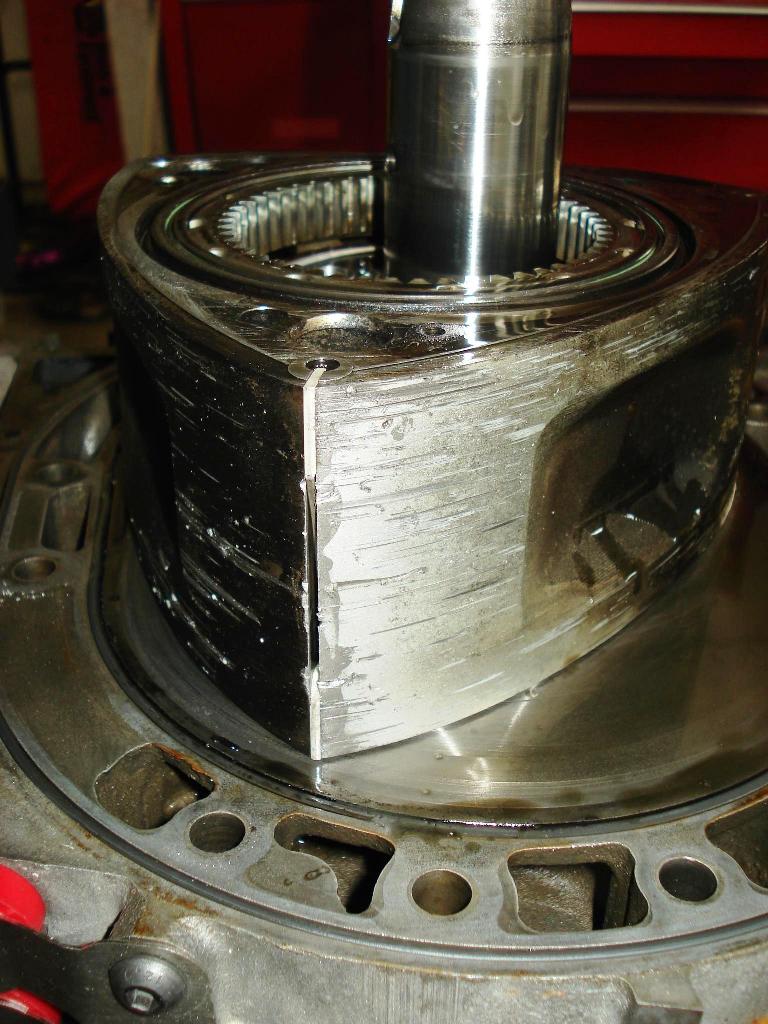
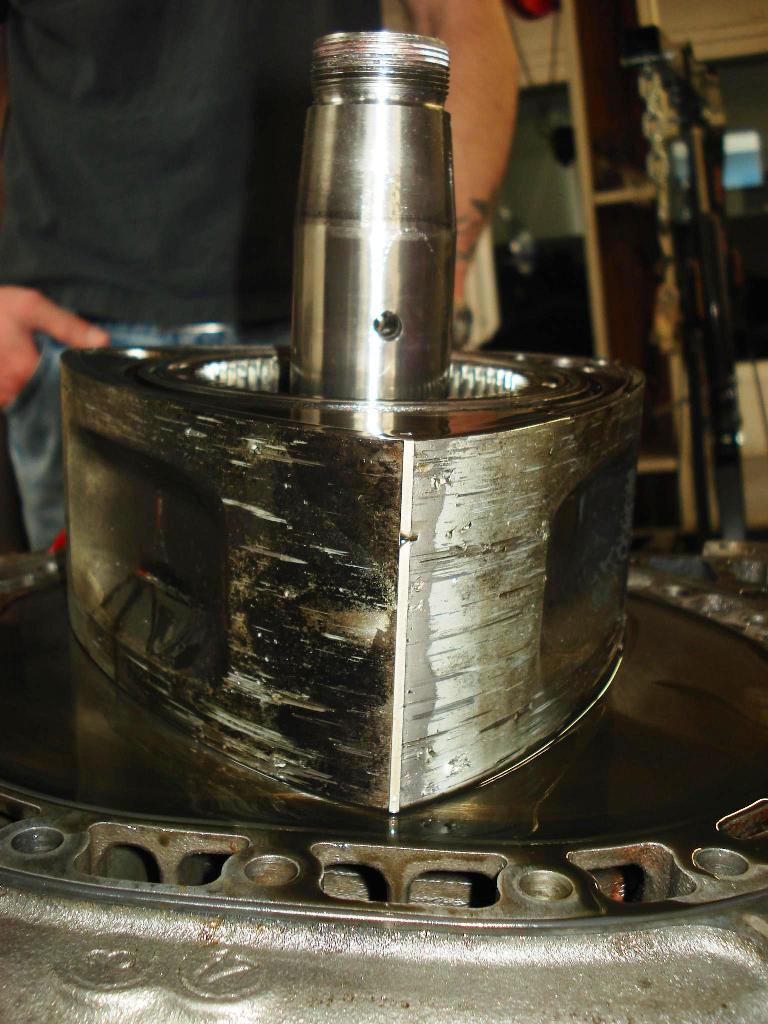
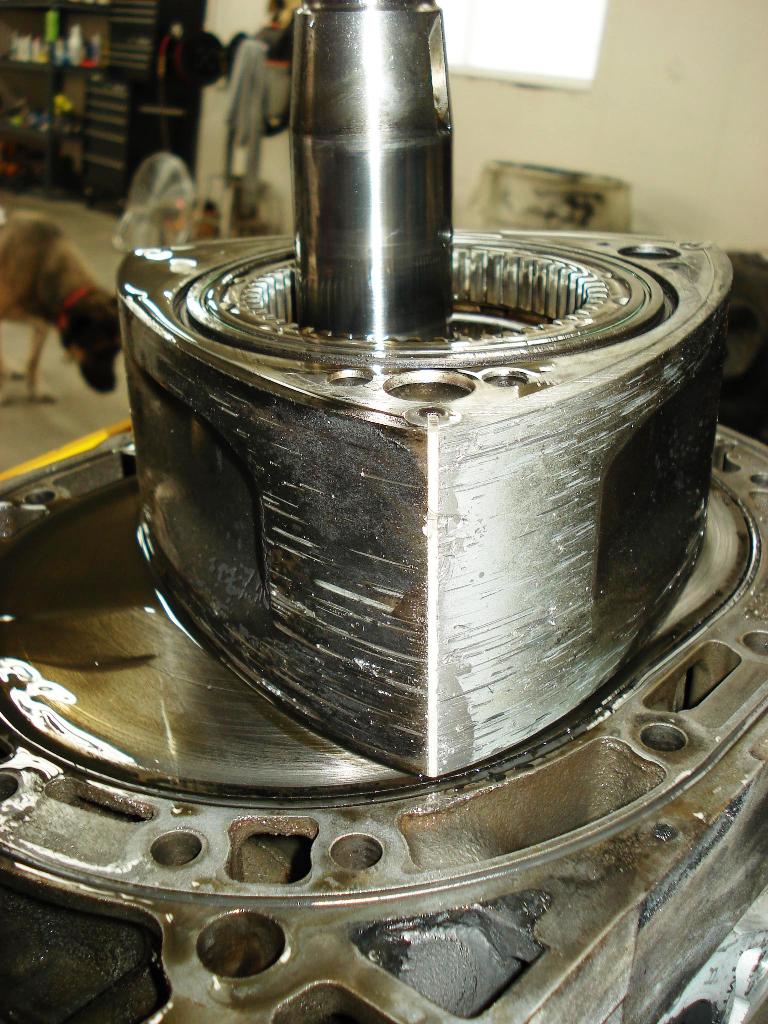
Well bad news, the wastegate did not open on my first pull and I over boosted to 34 psi and blew the apex seals on my rear rotor and destroyed the turbine on the 500R.
3/3/08
Well, after thinking over what happened, basically it was my fault. I misunderstood the setup recommendation from one of the Synapse Reps on connecting the EBC to the WG. Plus a weeks worth of sleep deprivation and being under the gun to get the car ready for the Saturday track event severely clouded my judgement that night. If I had not been so tired and had checked everything before I did a full throttle pull this would have never happened. This was a very expensive lesson, but it's fixable. I just need to muster up the money to get the turbo and engine fixed.....So close.
All three apex seals, the rear rotor and rotor housing are toast, hopefully the side plates are still good. Anyboy got a set of Iannetti one piece ceramic apex seals for a good price? Also a rotor and rear housing that's in good shape?

Well, Bobby and I went to the wee hours of 3am last night, but didn't quite get done. Bobby is still working on the temporary aluminum duct for the IC. So tonight finish that, check fluid's, finish block-offs and start tuning.
3/1/08
In my sleep deprived delirium I didn't install the boosted side of the boost source line to the correct location on my synapse wastegate. What happened next was a permanently close wastegate. Engine Go boom, Sand Panda
Well bad news, the wastegate did not open on my first pull and I over boosted to 34 psi and blew the apex seals on my rear rotor and destroyed the turbine on the 500R.
3/3/08
Well, after thinking over what happened, basically it was my fault. I misunderstood the setup recommendation from one of the Synapse Reps on connecting the EBC to the WG. Plus a weeks worth of sleep deprivation and being under the gun to get the car ready for the Saturday track event severely clouded my judgement that night. If I had not been so tired and had checked everything before I did a full throttle pull this would have never happened. This was a very expensive lesson, but it's fixable. I just need to muster up the money to get the turbo and engine fixed.....So close.
All three apex seals, the rear rotor and rotor housing are toast, hopefully the side plates are still good. Anyboy got a set of Iannetti one piece ceramic apex seals for a good price? Also a rotor and rear housing that's in good shape?
Thread Starter
Joined: Jul 2005
Posts: 2,913
Likes: 4
From: Kingman, AZ
3/3/08
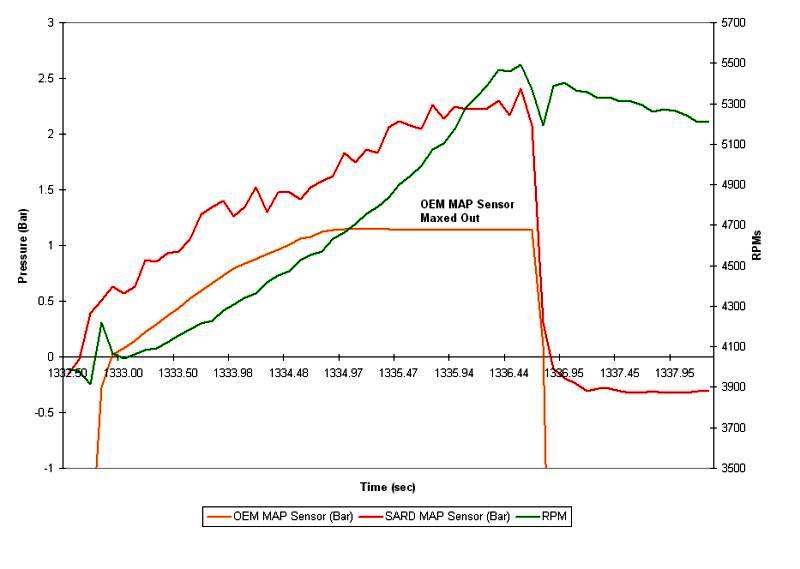
Here's a graph of the Boost & RPM trace when I blew up my motor. At least I know this turbo is going to kick *** response wise once I get it back on the road. 500 rpm transition from 0 bar to 1 bar, fifth gear.
4/3/08
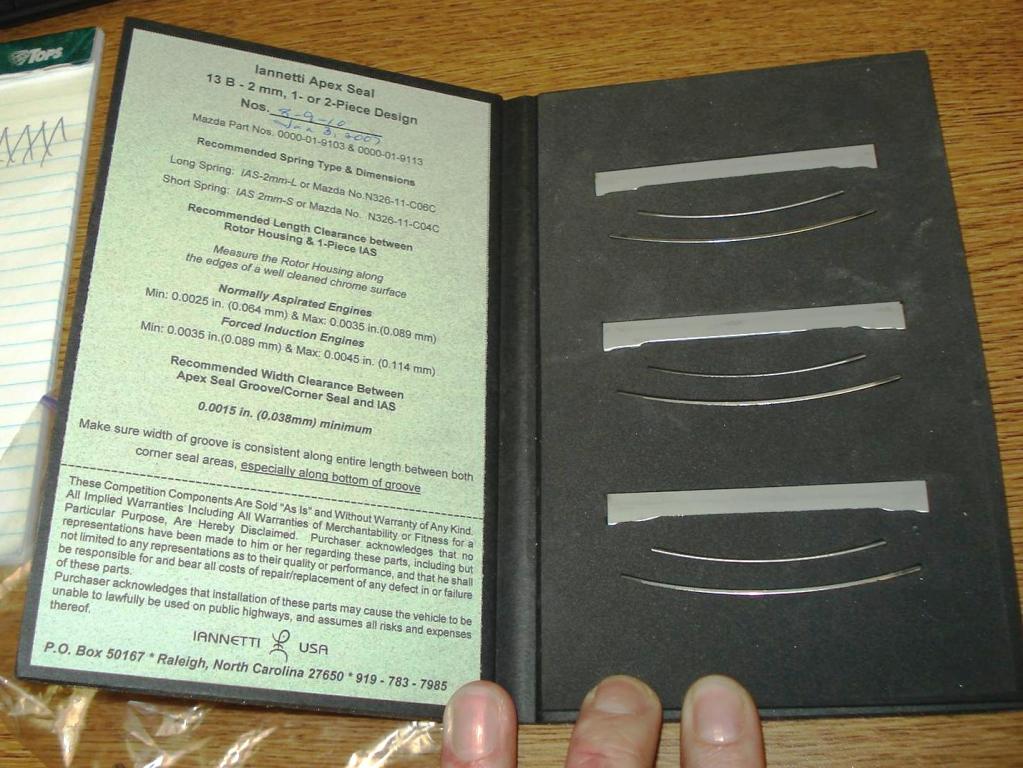
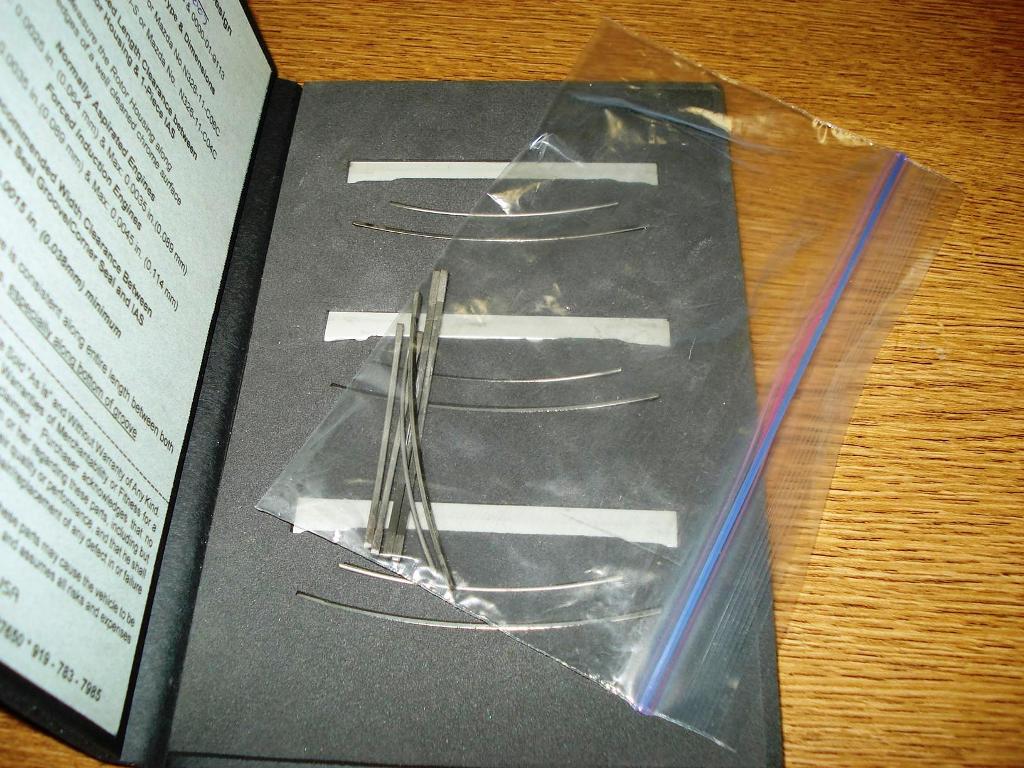
Received the replacement Iannetti 2mm ceramic apex seals and a second set of new springs. Will be ordering the other parts towards the end of this months, once I recoup from my DGRR08 trip. I really can't afford it, but I need it.
Herblenny is hooking me up with his RX-8 while I'm there. Phil's the man!
4/27/08
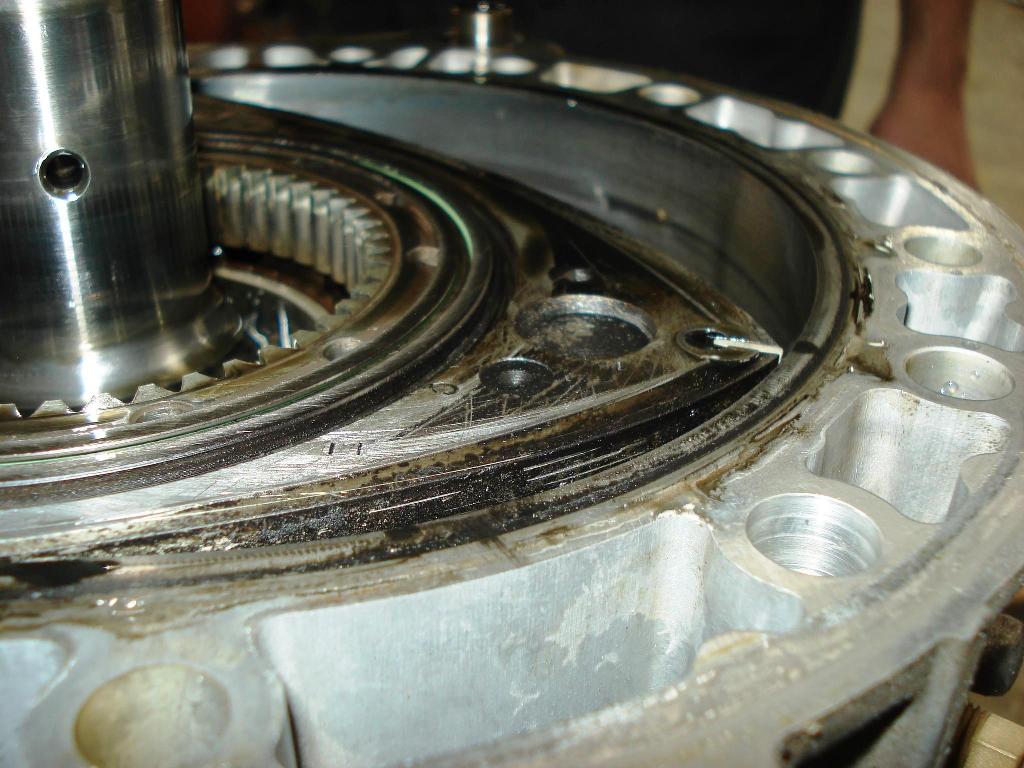
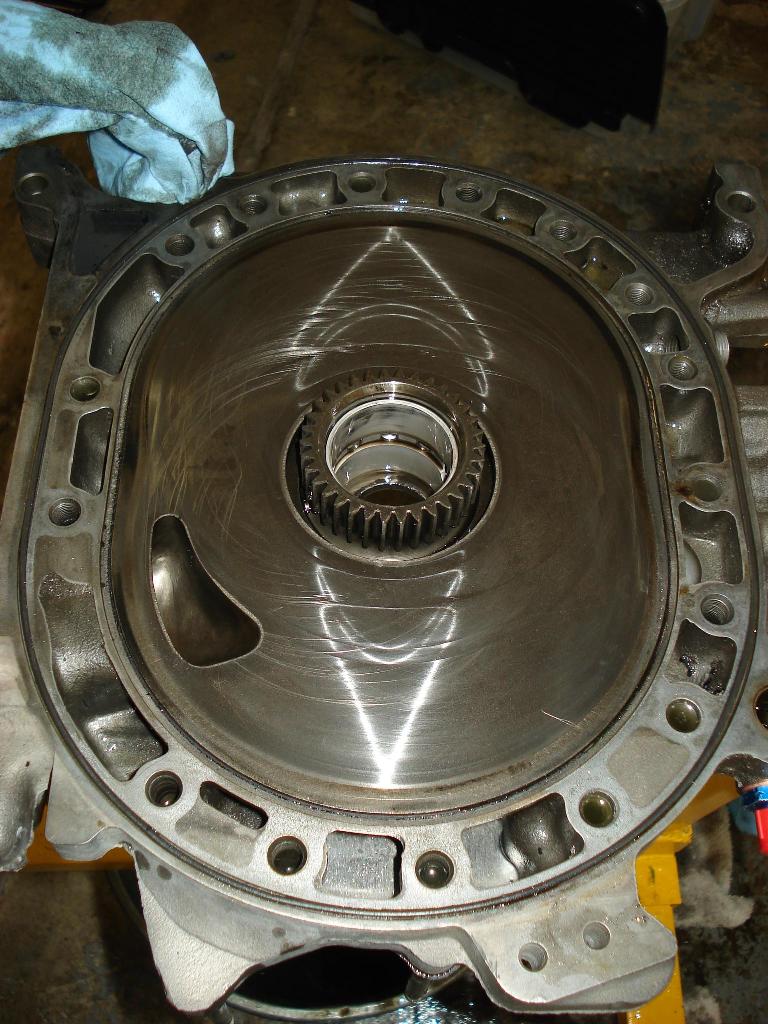
Well, took the motor apart and got a few surprises, looks like I need to get the irons lapped and re-coated if possible. May need to get new ones, let's hope not. Everything else that blew up was expected. Not pretty.
Will be buying parts soon. Depending on if the irons are salvageable or not I may have the motor built by the end of May.
Here's a graph of the Boost & RPM trace when I blew up my motor. At least I know this turbo is going to kick *** response wise once I get it back on the road. 500 rpm transition from 0 bar to 1 bar, fifth gear.
4/3/08
Received the replacement Iannetti 2mm ceramic apex seals and a second set of new springs. Will be ordering the other parts towards the end of this months, once I recoup from my DGRR08 trip. I really can't afford it, but I need it.
Herblenny is hooking me up with his RX-8 while I'm there. Phil's the man!
4/27/08
Well, took the motor apart and got a few surprises, looks like I need to get the irons lapped and re-coated if possible. May need to get new ones, let's hope not. Everything else that blew up was expected. Not pretty.
Will be buying parts soon. Depending on if the irons are salvageable or not I may have the motor built by the end of May.
Thread Starter
Joined: Jul 2005
Posts: 2,913
Likes: 4
From: Kingman, AZ
5/5/08
Okay, so Rob at Pineapple say's the side plates look like they can be resurfaced. And he sold me a good rotor and usable rotor housing for a good price. So now I will do some mods to the cooling passages and such, then off to resurfacing and recoating.
I just saved myself a lot of money, which I can now dump into performance mods to the motor, hehe
5/23/08
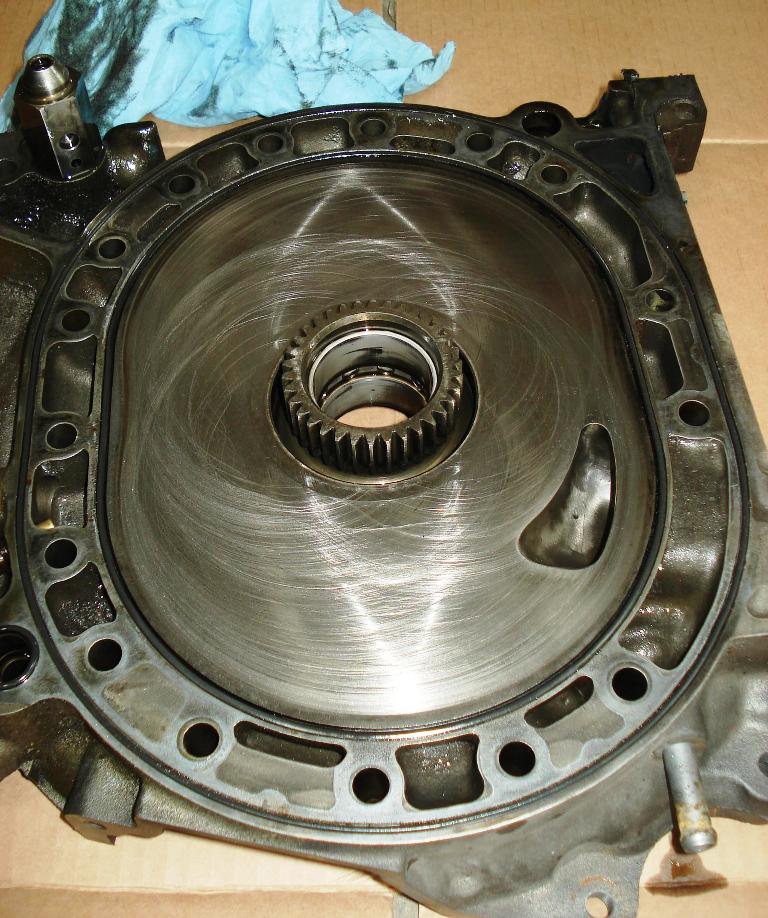
Well dropped off the side plates yesterday to get lapped. Hopefully the grooves aren't deep enough where they have to remove more than 0.004" of material.
I got a good rotor from Pineapple and ordered a Cermet B coated JHB rotor housing for the rear.
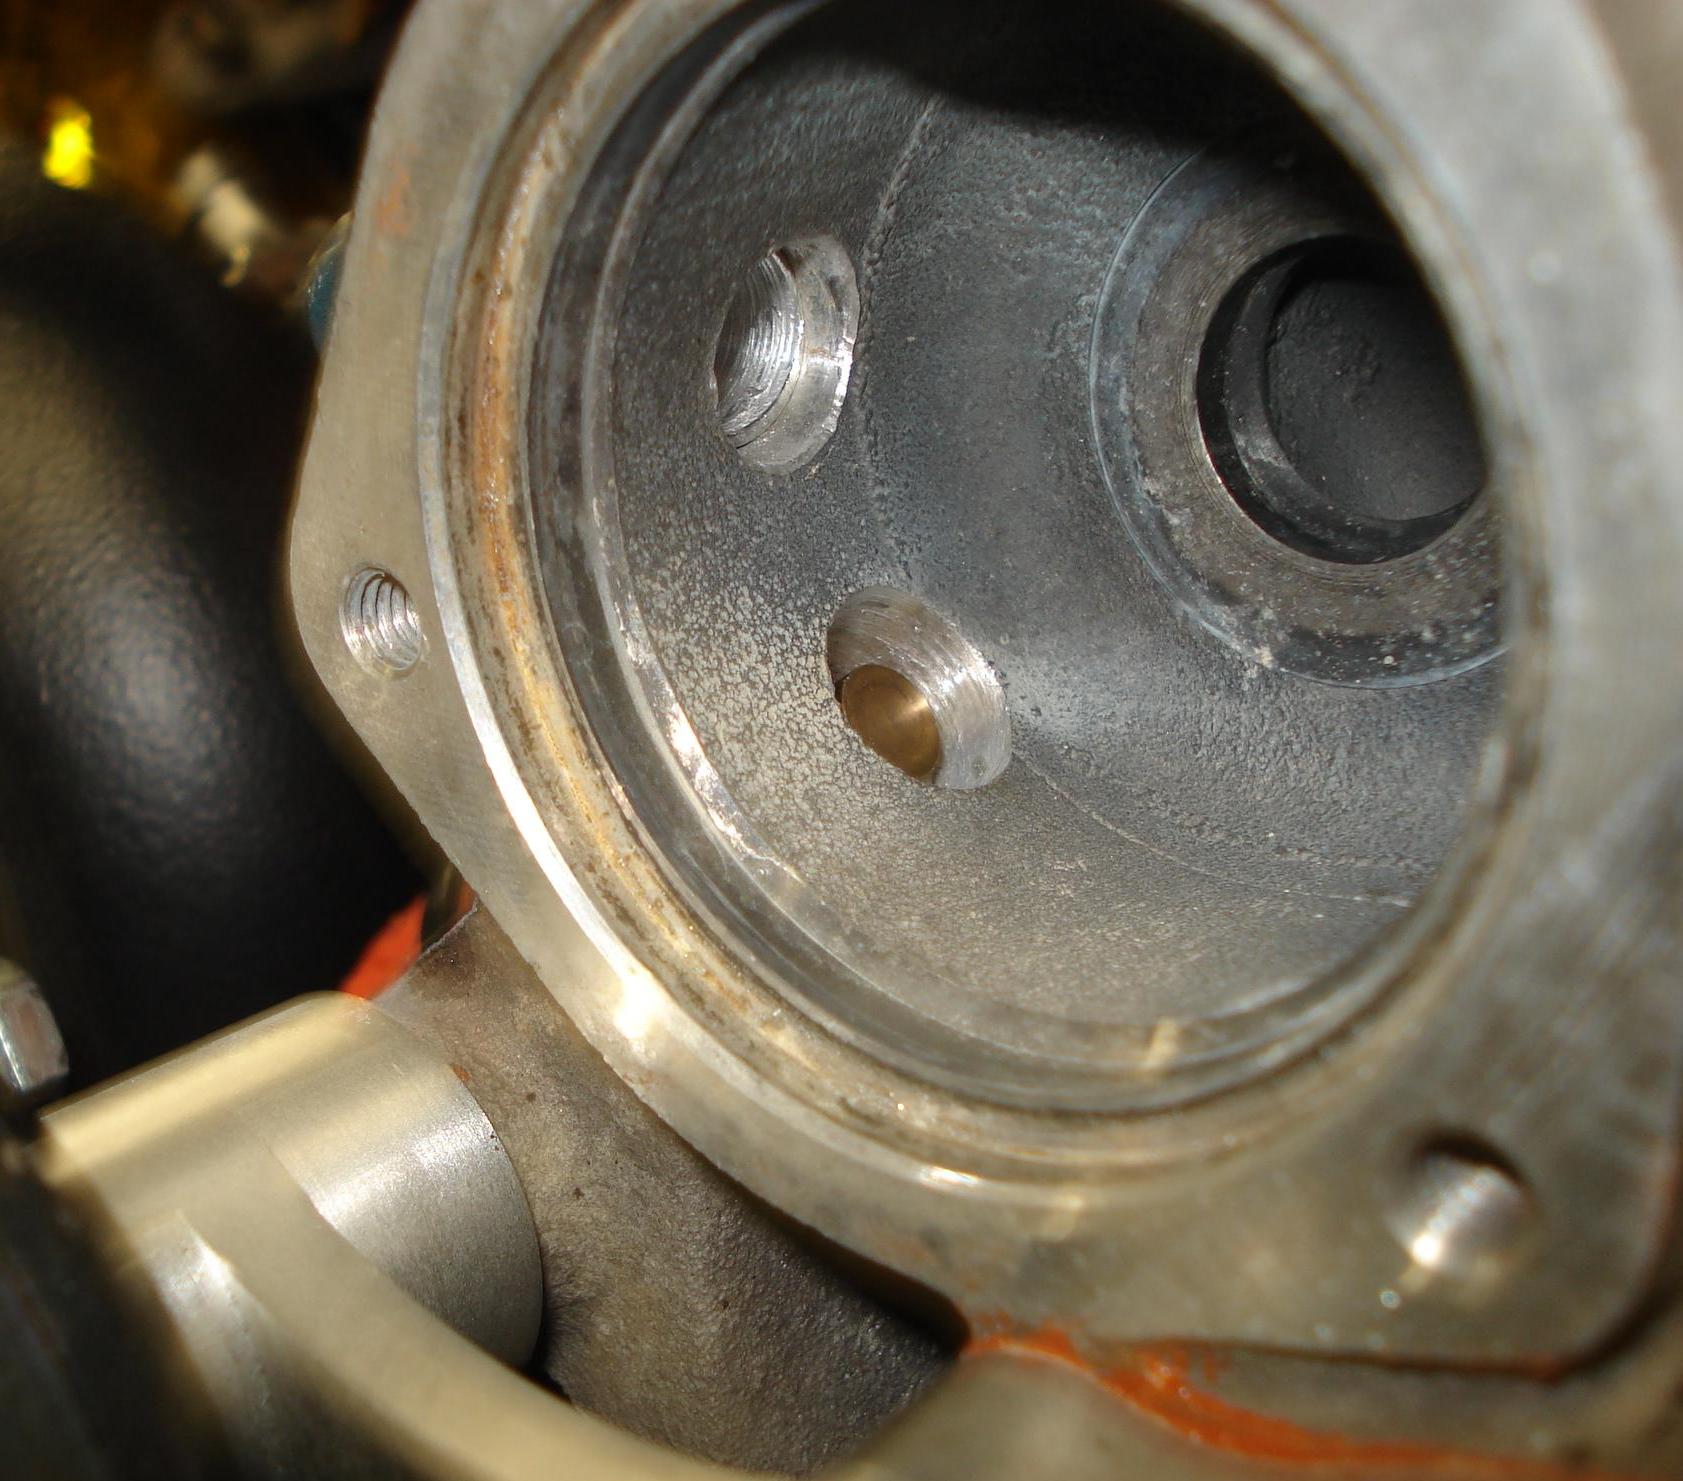
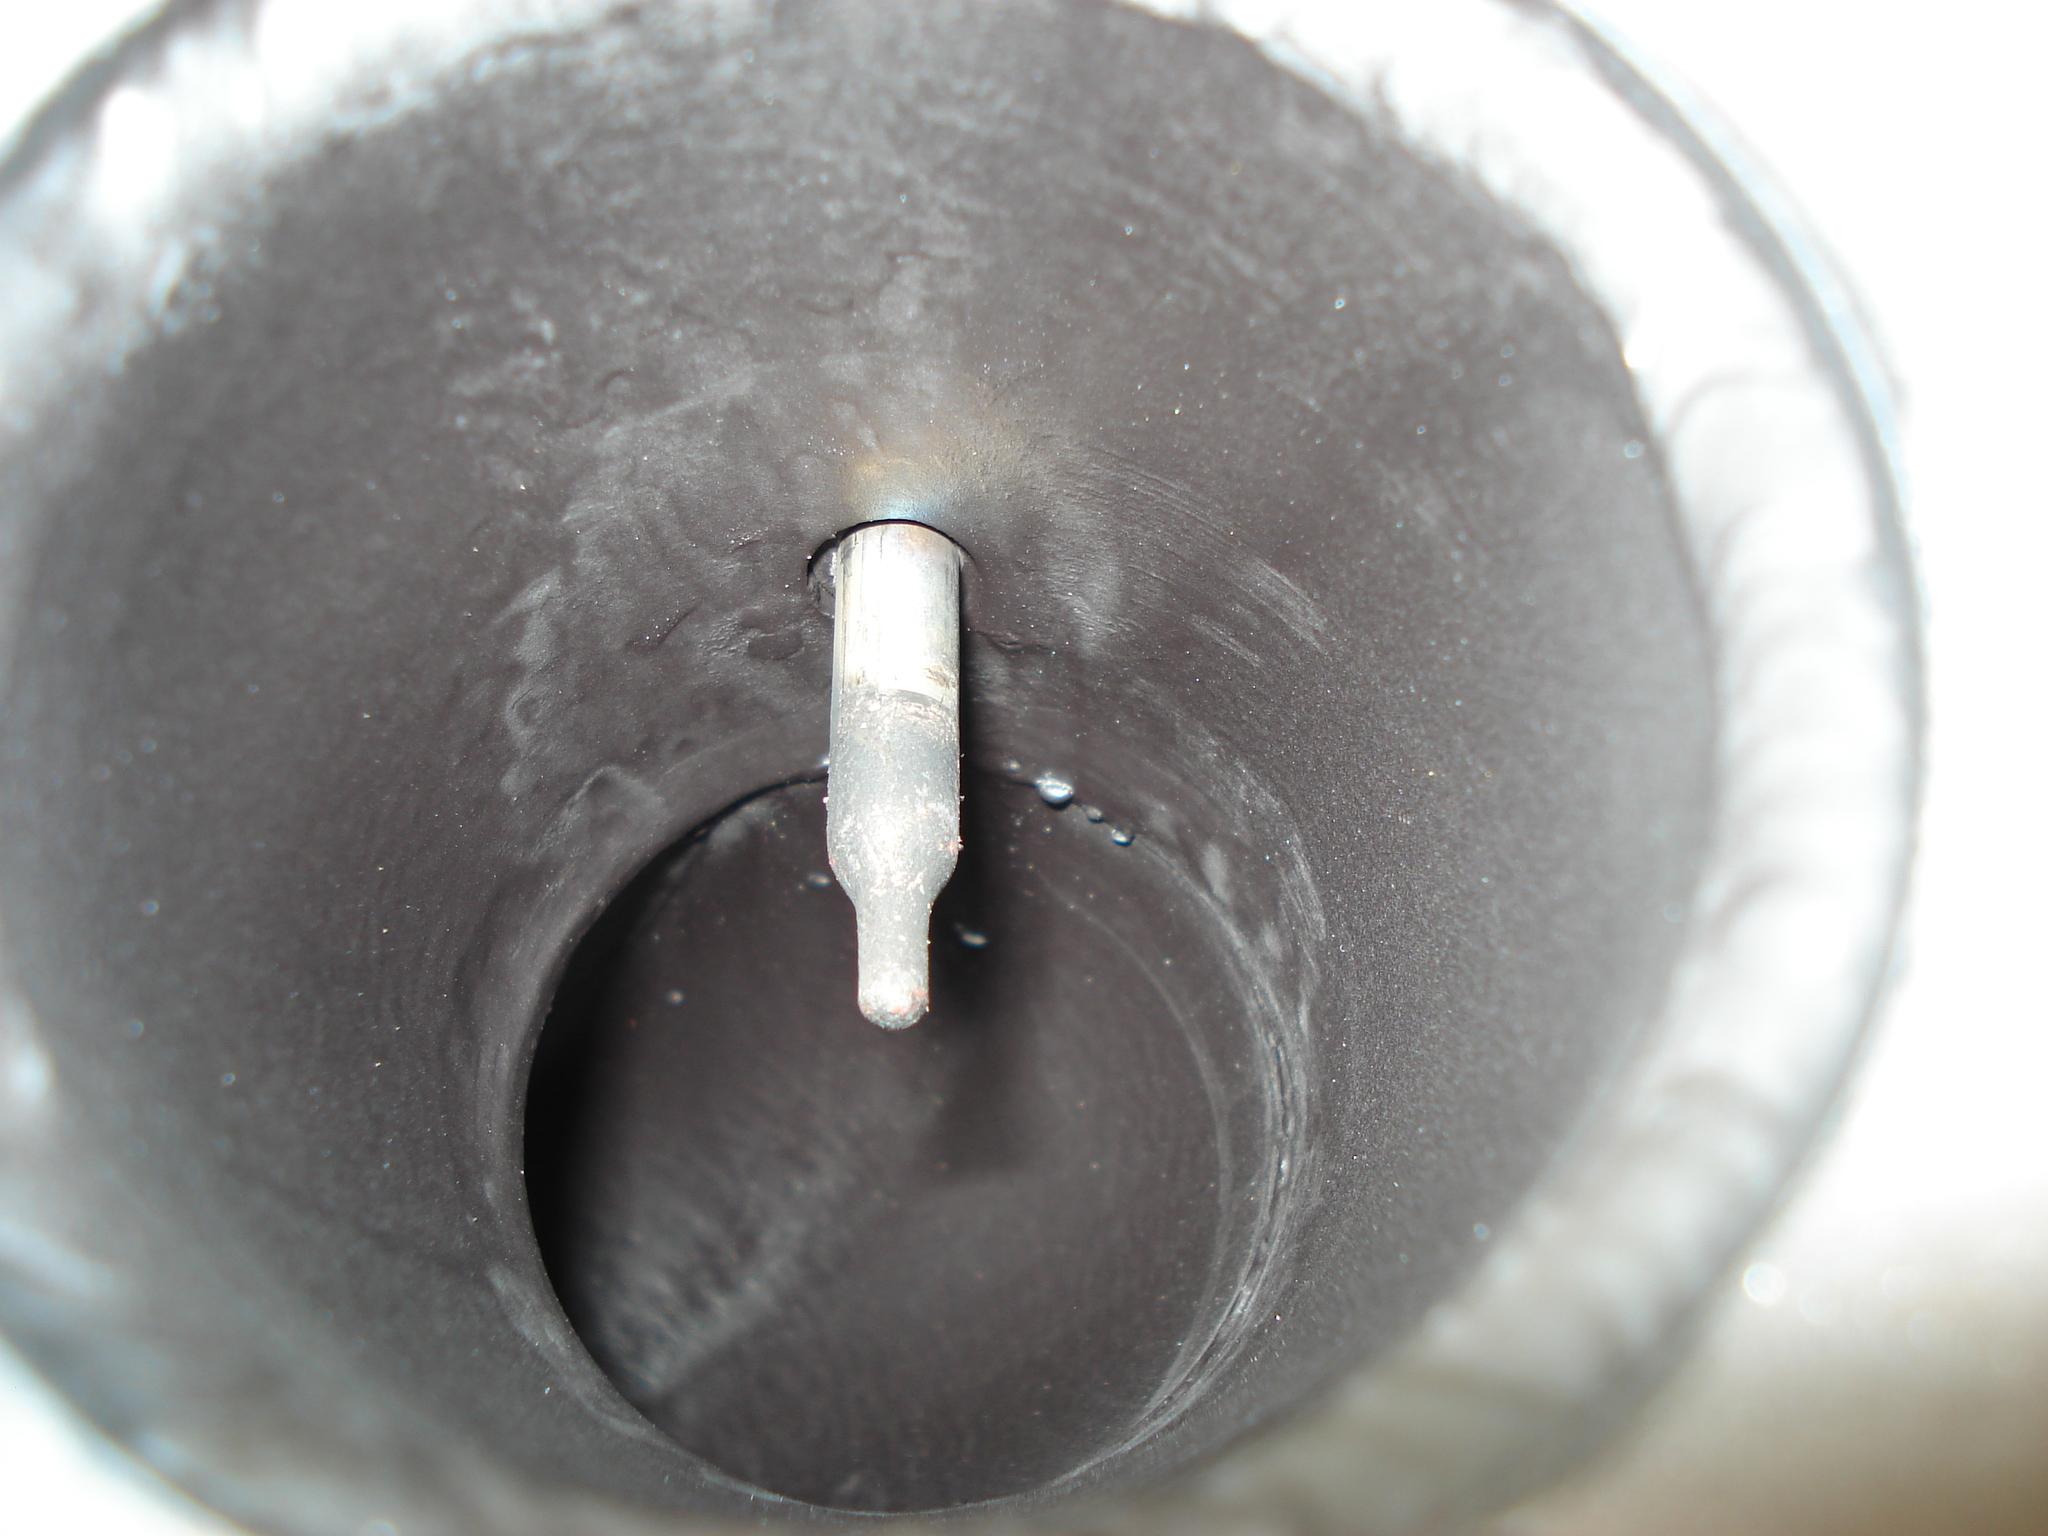
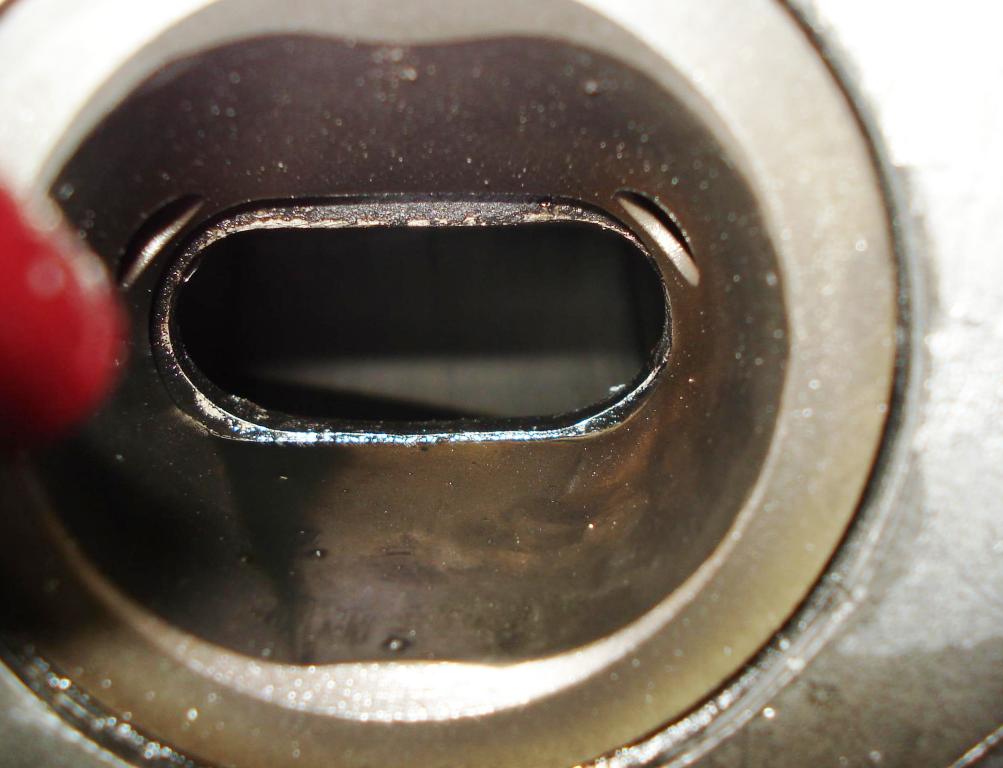
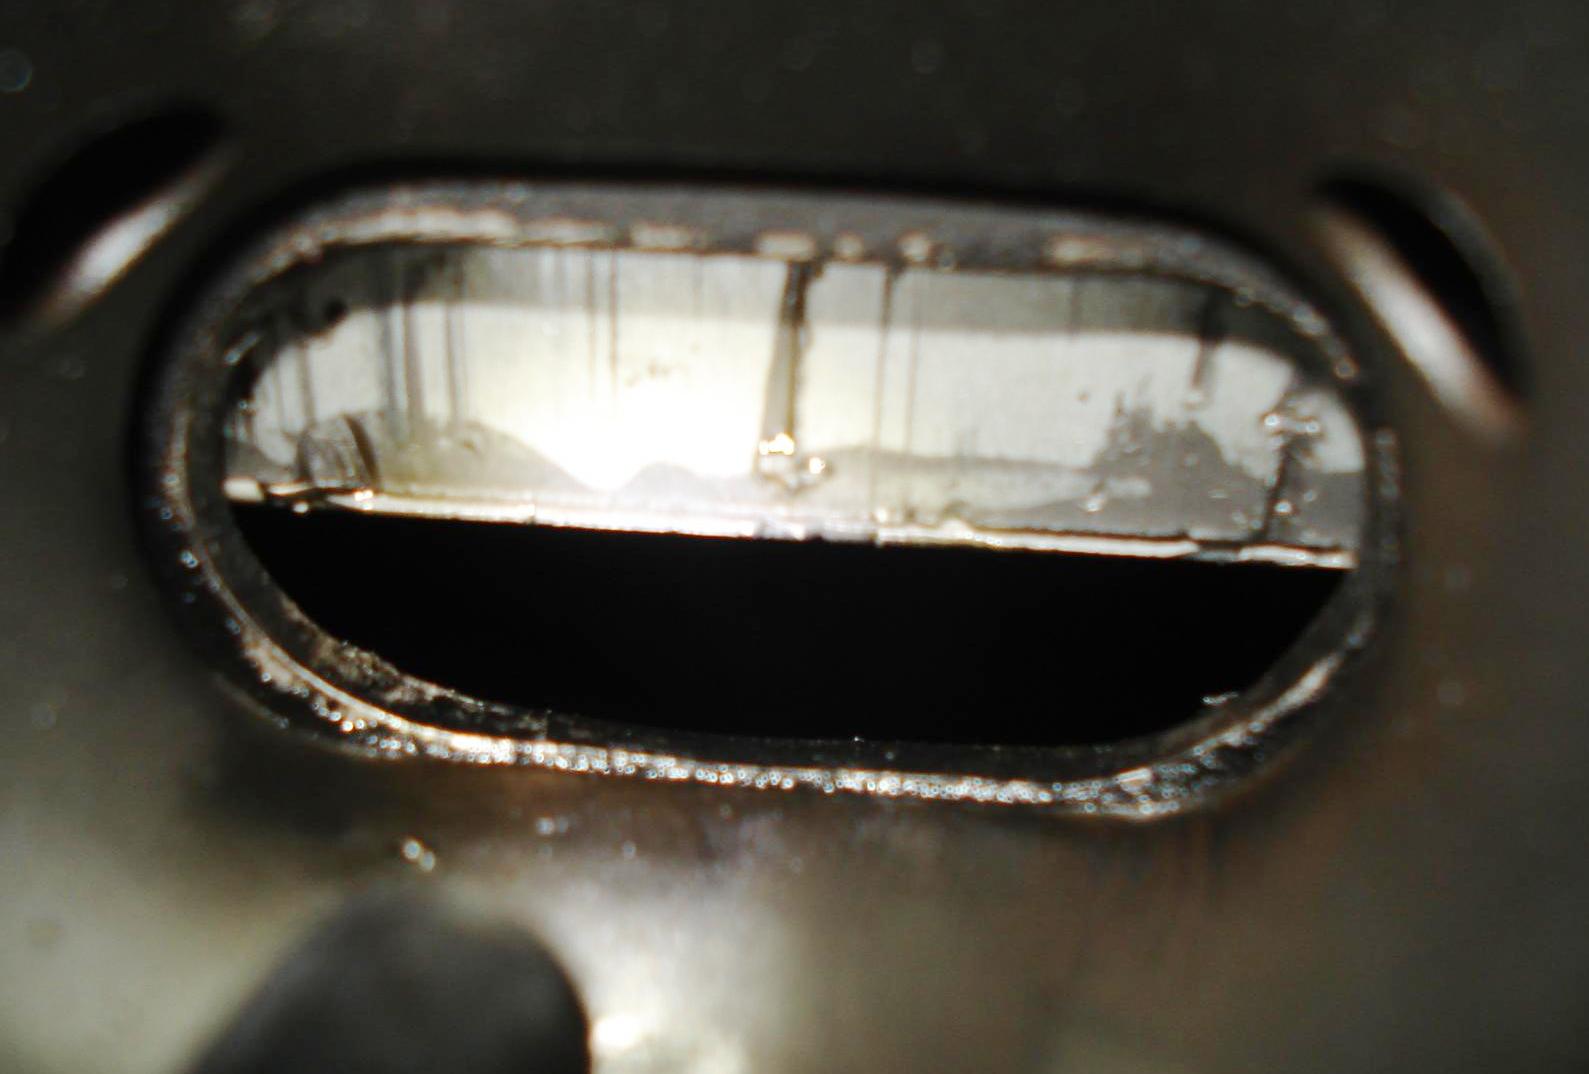
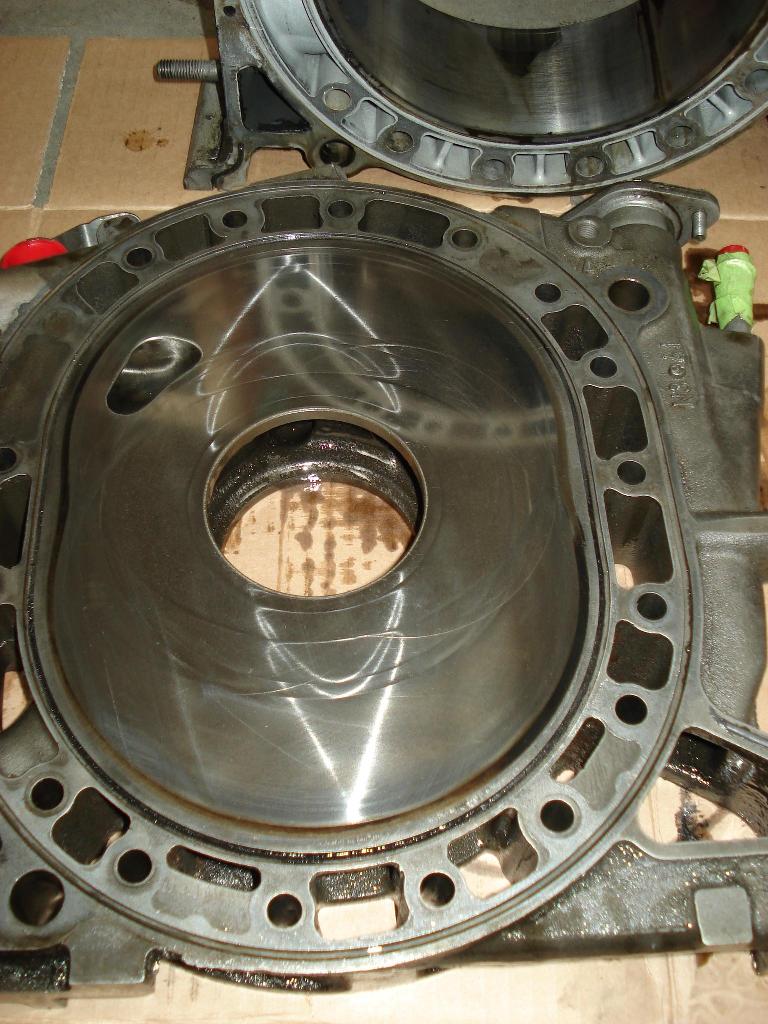
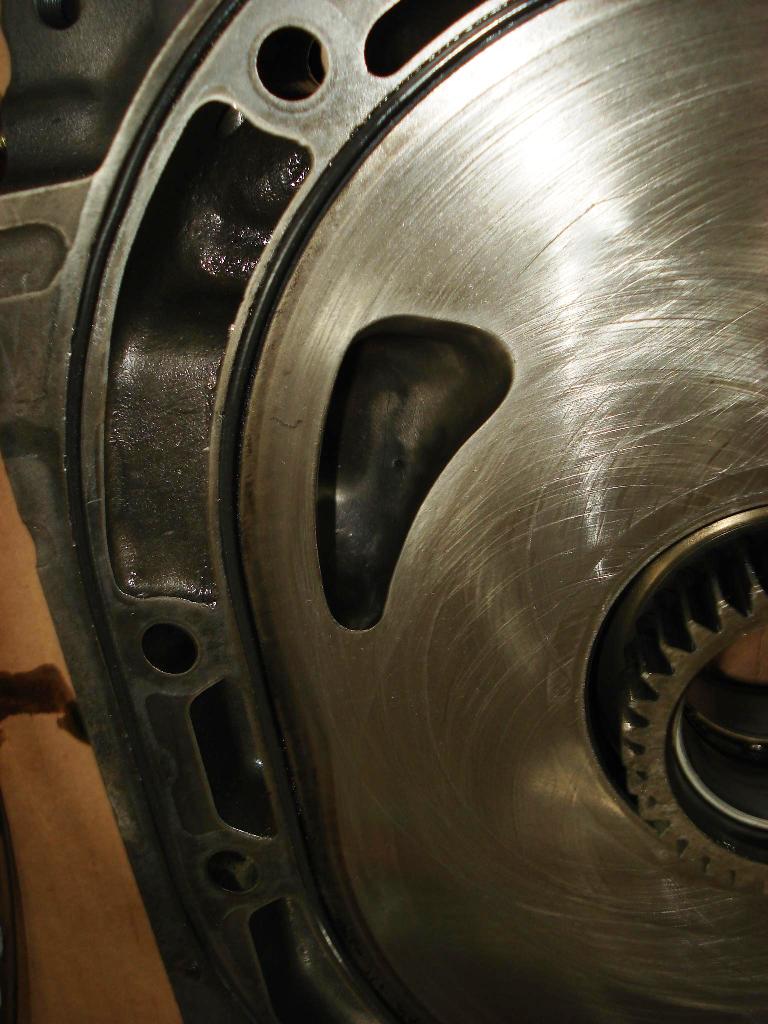
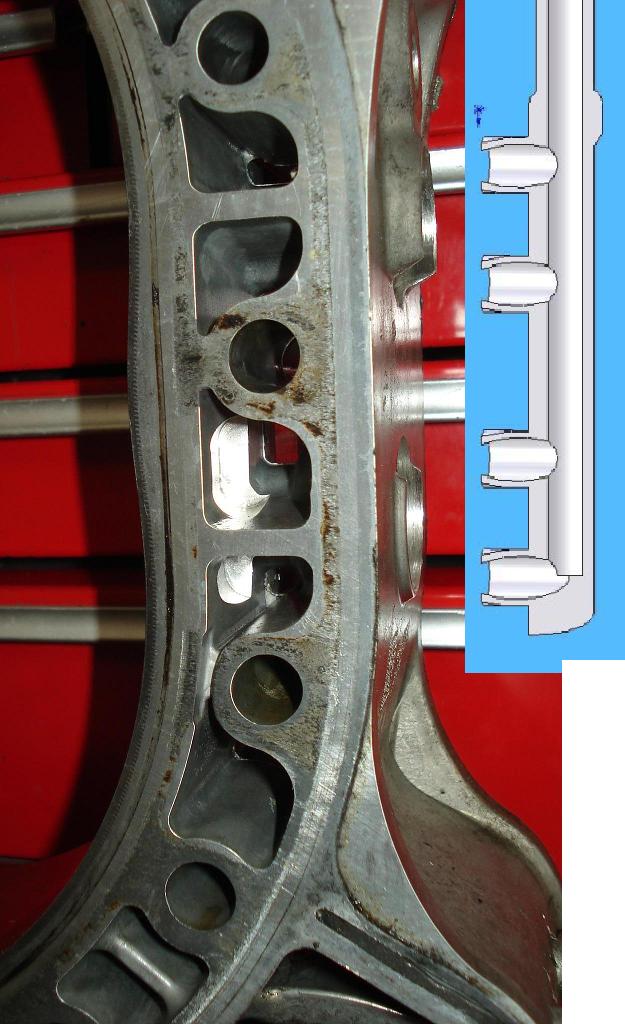
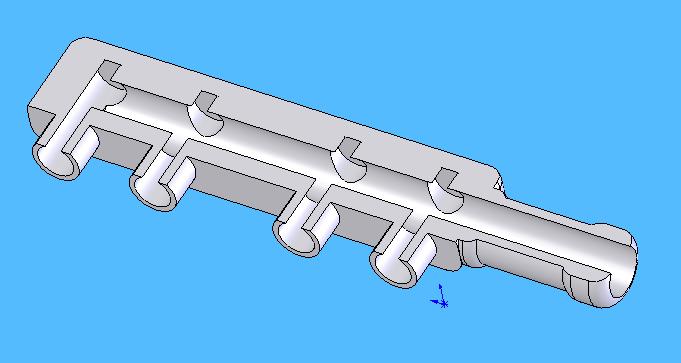
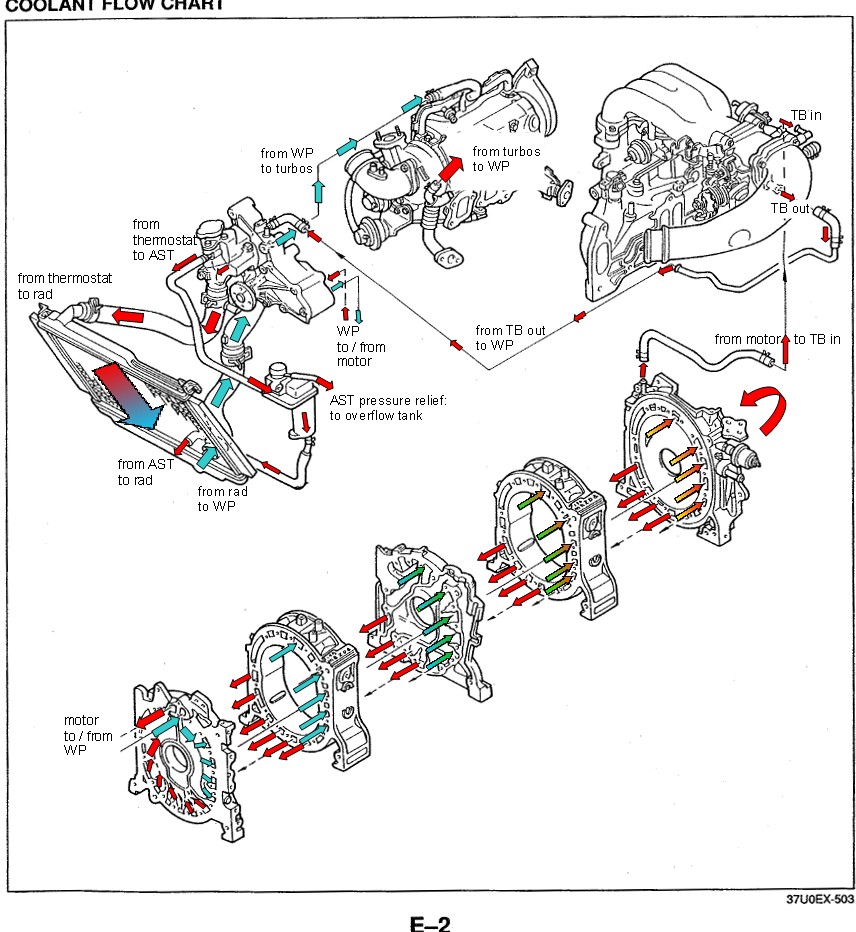
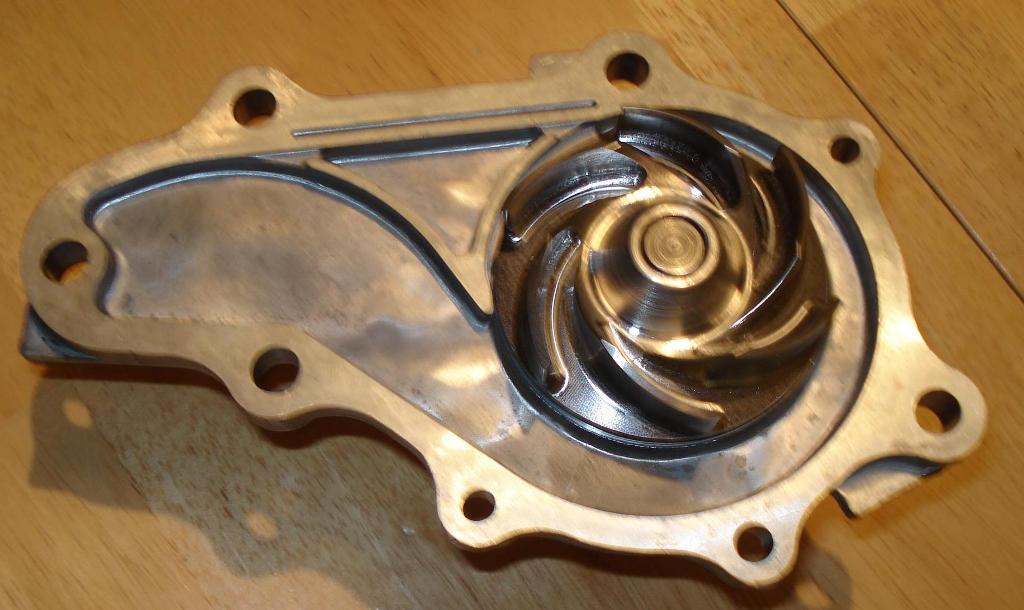
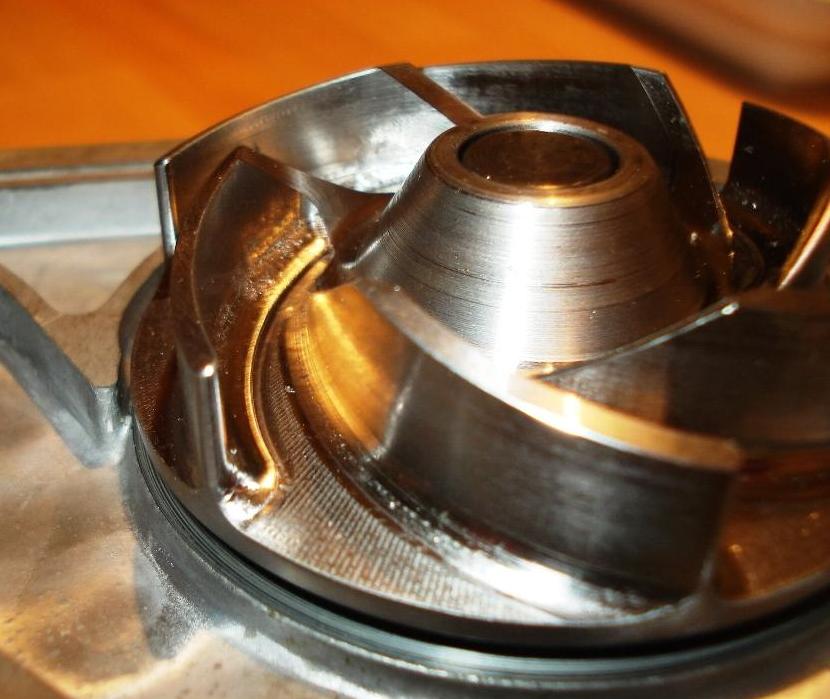
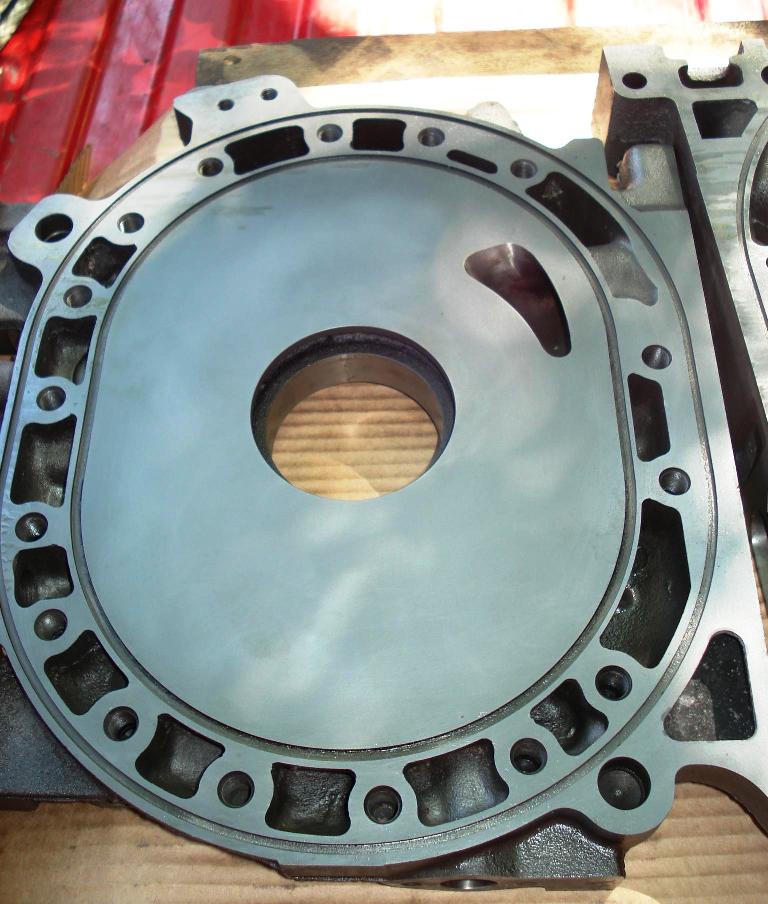
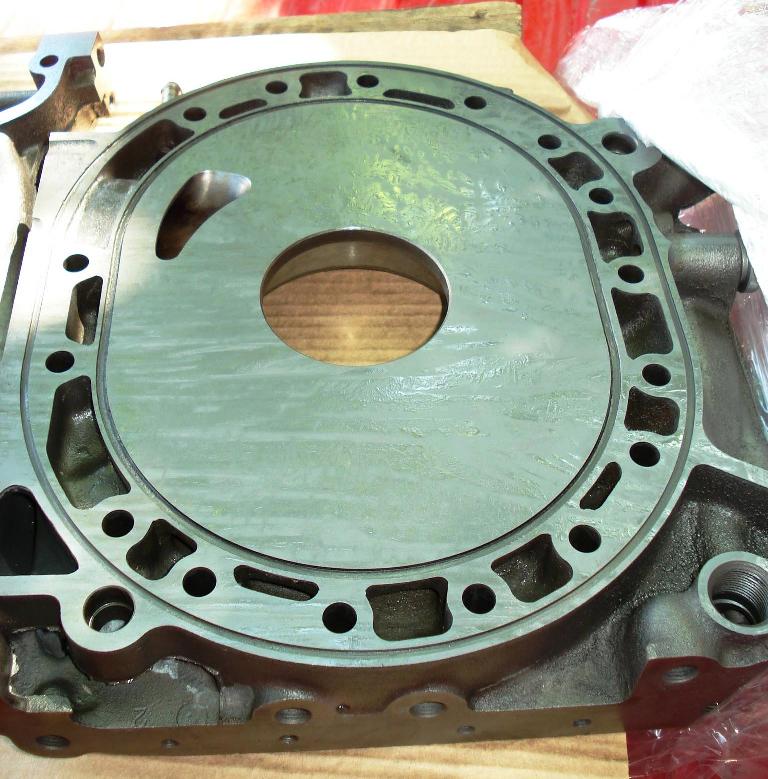
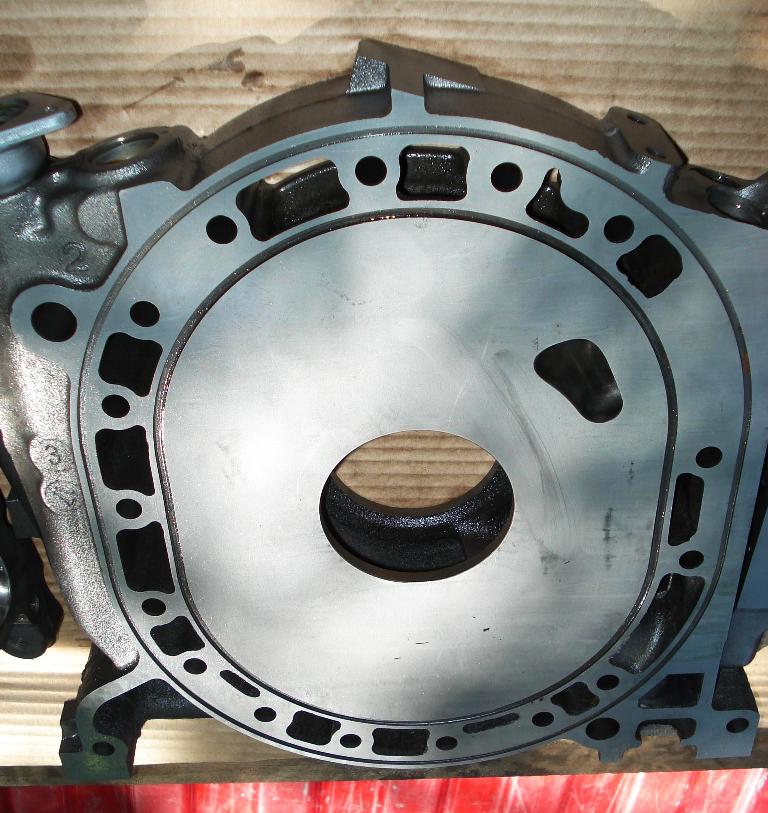
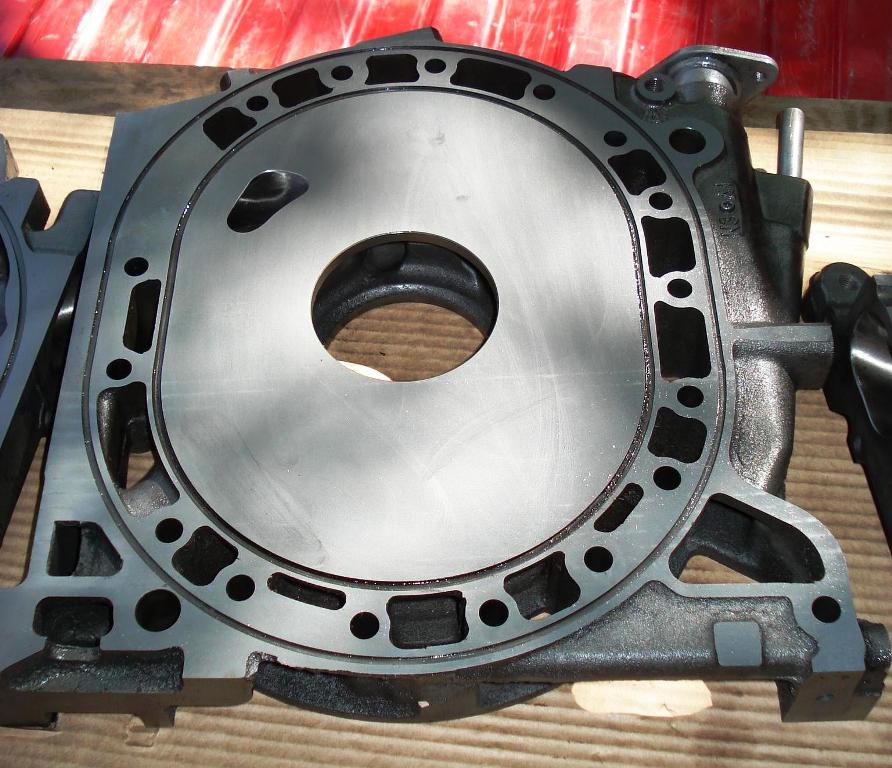
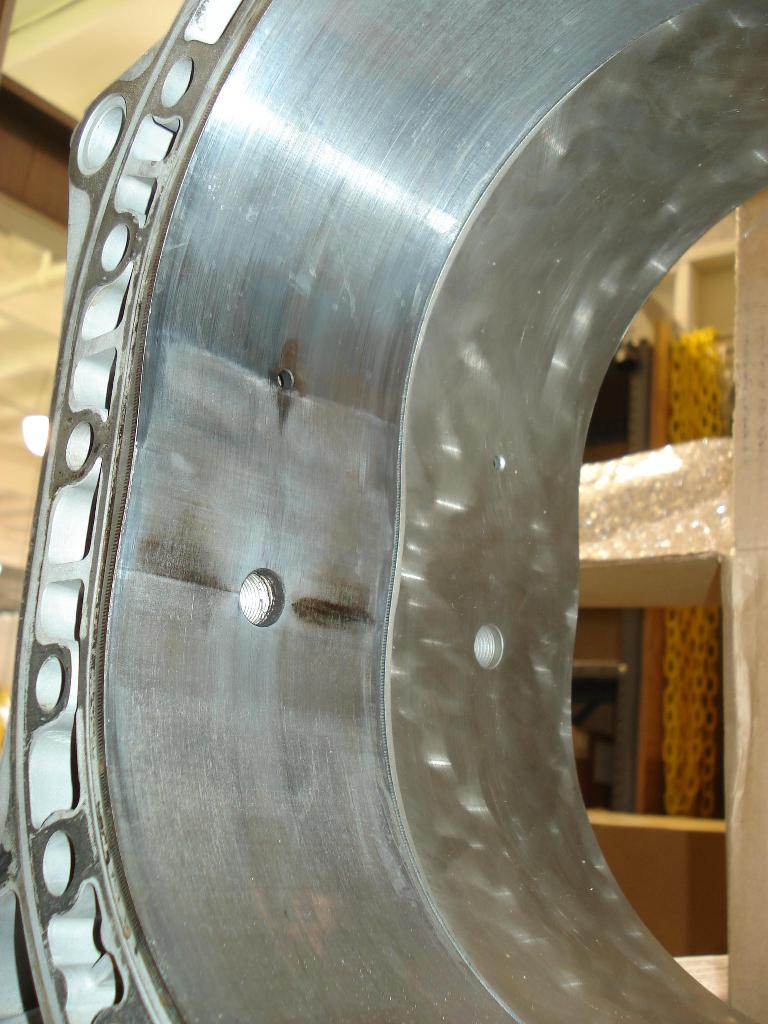
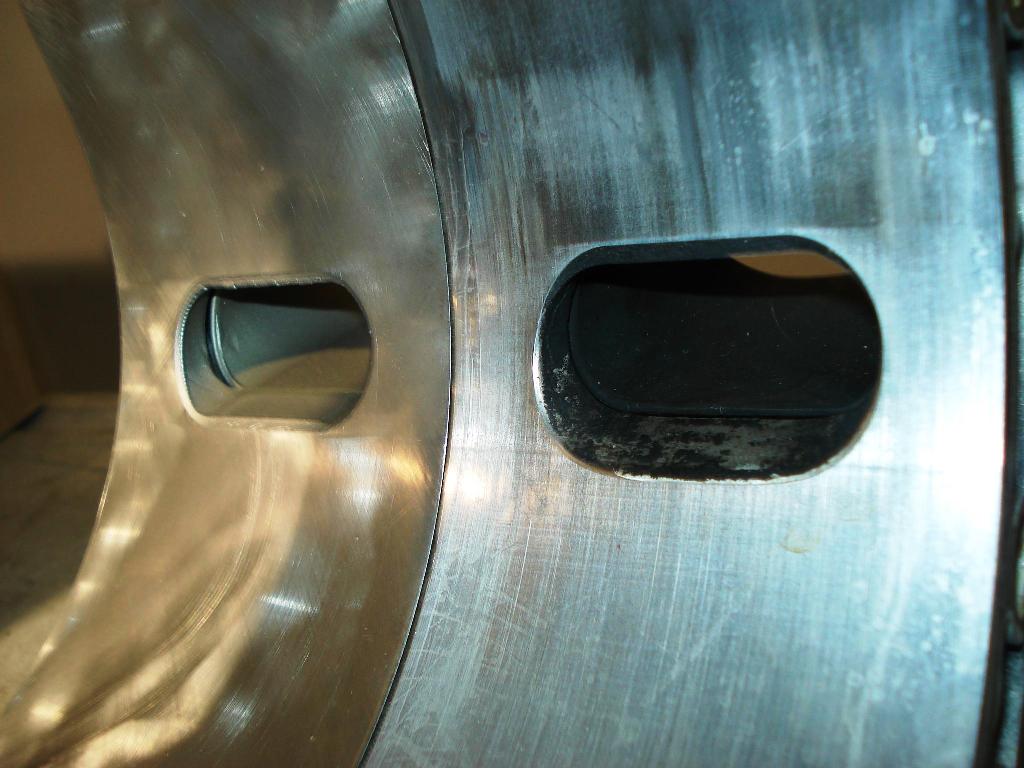
Jared Still ordered me a mazmart water pump and high flow thermostat and I will be making some coolant mods to the rear rotor housing to improve cooling performance even further. See attached pictures to get an idea what I'm doing.
And I'm in the process of ordering engine parts, will be ordering the last of it Tuesday when I got money in my bank account again, lol.
5/30/08
Well I got my side plates, JHB Cermet B coated rotor housing and seal kit in today.
The machinist had to take off 0.004" for both the front and rear plate, 0.005" and 0.003" for the rear and front respectively on the center plate. He also said that the center plate was 0.0035" out of parallel. Hopefully the TiN is still intact on all the faces, will have to test the micro surface hardness to confirm.
The Cermet B housing needs to be port matched and have my intended coolant mod performed on it.
I've decided to stick with my original front rotor housing mostly due to my finances and it's still in good shape. That is rather amazing considering it has a little over 100K miles on it and it has gone through four engine failures now. I just plan on cleaning it up a little with a little lapping.
Okay, so Rob at Pineapple say's the side plates look like they can be resurfaced. And he sold me a good rotor and usable rotor housing for a good price. So now I will do some mods to the cooling passages and such, then off to resurfacing and recoating.
I just saved myself a lot of money, which I can now dump into performance mods to the motor, hehe
5/23/08
Well dropped off the side plates yesterday to get lapped. Hopefully the grooves aren't deep enough where they have to remove more than 0.004" of material.
I got a good rotor from Pineapple and ordered a Cermet B coated JHB rotor housing for the rear.
Jared Still ordered me a mazmart water pump and high flow thermostat and I will be making some coolant mods to the rear rotor housing to improve cooling performance even further. See attached pictures to get an idea what I'm doing.
And I'm in the process of ordering engine parts, will be ordering the last of it Tuesday when I got money in my bank account again, lol.
5/30/08
Well I got my side plates, JHB Cermet B coated rotor housing and seal kit in today.
The machinist had to take off 0.004" for both the front and rear plate, 0.005" and 0.003" for the rear and front respectively on the center plate. He also said that the center plate was 0.0035" out of parallel. Hopefully the TiN is still intact on all the faces, will have to test the micro surface hardness to confirm.
The Cermet B housing needs to be port matched and have my intended coolant mod performed on it.
I've decided to stick with my original front rotor housing mostly due to my finances and it's still in good shape. That is rather amazing considering it has a little over 100K miles on it and it has gone through four engine failures now. I just plan on cleaning it up a little with a little lapping.