
93's FD Project... A never ending story

Thread Starter
Junior Member
Joined: Dec 2017
Posts: 18
Likes: 15
From: Torino
Well guys, here we go!
First of all I hope this is the correct section for this thread where I will tell you the story of my 93's FD and where I will let you know about all future updates.
In the far 2015 I was looking to buy a RX7 and at that time I had no idea about the car that is, about maintenance, problems, reliability, for me was just a car to start the engine and drive around in the traffic.
I soon understood that this was possible but the FD was build for other things... so I started to get informations about mechanics, about history and all... yeah ok generally you get the infos before buy the car, I did the exactly opposite ahah
I started my research, I was looking to buy a FD with already italian number plate so the research was easy due there were just few 7 for sale in Italy.
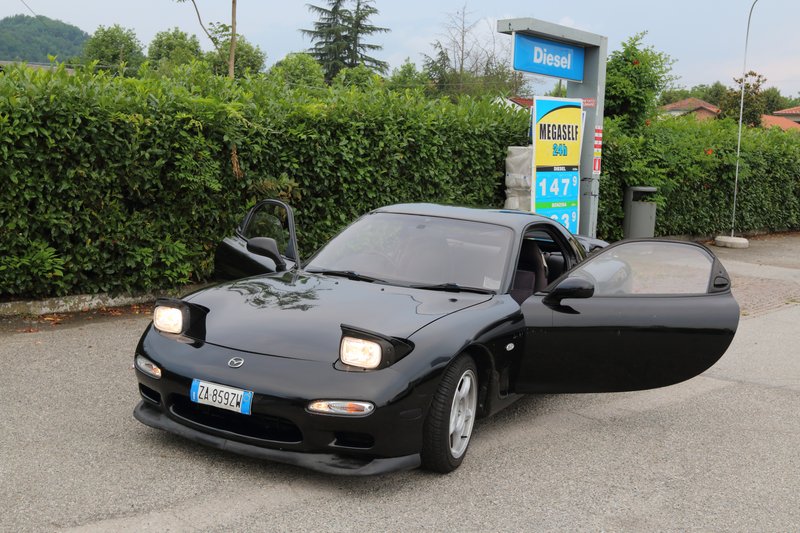
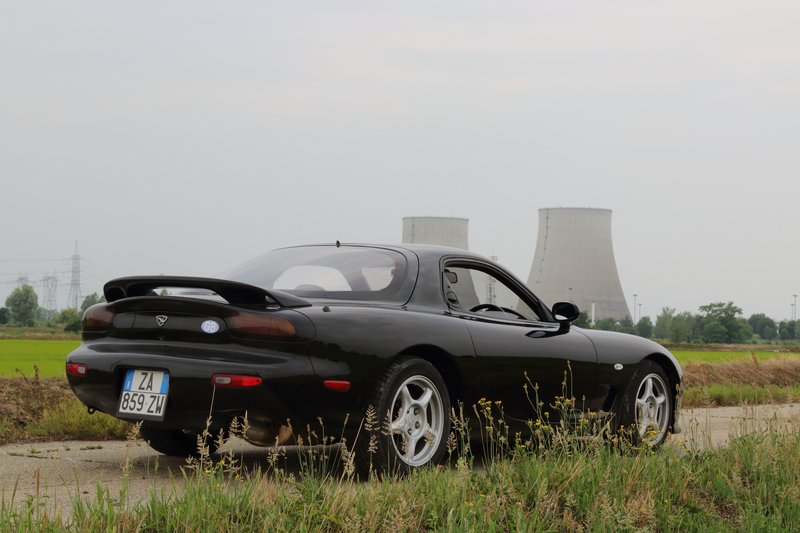
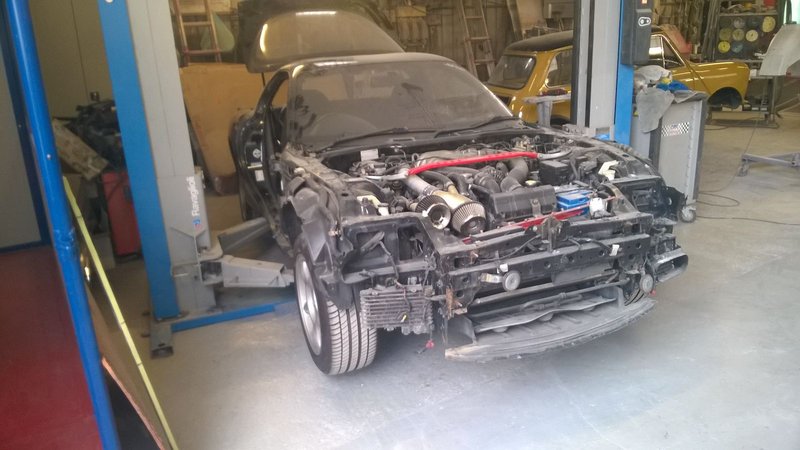
After this research and some thought I decided to go and look one black FD... it seemed nice in pictures, when I arrived was just a block of rust, the owner told me it has been abandoned for 4 years
After a negotiation I bought this car for a reaaally cheap price, at least the engine was running, with low compression but was running lol. The car was fully stock except for the turbos intake and probably the exhaust, at least, the old owner told me that was stock... I never found a logo or something on it so I never understood if it was really stock or aftermarket, but who cares I changed it lol
Thinking back about the conditions of the car, I'm still surprised the kms that she let me do to come back home that time.
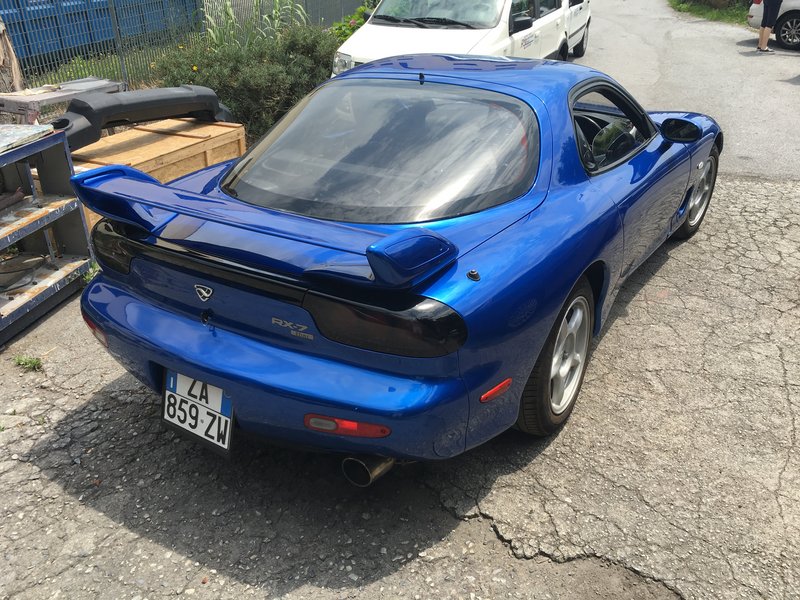
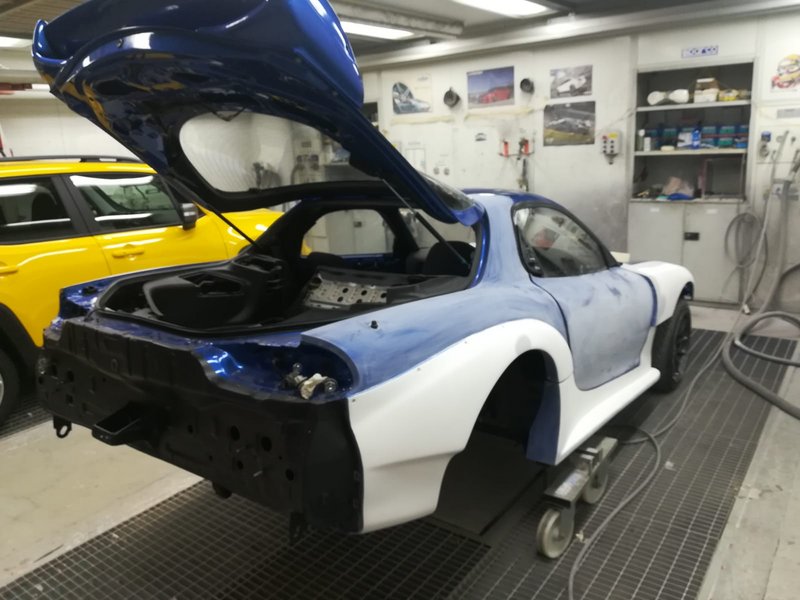
Following here the first pictures I took to the car the day after I bought it
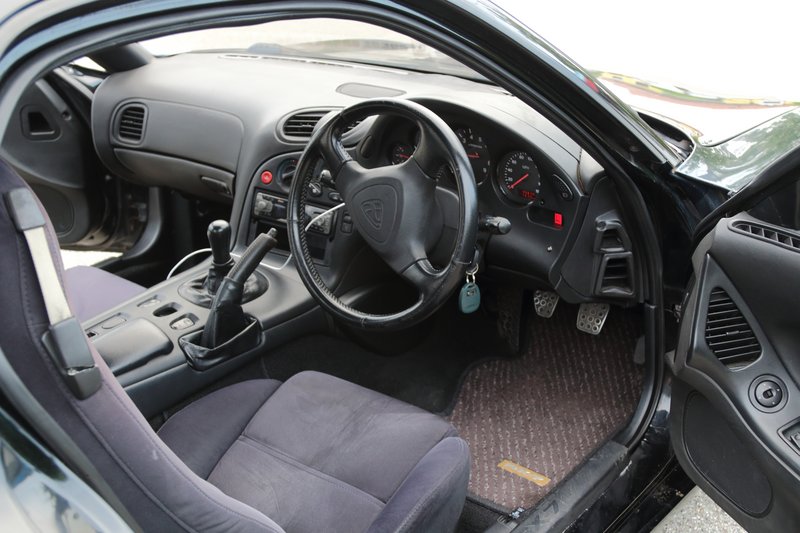
The really first thing I did was dismount the seats, and cockpit to clean everything, at least I would have drove the car in the clean (this part has been easy)

After few months of use I sent the car to a bodyshop to paint it in blue and solve the rust.
The car has been stopped for the whole winter season, in the meanwhile she was getting blue I decided to dismount the mechanic on the front side, I should also did a rebuild but I didn't... in hindsight I should have done also that. We will see why in the next posts
Unfortunately I haven't many pics of the works because... to be honest I lost the phone where they were saved LOL
Anyway I sandblasted, painted, galvanized and everything was necessary.
Finally after months of work, waiting for parts and having trouble the car was ready with the mechanic as new on the front part.
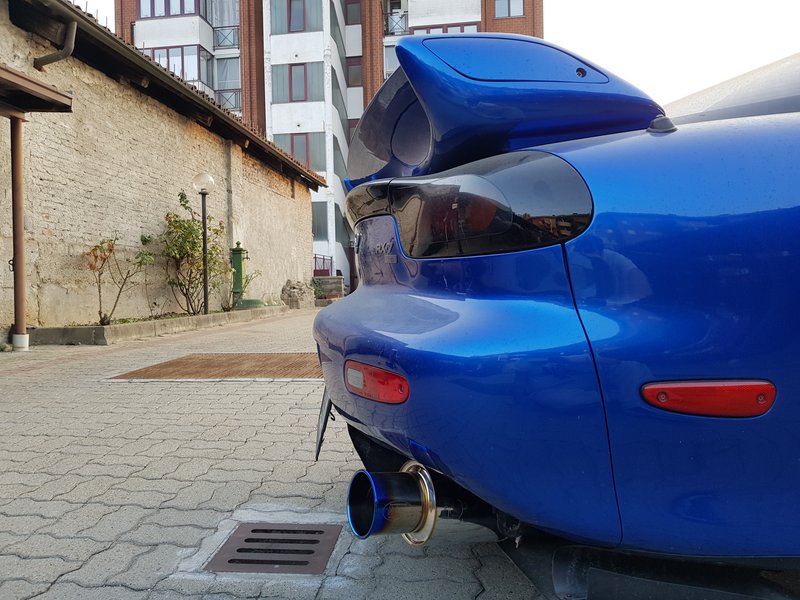
On the exterior I just changed the wing with a 99's spec style. At that time I was not obsessed about genuine parts... good unexpensive old times..
Oh yes, I installed also the right cover of the headlight with that horrible intake
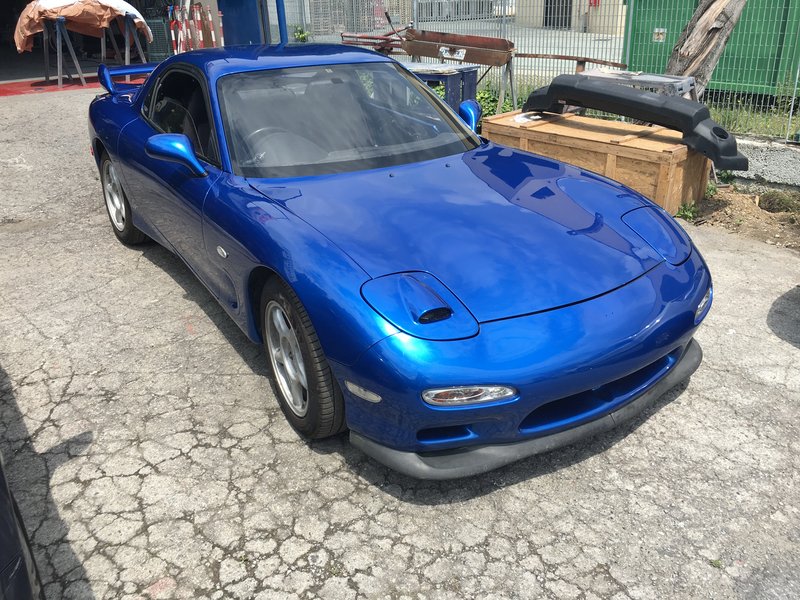
The car was on the road again but with the rear mechanic in very bad conditions and with the engine getting worst...
But we will see this in the next episodes!
First of all I hope this is the correct section for this thread where I will tell you the story of my 93's FD and where I will let you know about all future updates.
In the far 2015 I was looking to buy a RX7 and at that time I had no idea about the car that is, about maintenance, problems, reliability, for me was just a car to start the engine and drive around in the traffic.
I soon understood that this was possible but the FD was build for other things... so I started to get informations about mechanics, about history and all... yeah ok generally you get the infos before buy the car, I did the exactly opposite ahah
I started my research, I was looking to buy a FD with already italian number plate so the research was easy due there were just few 7 for sale in Italy.
After this research and some thought I decided to go and look one black FD... it seemed nice in pictures, when I arrived was just a block of rust, the owner told me it has been abandoned for 4 years
After a negotiation I bought this car for a reaaally cheap price, at least the engine was running, with low compression but was running lol. The car was fully stock except for the turbos intake and probably the exhaust, at least, the old owner told me that was stock... I never found a logo or something on it so I never understood if it was really stock or aftermarket, but who cares I changed it lol
Thinking back about the conditions of the car, I'm still surprised the kms that she let me do to come back home that time.
Following here the first pictures I took to the car the day after I bought it
The really first thing I did was dismount the seats, and cockpit to clean everything, at least I would have drove the car in the clean (this part has been easy)
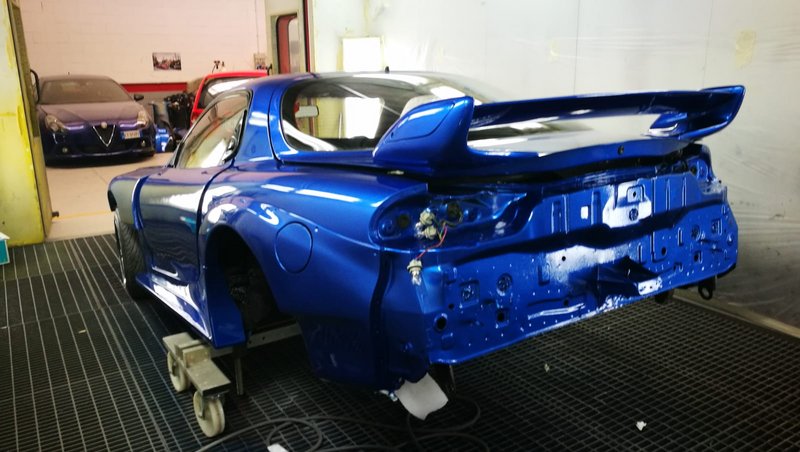
After few months of use I sent the car to a bodyshop to paint it in blue and solve the rust.
The car has been stopped for the whole winter season, in the meanwhile she was getting blue I decided to dismount the mechanic on the front side, I should also did a rebuild but I didn't... in hindsight I should have done also that. We will see why in the next posts
Unfortunately I haven't many pics of the works because... to be honest I lost the phone where they were saved LOL
Anyway I sandblasted, painted, galvanized and everything was necessary.
Finally after months of work, waiting for parts and having trouble the car was ready with the mechanic as new on the front part.
On the exterior I just changed the wing with a 99's spec style. At that time I was not obsessed about genuine parts... good unexpensive old times..
Oh yes, I installed also the right cover of the headlight with that horrible intake
The car was on the road again but with the rear mechanic in very bad conditions and with the engine getting worst...
But we will see this in the next episodes!
Thread Starter
Junior Member
Joined: Dec 2017
Posts: 18
Likes: 15
From: Torino
Let's go with the chapter 2 of the story!
Few weeks later I've taken the car back from the bodyshop she started to leakege fuel somewhere in the engine bay at cold start, it was the pulsation damper that was failing so my mechanic removed that. During this time I also removed the catalyzer and installed the Apexi on the car.
Obviously a specialist mapped the ECU, then I started to play with the apexi's commander like a stupid and 3000kms later... the engine blew up.
So here the story starts to be more interesting I think.
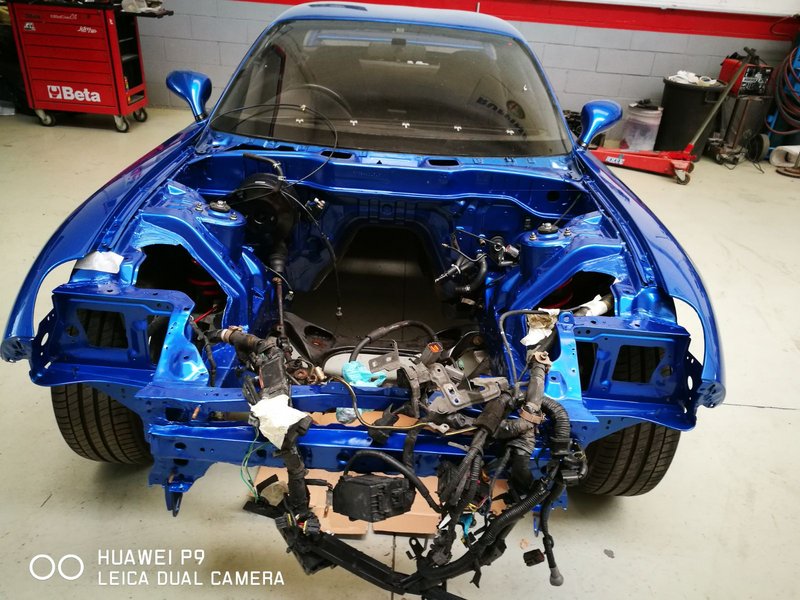
First of all I started to study the car (engine, chassis, mechanic, history, tuners and everything) then I started to dismount the mechanic on the rear side.
I sent the car again to the bodyshop to dismount the engine, the gearbox and for repaint the engine bay (from black to blue).
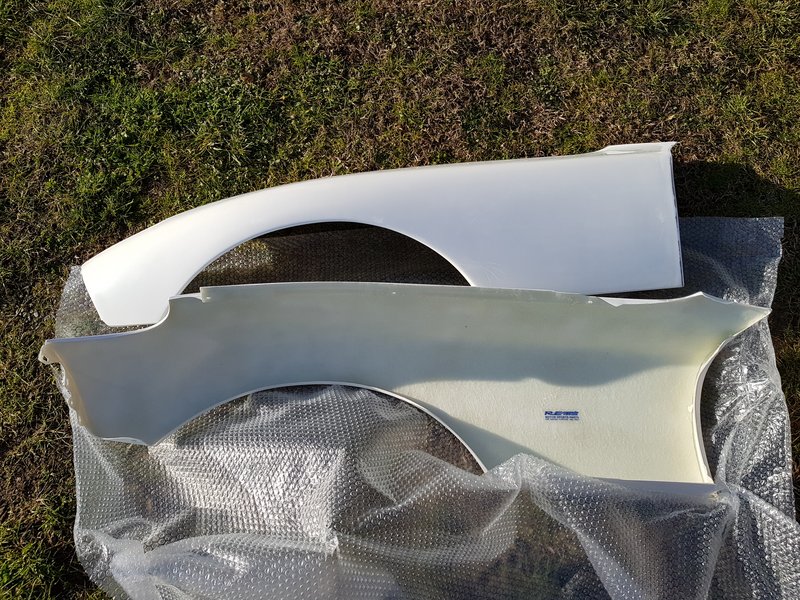
I was also buying a genuine Amemiya's bumper, unfortunately I listened to a friend who told me to buy a replica in UK that was less expensive and with the same quality, clearly it wasn't so I started to be even more obsessed about own genuine parts.
I also tried to made a custom front fender, a mix between a FEED and a Re Amemiya, but I didn't like the result, the car was wide on the front and not on the rear, was looking really bad in my opinion.
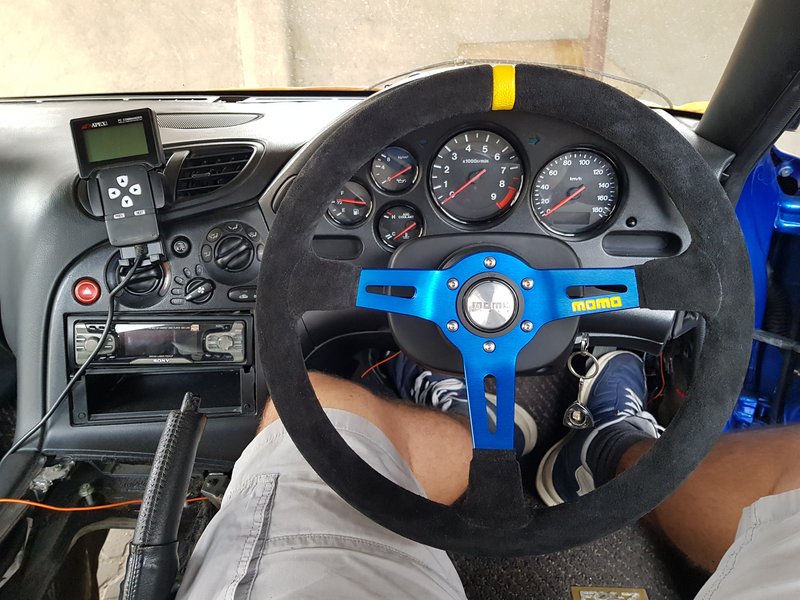
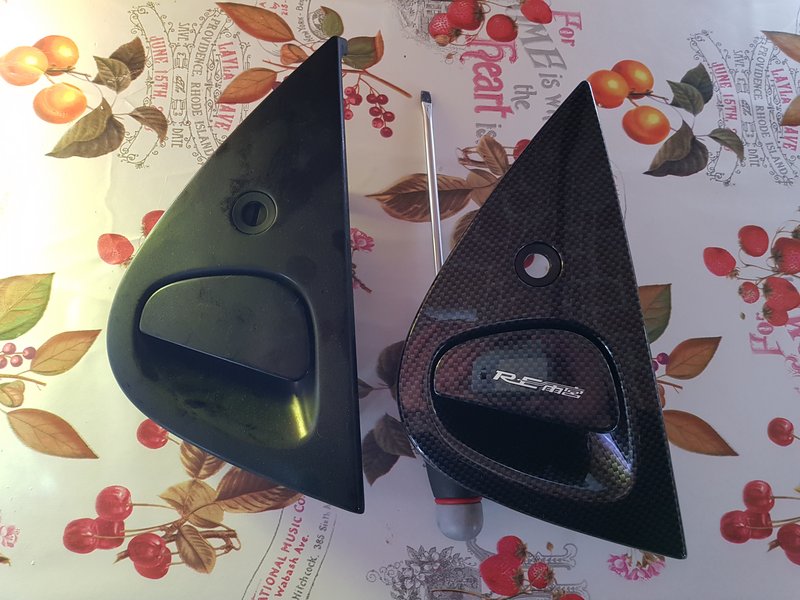
In the meanwhile I bought some other parts like Kakimoto exhaust, Momo steering wheel, Re Amemiya door handles
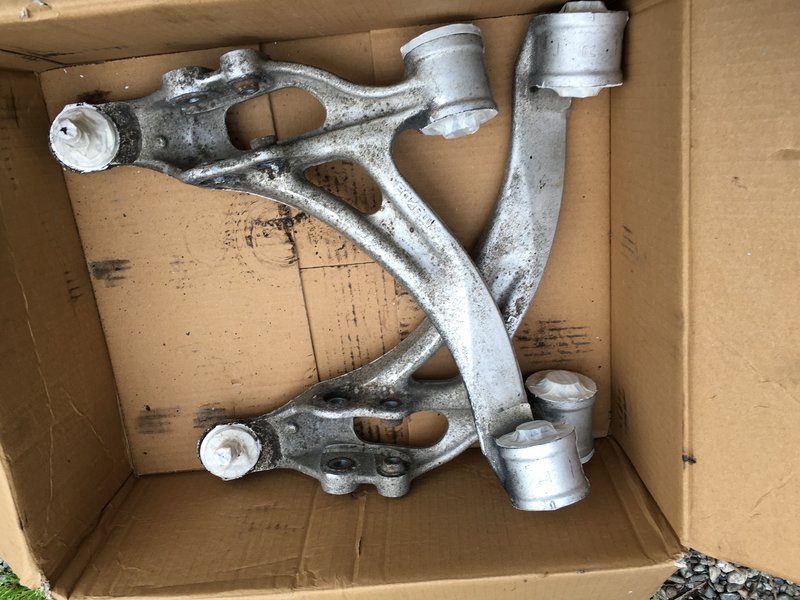
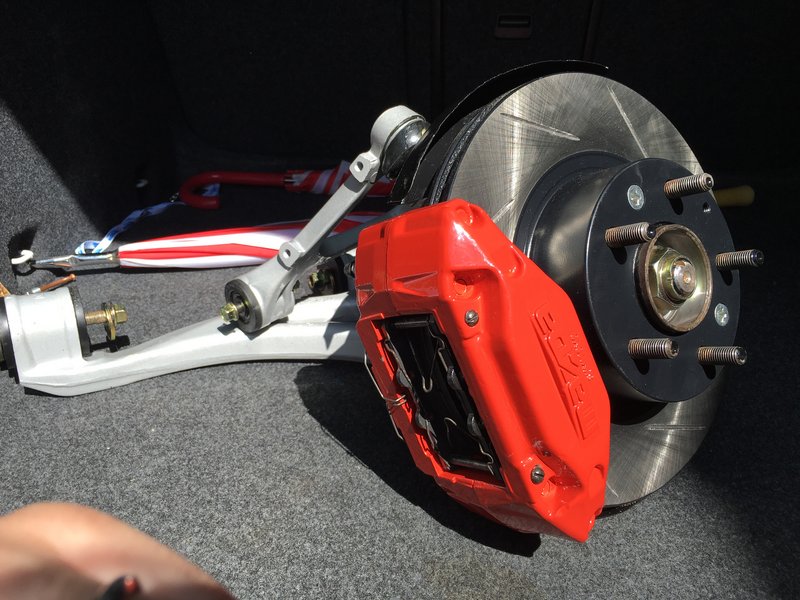
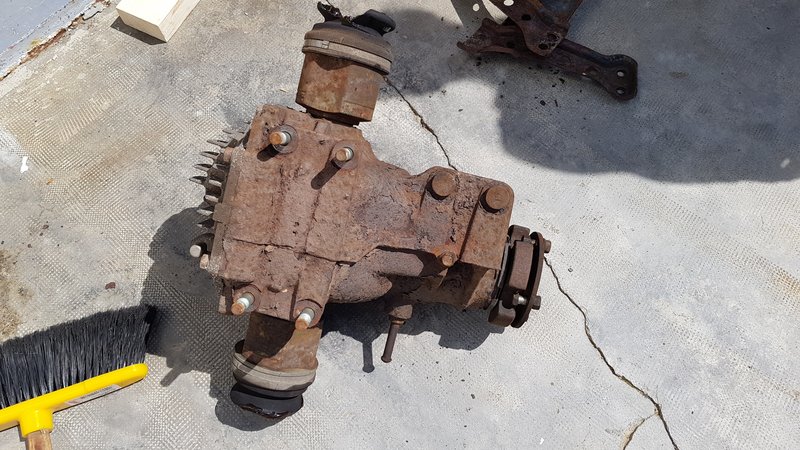
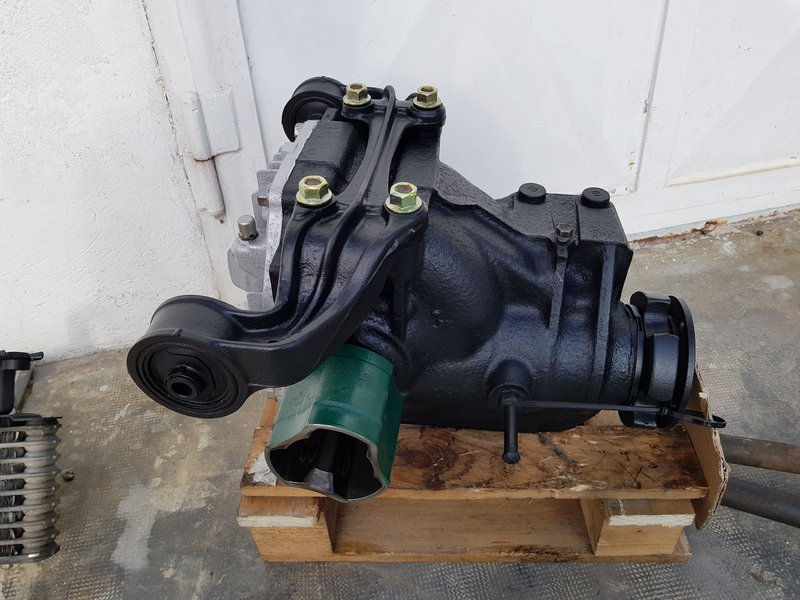
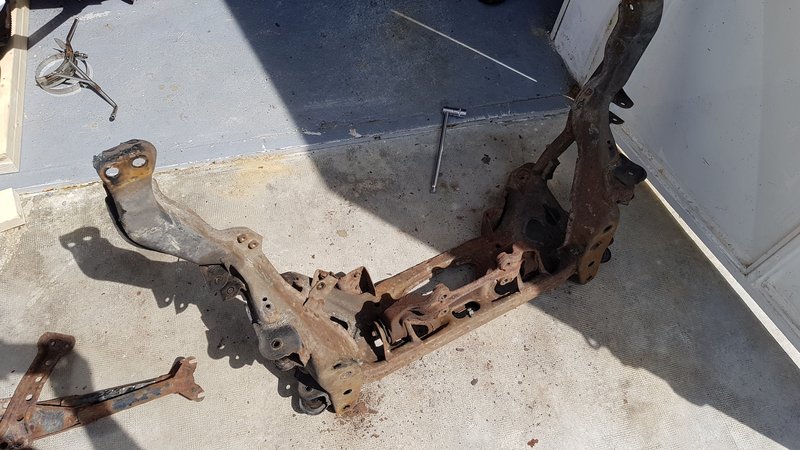
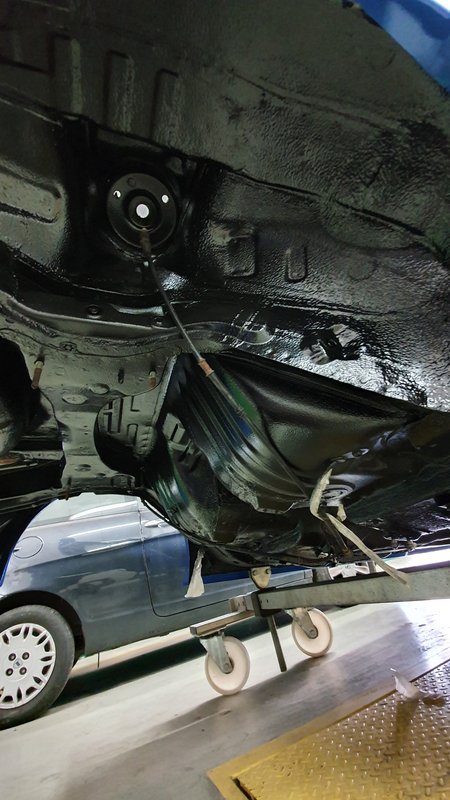
Once the car was back from the bodyshop I started to dismount the rear mechanical parts and I realized the seriousness of the situation.
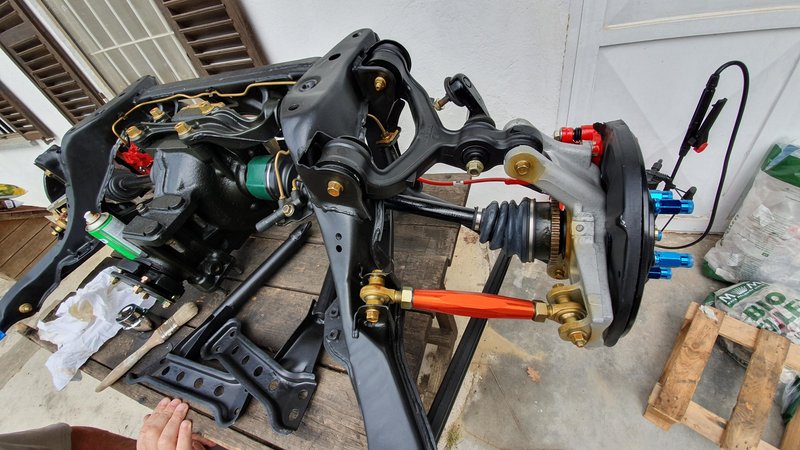
The restoration works requestd a lot of patience, I sandblasted, galvanized, painted and changed what necessary and you can find here below some before/after photos (due the rule of 12 photos per post I will put just the links with the photos).
We also did a check to the gearbox by opening it due a problem with a synchronizer, in the end has been changed with another gearbox because we haven't been able to find the spare part needed, also the fuel lines were rusted and have been done new, bushings and bearings have all been changed, the differential has been overhauled and for sure I'm forgetting some work.
https://i.postimg.cc/V6sPT1wK/20180816-122324.jpg
https://i.postimg.cc/KcVC7t1q/20180906-130838.jpg
https://i.postimg.cc/D0WHkwMP/20181215-120000.jpg
https://i.postimg.cc/yxdg7wmP/20180607-105020.jpg
https://i.postimg.cc/1t3bBH0T/20180930-115818.jpg
Anyway at this time the engine was arrived from few months and was sitting in the garage in front of the car (unfortunately not in the car yet LOL), the undercarriage has been recovered from the rust and the rear mechanical parts were recovered as well.
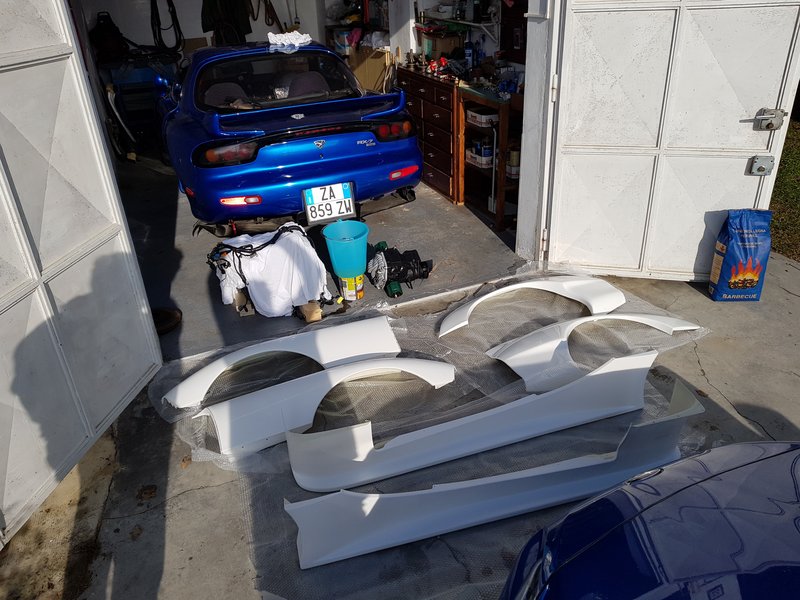
We were ready to reassemble this puzzle... oh yeah, in the meanwhile during these months I also bought the AD GT II Re Amemiya's bodykit just to do the things much easier. LOL
See ya in the next episodes!
Few weeks later I've taken the car back from the bodyshop she started to leakege fuel somewhere in the engine bay at cold start, it was the pulsation damper that was failing so my mechanic removed that. During this time I also removed the catalyzer and installed the Apexi on the car.
Obviously a specialist mapped the ECU, then I started to play with the apexi's commander like a stupid and 3000kms later... the engine blew up.
So here the story starts to be more interesting I think.
First of all I started to study the car (engine, chassis, mechanic, history, tuners and everything) then I started to dismount the mechanic on the rear side.
I sent the car again to the bodyshop to dismount the engine, the gearbox and for repaint the engine bay (from black to blue).
I was also buying a genuine Amemiya's bumper, unfortunately I listened to a friend who told me to buy a replica in UK that was less expensive and with the same quality, clearly it wasn't so I started to be even more obsessed about own genuine parts.
I also tried to made a custom front fender, a mix between a FEED and a Re Amemiya, but I didn't like the result, the car was wide on the front and not on the rear, was looking really bad in my opinion.
In the meanwhile I bought some other parts like Kakimoto exhaust, Momo steering wheel, Re Amemiya door handles
Once the car was back from the bodyshop I started to dismount the rear mechanical parts and I realized the seriousness of the situation.
The restoration works requestd a lot of patience, I sandblasted, galvanized, painted and changed what necessary and you can find here below some before/after photos (due the rule of 12 photos per post I will put just the links with the photos).
We also did a check to the gearbox by opening it due a problem with a synchronizer, in the end has been changed with another gearbox because we haven't been able to find the spare part needed, also the fuel lines were rusted and have been done new, bushings and bearings have all been changed, the differential has been overhauled and for sure I'm forgetting some work.
https://i.postimg.cc/V6sPT1wK/20180816-122324.jpg
https://i.postimg.cc/KcVC7t1q/20180906-130838.jpg
https://i.postimg.cc/D0WHkwMP/20181215-120000.jpg
https://i.postimg.cc/yxdg7wmP/20180607-105020.jpg
https://i.postimg.cc/1t3bBH0T/20180930-115818.jpg
Anyway at this time the engine was arrived from few months and was sitting in the garage in front of the car (unfortunately not in the car yet LOL), the undercarriage has been recovered from the rust and the rear mechanical parts were recovered as well.
We were ready to reassemble this puzzle... oh yeah, in the meanwhile during these months I also bought the AD GT II Re Amemiya's bodykit just to do the things much easier. LOL
See ya in the next episodes!


Thread Starter
Junior Member
Joined: Dec 2017
Posts: 18
Likes: 15
From: Torino
@HiWire Thank you Sir!
Can't wait to post another chapter so here we go!
After all that work was time to reassemble everything.
The plan was:
- Send the car to the bodyshop
- Install the rear mechanic
- Install the Amemiya's kit
- Install the engine and gearbox
Let's see how is gone
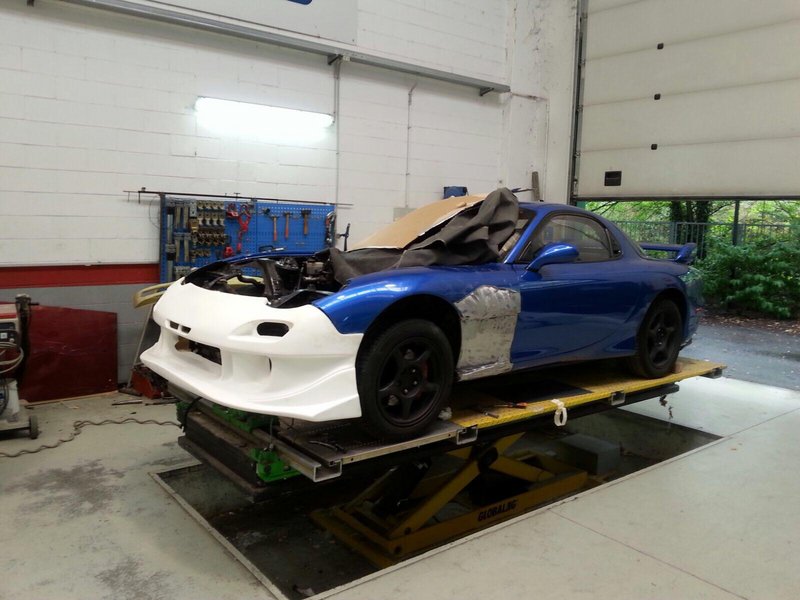
The first thing I noticed when the kit was arrived has been the quality, was fitting perfectly, I've been able to try it on the car in the garage with some tape
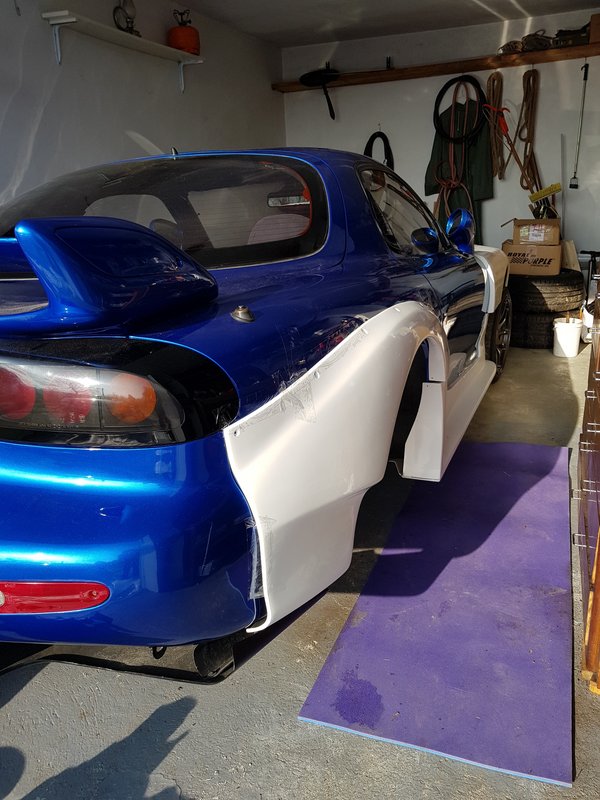
Ok I admit, not a perfect fit ahah but hey that's not my job.
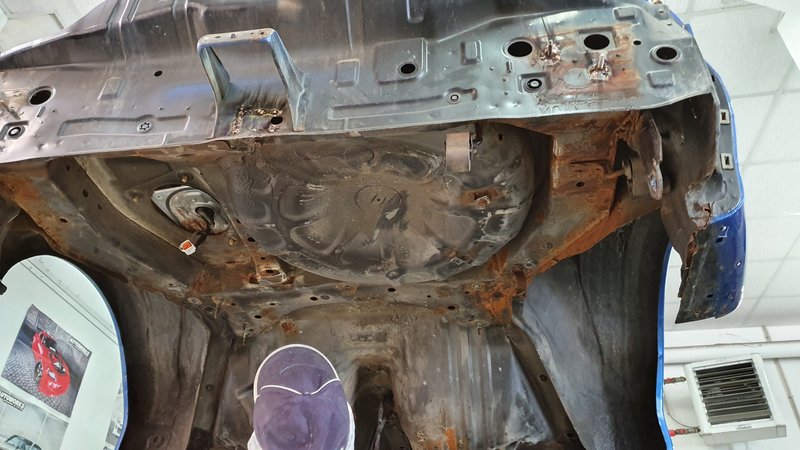
I sent the car to the bodyshop (again?!) to install it and remove all the rust in the undercarriage (how said in the previous post)
The front bumper was still the replica's one, I was tired to wait for parts and everything so I decided to use that one at that time. I also got from a friend a pair of sleek headlights (probably from EVO-R) but also in this case was just a provvisory solution waiting for a pair of genuine sleek headlights
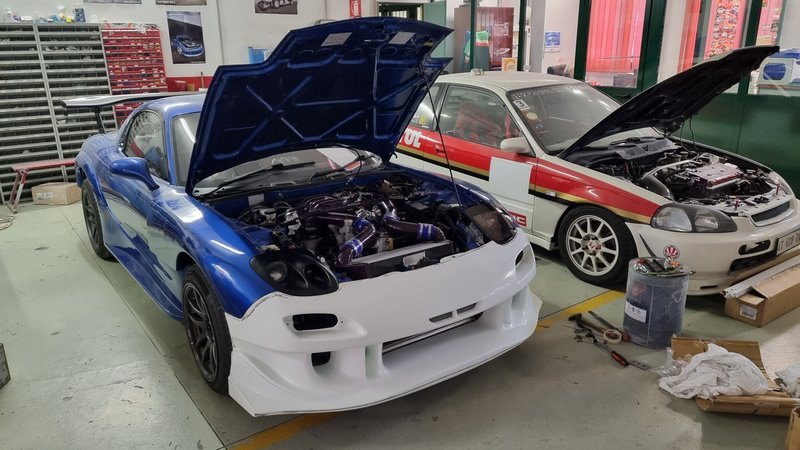
This is how the car looks like finished

Just a terrible fitting of the front bumper and a little bit high, but ready to go off-road ahah
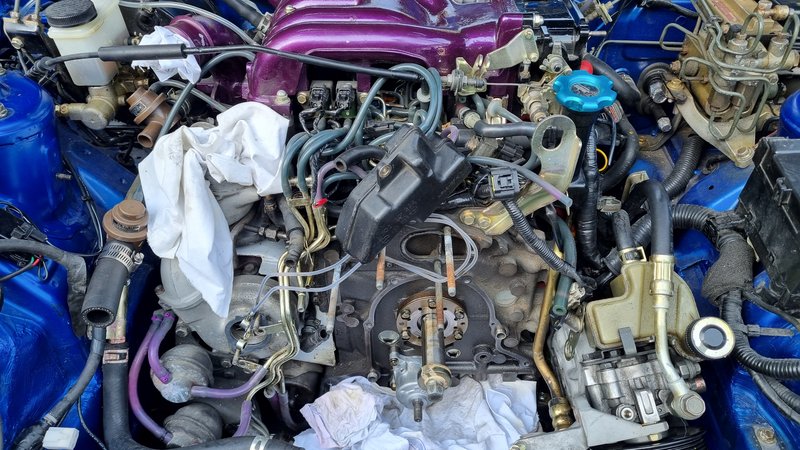
Now was time to send the car to the mechanic to install back the engine, I wasn't able to do that, but I was able to think:
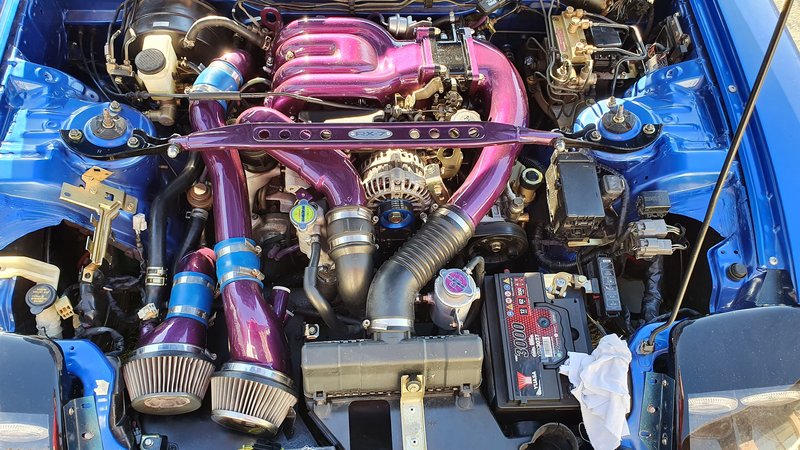
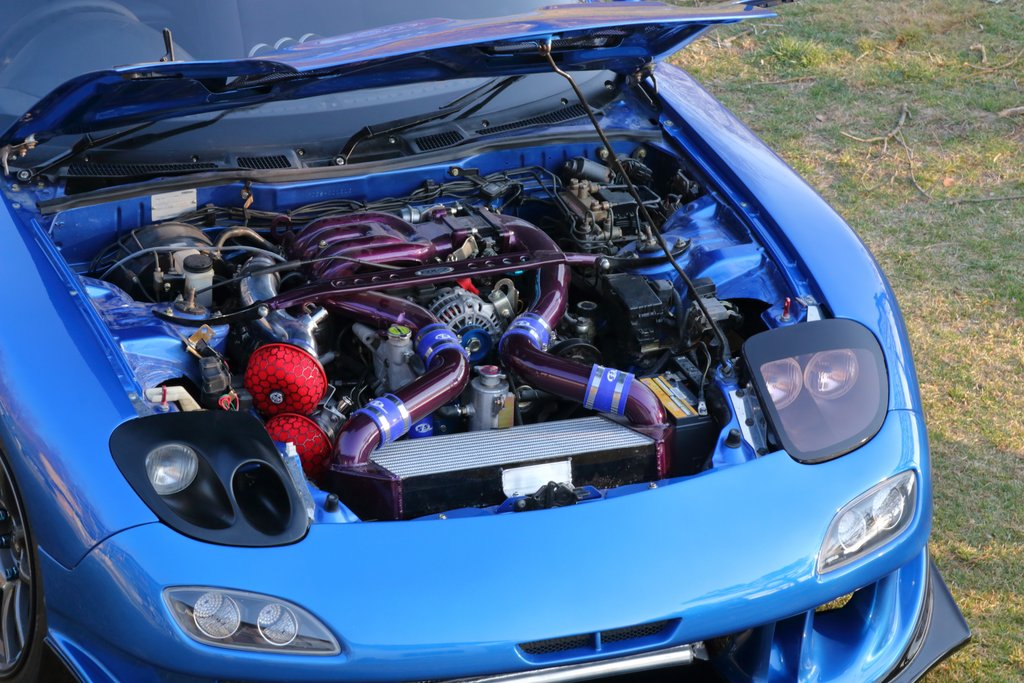
Would be cool to improve the quality of the engine bay which was very poor. With all the car pretty new, would have been a shame to open the hood and find such a terrible look.
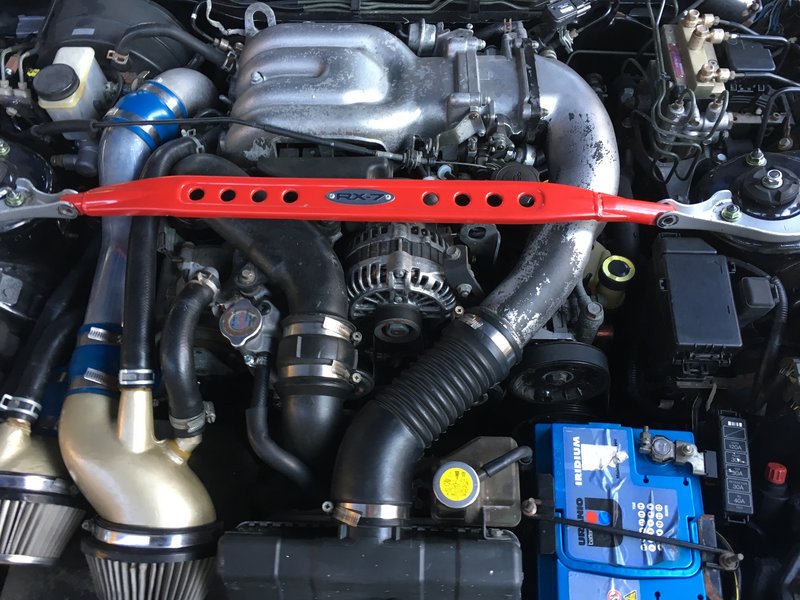
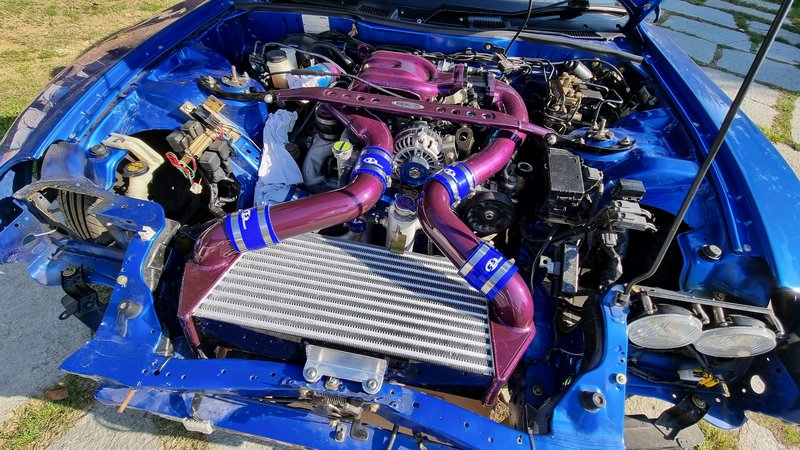
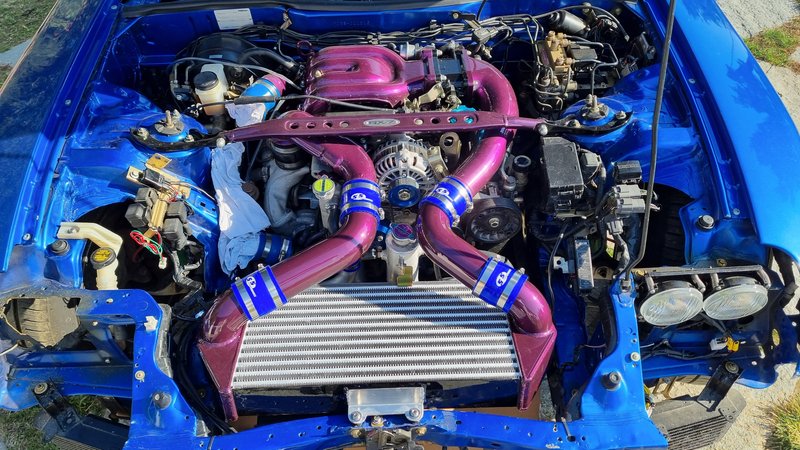
So I decided to go for purple, I love the contrast between colors, first of all I decided to paint the engine intake in purple leaving the turbos intake in chrome, then I painted also that.
Apart for the throttle body which I painted in black.
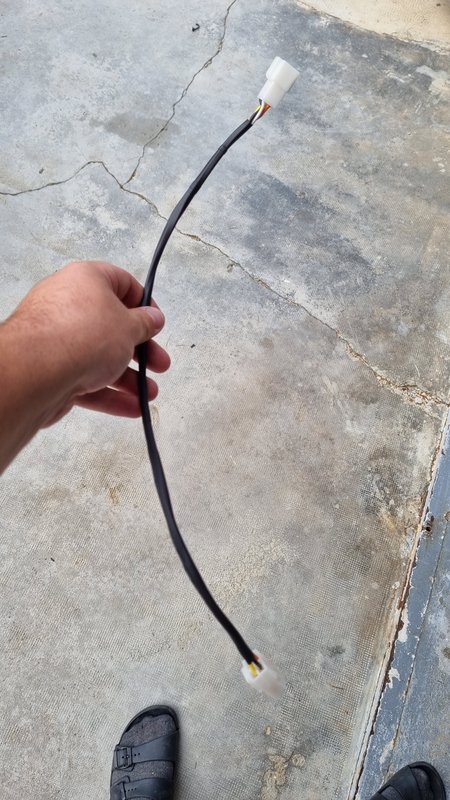
Anyway during the remounting back of the engine, gearbox, fuel lines etc... I did some minor upgrades like Re Amemiya AST, silicone vacuum lines, new exedy clutch, new fly-wheel, replace all the fans relays, obviously remove the air pump, new water pump, replace the turbo control solenoid that wasn't working and this should be all.
The plan was/is keep the sequential turbos without go with extreme power, for where I drive a power around 300hp is enough. Another thing I decided to do with the new engine is premix.
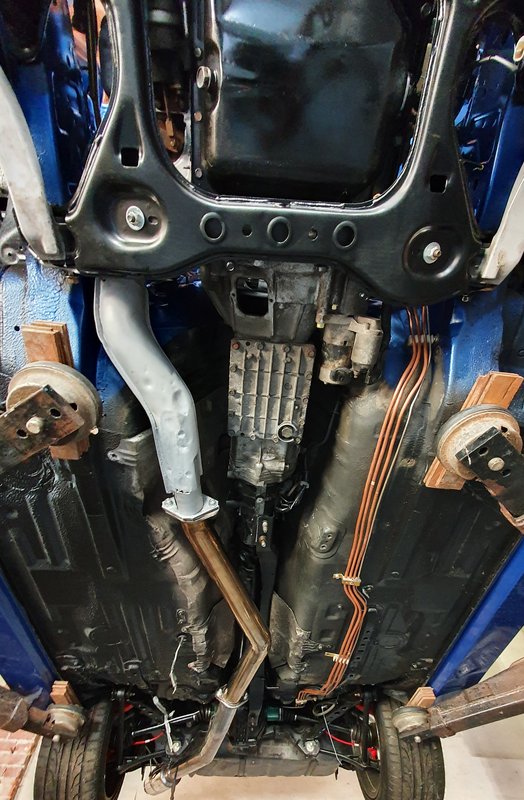
This is how the undercarriage and the engine bay looks like after the remounting back
Here there is a video of the second start-up, the first one has been done by the mechanic so there isn't a video
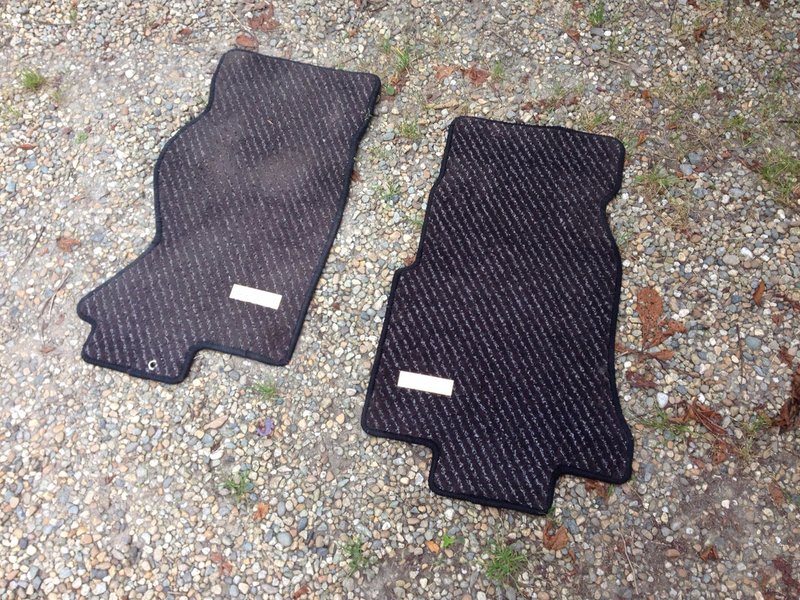
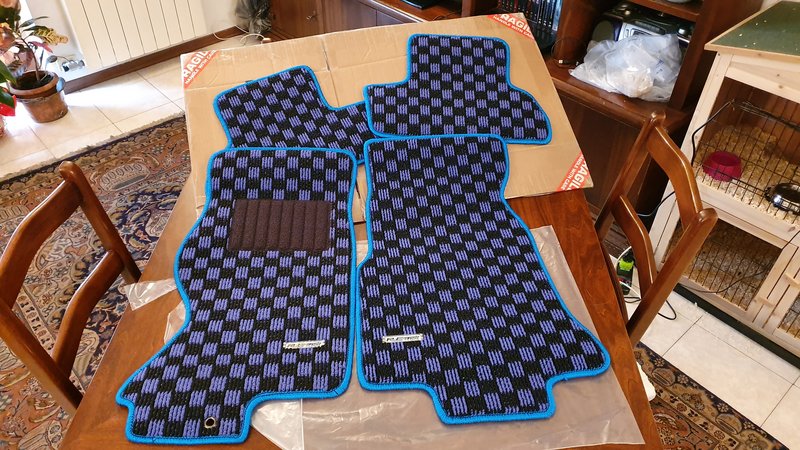
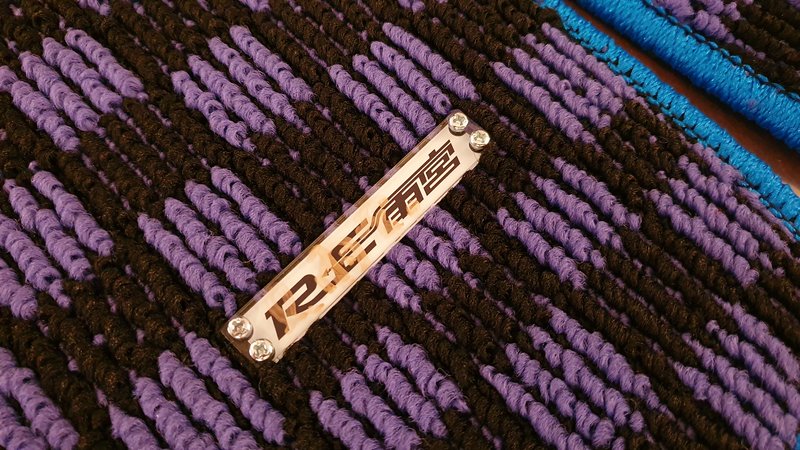
Another way to have it unique was buy this set of Re Amemiya's carpets signed by Amemiya himself, I bought them, installed on the car, took a picture, removed the signed one and then closed it in the house ahaha
Can't wait to post another chapter
so here we go!After all that work was time to reassemble everything.
The plan was:
- Send the car to the bodyshop
- Install the rear mechanic
- Install the Amemiya's kit
- Install the engine and gearbox
Let's see how is gone
The first thing I noticed when the kit was arrived has been the quality, was fitting perfectly, I've been able to try it on the car in the garage with some tape
Ok I admit, not a perfect fit ahah but hey that's not my job.
I sent the car to the bodyshop (again?!) to install it and remove all the rust in the undercarriage (how said in the previous post)
The front bumper was still the replica's one, I was tired to wait for parts and everything so I decided to use that one at that time. I also got from a friend a pair of sleek headlights (probably from EVO-R) but also in this case was just a provvisory solution waiting for a pair of genuine sleek headlights
This is how the car looks like finished
Just a terrible fitting of the front bumper and a little bit high, but ready to go off-road ahah
Now was time to send the car to the mechanic to install back the engine, I wasn't able to do that, but I was able to think:
Would be cool to improve the quality of the engine bay which was very poor. With all the car pretty new, would have been a shame to open the hood and find such a terrible look.
So I decided to go for purple, I love the contrast between colors, first of all I decided to paint the engine intake in purple leaving the turbos intake in chrome, then I painted also that.
Apart for the throttle body which I painted in black.
Anyway during the remounting back of the engine, gearbox, fuel lines etc... I did some minor upgrades like Re Amemiya AST, silicone vacuum lines, new exedy clutch, new fly-wheel, replace all the fans relays, obviously remove the air pump, new water pump, replace the turbo control solenoid that wasn't working and this should be all.
The plan was/is keep the sequential turbos without go with extreme power, for where I drive a power around 300hp is enough. Another thing I decided to do with the new engine is premix.
This is how the undercarriage and the engine bay looks like after the remounting back
Here there is a video of the second start-up, the first one has been done by the mechanic so there isn't a video
Another way to have it unique was buy this set of Re Amemiya's carpets signed by Amemiya himself, I bought them, installed on the car, took a picture, removed the signed one and then closed it in the house ahaha
Thread Starter
Junior Member
Joined: Dec 2017
Posts: 18
Likes: 15
From: Torino
Now that the puzzle was "finished" finally after 3 years and half from the last drive I was able to drive the car again on the road, but the works were not finished.
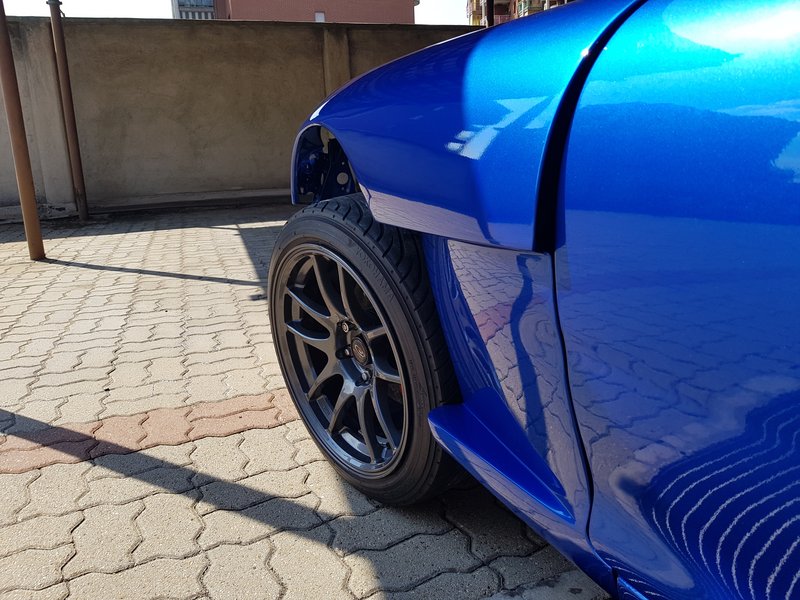
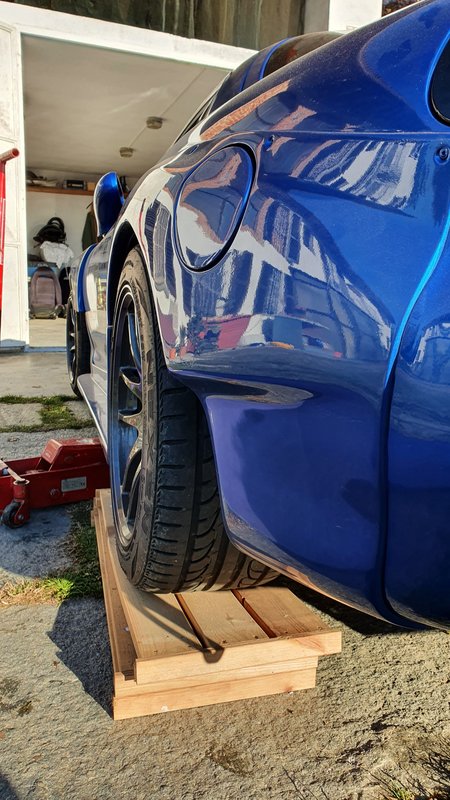
The priority was install the coilovers, I opted for a Tein Super Street since I use the car only on the streets, it was a good choise.
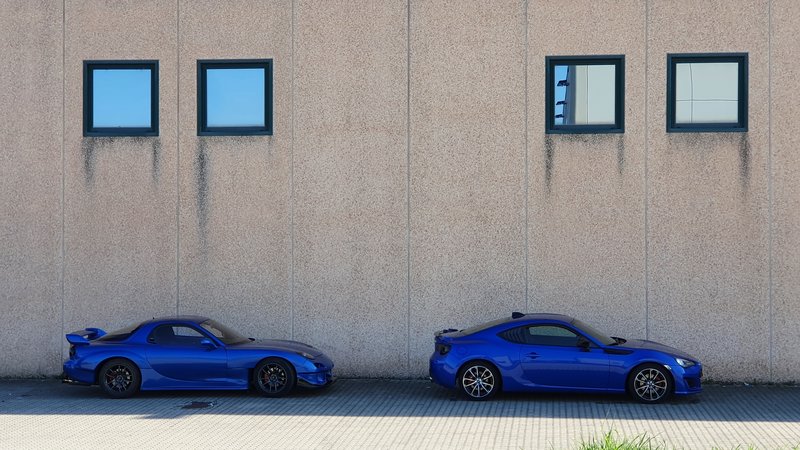
Here the first time that I used both my cars together just after the installation, I did that by myself with the car on jack... has been a pain
Anyway I was able to use it for the whole summer, just had minor issues like some small leakege from radiator.
Oh yes I was using the car without the front blinkers due I ordered them from Car Shop Glow and I was waiting for them. I'm a smart guy, I ordered them too late lol
Just few days later I also ordered rear 25mm spacers, because with the wide-kit the offset of the rear wheels was completely wrong
Definetely nicer with the spacers.
Nothing more to say honestly, I used the car for the rest of the summer, without major troubles.
Then the winter has come and I decided to completely dismount the interior to install the additional gauges (Oil temp, Oil press, water temp) and opted to wrap the cockpit and door panels in black alcantara with blue stitchings!
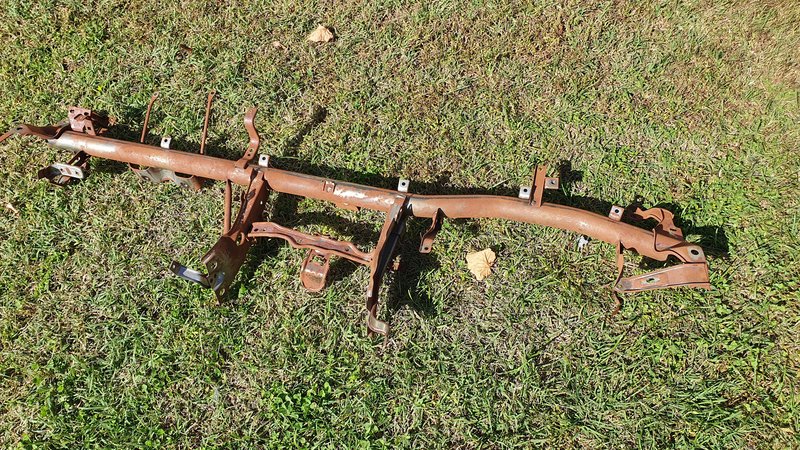
In the meanwhile I also galvanized the frame behind the dashboard, clean/reoder the electrical parts and fix all the missing bolts/screw
Here below some pics of the frame and some during the works for install the gauges.

Now I was waiting to have my dashboard wrapped in alcantara, the company was in late of about 2 months... and was getting difficult even talk with them. Then I discovered that the company was in troubles so I decided to get my dashboard back before miss it forever.
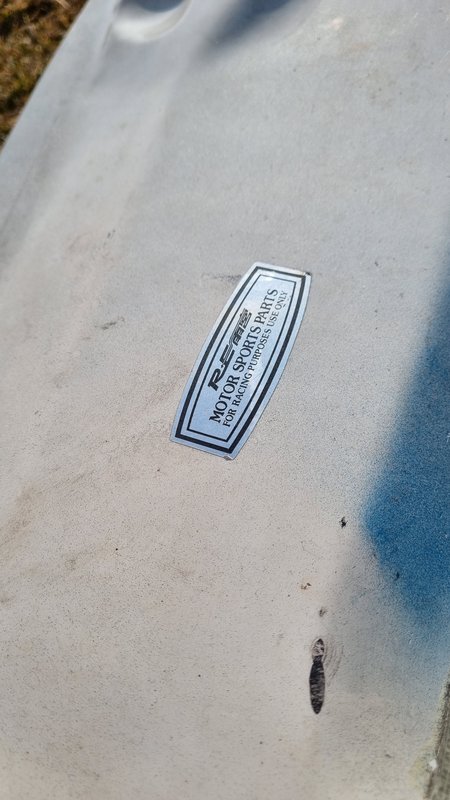
Unfortunateely they haven't done anything on it and I was tired to don't use the car so I decided to install it back as it was with a Re Amemiya sticker which give me +30hp! lol
Would have been nice also to change the seats but since I'm not a small guy is difficult find a sport seat where I'm comfortable

In the meanwhile I also got Rmagic holder for the Apexi Commander and Re Amemiya scuff plates
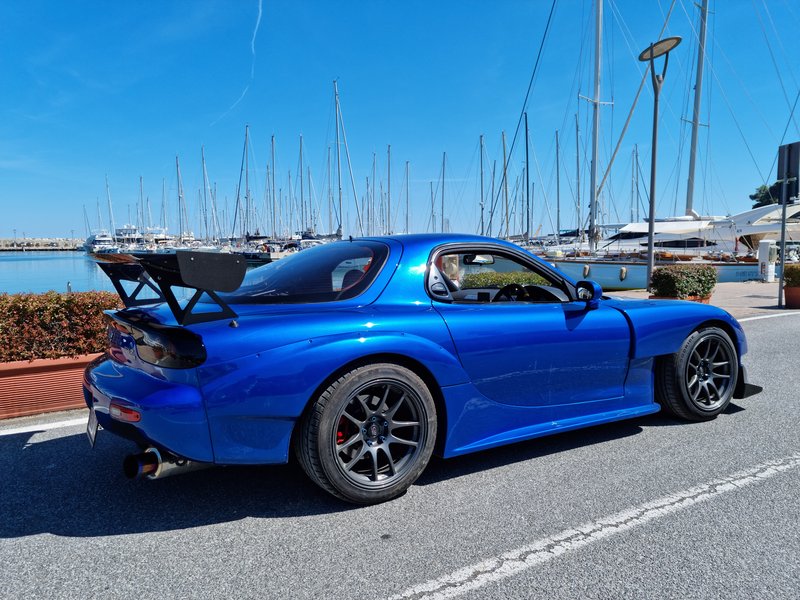
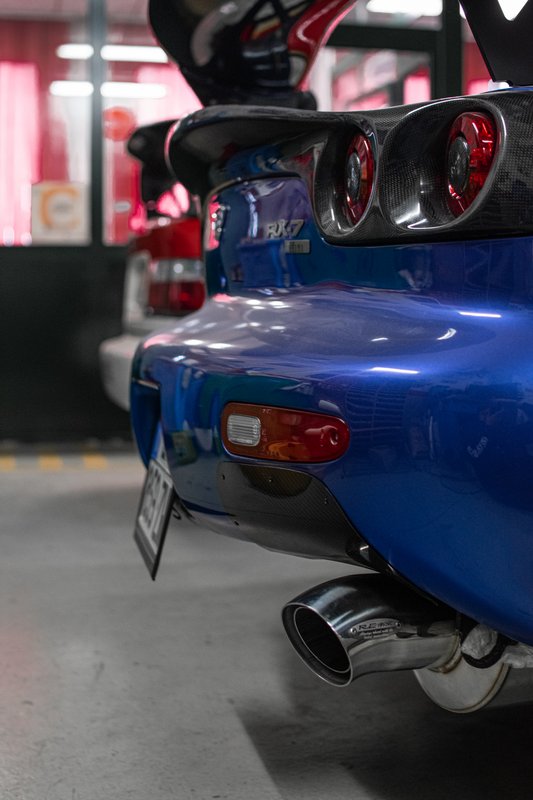
Now as you may have noticed the car was without the rear 99spec wing... that's why I sold it because the Re Amemiya GT2 wing was on its way!
As soon as it arrived I installed it and the car was always much nearer to the 7 of my dreams
Maybe would have been nicer with the high mounts, but since I don't wanna be noticed by the police I opted for the low mounts... Not sure that the police will not notice me LOL
Don't worry I also blinded the holes of the old wing later ahaha
The spring was coming back, the car was ready again to hit the roads... and then she decided to broke the alternator! Fortunately I was able to get a new one in 5 days.
In the next episode, Car Shop Glow front lights V3, Re Amemiya headlights and the first journey to the sea with the new look
The priority was install the coilovers, I opted for a Tein Super Street since I use the car only on the streets, it was a good choise.
Here the first time that I used both my cars together just after the installation, I did that by myself with the car on jack... has been a pain
Anyway I was able to use it for the whole summer, just had minor issues like some small leakege from radiator.
Oh yes I was using the car without the front blinkers due I ordered them from Car Shop Glow and I was waiting for them. I'm a smart guy, I ordered them too late lol
Just few days later I also ordered rear 25mm spacers, because with the wide-kit the offset of the rear wheels was completely wrong
Definetely nicer with the spacers.
Nothing more to say honestly, I used the car for the rest of the summer, without major troubles.
Then the winter has come and I decided to completely dismount the interior to install the additional gauges (Oil temp, Oil press, water temp) and opted to wrap the cockpit and door panels in black alcantara with blue stitchings!
In the meanwhile I also galvanized the frame behind the dashboard, clean/reoder the electrical parts and fix all the missing bolts/screw
Here below some pics of the frame and some during the works for install the gauges.
Now I was waiting to have my dashboard wrapped in alcantara, the company was in late of about 2 months... and was getting difficult even talk with them. Then I discovered that the company was in troubles so I decided to get my dashboard back before miss it forever.
Unfortunateely they haven't done anything on it and I was tired to don't use the car so I decided to install it back as it was with a Re Amemiya sticker which give me +30hp! lol
Would have been nice also to change the seats but since I'm not a small guy is difficult find a sport seat where I'm comfortable
In the meanwhile I also got Rmagic holder for the Apexi Commander and Re Amemiya scuff plates
Now as you may have noticed the car was without the rear 99spec wing... that's why I sold it because the Re Amemiya GT2 wing was on its way!
As soon as it arrived I installed it and the car was always much nearer to the 7 of my dreams
Maybe would have been nicer with the high mounts, but since I don't wanna be noticed by the police I opted for the low mounts... Not sure that the police will not notice me LOL
Don't worry I also blinded the holes of the old wing later ahaha
The spring was coming back, the car was ready again to hit the roads... and then she decided to broke the alternator! Fortunately I was able to get a new one in 5 days.
In the next episode, Car Shop Glow front lights V3, Re Amemiya headlights and the first journey to the sea with the new look
Thread Starter
Junior Member
Joined: Dec 2017
Posts: 18
Likes: 15
From: Torino
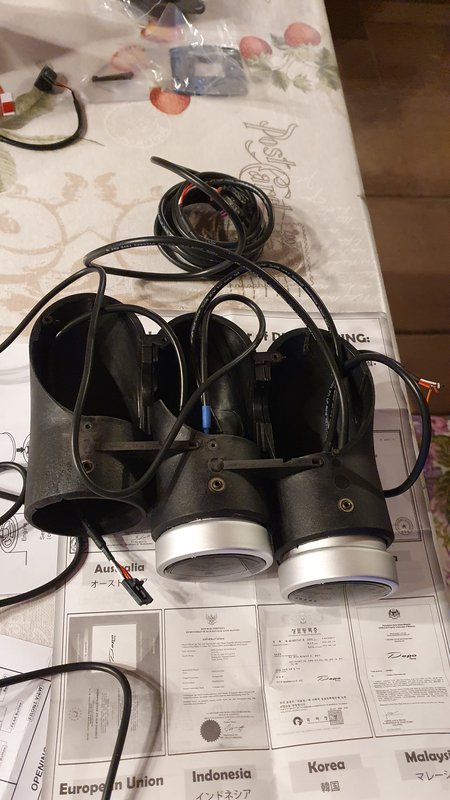
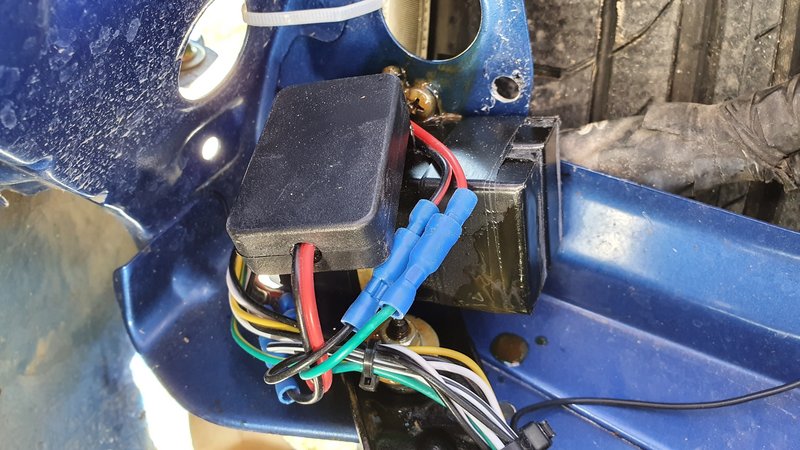
Finally the Car Shop Glow blinkers were arrived, I was impatient to install them also because drive around without front blinkers isn't exactly legal
The instruction were clear, the problem has been that due the bumper wasn't a genuine one I had to rework the bumper because the space for the lights wasn't enough.
Anyway the electrical connections have been done, and without the pop-up headlights I was able to use some unused bolt to fix the control unit for the lights


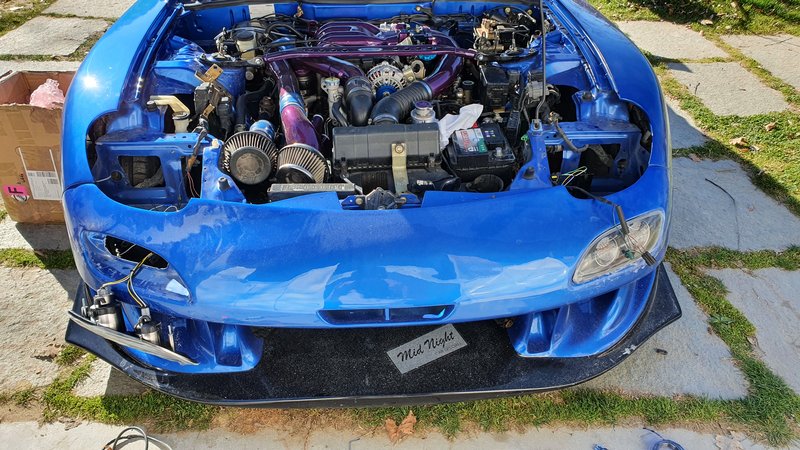
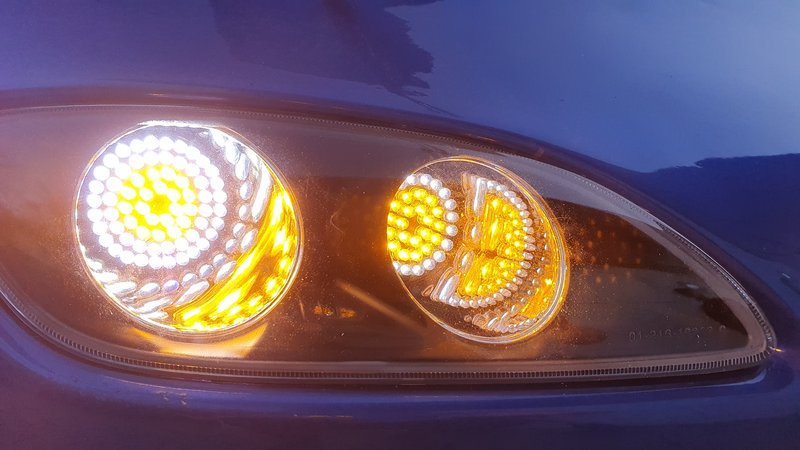
Just few weeks later also arrived the pair of genuine Re Amemiya headlights, decided to go with the right headlights with the vent due to a future idea...
I installed by myself due was usless go again to the bodyshop at that time because I had already decided to buy the genuine front bumper so my thought was "I will bring the car to the bodyshop when the bumper will arrive so they will be able to align everything"
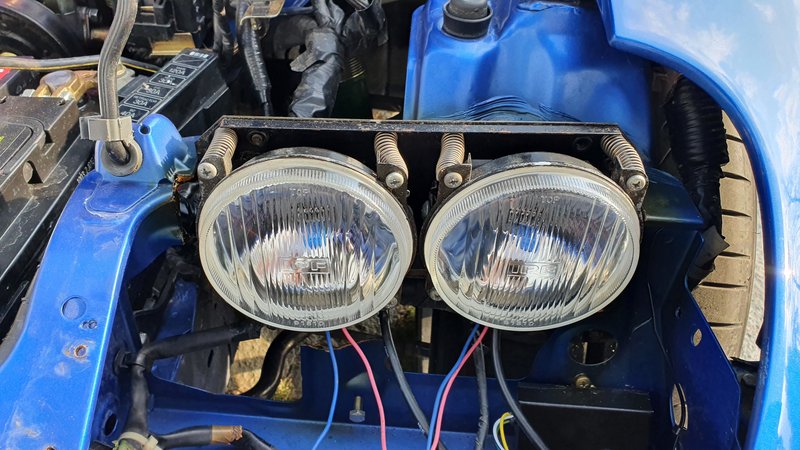
Anyway headlights installed, not perfectly aligned, but at least they work lol
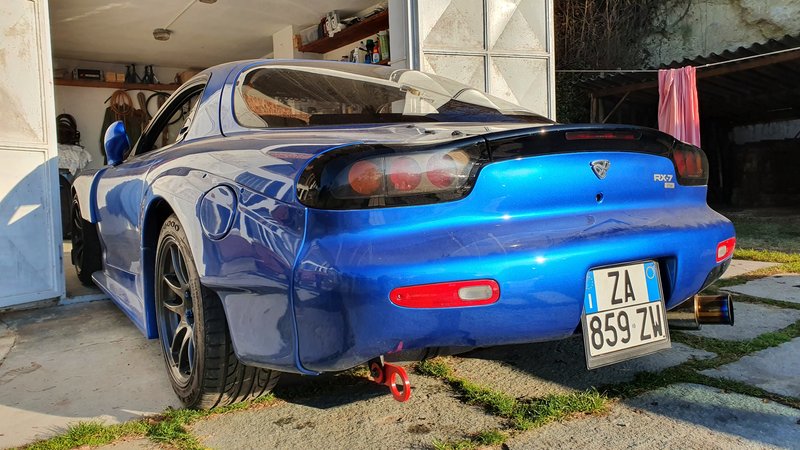
This is how the car looked like with her final setup
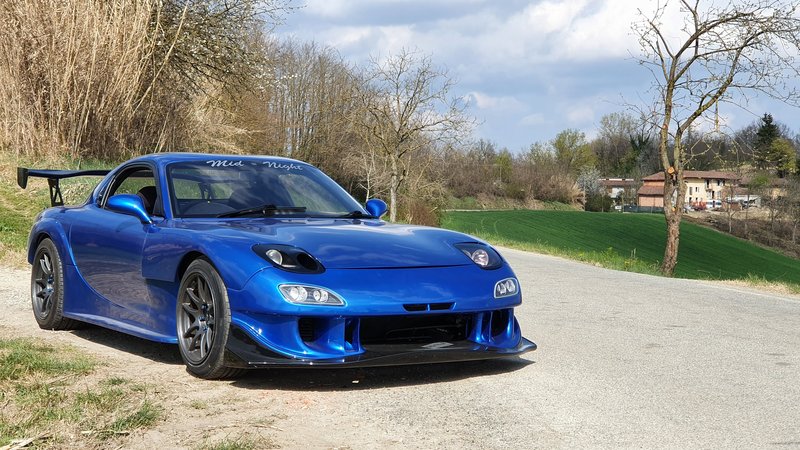
Finally was time to use the car for some longer trip and I decided to use it to go to the sea. The drive has been really enjoyable and the car had no problems at all.
After years of problems, restoration, works and everything have been really nice to drive the car again and I was veeery happy
I was already thinking to the future mods to do
- Re Amemiya V Mount
- Re Amemiya genuine bumper
- Re Amemiya dolphin exhaust
- Re Amemiya led tail lights
- Re Amemiya bonnet (Unfortunatly I'm not been able to find one for sale yet)
- Align everything on the front of the car and get a proper ECU tune
We will see all in the next episodes
The instruction were clear, the problem has been that due the bumper wasn't a genuine one I had to rework the bumper because the space for the lights wasn't enough.
Anyway the electrical connections have been done, and without the pop-up headlights I was able to use some unused bolt to fix the control unit for the lights
Just few weeks later also arrived the pair of genuine Re Amemiya headlights, decided to go with the right headlights with the vent due to a future idea...
I installed by myself due was usless go again to the bodyshop at that time because I had already decided to buy the genuine front bumper so my thought was "I will bring the car to the bodyshop when the bumper will arrive so they will be able to align everything"
Anyway headlights installed, not perfectly aligned, but at least they work lol
This is how the car looked like with her final setup
Finally was time to use the car for some longer trip and I decided to use it to go to the sea. The drive has been really enjoyable and the car had no problems at all.
After years of problems, restoration, works and everything have been really nice to drive the car again and I was veeery happy
I was already thinking to the future mods to do
- Re Amemiya V Mount
- Re Amemiya genuine bumper
- Re Amemiya dolphin exhaust
- Re Amemiya led tail lights
- Re Amemiya bonnet (Unfortunatly I'm not been able to find one for sale yet)
- Align everything on the front of the car and get a proper ECU tune
We will see all in the next episodes
Thread Starter
Junior Member
Joined: Dec 2017
Posts: 18
Likes: 15
From: Torino
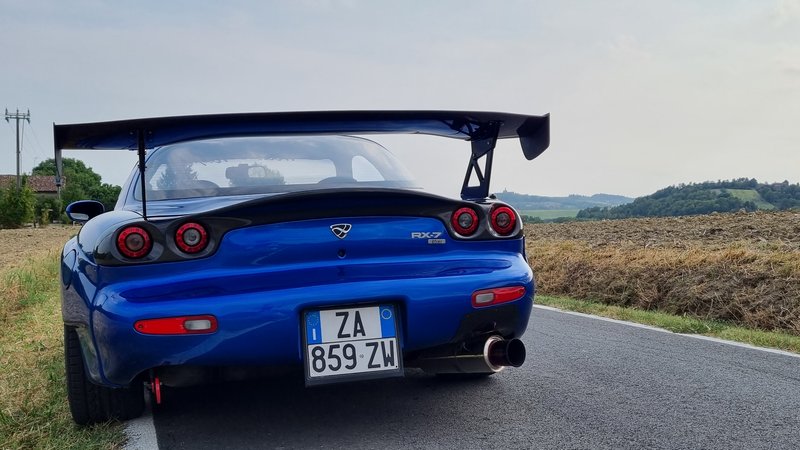
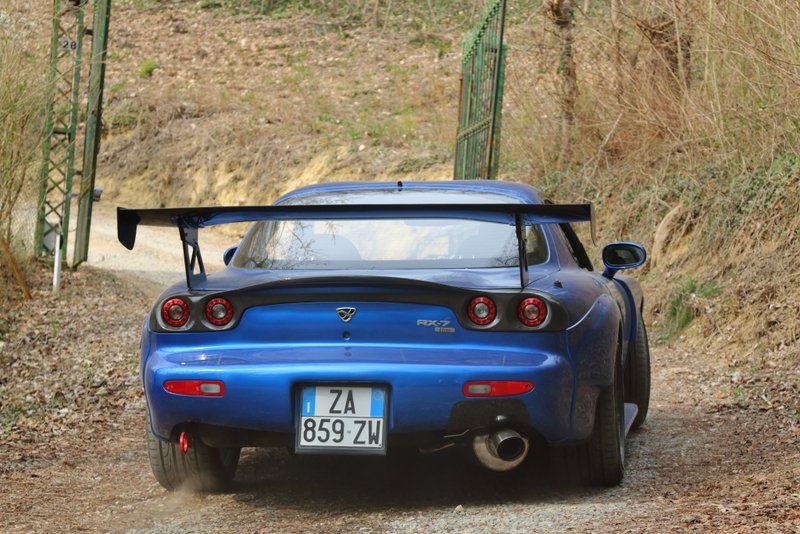
Now was time to change the rear lights, the choice was between the Re Amemiya cover or the Re Amemiya led tail lights, since my left tail lights was having problems I decided to completely change them and I opted for the led tail lights.
I waited them for 4 months but it was worth it.
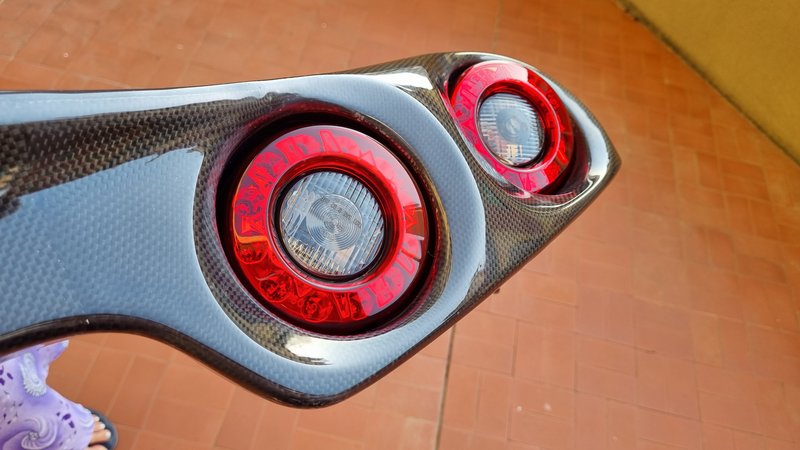
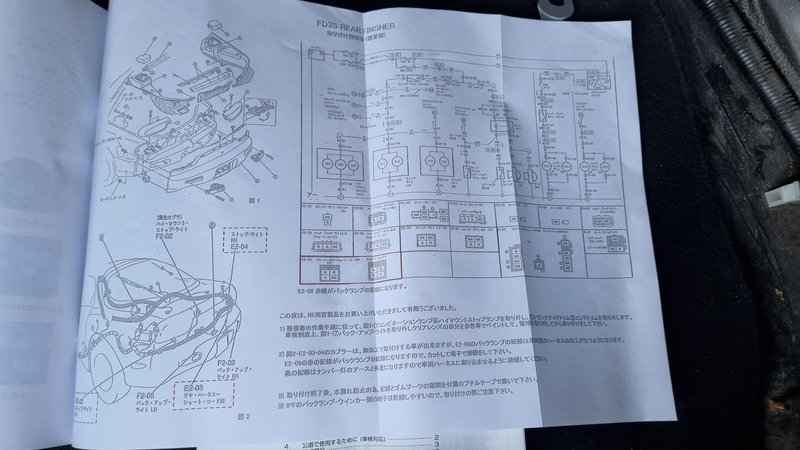
To be honest I had some problem with the instructions due they were obviously in japanese, but with my little helper (see the picture in the link to discover ahah) I had no problems at all, the biggest problem was to understand how secure the indicators/reverse lights to the brake lights due to the clips, once understood that everything has gone fine.
The electrical connections has been simple and even more simple has been secure the whole part to the car.
If I have to find a problem with this product I have to say that in some point the carbon looks not so good and in some point wasn't gloss but to solve this has been enought polish
https://i.postimg.cc/cLwDK1GP/20210807-093811.jpg
Next step: V-Mount
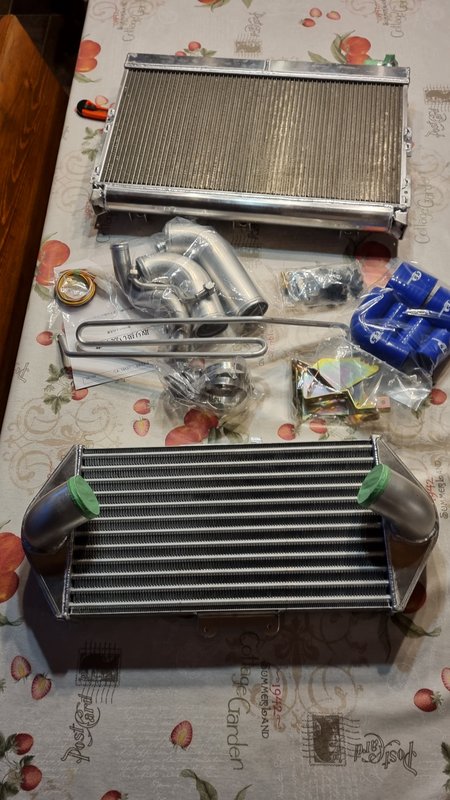
As I wrote few posts ago (if I remember correctly) I had some small leakege from radiator and I had to plan to upgrade the intercooler so I decided to go with a V-Mount, I choose to go always with the Re Amemiya
Nothing to say about this kit, the fitment was just perfect.
Since I removed the stock intercooler and radiator I took advantage of it and cleaned everything from the coolant leaked in the last months.
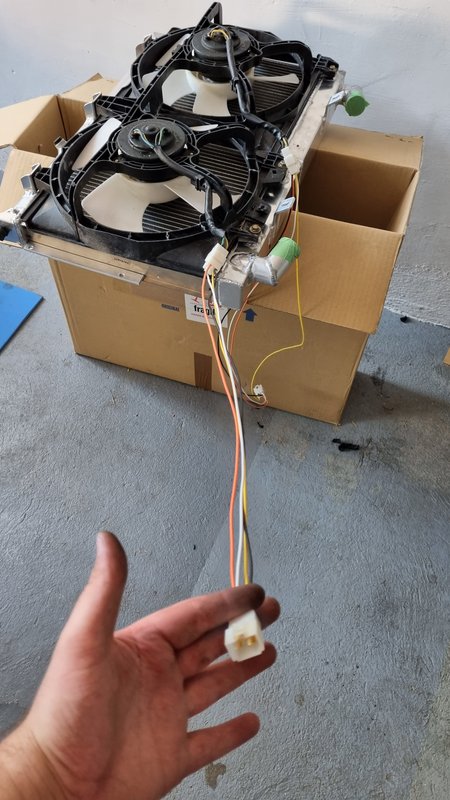
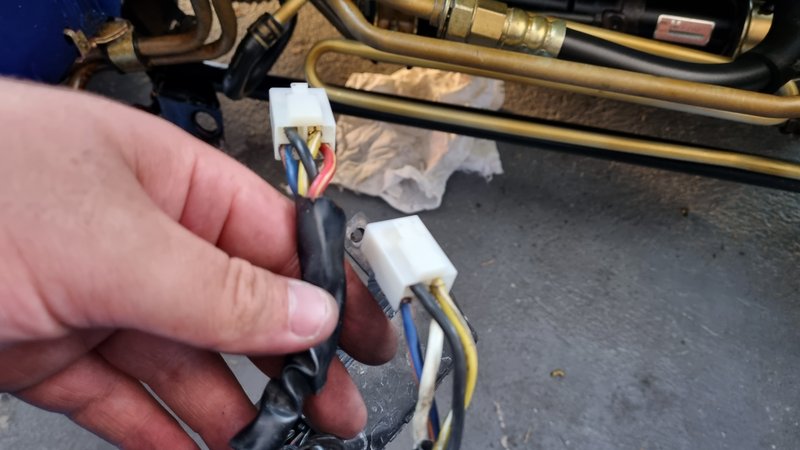
Installing the fans on the new radiator has been simple, before install definitely I tested if the fan relay manual control was working and it was so the radiator was ready to be installed
Obiouvsly the electrical connection cables were covered with heat shrink sleeve to be protected
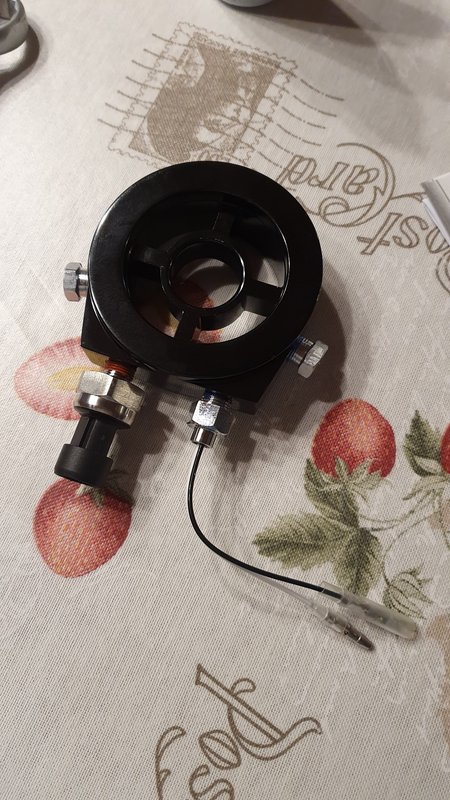
I also installed the water temperature sensor since the radiator pipe has the predisposition for this
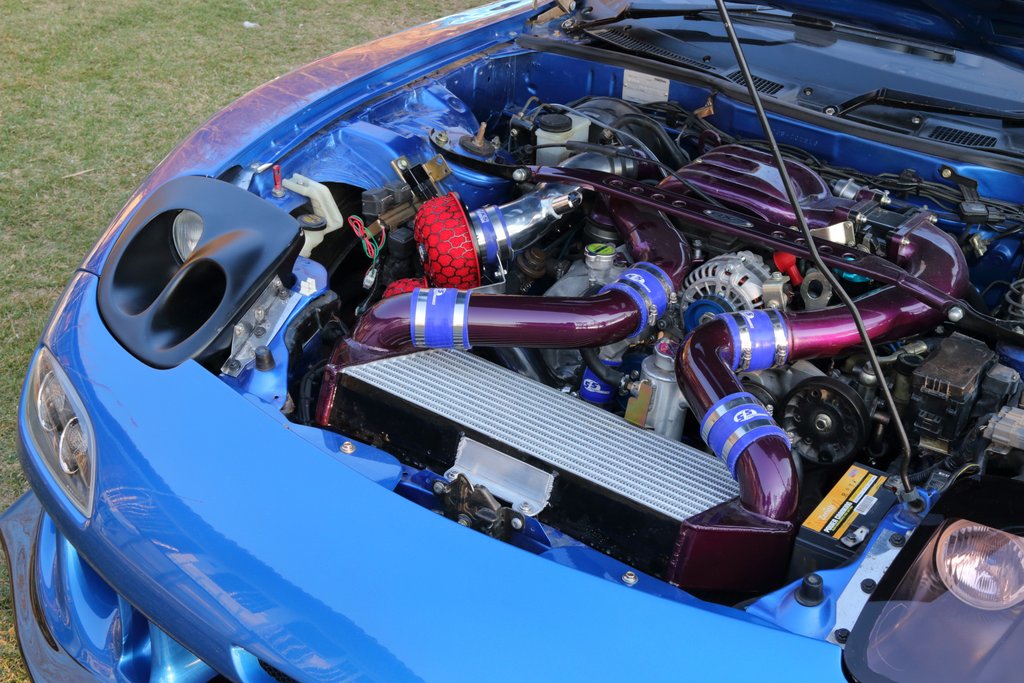
Before install the intercooler I had to paint the pipes in purple, decided to paint even the intercooler in purple on the left and right sides and black on the front and back sides.
Anyway this was the final result
After have installed everything I started the car just to check that there wasn't any leakege. Once I saw that there wasn't any, I turned off the car, pushed in the garage and started to waiting for the bumper which was on his way.
I had to change the turbos intake since mine wasn't compatible with the V-Mount and opted for a classic HKS intake
At the moment the car is at the bodyshop for install the new genuine bumper. Will post the updates soon here!
I waited them for 4 months but it was worth it.
To be honest I had some problem with the instructions due they were obviously in japanese, but with my little helper (see the picture in the link to discover ahah) I had no problems at all, the biggest problem was to understand how secure the indicators/reverse lights to the brake lights due to the clips, once understood that everything has gone fine.
The electrical connections has been simple and even more simple has been secure the whole part to the car.
If I have to find a problem with this product I have to say that in some point the carbon looks not so good and in some point wasn't gloss but to solve this has been enought polish
https://i.postimg.cc/cLwDK1GP/20210807-093811.jpg
Next step: V-Mount
As I wrote few posts ago (if I remember correctly) I had some small leakege from radiator and I had to plan to upgrade the intercooler so I decided to go with a V-Mount, I choose to go always with the Re Amemiya
Nothing to say about this kit, the fitment was just perfect.
Since I removed the stock intercooler and radiator I took advantage of it and cleaned everything from the coolant leaked in the last months.
Installing the fans on the new radiator has been simple, before install definitely I tested if the fan relay manual control was working and it was so the radiator was ready to be installed
Obiouvsly the electrical connection cables were covered with heat shrink sleeve to be protected
I also installed the water temperature sensor since the radiator pipe has the predisposition for this
Before install the intercooler I had to paint the pipes in purple, decided to paint even the intercooler in purple on the left and right sides and black on the front and back sides.
Anyway this was the final result
After have installed everything I started the car just to check that there wasn't any leakege. Once I saw that there wasn't any, I turned off the car, pushed in the garage and started to waiting for the bumper which was on his way.
I had to change the turbos intake since mine wasn't compatible with the V-Mount and opted for a classic HKS intake
At the moment the car is at the bodyshop for install the new genuine bumper. Will post the updates soon here!
Trending Topics
Thread Starter
Junior Member
Joined: Dec 2017
Posts: 18
Likes: 15
From: Torino
This will be not a long post, just small updates from the bodyshop
The bumper is now installed on the car (not in the definitively way) but already fit much much better than the old replica one, they also improved the fitment of the headlights and fixed the bulbs of the right one a bit higher and now are in the correct position

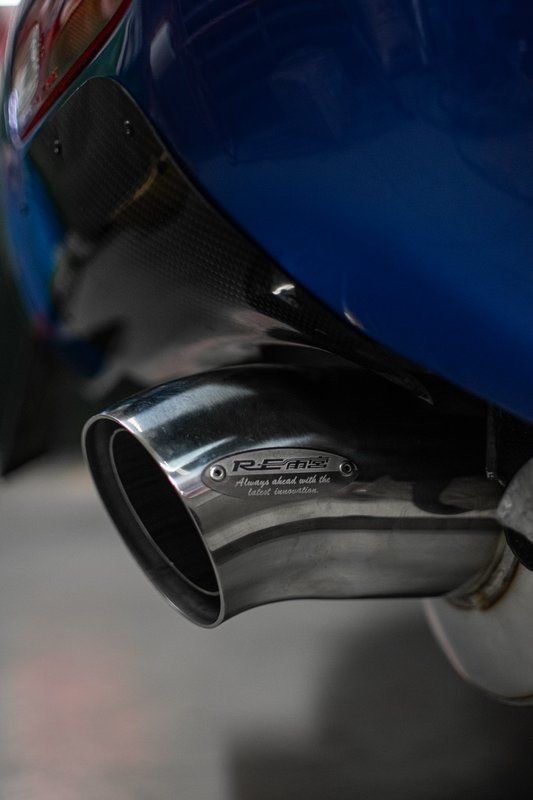
In the meanwhile I also installed the new Re Amemiya exhaust, unfortunately I've been unable to start the car due the turbo intakes are missing and I prefer don't start the car without a proper ECU tune with this intercooler setup.
I can't wait to hear it!
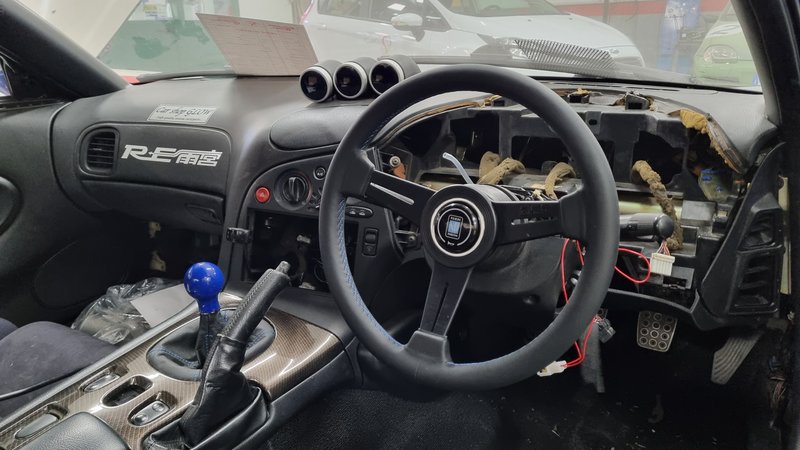
In the end I changed the steering wheel and looks soo much better than before
The next steps will be finish the body of the car, finally I've been able to buy a genuine AD9 hood and it will arrive next week so we will see how the car will look like, for sure will be breathtaking. Then I will have to get a proper ECU tune.
I will also have to check the pulley of the engine shaft because in my opinion isn't good (even if it's new), change the sparks, change the oil, reinstall the cluster (hoping will be fixed) and finally enjoy her
The bumper is now installed on the car (not in the definitively way) but already fit much much better than the old replica one, they also improved the fitment of the headlights and fixed the bulbs of the right one a bit higher and now are in the correct position
In the meanwhile I also installed the new Re Amemiya exhaust, unfortunately I've been unable to start the car due the turbo intakes are missing and I prefer don't start the car without a proper ECU tune with this intercooler setup.
I can't wait to hear it!
In the end I changed the steering wheel and looks soo much better than before
The next steps will be finish the body of the car, finally I've been able to buy a genuine AD9 hood and it will arrive next week so we will see how the car will look like, for sure will be breathtaking. Then I will have to get a proper ECU tune.
I will also have to check the pulley of the engine shaft because in my opinion isn't good (even if it's new), change the sparks, change the oil, reinstall the cluster (hoping will be fixed) and finally enjoy her
Thread Starter
Junior Member
Joined: Dec 2017
Posts: 18
Likes: 15
From: Torino
Just a small update...
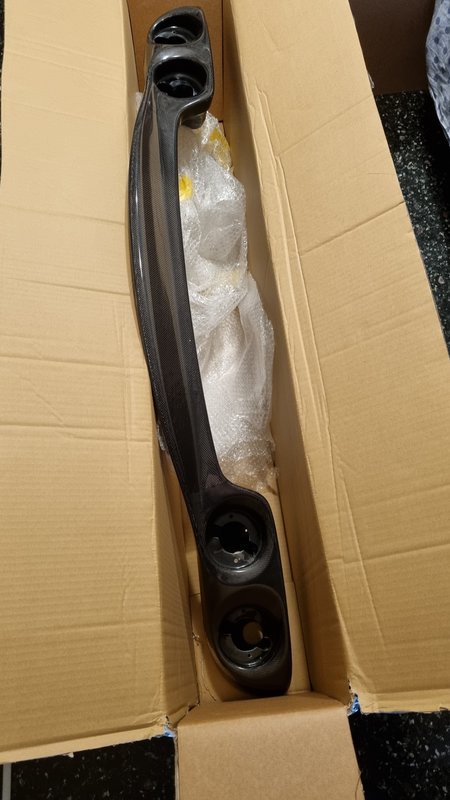
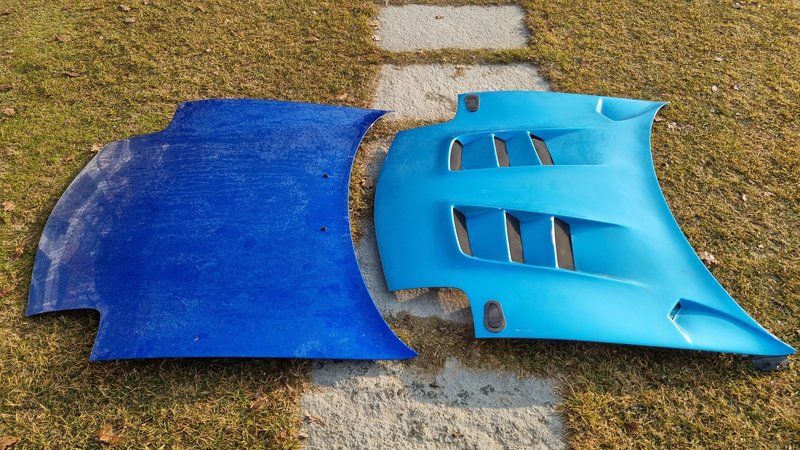
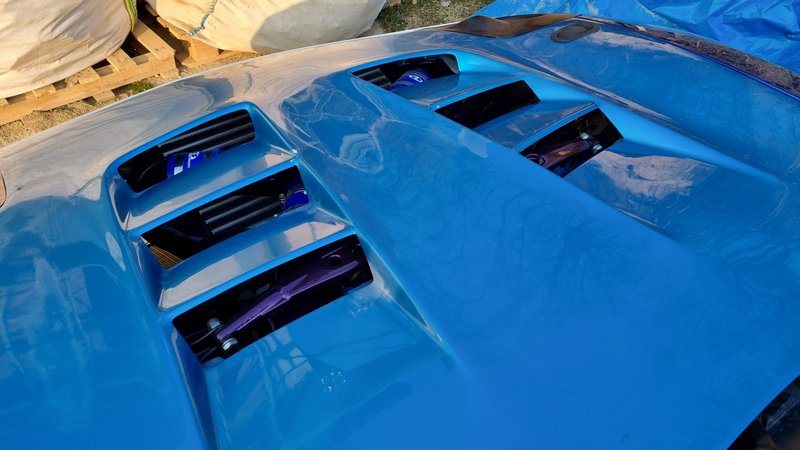
Finally the AD9 hood is arrive and I had to buy this one used since Re Amemiya isn't procuding it anymore.
Anyway isn't in bad conditions and I've been able to install it by myself, here below the result.
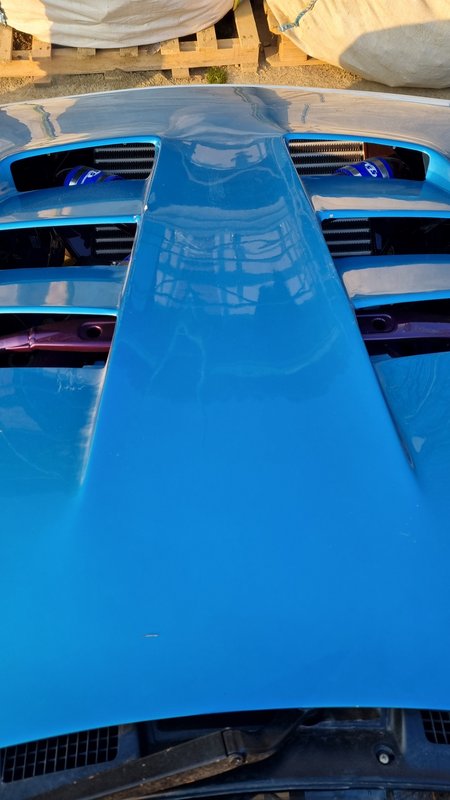
Obviously the color is different, the car will go to the bodyshop next week to fix and paint everything, I'm still not sure if paint all the hood in blue or paint it in blue with the vents in black... open to some advice!
I'm in love with the fact that everything is clearly visible throught the vents, anyway I will buy the rain guards... I can't park the car on the road in that conditions ahah
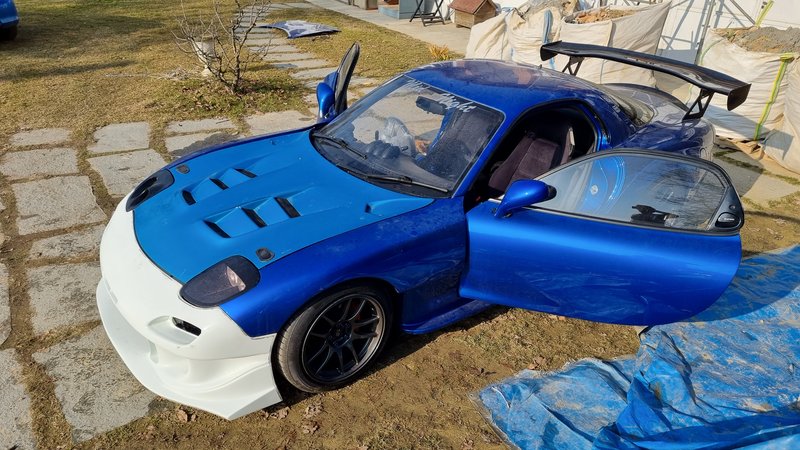

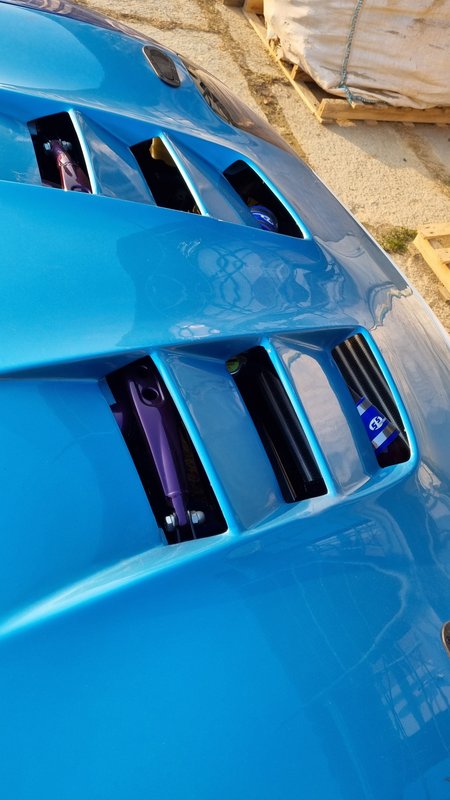
Honestly contrary of what I've read around this hood fit very very well and much better than my old stock one!!
As last thing I finally started the engine after months with the new Re Amemiya exhaust, I have to admit that is much quiter compared to the Kakimoto I had installed before, but I really like it!
I will post a video soon for sure!
I'll keep you update as always
Finally the AD9 hood is arrive and I had to buy this one used since Re Amemiya isn't procuding it anymore.
Anyway isn't in bad conditions and I've been able to install it by myself, here below the result.
Obviously the color is different, the car will go to the bodyshop next week to fix and paint everything, I'm still not sure if paint all the hood in blue or paint it in blue with the vents in black... open to some advice!
I'm in love with the fact that everything is clearly visible throught the vents, anyway I will buy the rain guards... I can't park the car on the road in that conditions ahah
Honestly contrary of what I've read around this hood fit very very well and much better than my old stock one!!
As last thing I finally started the engine after months with the new Re Amemiya exhaust, I have to admit that is much quiter compared to the Kakimoto I had installed before, but I really like it!
I will post a video soon for sure!
I'll keep you update as always
Thread Starter
Junior Member
Joined: Dec 2017
Posts: 18
Likes: 15
From: Torino
Finally I found the time to post an update with the latest mods/upgrades
The car has been at the bodyshop for the repaint and the installation of the front bumper and the hood, the result is really satisfying. Finally the space between the hood and the bumper is the same, check the photo below for the difference, here was before:
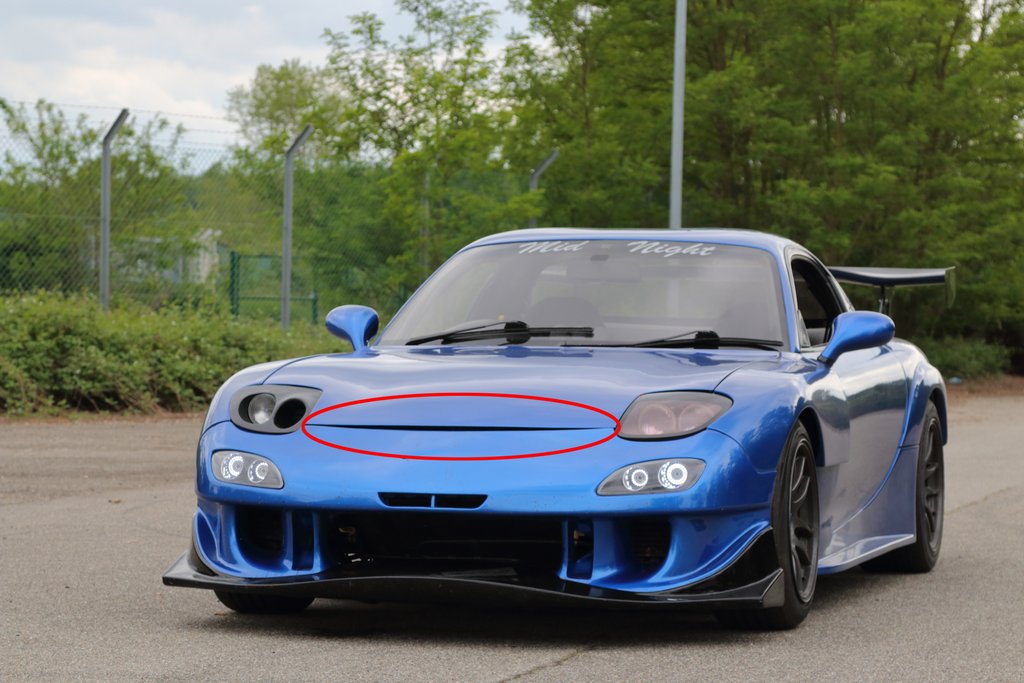
Also the lights now fit much better and are installed in the correct way with all the screws and bolts.
About the hood I have to say that I was worried about the fitment since I read that the AD9 have some problems with the fitting but is almost perfect.
As you can see in the second photo here below there is a small problem with the ducted headlight because the space between the light and the hood is much bigger that the space on the other side with the other light, will be improved next time.
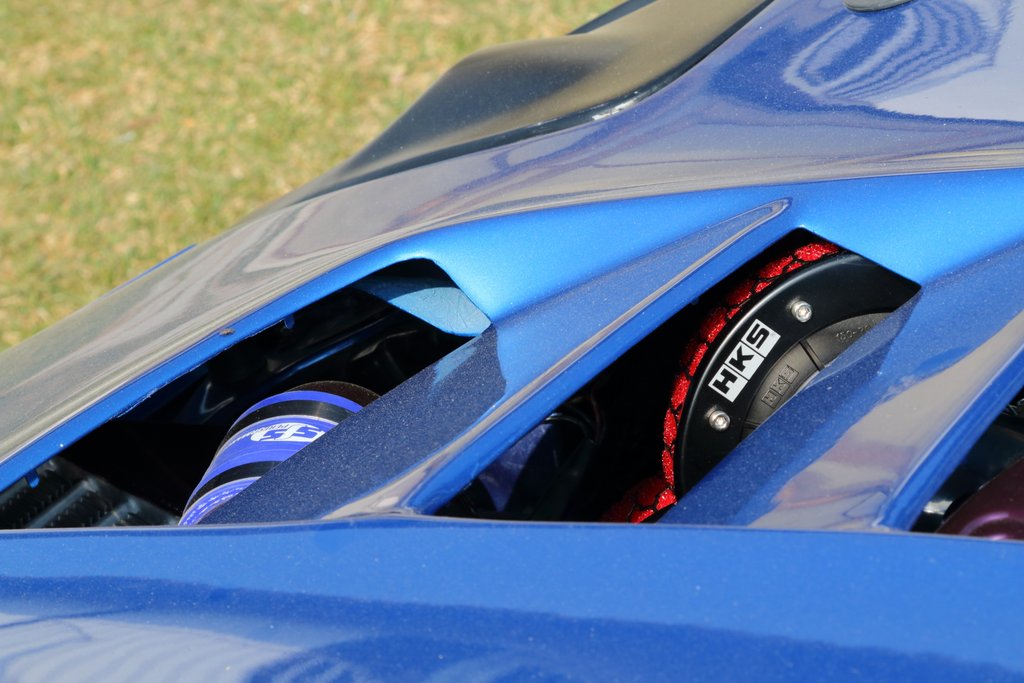
At this point with the car finished and back to home I installed the new HKS intake which fit with the V-Mount.
Now the engine setup with this intake is completed. I don't know if what I'm going to describe is normal and would be nice to hear what do you think about it. I drove the car around to test everything (Radiator lines, intercooler, intake etc...) as I said in the posts before I have the Apexi FC with the base map so not yet tuned, but the car is much much more enjoyable than before. Now she runs smooth, before with the stock old intercooler and the old intake was running very bad, especially under 3500rpm when she really yanked a lot.
Even the knocks are lower, before during normal drive they were between 30 and 40, now they are between 20 and 30.
Anyway maybe we are going offtopic, in case I will open a dedicated thread about this.
Going back to the project, in any case I will do a ECU tune for this setup.
In the meanwhile other parts are in order but probably will take a long time to wait.
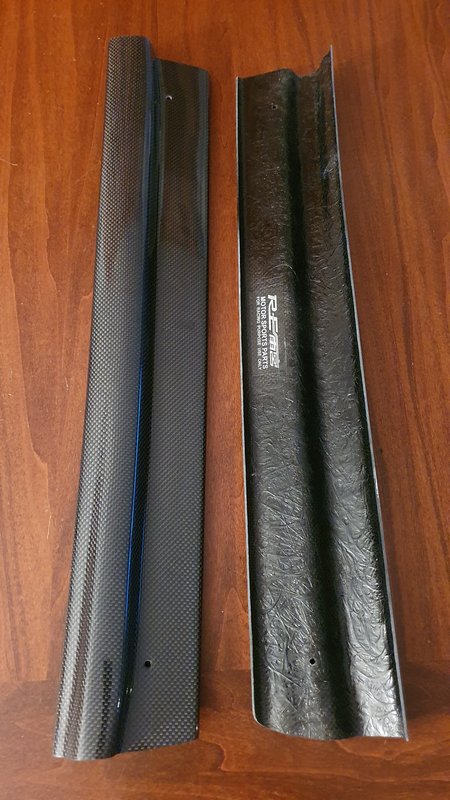
Re Amemiya Canard Pro in carbon fiber
Re Amemiya Front Fender Diffuser in carbon fiber
Re Amemiya AD Side Step Generator in carbon fiber
Re Amemiya AD9 Hood Duct Garnish in carbon fiber
Re Amemiya Rear Diffuser Pro in FRP
Re Amemiya cover for the ducted healight
I opted for a rear diffuser in FRP since probably will be destroyed after 2 days of use due the bad roads conditions around in Italy...
I'll keep you update as soon as I get news
Cheers guys!
The car has been at the bodyshop for the repaint and the installation of the front bumper and the hood, the result is really satisfying. Finally the space between the hood and the bumper is the same, check the photo below for the difference, here was before:
Also the lights now fit much better and are installed in the correct way with all the screws and bolts.
About the hood I have to say that I was worried about the fitment since I read that the AD9 have some problems with the fitting but is almost perfect.
As you can see in the second photo here below there is a small problem with the ducted headlight because the space between the light and the hood is much bigger that the space on the other side with the other light, will be improved next time.
At this point with the car finished and back to home I installed the new HKS intake which fit with the V-Mount.
Now the engine setup with this intake is completed. I don't know if what I'm going to describe is normal and would be nice to hear what do you think about it. I drove the car around to test everything (Radiator lines, intercooler, intake etc...) as I said in the posts before I have the Apexi FC with the base map so not yet tuned, but the car is much much more enjoyable than before. Now she runs smooth, before with the stock old intercooler and the old intake was running very bad, especially under 3500rpm when she really yanked a lot.
Even the knocks are lower, before during normal drive they were between 30 and 40, now they are between 20 and 30.
Anyway maybe we are going offtopic, in case I will open a dedicated thread about this.
Going back to the project, in any case I will do a ECU tune for this setup.
In the meanwhile other parts are in order but probably will take a long time to wait.
Re Amemiya Canard Pro in carbon fiber
Re Amemiya Front Fender Diffuser in carbon fiber
Re Amemiya AD Side Step Generator in carbon fiber
Re Amemiya AD9 Hood Duct Garnish in carbon fiber
Re Amemiya Rear Diffuser Pro in FRP
Re Amemiya cover for the ducted healight
I opted for a rear diffuser in FRP since probably will be destroyed after 2 days of use due the bad roads conditions around in Italy...
I'll keep you update as soon as I get news
Cheers guys!

Now was time to change the rear lights, the choice was between the Re Amemiya cover or the Re Amemiya led tail lights, since my left tail lights was having problems I decided to completely change them and I opted for the led tail lights.
I waited them for 4 months but it was worth it.
To be honest I had some problem with the instructions due they were obviously in japanese, but with my little helper (see the picture in the link to discover ahah) I had no problems at all, the biggest problem was to understand how secure the indicators/reverse lights to the brake lights due to the clips, once understood that everything has gone fine.
The electrical connections has been simple and even more simple has been secure the whole part to the car.
If I have to find a problem with this product I have to say that in some point the carbon looks not so good and in some point wasn't gloss but to solve this has been enought polish
https://i.postimg.cc/cLwDK1GP/20210807-093811.jpg
A car won't pass inspection in my state if it doesn't have a middle brake light and it's the main thing keeping me from these lights.
Thread Starter
Junior Member
Joined: Dec 2017
Posts: 18
Likes: 15
From: Torino
Absolutely love the taillights. Are you running any sort of third brake light? Inside the hatch maybe? It looks like this one is eliminating the middle light all together.
A car won't pass inspection in my state if it doesn't have a middle brake light and it's the main thing keeping me from these lights.
A car won't pass inspection in my state if it doesn't have a middle brake light and it's the main thing keeping me from these lights.
Anyway I will have to see when will be the moment of the inspection.. will be fun, even because no one here know the rx7
Thread Starter
Junior Member
Joined: Dec 2017
Posts: 18
Likes: 15
From: Torino
A lot of time is passed since last update, this because I was waiting to get the new parts to do it.
Unfortunately the Side Steps and the Hood Garnish are delayed and the shipment of the whole order is scheduled for October... now I hope to get, at least, the other parts that are ready for shipping (Rear diffuser, canards and side diffusers)
Anyway in the meantime I can do 2 smaller updates, the first one for the mechanical part and the other one for some pretty rare goods.
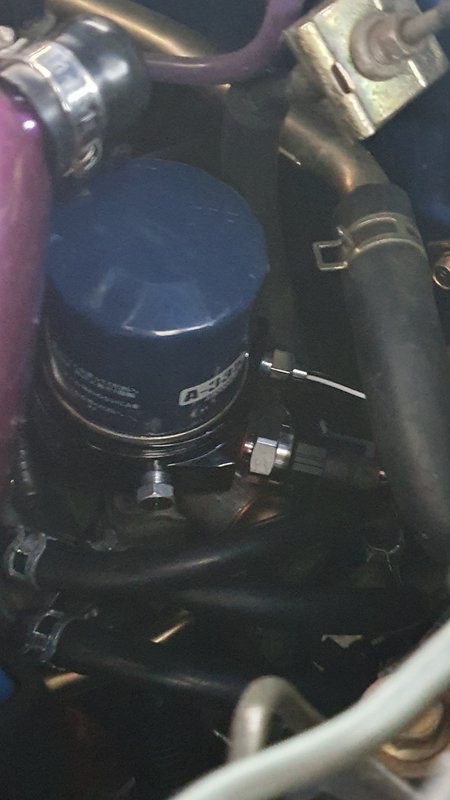
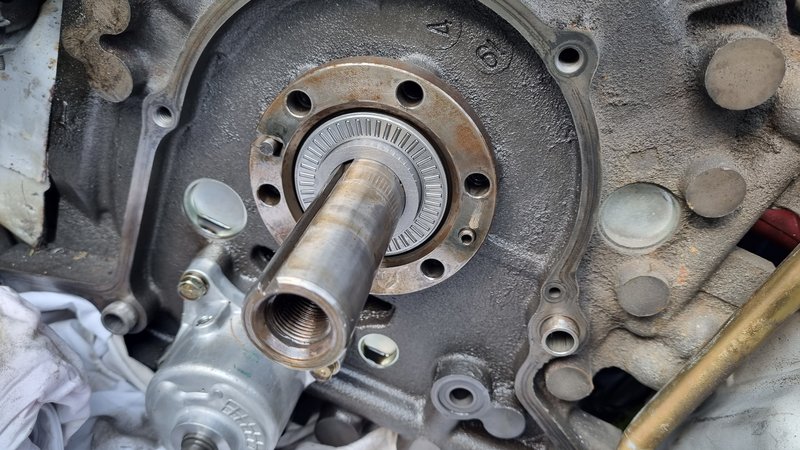
So first of all, few weeks ago I noticed that the shaft pulley rotation was bad, as first thing I though that the problem was the pulley so I dismounted it, but after a small check I discover that was a more deep problem...
Then I started an adventure deciding to dismount everything without remove the engine from the car and this is what I've found
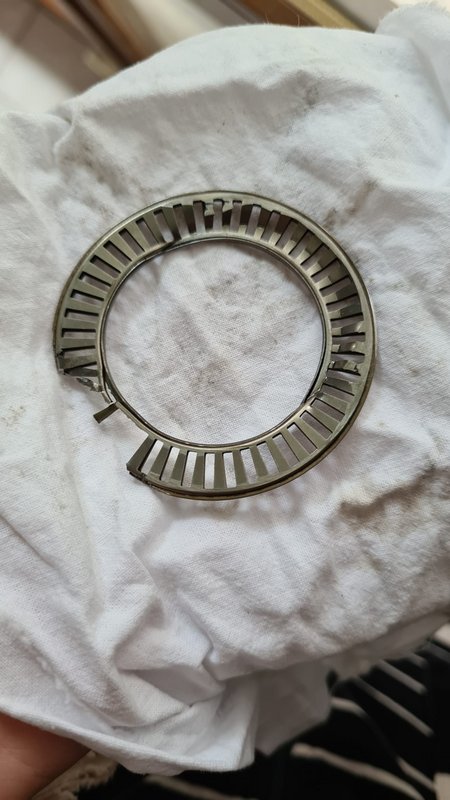
Fortunately the engine hasn't been damaged, who rebuilt this engine in Jap probably did a "small" mistake...
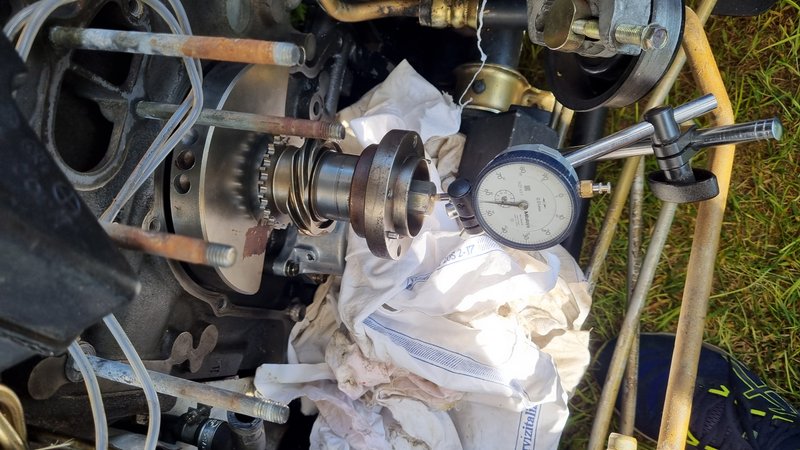
Now with a clear situation, I've been able to order the spare parts. I ordered a new spacer, two new bearings and one new thrust washer. Everything arrived in 2 weeks and was the time to remount everything back (HELP!!!) lol
I also checked the shaft play before and after to be sure I solved the problem and it was!
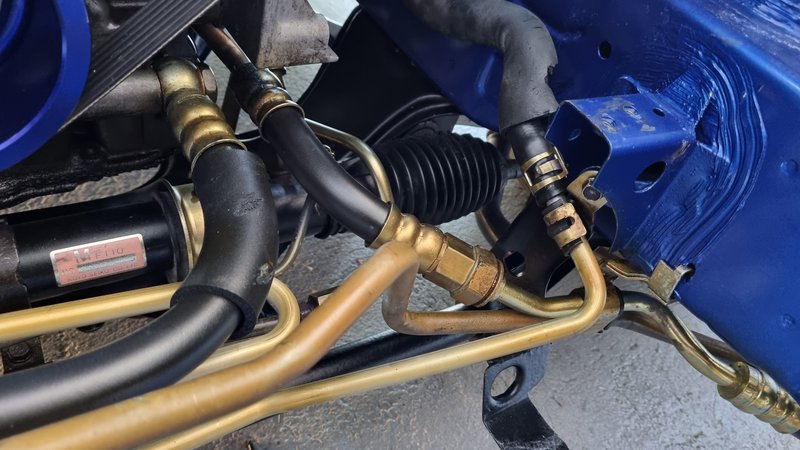
In the meanwhile I changed the oil (again) and fixed other 2 stupid problems, nothing bad just improved the power steering line position and improved the installation of the water temp sensor.
To be honest I though would have been more difficult to do, I spent "just" two days, one to dismount and the other one to remount.
In the end, the problem has been solved in time without damage and now the pulley is running perfect
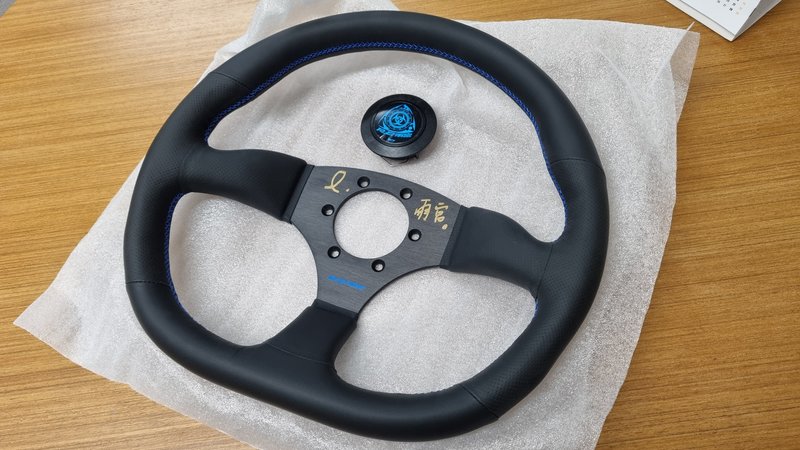
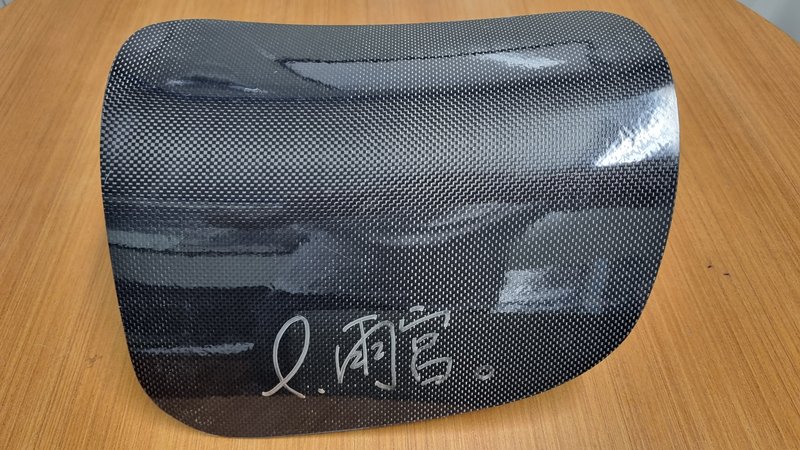
In the second part of this post I show you two parts arrived for my collection
- Re Amemiya steering wheel
- Re Amemiya dashboard panel
Both are signed and required a lot of patience to get them
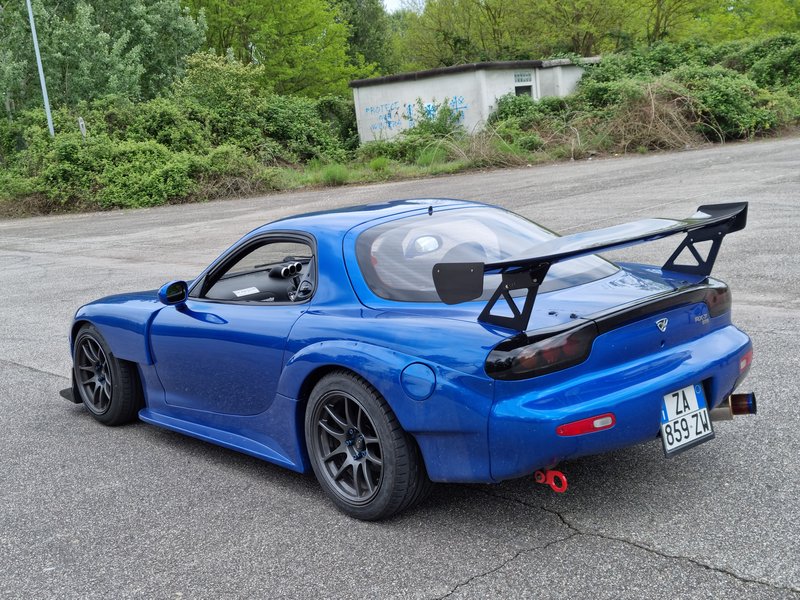
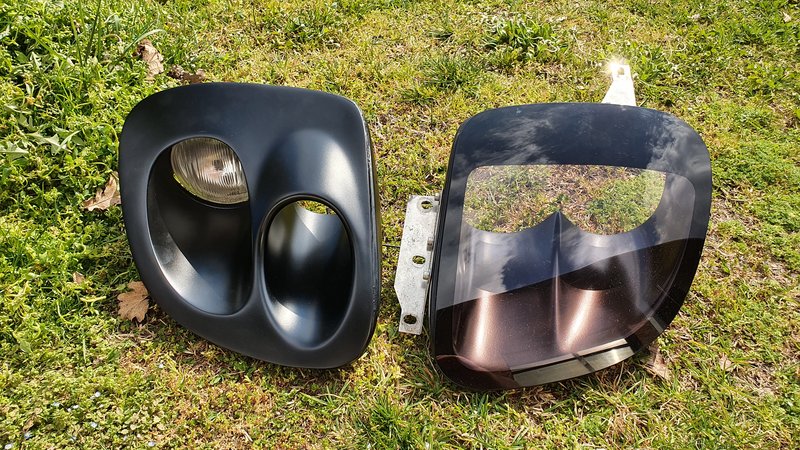
At the moment, as I said at the beginning, I'm still waiting the parts ordered in april BUT... in the meanwhile I sold my headlights set with the duct and bought a brand new of Re Amemiya headlights with IPF lights and without the duct, this time I will paint them in blue and not black.
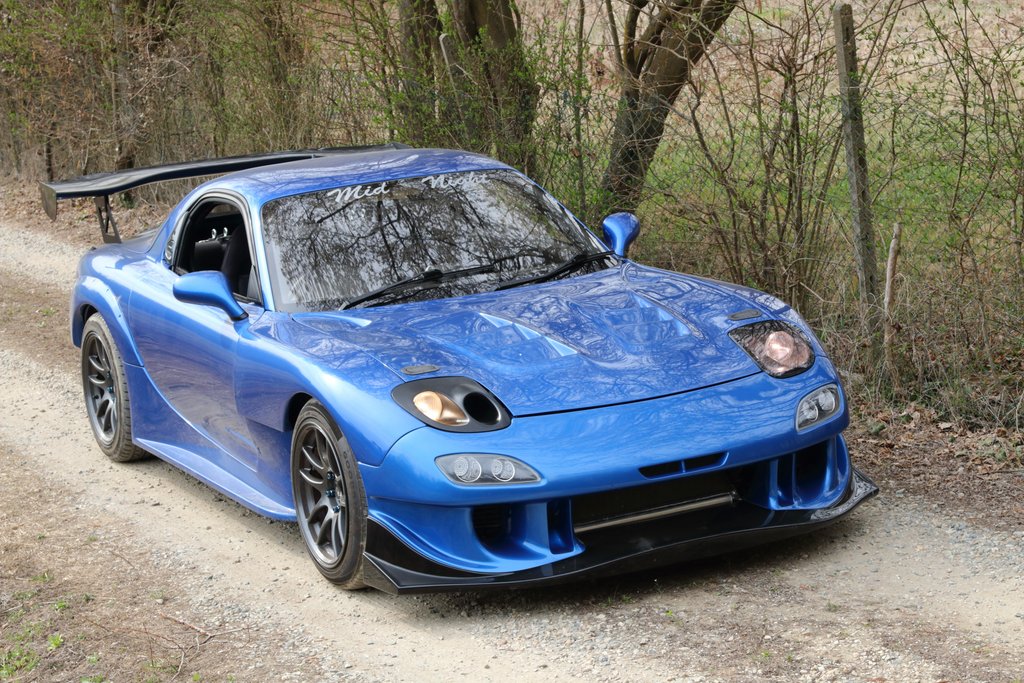
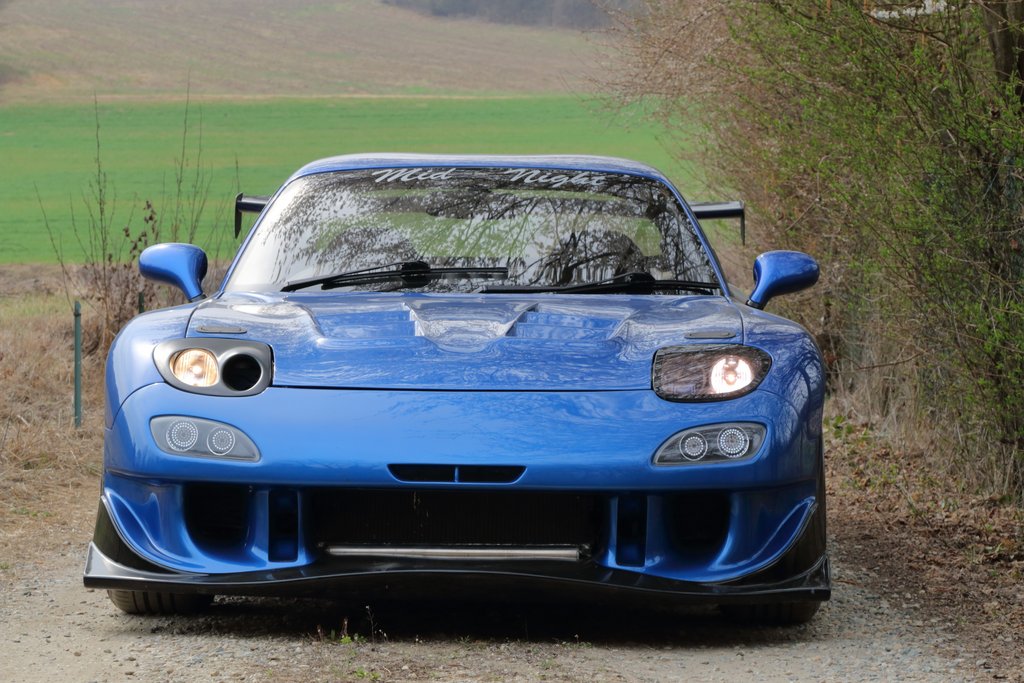
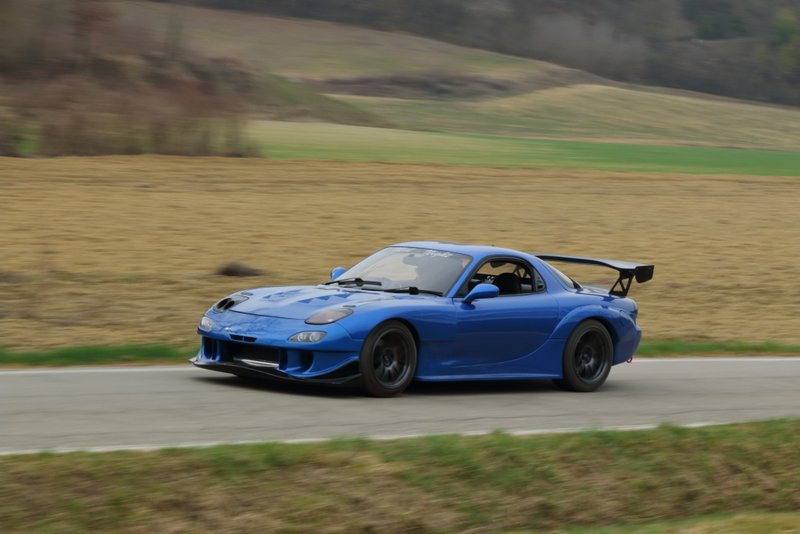
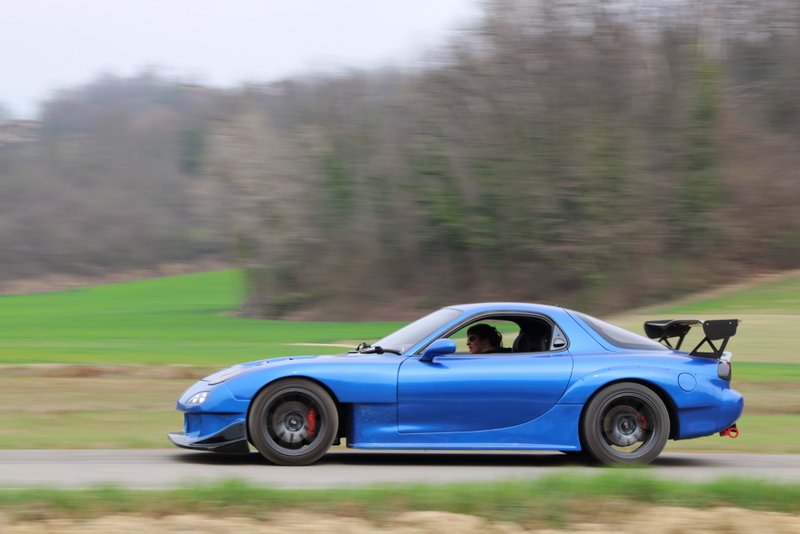
To finish this post just few photos of the car taken by myself I hope you will enjoy them!
Unfortunately the Side Steps and the Hood Garnish are delayed and the shipment of the whole order is scheduled for October... now I hope to get, at least, the other parts that are ready for shipping (Rear diffuser, canards and side diffusers)
Anyway in the meantime I can do 2 smaller updates, the first one for the mechanical part and the other one for some pretty rare goods.
So first of all, few weeks ago I noticed that the shaft pulley rotation was bad, as first thing I though that the problem was the pulley so I dismounted it, but after a small check I discover that was a more deep problem...
Then I started an adventure deciding to dismount everything without remove the engine from the car and this is what I've found
Fortunately the engine hasn't been damaged, who rebuilt this engine in Jap probably did a "small" mistake...
Now with a clear situation, I've been able to order the spare parts. I ordered a new spacer, two new bearings and one new thrust washer. Everything arrived in 2 weeks and was the time to remount everything back (HELP!!!) lol
I also checked the shaft play before and after to be sure I solved the problem and it was!
In the meanwhile I changed the oil (again) and fixed other 2 stupid problems, nothing bad just improved the power steering line position and improved the installation of the water temp sensor.
To be honest I though would have been more difficult to do, I spent "just" two days, one to dismount and the other one to remount.
In the end, the problem has been solved in time without damage and now the pulley is running perfect
In the second part of this post I show you two parts arrived for my collection
- Re Amemiya steering wheel
- Re Amemiya dashboard panel
Both are signed and required a lot of patience to get them
At the moment, as I said at the beginning, I'm still waiting the parts ordered in april BUT... in the meanwhile I sold my headlights set with the duct and bought a brand new of Re Amemiya headlights with IPF lights and without the duct, this time I will paint them in blue and not black.
To finish this post just few photos of the car taken by myself I hope you will enjoy them!

Thread
Thread Starter
Forum
Replies
Last Post