
93 Build...Finally giving in to the obsession

Thread Starter
Joined: Nov 2005
Posts: 1,319
Likes: 1
From: New Bern, NC
quick question fellas:
the twin turbo oil feed (hardline) pipe, as seen here:
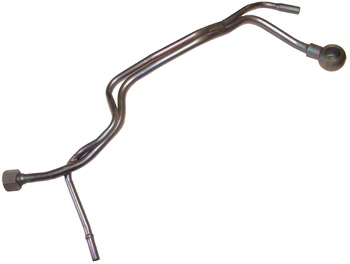
since I was apparently horrible at labeling stuff, I can't seem to find where the pipe that attaches to it goes...it's not even seen on the oil path diagram (probably because it has nothing to do with oil)
any help would be great guys
the twin turbo oil feed (hardline) pipe, as seen here:

since I was apparently horrible at labeling stuff, I can't seem to find where the pipe that attaches to it goes...it's not even seen on the oil path diagram (probably because it has nothing to do with oil)

any help would be great guys
if i remember right, and I'm pretty sure...it's for the pcv system. The turbo side pipe goes to the primary intake nipple (one of them) and the other pipe connects to the oil filler neck.
Thread Starter
Joined: Nov 2005
Posts: 1,319
Likes: 1
From: New Bern, NC
doesn't our PCV system go straight from the oil filler neck to the UIM though? if this pipe is unnecessary i'll get rid of it, but I want to make sure before I do.
if you look on the factory oil neck there are two nipples. One goes to the UIM where the actual PCV valve is located. The other is a breather line that utilizes that pipe you asked about and runs down to one of the 2 nipples located on the primary turbo inlet elbow.
There's lots of threads and debates about the proper setup for a pcv/catch can/breather system, sift through them and find whats best for you. I personally ran my twins without a pcv valve (and i believe the 95s+ also eliminated it) and so that one nipple on the oil neck I capped and just kept the breather line running to the primary turbo intake nipple.
If I had to guess, this is how the IRP neck should be plumbed unless it's setup for a catch can system which really isn't all that different.
BTW, MAAAAAAAJOR props on this build....just went back and it's some good ish. The pay off of driving at the end will make it all worth it.


so what ever did happen to Rich's FD? I mean before you got it. I know he said he was gonna tell the story, but I never saw it. Doesn't mean he didn't of course.
Thread Starter
Joined: Nov 2005
Posts: 1,319
Likes: 1
From: New Bern, NC
I just know that it was wrecked...if you want the full story, you'd have to ask him, so i'll respect his privacy.
Thread Starter
Joined: Nov 2005
Posts: 1,319
Likes: 1
From: New Bern, NC
So I've been working on a couple things lately:
tapped the water filler neck to delete the AST, FC rad cap with nipple on the way from Ray. there will be a plug where the old nipple used to be. I still need to tap another 1/8" NPT for the PLX sensor.
finished up the banzai racing FPD delete
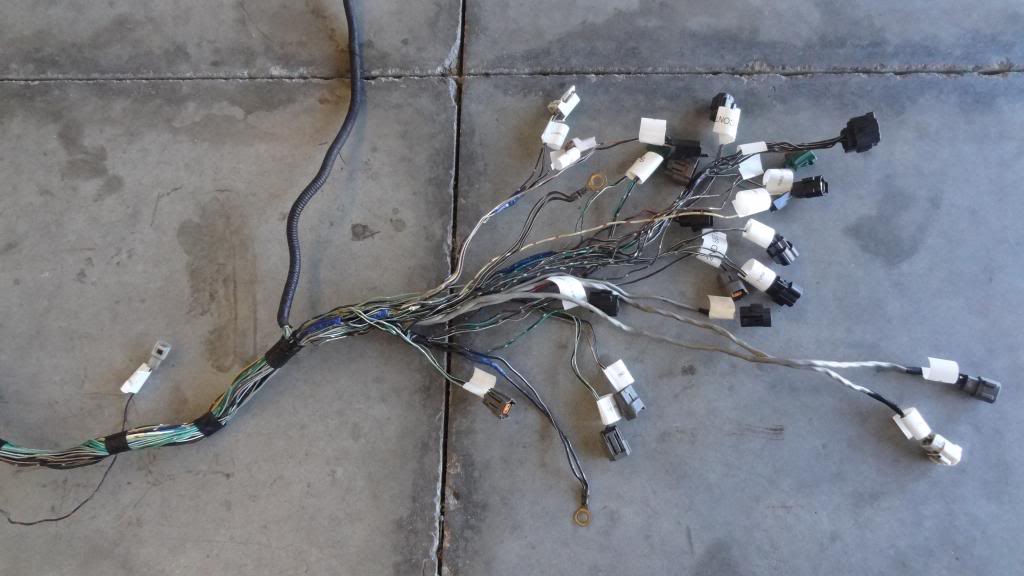
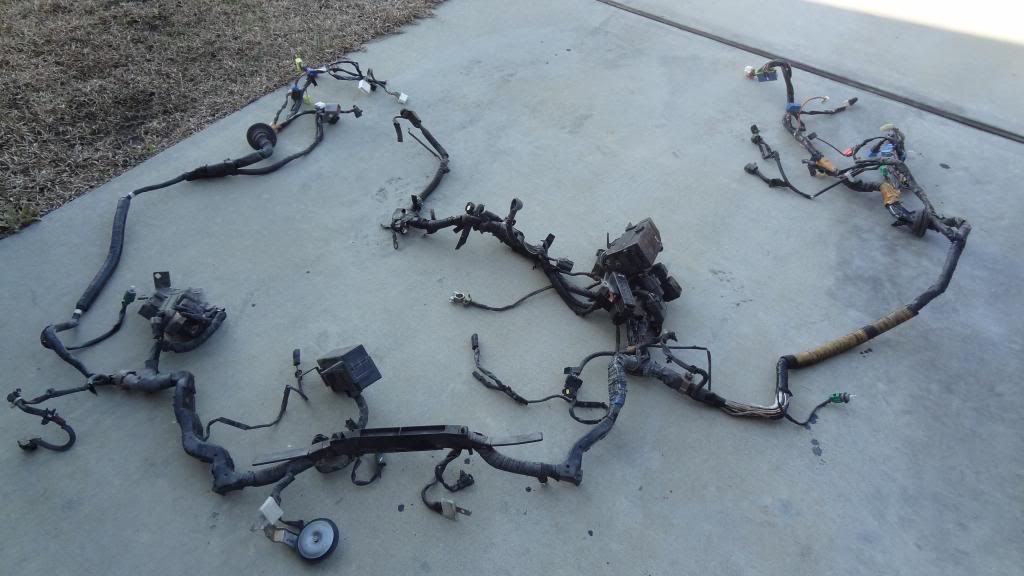
Finally got around the labeling all the connectors in the wiring harness
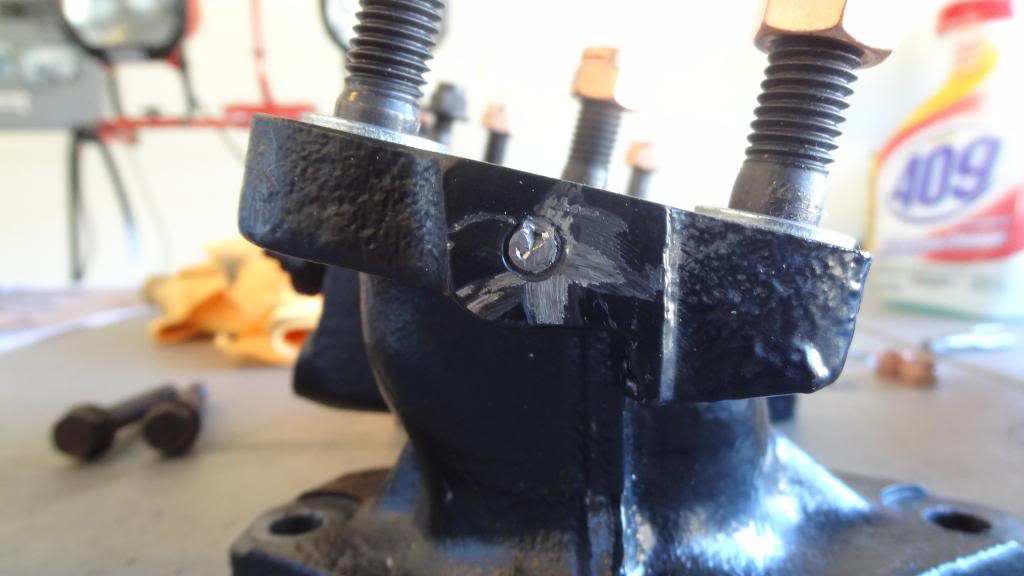
this turned into a nightmare. one of the heat shield bolts head broke off so I tried to counter sink it out, and the counter sink broke. now I need to find a machine shop to drill press and re-tap it
Rotary life
tapped the water filler neck to delete the AST, FC rad cap with nipple on the way from Ray. there will be a plug where the old nipple used to be. I still need to tap another 1/8" NPT for the PLX sensor.

finished up the banzai racing FPD delete

Finally got around the labeling all the connectors in the wiring harness

this turned into a nightmare. one of the heat shield bolts head broke off so I tried to counter sink it out, and the counter sink broke. now I need to find a machine shop to drill press and re-tap it

Rotary life


Thread Starter
Joined: Nov 2005
Posts: 1,319
Likes: 1
From: New Bern, NC
I removed the fuel pulsation dampener as it's prone to leaking and most believe that it's a bit of over engineering from Mazda. I did keep the fuel pressure regulator but removed the solenoid and ran the vacuum hose to the UIM.
Recovering Milkaholic
iTrader: (7)
Joined: Jan 2002
Posts: 8,206
Likes: 0
From: Budds Creek, Maryland
Yea I know they are not reliable and have caused their fair share of car-be-que's but I haven't previously heard of them being deleted using a stock rail. Sounds interesting.
Thread Starter
Joined: Nov 2005
Posts: 1,319
Likes: 1
From: New Bern, NC
all you gotta do is tap the primary rail on the FPD side with a 1/2" NPT tap, clean it out and screw in a hose barb. easiest thing I've ever done.
that broken counter sink.... I bet you could get it out using a steady hand a very fine drill bit... Just use a punch to get a nice little centered little dent. Then use the tiny drill bit to drill it out on your own. It may even bite the counter sink and pull it out.
Thread Starter
Joined: Nov 2005
Posts: 1,319
Likes: 1
From: New Bern, NC
that broken counter sink.... I bet you could get it out using a steady hand a very fine drill bit... Just use a punch to get a nice little centered little dent. Then use the tiny drill bit to drill it out on your own. It may even bite the counter sink and pull it out.
Ultimate conclusion: drill press!
Plus, there's other things I need drilled and tapped anyways. Along with my wideband bung.
Thread Starter
Joined: Nov 2005
Posts: 1,319
Likes: 1
From: New Bern, NC
Before I forget to ask. I'm blocking the stock O2 bung and welding my wideband bung farther downstream.
My question is, where should I weld it? I still don't have the car and I don't want to weld it on and have the wideband O2 hit the chassis somewhere.
My question is, where should I weld it? I still don't have the car and I don't want to weld it on and have the wideband O2 hit the chassis somewhere.
Thread Starter
Joined: Nov 2005
Posts: 1,319
Likes: 1
From: New Bern, NC
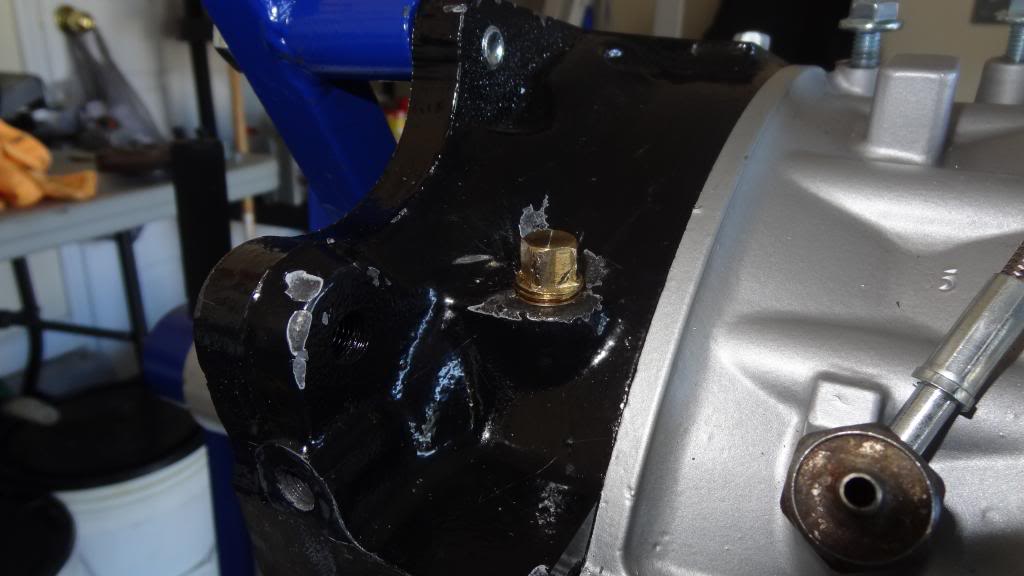
Finished up the nipple delete and block on the water filler neck.

Blocked the throttle body return nipple on the water pump housing.
Got almost done with blocking off the throttle body supple line...
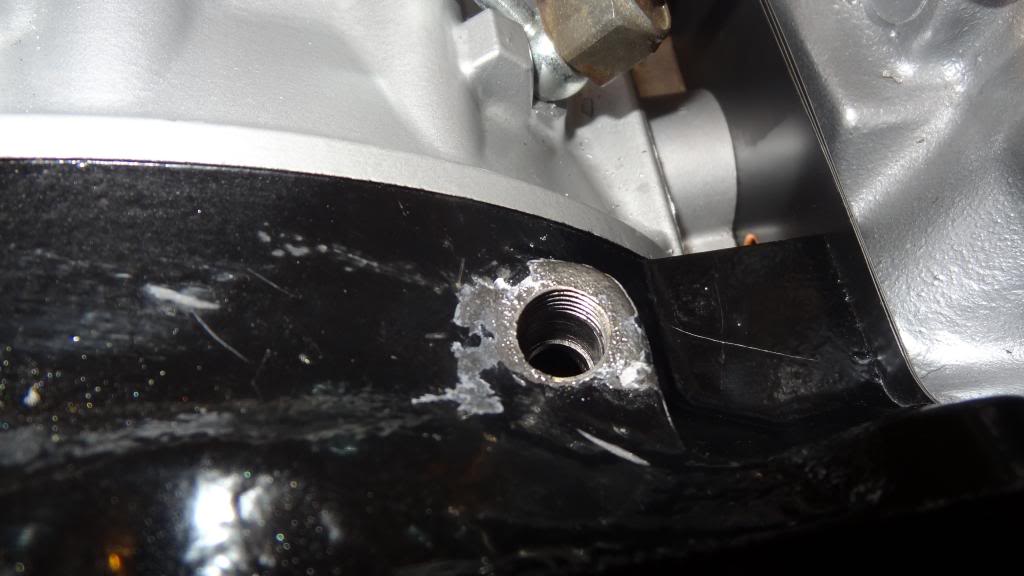
Then this happened
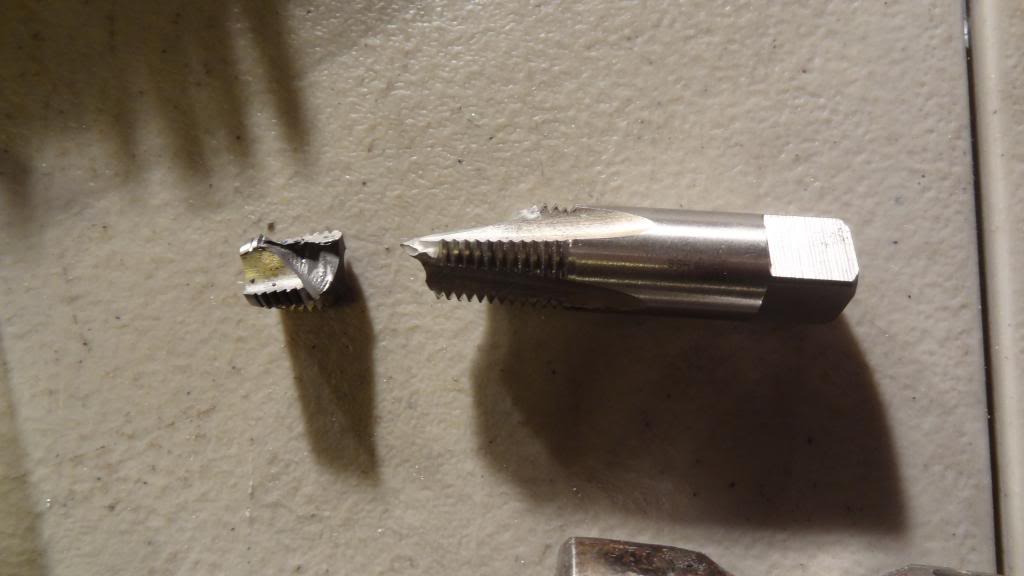
it was a nightmare because half of the tap was stuck in the block and I was freaking out....and my wife, with her finesse and gentle hands, actually got it out.
Went and got another tap and finished it up
This is the project for the next couple days
And do not fret my fellow RX7 friends....I will flush the coolant system before I run the car

Blocked the throttle body return nipple on the water pump housing.

Got almost done with blocking off the throttle body supple line...

Then this happened

it was a nightmare because half of the tap was stuck in the block and I was freaking out....and my wife, with her finesse and gentle hands, actually got it out.
Went and got another tap and finished it up

This is the project for the next couple days

And do not fret my fellow RX7 friends....I will flush the coolant system before I run the car
Thread Starter
Joined: Nov 2005
Posts: 1,319
Likes: 1
From: New Bern, NC
Also, because I have been mulling over how to *properly* delete the coolant passage from the throttle body itself, I just opted for the easy route and ordered the CNC machine billet throttle body. I honestly just can't stand how the stock throttle body looks and to me it's an eyesore.

Thread Starter
Joined: Nov 2005
Posts: 1,319
Likes: 1
From: New Bern, NC
It's a combination of both look and the slightly better airflow that it offers. I decided it was a decent upgrade since I also tried to disassemble the stock one and kinda messed it up. I could make it still work but I want this car to look clean. I will agree though, it is overpriced.