
Banzai Racing 20B Oil Pan Brace Installation How-To

Thread Starter


Joined: Jan 2008
Posts: 4,868
Likes: 344
From: Indiana
Banzai Racing 20B Oil Pan Brace Installation How-To
We have finally finished the developement of our Oil Pan Brace kit for the 20B. It follows the same principals as all of our other braces. The purpose is to help eliminate oil pan leaks caused by engine flex. The following procedure is a guide for installation while the engine is out. The brace can be installed while the engine is still in the vehicle, but the subframe will need to be dropped.
Tools required:
M6 x 1.0 Tap (recommended) or Pick
3mm Allen Wrench
Torque Wrench
10mm Socket
Flat Head Screw Driver
Dremel Tool or Die Grinder
And a can of Permetex "The Right Stuff" (or Silicone RTV)
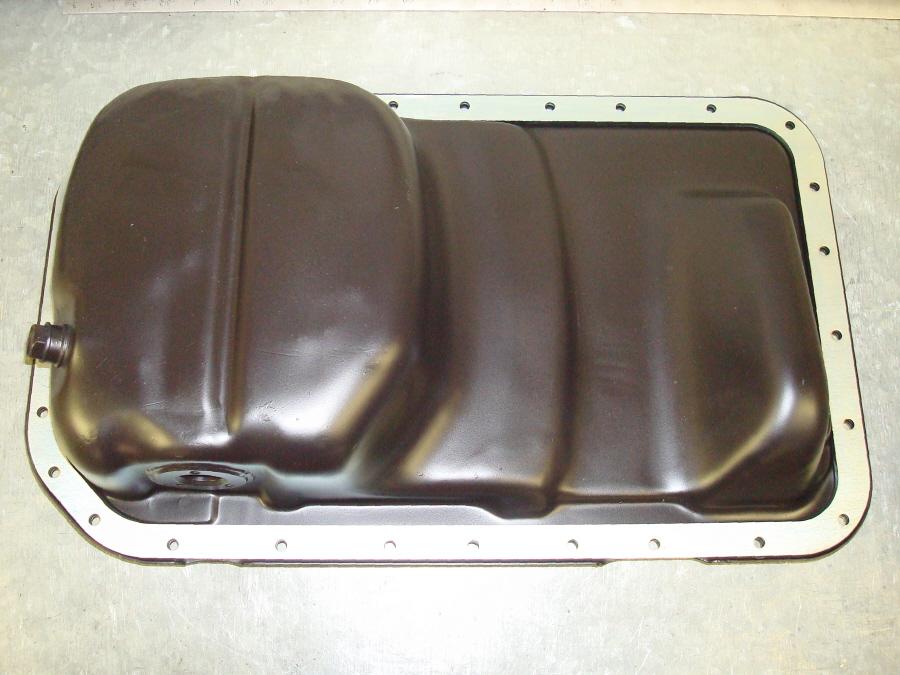
1. Clean the oil pan and engine contact surfaces thoroughly.
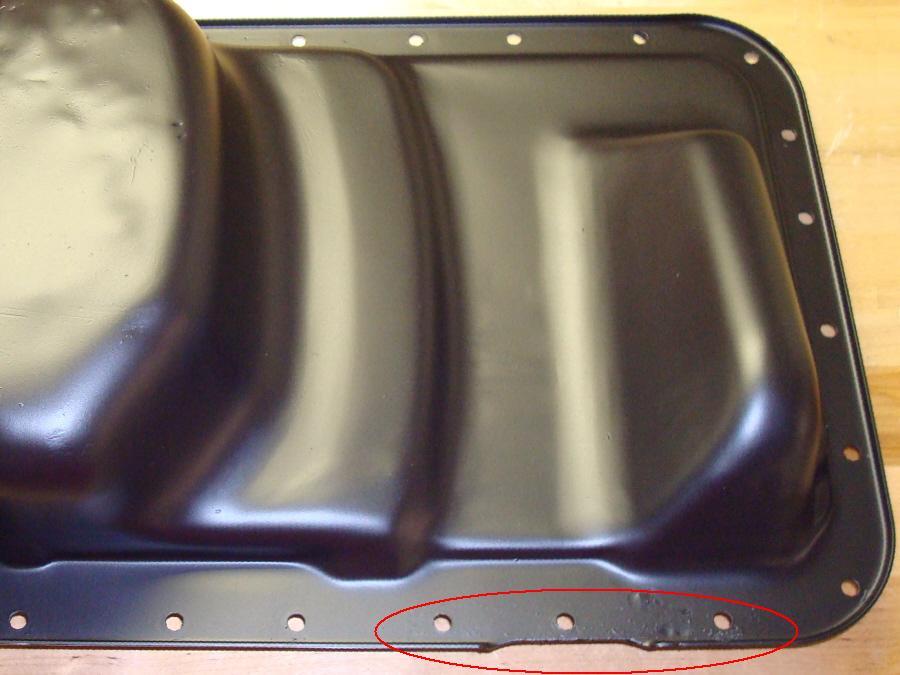
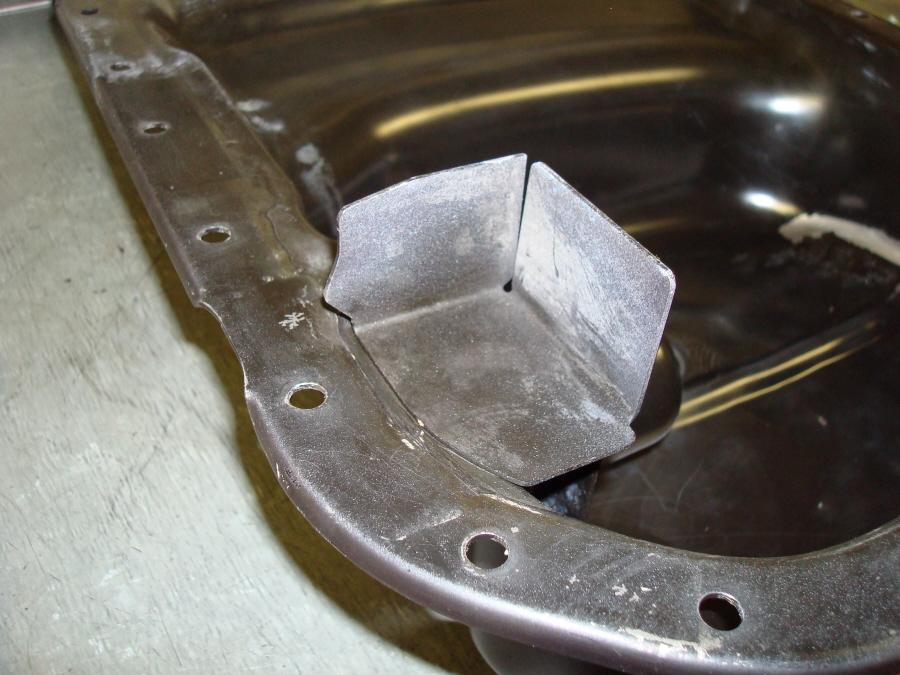
2. Pry Torque Spreader Strip from the oil pan using a flat head screw driver. It comes off very easily, it is only tack welded at one end.
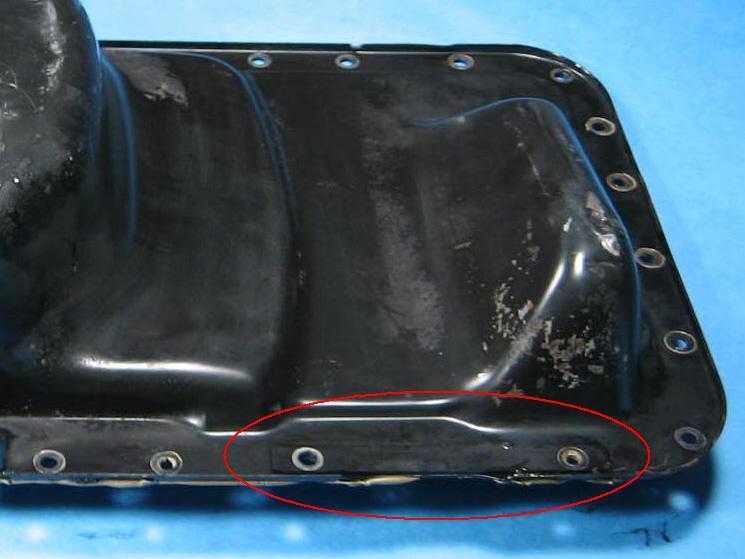
3. Using a dremel or die grinder, remove the tack welds used to affix Torque Spreader Strip. To prevent rust we recommend painting the oil pan and exposed metal.
4. Clean out oil pan bolt holes completely, ensuring that there is no RTV, dirt, etc. at base of holes. Failure to do so may result in cracking of plates. We recommend using a M6 x 1.0 Tap , but you may use a pick if necessary
5. Ensure that the contact surface of all parts are clean.
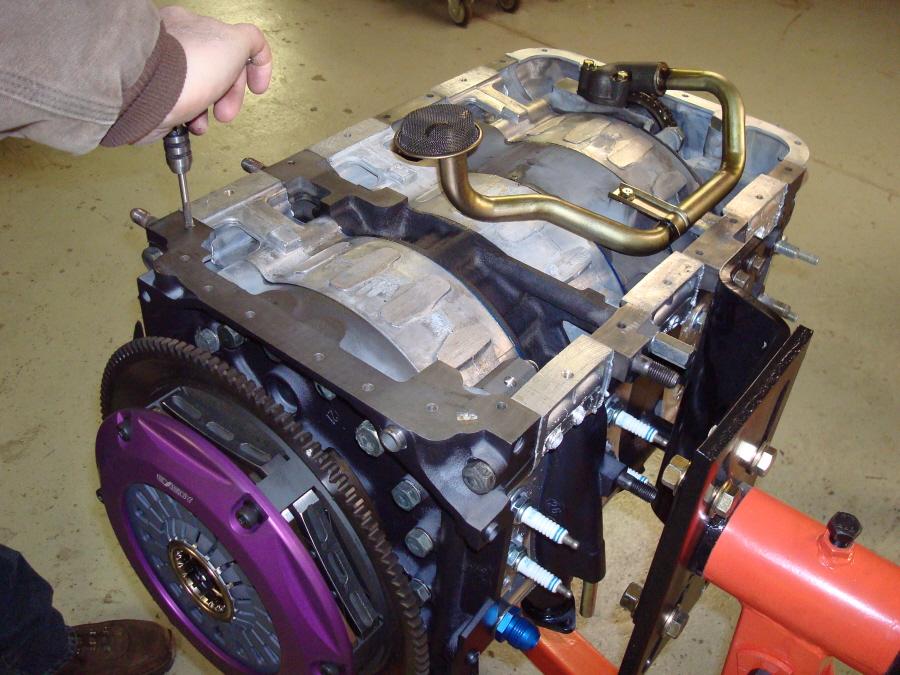
6. Using 3mm Allen wrench, thread studs into oil pan mounting holes . DO NOT install the studs in the 6 holes on the rear corner at the Oil Pressure Regulator to allow for baffle clearance. If you experience difficulty inserting the studs, please ensure that the holes are thoroughly clean.
7. Test fit the oil pan brace on oil pan. Drain Plug must be removed. If the holes do not line up, then flip the brace over. Depending on how banged up your oil pan is you may need to pry the lip out to allow for proper fitment.
8. Apply a 4 - 6mm continuous bead of Permetex The Right Stuff (or silicone sealant) to the bottom of the engine along the inside of the studs. Follow the manufactureres directions for allowable time but most recommend installation within 1-5 minutes.
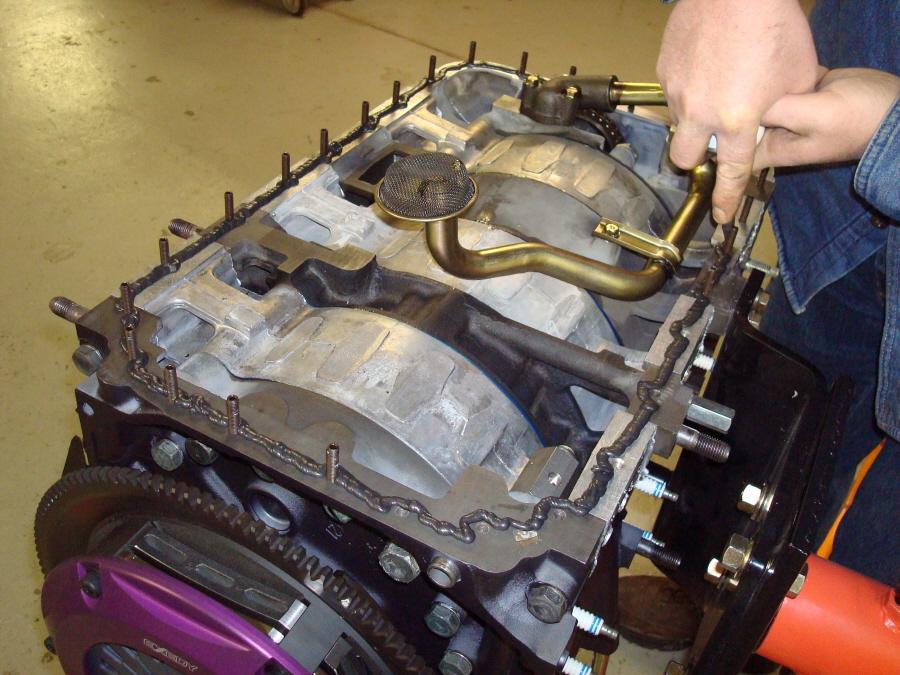
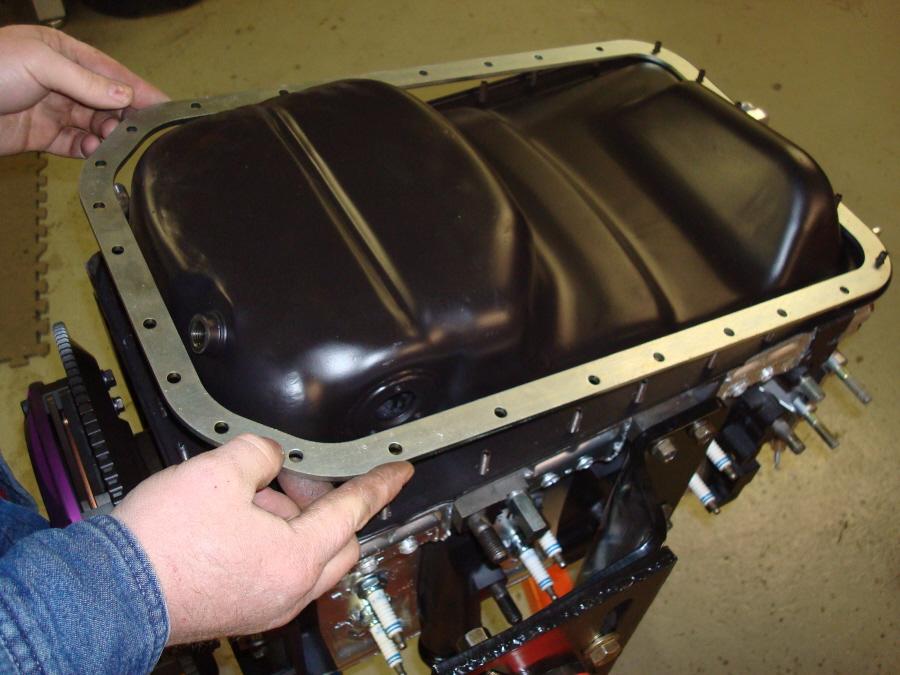
9. Lower oil pan onto studs at an angle as pictured, this allows the baffle to clear the rotor housing.

10. Install remaining six studs prior to applying any pressure to the oil pan
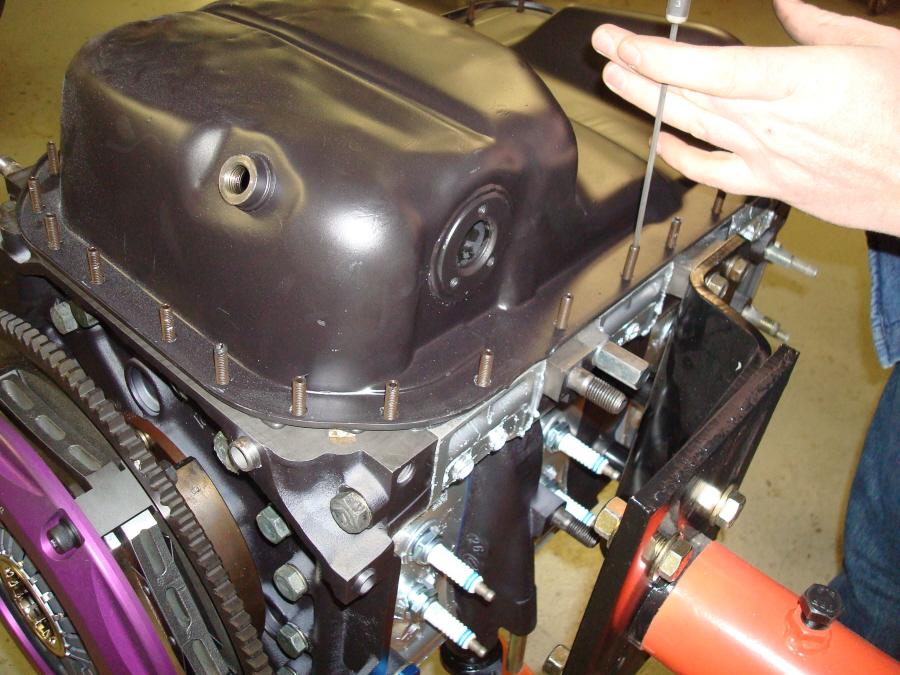
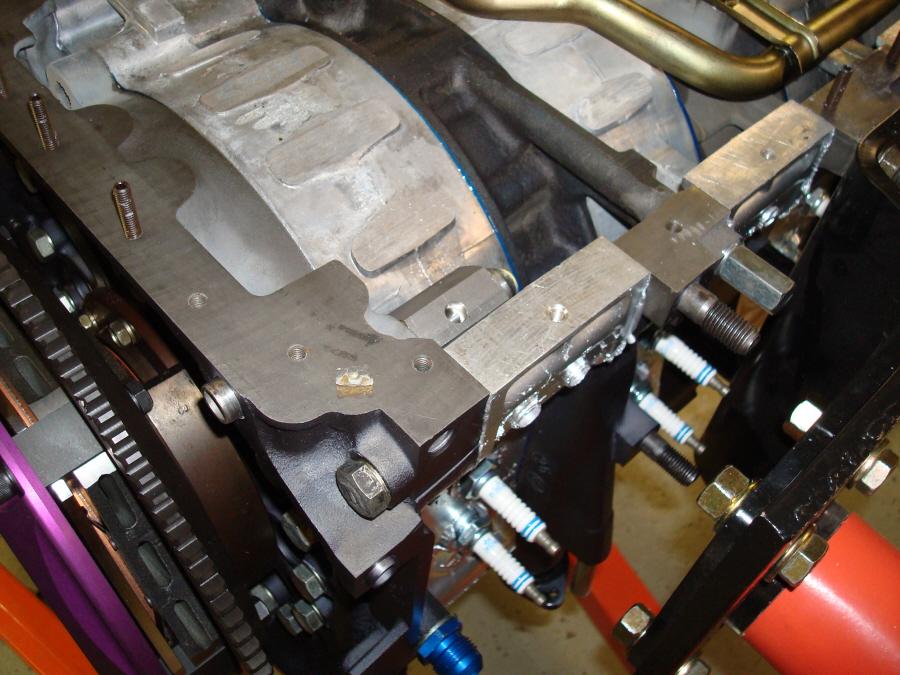
11. Install Oil Pan Brace
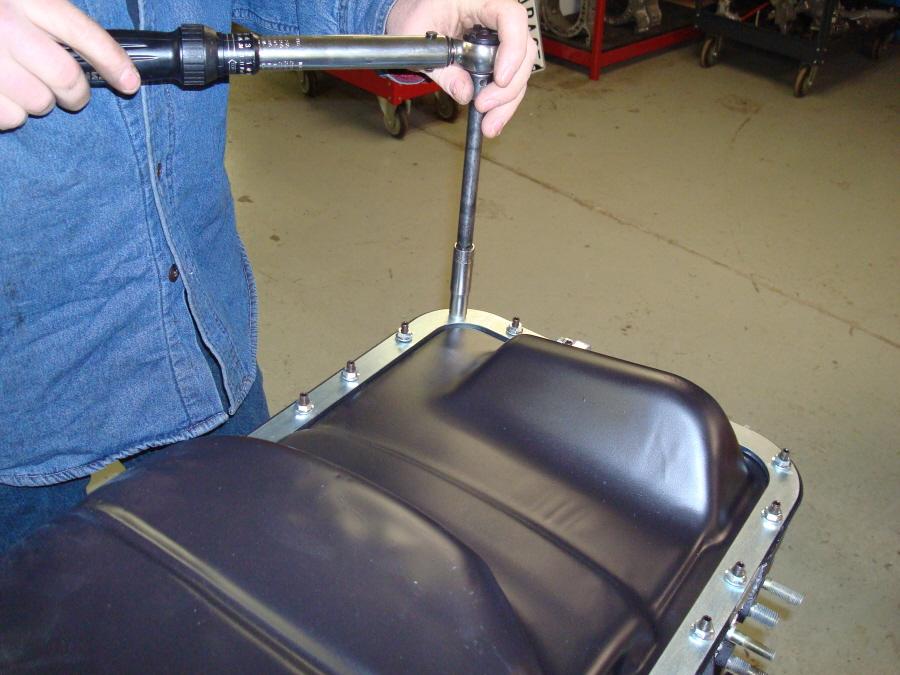
12. Thread hex nuts onto oil pan studs.
13. Torque nuts gradually and evenly to 104 in-lbf. Do not over torque nuts as this may cause studs to break
14. Allow a minimum of 24 hours for RTV to cure

This complete how-to can also be found on our website.
Tools required:
M6 x 1.0 Tap (recommended) or Pick
3mm Allen Wrench
Torque Wrench
10mm Socket
Flat Head Screw Driver
Dremel Tool or Die Grinder
And a can of Permetex "The Right Stuff" (or Silicone RTV)
1. Clean the oil pan and engine contact surfaces thoroughly.
2. Pry Torque Spreader Strip from the oil pan using a flat head screw driver. It comes off very easily, it is only tack welded at one end.
3. Using a dremel or die grinder, remove the tack welds used to affix Torque Spreader Strip. To prevent rust we recommend painting the oil pan and exposed metal.
4. Clean out oil pan bolt holes completely, ensuring that there is no RTV, dirt, etc. at base of holes. Failure to do so may result in cracking of plates. We recommend using a M6 x 1.0 Tap , but you may use a pick if necessary
5. Ensure that the contact surface of all parts are clean.
6. Using 3mm Allen wrench, thread studs into oil pan mounting holes . DO NOT install the studs in the 6 holes on the rear corner at the Oil Pressure Regulator to allow for baffle clearance. If you experience difficulty inserting the studs, please ensure that the holes are thoroughly clean.
7. Test fit the oil pan brace on oil pan. Drain Plug must be removed. If the holes do not line up, then flip the brace over. Depending on how banged up your oil pan is you may need to pry the lip out to allow for proper fitment.
8. Apply a 4 - 6mm continuous bead of Permetex The Right Stuff (or silicone sealant) to the bottom of the engine along the inside of the studs. Follow the manufactureres directions for allowable time but most recommend installation within 1-5 minutes.
9. Lower oil pan onto studs at an angle as pictured, this allows the baffle to clear the rotor housing.
10. Install remaining six studs prior to applying any pressure to the oil pan
11. Install Oil Pan Brace
12. Thread hex nuts onto oil pan studs.
13. Torque nuts gradually and evenly to 104 in-lbf. Do not over torque nuts as this may cause studs to break
14. Allow a minimum of 24 hours for RTV to cure
This complete how-to can also be found on our website.

Thread
Thread Starter
Forum
Replies
Last Post