
Vacuum rats nest starting from scratch....


Thread Starter
Junior Member
Joined: May 2010
Posts: 46
Likes: 0
From: Greensboro, NC
Vacuum rats nest starting from scratch....
As my project continues I finally worked up the nerve to pull off my upper intake not due to lack of knowledge but just pure fear of what it may contain. My fears were realized and there are tons of broken parts and missing pieces. What would be my best bet on stock twins to simplify and start all the way over?


Just do a big printout of the vacuum diagram and go to work. It's really not as hard as it looks and as others make it out to be.
A while back, I took a good copy of the colored vacuum diagram to Kinko's on a flash drive. They printed it on 11x17 paper in color and laminated the print for $6. I've been using it for years, it's a great reference.
Anyhow, get some good silicone vacuum hose from Hose Techniques, a set of my Viton check valves (PM me for info if you don't have a set), a few replacement solenoids if you have some broken ones, and a Saturday afternoon.
If the stock vacuum hose is on there rock solid, just leave it be. No sense replacing it, the one on there works perfectly and is definitely not coming off. Any that are loose or broken replace with silicone. Replace all the lines to/from the intake manifold, the MAP sensor, pressure tank, etc. with silicone. Put in the new check valves, button it up, done.
Dale
Thread Starter
Junior Member
Joined: May 2010
Posts: 46
Likes: 0
From: Greensboro, NC
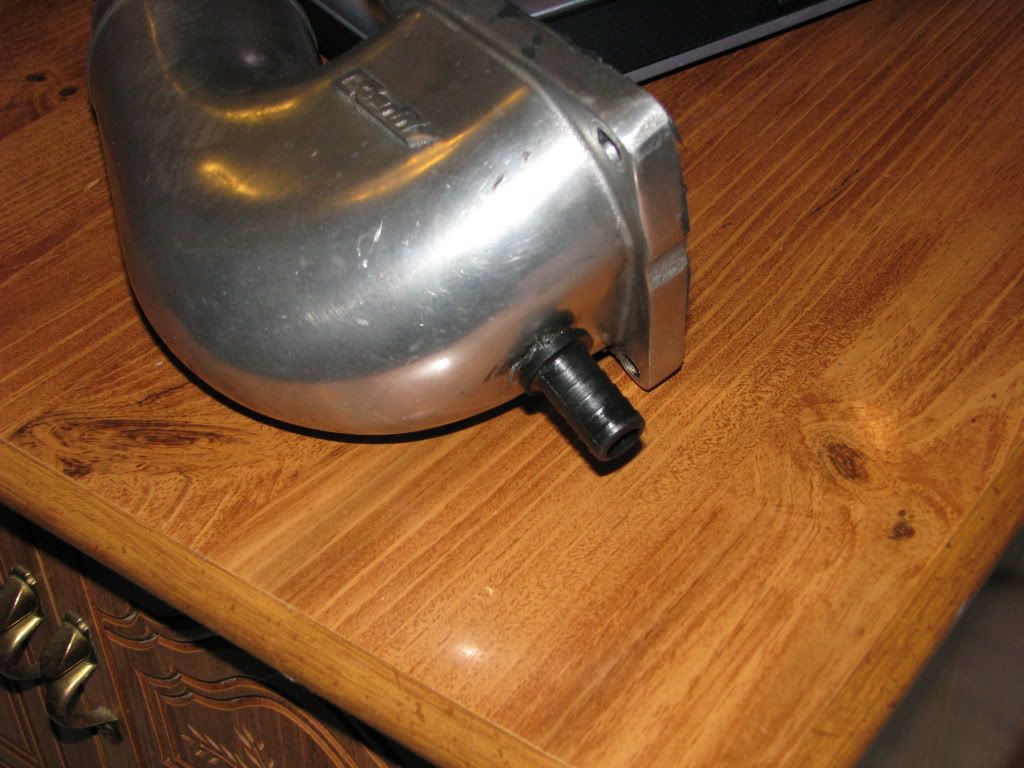
why the **** would anyone do this? I assume thats for some sorta IAC on the bottom of the intake manifold? I would also assume it is normally eliminated once one of these are installed.. This thing is just loosely sitting in there. I really believe they didnt understand the concept of boost or vac....

While you're under there its a good idea to test your solenoids as well. Dgeesaman has a great write up on how to do it (you need a mityvac and a 9v battery or a 12vdc power source like a PC power supply).
Wiggle the connections on your solenoids, if they break replace them. My theory is if stuff is so brittle it breaks when you touch it you should replace it anyway.
I also re-wrapped parts of my wiring harness because the old wrap was so brittle it actually cracked to pieces when I moved it.
Making a clean spot in the engine bay leads to all kinds of work lol.
By the way, I can personally attest to Dale's viton check valves, I bought 2 sets of those suckers and they are outstanding.
Last edited by twinsinside; May 18, 2010 at 08:32 PM. Reason: addendum
Thread Starter
Junior Member
Joined: May 2010
Posts: 46
Likes: 0
From: Greensboro, NC
all of the solenoids look like pure hell half with broken vents other have have broken vac connectors lol. Is there a cheap place to pick these things up? Also i found this simplified vac diagram is it acceptable to put the car to this manner with no issues?

Definitely doesn't seem so bad i just hate not being able to have a proper reference to look at it as new as im missing alot of items i think... Also what is your experience with oil in the intake and throttle body. What typically causes this issue i would assume to much/wrong weight oil and a screwy PCV system. Also they had some nipple on the back of the existing greddy power elbow that is just in there lol huggeeee boost leaks everywhere...

That being said, too much oil can be an indication of the turbos having worn or blown seals. The only real way to know is to clean out the intake track (piping and intercooler), then run the car for again with everything back together. Check the intake track after 50-100 miles of casual driving and see if you have oil back in the intake track. If you do, the turbos are done.
I assume thats for some sorta IAC on the bottom of the intake manifold? I would also assume it is normally eliminated once one of these are installed.. This thing is just loosely sitting in there. I really believe they didnt understand the concept of boost or vac....
That's for the Accelerated Warm-up System (AWS). Most people just eliminate the system. That's a shame the previous owner drilled out the Greddy elbow for that. I would just remove it and fill/plug the hole.
Trending Topics
There's a number of different ways you can simply the vac hose.
You can run a "simplified sequential" if you want to keep the turbos the way they function now.
Basically "simplified" translates into "remove all emissions related equipment and double throttle system" . I don't have to worry about emissions but I have read that it can/will affect your ability to pass smog checks and in some cases visual checks.

Thread
Thread Starter
Forum
Replies
Last Post
streetlegal?
New Member RX-7 Technical
13
Mar 17, 2022 02:46 PM
1993fd3sracer1
1st Generation Specific (1979-1985)
20
Sep 7, 2015 11:50 AM
12abridgeport
1st Generation Specific (1979-1985)
2
Aug 17, 2015 06:28 PM