Tearing down my FD

 02-01-07, 08:33 AM
#52
Original Gangster/Rotary!

iTrader: (213)
Originally Posted by FJDRX7
heat the 19mm bolt a bit, it will come off
 02-04-07, 07:41 AM
#53
still 1.3 liter v8 eater
Join Date: Sep 2006
Location: San Diego, CA
Posts: 546
Likes: 0
Received 0 Likes
on
0 Posts
Originally Posted by pincusa
Looks like a good project. A few thoughts having looked through the pictures:
When you do open the motor up, get some plywood to put the internals on. You don't want rotors, E-shafts, or other machined parts on the floor getting scratched.
For cleaning, start to line up a parts washer and a few gallons of carb cleaner for the rotors.
Hard to tell from the pictures, but please be sure to use some jack stands. The car is light, but not that light...
Good luck! I've seen my garage look like that many time (I'm on my third engine)
you should put them on a hanger, each marked, and dip them in the carb cleaner too.
 02-04-07, 09:39 AM
#55
Original Gangster/Rotary!
iTrader: (213)
Originally Posted by telum01
i'm going to go with all-new seals, springs, etc. with all the work i'm putting into this i want to cover everything i can.
02-06-07, 11:39 AM
#56
Rotary Enthusiast
Thread Starter

Join Date: Apr 2006
Location: Grovetown, Ga
Posts: 849
Likes: 0
Received 0 Likes
on
0 Posts
my impact wrench (230 lb/ft @ 90 psi) didn't do a damn thing to the 19mm bolt. my buddy's impact wrench (500 lb/ft @ 90 psi) didn't do a damn thing to the 19mm bolt. my buddy's impact wrench on NAWWWZZ (eleventybillion lb/ft @ 120 psi) pulled that sucker out. so now the engine is ready to come apart!!
 02-06-07, 08:35 PM
#58
Rotary Enthusiast
Thread Starter
Join Date: Apr 2006
Location: Grovetown, Ga
Posts: 849
Likes: 0
Received 0 Likes
on
0 Posts
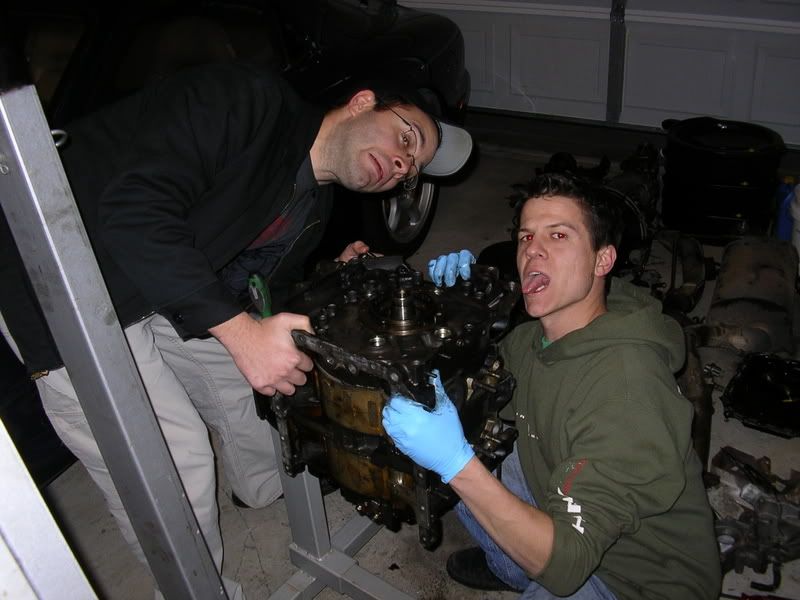
total labor time was only about 20 minutes. it was stupid easy. the camera was acting up so we only got a couple of pics. i'll take some more tomorrow and i'll make sure i get some good ones to show the condition of the housings. i found the coolant seal that was the cause of this adventure.
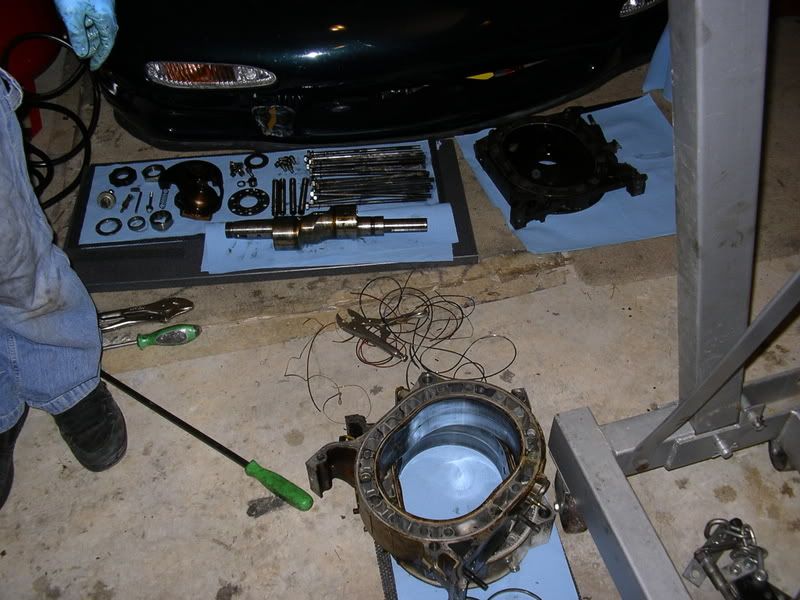
the tension bolts are all numbered, rotors are labeled, seals and such aren't sorted because they're getting replaced anyway. i've been awake for 28 hours now, so i'm gonna stop now. i'll put up more pics, details, and whatever else tomorrow.


 02-06-07, 10:59 PM
#63
Rotary Enthusiast
Thread Starter
Join Date: Apr 2006
Location: Grovetown, Ga
Posts: 849
Likes: 0
Received 0 Likes
on
0 Posts
Originally Posted by DonVito
I look a lil "special" in that top pic... :/

Originally Posted by CrackerJackToy
Wow, great thread! Keep the pix acoming!
02-07-07, 11:23 AM
#64
Good work... keep the posts coming.....
in the deep end? maybe like Herblennys and recover EVERYTHING!!! thats also a sweet build.... that is what im going to do some time to my FD just make everything look brand new.... lol lots of work thats for sure.... but well worth it
Pr�digy
Originally Posted by telum01
i figure if i'm gonna jump into a project like this, i might as well jump in the deep end.
in the deep end? maybe like Herblennys and recover EVERYTHING!!! thats also a sweet build.... that is what im going to do some time to my FD just make everything look brand new.... lol lots of work thats for sure.... but well worth it
Pr�digy
02-07-07, 02:15 PM
#65
Rotary Enthusiast
Thread Starter
Join Date: Apr 2006
Location: Grovetown, Ga
Posts: 849
Likes: 0
Received 0 Likes
on
0 Posts
when i get in the money i'm waiting for i'll be able to get more parts and start putting things together. as i get things together i'll be doing a few write-ups, such as the switch panel i'm putting in.
02-07-07, 04:53 PM
#66
Rotary Enthusiast
Thread Starter
Join Date: Apr 2006
Location: Grovetown, Ga
Posts: 849
Likes: 0
Received 0 Likes
on
0 Posts
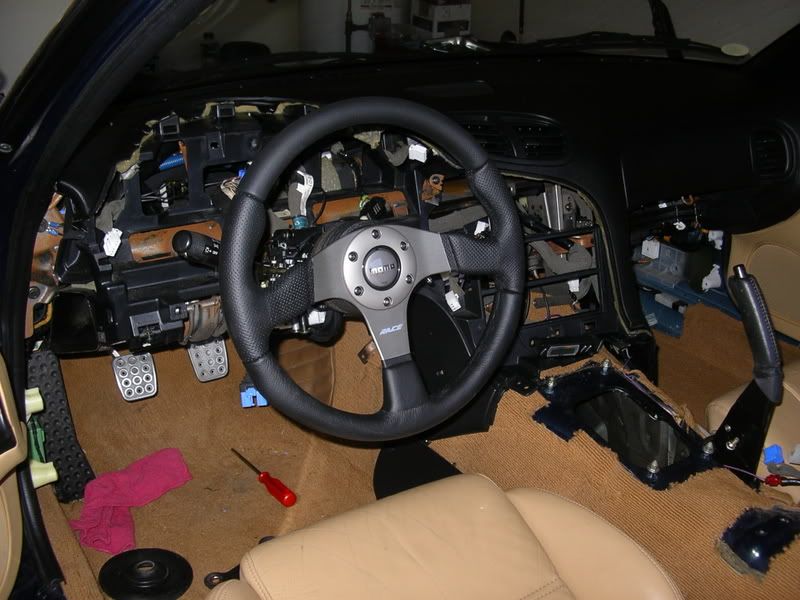
here's a pic of the interior, which is still torn up, but it shows the new steering wheel and you can also see the Blitz DCIV FATT sitting on the transmission tunnel:
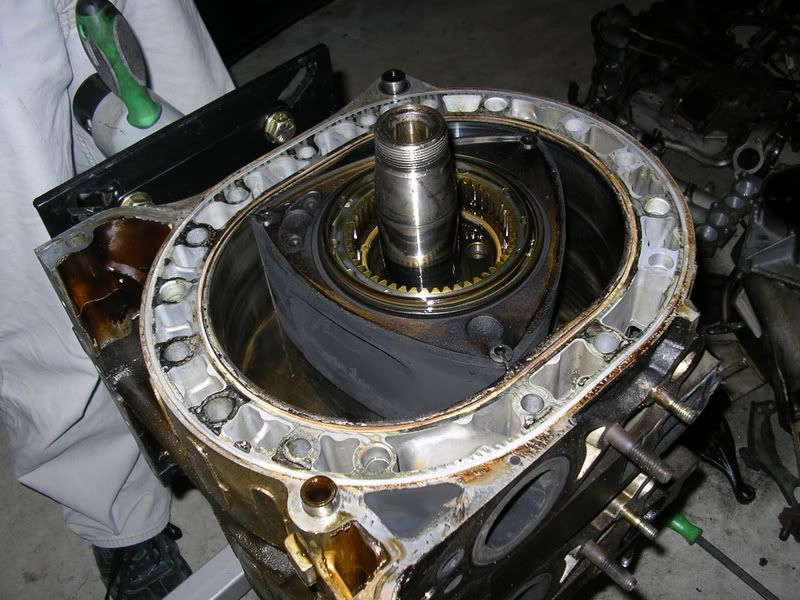
there's a ton of carbon buildup on the rotors, which isn't cool. it doesn't help that the engine sat for so long before i tore it apart. oh well, it's getting rebuilt anyway!
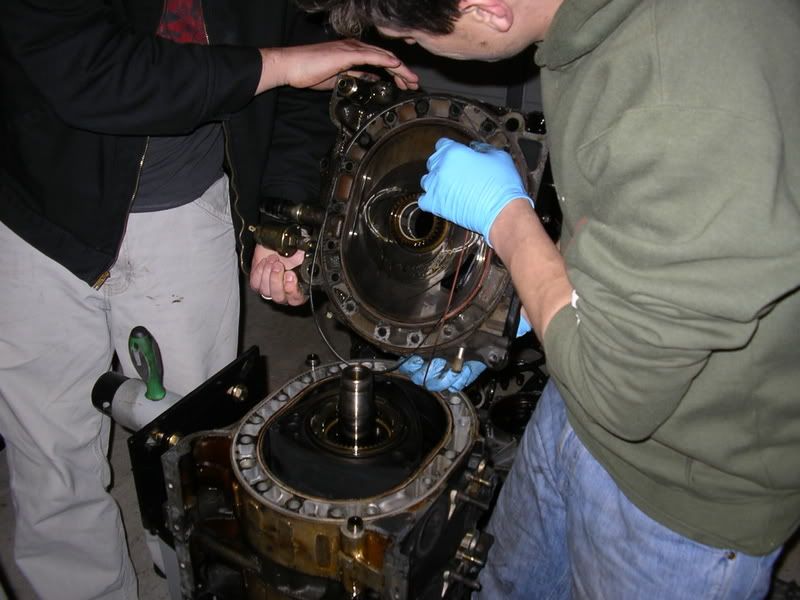
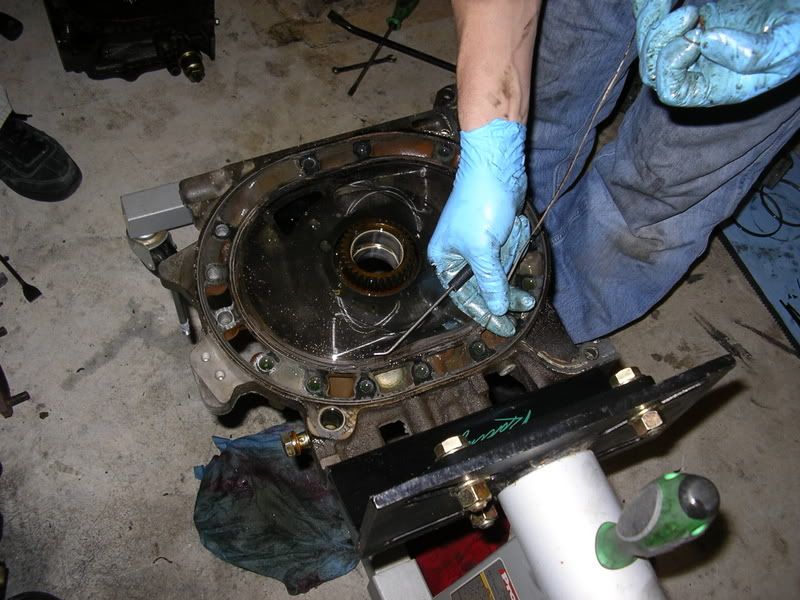
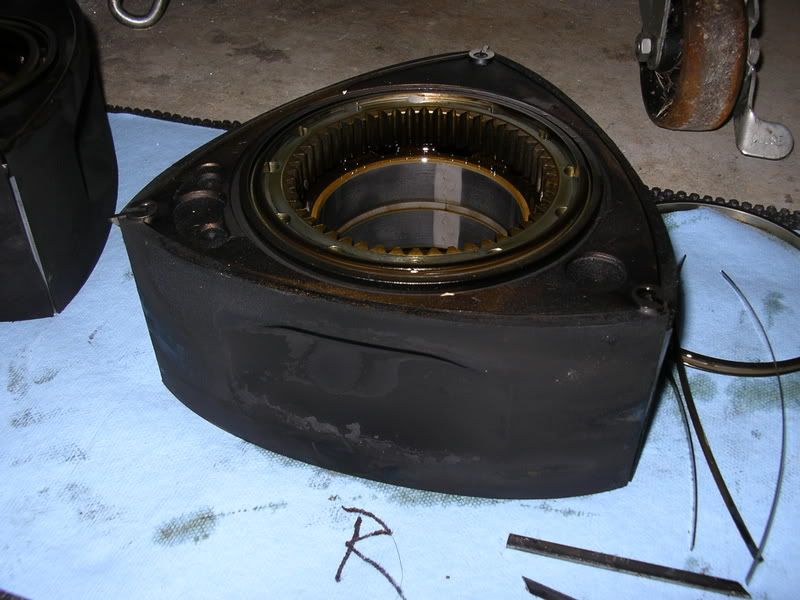
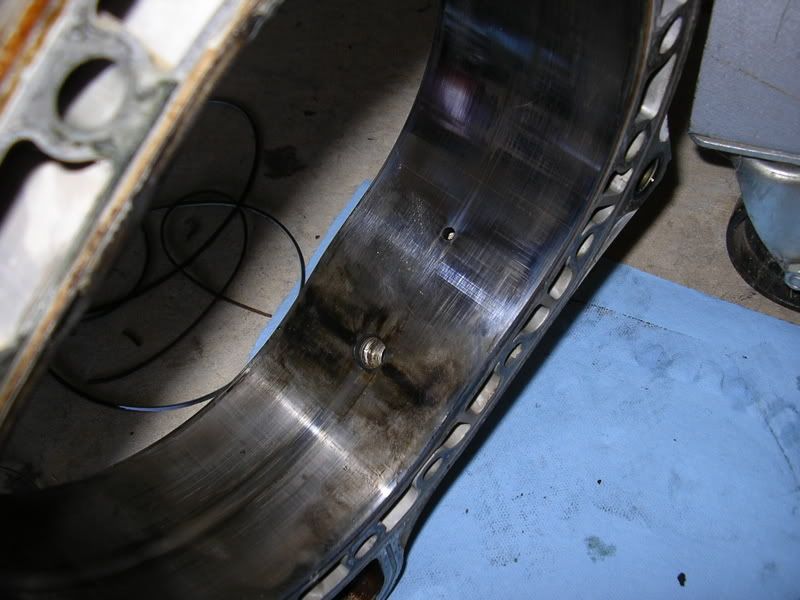
here's some pics of the front rotor, housing, and end plate:
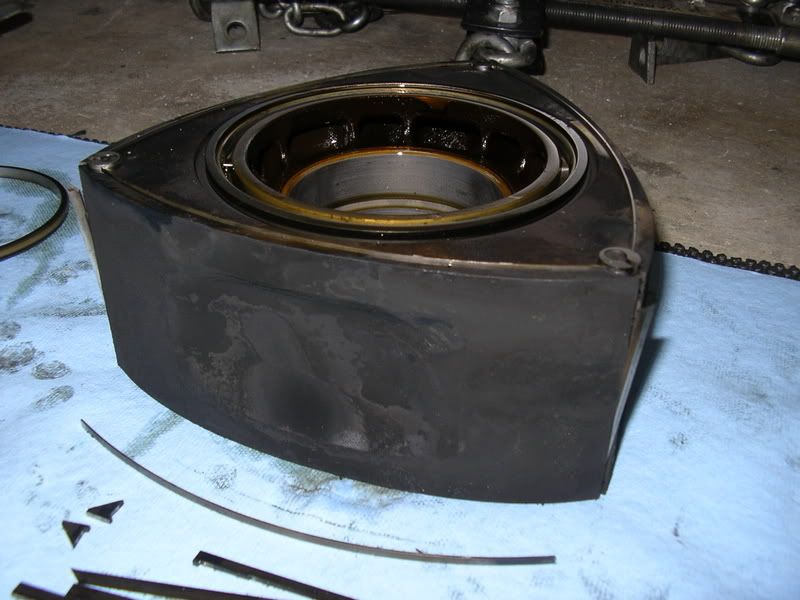
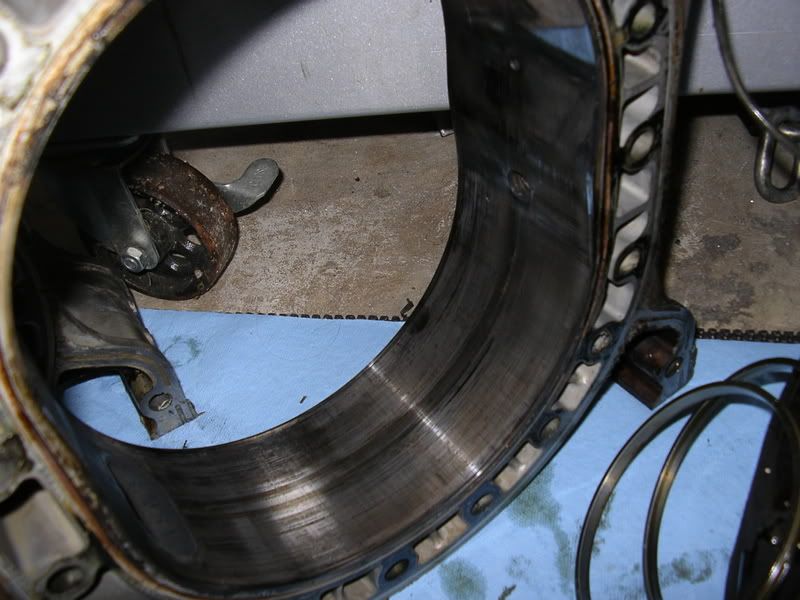
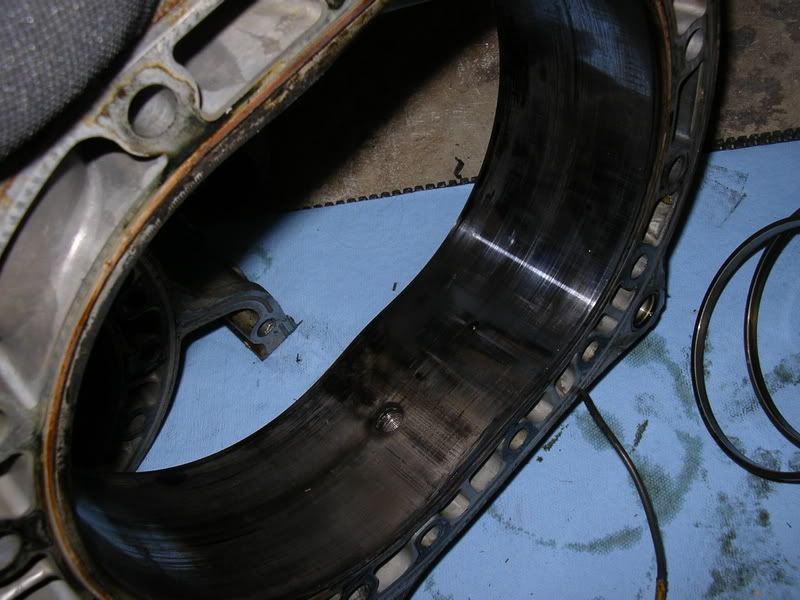

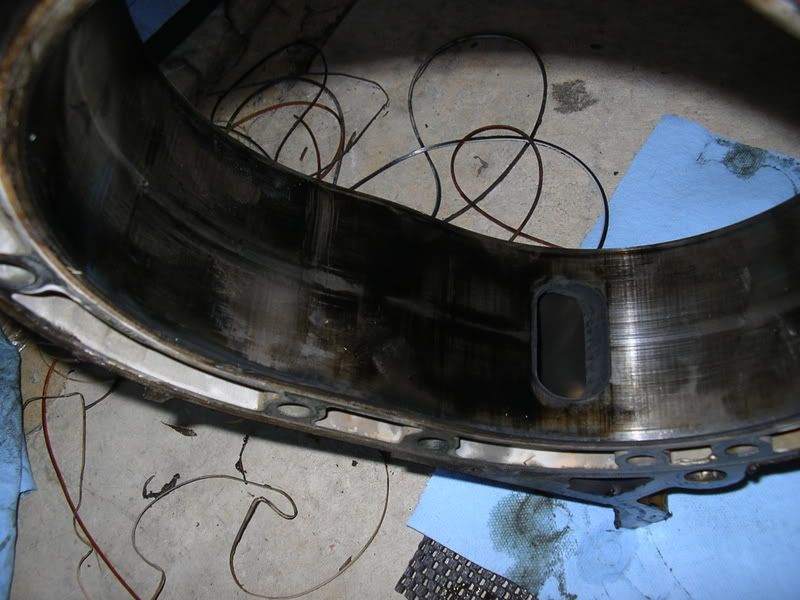
here's the rear rotor and housing:
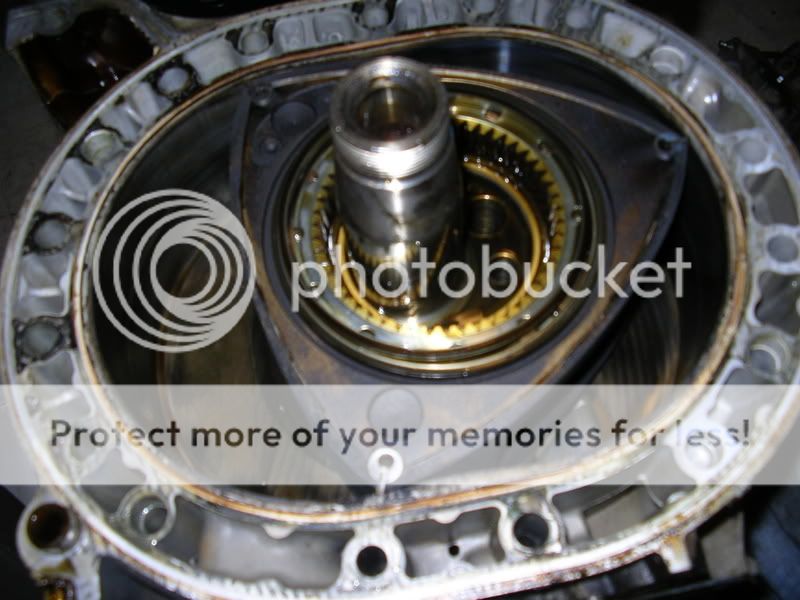
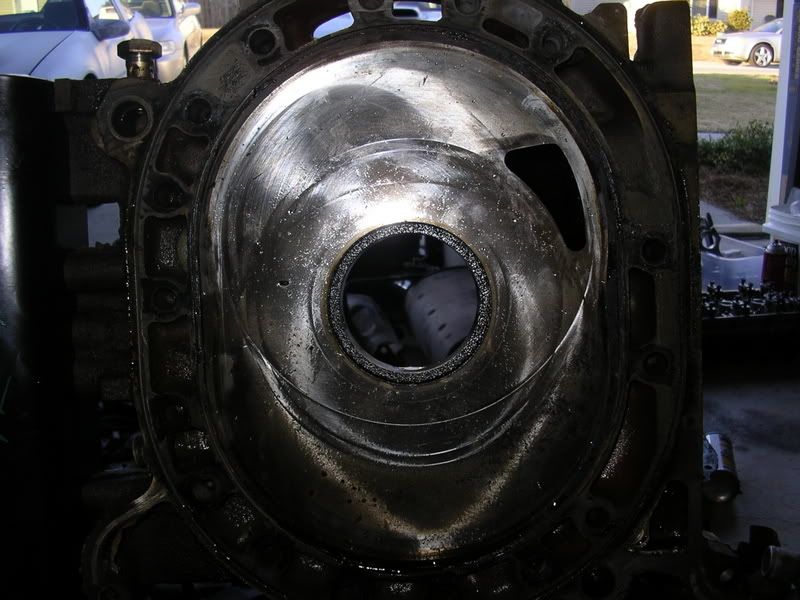
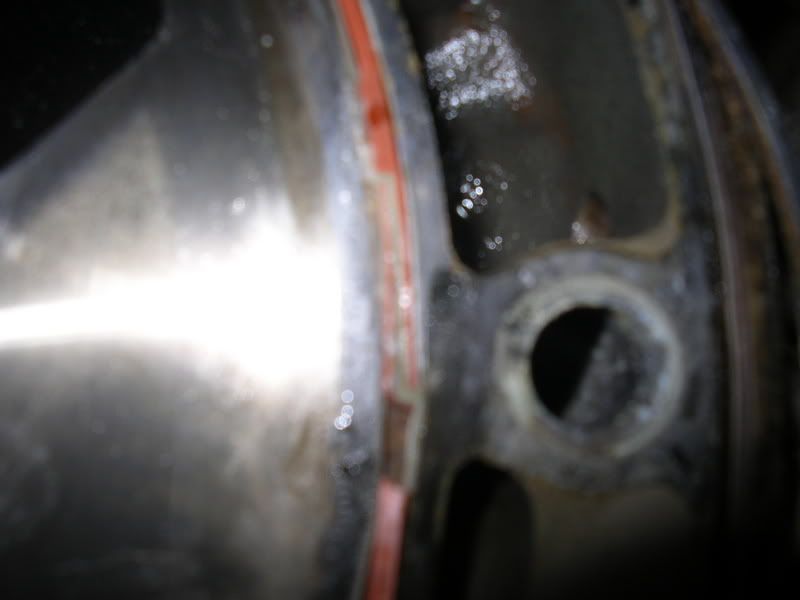
here's the bad seal. the pic sucks, but you can see where the coolant made its way through the seal. the seal broke extremely easily when we pulled the plate off due to the coolant getting through it:
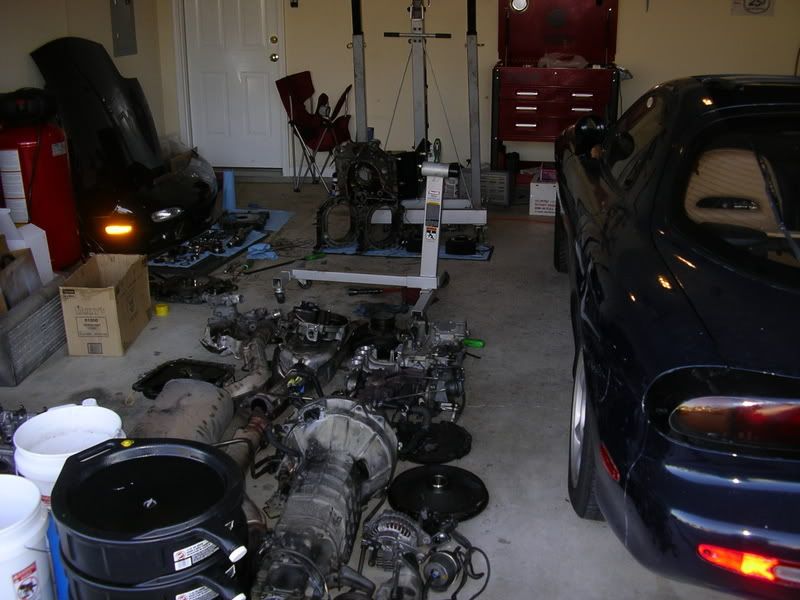
and here's a pic of the mess i've made:
there's a ton of carbon buildup on the rotors, which isn't cool. it doesn't help that the engine sat for so long before i tore it apart. oh well, it's getting rebuilt anyway!
here's some pics of the front rotor, housing, and end plate:
here's the rear rotor and housing:
here's the bad seal. the pic sucks, but you can see where the coolant made its way through the seal. the seal broke extremely easily when we pulled the plate off due to the coolant getting through it:
and here's a pic of the mess i've made:

 02-07-07, 10:59 PM
#71
Original Gangster/Rotary!
iTrader: (213)
Those rotor housings dont look so good. How many miles on them? Also, to help clean the rotors of carbon, after using carb cleaner and a razor blade scraper, I take a die grinder to them with some green 3M rolloc bristles, works like a charm
02-08-07, 09:05 AM
#72
Rotary Enthusiast
Thread Starter
Join Date: Apr 2006
Location: Grovetown, Ga
Posts: 849
Likes: 0
Received 0 Likes
on
0 Posts
less than 48k miles... i'm hoping they'll look a little better once cleaned up and i can see what really needs to be done with them. i hope they don't need to be replaced because that's not gonna look too pretty for my budget.
02-08-07, 03:33 PM
#73
Mate, you better kiss your "budget" good bye. I had to replace rotors and housings that I wasn't counting on but at the end of the day, if in doubt, replace it.
I must have been lucky I had no problem with the 19mm bolt of flywheel nut using only cheap air tools.
I went with all new seals, bearings, etc as well. I'm just ready to re-assemble mine now.
Cleaning & measuring stage takes ages, be sure to do a thorough job!
Good luck and keep the pics coming.....I'll keep an eye on this thread!!
My thread: https://www.rx7club.com/build-threads-292/fd-rebuild-down-under-pics-602080/
02-08-07, 04:08 PM
#74
Rotary Enthusiast
Thread Starter
Join Date: Apr 2006
Location: Grovetown, Ga
Posts: 849
Likes: 0
Received 0 Likes
on
0 Posts
Originally Posted by wjp005
Mate, you better kiss your "budget" good bye. I had to replace rotors and housings that I wasn't counting on but at the end of the day, if in doubt, replace it.
I must have been lucky I had no problem with the 19mm bolt of flywheel nut using only cheap air tools.
I went with all new seals, bearings, etc as well. I'm just ready to re-assemble mine now.
Cleaning & measuring stage takes ages, be sure to do a thorough job!
Good luck and keep the pics coming.....I'll keep an eye on this thread!!
My thread: https://www.rx7club.com/showthread.php?t=602080
i like your thread, looks like you're doing some good work. sorry about those seals and housings, though!
02-08-07, 04:33 PM
#75
That slit youve highlighted on the inner coolant seal is where the seal joins to itself, thats not where the coolant got through (if you look at your new seal, you will see that same strip - and its always placed just above and right of the intake port)
still, it dont matter, at least your getting the build on a bit! Looking good...keep em coming
still, it dont matter, at least your getting the build on a bit! Looking good...keep em coming