Tearing down my FD
 01-25-07, 12:34 AM
#26
Rotary Enthusiast
Thread Starter

Join Date: Apr 2006
Location: Grovetown, Ga
Posts: 849
Likes: 0
Received 0 Likes
on
0 Posts
unfortunately no, we didn't pop the 19mm nut off the main pulley. i realized it after we had the engine back to my house. i'm going to be getting some air tools of my own soon (hopefully today!) and i'll worry about it once i even have the capability to get the nut off. got any suggestions for the 19mm nut?
 01-25-07, 06:59 AM
#27
Original Gangster/Rotary!

iTrader: (213)
Originally Posted by telum01
unfortunately no, we didn't pop the 19mm nut off the main pulley. i realized it after we had the engine back to my house. i'm going to be getting some air tools of my own soon (hopefully today!) and i'll worry about it once i even have the capability to get the nut off. got any suggestions for the 19mm nut?
If you buy your own air tools, you'll need a serious gun and a compressor about as big as you are. A small rinky-dink compressor won't cut it.
01-25-07, 08:56 AM
#28
almost done
Join Date: Dec 2001
Location: 250 HZ
Posts: 1,049
Likes: 0
Received 0 Likes
on
0 Posts
I'm surprised that only goodfella mentioned the front pulley bolt, if the impact wrench does not work just sit the engine bottom side down put the flywheel back on and to make a quick flywheel stopper get 1/4" flat bar that is about 3' then drill 2 holes on the bar so you can fit over two of the three clutch alignment guides that are on the flywheel, then have a friend try and hold the engine down while you at attempt to remove the 19mm bolt with a breaker bar with at least 3' of leverage, good luck!
the front pulley bolt always comes out first, i remember a looong time ago the first time my friends and i tried to remove the front pulley bolt after the engine was out sitting on a old tire.... that s%#t was a disaster, but when you learn the hard way you don't forget!
the front pulley bolt always comes out first, i remember a looong time ago the first time my friends and i tried to remove the front pulley bolt after the engine was out sitting on a old tire.... that s%#t was a disaster, but when you learn the hard way you don't forget!
01-25-07, 11:44 AM
#29
Originally Posted by GoodfellaFD3S
Yup, bring the engine back to his place. I wouldnt even attempt to get it off the breaker bar way with the motor sitting on the garage floor like that. Ideally you'd use a breaker bar on it while motor was still bolted down to the subframe, before you pulled it out.
If you buy your own air tools, you'll need a serious gun and a compressor about as big as you are. A small rinky-dink compressor won't cut it.
If you buy your own air tools, you'll need a serious gun and a compressor about as big as you are. A small rinky-dink compressor won't cut it.
definately. get at minimum a 30 gallon belt driven compressor and a 1/2", 600 lbft impact gun from IR. Ideally, you'd get a 60 or 80 gallon compressor and a 3/4" 1000 lbft IR impact gun.
01-25-07, 12:16 PM
#30
Rotary Enthusiast
Thread Starter
Join Date: Apr 2006
Location: Grovetown, Ga
Posts: 849
Likes: 0
Received 0 Likes
on
0 Posts
damnit! well, things were going quite smoothly for so long, something was bound to happen. thanks for the advice and i'll see what i can do.
on a happier note, look what came in from Brainchild Customs today!
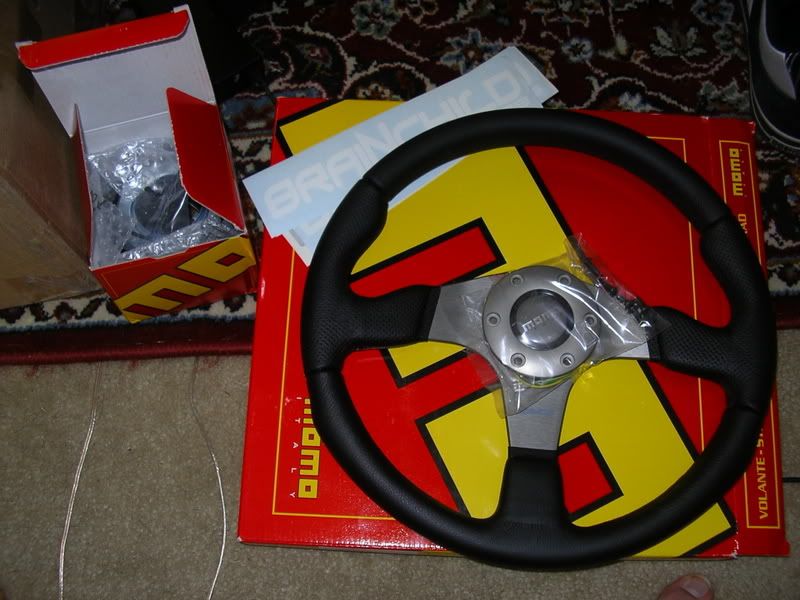
i was a little worried about how i would hook up a botton for the horn. but the center of the steering wheel is actually the horn button. this thing is gorgeous and very nice quality
on a happier note, look what came in from Brainchild Customs today!
i was a little worried about how i would hook up a botton for the horn. but the center of the steering wheel is actually the horn button. this thing is gorgeous and very nice quality
01-25-07, 12:34 PM
#31
Rotary Enthusiast
Thread Starter
Join Date: Apr 2006
Location: Grovetown, Ga
Posts: 849
Likes: 0
Received 0 Likes
on
0 Posts
stock vs Momo:
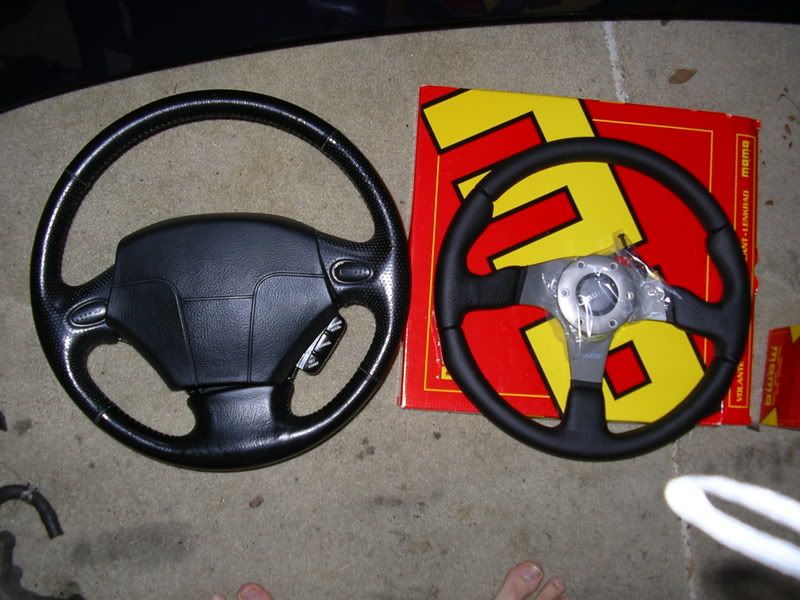
the Momo looks a little smaller than it really is because it's sitting lower. there's really about 1/2" difference in diameter (1/4" all around).
the Momo looks a little smaller than it really is because it's sitting lower. there's really about 1/2" difference in diameter (1/4" all around).
01-25-07, 03:52 PM
#32

that 19mm bolt is a BITCH.
I did it without air tools though...heres how:
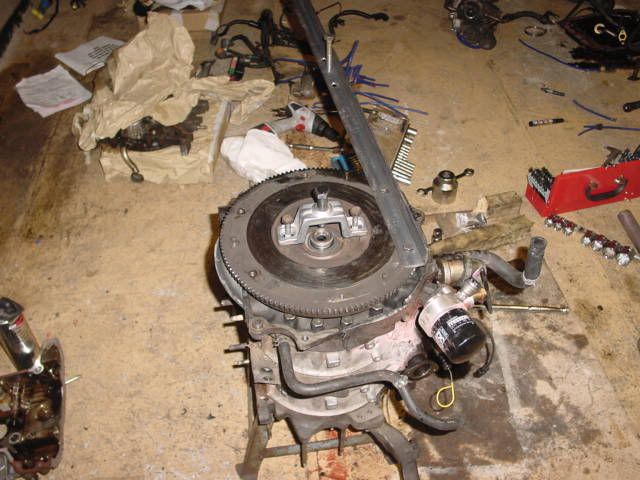
I took a long piece of angle iron and fixed it as so (youll need to re-install your flywheel, woodruff key and nut for this - it doesnt need to be uber tight though)
just drill your angle iron and bolt it to the flywheel using the nuts.
I then used a 1/2 inch drive 4foot breaker bar with a 3 foot pole slid over the end of it to crack the bastard off. The angle iron stops the engine rotating.
The engine WILL try and lift off the ground when you do this. I got two (yes, two) friends to stand on the engine, while i put as much pressure as i could on the nut without the engine lifting, and then i rocked the bar up and down a few mm (just bounce on it)
eventually it will break loose, but be prepared to loose some hair.
I did it without air tools though...heres how:
I took a long piece of angle iron and fixed it as so (youll need to re-install your flywheel, woodruff key and nut for this - it doesnt need to be uber tight though)
just drill your angle iron and bolt it to the flywheel using the nuts.
I then used a 1/2 inch drive 4foot breaker bar with a 3 foot pole slid over the end of it to crack the bastard off. The angle iron stops the engine rotating.
The engine WILL try and lift off the ground when you do this. I got two (yes, two) friends to stand on the engine, while i put as much pressure as i could on the nut without the engine lifting, and then i rocked the bar up and down a few mm (just bounce on it)
eventually it will break loose, but be prepared to loose some hair.
01-25-07, 03:53 PM
#33
Full Member
iTrader: (1)
Join Date: Sep 2004
Location: NY
Posts: 234
Likes: 0
Received 0 Likes
on
0 Posts
Looks like a good project. A few thoughts having looked through the pictures:
When you do open the motor up, get some plywood to put the internals on. You don't want rotors, E-shafts, or other machined parts on the floor getting scratched.
For cleaning, start to line up a parts washer and a few gallons of carb cleaner for the rotors.
Hard to tell from the pictures, but please be sure to use some jack stands. The car is light, but not that light...
Good luck! I've seen my garage look like that many time (I'm on my third engine)
01-25-07, 05:08 PM
#34
Rotary Enthusiast
Thread Starter
Join Date: Apr 2006
Location: Grovetown, Ga
Posts: 849
Likes: 0
Received 0 Likes
on
0 Posts
thanks for the advice, i'll go pick up some angle iron and plywood before i go any farther on the engine. i got an engine stand today and i ordered an adapter for it last night. it'll be a lil bit before i make any more progress on the engine, but i'll be sure to let everyone know how it goes.
i hope there are people learning from my experience (i sure have learned a lot so far), which is the main point of this thread.
i hope there are people learning from my experience (i sure have learned a lot so far), which is the main point of this thread.
01-26-07, 06:24 AM
#35
REPU Wanter
iTrader: (1)
Join Date: Sep 2002
Location: Cherry Point / Havelock NC
Posts: 725
Likes: 0
Received 2 Likes
on
2 Posts
It may take some heat, mine did. Oh and I bent a piece of angle iron like that pretty easily.
One note! Don't trust jacks ever. Infact the one in the picture looks like a cheap chinese one. Complacency is what Kills.
One note! Don't trust jacks ever. Infact the one in the picture looks like a cheap chinese one. Complacency is what Kills.
01-26-07, 06:44 AM
#37
Originally Posted by sevensheaven
It may take some heat, mine did. Oh and I bent a piece of angle iron like that pretty easily.
One note! Don't trust jacks ever. Infact the one in the picture looks like a cheap chinese one. Complacency is what Kills.
One note! Don't trust jacks ever. Infact the one in the picture looks like a cheap chinese one. Complacency is what Kills.
01-26-07, 04:52 PM
#39
Rotary Enthusiast
Thread Starter
Join Date: Apr 2006
Location: Grovetown, Ga
Posts: 849
Likes: 0
Received 0 Likes
on
0 Posts
i think i mentioned it earlier, but i just had to pull off a couple bolts and i had enough people with me that they could have easily lifted the car if something did happen to go wrong. i usually practice a good deal of safety
yes, it is.
Originally Posted by KINETIK_FD3S
^ looks like a craftsman jack.
01-31-07, 04:19 PM
#41
Rotary Enthusiast
Thread Starter
Join Date: Apr 2006
Location: Grovetown, Ga
Posts: 849
Likes: 0
Received 0 Likes
on
0 Posts
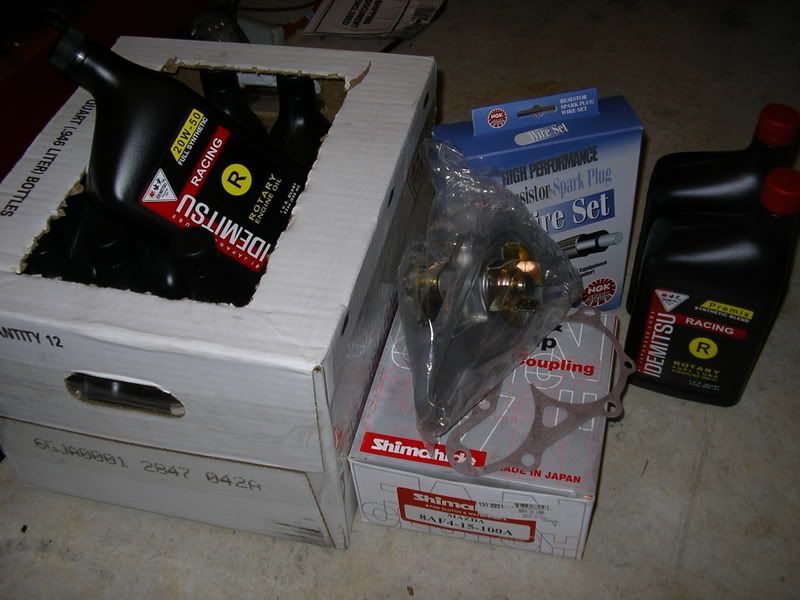
another goodie from my buddy Alex at Brainchild Customs:
Idemitsu Racing oil and premix, NGK spark plug wires, and a new water pump:
engine on the stand and ready to go:
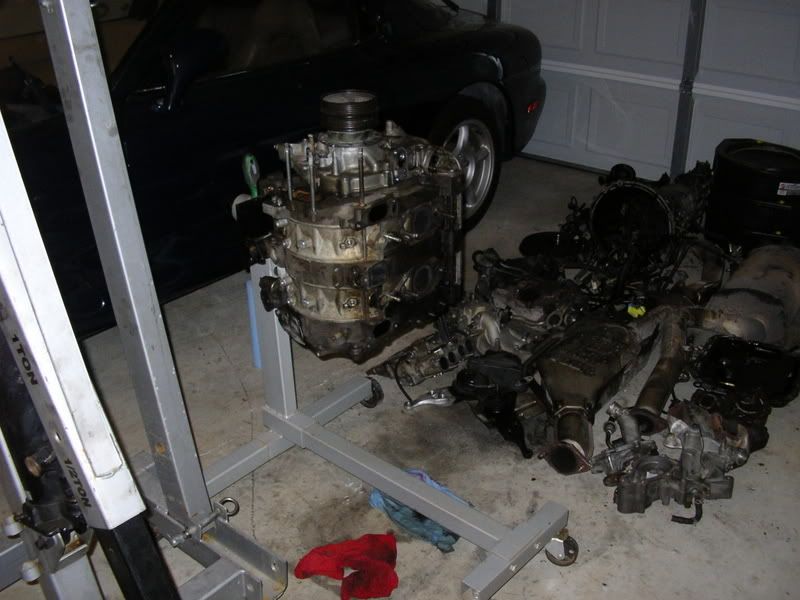
after just one pass with the industrial wipes, here's the difference:
Idemitsu Racing oil and premix, NGK spark plug wires, and a new water pump:
engine on the stand and ready to go:
after just one pass with the industrial wipes, here's the difference:
02-01-07, 12:34 AM
#42
Rotary Enthusiast
Thread Starter
Join Date: Apr 2006
Location: Grovetown, Ga
Posts: 849
Likes: 0
Received 0 Likes
on
0 Posts
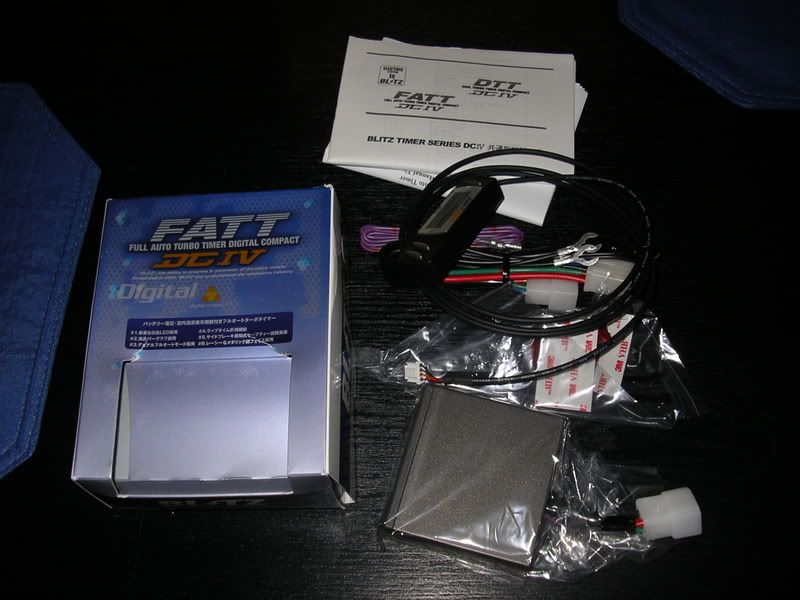
also from Brainchild Customs, an HKS turbo timer harness:
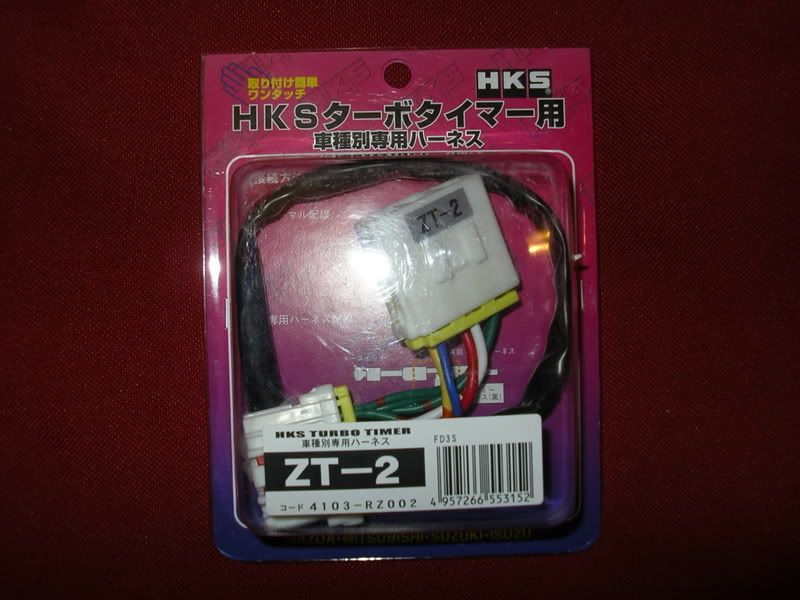
it came with the MOMO stuff, and i completely missed it. good thing my dumbass didn't throw the box out yet. it fits perfectly with the Blitz DCIV FATT.
it came with the MOMO stuff, and i completely missed it. good thing my dumbass didn't throw the box out yet. it fits perfectly with the Blitz DCIV FATT.
02-01-07, 01:36 AM
#44
Rotary Enthusiast
Thread Starter
Join Date: Apr 2006
Location: Grovetown, Ga
Posts: 849
Likes: 0
Received 0 Likes
on
0 Posts
i'm planning to go single down the road, but not just yet. i got the turbo timer because i'm not usually that patient and i don't usually like to wait for the engine to cool down. as for heat soak, i think the benefit of the engine idling outweighs the extra heat. i'm sure the heat generated from idling is a lot less than the amount generated while driving around. i'll be installing a manual fan control switch so i'm going to see if i can make the fans help out with the cool-down.
02-01-07, 01:57 AM
#46
Rotary Enthusiast
Thread Starter
Join Date: Apr 2006
Location: Grovetown, Ga
Posts: 849
Likes: 0
Received 0 Likes
on
0 Posts
i'll be getting one as soon as i can, but it will be after everything is back together. i'll look into what all the Power FC can do, i didn't know i'd be able to control the fans through it. thanks for the head's up.
02-01-07, 03:37 AM
#47
Originally Posted by telum01
stock vs Momo:
the Momo looks a little smaller than it really is because it's sitting lower. there's really about 1/2" difference in diameter (1/4" all around).
the Momo looks a little smaller than it really is because it's sitting lower. there's really about 1/2" difference in diameter (1/4" all around).
 02-01-07, 04:10 AM
#48
Rotary Enthusiast
Thread Starter
Join Date: Apr 2006
Location: Grovetown, Ga
Posts: 849
Likes: 0
Received 0 Likes
on
0 Posts
i wasn't worried about the cruise control. i only use cruise control on long trips and my FD won't be making any of those any time soon, i'll just have to rough it on those very rare occasions. i'm just glad it keeps the horn!
i installed the turbo timer and steering wheel, and did some more cleaning in the engine bay. so there's a little bit of progress for the night.
i installed the turbo timer and steering wheel, and did some more cleaning in the engine bay. so there's a little bit of progress for the night.
 02-01-07, 06:59 AM
#50
Originally Posted by latinFD
I just bought the SAME exact one, i'm just waiting for the hub adapter. Gotta say bye to the cruise control
I'll grab a picture of mine when I get over to the shop for your reference