
RE-A Sleek Light Install Help

Thread Starter
Joined: Mar 2003
Posts: 390
Likes: 13
From: Anaheim
I just picked up a used set of RE sleek lights and was wondering if anyone here knows of a write up or link to instruction manual. I know the chassis has to be trimmed a bit and I can prob figure it out by looking, but Id just like to cross ref with some documentation.
Any help is appreciated.
Thx!
Any help is appreciated.
Thx!

http://www.encompass-tech.com/photog...stallation.pdf
Try this it's how to install rotary extreme headlights their similar to the ones you have hope it helps
Try this it's how to install rotary extreme headlights their similar to the ones you have hope it helps

Thread Starter
Joined: Mar 2003
Posts: 390
Likes: 13
From: Anaheim
Oh...I got them through neweraparts. The price was right but it was kind of a hassle dealing with them.
Your other options are: rhdjapan, nengun, MizuumiBid2U, yahoo japan...to name a few.
Your other options are: rhdjapan, nengun, MizuumiBid2U, yahoo japan...to name a few.
Trending Topics
Thread Starter
Joined: Mar 2003
Posts: 390
Likes: 13
From: Anaheim
NewEra happened to have a used set off a customer car that they let go for cheap, otherwise I wouldnt have ordered from them. Just got lucky with the timing when I hit them up.
$2300 is absurd. RHDJapan is like $1400 brand new.
$2300 is absurd. RHDJapan is like $1400 brand new.
Thread Starter
Joined: Mar 2003
Posts: 390
Likes: 13
From: Anaheim
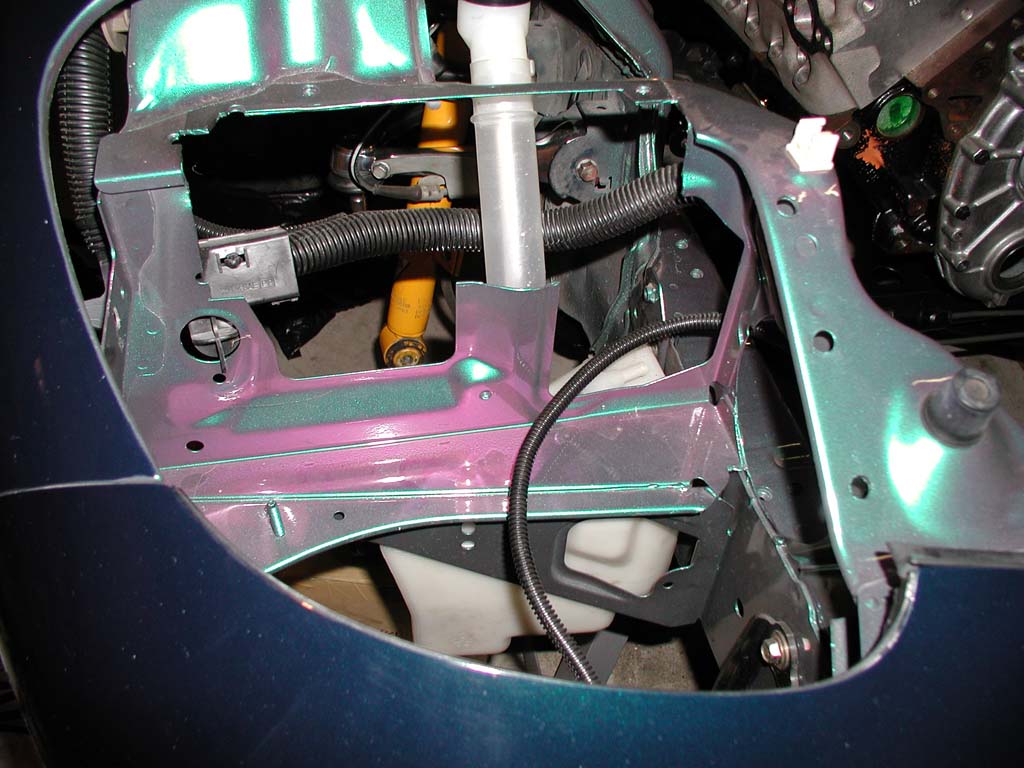
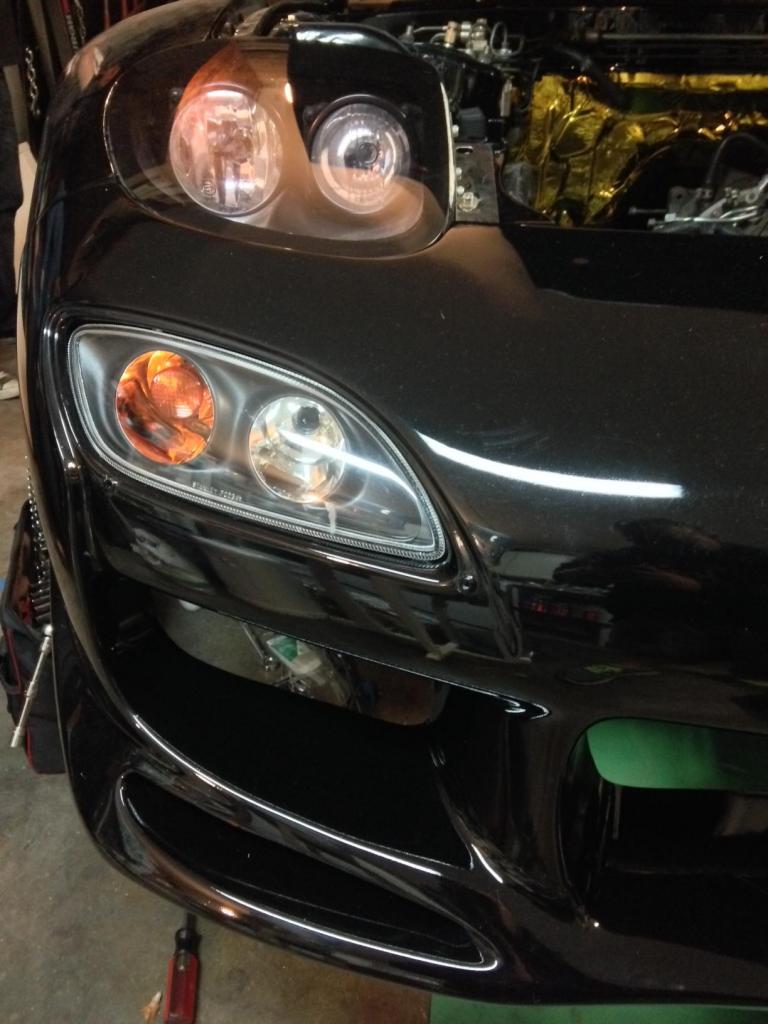
Finally got around to uploading the pics.
Installation was pretty straight forward. My air saw took a dive on me a while back so I had to do the cutting with a cut off wheel. I think the air saw would be a slightly easier approach since you really have to be careful with the wheel not to accidentally touch the fender, wiring harness, etc. It would prob be best to remove the fenders, but I was being lazy/cocky. Pretty much went smoothly and Im really happy with the results.
Heres some pics:
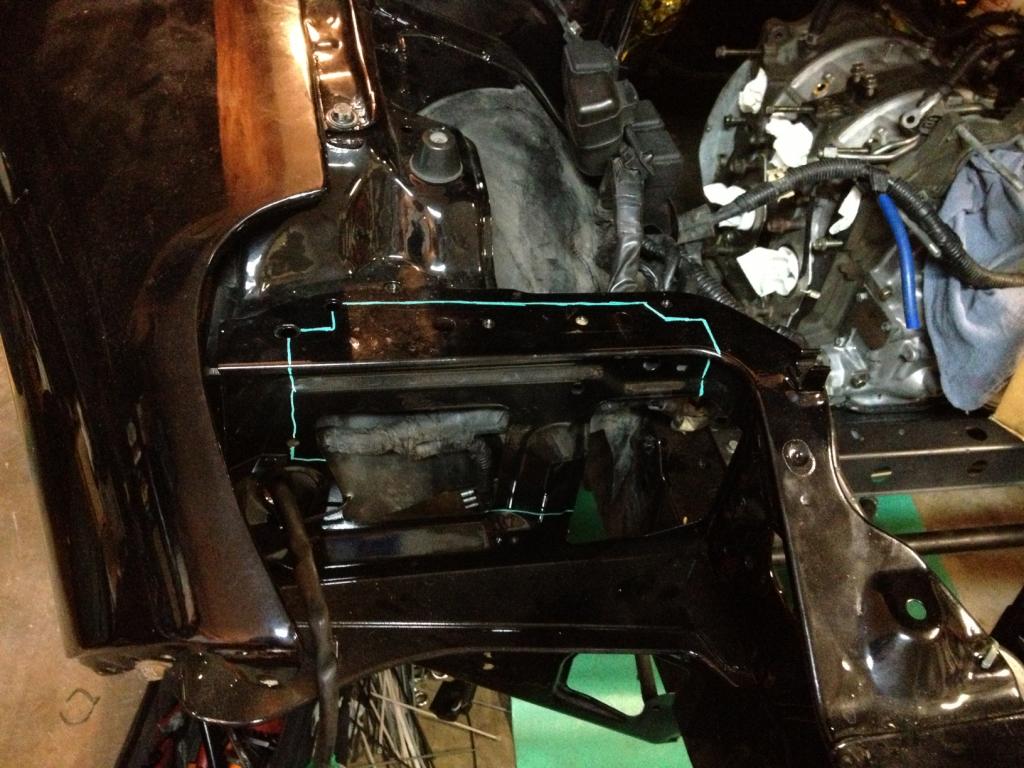
Found these images on FD3S.net and used them as a template of where to cut.
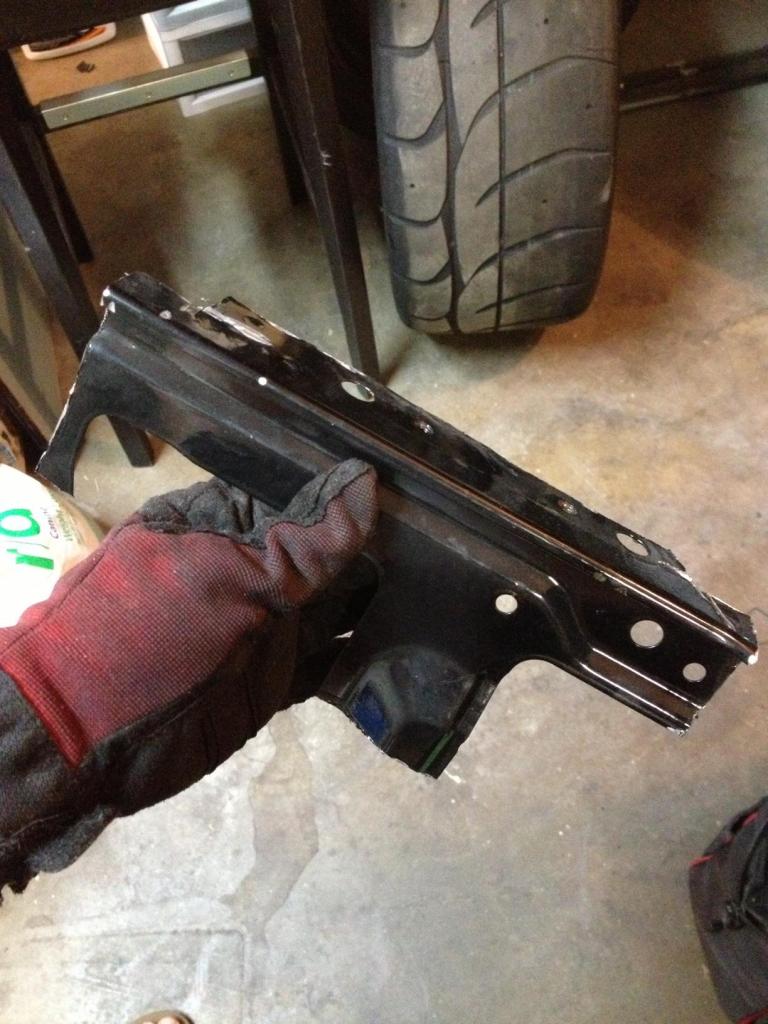
The fender is def in the danger zone when using a wheel.
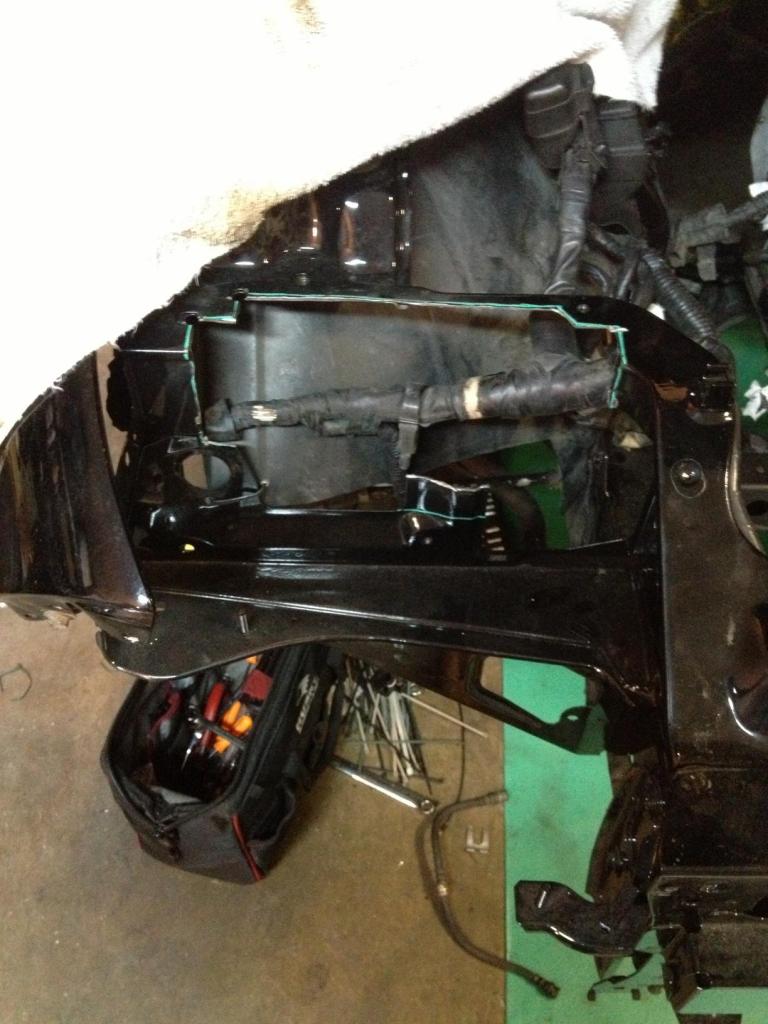
The harness sits right under the area youre cutting so be careful. I barely touched it and now need to repair a wire...
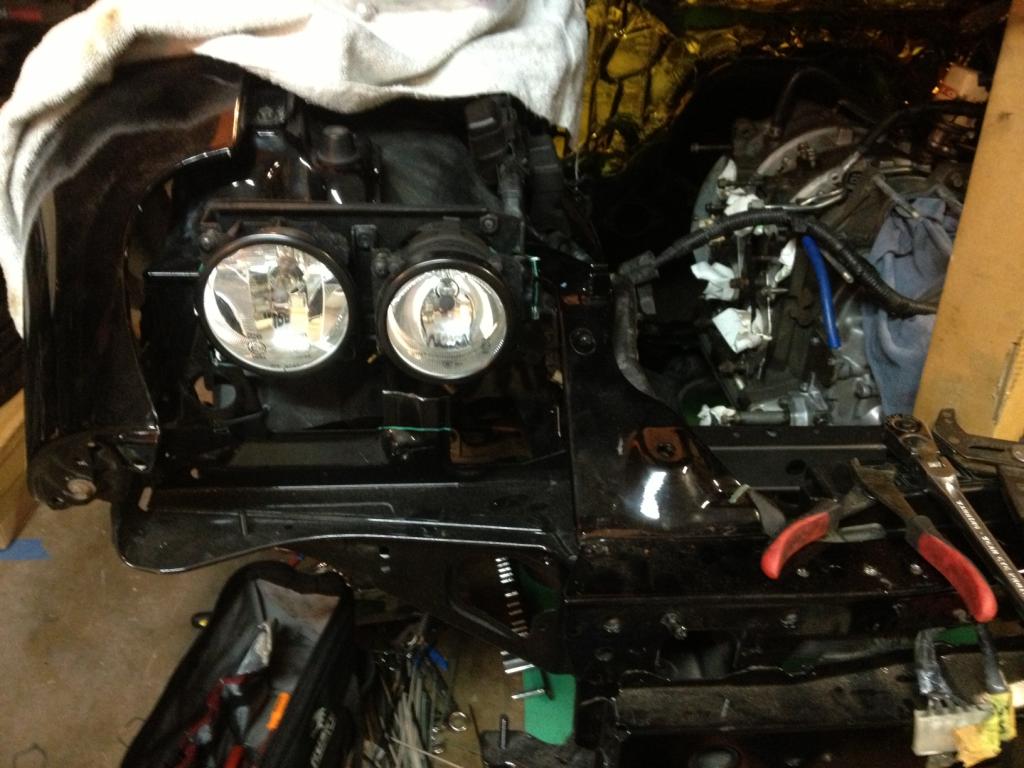
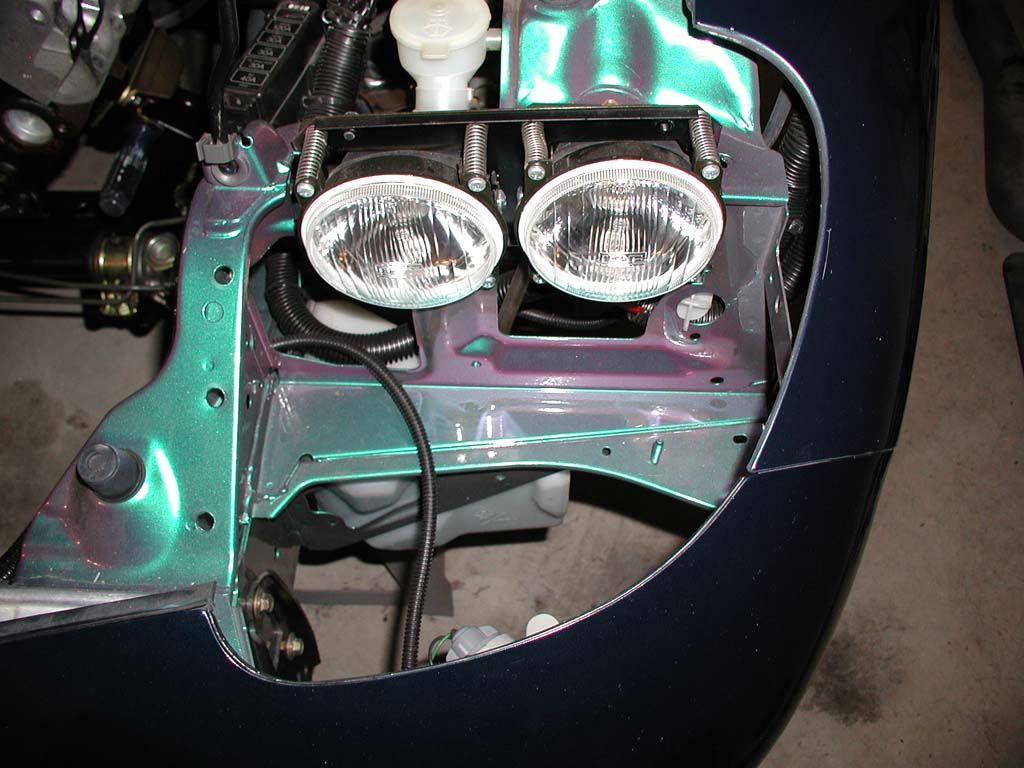
The bulb assembly mounts using two of the stock headlight assembly bolt locations. Ive read there is a third mounting point but I couldnt see how that is possible from looking at the setup. Chime in if you know.
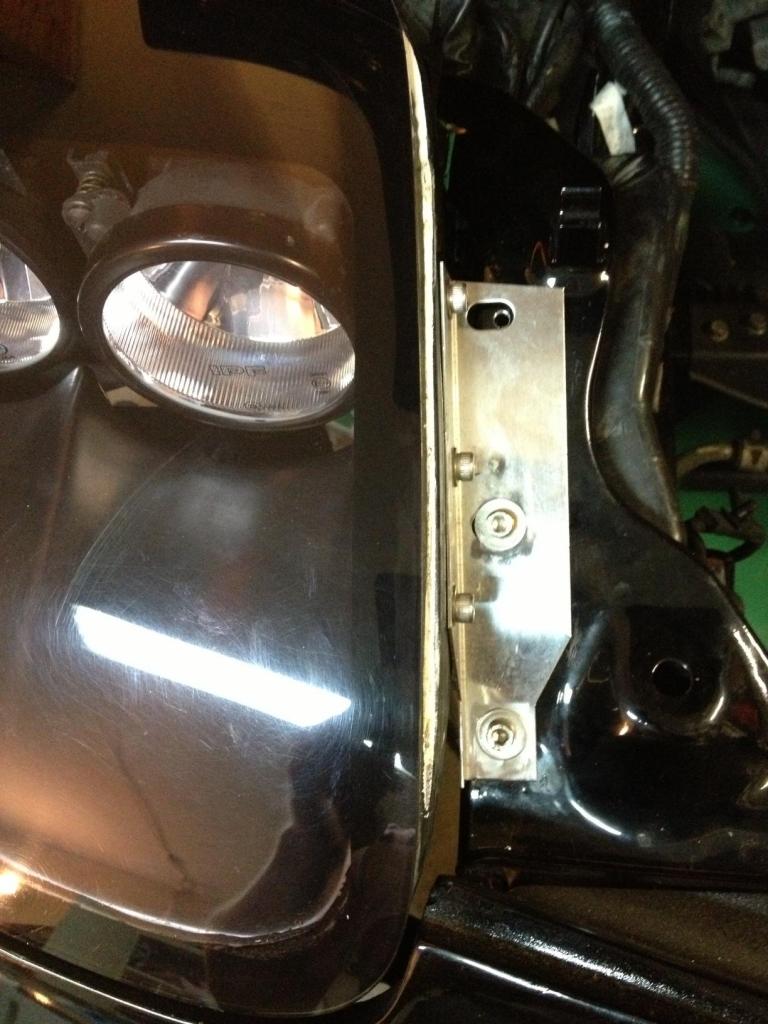
The covers have 3 mounting points: fender bolt, under the hood, and under the fender near the wheel well. The wheel well one is kind of weird...the mounting flange on the headlight does not reach the mounting point on the chassis so I used a long bolt and left an air gap. From what ive read you dont even need to put a nut on it, its meant just to sit in the chassis mounting point for added stability, but I used a nut anyways. If anyone knows, please correct me if Im wrong. You need to drill three holes for the part that mounts under the hood. The kit comes with riv-nut style expanding nutcert type things for the three bolts. My kit was used and the seller did not include these parts so you can either use a nut and bolt (pita to reach around and hold the nut from underneath) or tap the holes like I did. Its thin metal but it seems ok...
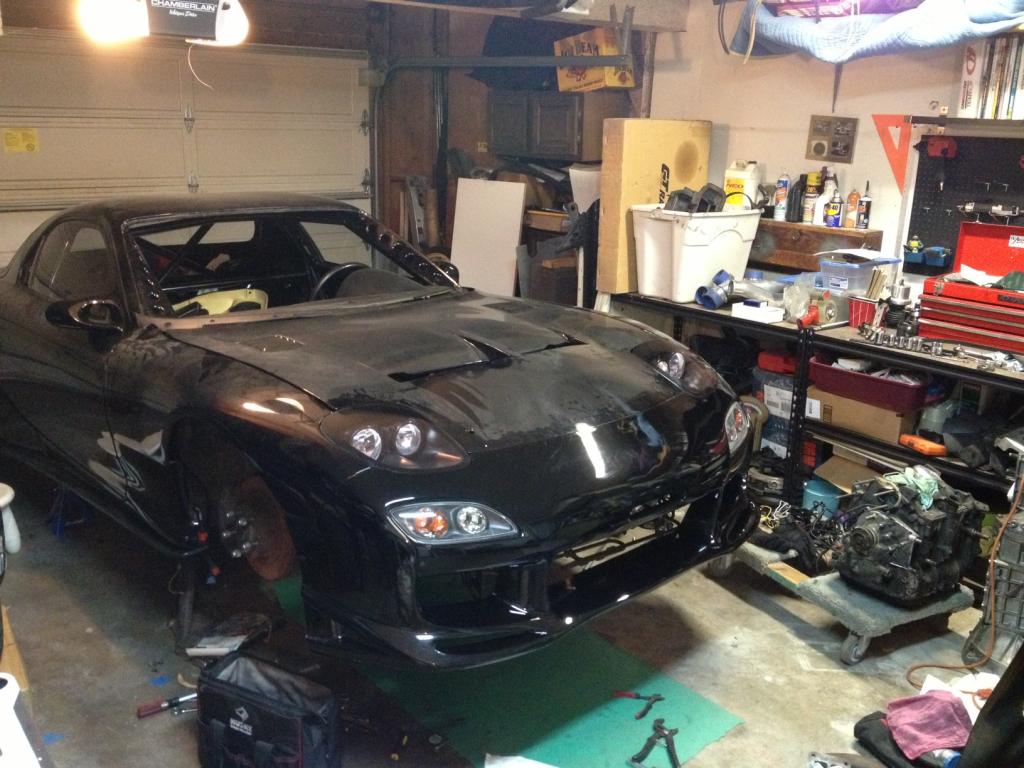
Finished product

Installation was pretty straight forward. My air saw took a dive on me a while back so I had to do the cutting with a cut off wheel. I think the air saw would be a slightly easier approach since you really have to be careful with the wheel not to accidentally touch the fender, wiring harness, etc. It would prob be best to remove the fenders, but I was being lazy/cocky. Pretty much went smoothly and Im really happy with the results.
Heres some pics:

Found these images on FD3S.net and used them as a template of where to cut.


The fender is def in the danger zone when using a wheel.


The harness sits right under the area youre cutting so be careful. I barely touched it and now need to repair a wire...

The bulb assembly mounts using two of the stock headlight assembly bolt locations. Ive read there is a third mounting point but I couldnt see how that is possible from looking at the setup. Chime in if you know.

The covers have 3 mounting points: fender bolt, under the hood, and under the fender near the wheel well. The wheel well one is kind of weird...the mounting flange on the headlight does not reach the mounting point on the chassis so I used a long bolt and left an air gap. From what ive read you dont even need to put a nut on it, its meant just to sit in the chassis mounting point for added stability, but I used a nut anyways. If anyone knows, please correct me if Im wrong. You need to drill three holes for the part that mounts under the hood. The kit comes with riv-nut style expanding nutcert type things for the three bolts. My kit was used and the seller did not include these parts so you can either use a nut and bolt (pita to reach around and hold the nut from underneath) or tap the holes like I did. Its thin metal but it seems ok...
Finished product


Thread
Thread Starter
Forum
Replies
Last Post