When you click on links to various merchants on this site and make a purchase, this can result in this site earning a commission. Affiliate programs and affiliations include, but are not limited to, the eBay Partner Network.
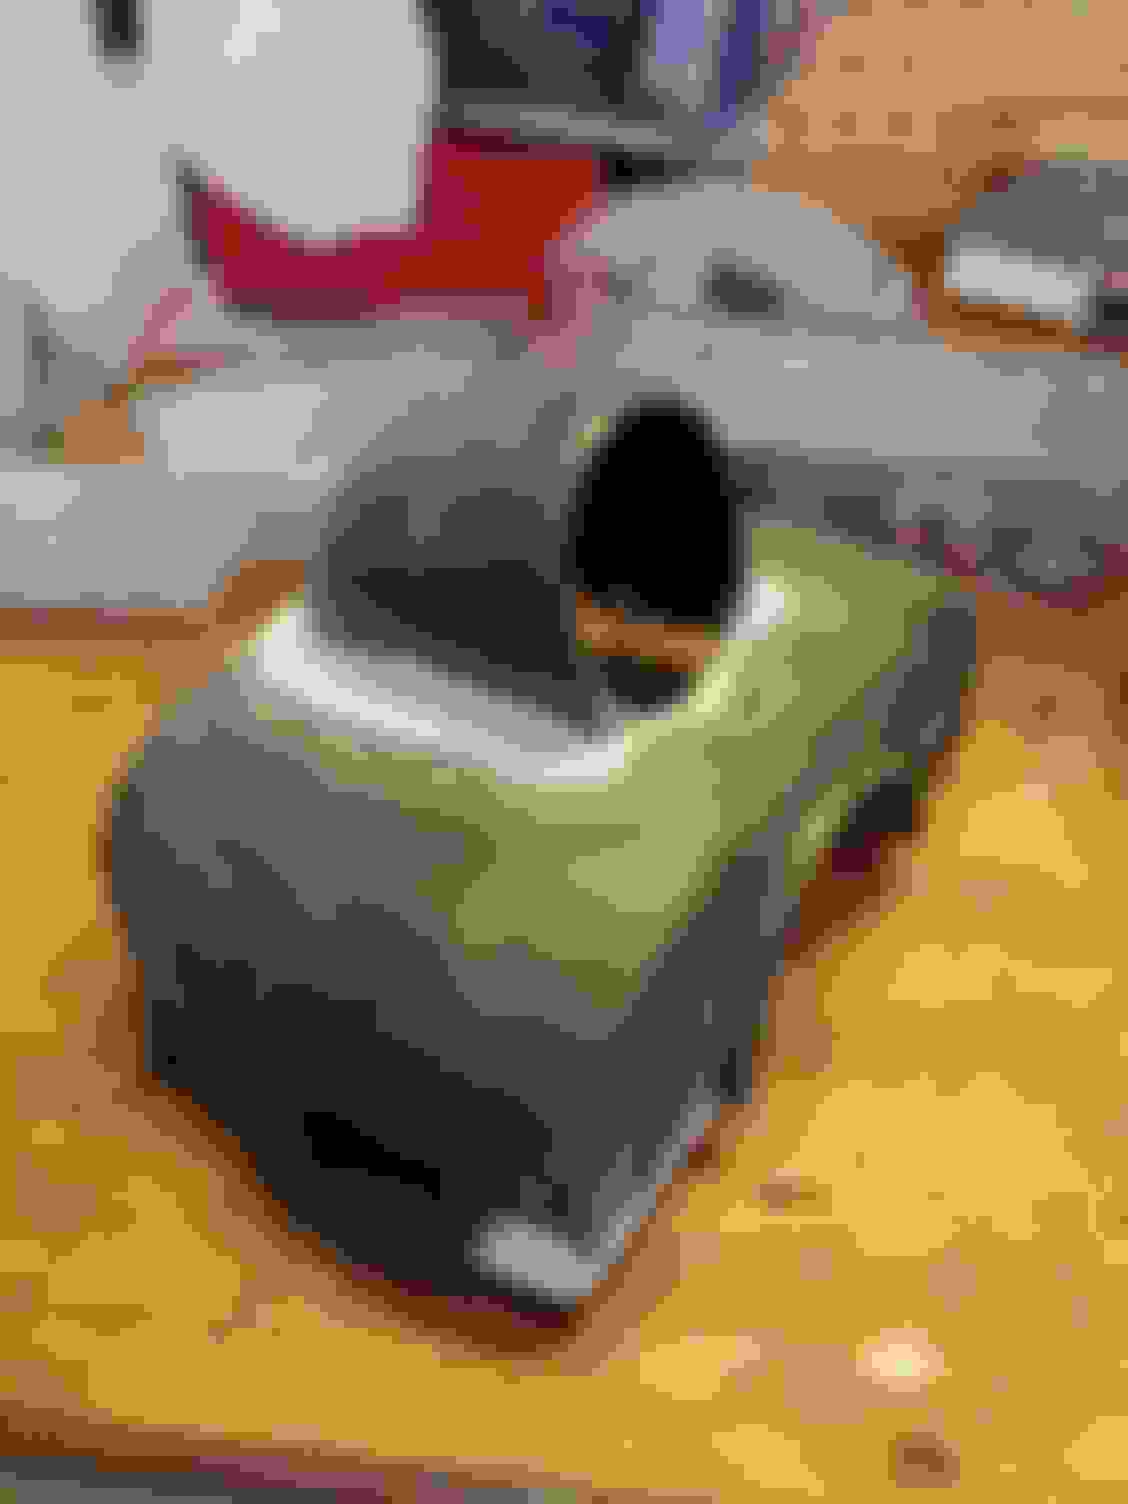
I recently decided to make my own center gauge pod since the REAmemiya pods are way too expensive while Pettit pods do not have the mounding tabs and pins and definitely not worth $140. I will be using the Haltech Can Gauge once I upgrade to the Haltech Elite but in the meantime a Bosch boost gauge will hold it's place. I started by purchasing an $8.00 single pillar pod from ebay and an extra top portion of the steering column shroud that had been ruined by the previous owner by drilling a hole in it for a switch so I got it for $25 shipped. I did not want to modify my own steering shroud in case I changed my mind.
I started by cutting off the access from the ebay gauge pod, then I cut the pod in half in order to shorten it by about half an inch and then glued it back together. You can see the seam down the middle of the pod in the second picture below.
Then I cut a hole in the oem steering column shroud and made an indent in the front by heating it up with a heat gun in order to sink the gauge down a bit. After test-fitting and measuring nearly 100 times, I glued the pod to the shroud and started applying bondo to smooth out the corners and make it look seamless.
The used steering cover that I purchased had all of the pins broken on it so I had to make my own. I ground down the parts where the old pins were molded into the cover in order to glue in some steel studs. I found some steel wire, cut it into short studs and placed them in the holes of the bottom cover, I then snapped the upper piece on and applied plastic bonding epoxy between the studs and the new cover. Just be careful not to glue the two halves together. This worked great and the cover mounds just like it did from the factory.
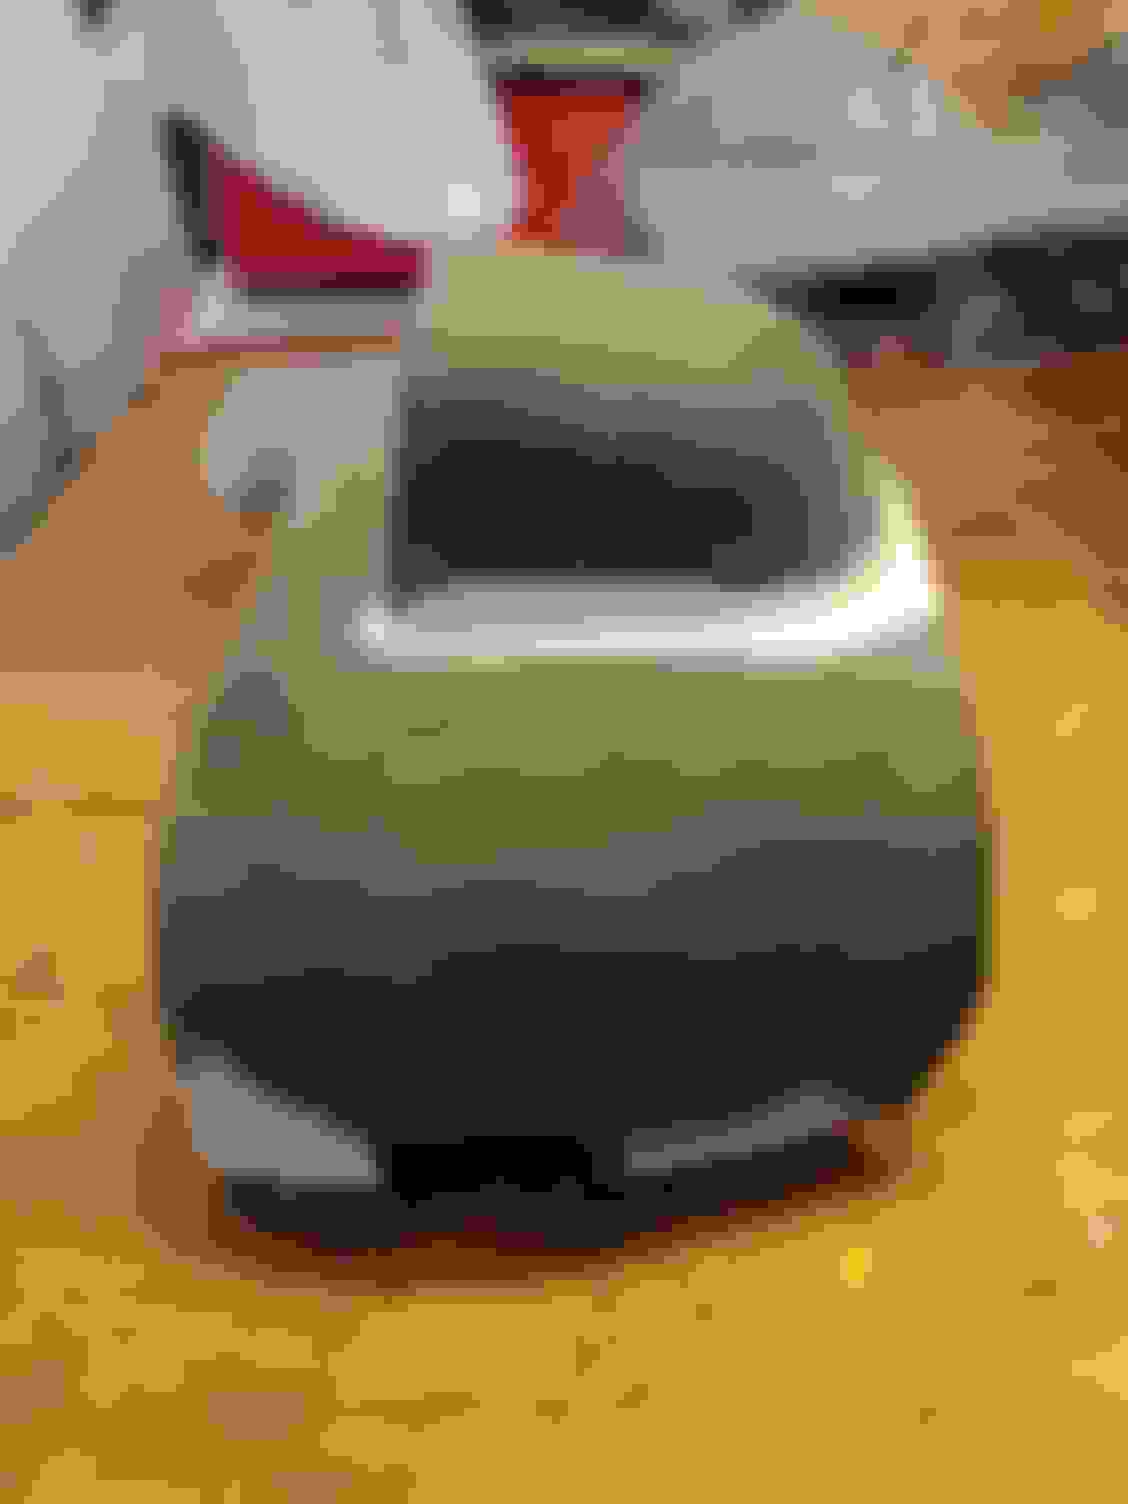
After a few hours of standing, it was time to apply the primer. I used regular Rustoleum primer that adheres to plastic (says it on the can).
After a few coats of primer and a bit more sanding, I painted the whole thing with black SEM trim paint. This paint is very durable and very easy to spay.
Not sure if anyone will be interested in doing this since it is a very time consuming process but nonetheless, I wanted to make a quick write-up since this gauge pod ended up costing me about $40 and fits like oem, because it is... Let me know what you think and if you need any more info or details.
That came out really nice, well worth the time invested! One question - did you cut the pod in half to shorten it because it was too long to fit the column base, or for looks/aesthetic reasons? I figure if that one step could be skipped, it would save DIY'er lots of time in finishing,
That came out really nice, well worth the time invested! One question - did you cut the pod in half to shorten it because it was too long to fit the column base, or for looks/aesthetic reasons? I figure if that one step could be skipped, it would save DIY'er lots of time in finishing,
The pod would still fit but it definitely would not look as good and it would also block more of the tach since it would end up sitting higher and further up on the steering column. Cutting the pod in half was actually a quick process compared to the rest of the job and I think it is worth the extra time.
That really looks awesome! Yeah, filler/sand/paint is a pain in the *** no matter how you look at it.
BTW, the JDM pods have the holes for the turn signal/wiper lever reversed. If you use a JDM pod on a LHD car you will have to notch it a good amount so the stalks clear and have full operation. Ran into that a LONG time ago.
Thanks Dale, it was definitely a lot of work. One more thing I should mention, be mindful of the turn signal mechanism that sticks up when you turn in the left signal. This means that if the gauge sits too low, you will not be able to engage the turn signal so measure accordingly.
The pod would still fit but it definitely would not look as good and it would also block more of the tach since it would end up sitting higher and further up on the steering column. Cutting the pod in half was actually a quick process compared to the rest of the job and I think it is worth the extra time.
Gotcha, I guess it all depends on what pod you have to start with. Seems there's a lot of variability in the shape of these A-pillar pods from one vendor to the next. If you have a pod that is on the shorter side in length & depth to begin with, you might be able to skip that cut & seam operation, Anyway, can't argue with the end result - looks great & well worth the effort!
Originally Posted by 93BlackFD3S
Thanks Dale, it was definitely a lot of work. One more thing I should mention, be mindful of the turn signal mechanism that sticks up when you turn in the left signal. This means that if the gauge sits too low, you will not be able to engage the turn signal so measure accordingly.
^Thanks for the tip - I was thinking that it might be possible mold the pod in more so the gauge/pod could sit a bit lower for a cleaner look and less obstruction of the tach. Good to know there's a lower limit to that.
Thanks again for sharing, this is the perfect solution for my FD. I only need one CAN bus gauge to read everything I need to off my Link ECU CAN bus, so the dual/triple pods for the center speaker are overkill. This looks much more OEM-ish and is very discrete. Now off to post a WTB ad for a used column clam shell
Pete, that is exactly why I made this pod, I only need one spot for a single canbus gauge once I upgrade to the haltech or adaptronic. I had my bose amps repaired so I did not want to lose the center speaker for the typical dash pod. I sunk the gauge down farther than any after market steering column pod to the point that I had to shave down a small bit off the turn signal mechanism. The mechanism is very sturdy and wraps all the way around so there is no harm in removing some material off the top. I do not have any pictures unfortunately but it is pretty self explanatory once you take the shroud off and put on the left turn signal. You can also position the gauge slightly higher so you don't have to do any trimming. Here is the link to the pod that I used, I chose it because it hugs the gauge tightly instead of most pods that add a few mils of thickness around the gauge which would block more of the tach. You are definitely working with limited space.