Can the throttle body and UIM be removed as a unit?
#3
I Sold My Car 2 the Devil
Join Date: Oct 2001
Location: Duncanville, Tx
Posts: 2,361
Likes: 0
Received 0 Likes
on
0 Posts
not really... Unplug the vac. lines going to the back of manifold... one going from the sensor by the brake booster... couple from the bottom... undo all the connecotrs... then the vac. lines in the front... mark them all so you know where they go... undo the coolant lines one under the TB and on by the firewall. one vac line to the double throttle... then undo the bolts... on the intake manifold... tape that sucker to make sure you don't drop anything down there... oh... the elbow comes off first....
#5
Rotary Freak
Thread Starter
OK, I took the time to remove the TB. But what I read above scares me...
The UIM is now unbolted, I will wait for tomorrow (daylight) to try to remove the vacuum and electrical connections so I can detach the UIM.
My concern now is that I have huge hands without a great amount of dexterity.
Do I have to get my hands all the way under the UIM before I can lift it off?
The UIM is now unbolted, I will wait for tomorrow (daylight) to try to remove the vacuum and electrical connections so I can detach the UIM.
My concern now is that I have huge hands without a great amount of dexterity.
Do I have to get my hands all the way under the UIM before I can lift it off?
#6
Originally posted by BLKTOPTRVL
Do I have to get my hands all the way under the UIM before I can lift it off?
Do I have to get my hands all the way under the UIM before I can lift it off?
#7
Lawn Ornament
Thats the only way i take mine off, of course I have a single turbo and no solenoids under there... No coolant going to the throttle body, and most of the sensors on the UIM removed....
I take mine off with the UIM, TB and Elbow attached
I take mine off with the UIM, TB and Elbow attached

Trending Topics
#8
Rotary Freak
Thread Starter
Originally posted by Mahjik
You'll have a little slack to lift the UIM up and tilt it towards the cockpit so you can get at the plugs underneath it. Make sure you disconnect the vacuum lines on the front before you begin to lift it.
You'll have a little slack to lift the UIM up and tilt it towards the cockpit so you can get at the plugs underneath it. Make sure you disconnect the vacuum lines on the front before you begin to lift it.
At this point, I have also left the alternator in place. I am guesing that once the UIM is tilted and the alt is removed, a lot more room is available.
Last edited by BLKTOPTRVL; 03-29-04 at 06:42 PM.
#9
Originally posted by BLKTOPTRVL
Thanks, I'll get into it tomorrow. If it is that tight under there, how do you get to ziptie the hoses to the nipples?
At this point, I have also left the alternator in place. I am guesing that once the UIM is tilted and the alt is removed, a lot more room is available.
Thanks, I'll get into it tomorrow. If it is that tight under there, how do you get to ziptie the hoses to the nipples?
At this point, I have also left the alternator in place. I am guesing that once the UIM is tilted and the alt is removed, a lot more room is available.
#10
Lives on the Forum
It can be done but I wouldn't recommend it until you've removed them seperately a few times to be certain you know where everything is.
4 vac lines on front of UIM, 3 vac lines on back of UIM, the AWS sensor plug under UIM, the AIT under the UIM, brake booster hose at end of UIM, ground connection at end of UIM, turbo precontrol and wastegate solenoids on front of UIM, TPS sensor on throttle body, upper throttle body coolant hose, lower throttle body coolant hose, accelerator cable, cruise control cable (if equipped).
Did I miss anything?

#11
Place your ad here...
Originally posted by DamonB
Did I miss anything?
Did I miss anything?


#12
Rotary Freak
Thread Starter
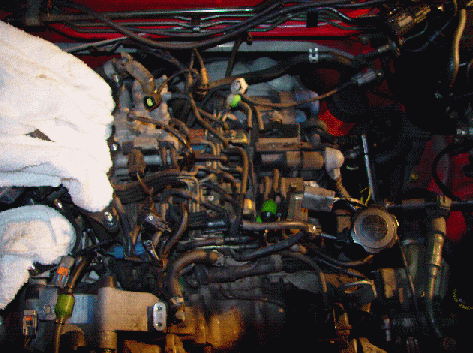
My God!!! What a mess.
This is more than a little scary when you look at the job ahead.
I purchased the car 4 years ago and I was told that the owner had a hose job done by Petitt right before he sold it to me.
When I look at the hoses, I see that a few of them are obviously new, but that most seem to be old. And if not old, they certainly have not all been zip tied. It looks like the rack has not been removed, but I can't say for sure.
My plan is to:
[list=1][*]take a few hundred pictures[*]disconnect all hoses from the rack[*]remove the rack[*]test the valves and filters[*]replace all hoses on the rack[*]replace the rack[*]replace all the hoses leading to the rack[*]replace the spark plug wires[*]put it all back together[/list=1]
Sound good?
I am taking my time and it seems this job might take 3-4 days.
Last edited by BLKTOPTRVL; 03-30-04 at 01:00 PM.
#13
Rotary Freak
Thread Starter
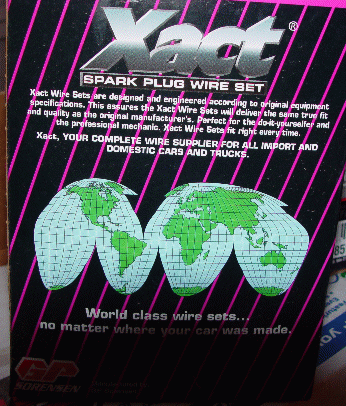
I purchased these wires a year ago when I thought it would be a simple job to replace them. Now that I have access to the old wires, I am not sure these are any good. Does anyone have any experience with these wires?

#14
Rotary Freak
Thread Starter
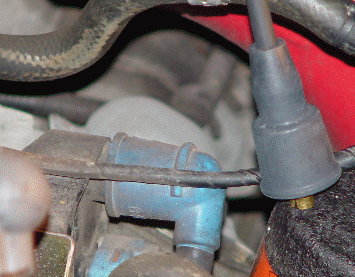
The reason I am not sure is that the new wires are 7mm, but the heads appear to be not quite as 'robust.'
In this pic, you can see the head of an old wire (blue) with the head of a new hanging from above.

In this pic, you can see the head of an old wire (blue) with the head of a new hanging from above.
#16
Rotary Freak
Thread Starter
I looked at my reciept... The wires I have were only $15 -- another reason they scare me. I certainly don't want to do all this and then have to replace them again in 6 months.
#19
Rotary Freak
Thread Starter
The answer is yes. More work. It's not that the work scares me... It's just so more to keep track of.
I think I will run to the store and buy some kind of label tags.
I think I will run to the store and buy some kind of label tags.
#22
PV = nRT
Join Date: Jan 2003
Location: New Zealand (was California)
Posts: 2,250
Likes: 0
Received 0 Likes
on
0 Posts
Use a hard screwdriver bit with hexagonal fitting. Place it in a socket w/ ratchet and use to get the screws facing the firewall.
Also,
If I were to make some more coil reloc. fittings and brackets, who would be interested?
As shown in this thread:
https://www.rx7club.com/showthread.p...hreadid=266738
Also,
If I were to make some more coil reloc. fittings and brackets, who would be interested?
As shown in this thread:
https://www.rx7club.com/showthread.p...hreadid=266738
Last edited by clayne; 03-30-04 at 02:52 PM.
#23
Rotary Freak
Thread Starter
Originally posted by saxyman990
Yeah, the coils are easy to get out. The solenoid rack is a different story (those screws are kind of a PITA to get out)
Yeah, the coils are easy to get out. The solenoid rack is a different story (those screws are kind of a PITA to get out)
I will try the four on front next (after I remove the coils), and then the ones on the back.
Does anyone know the procedure for testing the solenoids?
#24
PV = nRT
Join Date: Jan 2003
Location: New Zealand (was California)
Posts: 2,250
Likes: 0
Received 0 Likes
on
0 Posts
To do a basic test, not including variable duty cycle, connect a hand vacuum pump to the solenoid port. Connect one side of the terminal to ground and connect another side of the terminal to +12-14V (battery).
You should hear the solenoid click and airflow will either be allowed or no longer allowed (depending on the solenoid's configuration).
You should hear the solenoid click and airflow will either be allowed or no longer allowed (depending on the solenoid's configuration).
#25
Rotary Freak
Thread Starter
Originally posted by clayne
Use a hard screwdriver bit with hexagonal fitting. Place it in a socket w/ ratchet and use to get the screws facing the firewall.
Also,
If I were to make some more coil reloc. fittings and brackets, who would be interested?
As shown in this thread:
https://www.rx7club.com/showthread.p...hreadid=266738

