
Boost gauge install for noobs/Defi gauge install

Boost gauge install for noobs/Defi gauge install
Well figured it was about time I started posting on the forum a bit. Anyways I've come a long way, but still pretty friggin new with FDs so this is to help those others that might need a complete bulletproof guide to install something. There's plenty of other good guides on the forum, this is just one that I did and there's not really any step by step guide for Defi D gauges so figured I'd make one. Anyways here we go.
First off you want to get all the parts you'll need so you don't end up having to run to Autozone or anything during your install. You'll want the following:
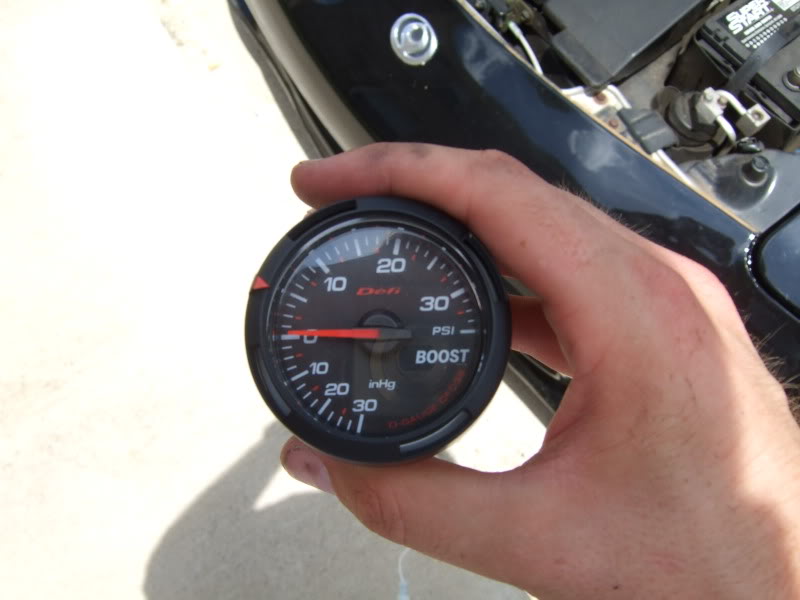
-A boost gauge of course: Using the Defi D Series Boost gauge for mine
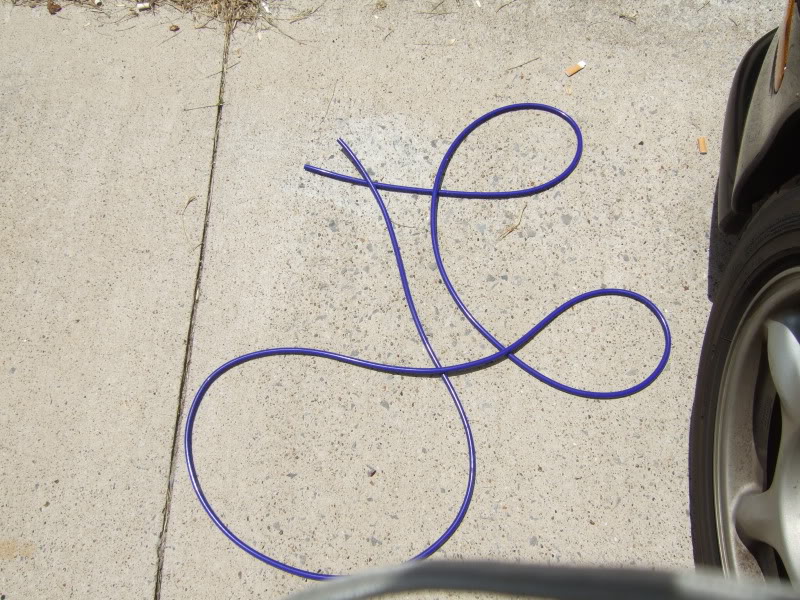
-vacuum hose: you'll need approx. 10 ft, maybe a little more depending on where you are mounting it. I got mine from Hose Techniques, but you can get it most places. The internal diameter size will vary depending on the gauge, but for the Defi D series it's 4mm.
-Some kind of clamping device: I used zipties, but you can use clamps or whatever else you feel like that gets the job done.
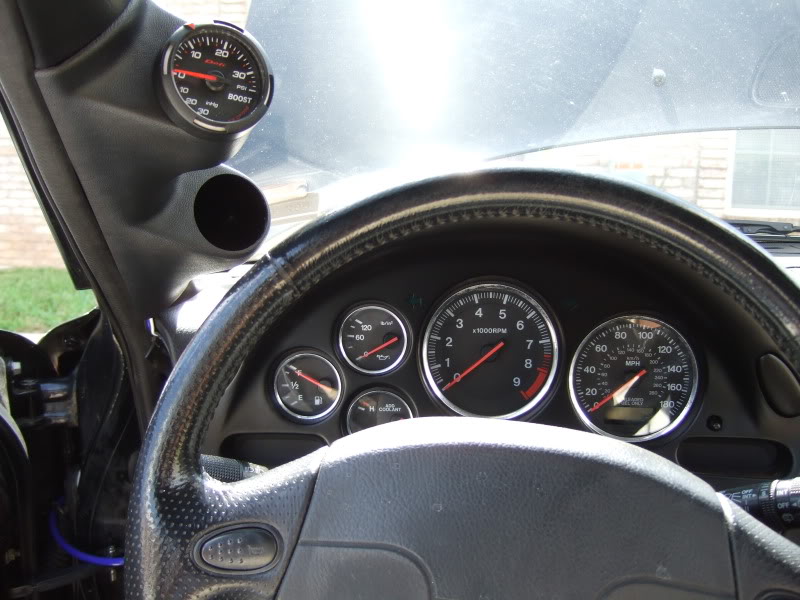
-A gauge pod and some mounting tape (double sided): Unless you actually want to drill into your A pillar to mount the pod. Not for me, but some people prefer it.

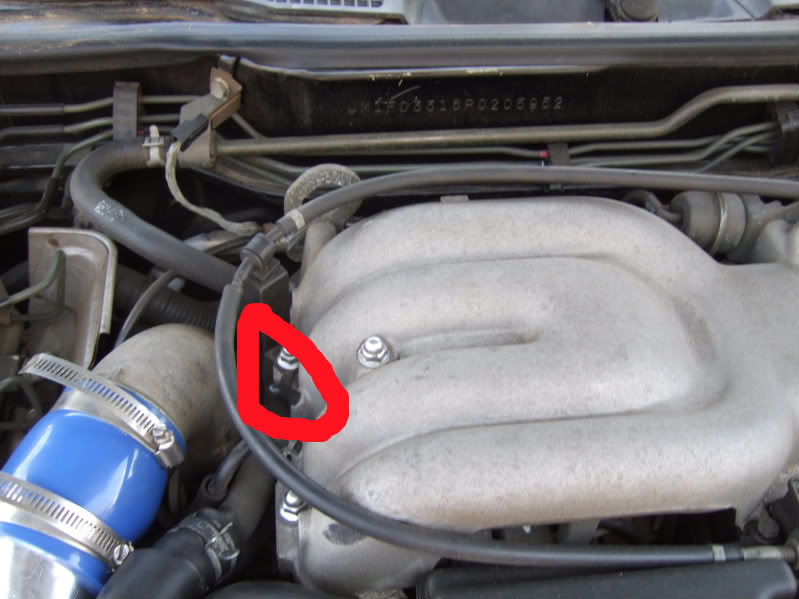
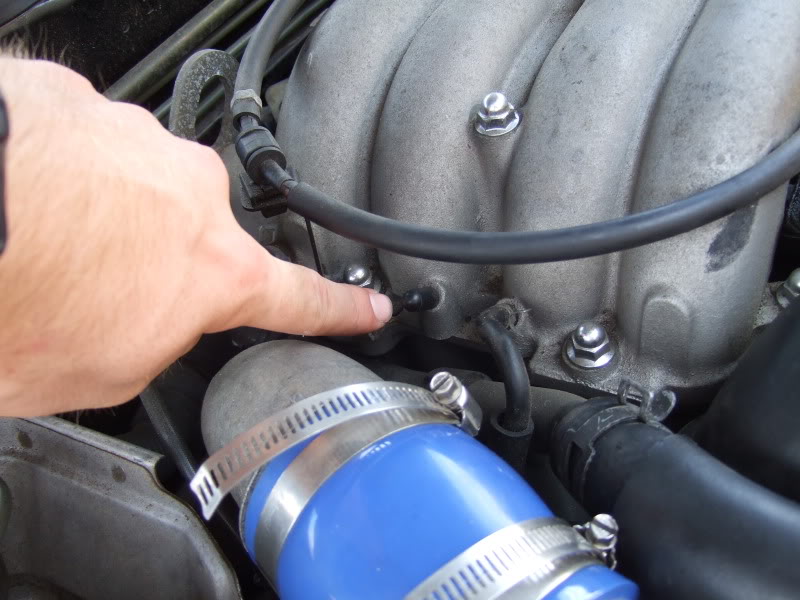
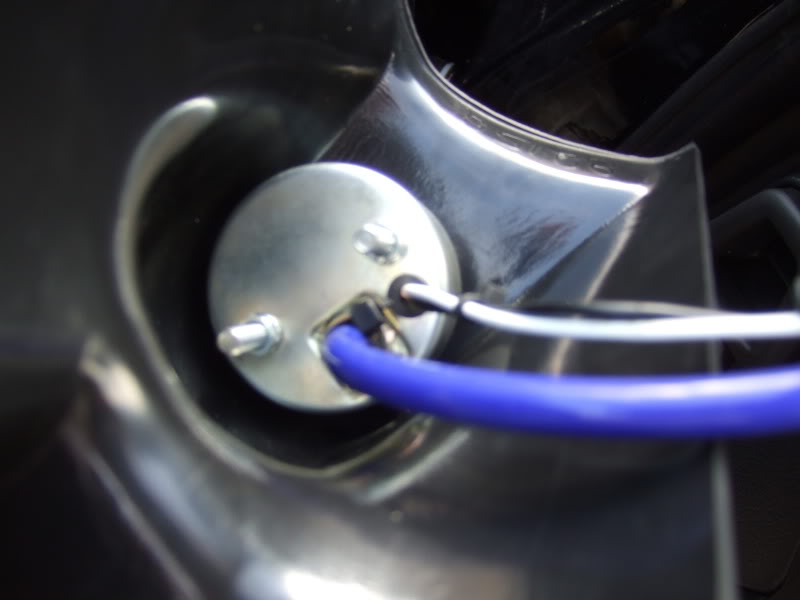
We'll begin with the connecting to the UIM. Take one end of your vacuum hose and attach it to the nipple on the left side of the UIM at the location shown.
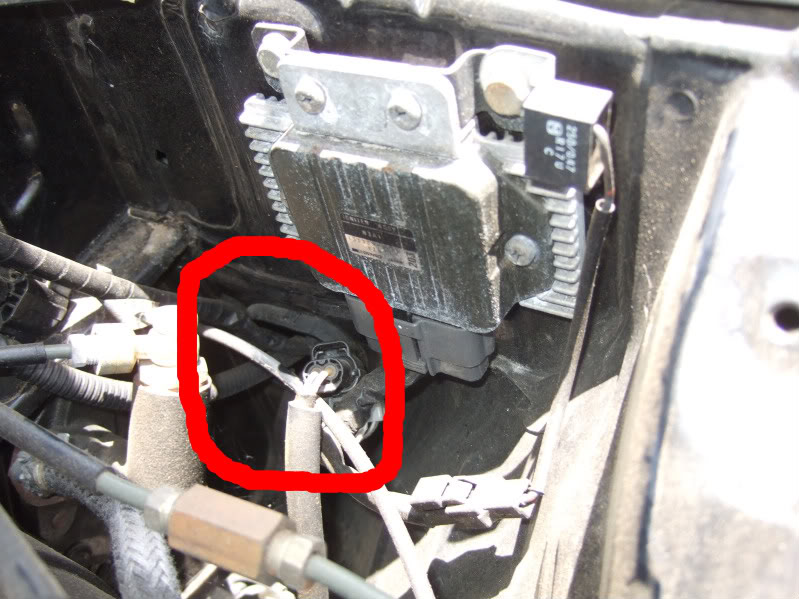
Next you'll need to wire the vacuum hose through the firewall to get into the interior. There are several ways to do this such as behind the driver wheel, but I decided to go through the opening that's under the cruise control unit (If you have a R1 like me then you won't have that unit and will just see an opening on the driver side at the back of the engine bay. I would also recommend attached the vacuum hose to someplace to keep it from moving around. You can see in the pictures I just ziptied it to another hose running along the rear of the engine bay.
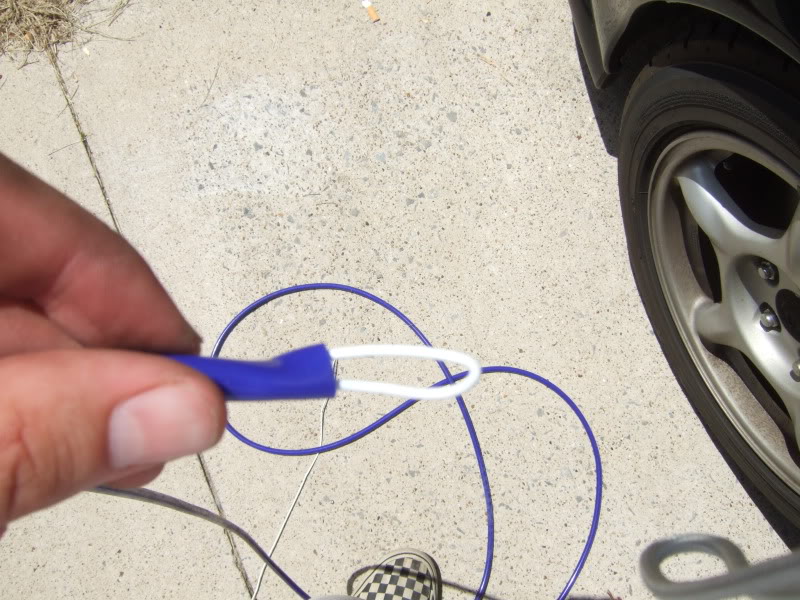
It's gonna be a little difficult to get to the hose after you put it through that hole on the side. What I did to remedy the problem was take a coat hanger and break off one piece and make a little loop I could grab and stuck it onto the end of the hose. Then I made a hook out of the rest of the hanger to grab the loop and pull it to the opening near the cockpit.
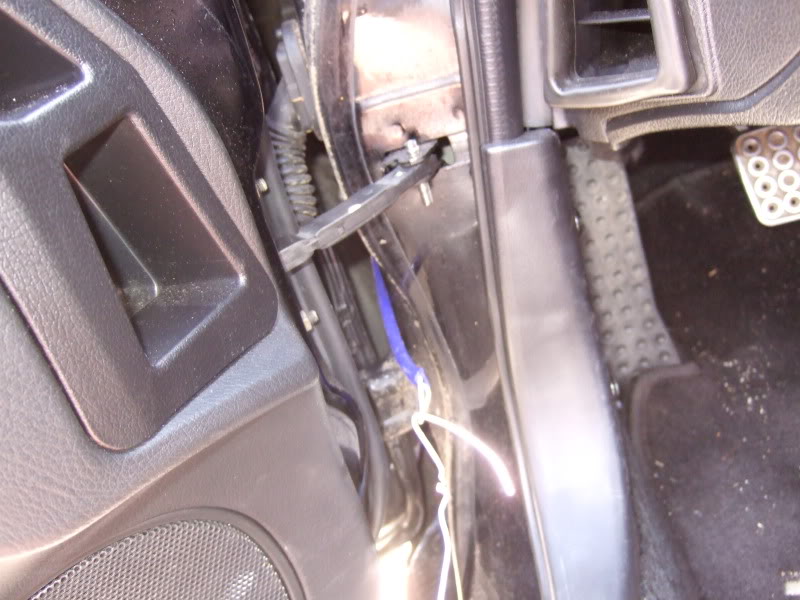
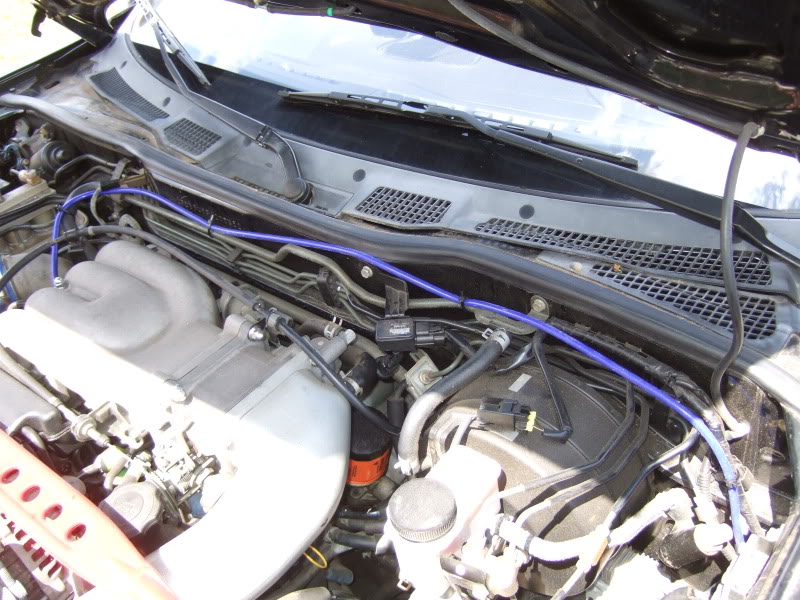
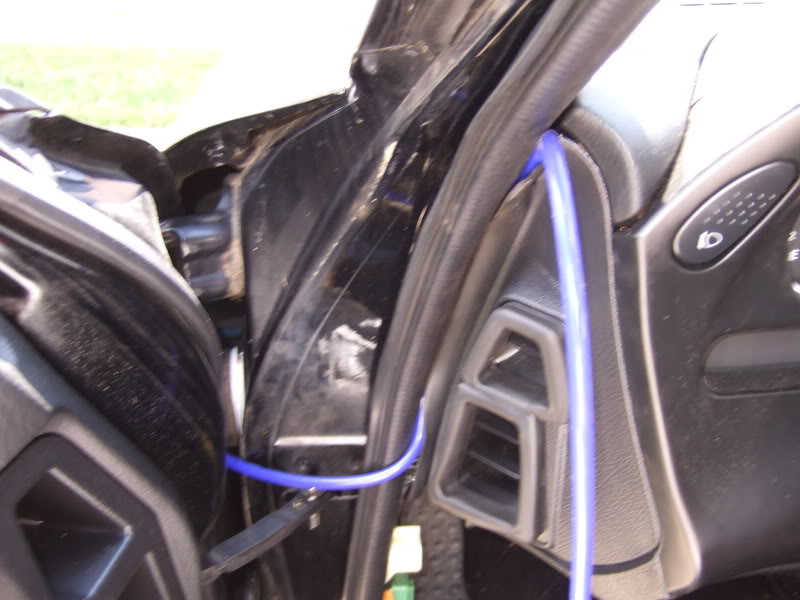
Next you'll want to wire it up to the A pillar or wherever else you want to mount your gauge. I went with the A pillar just cause that's where I wanted it. You can read the other writeups for mounting the gauge in other places. You'll want to run the vacuum line behind the rubber of the driver side vents. You might need to take the vents off first (which can be done by just grabbing the vents and pulling straight out) but you shouldn't need to. And behind the rubber it doesn't pinch the hose at all so no need to worry about it pinching your line.
First off you want to get all the parts you'll need so you don't end up having to run to Autozone or anything during your install. You'll want the following:
-A boost gauge of course: Using the Defi D Series Boost gauge for mine
-vacuum hose: you'll need approx. 10 ft, maybe a little more depending on where you are mounting it. I got mine from Hose Techniques, but you can get it most places. The internal diameter size will vary depending on the gauge, but for the Defi D series it's 4mm.
-Some kind of clamping device: I used zipties, but you can use clamps or whatever else you feel like that gets the job done.
-A gauge pod and some mounting tape (double sided): Unless you actually want to drill into your A pillar to mount the pod. Not for me, but some people prefer it.
We'll begin with the connecting to the UIM. Take one end of your vacuum hose and attach it to the nipple on the left side of the UIM at the location shown.
Next you'll need to wire the vacuum hose through the firewall to get into the interior. There are several ways to do this such as behind the driver wheel, but I decided to go through the opening that's under the cruise control unit (If you have a R1 like me then you won't have that unit and will just see an opening on the driver side at the back of the engine bay. I would also recommend attached the vacuum hose to someplace to keep it from moving around. You can see in the pictures I just ziptied it to another hose running along the rear of the engine bay.
It's gonna be a little difficult to get to the hose after you put it through that hole on the side. What I did to remedy the problem was take a coat hanger and break off one piece and make a little loop I could grab and stuck it onto the end of the hose. Then I made a hook out of the rest of the hanger to grab the loop and pull it to the opening near the cockpit.
Next you'll want to wire it up to the A pillar or wherever else you want to mount your gauge. I went with the A pillar just cause that's where I wanted it. You can read the other writeups for mounting the gauge in other places. You'll want to run the vacuum line behind the rubber of the driver side vents. You might need to take the vents off first (which can be done by just grabbing the vents and pulling straight out) but you shouldn't need to. And behind the rubber it doesn't pinch the hose at all so no need to worry about it pinching your line.
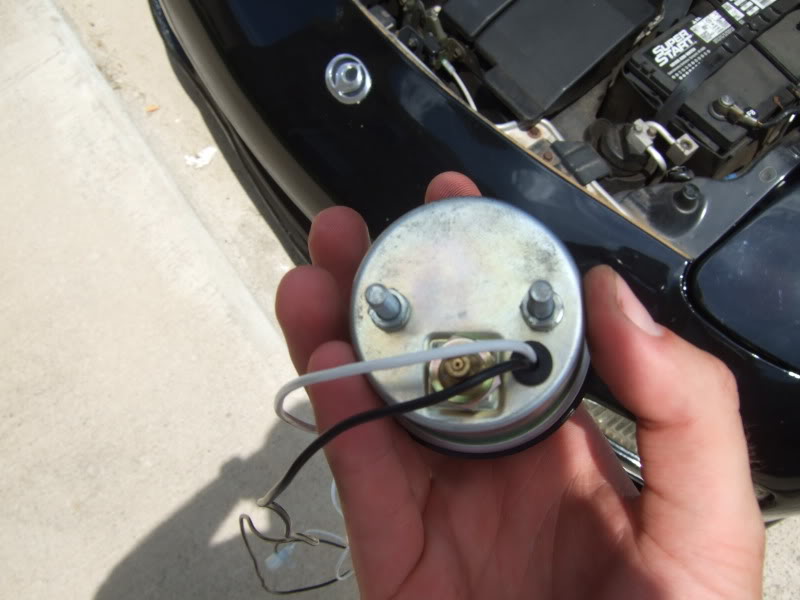
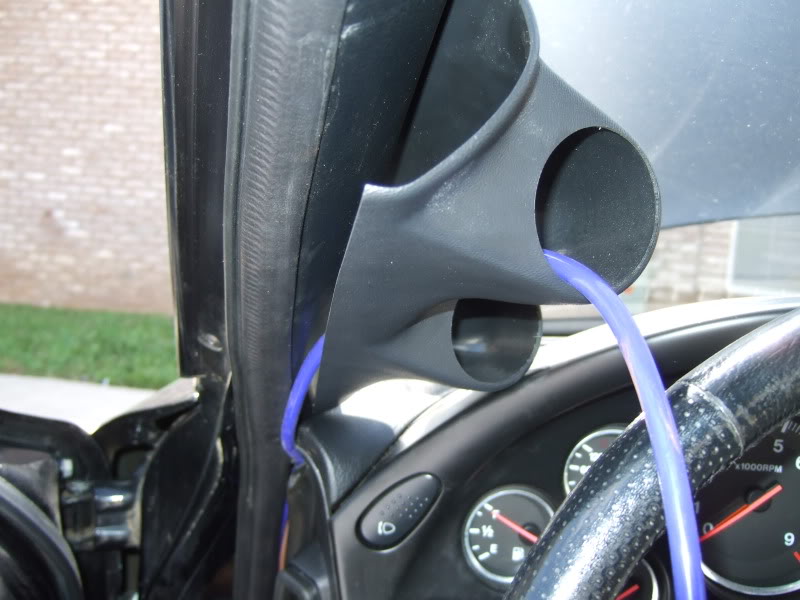
Next you'll want to get your gauge pod prepped. Place the gauge in the pod and cut the vacuum hose to where it makes a perfect fit and doesn't leave too much excess left over. I also went ahead and ziptied the electrical wires to the vacuum line and wired them back down the same way as the vacuum line so they would be nice and neat. Attach the end of the vacuum line to the gauge and ziptie it tight.
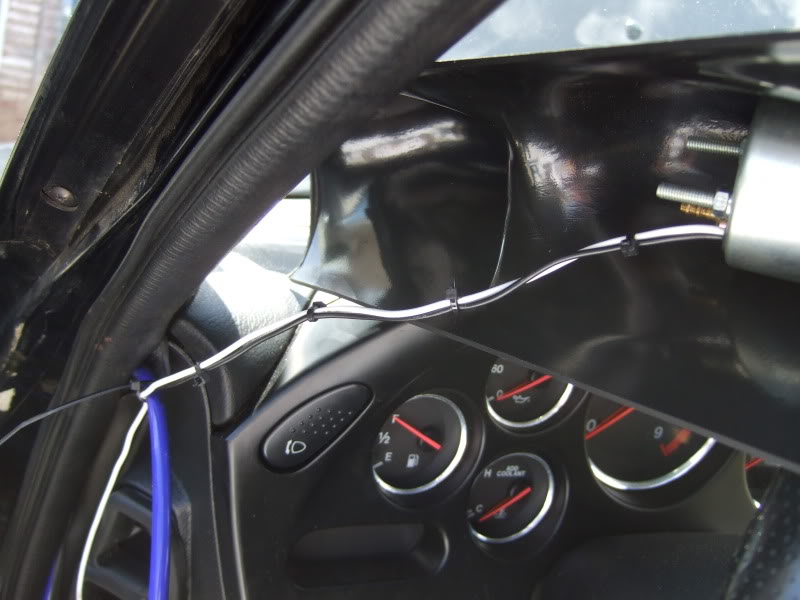
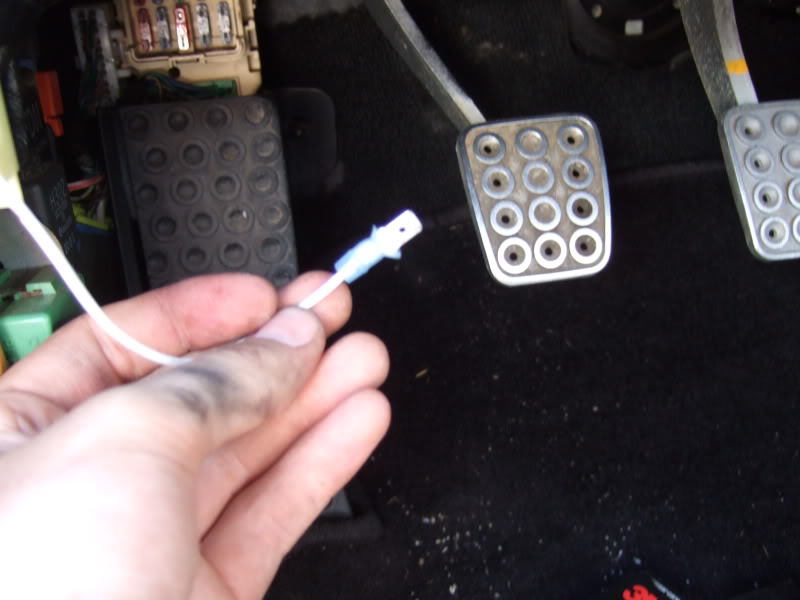
As for the electrical lines. I added a couple tips to the wires so I could plug them in where I wanted. They can be picked up almost anywhere including Walmart. I put just a flat end on the white line for power and plugged it into the AUX power port on the fuse panel down by the dead pedal. Obviously make sure to have your battery disconnected just in case.
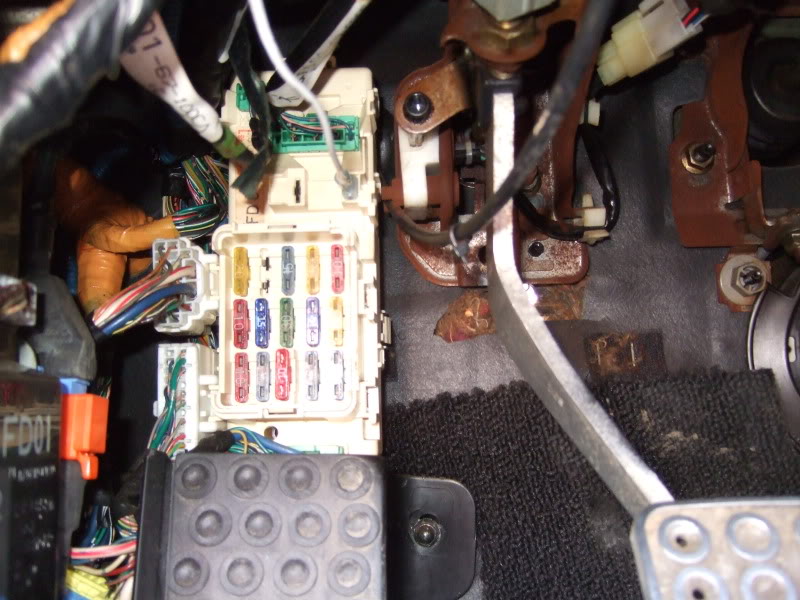
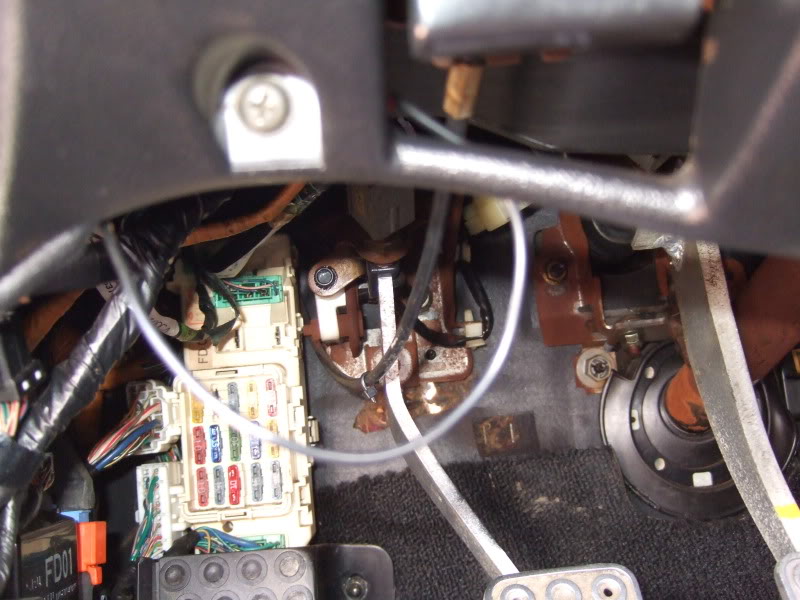
As for the black wire (ground) I put an end with an opening on it so I could screw it into the bottom left of the panel under the steering column. Unforunately I forgot to take a pic of it, but should be fairly straightforward as far as what type of end I'm referring to for the wire.
Then I would recommend reconnecting your battery and turn on the car to make sure the gauge is working before I completely attached it to the pillar. Once you confirm that it works you can mount it to the pillar. I used double sided tape so I wouldn't have to drill holes and also so I could take it back off when I get ready to install my other gauge.
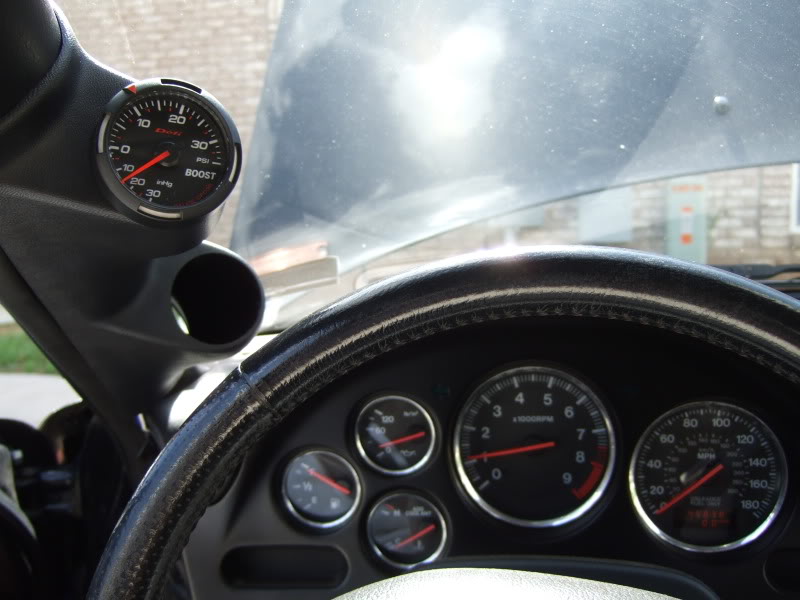
And there you go, now you're finished. Just tidy up the hoses and wires to make them as inconspicuous as possible. As you can see from my pics, they only poke out a tiny bit in that one area, other than that you can't see them at all. Hope it helped those that need it. I tried to break it down as far as I could and make it as simple as possible.
As for the electrical lines. I added a couple tips to the wires so I could plug them in where I wanted. They can be picked up almost anywhere including Walmart. I put just a flat end on the white line for power and plugged it into the AUX power port on the fuse panel down by the dead pedal. Obviously make sure to have your battery disconnected just in case.
As for the black wire (ground) I put an end with an opening on it so I could screw it into the bottom left of the panel under the steering column. Unforunately I forgot to take a pic of it, but should be fairly straightforward as far as what type of end I'm referring to for the wire.
Then I would recommend reconnecting your battery and turn on the car to make sure the gauge is working before I completely attached it to the pillar. Once you confirm that it works you can mount it to the pillar. I used double sided tape so I wouldn't have to drill holes and also so I could take it back off when I get ready to install my other gauge.
And there you go, now you're finished. Just tidy up the hoses and wires to make them as inconspicuous as possible. As you can see from my pics, they only poke out a tiny bit in that one area, other than that you can't see them at all. Hope it helped those that need it. I tried to break it down as far as I could and make it as simple as possible.

Kool.
I have had problems with the silicone hose in tight spaces.The silicone hose is soft and easy to bend so if you route the hose through a tight area it might kink causing inaccurate boost readings.Personally i would run black vacuum line (its a little harder than silicone) inside the cabin and silicone hose in the engine bay so that the heat wont make it brittle.
That is just my opinion does not mean i am correct.
Hmm yeah I didn't really think about that. Well I'll keep monitoring it and update the thread if anything changes. So far haven't really had any problems with innaccurate readings, but I can definately see where one might occur. If it does though then I'll just reroute it another way I suppose. Thanks for the input.


More from the FAQ thread stickied in this forum.
http://www.fd3s.net/boost_gauge_install.html
http://home.ptd.net/~blouzbee/guides/boost.html
http://www.fd3s.net/boost_gauge_install.html
http://home.ptd.net/~blouzbee/guides/boost.html
IMO, you would have been better bringing the vacuum line through the firewall, there is a hole behind the carpet by the clutch pedal - just makes it a cleaner install and you don't have to worry about pinching the line. It would annoy me seeing a vacuum line (especially blue) everytime I opened the door. Other then that, good write-up.
Haha yeah noticed that hole after I was already almost done. I'll probably go back and rewire it through there. Alwell for now it's holding up well and is getting the job done. Haha and yeah probably shoulda gone with black, wouldn't be as noticeable, live and learn haha.
Those two links are also good writeups, I just wanted to make a super simple one for those that might need a complete broken down install with lots of pics. I know I read them both before I did mine and they helped me out. I just know there are some out there that would still be confused.
Those two links are also good writeups, I just wanted to make a super simple one for those that might need a complete broken down install with lots of pics. I know I read them both before I did mine and they helped me out. I just know there are some out there that would still be confused.
Trending Topics

Full Member
Joined: Feb 2013
Posts: 153
Likes: 0
From: Toronto
I know I'm bumping an ancient thread but I just installed my boost gauge and I'm not sure if it is working correctly.. At idle its reading about -15 vacuum but if I stay in idle and rev all the way to the red line it never even boosts at all, is this expected behaviour? I would have expected the boost to climb with rpms.. I took the car out for a spin and most of the time the gauge reads in vacuum unless I floor it then it goes to 5-10.
Anyway is this correct or is something wrong?
Anyway is this correct or is something wrong?


Thread
Thread Starter
Forum
Replies
Last Post