
She Followed Me Home, Honest

Hoping for cooler weather I've been shillyshallying about for a few days, but the forcast continues to look grim, so today I began the interior work.
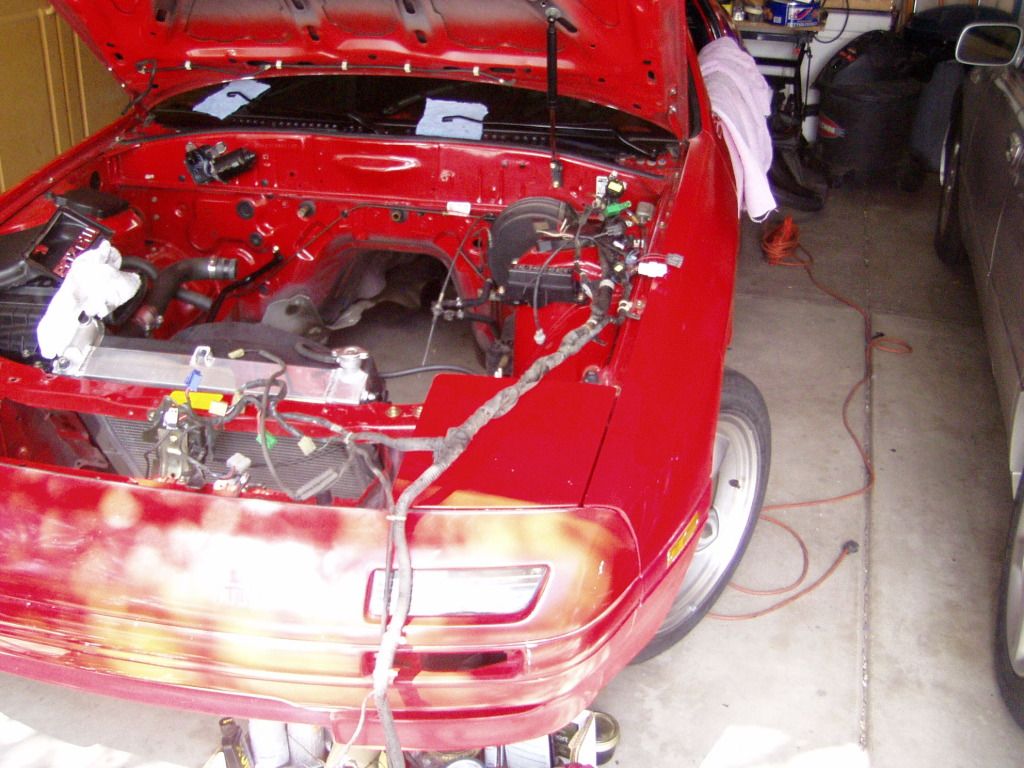
Within the (relatively) cool confines of the garage I cannot fully open the passenger door and that's kind of necessary for the work to come, so out she rolled into the unforgiving sun.
The two main objectives are to remove the dash and delete the faulty mousetrack seatbelts.
First I removed the seats, making silent guesses as to what I might find underneath.
One solitary sunflower seed...that was it.
This car is beginning to creep me out.
The seattracks are immaculate, could have been installed yesterday if you judge by appearance/grime.
The cigarette lighter element has never been used, nor has the ashtray. The inside of the glovebox (BTW, anyone ever notice how freakishly heavy the door to that is?) is unscratched and unmarred.
How does a car rack up 138k miles with no sign of human occupancy?
With the seats out, I began removing the autobelt crap from the transmission tunnel...all went well except the driver side receiver bolt decided to fight every turn of the way. Oddly, there was no visual reason why this one bolt was such a bitch once I finally got it out.
And what the hell are the seatbelt mounting bolts anyway?
None of the mount point hardware appears to be standard metric (I used a 16mm socket on them), nor SAE...it's like Whitworth or something.
Strange.
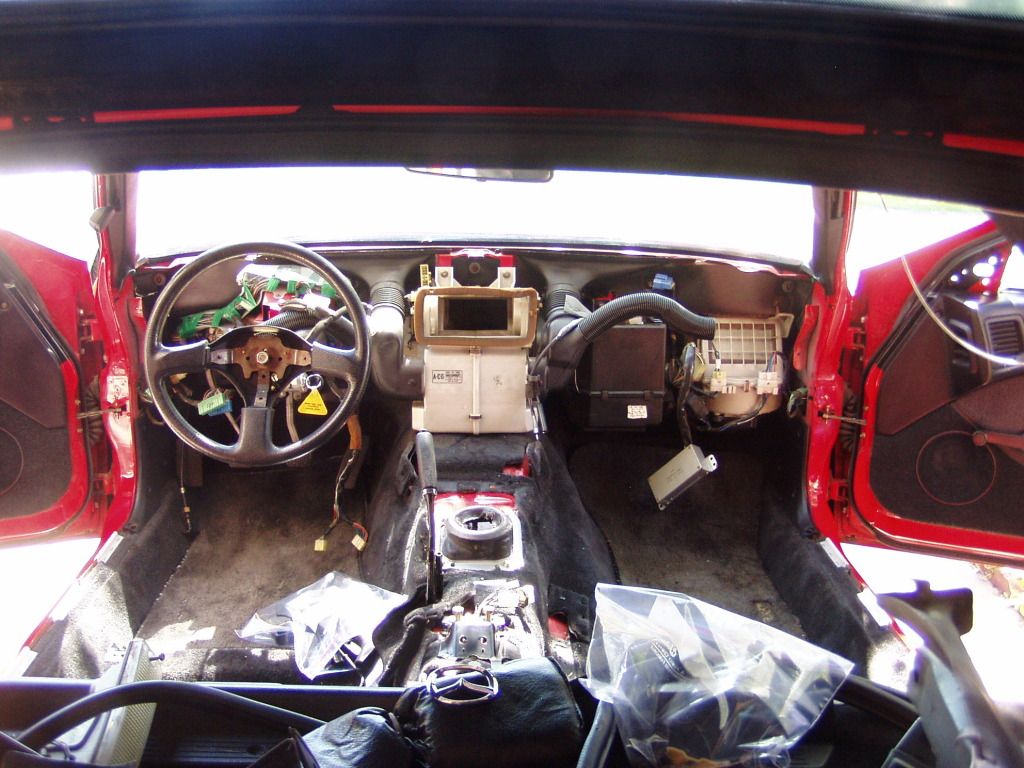
Finally done with that, I moved to the dash.
I hate the FC dash.
The way the center includes the shifter surround is stupidly vulnerable and all the mounting solutions seem designed to fail, especially after 23 years of plastic embrittlement.
I've removed my other dash a few times, so I know where things are but even so- and being as careful as possible- I broke five tabs in various places.
I'm pretty sure this dash has never been touched either, I saw hardware/trim pieces I didn't know existed.
Tired and drenched in sweat, I stopped here:
I had planned on removing the carpet but it's so clean I don't see the point, a good vacuum when I'm done should do it.
The dash will stay out till after the swap, mainly because of how simple it makes swapping harnesses,
The chassis harness on the old car is already set up for the battery relocate and has the battery cable running through it's grommet. This time, when I pull the engine I'm going to leave the harness in place and unplug from the ECU and being dash (and blower motor)-free simplifies that. Plus, it will be much less painful to install the clutch MC and brake booster.
Next, the a and b pillar plastics come out and the mousetracks proper get 86ed.
Finally, the bin support structure leaves to make installing the new battery mount possible.
I also need to remove the fuel pump bulkhead and examine the inside of the tank.
At that point I'll have been pretty much all over the chassis and the initial inspection/cleaning will be done.
That will be good.
Within the (relatively) cool confines of the garage I cannot fully open the passenger door and that's kind of necessary for the work to come, so out she rolled into the unforgiving sun.
The two main objectives are to remove the dash and delete the faulty mousetrack seatbelts.
First I removed the seats, making silent guesses as to what I might find underneath.
One solitary sunflower seed...that was it.
This car is beginning to creep me out.
The seattracks are immaculate, could have been installed yesterday if you judge by appearance/grime.
The cigarette lighter element has never been used, nor has the ashtray. The inside of the glovebox (BTW, anyone ever notice how freakishly heavy the door to that is?) is unscratched and unmarred.
How does a car rack up 138k miles with no sign of human occupancy?
With the seats out, I began removing the autobelt crap from the transmission tunnel...all went well except the driver side receiver bolt decided to fight every turn of the way. Oddly, there was no visual reason why this one bolt was such a bitch once I finally got it out.
And what the hell are the seatbelt mounting bolts anyway?
None of the mount point hardware appears to be standard metric (I used a 16mm socket on them), nor SAE...it's like Whitworth or something.
Strange.
Finally done with that, I moved to the dash.
I hate the FC dash.
The way the center includes the shifter surround is stupidly vulnerable and all the mounting solutions seem designed to fail, especially after 23 years of plastic embrittlement.
I've removed my other dash a few times, so I know where things are but even so- and being as careful as possible- I broke five tabs in various places.
I'm pretty sure this dash has never been touched either, I saw hardware/trim pieces I didn't know existed.
Tired and drenched in sweat, I stopped here:
I had planned on removing the carpet but it's so clean I don't see the point, a good vacuum when I'm done should do it.
The dash will stay out till after the swap, mainly because of how simple it makes swapping harnesses,
The chassis harness on the old car is already set up for the battery relocate and has the battery cable running through it's grommet. This time, when I pull the engine I'm going to leave the harness in place and unplug from the ECU and being dash (and blower motor)-free simplifies that. Plus, it will be much less painful to install the clutch MC and brake booster.
Next, the a and b pillar plastics come out and the mousetracks proper get 86ed.
Finally, the bin support structure leaves to make installing the new battery mount possible.
I also need to remove the fuel pump bulkhead and examine the inside of the tank.
At that point I'll have been pretty much all over the chassis and the initial inspection/cleaning will be done.
That will be good.

Full Member
Joined: Nov 2011
Posts: 105
Likes: 0
From: orange, ca
Really impressed with the build and the time you're taking to do this right. Supremely jealous of the deal, I can't seem to find even a basket case for less than $2500. Keep it up and keep us posted!
Yeah, I paid $2500 for the '91 and it wasn't half as nice as this car.
I forgot to mention that even the stereo install is nice.
I figured I'd redo it but's almost better than what I'd have done, so it stays.
I forgot to mention that even the stereo install is nice.
I figured I'd redo it but's almost better than what I'd have done, so it stays.
How "just for good measure" will you get whilst having the dash out? For example, ours doesnt have heat because the heater core leaked (coolant loves to soak into the sound deadening fibers under the carpert) so we bypassed it. Are there are candidates to address while you have the dash out?


Joined: Mar 2001
Posts: 31,859
Likes: 3,243
From: https://www2.mazda.com/en/100th/
i'm pretty sure i made a bigger mess in the day i drove it home!
the Rx8 is much nicer to clean than the FC, most of the interior comes out in about half an hour, although the odd bit is that the cupholder is 5 feet long...
The only other thing I've thought to check is the seal between the fresh air intake and the firewall (I'll bet it's fine).
@southsidecox:
I've spent many a night in your town...lived in Atlanta and raced at Little Talledega dozens of times.
I'm afraid if I start selling parts from the car that the magic spell will be broken and I'll find just a pile of red dust.
I'm semi-serious.
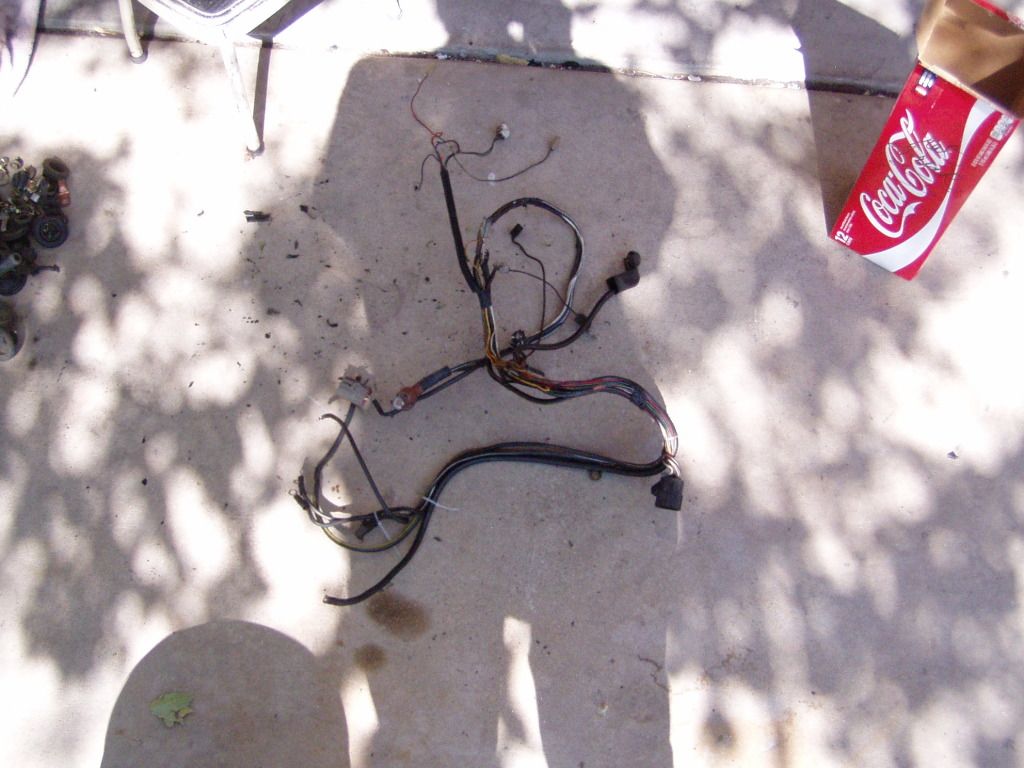
Started the morning (early as I dared, trying to beat the heat) by pulling the bin structure:
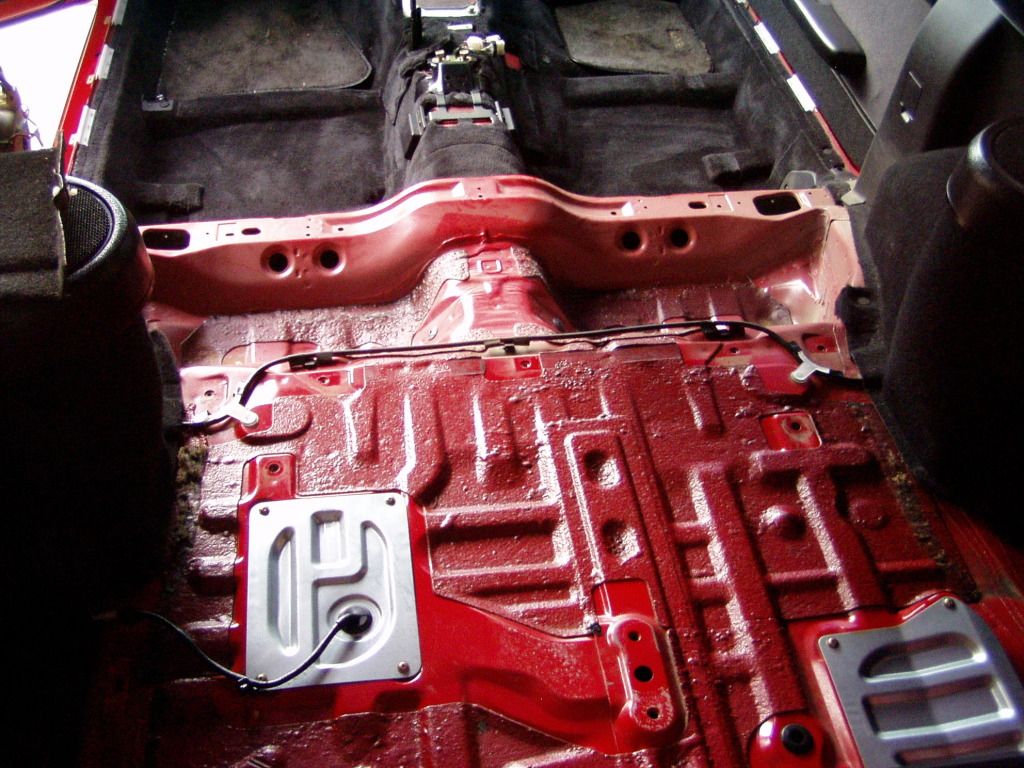
This was necessary for two things- the scheduled battery relocate and the conversion from auto to manual seatbelts.
Here are the much maligned "mousetrack" belt assemblies in their natural habitat, broken and out of the car:
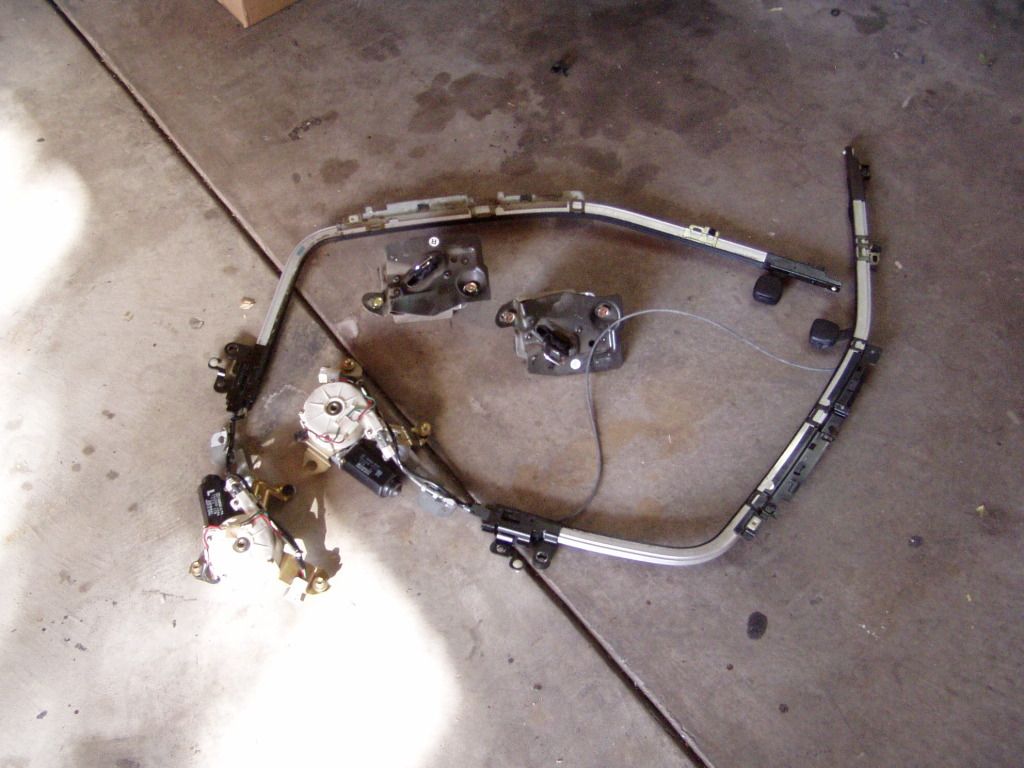
It may seem odd but you really do need to strip the interior to this extent to swap the belts.
I'll skip the long and profane rant I'd mentally prepared about our interior plastics but will say this...
I've read of people complaining about dealers "mishandling" their A/B pillar plastics during the course of seatbelt replacement and I'll tell you what, if I was a dealer I'd refuse to touch your interior unless you pulled it yourself or signed a waiver absolving me of responsibility.
My passenger A pillar broke into three parts just removing the covers that hide the retaining screws.
Literally fell to pieces before I'd even tried to really remove it.
Nothing I could have done about it but if I were a dealer tech, the customer would no doubt be howling for replacement plastic.
Anyway, the driver side is done and Ill do the passenger side later this afternoon as the sun moves behind the house (it's 100� here today).
This was necessary for two things- the scheduled battery relocate and the conversion from auto to manual seatbelts.
Here are the much maligned "mousetrack" belt assemblies in their natural habitat, broken and out of the car:
It may seem odd but you really do need to strip the interior to this extent to swap the belts.
I'll skip the long and profane rant I'd mentally prepared about our interior plastics but will say this...
I've read of people complaining about dealers "mishandling" their A/B pillar plastics during the course of seatbelt replacement and I'll tell you what, if I was a dealer I'd refuse to touch your interior unless you pulled it yourself or signed a waiver absolving me of responsibility.
My passenger A pillar broke into three parts just removing the covers that hide the retaining screws.
Literally fell to pieces before I'd even tried to really remove it.
Nothing I could have done about it but if I were a dealer tech, the customer would no doubt be howling for replacement plastic.
Anyway, the driver side is done and Ill do the passenger side later this afternoon as the sun moves behind the house (it's 100� here today).

i hear ya on the seat belt track removal that was probably my least favorite part of stripping my interior and to top it of my driver side a pillar crumbled into at least 20 pieces the passenger side was salvageable tho with some epoxy and black spray paint
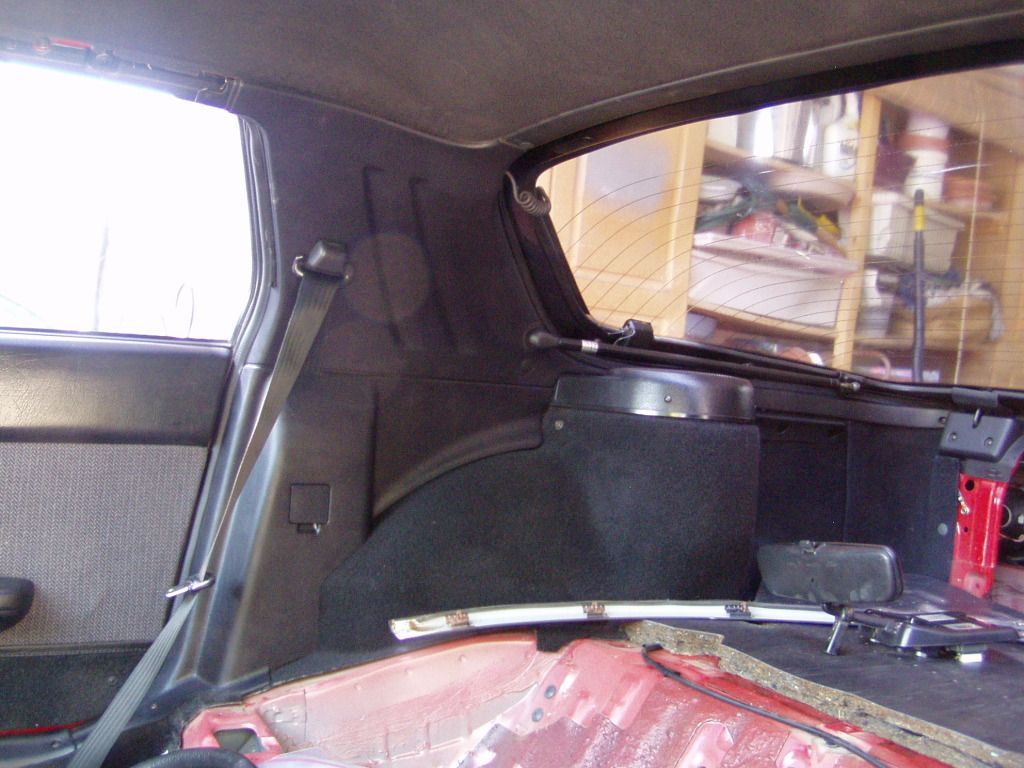
Here you can see the basics of the manual belt install:
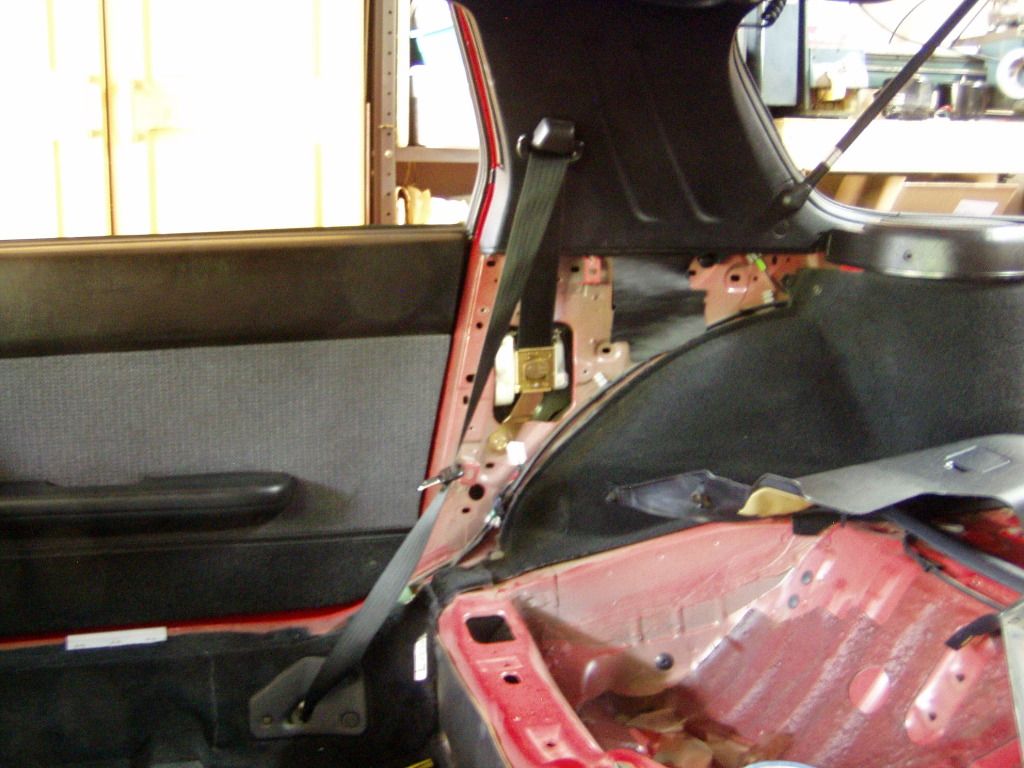
I'm doing a bit nicer job this time around and retaining the trim pieces, particularly the one down at the rocker panel and the top of the trans tunnel. This avoids unsightly gaps in the carpeting and has a more finished look.
Then I decided to bite the bullet and check out the gas tank.
Once again, the expectations were worse than reality...the bulkhead screws came out with no drama whatsoever, even the fuel hoses were pliable and just came right off.
Inside of the tank looks pretty good (although the bit of fuel remaining absolutely reeks):
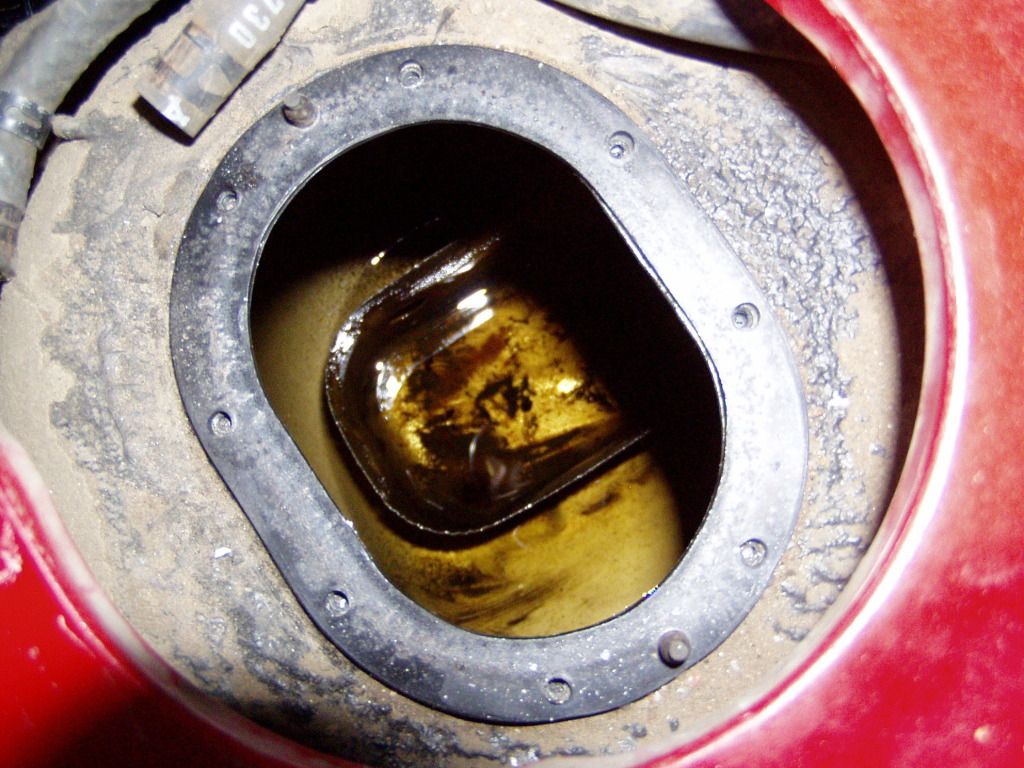
The pump assy. looks OK to me:
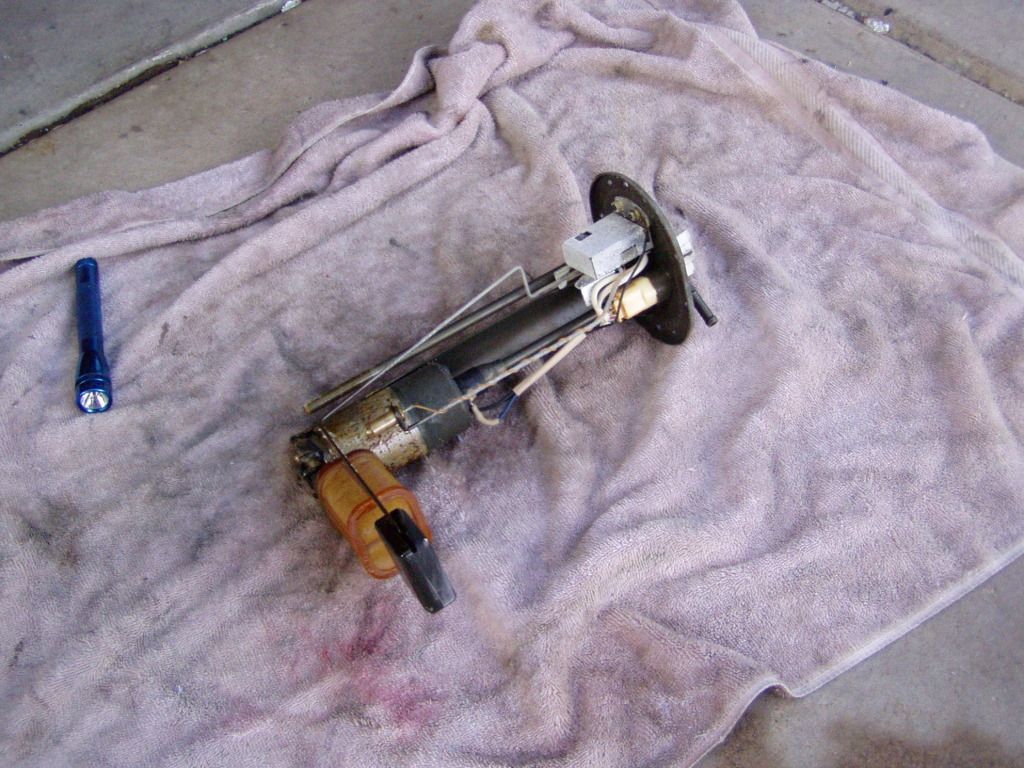
I just put it all back together, secure in the knowledge that it's easily removed if need be.
So, two more big items crossed off the list.
I'm doing a bit nicer job this time around and retaining the trim pieces, particularly the one down at the rocker panel and the top of the trans tunnel. This avoids unsightly gaps in the carpeting and has a more finished look.
Then I decided to bite the bullet and check out the gas tank.
Once again, the expectations were worse than reality...the bulkhead screws came out with no drama whatsoever, even the fuel hoses were pliable and just came right off.
Inside of the tank looks pretty good (although the bit of fuel remaining absolutely reeks):
The pump assy. looks OK to me:
I just put it all back together, secure in the knowledge that it's easily removed if need be.
So, two more big items crossed off the list.
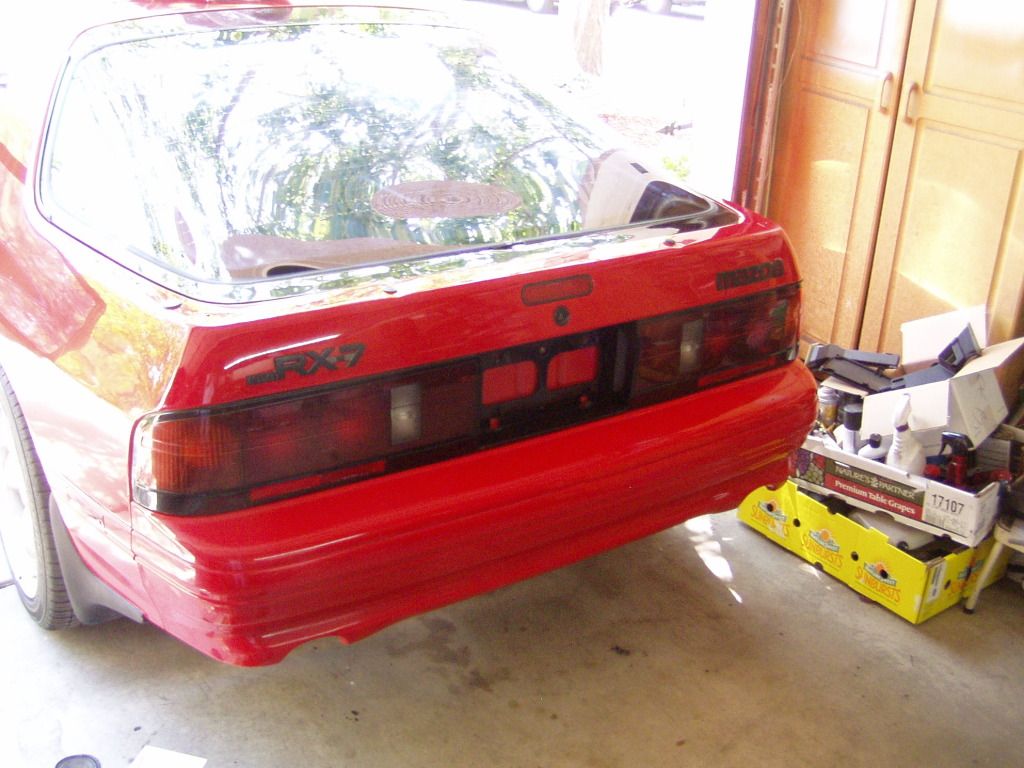
Today I began putting things back on the car and it really feels good.
I started with the tail lights:
Which allowed for most of the interior aft of the doors to be installed:
There's a surprising amount of (mostly plastic) hardware involved and I spent considerable time shuttling between chassis, making sure the GTU got the full compliment of correct doodads,
I'm even going to try using two pads underneath the carpet behind the bin support to eliminate the step that Mazda left. Why the rear deck wasn't flush always ticked me off.
Painted the wiper arms:

Spent way too much time trying to get the glass clean, particularly the windshield.
Figured it would never be easier to do than now but it's still awkward and I've never discovered a really good way of doing it.
Since it's pretty obvious the car hasn't been smoked in, the greasy residue on the glass must be ex-gassing from the dash vinyl...whatever the hell it is, it's tough to remove.
I finally tried near boiling water with a few drops of dishwashing detergent, a squeegee and a fluffy towel...progress was made but I'll have to make a second pass, at least.
The exterior of the windshield shows the typical dust pitting...no matter what you do, in Denver your windshield is pretty well trashed in just a few years because of all the airborne dirt from the plains.
I don't know if those windshield "doctors" actually work or not but it's not a high priority item right now.
I'll be happy if it's just not all smeary.
Until the actual swap occurs, the interior work is practically finished for now.
Back into the bay for a few more details.
I started with the tail lights:
Which allowed for most of the interior aft of the doors to be installed:
There's a surprising amount of (mostly plastic) hardware involved and I spent considerable time shuttling between chassis, making sure the GTU got the full compliment of correct doodads,
I'm even going to try using two pads underneath the carpet behind the bin support to eliminate the step that Mazda left. Why the rear deck wasn't flush always ticked me off.
Painted the wiper arms:
Spent way too much time trying to get the glass clean, particularly the windshield.
Figured it would never be easier to do than now but it's still awkward and I've never discovered a really good way of doing it.
Since it's pretty obvious the car hasn't been smoked in, the greasy residue on the glass must be ex-gassing from the dash vinyl...whatever the hell it is, it's tough to remove.
I finally tried near boiling water with a few drops of dishwashing detergent, a squeegee and a fluffy towel...progress was made but I'll have to make a second pass, at least.
The exterior of the windshield shows the typical dust pitting...no matter what you do, in Denver your windshield is pretty well trashed in just a few years because of all the airborne dirt from the plains.
I don't know if those windshield "doctors" actually work or not but it's not a high priority item right now.
I'll be happy if it's just not all smeary.
Until the actual swap occurs, the interior work is practically finished for now.
Back into the bay for a few more details.
Yeah, I'm a long time (since the mid-70's) Rain X user but it doesn't really clean glass and anyway, it's the inside that's being a bitch, not the outside.
I'll have to wait till Sunday and nab some newsprint from a neighbor because I sure as hell don't get one anymore.
Well, another in a long line of my assumptions was shot down today.
I figured that the chassis harness (driver side) terminated just inside the firewall with some plugs...but nooooo, it continues it's merry way across the dash and to hell and gone as far as I know.
So much for just swapping over my other harness.
This is going to require some ponderin'.
I really didn't want to get into full blown harness modification right now, I'd much prefer to get the car driving, take my time working on a schematic and do the wiring next spring, fully prepared.
I guess I'll just do some mickeymouse fixes to the damn rabbit damage and live with it for a while.
I suppose I should drop the blower motor and see if any nasty surprises await me there...
Passion for Racing
Joined: Aug 2010
Posts: 1,066
Likes: 2
From: Crown Point, Indiana
I always have the best luck with Invisible Glass and a microfiber. Works best when the glass is nice and cool. It's amazing what a transformation it makes in the clearness and shine of the glass.
Took me a while to figure out what you were talking about...
Just dropped the blower assembly...like everything else in this car it was freakishly clean and the sealing foam wasn't even all dried up.
Pulled the EM harness with no trouble, definitely the way to do it, IMO.
So far, with the exception of the rabbit damage, I've seen no indication of electrical problems at all- no crispy wires, no overheated connectors...it all looks good.
Cleaned and painted a few little brackets, now to find some brake hardlines.
Another semi-fun day of touch up and test fitting.
Only "semi" because of a 2 1/2 hour timesuck, needlessly aggravating encounter with Advance Auto.
I did finally get the correct brake line and was able to bend it into position...mostly.
The MC/prop valve end will have to wait until those are installed.
Painted the airbox mount brackets, the heater return line and the main fuse box bracket.
I've gone back and forth about relocating the fusebox, but decided that for this stage of the build, the stock spot was perfectly fine.
It is easily accessible and well protected from the elements, so it's not like the original site was arbitrary.
Quite a bit of that section of the harness gets stripped back for the battery relocate and I'll just tidy up the branch that travels to the fuses at that time.
I final installed the r/h wheelwell liner...doesn't seem like much but like the interior, there's a lot of damn hardware for such a simple part.
I noticed that I should clean the insides of my wheels too.
Some other time, the wheels will be off again.
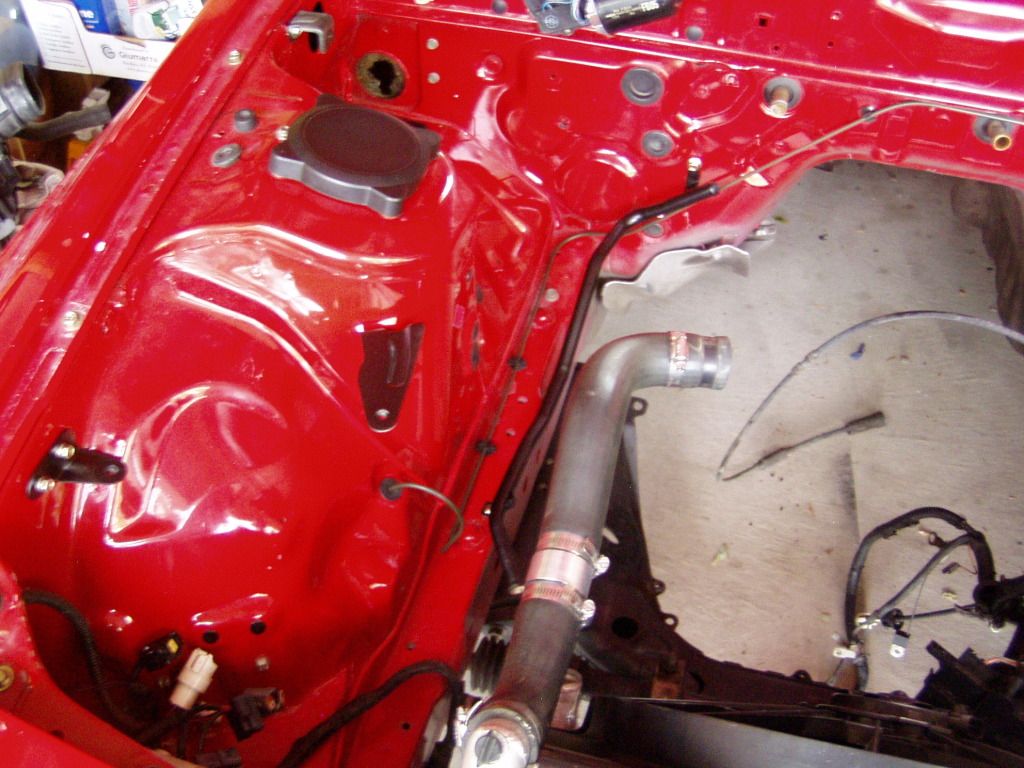
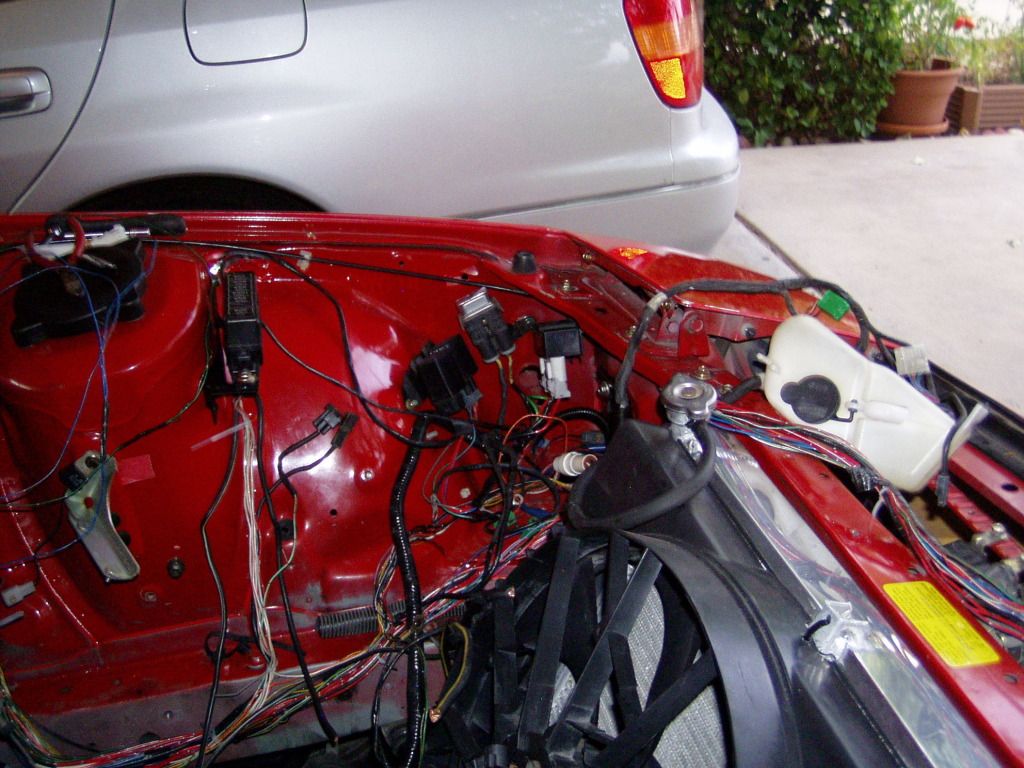
Began the electrical this AM:
Pulled out the entire front harness and have stripped it all the way to the connections for the trailing coil.
The primary reason is the relocate of the washer reservoir/pump.
I need the pump connector around the wiper motor now, not up at the headlight.
It'll run behind the booster and tuck up under the firewall lip.
All the AC wiring can be deleted.
The "power" harness (starter, alternator, battery) is now separate from the rest and the power steering fluid/grime has been taken care of.
After the harness prune is over, I'll reconnect the harness and adjust the wire runs.
I'll be able to reuse all of the factory split loom tubing...as usual, under the tape it's in great condition.
I also did some fooling around, mostly as an escape from the sticky harness stripping, and decided to keep the jack stuff onboard.
I cleaned up and lubed the aluminum jack and handle and opened the supplied wheel chocks.
Pretty sure the chocks have never even been removed from the storage bag (there's only one impression on the foam padding).
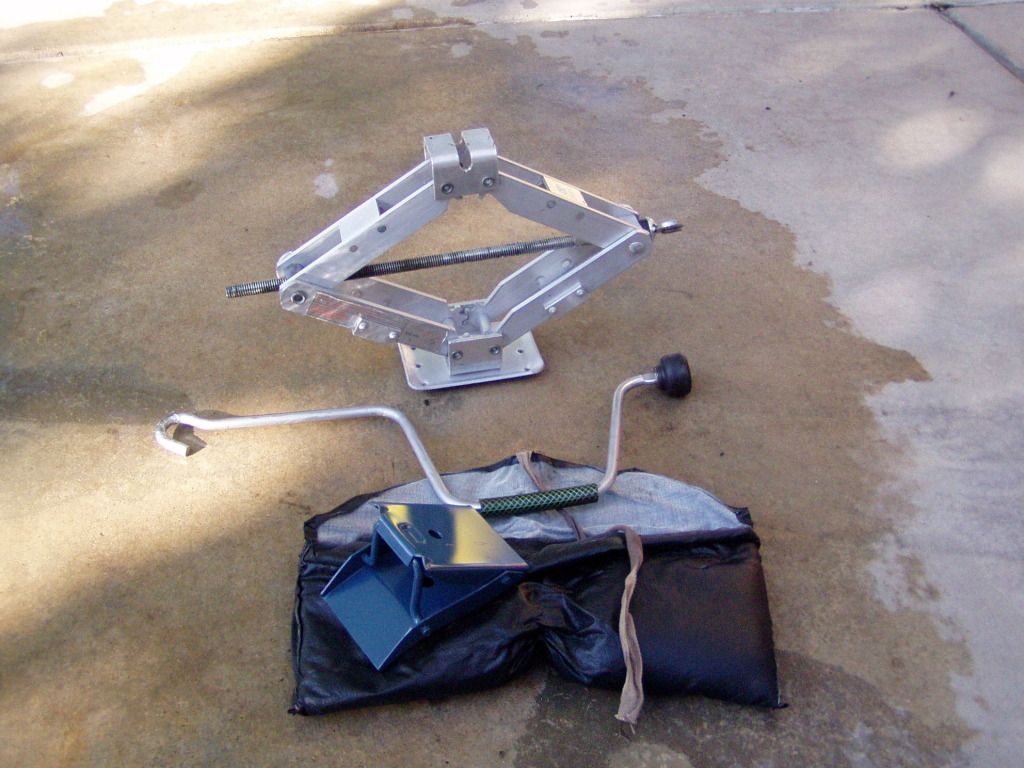
The jack will not fit in the stock location (it's wider than the blue steel stocker) but the handle clips in correctly and the chocks fit nicely in the space, so it's buttoned up. The jack I'm going to try to mount in the spare wheelwell.
Not sure why I'm doing this because I know I'll never use them but it seemed like the completist thing to do.
For some reason, it seems to compliment the mudflaps.
And then there's this...
Just thinking on it.
Those are vents from a turboZ (300, maybe?) that I found a few months ago.
I've become interested in extractor venting after seeing what Digitalsolo did to his car (he used Lumina vents) but the Z vents were the only ones at the yard.
Not many cars have hood vents, as it turns out.
Anyway, I'm just looking for now.
Pulled out the entire front harness and have stripped it all the way to the connections for the trailing coil.
The primary reason is the relocate of the washer reservoir/pump.
I need the pump connector around the wiper motor now, not up at the headlight.
It'll run behind the booster and tuck up under the firewall lip.
All the AC wiring can be deleted.
The "power" harness (starter, alternator, battery) is now separate from the rest and the power steering fluid/grime has been taken care of.
After the harness prune is over, I'll reconnect the harness and adjust the wire runs.
I'll be able to reuse all of the factory split loom tubing...as usual, under the tape it's in great condition.
I also did some fooling around, mostly as an escape from the sticky harness stripping, and decided to keep the jack stuff onboard.
I cleaned up and lubed the aluminum jack and handle and opened the supplied wheel chocks.
Pretty sure the chocks have never even been removed from the storage bag (there's only one impression on the foam padding).
The jack will not fit in the stock location (it's wider than the blue steel stocker) but the handle clips in correctly and the chocks fit nicely in the space, so it's buttoned up. The jack I'm going to try to mount in the spare wheelwell.
Not sure why I'm doing this because I know I'll never use them but it seemed like the completist thing to do.
For some reason, it seems to compliment the mudflaps.
And then there's this...
Just thinking on it.
Those are vents from a turboZ (300, maybe?) that I found a few months ago.
I've become interested in extractor venting after seeing what Digitalsolo did to his car (he used Lumina vents) but the Z vents were the only ones at the yard.
Not many cars have hood vents, as it turns out.
Anyway, I'm just looking for now.
^
Very possible.
Changed my mind again about the electrical work.Attempted to take a longer view, one that more fully accepted that there would be a stage two.
I could see the future me needing to use wires that were already included in the harness/connectors, repurposing them as needed. Anything I pruned now would be gone forever, to little real benefit.
Several things still get changed, beyond the relocated washer pump, I've also relocated the leading coil and the horns.

Decided to try a long gestating concept and also relocated the fan relay/control setup.
I'm very pleased with the component siting/mounting but the wiring will need redoing.
It's all been moved to nestle behind the drivers headlight, tucked away and out of sight, also quite shrouded from the elements.
While fiddling with the electrical, I took breaks and swapped the sealing rubber between the two hoods. The rubber on my alloy hood was covered in overspray and had lost a lot of it's "rubbery-ness".
The GTU stuff was much nicer.
This took longer then anticipated (lots of push pin fasteners) but is worth it as a small touch,
I always noticed the oversprayed parts, now I can find some new triviality to obsess over.
Multitasking again (or "dithering around", as some would have it), I also began repair of the broken pass. side A-pillar plastic.
I have a good set of S4 manual belt pillar parts but mounting any plastic becomes a challenge once the mousetracks are gone because, the track also doubles as the mount platform for the trim.
Only three mounting points remain...at the bottom where it basically just wedges into the dash side, at the top where it meets the header trim above the windshield and lastly, at the back of the window where it meets the B-pillar trim.
Turns out, the S5 plastic is the better option because it's bigger and covers the gap at the headliner. The narrower S4 stuff just barely makes it.
I've been preparing for the last two days, reactivating the ABS "bondo" slurry ("reactivating"= add acetone to soften) and made the repairs earlier. See what it's like tomorrow.
So many things to do, all with their own lead times and "must do before" steps.It looks chaotic- and it is- but I can see the path to a good resolution, it's coming.
Very possible.
Changed my mind again about the electrical work.Attempted to take a longer view, one that more fully accepted that there would be a stage two.
I could see the future me needing to use wires that were already included in the harness/connectors, repurposing them as needed. Anything I pruned now would be gone forever, to little real benefit.
Several things still get changed, beyond the relocated washer pump, I've also relocated the leading coil and the horns.
Decided to try a long gestating concept and also relocated the fan relay/control setup.
I'm very pleased with the component siting/mounting but the wiring will need redoing.
It's all been moved to nestle behind the drivers headlight, tucked away and out of sight, also quite shrouded from the elements.
While fiddling with the electrical, I took breaks and swapped the sealing rubber between the two hoods. The rubber on my alloy hood was covered in overspray and had lost a lot of it's "rubbery-ness".
The GTU stuff was much nicer.
This took longer then anticipated (lots of push pin fasteners) but is worth it as a small touch,
I always noticed the oversprayed parts, now I can find some new triviality to obsess over.
Multitasking again (or "dithering around", as some would have it), I also began repair of the broken pass. side A-pillar plastic.
I have a good set of S4 manual belt pillar parts but mounting any plastic becomes a challenge once the mousetracks are gone because, the track also doubles as the mount platform for the trim.
Only three mounting points remain...at the bottom where it basically just wedges into the dash side, at the top where it meets the header trim above the windshield and lastly, at the back of the window where it meets the B-pillar trim.
Turns out, the S5 plastic is the better option because it's bigger and covers the gap at the headliner. The narrower S4 stuff just barely makes it.
I've been preparing for the last two days, reactivating the ABS "bondo" slurry ("reactivating"= add acetone to soften) and made the repairs earlier. See what it's like tomorrow.
So many things to do, all with their own lead times and "must do before" steps.It looks chaotic- and it is- but I can see the path to a good resolution, it's coming.
Just found this tread - nice work on the restoration. First time I saw mud flaps on a FC
Can I keep her Mom, can I....pleeeeeze?
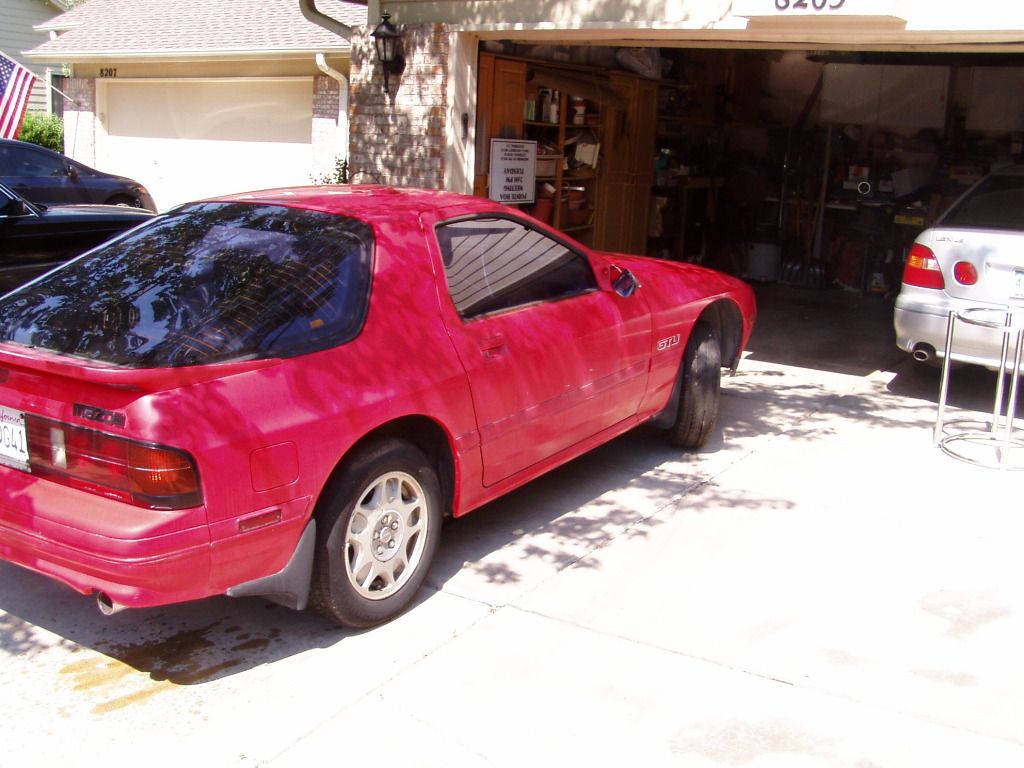
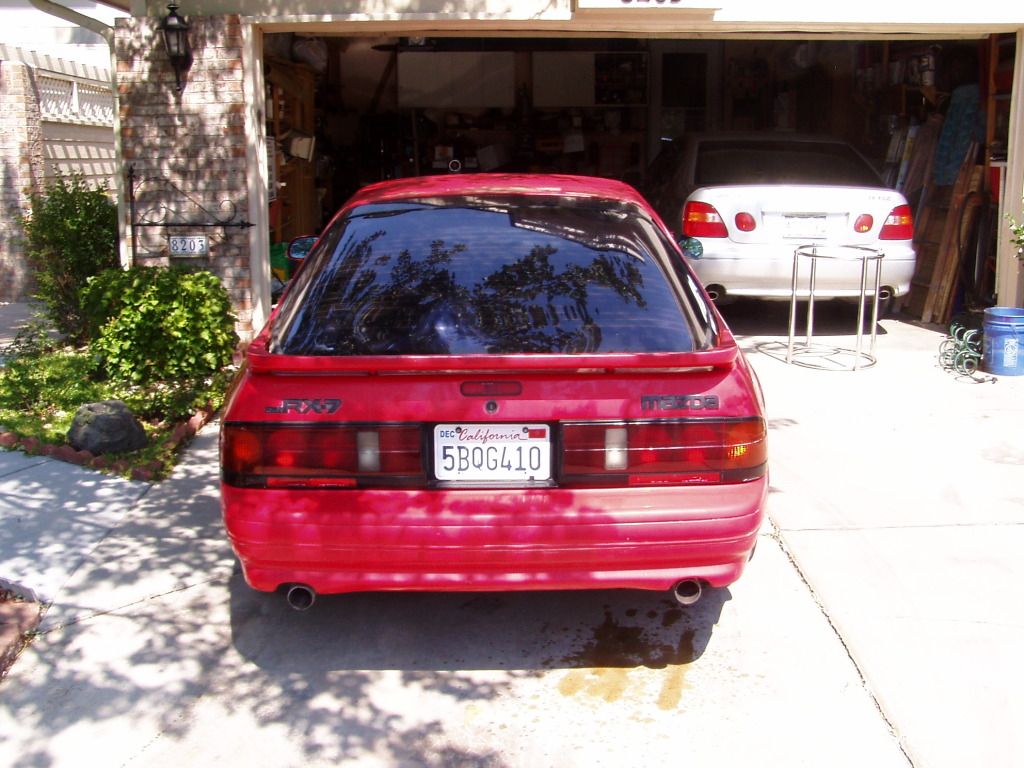
OK, it didn't really follow me home, the real story is less poignant.
Last titled in 2007, this is a 1990 GTU that sat after failing emissions.
Somewhat later the owner discovered that rabbits had dined out on the engine wiring and the car was ceded to my friends at Precision Import Repair here in Denver.
They had designs on a few parts (armrest console, PS pump, brake booster and engine/transmission but the rolling chassis was completely surplus to them.
But not to me.
Over the past few years, my DD 1991 Coupe has suffered the slings and arrows of outdoor living/parking lots/road debris and the final straw came when someone scraped up the rear quarterpanel pretty good. Prior to that, I'd consoled myself by saying the worst of the dings/dents were on replaceable panels (if I got motivated) but that comfort was gone.
I was casually looking at other cars, but then saw this one.
It pushed all my buttons.
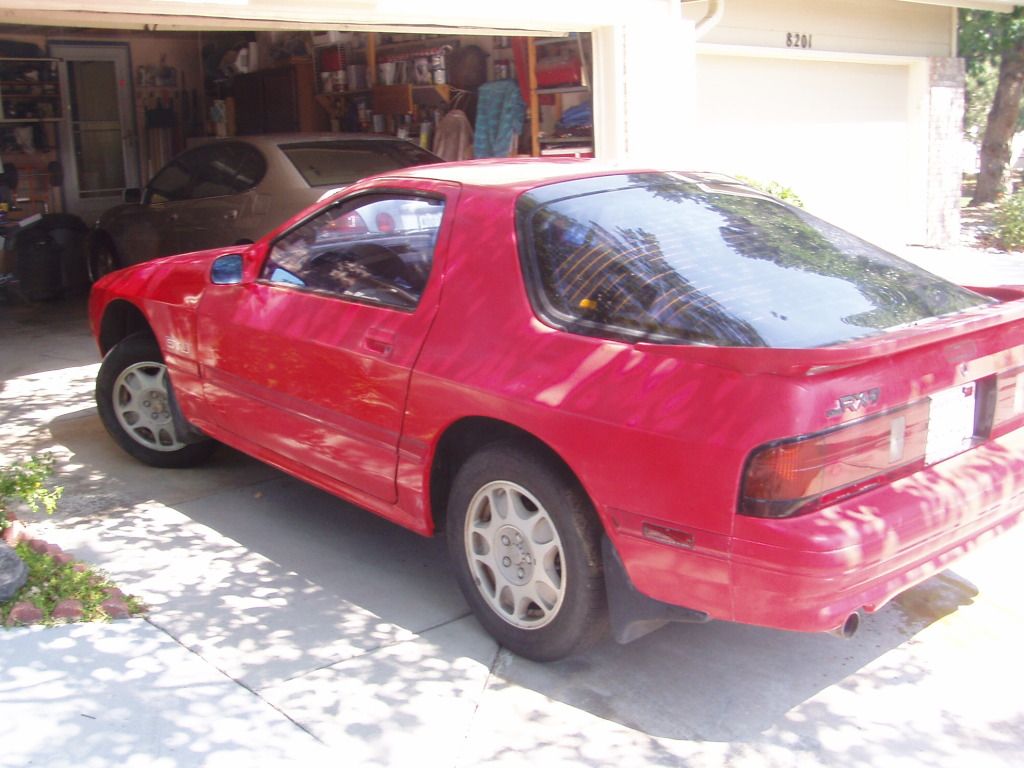
Manual windows, no sunroof, no real dings or dents to speak of, a flawless undercarriage (perfectly straight pinch welds, undented frame rails, no rust whatsoever) and, the icing on the cake, a very nice set of OEM mud guards.
The interior is remarkably fine, not a single cracked vent/plastic piece, the whole thing exceptionally clean, even the driver seat shows no wear/scuffs.
All the electrics- even the clock- are fully functional, I doubt the ashtray has ever even been open.
Odometer shows 139K miles.
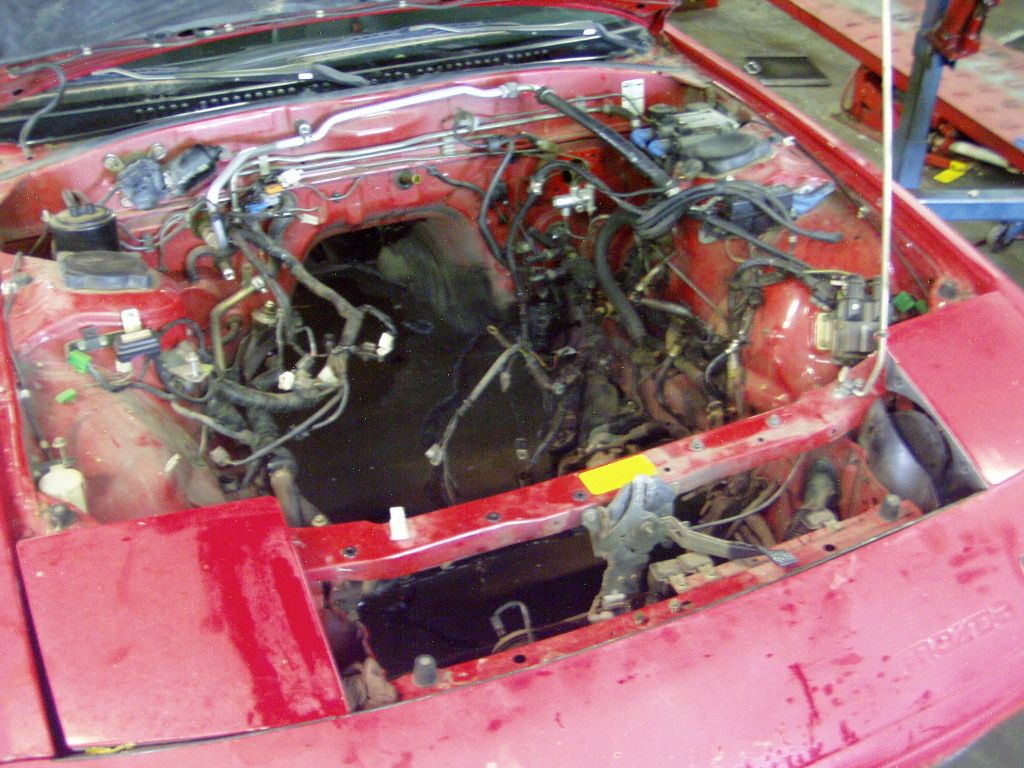
When I first saw it with the engine still in place, I was amazed by how unmolested the bay was, every clip/clamp/bracket and shield just as Mazda intended.
Because the guys at Precision are going to carb/dizzy the motor (it's going in a 1st gen racecar), they weren't interested in the intake, so I harvested all that gaining an untouched throttle body and intake, AFM, airbox, injectors...basically the whole thing save the lower manifold (they want the aux ports).
I traded them some computer/electrical labor for the rolling chassis and had to pull the motor/trans myself.
The registration/emissions on my 91 are good till March, so I have several months to play with this chassis before swapping in my drivetrain.
First up is to strip her down and see how clean I can get it.
I'll be pulling all the body panels forward of the doors and basically doing at all once the mods I've done to the current car over several years.
There will be electrical work but I haven't decided yet how extensive.
At the minimum there'll be significant pruning and tucking or I may jettison the Mazda harness entirely and start from scratch.
The interior will be gutted entirely.
This will be necessary to work on the wiring anyway but I also want to pull the carpet for a power wash and detail the dash (clean/reseal all the ducts mainly).
Both of the mousetracks are trash, the belts will be replaced with manuals.
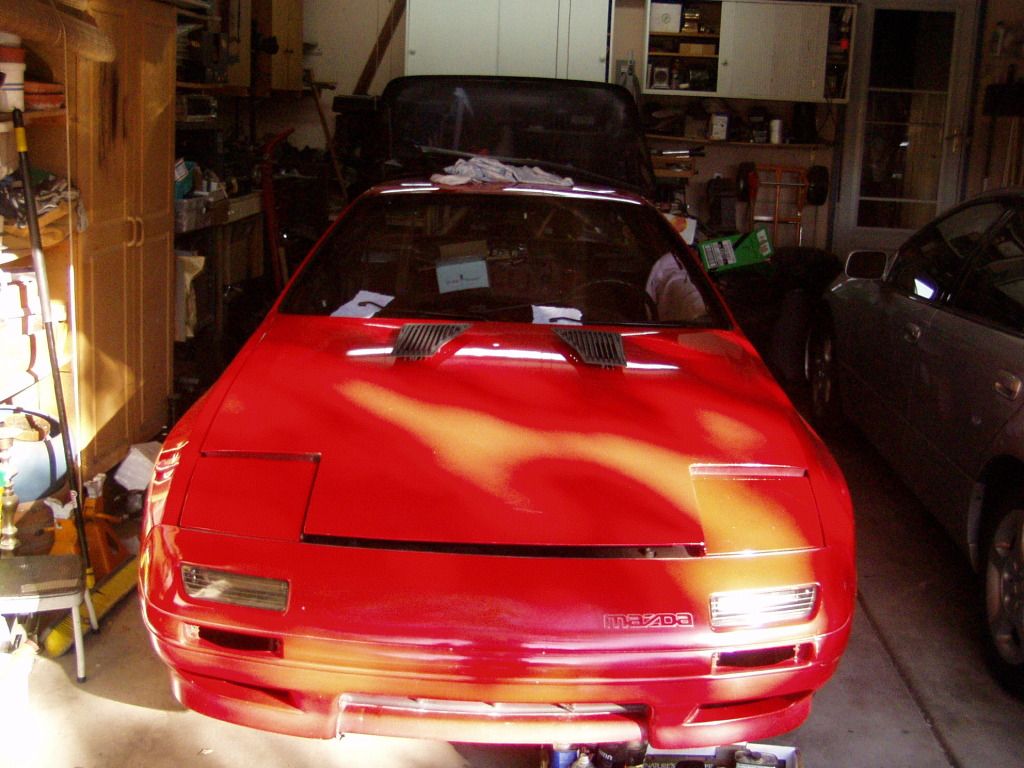
Although the exterior is in very nice condition, the paint itself is not.
Quite dirty and oxidized (but zero rust), it'll be interesting to see how it responds to clay/polish/wax.
I already did a little test patch on the roof (again, YAY!, no sunroof!) and it looks promising.
I'll be removing the wing as it's in bad shape but whether or not I just put my good one back on is undetermined.
I really like the FC wingless but am unsure how well I can deal with the holes.
I don't want to weld/touch up, which is the right way, because starting on the paint is a very slippery slope with a car this old.
I'd also like to obtain a wipered hatch.
I figure that around January I'll swap over all the goodies from my current car to the (hopefully) renovated GTU chassis. The suspension, cooling, brakes and wheels will all make the journey.
Assuming my engine is still purring along (and I haven't hit the lottery), I'll put a new clutch in, clean it up, maybe put headers on and install it as is.
So, this should be fun.
Note:
Experienced engine pullers may wonder and chuckle about the engine harness still being in place.
I am aware that pulling the harness from the cabin side and leaving it attached to the engine is the easy, fast way.
I had to wait (as it turned out, three days) to gain access to inside shop space.
So I just started idly removing bits of the intake, broiling out in the sun, using just my junkyard toolbox.
Not only did I want to carefully remove these bits but I was curious about the extent of the rabbit damage.
At the end of day 3, I was down to the bare keg top and the harness already free of the engine, so I just left it.
Funny thing about the rabbits.
They didn't touch the harness side of the wiring at all but inhaled the wiring from the plugs to the components. They got the TPS and the OMP (bastards! I wanted both of those...) and that's about it.
With a little luck in the classifieds, I'd bet the car would have run for less than $100.
OK, it didn't really follow me home, the real story is less poignant.
Last titled in 2007, this is a 1990 GTU that sat after failing emissions.
Somewhat later the owner discovered that rabbits had dined out on the engine wiring and the car was ceded to my friends at Precision Import Repair here in Denver.
They had designs on a few parts (armrest console, PS pump, brake booster and engine/transmission but the rolling chassis was completely surplus to them.
But not to me.
Over the past few years, my DD 1991 Coupe has suffered the slings and arrows of outdoor living/parking lots/road debris and the final straw came when someone scraped up the rear quarterpanel pretty good. Prior to that, I'd consoled myself by saying the worst of the dings/dents were on replaceable panels (if I got motivated) but that comfort was gone.
I was casually looking at other cars, but then saw this one.
It pushed all my buttons.
Manual windows, no sunroof, no real dings or dents to speak of, a flawless undercarriage (perfectly straight pinch welds, undented frame rails, no rust whatsoever) and, the icing on the cake, a very nice set of OEM mud guards.
The interior is remarkably fine, not a single cracked vent/plastic piece, the whole thing exceptionally clean, even the driver seat shows no wear/scuffs.
All the electrics- even the clock- are fully functional, I doubt the ashtray has ever even been open.
Odometer shows 139K miles.
When I first saw it with the engine still in place, I was amazed by how unmolested the bay was, every clip/clamp/bracket and shield just as Mazda intended.
Because the guys at Precision are going to carb/dizzy the motor (it's going in a 1st gen racecar), they weren't interested in the intake, so I harvested all that gaining an untouched throttle body and intake, AFM, airbox, injectors...basically the whole thing save the lower manifold (they want the aux ports).
I traded them some computer/electrical labor for the rolling chassis and had to pull the motor/trans myself.
The registration/emissions on my 91 are good till March, so I have several months to play with this chassis before swapping in my drivetrain.
First up is to strip her down and see how clean I can get it.
I'll be pulling all the body panels forward of the doors and basically doing at all once the mods I've done to the current car over several years.
There will be electrical work but I haven't decided yet how extensive.
At the minimum there'll be significant pruning and tucking or I may jettison the Mazda harness entirely and start from scratch.
The interior will be gutted entirely.
This will be necessary to work on the wiring anyway but I also want to pull the carpet for a power wash and detail the dash (clean/reseal all the ducts mainly).
Both of the mousetracks are trash, the belts will be replaced with manuals.
Although the exterior is in very nice condition, the paint itself is not.
Quite dirty and oxidized (but zero rust), it'll be interesting to see how it responds to clay/polish/wax.
I already did a little test patch on the roof (again, YAY!, no sunroof!) and it looks promising.
I'll be removing the wing as it's in bad shape but whether or not I just put my good one back on is undetermined.
I really like the FC wingless but am unsure how well I can deal with the holes.
I don't want to weld/touch up, which is the right way, because starting on the paint is a very slippery slope with a car this old.
I'd also like to obtain a wipered hatch.
I figure that around January I'll swap over all the goodies from my current car to the (hopefully) renovated GTU chassis. The suspension, cooling, brakes and wheels will all make the journey.
Assuming my engine is still purring along (and I haven't hit the lottery), I'll put a new clutch in, clean it up, maybe put headers on and install it as is.
So, this should be fun.
Note:
Experienced engine pullers may wonder and chuckle about the engine harness still being in place.
I am aware that pulling the harness from the cabin side and leaving it attached to the engine is the easy, fast way.
I had to wait (as it turned out, three days) to gain access to inside shop space.
So I just started idly removing bits of the intake, broiling out in the sun, using just my junkyard toolbox.
Not only did I want to carefully remove these bits but I was curious about the extent of the rabbit damage.
At the end of day 3, I was down to the bare keg top and the harness already free of the engine, so I just left it.
Funny thing about the rabbits.
They didn't touch the harness side of the wiring at all but inhaled the wiring from the plugs to the components. They got the TPS and the OMP (bastards! I wanted both of those...) and that's about it.
With a little luck in the classifieds, I'd bet the car would have run for less than $100.
I'm pleased to report that the a-pillar repair seems a success.
This shows the repair and the size of the broken segment:
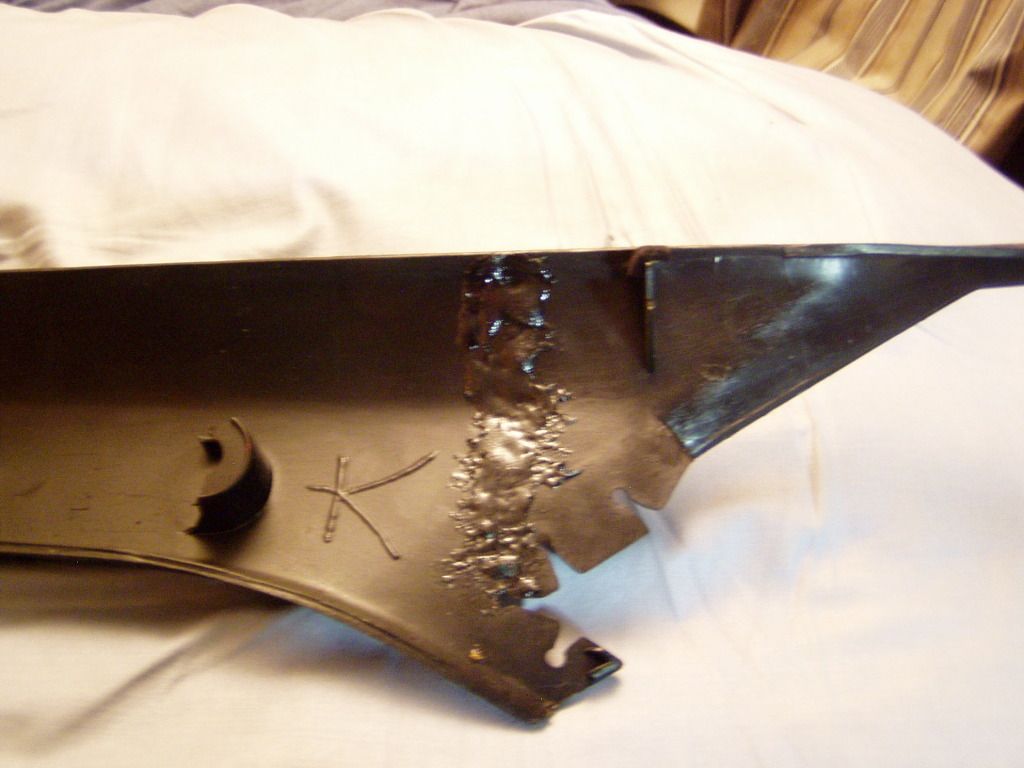
This was the only piece that broke cleanly off, the other two areas only cracked.
The cracked areas were similarly treated but a wider smear across the back, hoping to discourage further expansion of the flaws.
This is all made easier by the textured outer surface, it tends to hide flaws quite well:
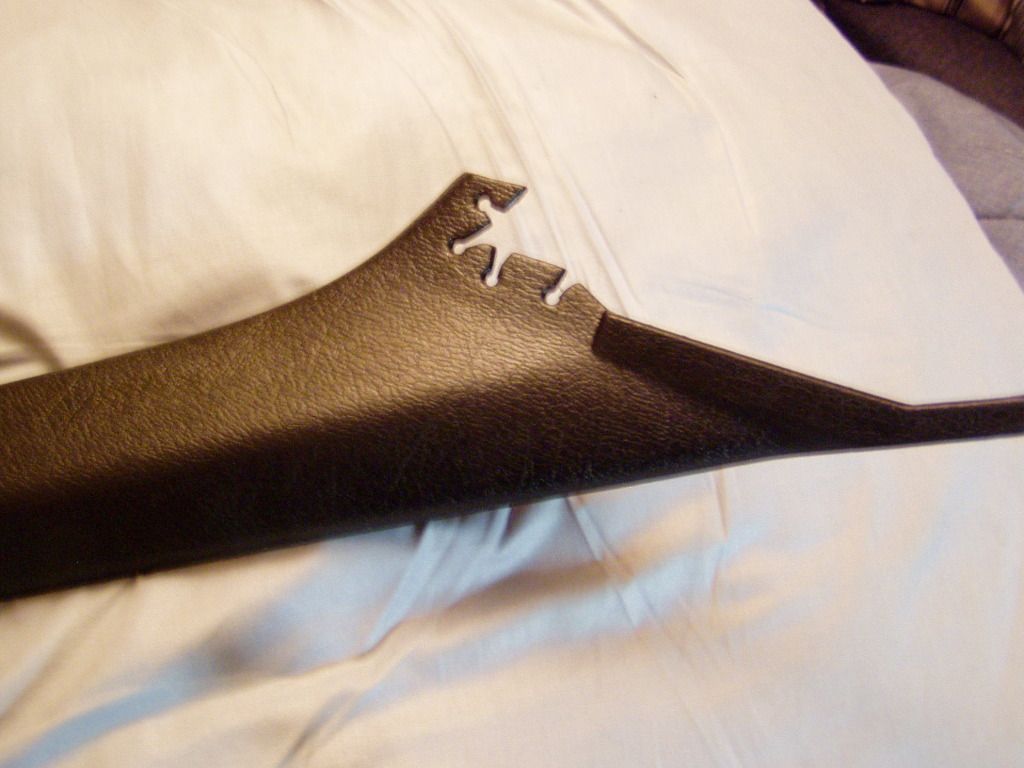
Fortunately, this most fragile of all the interior plastic is not frequently removed, so I'm hopeful the problem is solved.
Next up for plastic work is the dash.
The defroster vents need some attention (I don't think I've ever seen a perfect pair) and there are a few mounting points, specifically, the two bottom gauge bezel tabs and one of the tabs for the finisher panel under the steering column (the panel that holds the little air vent for your *****).
All these little tabs with screw receptacle tabs clipped on are designed to fail, there's no way they survive the torque exerted more than a few times.
I know I can do better.
This shows the repair and the size of the broken segment:
This was the only piece that broke cleanly off, the other two areas only cracked.
The cracked areas were similarly treated but a wider smear across the back, hoping to discourage further expansion of the flaws.
This is all made easier by the textured outer surface, it tends to hide flaws quite well:
Fortunately, this most fragile of all the interior plastic is not frequently removed, so I'm hopeful the problem is solved.
Next up for plastic work is the dash.
The defroster vents need some attention (I don't think I've ever seen a perfect pair) and there are a few mounting points, specifically, the two bottom gauge bezel tabs and one of the tabs for the finisher panel under the steering column (the panel that holds the little air vent for your *****).
All these little tabs with screw receptacle tabs clipped on are designed to fail, there's no way they survive the torque exerted more than a few times.
I know I can do better.
I attempted to repair a crack on the dash structure, not sure yet how that's going.
I don't know if the yellow plastic of the dash skin is ABS or what, so this first repair is just a test.
Seems to be working, time will tell.
Spent most of the day placing and shaping the chassis harness and assembling the clips/clamps to hold it in place.
There's just a bit of "repair" to do (splice in a new R/H running/TS 3-pin connector and terminate the low coolant warning wire) and a few additions (add wiring for the horns/relay and the efan) and the harness can be final installed.
There was not much to be done about the main trunk that runs down the frame rail- and that's fine because much of it is hidden- but I when a different route once the harness gets to the rad and exits into the nose.
Unlike Mazda, I turned up and ran across the underside of the rad support (behind the hood release), then down and out the side of the rad support. This keeps the harness much further from harm's way, out of the airflow to the core(s) and almost completely invisible.
This required a bit of trimming on the rad support to enlarge the chosen exit hole so the big connectors can pass through, I'll show that when the harness is installed.
Next will be the efan wiring, which is almost completely separate from the rest but will share some real estate and routing. With the stock airbox and the relocated recovery tank in place, most of the big connector sites (basically, behind the headlights) is hidden and should look clean.
The fusebox and it's wire trunk (considerably pruned) are what they are, I just want a simple,easily clipped path that keeps the wiring away from the brake line that goes into the wheelwell.
I think it'll look pretty good in a day or two.
All the harness prep is complete and it's ready for looming.
Took a trip to the junkyard, prayed for miracles, got some OK goodies but nothing extraordinary and definitely not what I was hunting.
That's how junkyards work.
Anyway, tomorrow the harness gets covered and final installed, I hope (if it takes longer, well then, it takes longer).
At that point I have to install the cable for the battery relocate, currently it's in the '91 and removing it effectively kills the car.
A moment of silence for the old '91, her heart will live on in the GTU.