
Removing Front Harness


Thread Starter
Junior Member
Joined: Oct 2019
Posts: 44
Likes: 0
From: Dallas, Texas
Removing Front Harness
So I didn't see a post with a DIY on removing the Front Wiring Harness. Let me preface this with, I am not a mechanic. I will not be liable for any damage you may do to your car following this guide.
Remember label everything, take your time, and good luck with sealed connectors.
This guide is specific to an 87 Turbo II. Should be similar though for N/A.
Tools: 10mm Open End/Box End wrench, 10mm Ratchet with extender. I used a deep socket.
Also my car didn't have any A/C, interior carpet, a radio, or some interior pieces. So I might have a step or two missing for those with full interiors. Please let me know if there is anything I should add or correct.
Drain your coolant & Unplug battery.
Link to all photos in post & extras.
Lastly, please forgive my rusted RX7 she was a northerner. Thanks for reading
Remember label everything, take your time, and good luck with sealed connectors.
This guide is specific to an 87 Turbo II. Should be similar though for N/A.
Tools: 10mm Open End/Box End wrench, 10mm Ratchet with extender. I used a deep socket.
Also my car didn't have any A/C, interior carpet, a radio, or some interior pieces. So I might have a step or two missing for those with full interiors. Please let me know if there is anything I should add or correct.
Drain your coolant & Unplug battery.
Link to all photos in post & extras.
- Remove Dashboard (How To).
- My link to the photos includes some for removing the dash
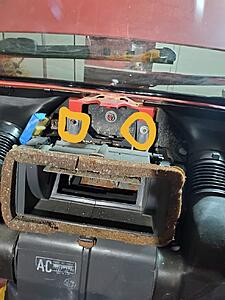
- After the dash is removed, next remove the blower motor. This will allow access to all the Engine and Front Harness.
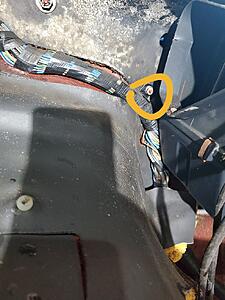
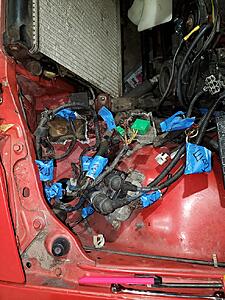
- I believe there are three 10mm nuts holding this motor on, two on the bottom. 1 on the top. Disconnect and mark both ends of the connectors with painter's tape or ties.
- I removed all three connectors from the ECU because I wanted to pull the Engine Wiring harness too. If you don't want to. I think you will be fine just pulling the Largest of the three connectors.
- Then start removing all the connectors and labeling them. (I personally label one the connector on the harness side P# and then on the other end of the connector J#)
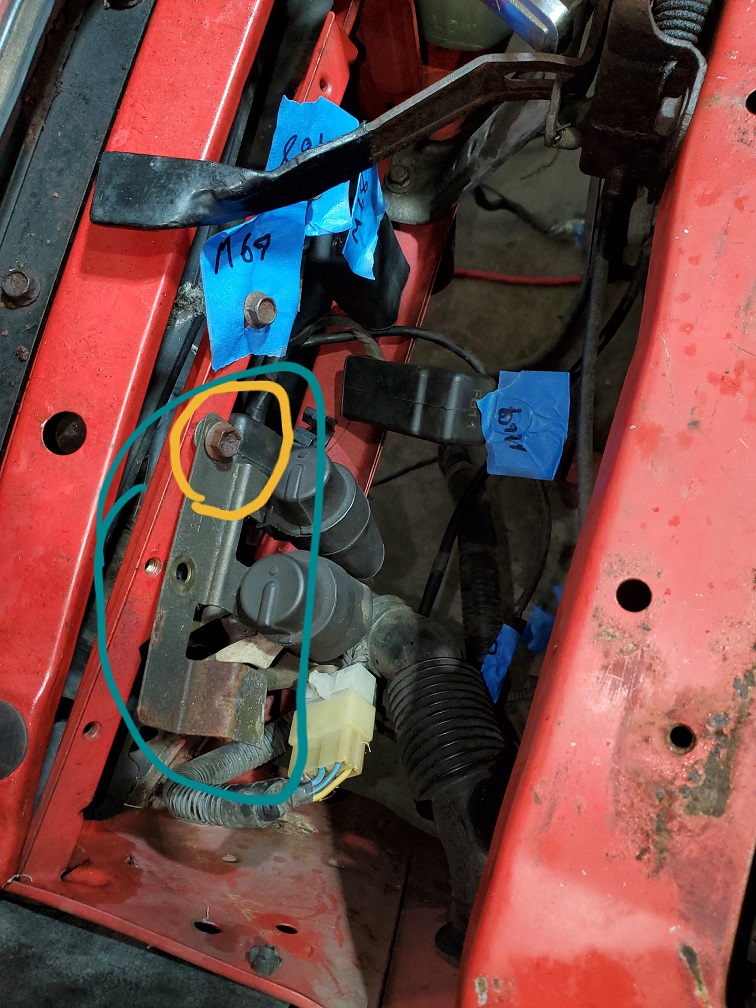
- When removing the connectors in the passenger foot-well, you may need to loosen this bolt to get at the connector below it.
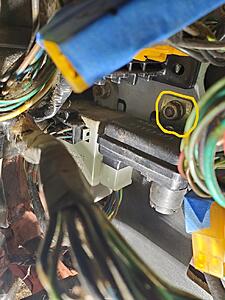
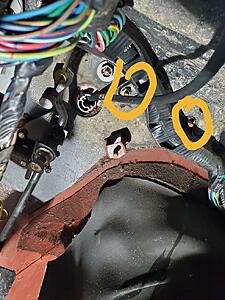
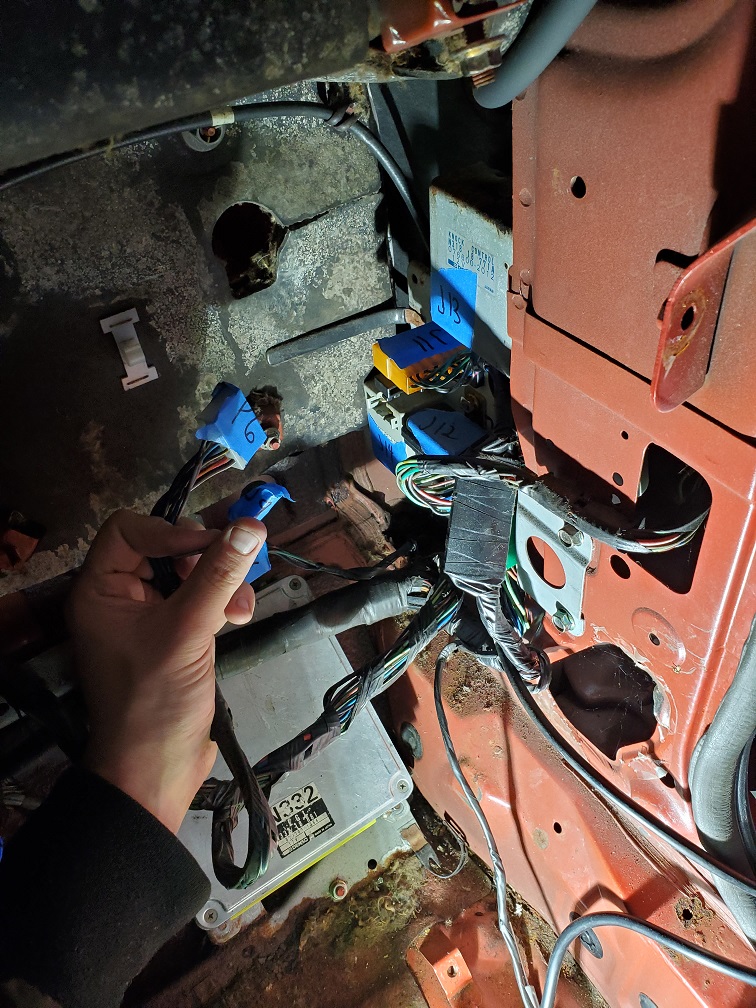
- Below is an image with most of the connectors removed and labeled.
- As you move your way along, you will get stuck at removing the harness past the Heater Core. To remove the heating core, there are two hoses that you need to undo from the firewall on the engine side that are connected to the core. Next remove the bolts holding it in, two on the top & one on the bottom left side.
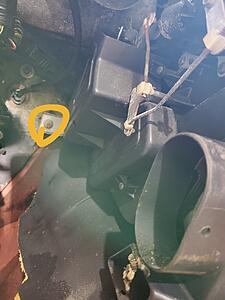
- With this removed, we can now access the bolts holding the harness into the fire wall. There should be three 10mm bolts.
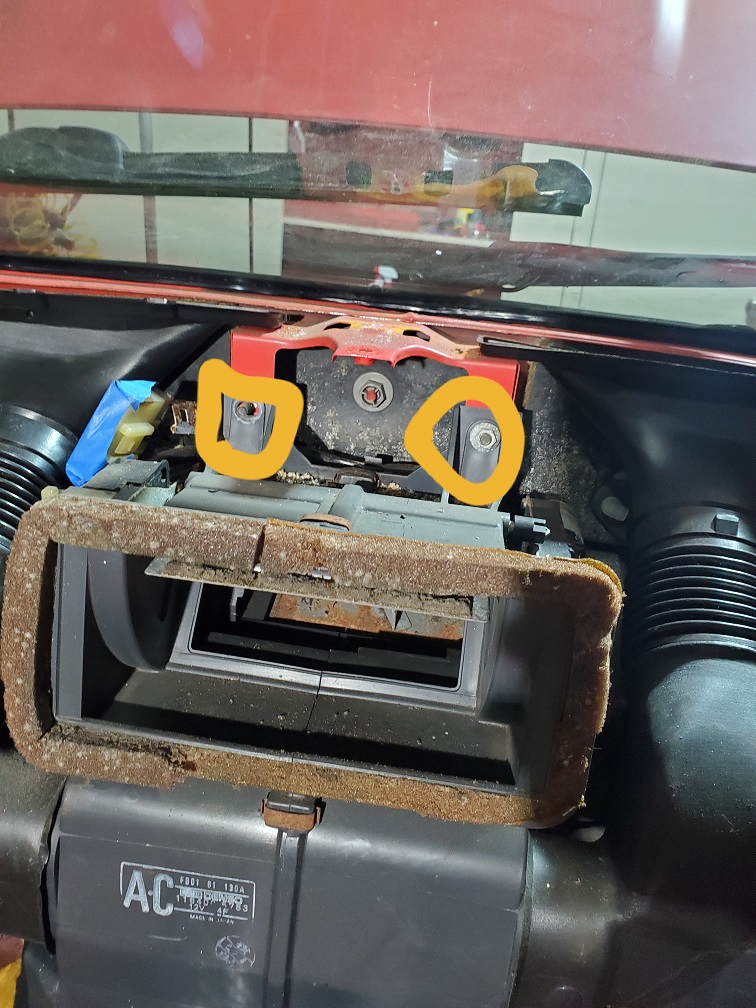
- Now we can move onto the two screws and the 10mm in the photo below.

- There is another 10mm bolt holding down the entire plastic mount located just to the left of the previous bolt/screws.
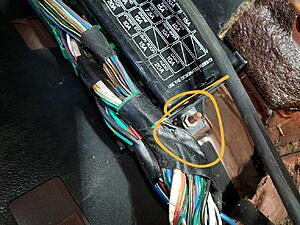
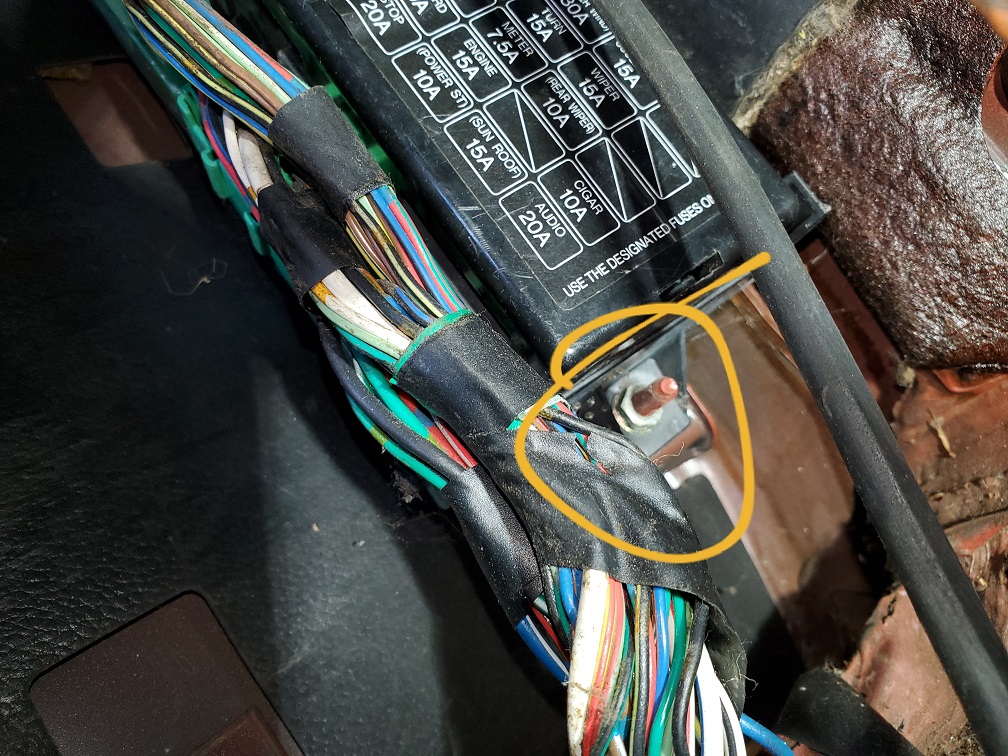
- Before you take off the plastic mount with all the wires (Pull up). You should move your way to the driver's footwell and start working on the fuse box area.
- Had to remove the turn signal CPU to reach the fuse box.

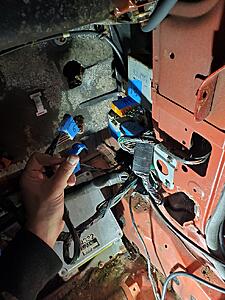
- Then I was able to undo the connectors running from the Back harness to the fuse box. The fuse box itself has a 10mm nut on the bottom, and is clipped at the top.
- After everything has been unplugged and labeled from the fusebox area & the steering column. You will want to move your way up to the passenger headlight section in the engine bay.
- Remove intake/TID/Filter.
- Unplug all the connector's to the lights, resistor pack, fuel pump relay, etc. You will need to remove the bracket holding the fuel pump relay to access both connectors. (Two 10mm bolts)
To remove the headlight connector, I just removed the two bolts on the back of the headlight and the two on top. The wedge my hand down in there and unplugged it. Might not work for everyone. Also you can ignore the purple marked area. Mark was made for something else I needed to remember. 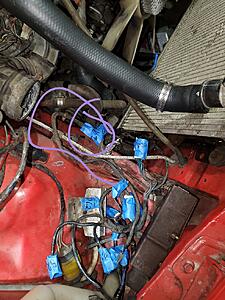
- From here pull the line under the car. Be ready for a lot of plastic clips that hold the harness to the engine bay. The harness is taped to the plastic clips on both sides.
- Remove Battery & Battery Tray.
- Now Remove connectors to lights, fuse box, and relays (near the horns). I pulled the relays with my harness.

- Both Coil Ignitors will need to be temporarily removed to access connectors and firewall. Both are held on by 10mm nuts.
- Undo and label connectors that were below the coil igniter.
- Now slowly but with some force, feed the entire harness through the fire wall into the car. It should be easier with two people.


Lastly, please forgive my rusted RX7 she was a northerner. Thanks for reading
Last edited by cactuscactus; Jan 13, 2021 at 10:42 PM.

Thread
Thread Starter
Forum
Replies
Last Post
automationLED
3rd Generation Specific (1993-2002)
16
Jul 29, 2015 10:16 PM
13bmaniac
3rd Generation Specific (1993-2002)
2
Jun 7, 2008 10:56 AM
Dan_s_young
1st Generation Specific (1979-1985)
4
Feb 5, 2006 10:33 PM