
Make your own window switches...

I ruined a small plastic piece inside my switches while I was cleaning the contacts last so I decided to make my own that shouldn't have to be replaced for the life of the car. There are a few somewhat similar threads, but this can be used by people who can't read a wiring diagram.
Materials Needed:
2 DPDT Mom On-Off-On switches (I used the rocker type here http://www.amazon.com/DPDT-Momentary.../dp/B001PNO4OE)
Wire (I used some 14 AWG I had laying around)
Solder and iron
ABS Plastic, Sheet metal, etc.
Sand paper/File (Having a dremel tool helps)
RTV
Electric tape (I used liquid tape)
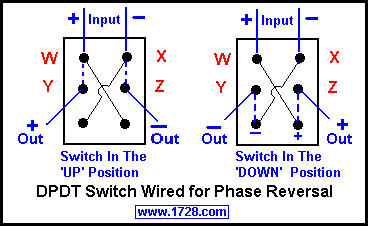
This is how a DPDT switch works:
I used 30A switches which may have been overkill, but I doubt they'll ever need to be replaced.
Steps
1. Cut a rough template of the outside edges of the panel the switches will be mounted in using your desired material, I used some ABS plastic from work. Because of how thin the edges are on my panel I recommend using something about 1/4" thick. This of course depends on the strength of your material and how large of switches you get, mine were fairly large.
2. Sand the outer edges to the point where it can fit in the opening, but leave it tight enough so you can just 'pop' it in.
3. You can use either a zip bit on a dremel to make the hole which I used until my dremel died , or what I had to do for about half of it and drill holes with a drill bit for the main area and then use a file or sand paper to get the switches in.
4. After I inserted the switches, I turned the panel upside down with the switches in and RTV'd them together to prevent any leaks and let it cure overnight. Don't use too much on the edges or it may not seat right in the door anymore.
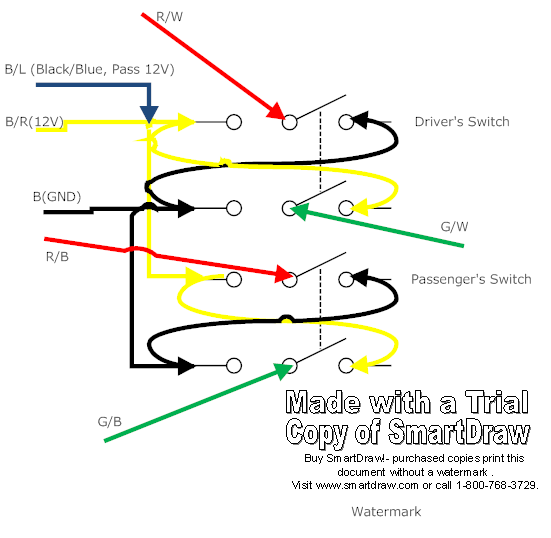
5. Now wiring the switches. I cut the male side of the harness for the switch from the original switch. I added a little wire between the cut harness and the switch. (About 3 inches which was somewhat excessive.) I soldered the wires to the switch this way:
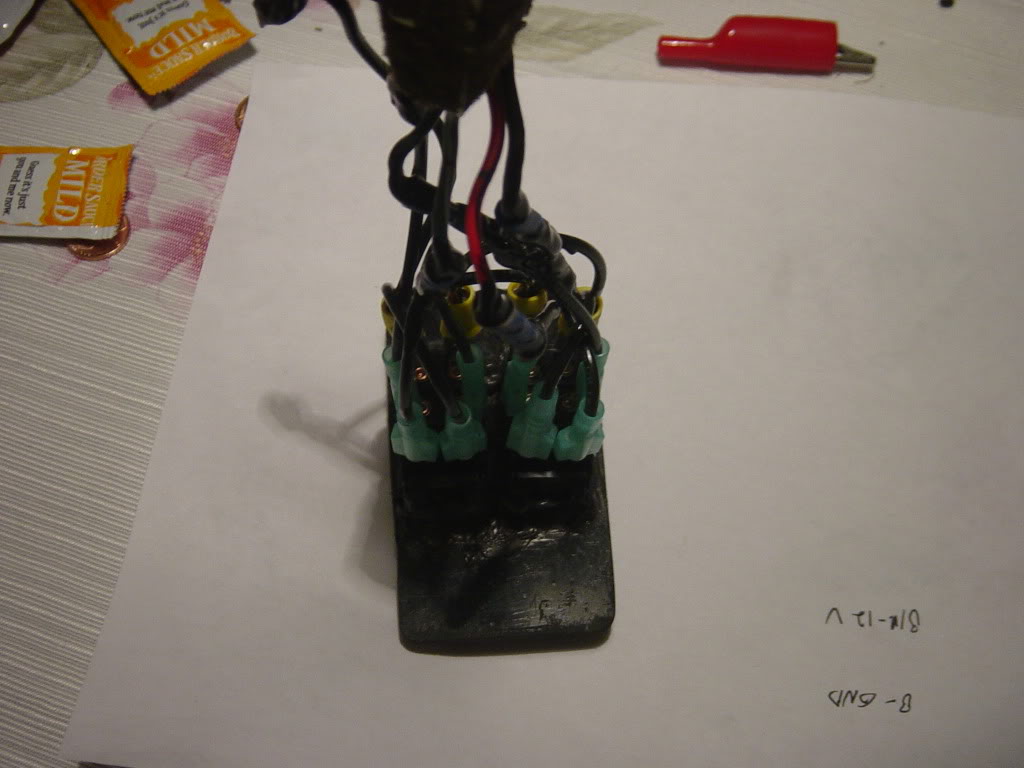
I had originally crimped the wires with female spade connectors but it makes the whole setup go too deep in the door and wont fit.
6. I then applied liquid tape to all metal connections showing.
Here is a picture when I used crimped connectors before to give you an idea:
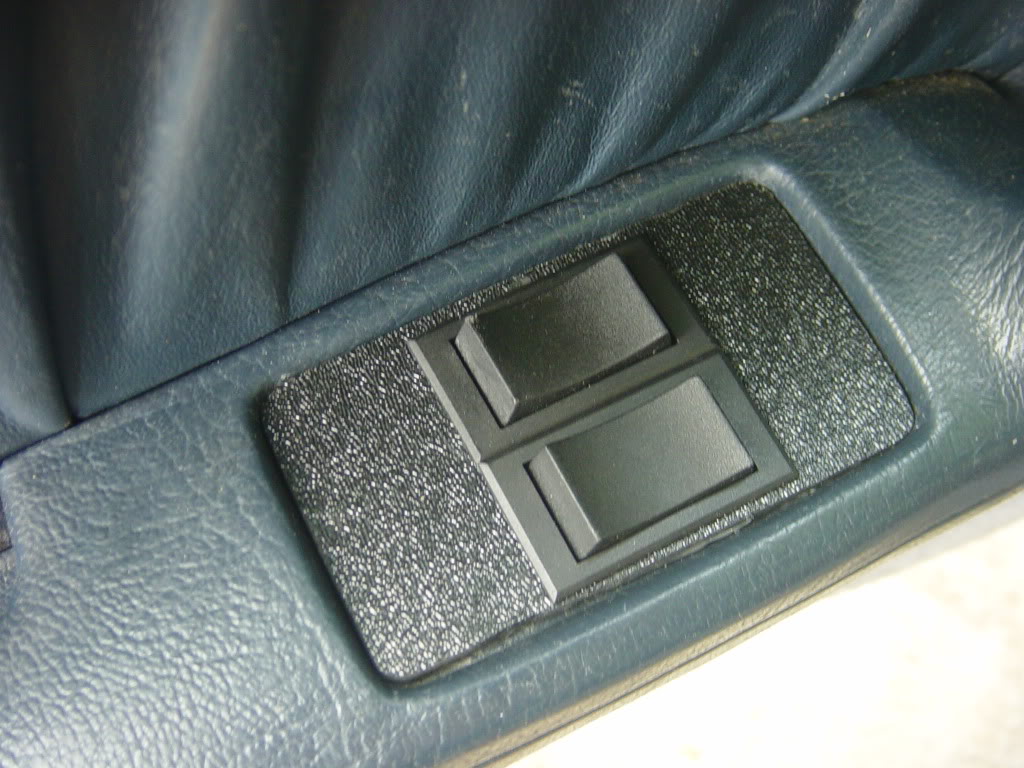
7. Plug it in. I'm going to RTV mine in most likely as it pops out if I shut my door too hard. Here's my finished product, if you take a little more time I'm sure it would look better too.
Notes:
If you don't want your passenger switch to have functionality you can opt not to combine the B/L (Black/Blue) and B/R (Black/Red) wires. These switches should last a long time, even taking the full 12V from the car.
Any thoughts or suggestions are appreciated.
Materials Needed:
2 DPDT Mom On-Off-On switches (I used the rocker type here http://www.amazon.com/DPDT-Momentary.../dp/B001PNO4OE)
Wire (I used some 14 AWG I had laying around)
Solder and iron
ABS Plastic, Sheet metal, etc.
Sand paper/File (Having a dremel tool helps)
RTV
Electric tape (I used liquid tape)
This is how a DPDT switch works:
I used 30A switches which may have been overkill, but I doubt they'll ever need to be replaced.
Steps
1. Cut a rough template of the outside edges of the panel the switches will be mounted in using your desired material, I used some ABS plastic from work. Because of how thin the edges are on my panel I recommend using something about 1/4" thick. This of course depends on the strength of your material and how large of switches you get, mine were fairly large.
2. Sand the outer edges to the point where it can fit in the opening, but leave it tight enough so you can just 'pop' it in.
3. You can use either a zip bit on a dremel to make the hole which I used until my dremel died
, or what I had to do for about half of it and drill holes with a drill bit for the main area and then use a file or sand paper to get the switches in.4. After I inserted the switches, I turned the panel upside down with the switches in and RTV'd them together to prevent any leaks and let it cure overnight. Don't use too much on the edges or it may not seat right in the door anymore.
5. Now wiring the switches. I cut the male side of the harness for the switch from the original switch. I added a little wire between the cut harness and the switch. (About 3 inches which was somewhat excessive.) I soldered the wires to the switch this way:
I had originally crimped the wires with female spade connectors but it makes the whole setup go too deep in the door and wont fit.
6. I then applied liquid tape to all metal connections showing.
Here is a picture when I used crimped connectors before to give you an idea:
7. Plug it in. I'm going to RTV mine in most likely as it pops out if I shut my door too hard. Here's my finished product, if you take a little more time I'm sure it would look better too.
Notes:
If you don't want your passenger switch to have functionality you can opt not to combine the B/L (Black/Blue) and B/R (Black/Red) wires. These switches should last a long time, even taking the full 12V from the car.
Any thoughts or suggestions are appreciated.


Trending Topics
 .
.
Forgot to mention that the switches will eventually all run out, leaving you something like this or the hand crank. Once the contacts have been sanded down to copper, the need to sand them will become more frequent, increasing the chances to break something old and plastic.


+1 to archive. We're going to need stuff like this more and more as our cars continue to age. My last window switch was so bad I was having to clean the contacts once a month. I'm just shocked I never had my car broken into while the window wouldn't roll up on my way to work.


Joined: Mar 2001
Posts: 31,849
Likes: 3,238
From: https://www2.mazda.com/en/100th/

Senior Member
Joined: May 2010
Posts: 535
Likes: 0
From: vancouver, bc
3d printing is slick. you can make real life prototypes for custom parts. so much more economical.
oh and you guys know first gen mpv switches fit almost perfectly and, aside from repinning the driver side switches, are direct plug and play right? a better revised design for the switches as well. and mpv's are a dime a dozen!
+1 for pw relay too. can not believe mazda didn't do this from the factory with how much current they draw
Joined: Mar 2001
Posts: 31,849
Likes: 3,238
From: https://www2.mazda.com/en/100th/