
JerryLH3's RX-7 Turbo II Restoration


Thread Starter
Joined: Feb 2001
Posts: 2,855
Likes: 225
From: Tampa, FL
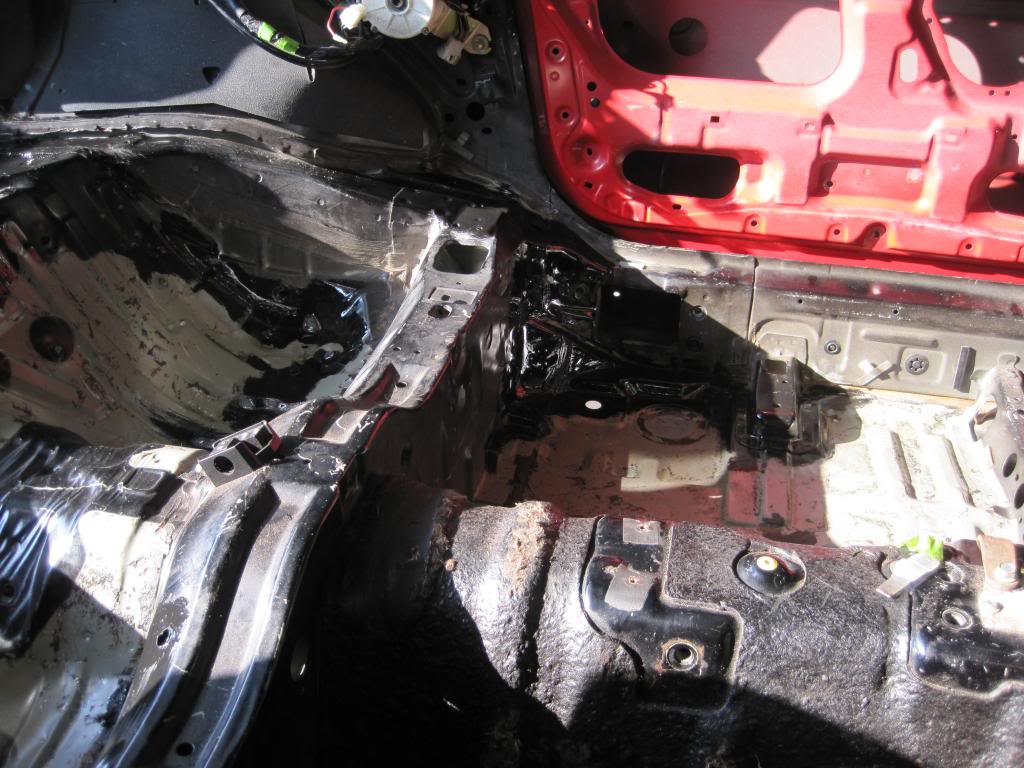
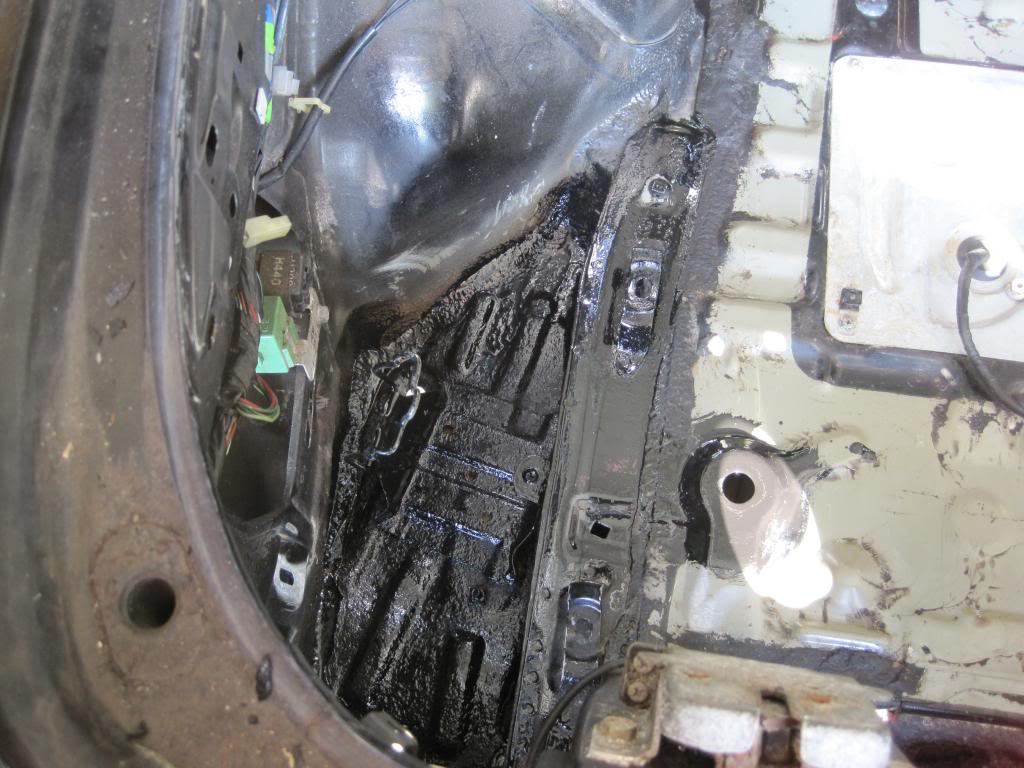
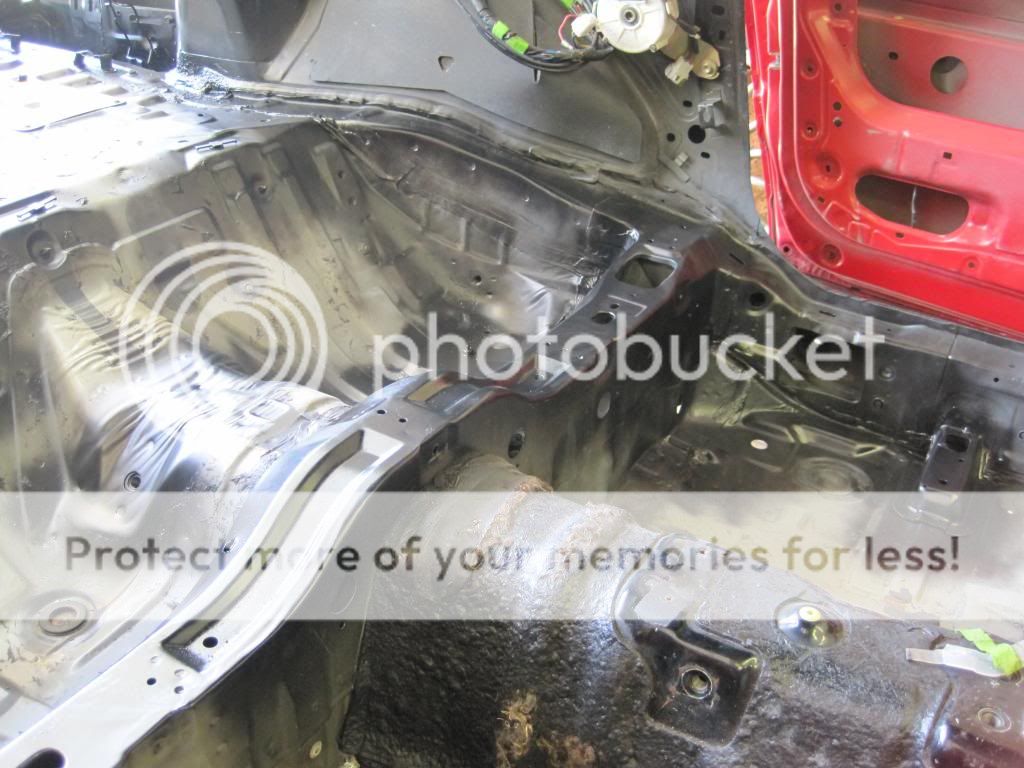
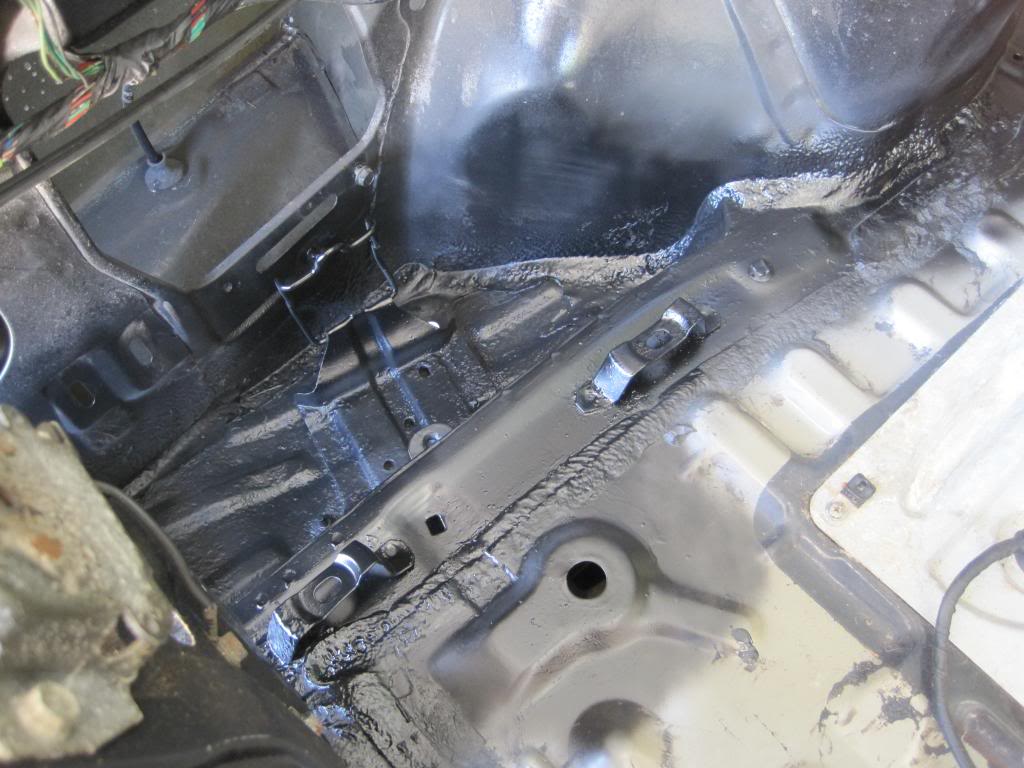
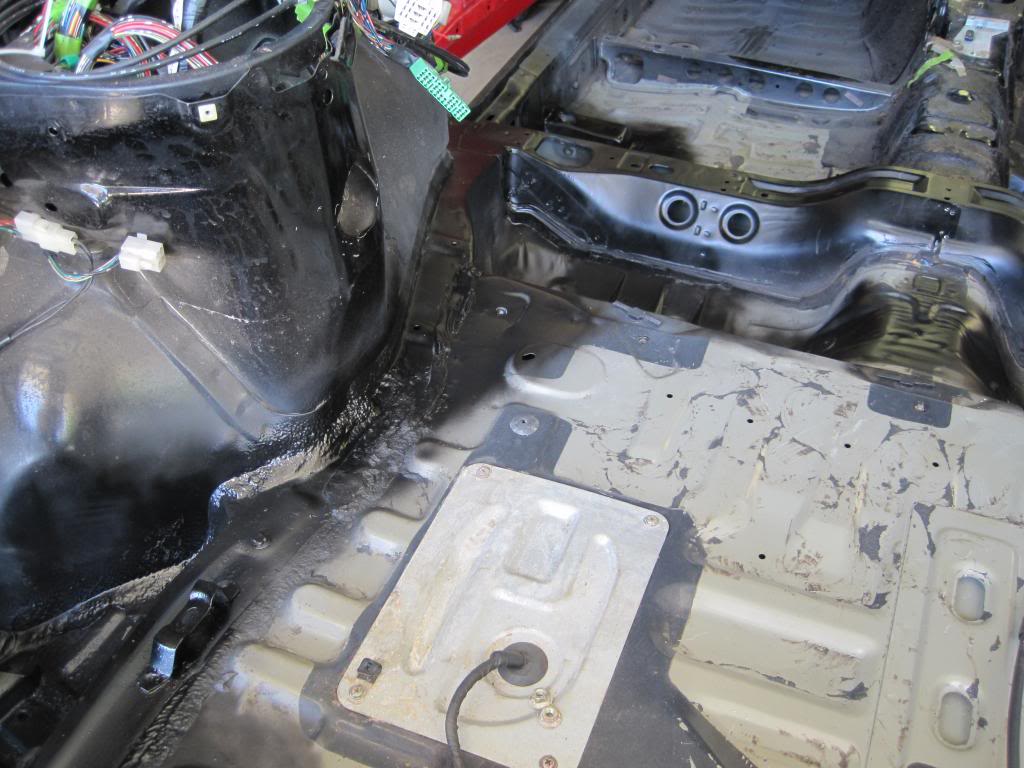
When I last left this thread, I was preparing to tackle the surface rust inside the passenger compartment and the hatch. I did not update the thread at the time, but I did take care of this in March and April.
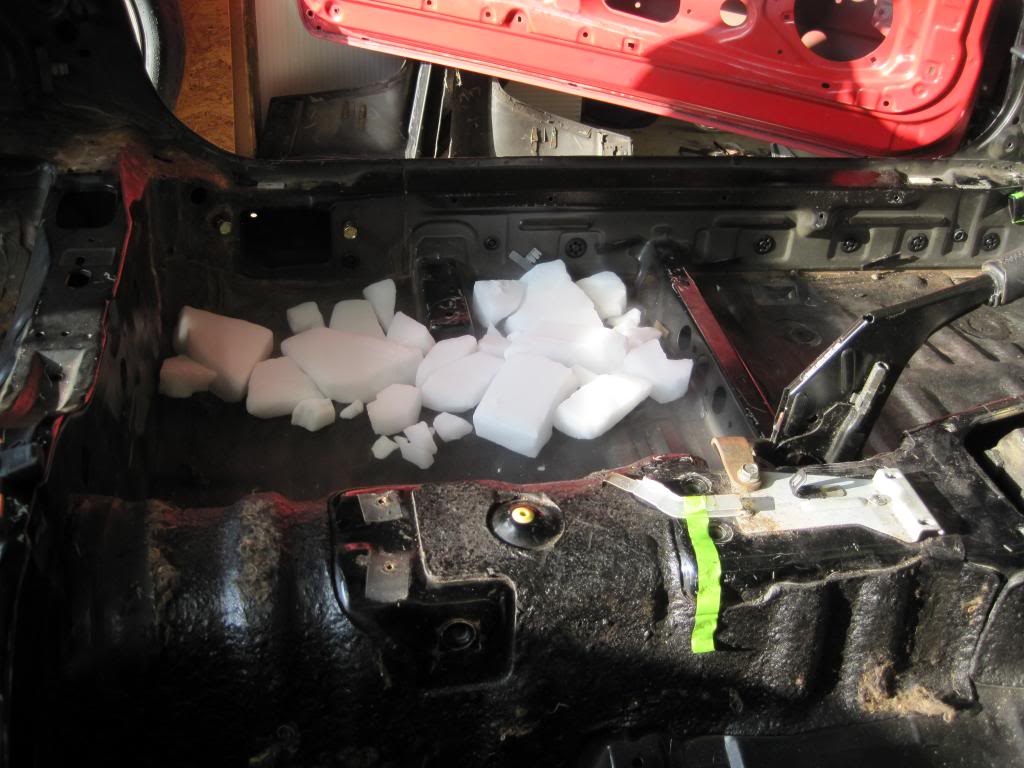
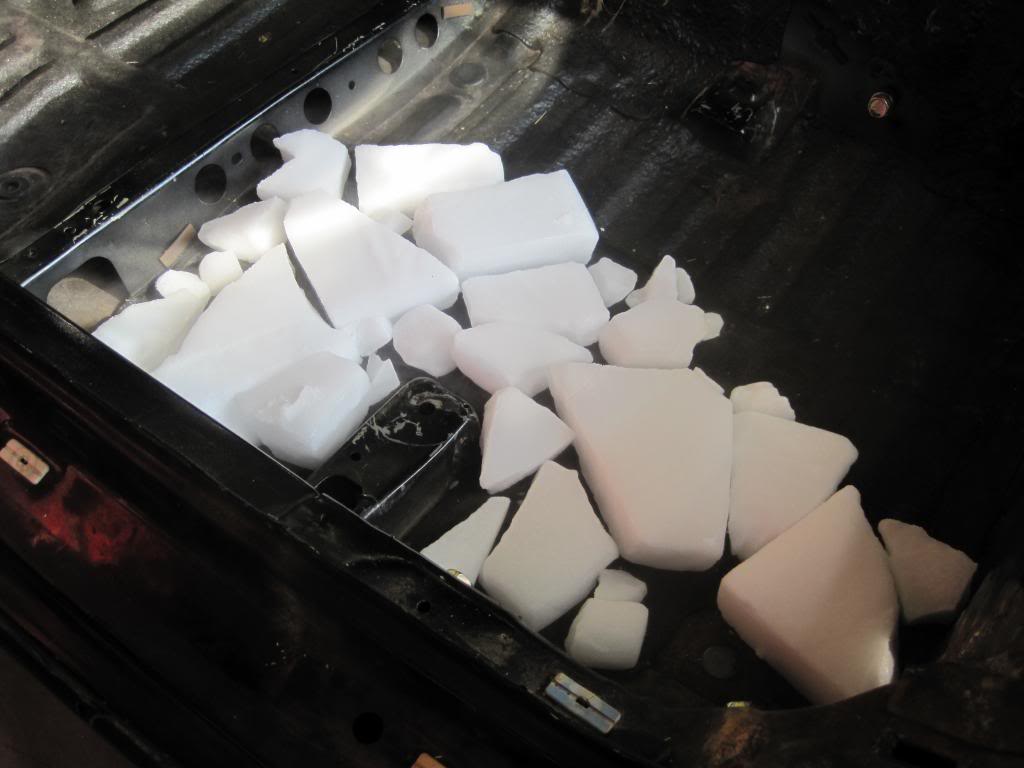
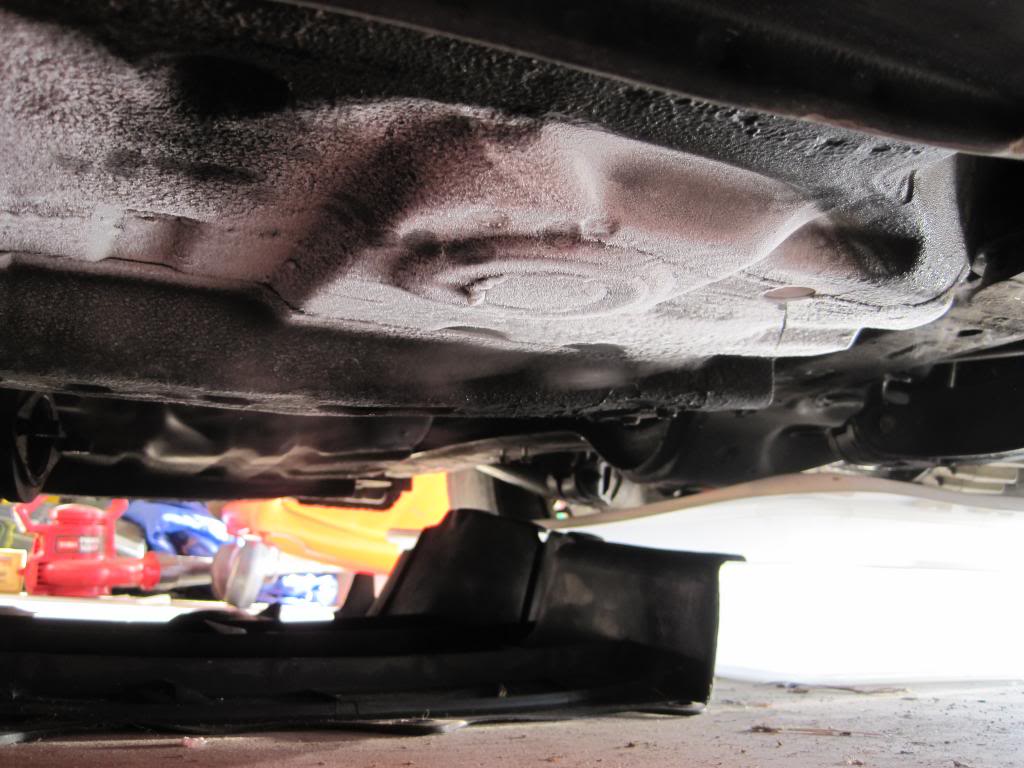
I first removed the sound deadening with dry ice. This was quite fun and went much quicker than I thought. It also ended up being massive overkill, but I don't know any other way. I'm going to be putting Dynamat down as a replacement. Everything behind the rail underneath the seats was stripped. I can tell you that it all added up to maybe 20 lbs. I mention it in a post I made elsewhere shortly after this. If you're ever strip this out for weight savings and it isn't a 100% track car - you're wasting your time.
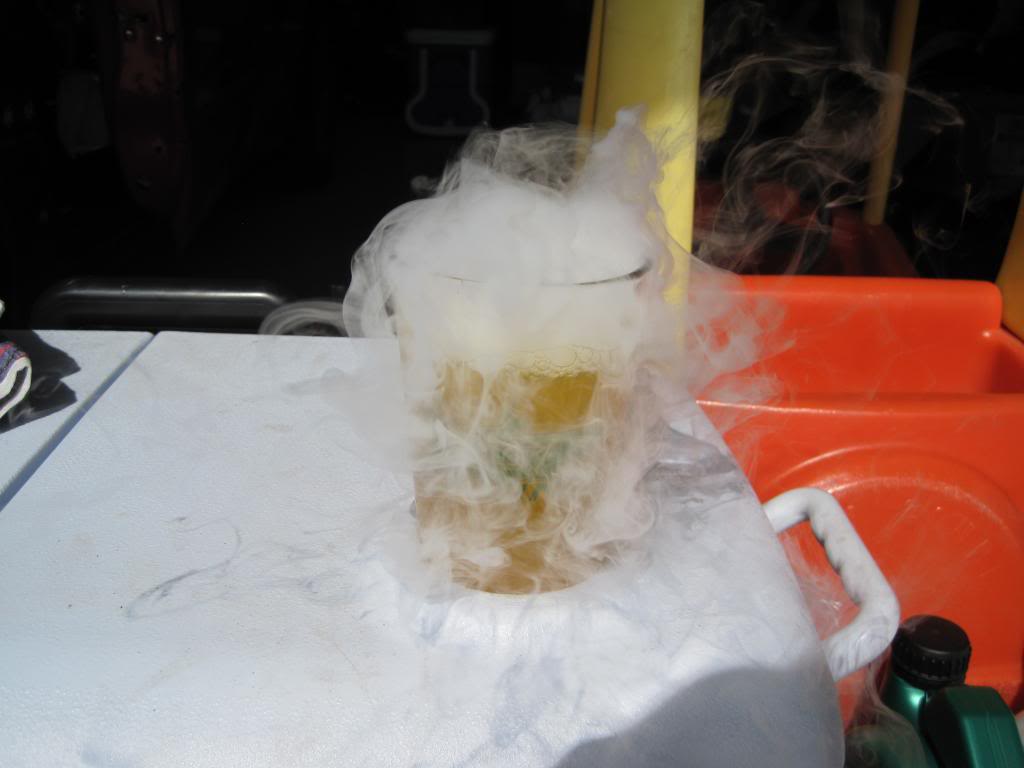
A nice frosty carbonated glass of juice:
After all the sound deadening was stripped, I could see the surface rust did extend a little bit underneath the sound deadening in a few spots. Again, this was overkill, but I have peace of mind that all surface rust is gone.
I then prepped the surfaces for POR-15, brushed on the POR-15 and then topcoated:
[img]https://i189.photobucket.com/albums/z320/jerrylh3/Mazda%20RX-7/2014_04/IMG_2264_zps9d473eb2.jpg[img]
I first removed the sound deadening with dry ice. This was quite fun and went much quicker than I thought. It also ended up being massive overkill, but I don't know any other way. I'm going to be putting Dynamat down as a replacement. Everything behind the rail underneath the seats was stripped. I can tell you that it all added up to maybe 20 lbs. I mention it in a post I made elsewhere shortly after this. If you're ever strip this out for weight savings and it isn't a 100% track car - you're wasting your time.
A nice frosty carbonated glass of juice:
After all the sound deadening was stripped, I could see the surface rust did extend a little bit underneath the sound deadening in a few spots. Again, this was overkill, but I have peace of mind that all surface rust is gone.
I then prepped the surfaces for POR-15, brushed on the POR-15 and then topcoated:
[img]https://i189.photobucket.com/albums/z320/jerrylh3/Mazda%20RX-7/2014_04/IMG_2264_zps9d473eb2.jpg[img]
Thread Starter
Joined: Feb 2001
Posts: 2,855
Likes: 225
From: Tampa, FL
The reason for my absence can mostly be attributed to three items. First, my job at the time was undergoing a transition and changing from one company to another. Second, ever since December, I have been hunting for a new job in my chosen field. And third, I finally was interviewed for a new job in April, was hired at the end of April and started in May. As a treat to myself, I did buy this:
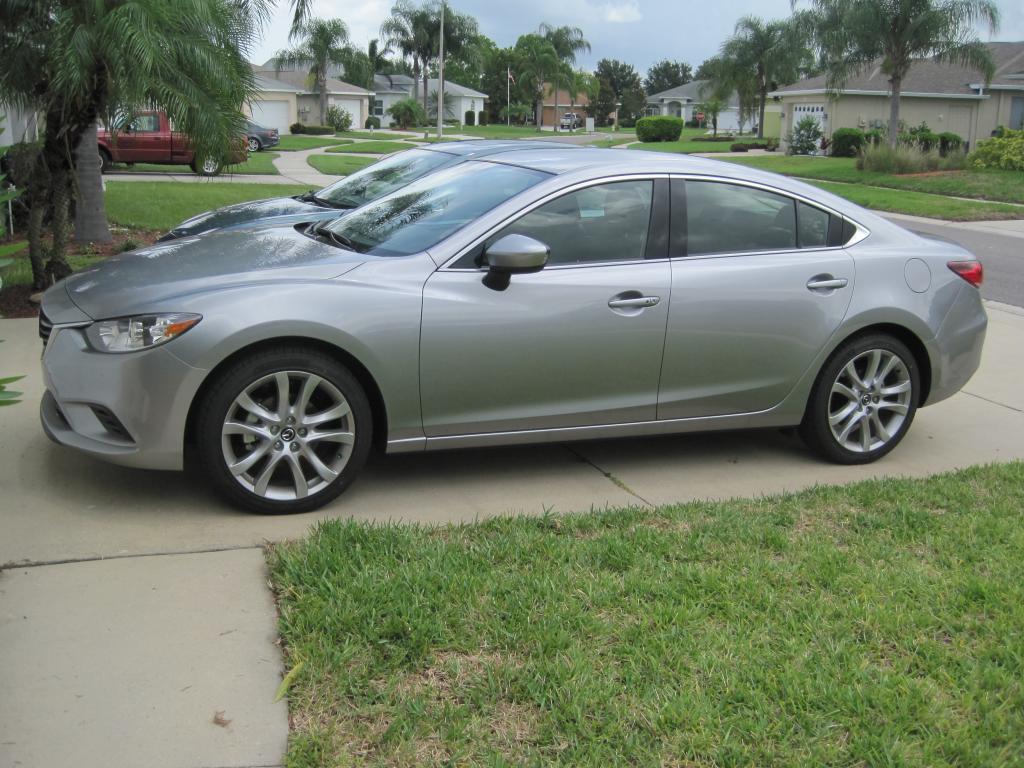
I bought it the day I was hired at my new job. Talk about putting the cart before the horse. It's much better than the 1999 Mercury Sable I had been driving for the past five years.
Obviously many things remain to be done. Next up is to finish the ABS delete with the proper brake lines and then I think I will be going full tilt into body work. Things can always change though, and they usually do.

Wow I am very impressed with what you have done to your car. I don't think I will ever have the time and patience to do that to my car. Let me ask you a question after all that restoration would you really want to drive the car? I wouldn't if it was me but that's just me. Show car possibly? Subscribed to this thread until it's done. Very useful info too. And congrats on your new car. We all need that once in awhile.
Thread Starter
Joined: Feb 2001
Posts: 2,855
Likes: 225
From: Tampa, FL
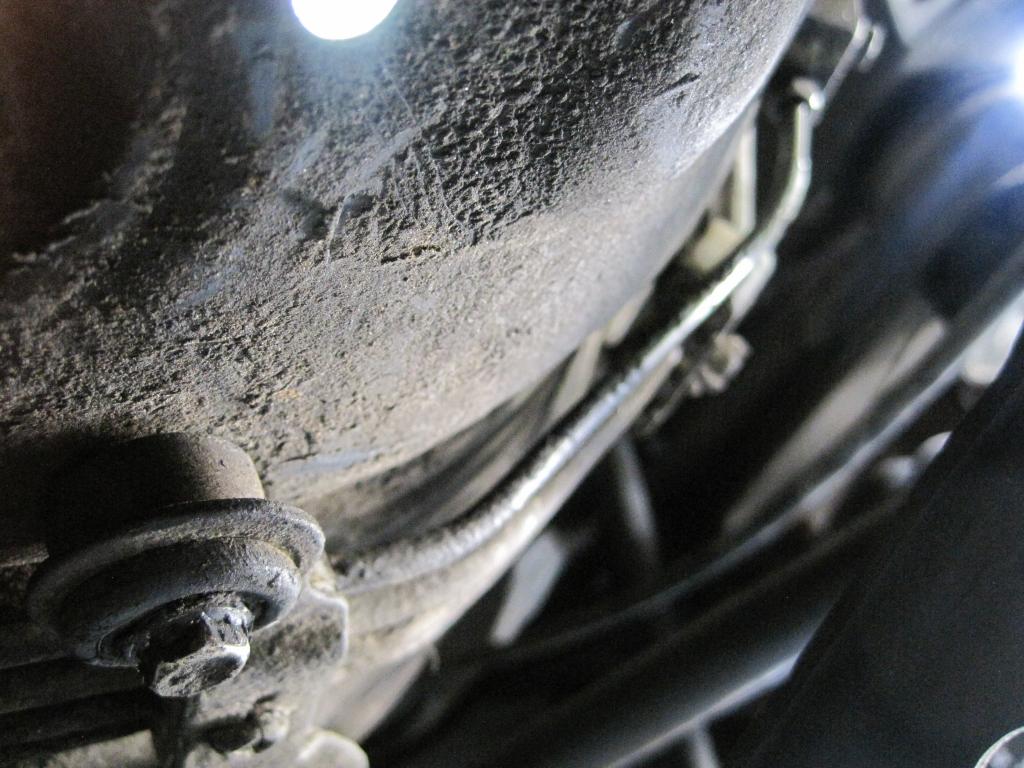
The ABS delete is now complete as all lines have been removed. I have run the line from the proportioning valve to the rear of the car and just need to run the lines to the two front wheels and rig up a tee fitting so that I can still use the turbo master cylinder. I was able to save all ABS line except for the one going to the rear of the car. I was not about to try and figure out how to get that out of there in one piece, so I did cut it. The replacement line went in fairly easily. I was actually pretty happy that I didn't have any setbacks that took up a lot of time this morning.
The completely empty area where an ABS pump and lines used to sit:
The replacement non-ABS line in its home in the proportioning valve:
On its way up to the distribution block:
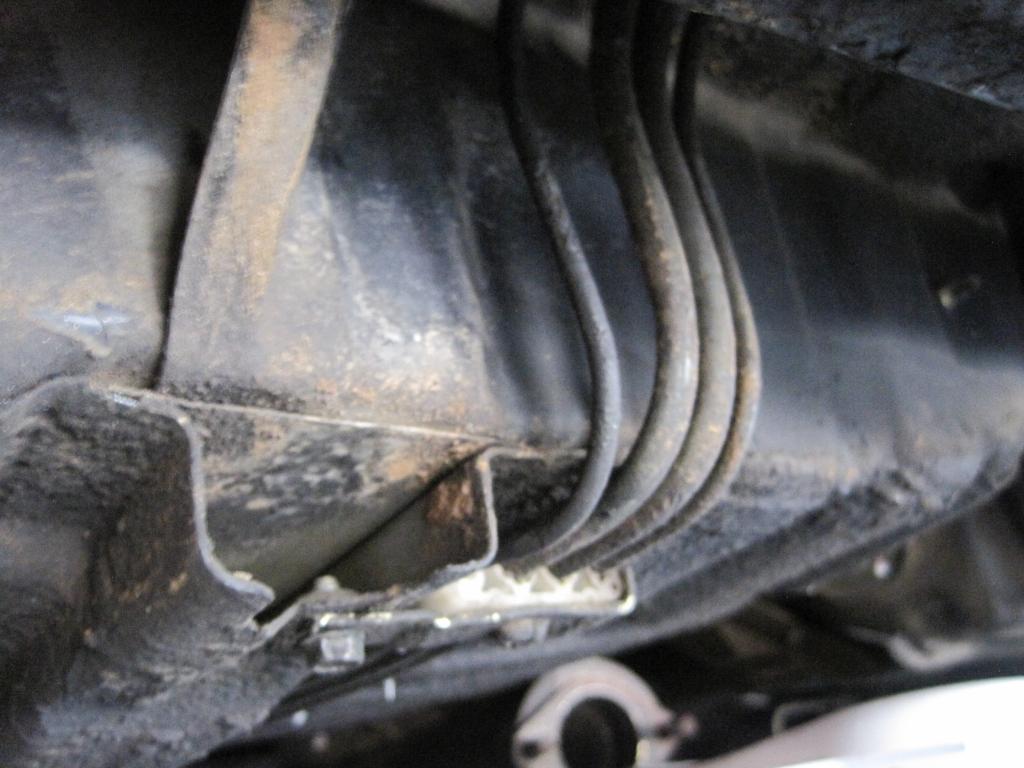
Looking back towards the front of the car:
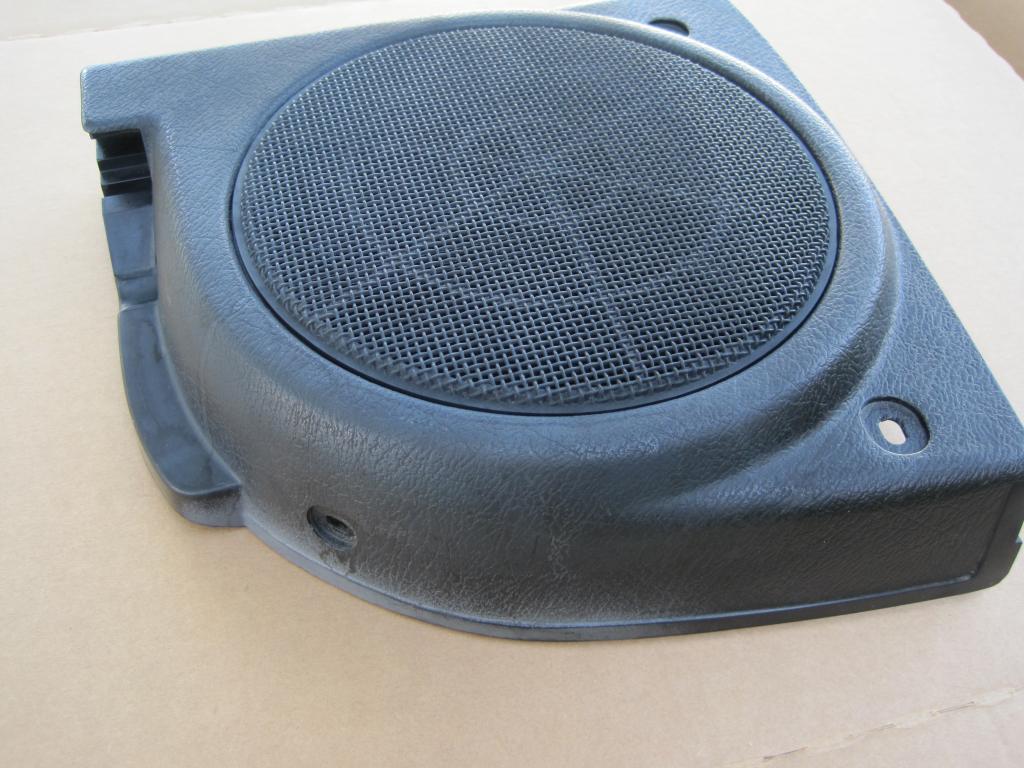
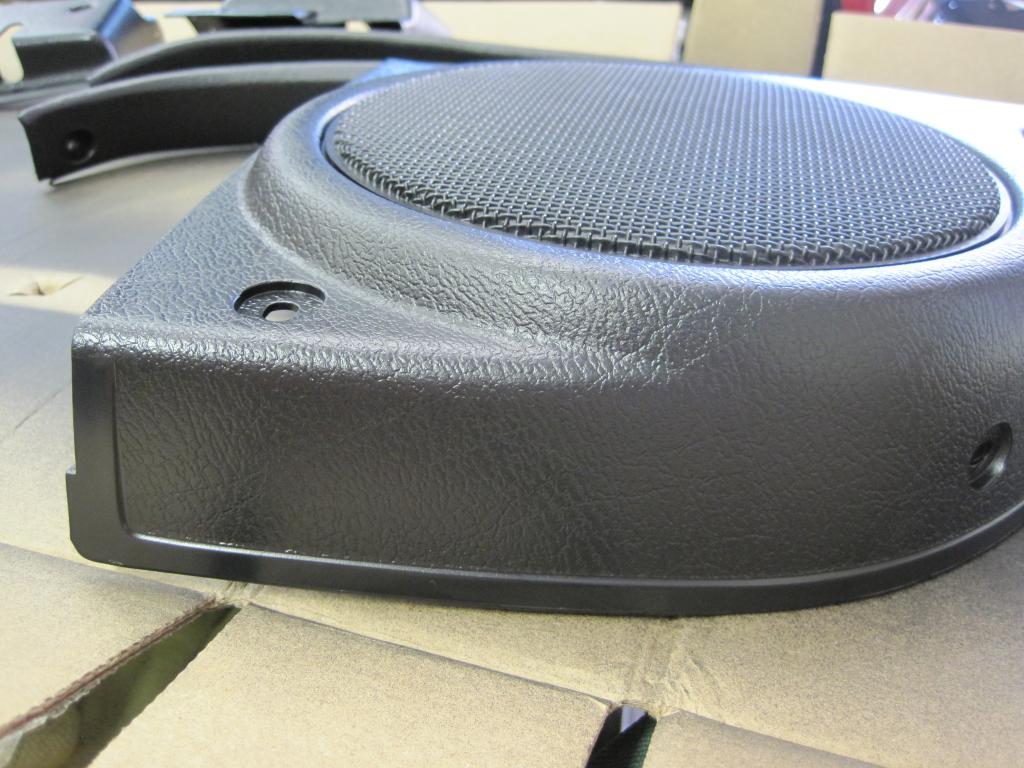
Also, I have recently painted every piece of trim from the B pillars back - two speaker covers, two pieces of hatch trim and the hatch latch covers. Here's a before and after of a speaker cover (not the same one, but a comparison of how much better they look); you can also see the other pieces in the background of the after picture:
Next weekend I hope to finish the brake lines, install a new master cylinder and get everything bled. At that point, the car will have working brakes for the first time in a few years.
The completely empty area where an ABS pump and lines used to sit:
The replacement non-ABS line in its home in the proportioning valve:
On its way up to the distribution block:
Looking back towards the front of the car:
Also, I have recently painted every piece of trim from the B pillars back - two speaker covers, two pieces of hatch trim and the hatch latch covers. Here's a before and after of a speaker cover (not the same one, but a comparison of how much better they look); you can also see the other pieces in the background of the after picture:
Next weekend I hope to finish the brake lines, install a new master cylinder and get everything bled. At that point, the car will have working brakes for the first time in a few years.

Thread Starter
Joined: Feb 2001
Posts: 2,855
Likes: 225
From: Tampa, FL
My goal is still to finish by the end of the year. You're welcome to come by any time. But once it's running, I'll be sure to drive up to your end of the Bay for a visit.
Thread Starter
Joined: Feb 2001
Posts: 2,855
Likes: 225
From: Tampa, FL
Still making a little bit of progress. Recently, I "finished" the brakes. I installed a new master cylinder and bled the system. I went with the non turbo master cylinder for ease of installation for the time being.
Unfortunately, it appears my front calipers may be shot. I'll take the blame for that, as the amount of time they spent vented to a humid atmosphere can probably be measured in years. I've also installed new clutch hydraulics and bled that system and everything is good to go there.
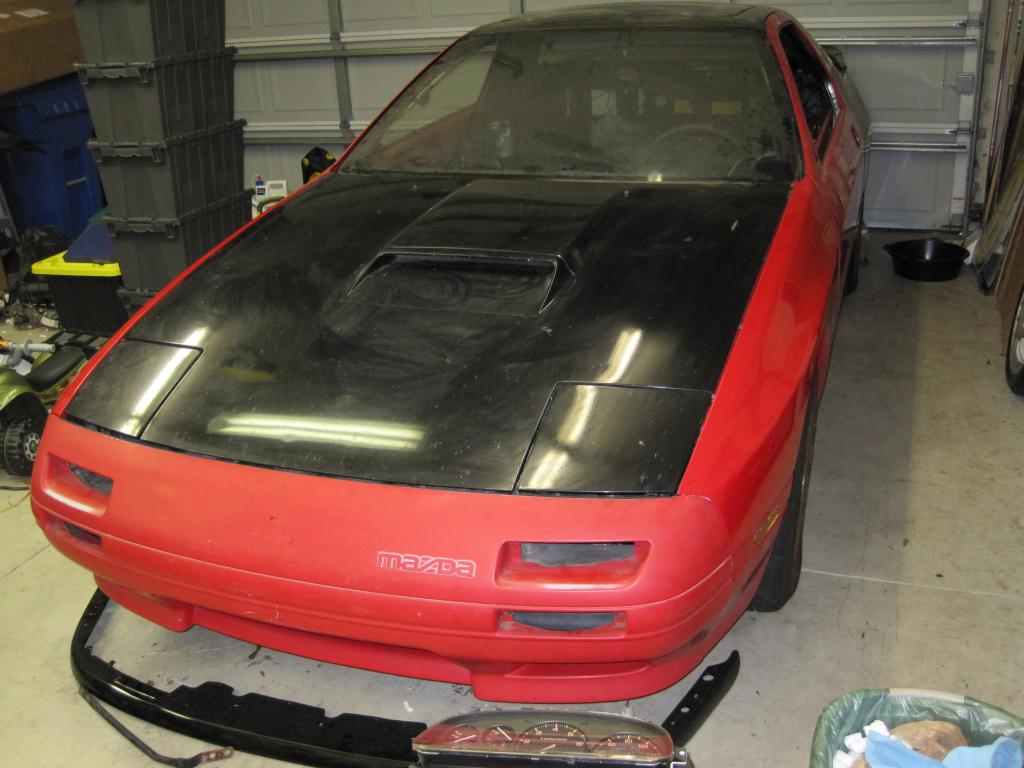
Here's a picture of how she sits right now.
I'm about to go full bore into body work. The current plan is to have the body and paint work done by the end of October. Ambitious, but we'll see.
Unfortunately, it appears my front calipers may be shot. I'll take the blame for that, as the amount of time they spent vented to a humid atmosphere can probably be measured in years. I've also installed new clutch hydraulics and bled that system and everything is good to go there.
Here's a picture of how she sits right now.
I'm about to go full bore into body work. The current plan is to have the body and paint work done by the end of October. Ambitious, but we'll see.
Thread Starter
Joined: Feb 2001
Posts: 2,855
Likes: 225
From: Tampa, FL
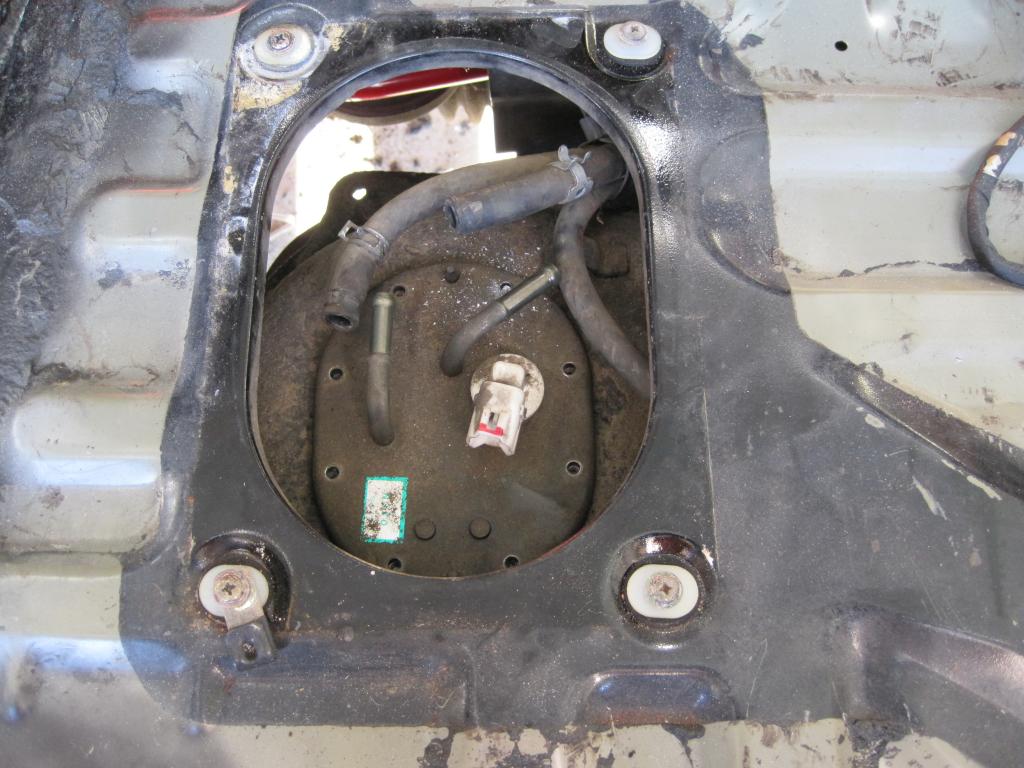
Two months already? Time flies, I guess. I suppose that means an update is in order. The next task on the agenda was replacing the fuel tank with a new one I've picked up.
First up was removing the old pump and level sender assembly from the tank. I had to use the rotary tool to grind off one of the heads of a screw that was stripped out. The screws will be replaced with some hex head bolts upon reassembly.
Looks good, eh?
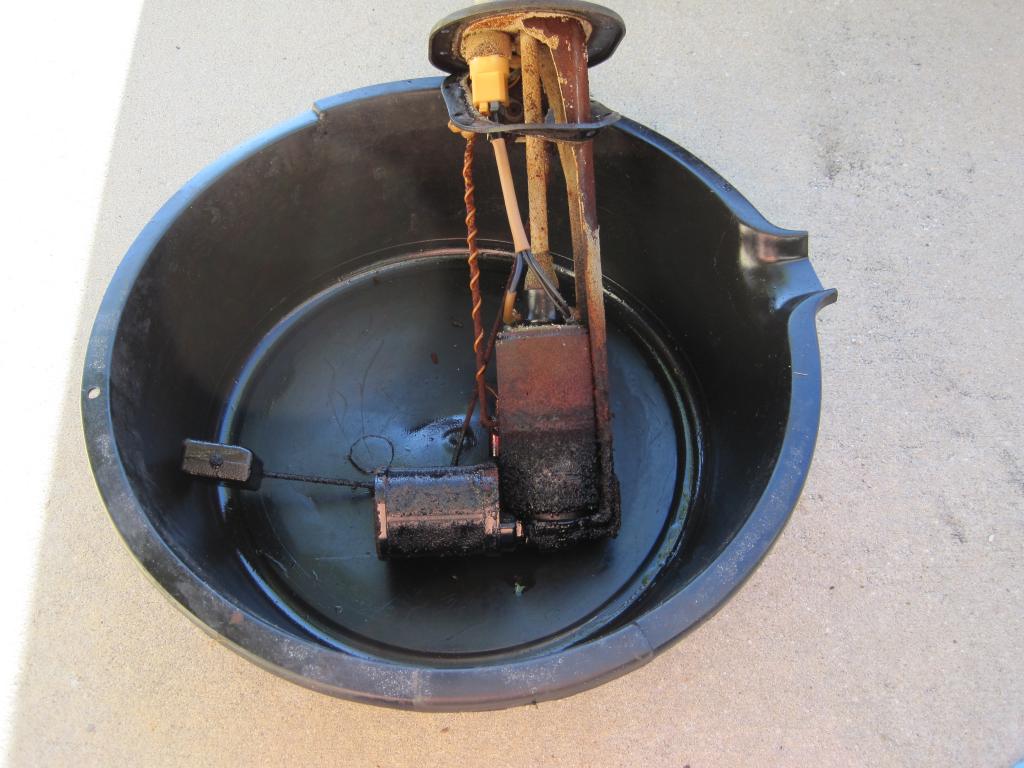
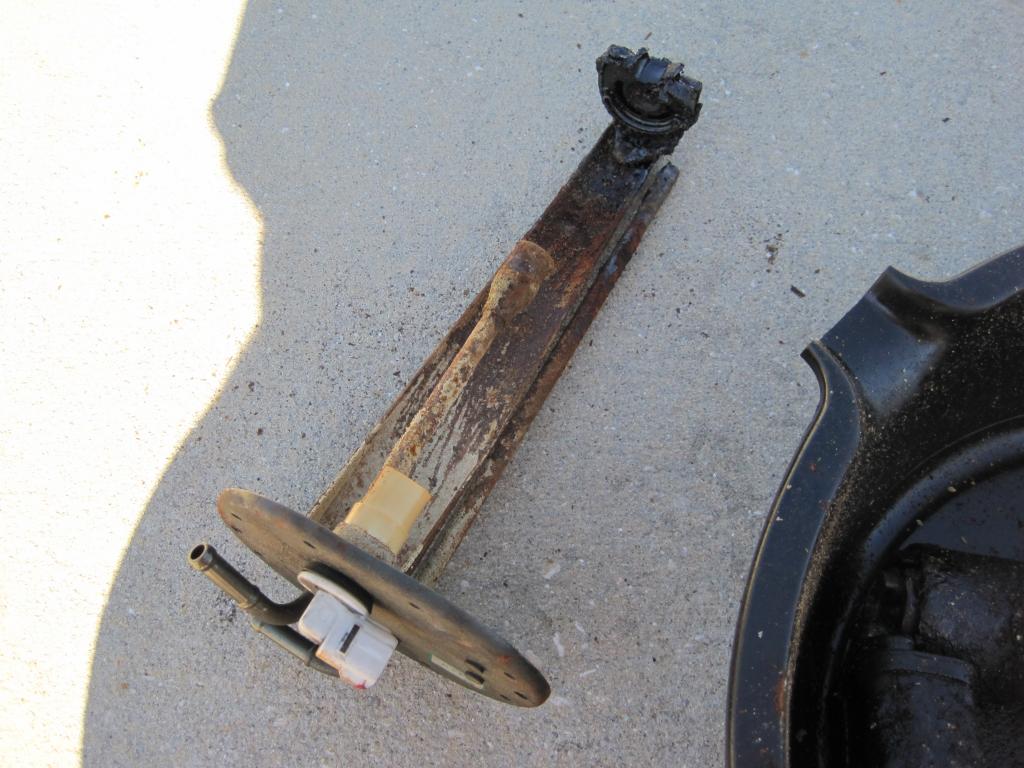
After some cleaning with a wire brush and carb cleaner, I managed to get the bracket looking pretty good, as I will have to reuse this.
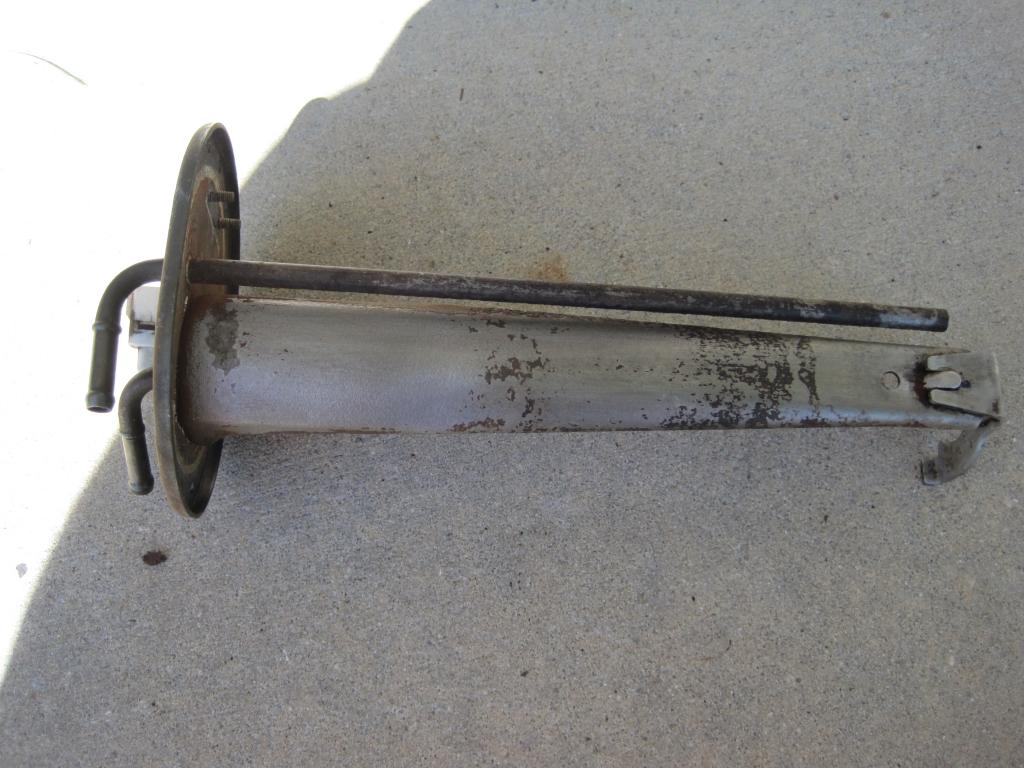
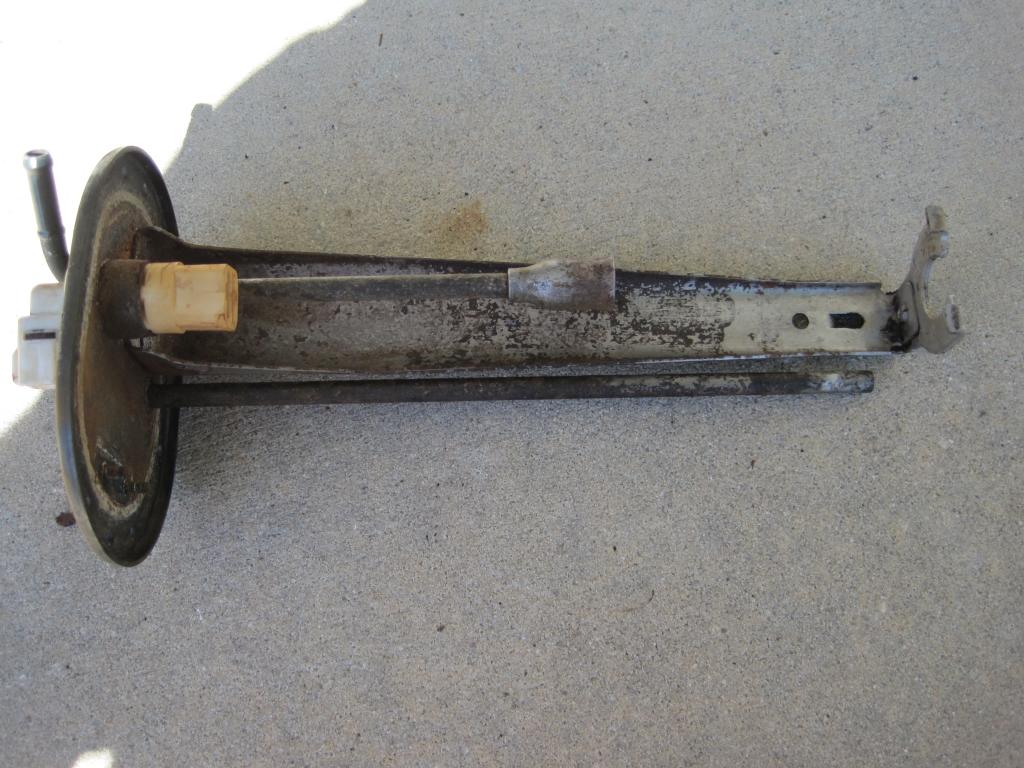
First up was removing the old pump and level sender assembly from the tank. I had to use the rotary tool to grind off one of the heads of a screw that was stripped out. The screws will be replaced with some hex head bolts upon reassembly.
Looks good, eh?
After some cleaning with a wire brush and carb cleaner, I managed to get the bracket looking pretty good, as I will have to reuse this.
Thread Starter
Joined: Feb 2001
Posts: 2,855
Likes: 225
From: Tampa, FL
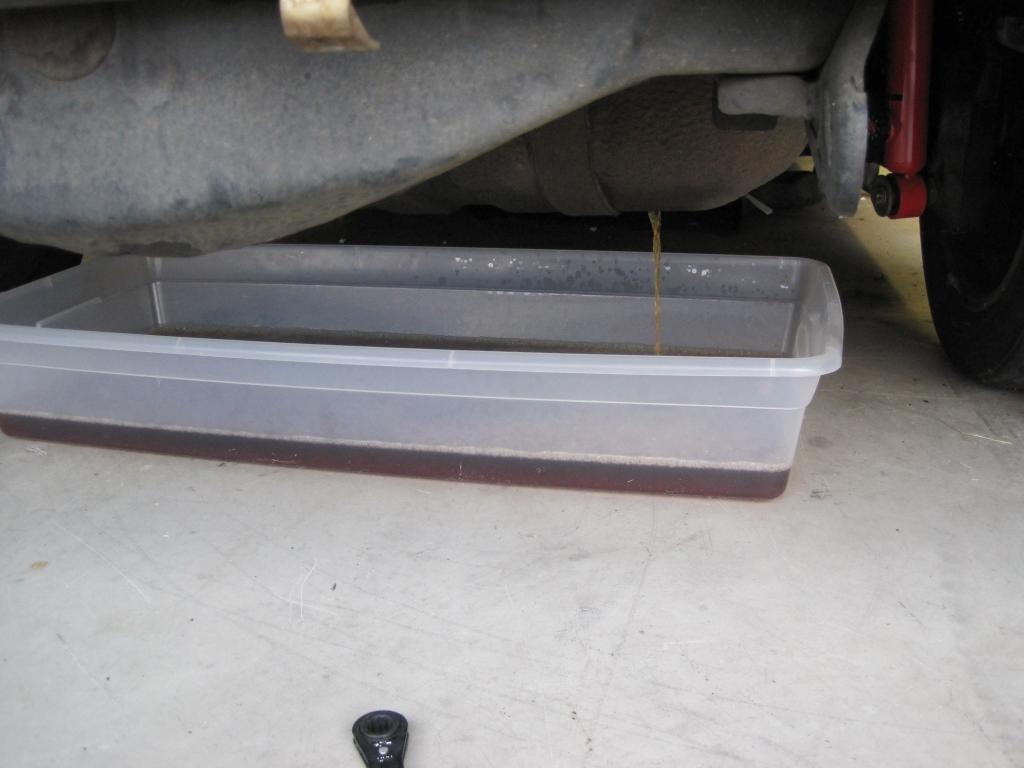
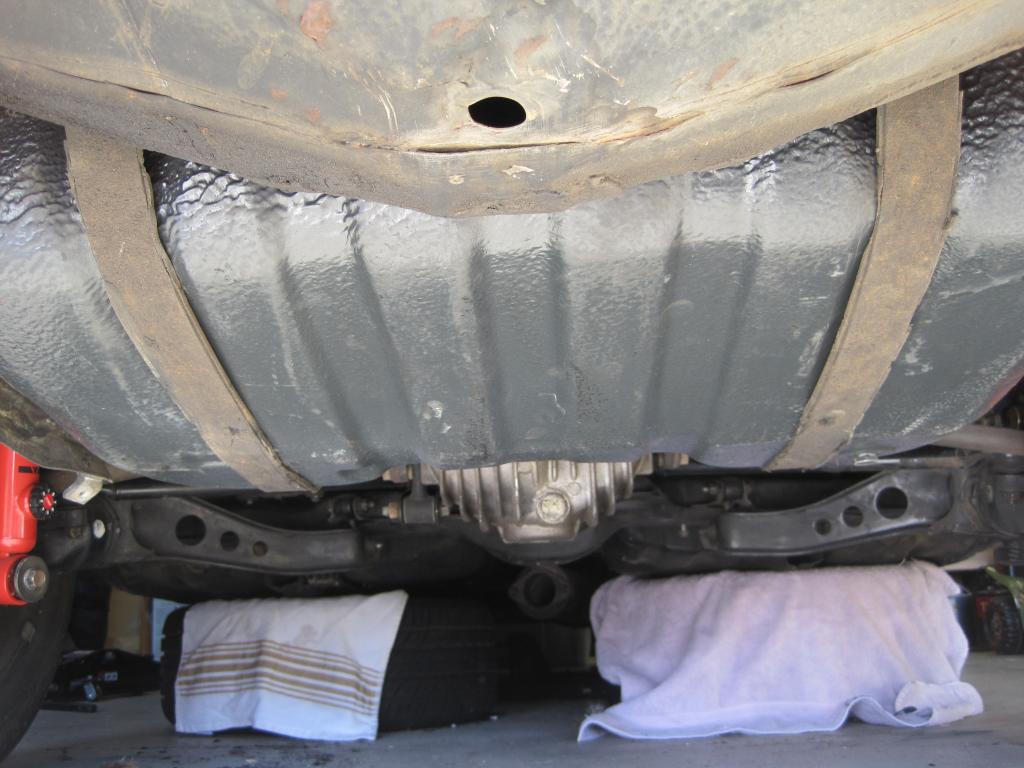
After a few week delay, it was then time to drain the tank.
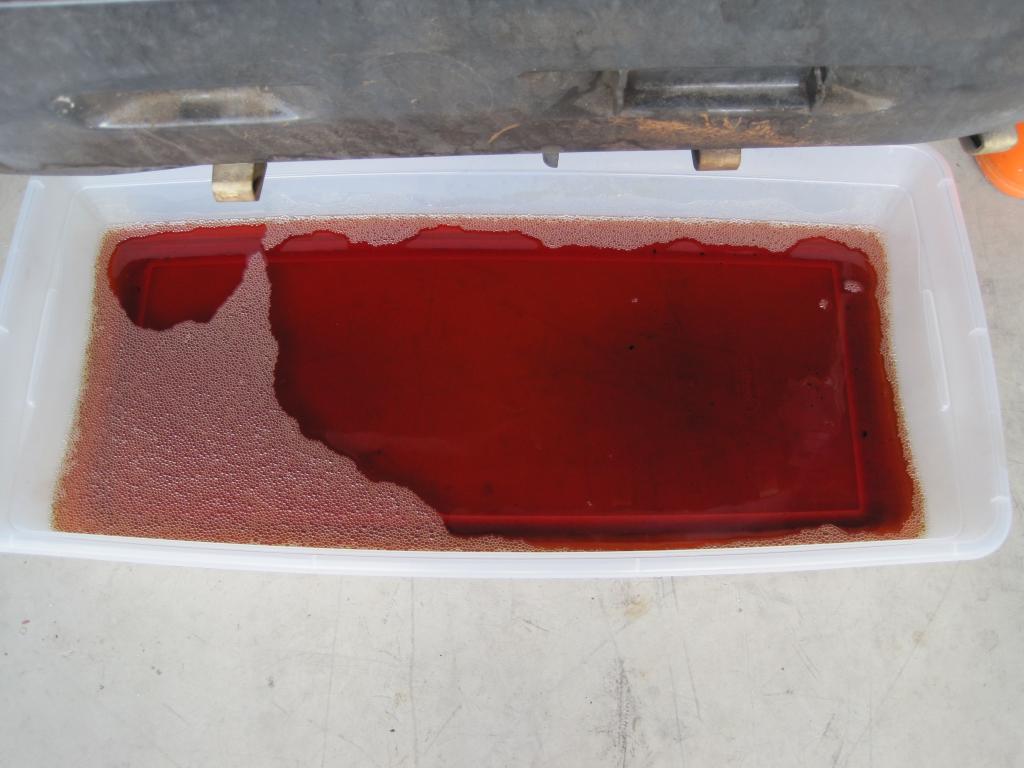
I removed the front heat shield and undid the front two bolts that hold the fuel tank straps on. Before the bolts were completely out, I maneuvered a jack into place to support the tank.
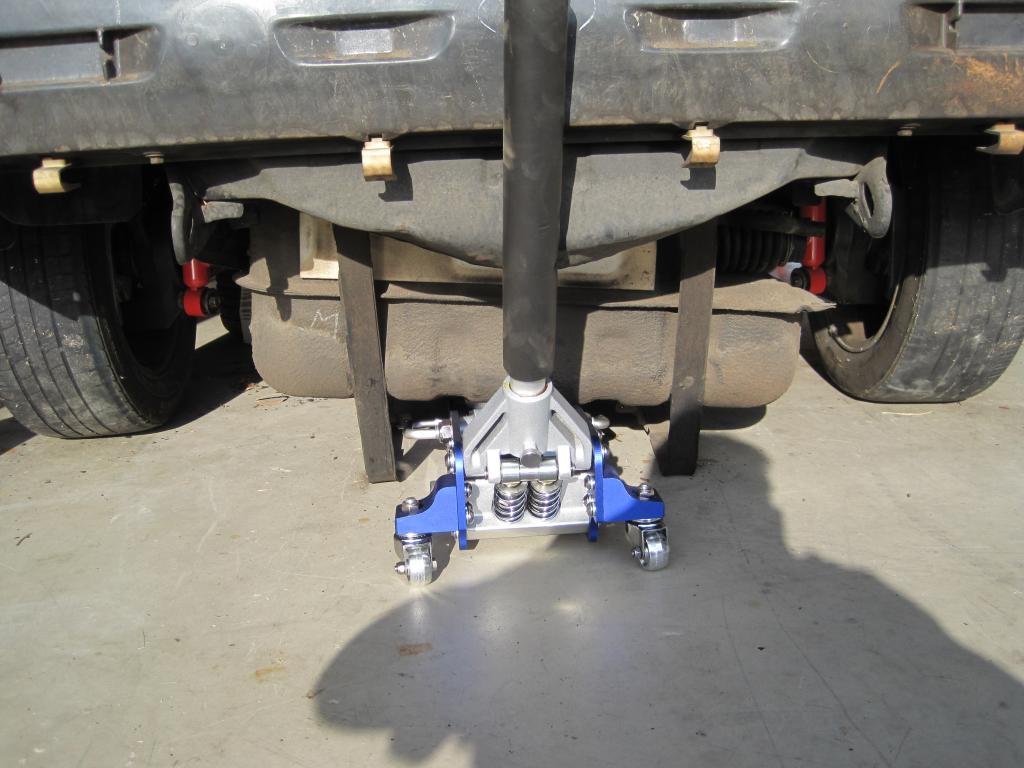
After that, I lowered the jack and finagled the fuel tank out from under the car.

Apparently I didn't take a shot of the inside of the tank, but it looked much like the outside - it had some nice rust colored undercoating gelatinous fuel all on the inside.
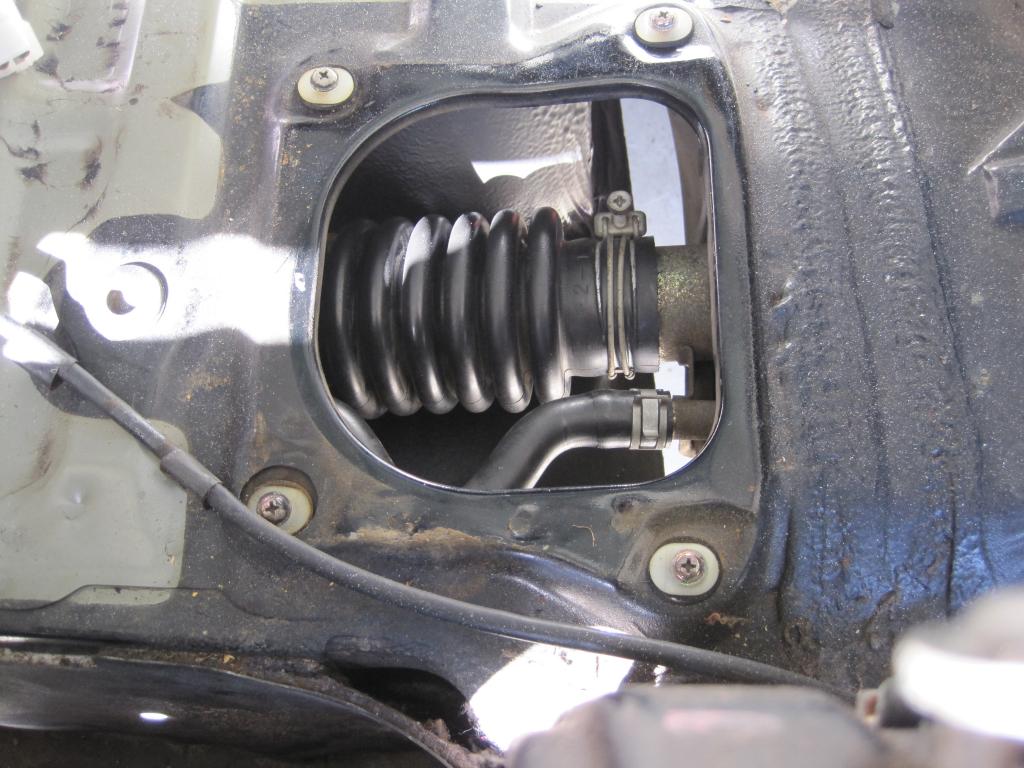
Here's the new tank ready to be installed. I put some foam tape in the places where the original tank had it seeing as how that could be vital for some vibration dampening/sound deadening.
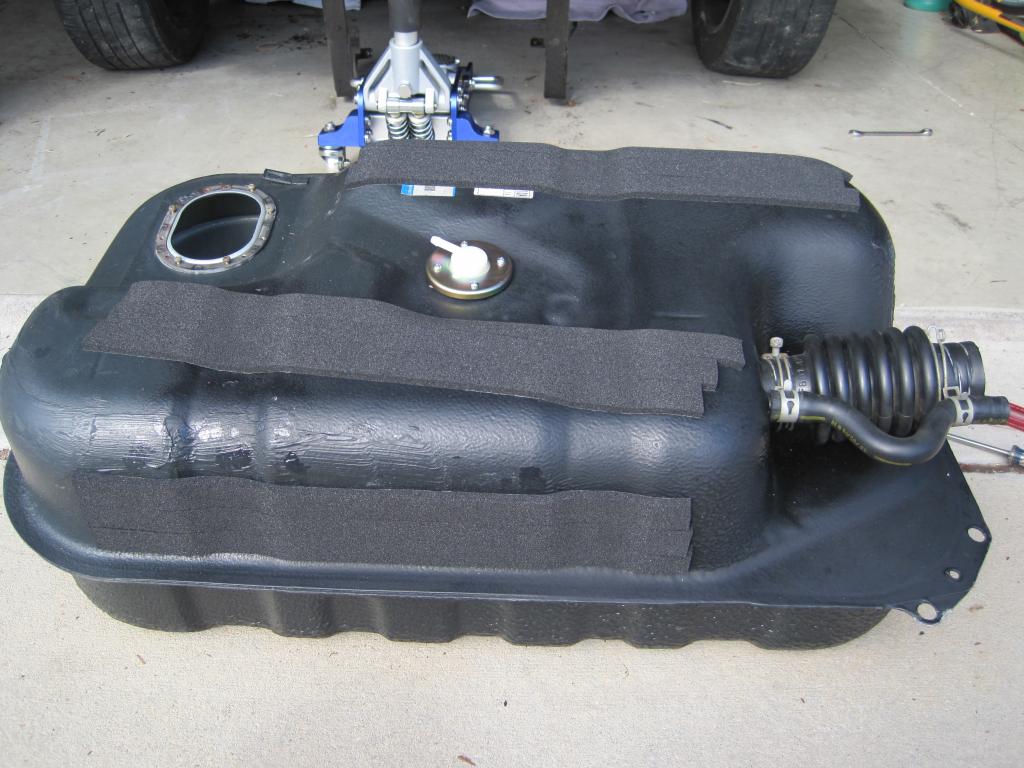
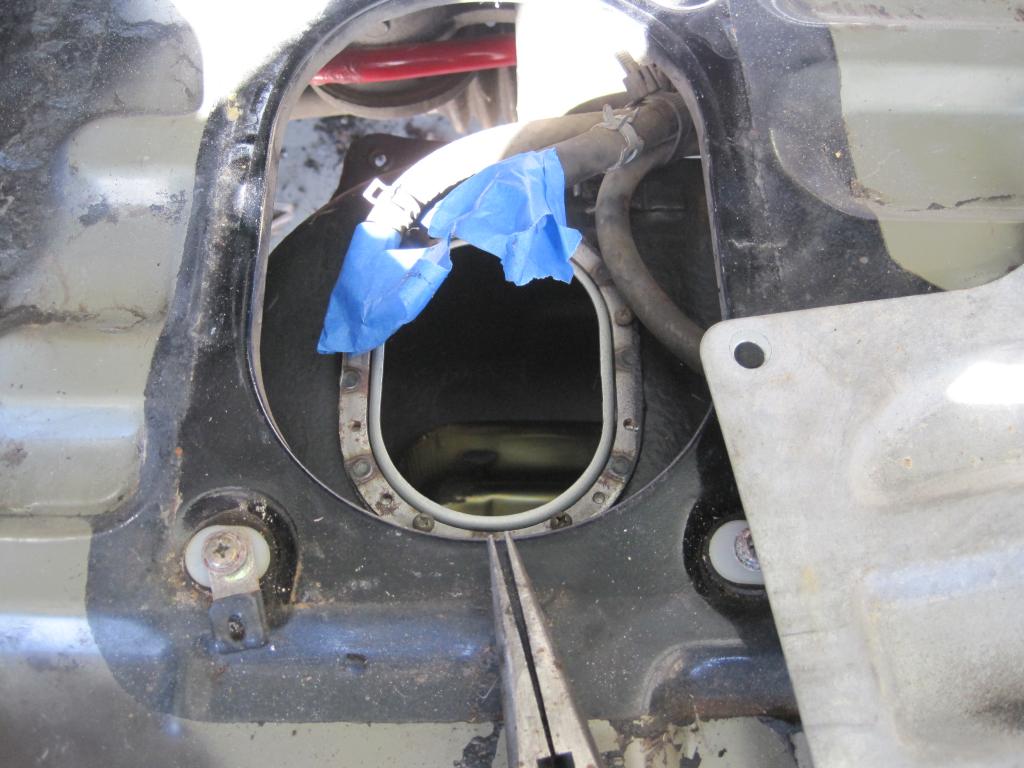
I told myself not to forget the vent hose to the charcoal canister. So, what did I do? Had the straps back up and I had forgotten about it. Pulled it back down real quick and installed the hose.
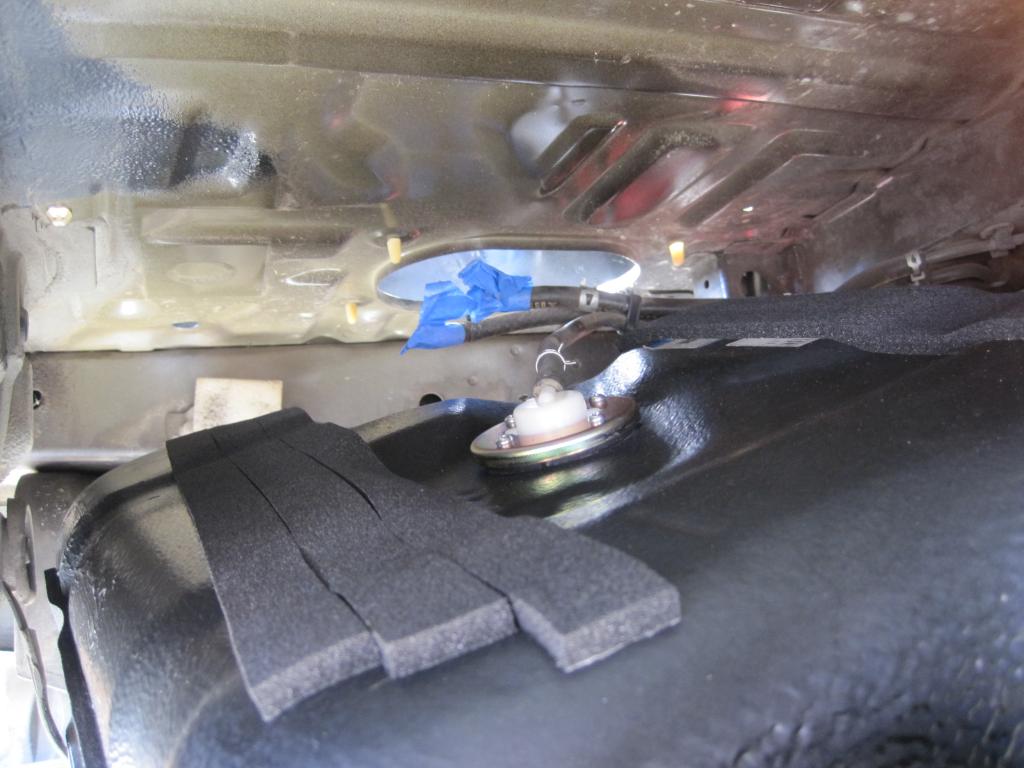
Brand new tank installed:
Hoses cleaned and reconnected:
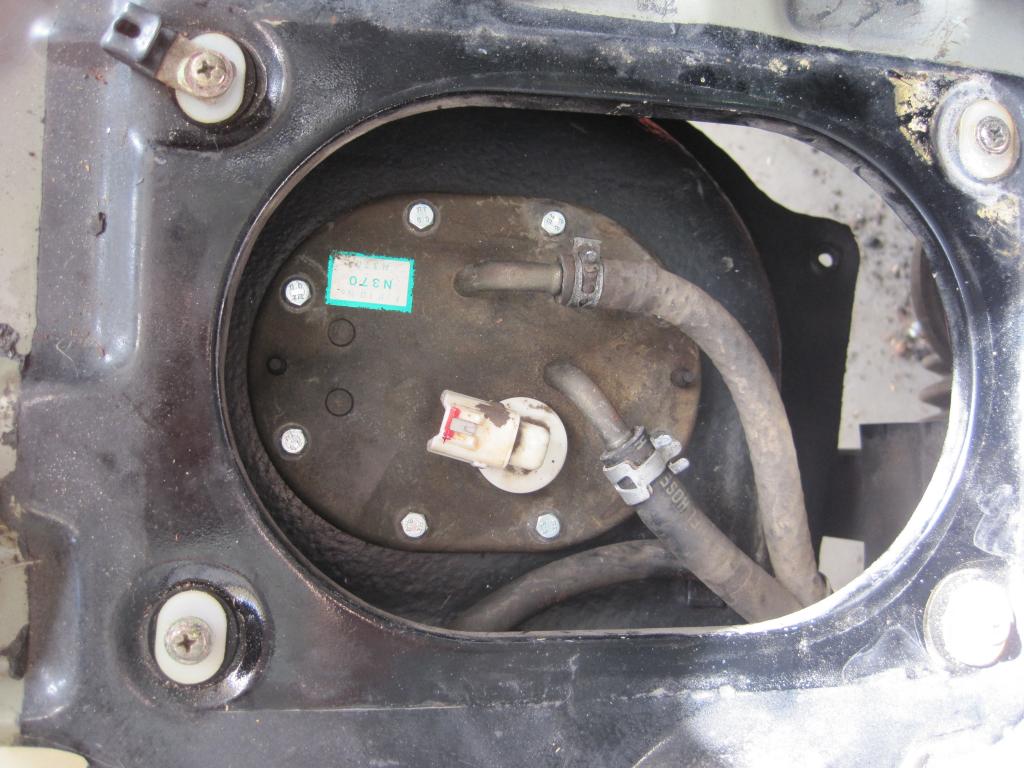
Ready for a new pump and level sender:
Next up is installing the new pump and level sender, fixing the sunroof, and replacing the brake proportioning valve (it is leaking at one of the fittings - I had seen the threads were kind of messed up, but thought I had managed to chase them and fix them).
The brake calipers have also been replaced at all four corners after I discovered that a few of them had seized up.
End of the year? Maybe. Might have to take a few vacation days...
I removed the front heat shield and undid the front two bolts that hold the fuel tank straps on. Before the bolts were completely out, I maneuvered a jack into place to support the tank.
After that, I lowered the jack and finagled the fuel tank out from under the car.
Apparently I didn't take a shot of the inside of the tank, but it looked much like the outside - it had some nice rust colored undercoating gelatinous fuel all on the inside.
Here's the new tank ready to be installed. I put some foam tape in the places where the original tank had it seeing as how that could be vital for some vibration dampening/sound deadening.
I told myself not to forget the vent hose to the charcoal canister. So, what did I do? Had the straps back up and I had forgotten about it. Pulled it back down real quick and installed the hose.
Brand new tank installed:
Hoses cleaned and reconnected:
Ready for a new pump and level sender:
Next up is installing the new pump and level sender, fixing the sunroof, and replacing the brake proportioning valve (it is leaking at one of the fittings - I had seen the threads were kind of messed up, but thought I had managed to chase them and fix them).
The brake calipers have also been replaced at all four corners after I discovered that a few of them had seized up.
End of the year? Maybe. Might have to take a few vacation days...
Very nice. Keeping my eye on it.
Just leaving this here before I run: After cleaning up the inside to the extent that you did, I would have said remove the sub-frame and clean up underneath. You already had the tank out and all the **** in the way of that, lol. Doing the fuel lines on mine, so I can relate. But yours look ok though.
Just leaving this here before I run: After cleaning up the inside to the extent that you did, I would have said remove the sub-frame and clean up underneath. You already had the tank out and all the **** in the way of that, lol. Doing the fuel lines on mine, so I can relate. But yours look ok though.
Thread Starter
Joined: Feb 2001
Posts: 2,855
Likes: 225
From: Tampa, FL
I already had the subframe out and I cleaned up the arms, hubs and subframe to a decent extent. The underside of the car isn't too shabby, but I'm past the point of wanting to strip everything down for a complete tear down anymore, lol.
Anyhow, fuel pump assembly is finally bolted in:
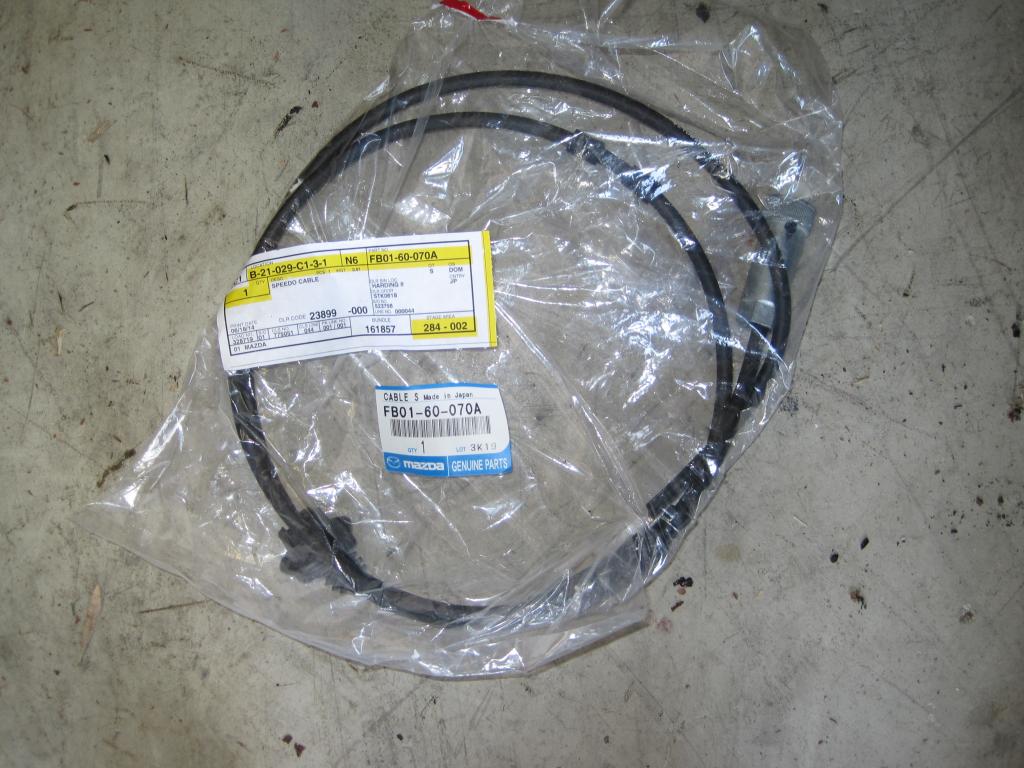
And the broken speedometer cable has been replaced:
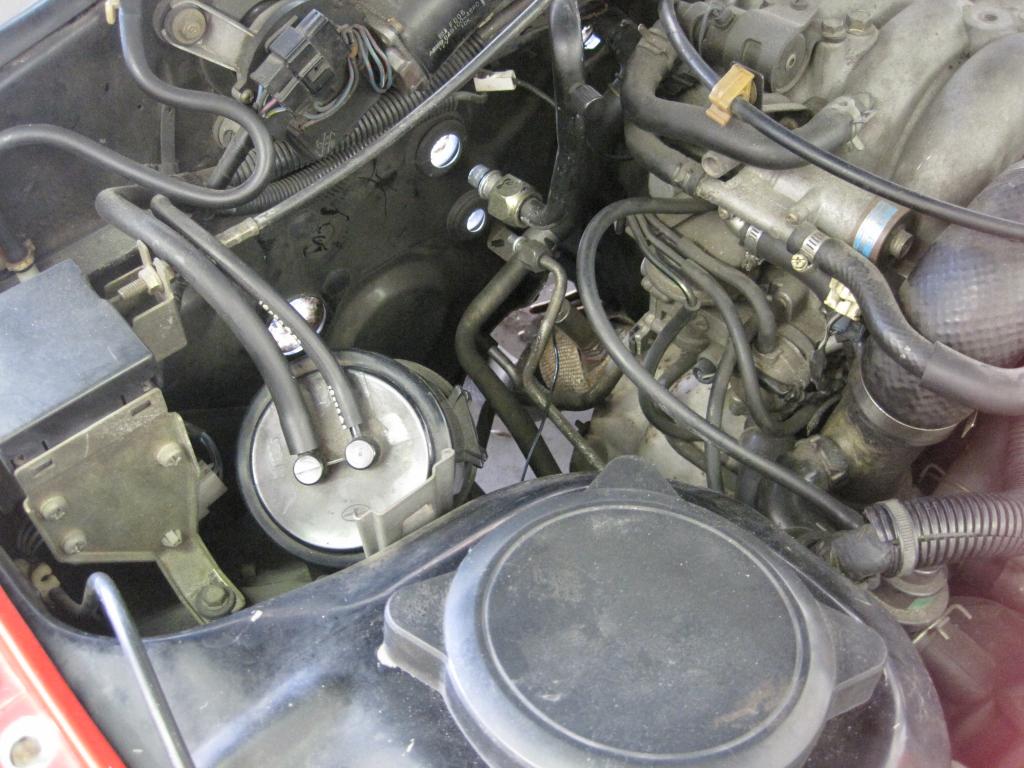
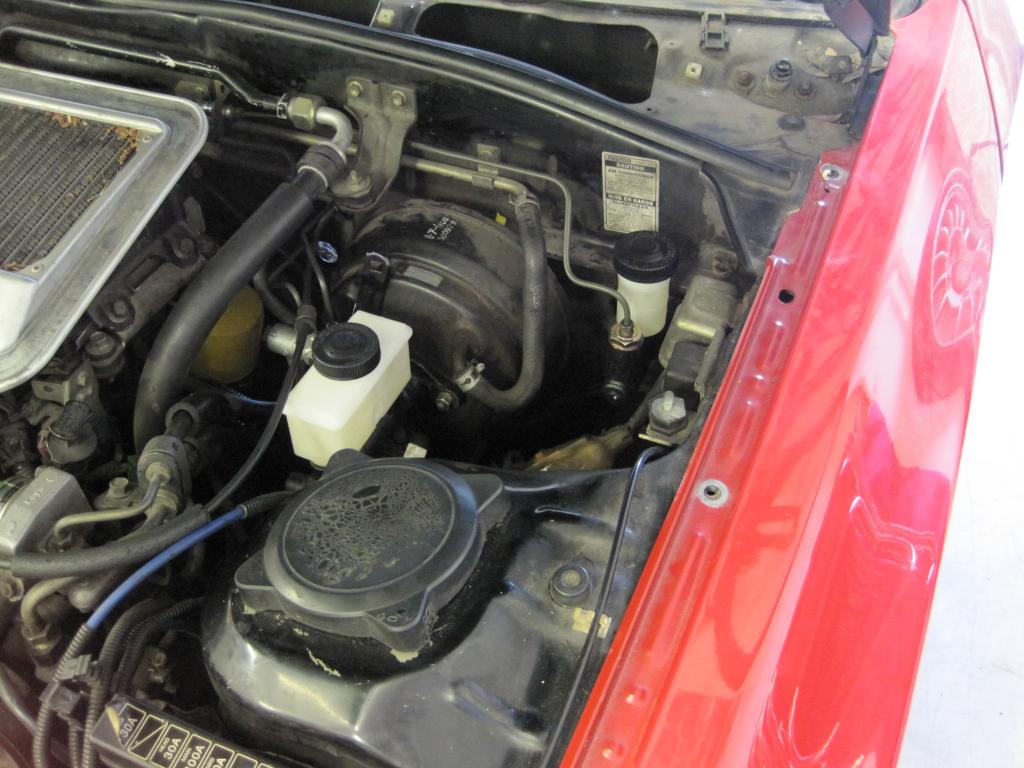
Also, the fuel filter in the engine bay has been replaced and the proper bolts and washers are now on the front sway bar end links. I noticed a while ago that I had messed that up, so I was able to get the proper cupped washer and longer bolt where it attaches to the sway bar. I'm a couple of odd jobs away from being over the mechanical hurdle and diving head first into body work. My end of the year goal is probably shot, but I'll keep plugging away.
Anyhow, fuel pump assembly is finally bolted in:
And the broken speedometer cable has been replaced:
Also, the fuel filter in the engine bay has been replaced and the proper bolts and washers are now on the front sway bar end links. I noticed a while ago that I had messed that up, so I was able to get the proper cupped washer and longer bolt where it attaches to the sway bar. I'm a couple of odd jobs away from being over the mechanical hurdle and diving head first into body work. My end of the year goal is probably shot, but I'll keep plugging away.
Thread Starter
Joined: Feb 2001
Posts: 2,855
Likes: 225
From: Tampa, FL
A guy who was somewhat local to me had one for a project he was doing until he parted the car. He wanted it gone, so I dropped everything one day and drove four hours round trip to get it. As far as I know, they are NLA from Mazda. The price I paid was well worth the journey and not having to spend time cleaning and sealing the old tank. Right now, the old tank is sitting on too of my shed and I'm not sure what I'm going to do with it.
A guy who was somewhat local to me had one for a project he was doing until he parted the car. He wanted it gone, so I dropped everything one day and drove four hours round trip to get it. As far as I know, they are NLA from Mazda. The price I paid was well worth the journey and not having to spend time cleaning and sealing the old tank. Right now, the old tank is sitting on too of my shed and I'm not sure what I'm going to do with it.
as always keep up the good work!
MECP Certified Installer
Joined: Feb 2009
Posts: 3,176
Likes: 3
From: Mesquite, TX-DFW
Jerry, I know I am late to the party, but dynamat extreme is heavier than the stock sound deadening that you removed.
An alternative would be dynaliner which is WAY lighter but expensive or you could get closed cell foam from a craft store and use 3m spray adhesive to stick it. The closed cell foam with spray adhesive would be considerably cheaper and have the same effect.
An alternative would be dynaliner which is WAY lighter but expensive or you could get closed cell foam from a craft store and use 3m spray adhesive to stick it. The closed cell foam with spray adhesive would be considerably cheaper and have the same effect.
Thread Starter
Joined: Feb 2001
Posts: 2,855
Likes: 225
From: Tampa, FL
Jerry, I know I am late to the party, but dynamat extreme is heavier than the stock sound deadening that you removed.
An alternative would be dynaliner which is WAY lighter but expensive or you could get closed cell foam from a craft store and use 3m spray adhesive to stick it. The closed cell foam with spray adhesive would be considerably cheaper and have the same effect.
An alternative would be dynaliner which is WAY lighter but expensive or you could get closed cell foam from a craft store and use 3m spray adhesive to stick it. The closed cell foam with spray adhesive would be considerably cheaper and have the same effect.
No real updates yet, but, for anyone interested, bodywork is truly progressing. There is nothing super glamorous about it though, so I will probably just post a few before and after pics when the car is about ready for primer.

Rotary Enthusiast
Joined: Feb 2005
Posts: 984
Likes: 0
From: Bossier City, LA
Jerry.....do you happen to have the part number to the gasket material you got from mcmaster carr for the blower? I just finished cleaning mine up and need some gasket for the recirculate/fresh air door.
Awesome job thus far! Im currently dealing with major nastiness in my tank that Im assuming you saw in yours before you lucked out and found a new one. I sure wish I could find a new one for a good deal!!
Awesome job thus far! Im currently dealing with major nastiness in my tank that Im assuming you saw in yours before you lucked out and found a new one. I sure wish I could find a new one for a good deal!!
Thread Starter
Joined: Feb 2001
Posts: 2,855
Likes: 225
From: Tampa, FL
I know that I've mentioned the dimensions of the foam somewhere, and maybe even a part number, but I don't have it off hand. Just measure however wide the flange is and you should be good to go. I think I got something that was 1/8" thick.
I will have a cargo cover. I got in an intense bidding battle a few years ago for one and won the auction. It may have been above going rate at the time, but it was practically new.
I will have a cargo cover. I got in an intense bidding battle a few years ago for one and won the auction. It may have been above going rate at the time, but it was practically new.
Rotary Enthusiast
Joined: Feb 2005
Posts: 984
Likes: 0
From: Bossier City, LA
I know that I've mentioned the dimensions of the foam somewhere, and maybe even a part number, but I don't have it off hand. Just measure however wide the flange is and you should be good to go. I think I got something that was 1/8" thick.
I will have a cargo cover. I got in an intense bidding battle a few years ago for one and won the auction. It may have been above going rate at the time, but it was practically new.
I will have a cargo cover. I got in an intense bidding battle a few years ago for one and won the auction. It may have been above going rate at the time, but it was practically new.
I happened upon some gasket material at my work that's working out beautifully. I've already redone my fresh/recirculate box and my evaporator box. Both all nice and clean and gaskets all replaced on the flaps and flanges.
I'm about to pull the heater core tonight and do that box.
I'm basically doing the same thing as you with my car....from the ground up.
Thread Starter
Joined: Feb 2001
Posts: 2,855
Likes: 225
From: Tampa, FL
I discovered my proportioning valve was leaking and have replaced it with an adjustable Wilwood unit from Flyin' Miata (cars use the same fittings - made for no need to source my own).
There has been a lot of part organization that took place to make sure things were grouped as I would need them for reassembly and that I had all the required hardware. Also, there is a growing pile of parts that I either need to sell or just junk as they are doing nothing but taking up space in the garage.
One thing that is for sure though is that the project is not dead. There have just been some, uh, pauses that have slowed things down. Hopefully there will be more to report on soon.