
JerryLH3's RX-7 Turbo II Restoration


Jerry - I opened your marathon thread last night for the first time...and read straight through the whole thing. Your dedication...both to the car and to the thread...are phenomenal. Thank you for doing and sharing the work with such great care.
Too bad about the ABS delete. Shoot me a PM if you still have all the hardware and want to sell it. Thanks. Rob
Too bad about the ABS delete. Shoot me a PM if you still have all the hardware and want to sell it. Thanks. Rob

You'll want to put a 2nd layer of foam attop what you already laid down on the blower box, where it mates to the sheet metal vent intake. We didn't do enough & it left a gap, letting water in whenever it rained. I don't imagine the car will see much rain if ever, but easier to do now w/ the dash out & stuff.
You'll want to put a 2nd layer of foam attop what you already laid down on the blower box, where it mates to the sheet metal vent intake. We didn't do enough & it left a gap, letting water in whenever it rained. I don't imagine the car will see much rain if ever, but easier to do now w/ the dash out & stuff.
Your problem lies in the firewall cavity because water shouldn't be able to get in the intake tube, no matter what (well, total submersion...).
Thread Starter

Joined: Feb 2001
Posts: 2,855
Likes: 225
From: Tampa, FL
It is closed cell adhesive backed foam from McMaster-Carr that is 5/8" wide and 1/8" thick. It looks like the part number is 8694K119.
Thanks! I'm not too bent up about losing the ABS. If I had remembered to put those wheels back on, I probably would have kept it, but I'd been going back and forth between deleting it anyway. That just tipped the scales. I do have everything, but for the moment I am going to hang onto it.
Yeah, I can't imagine Mazda ever intending that foam they used to seal against water.
I've just about finished up the same task on the air mix unit. There was quite a bit of nasty degraded foam in there. I am now way more familiar with FC ventilation than most people as I took a few minutes and paid attention to what each door was doing.
Maybe this weekend, but surely within the next week, I will be making the most important purchase of the project yet - paint. The time has come to get the body work and paint completed. After I finish that, I really think I am on the downhill slope.
Jerry - I opened your marathon thread last night for the first time...and read straight through the whole thing. Your dedication...both to the car and to the thread...are phenomenal. Thank you for doing and sharing the work with such great care.
Too bad about the ABS delete. Shoot me a PM if you still have all the hardware and want to sell it. Thanks. Rob
Too bad about the ABS delete. Shoot me a PM if you still have all the hardware and want to sell it. Thanks. Rob
I've just about finished up the same task on the air mix unit. There was quite a bit of nasty degraded foam in there. I am now way more familiar with FC ventilation than most people as I took a few minutes and paid attention to what each door was doing.
Maybe this weekend, but surely within the next week, I will be making the most important purchase of the project yet - paint. The time has come to get the body work and paint completed. After I finish that, I really think I am on the downhill slope.
Well let me put it this way. A non-sunroof car I have had a big puddle of water on the passenger side foot area, around the vacinity of the ECU. This was after a good heavy rainstorm.
I pulled the blower box, doubled up on the foam, & never once in over a year of the car being ungaraged, daily driven by my wife, has there been water in that same spot.
I pulled the blower box, doubled up on the foam, & never once in over a year of the car being ungaraged, daily driven by my wife, has there been water in that same spot.
Thread Starter
Joined: Feb 2001
Posts: 2,855
Likes: 225
From: Tampa, FL
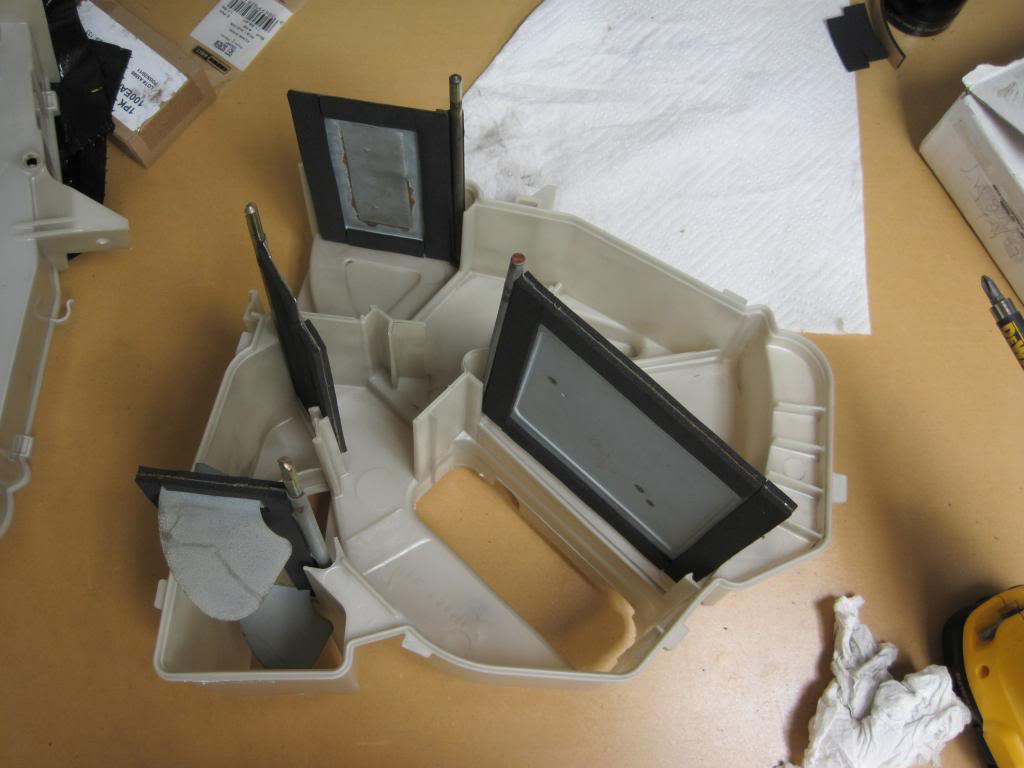
Next up, the air mix unit received the same treatment as the blower unit. Everything came apart and was thoroughly cleaned. The doors got new foam and new grease was applied to all moving parts. You can see in the sequence of photos just how bad the foam was on these doors.
Everything is back together and awaiting reinstallation - with the exception of the heater core. I noticed a trouble spot that I want to make sure is leak free before it goes back in.
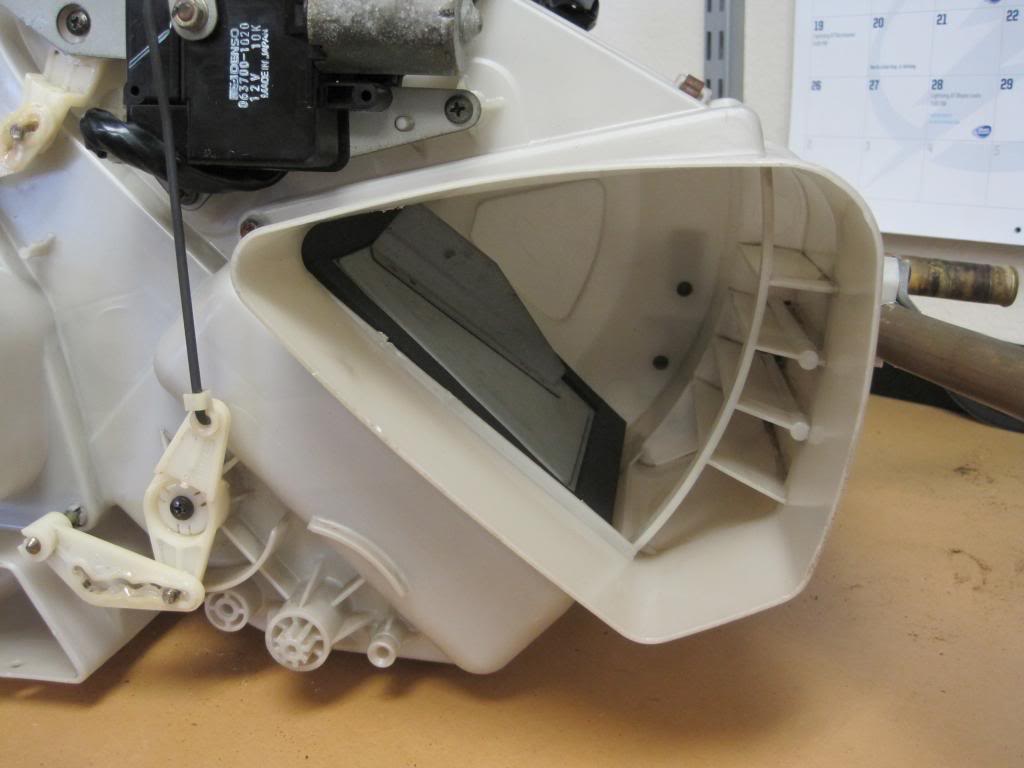
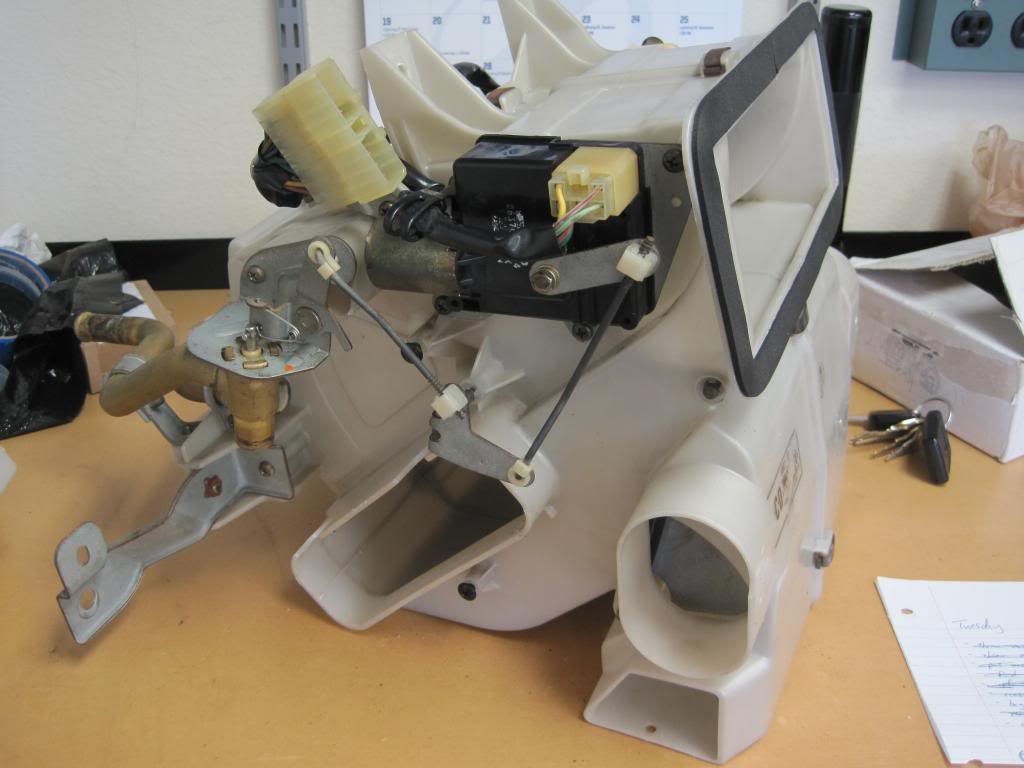
Everything is back together and awaiting reinstallation - with the exception of the heater core. I noticed a trouble spot that I want to make sure is leak free before it goes back in.
Thread Starter
Joined: Feb 2001
Posts: 2,855
Likes: 225
From: Tampa, FL
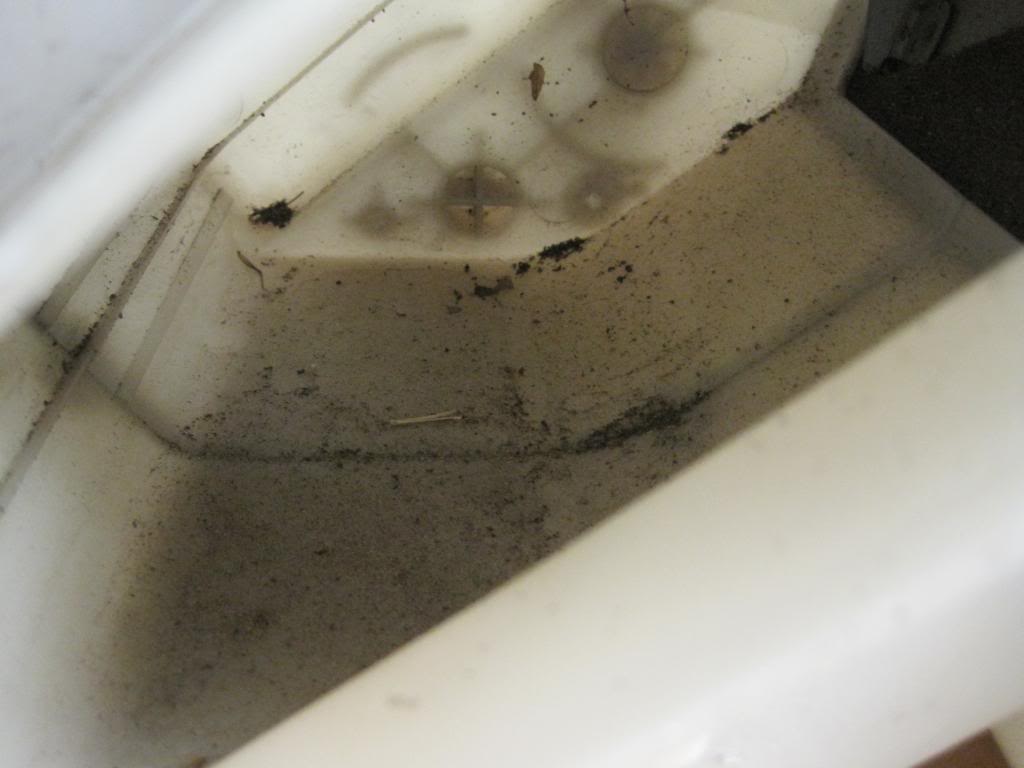
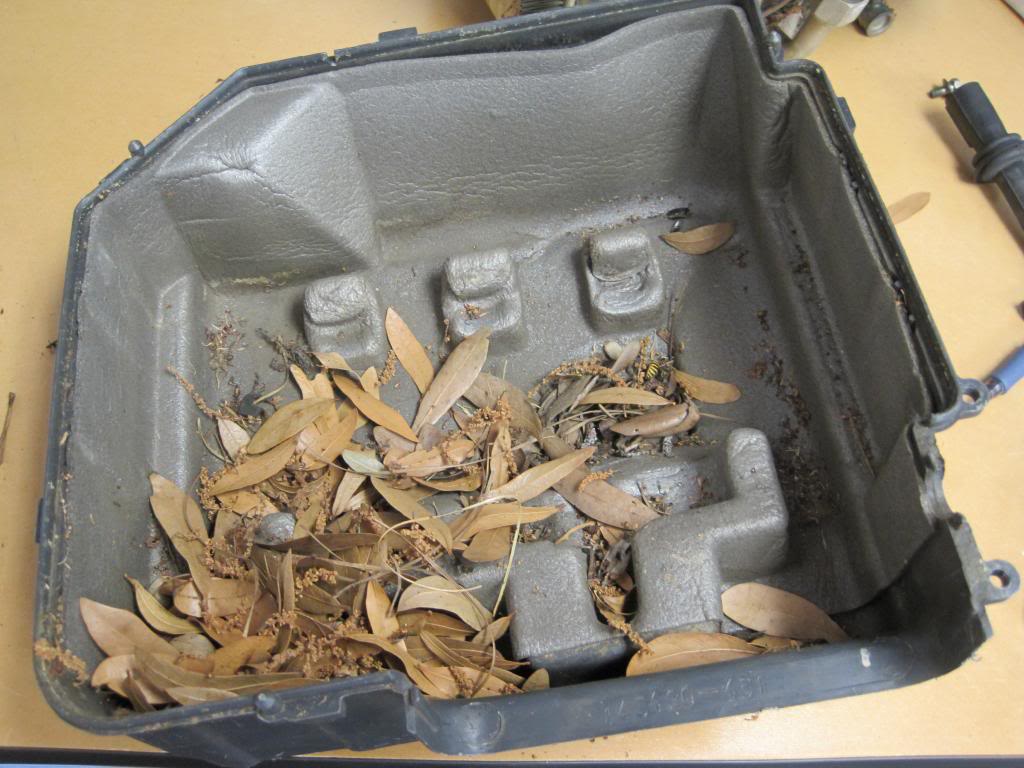
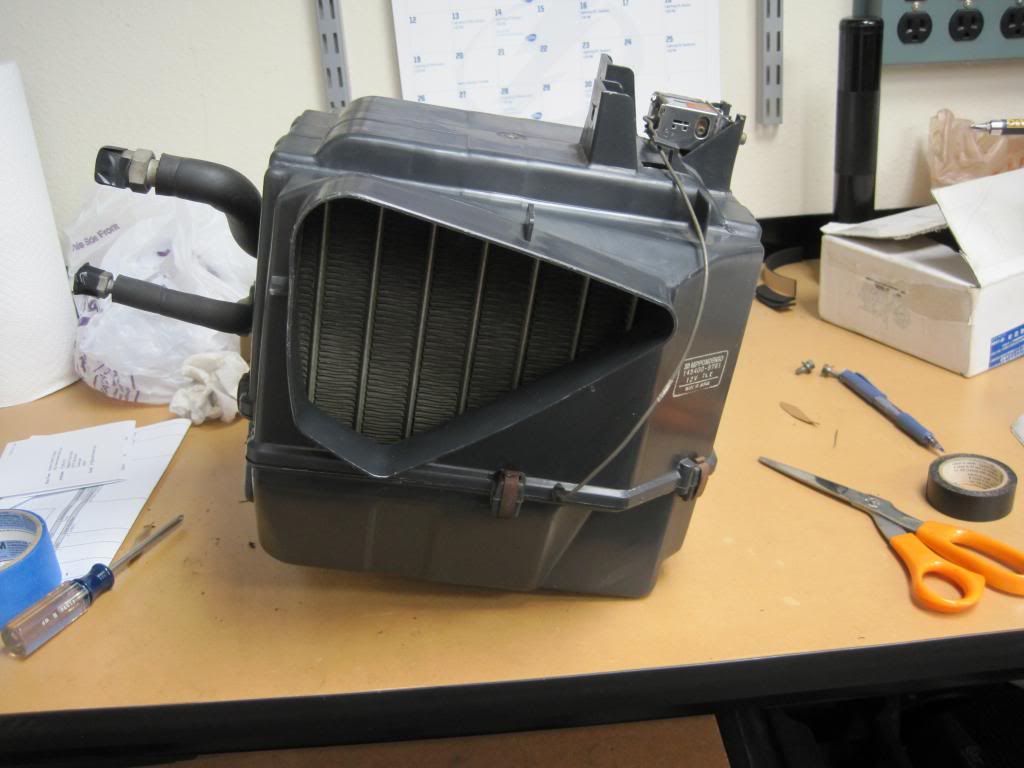
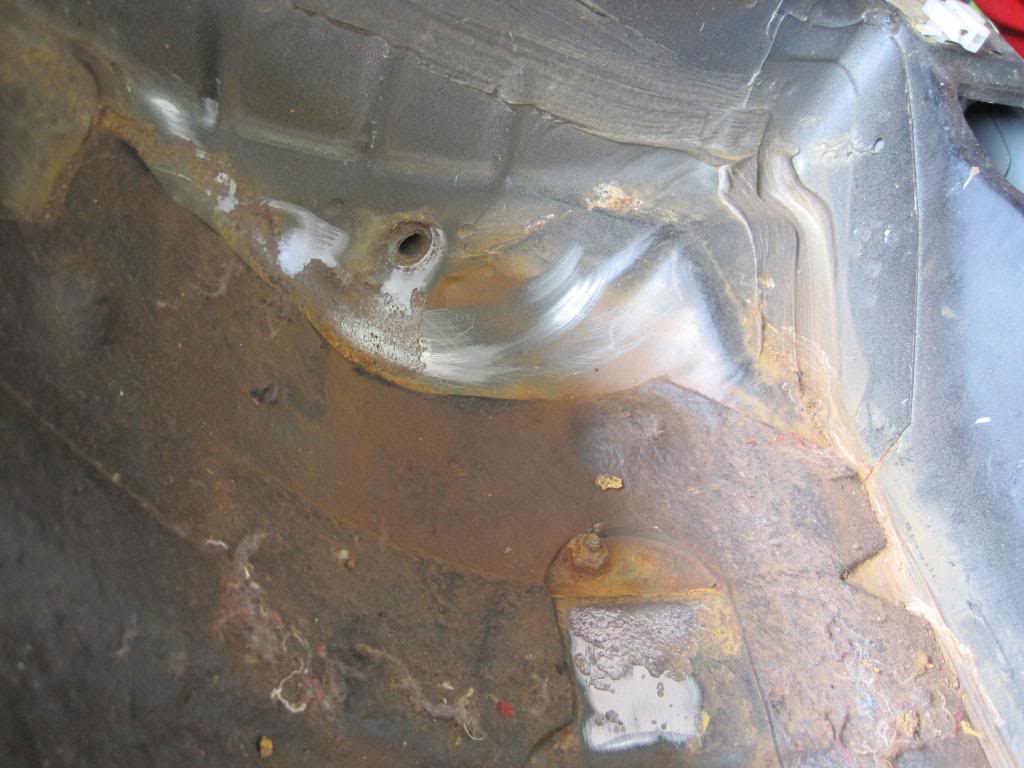
Continuing with the recent theme, there was one last under dash ventilation item to address - the evaporator assembly. Over the years (when the AC actually worked), I was plagued with a clogged drain on the evaporator assembly that would end up with water leaking out of the unit and onto the passenger floorboard. The work I did at the time was never going to be sufficient without taking the unit out and properly cleaning the drain.
NOTE: It is illegal to purposefully vent ANY refrigerant into the atmosphere. When performing AC work, either have the system evacuated or verify with a set of gauges that the system has no pressure - and thus, no refrigerant.
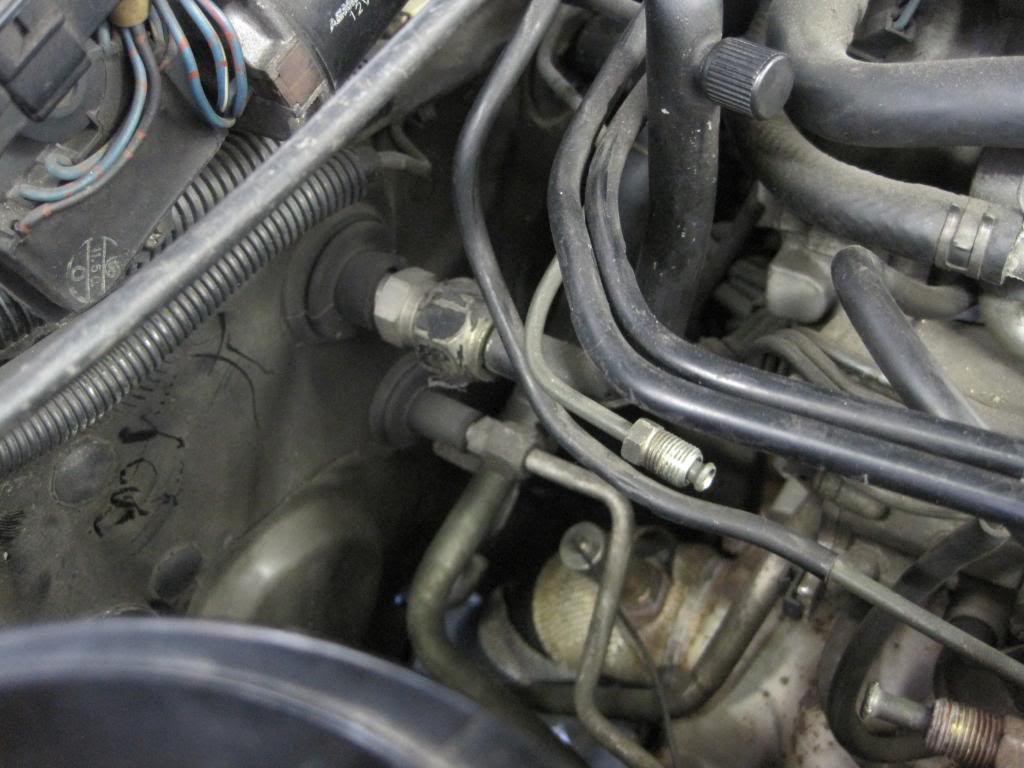
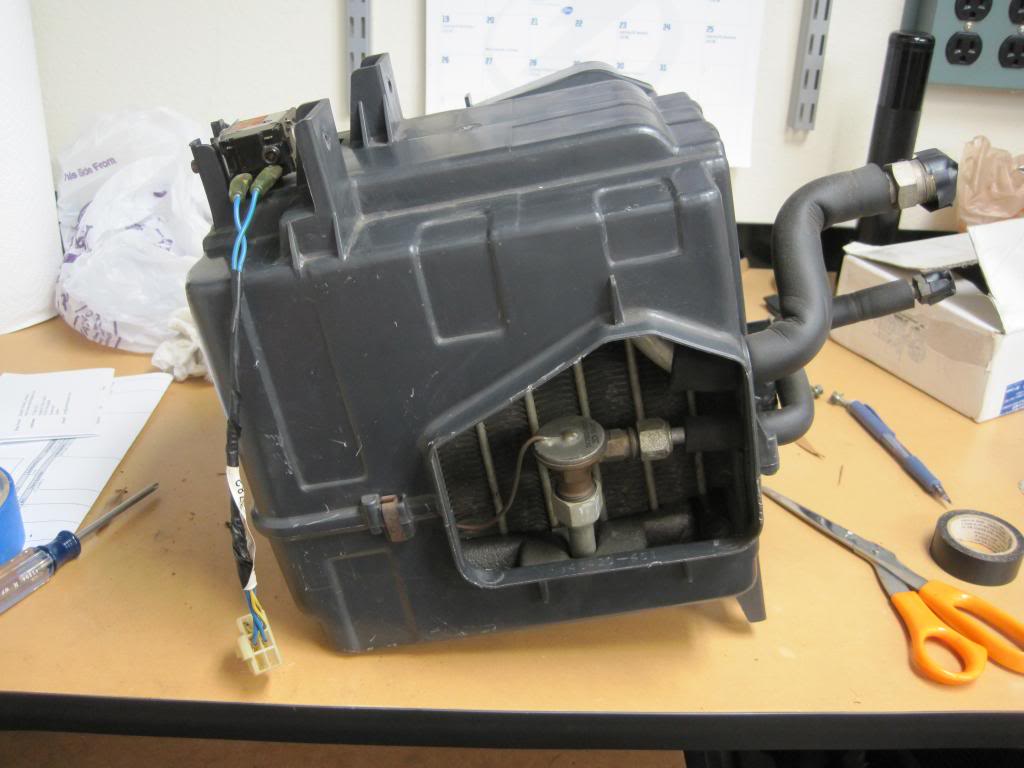
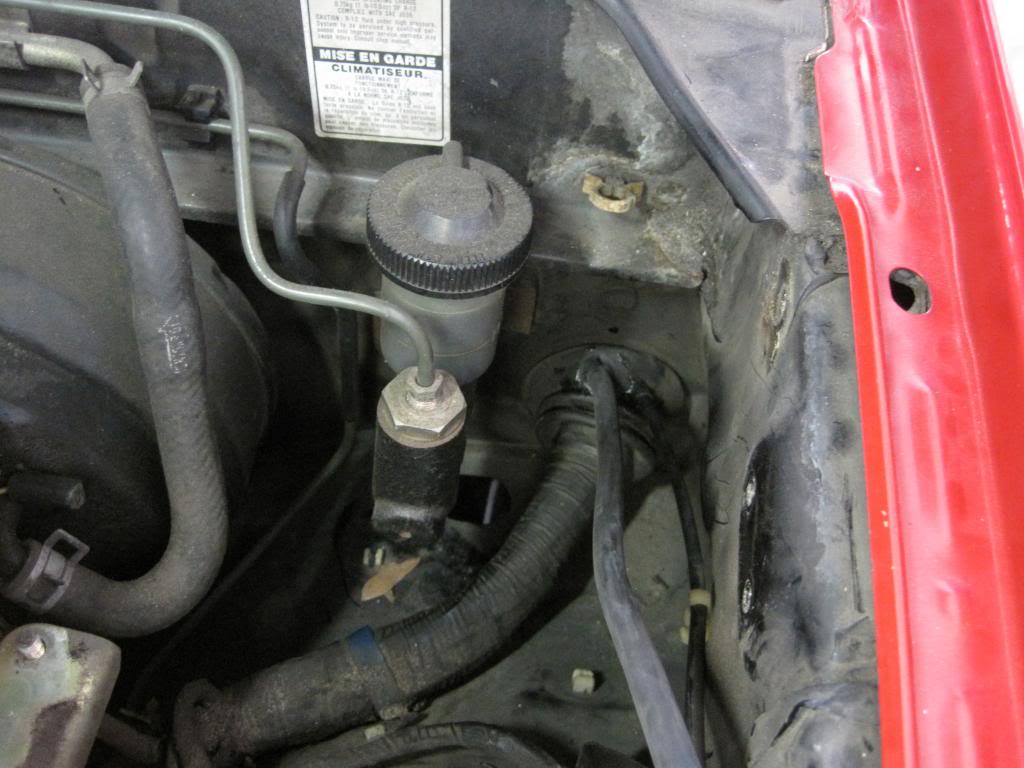
Now that my disclaimer is out of the way, I verified there was no pressure in the system and was safe to disconnect the evaporator and take the unit out of the car. First I disconnect the low side and high side lines in the engine bay:
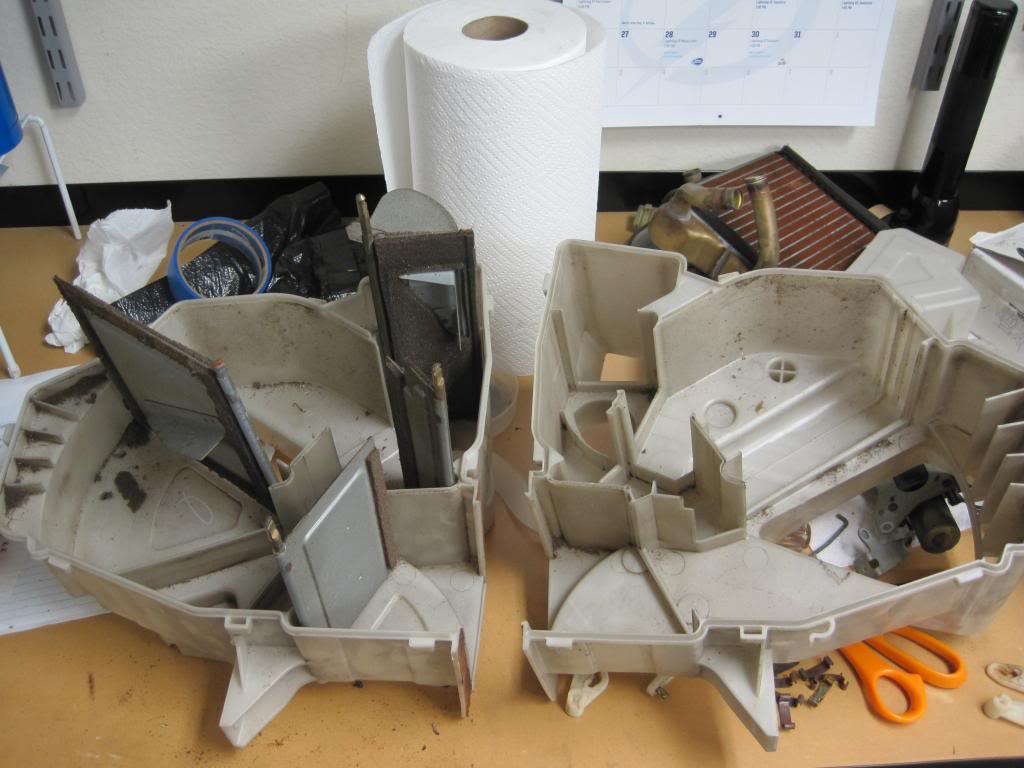
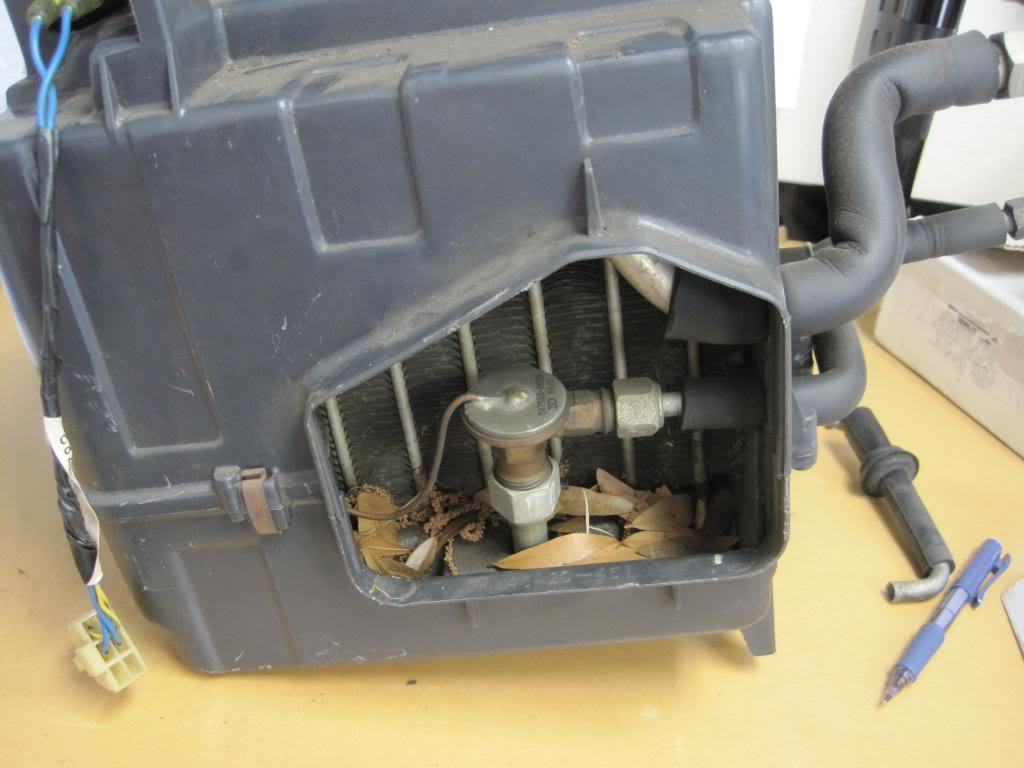
Once I took the assembly out of the car (only three nuts hold it onto the chassis), it was clear that nothing short of full removal would clean this drain:
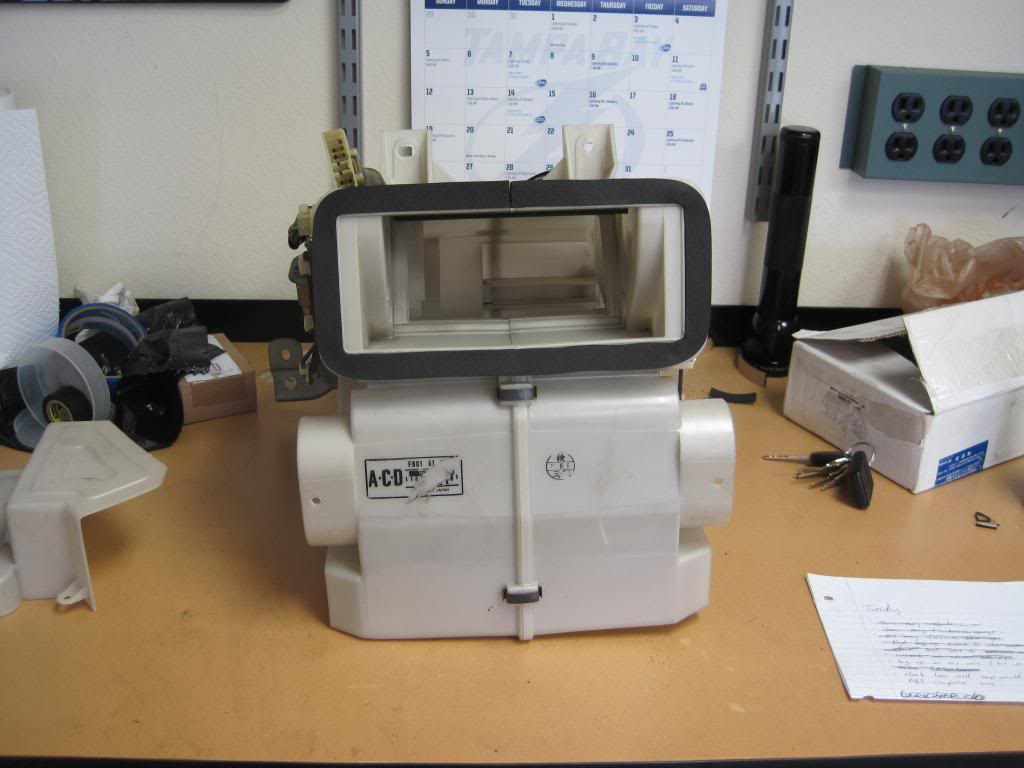
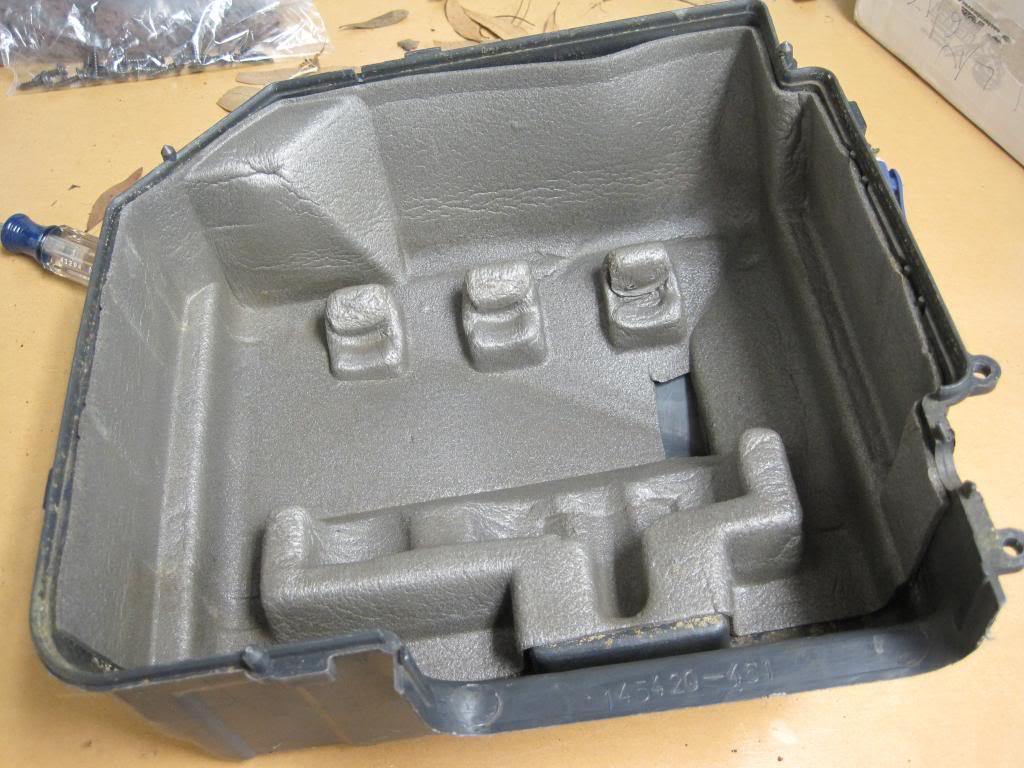
I gave the plastic case pieces a good cleaning with soapy water and let everything dry overnight. I used compressed air to blow out as much debris as possible from the fins of the evaporator. Evaporator fins are extremely fragile! Do your best to never touch them. After the case dried overnight, everything went back together:
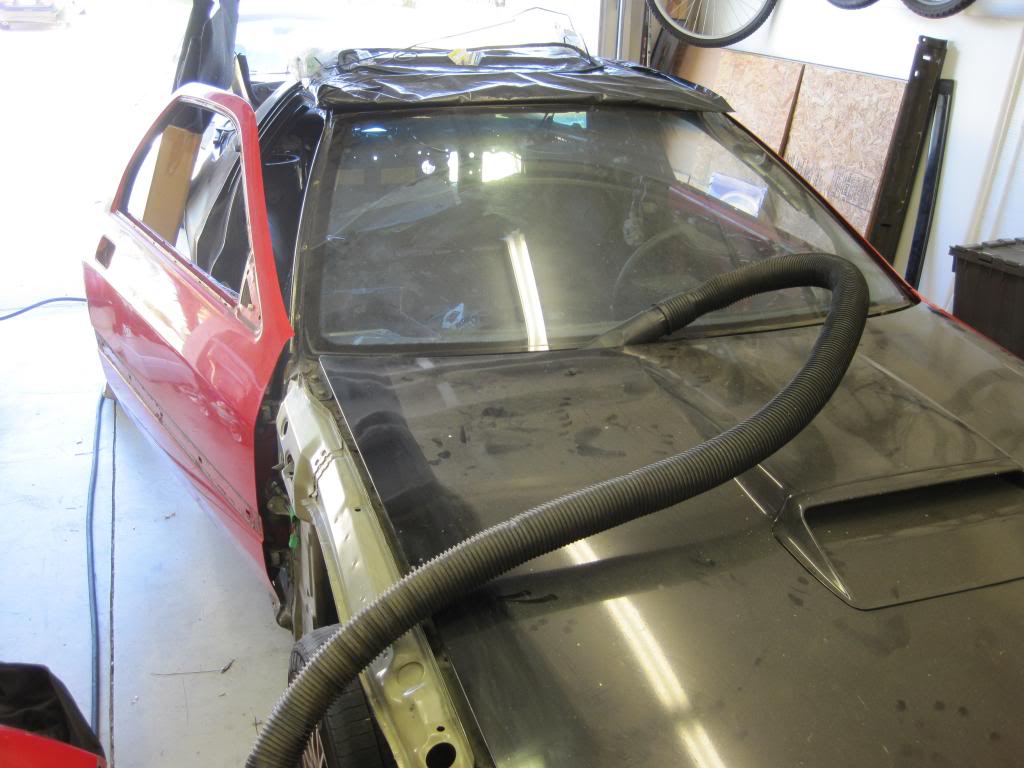
The last thing I did was do my best to suck out all the dead leaves and other trash in the cowl that was stuck on the intake screen. Leaving the vacuum like this and getting in the car to dislodge stuff from the screen with a screwdriver seemed to work well, but there's still some crap in there. I need a smaller hose and attachment to really get all of it.
NOTE: It is illegal to purposefully vent ANY refrigerant into the atmosphere. When performing AC work, either have the system evacuated or verify with a set of gauges that the system has no pressure - and thus, no refrigerant.
Now that my disclaimer is out of the way, I verified there was no pressure in the system and was safe to disconnect the evaporator and take the unit out of the car. First I disconnect the low side and high side lines in the engine bay:
Once I took the assembly out of the car (only three nuts hold it onto the chassis), it was clear that nothing short of full removal would clean this drain:
I gave the plastic case pieces a good cleaning with soapy water and let everything dry overnight. I used compressed air to blow out as much debris as possible from the fins of the evaporator. Evaporator fins are extremely fragile! Do your best to never touch them. After the case dried overnight, everything went back together:
The last thing I did was do my best to suck out all the dead leaves and other trash in the cowl that was stuck on the intake screen. Leaving the vacuum like this and getting in the car to dislodge stuff from the screen with a screwdriver seemed to work well, but there's still some crap in there. I need a smaller hose and attachment to really get all of it.


 ). Thanks for the updates, keep it up!
Joined: Dec 2006
Posts: 2,859
Likes: 13
From: Sterling Heights, MI
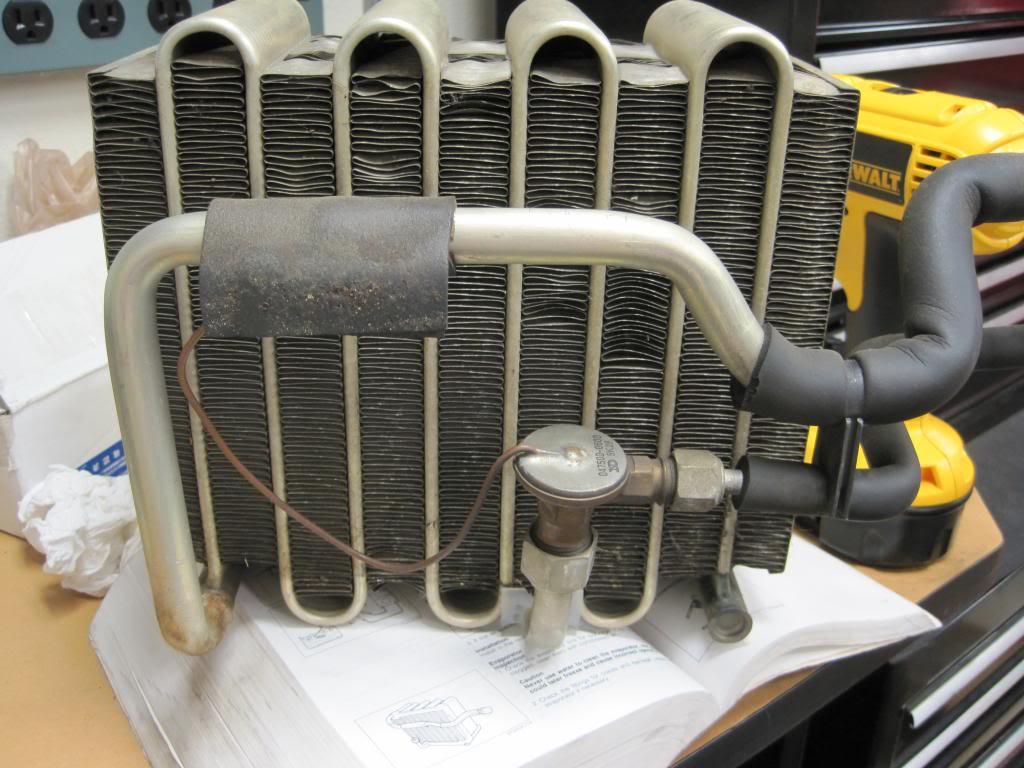
Just split my evaporator case apart... Yikes! Mine was very gnarly. Yours looked pretty clean in comparison  . I do have a question, where does this go? The end of mine was just floating around in the case.
. I do have a question, where does this go? The end of mine was just floating around in the case.
Just split my evaporator case apart... Yikes! Mine was very gnarly. Yours looked pretty clean in comparison . I do have a question, where does this go? The end of mine was just floating around in the case.
. I do have a question, where does this go? The end of mine was just floating around in the case.Joined: Dec 2006
Posts: 2,859
Likes: 13
From: Sterling Heights, MI
 .
.
Thread Starter
Joined: Feb 2001
Posts: 2,855
Likes: 225
From: Tampa, FL
No apologies necessary. The more information the better. I'd actually considered taking a picture of the thermoswitch and the bent fins where it obviously was.
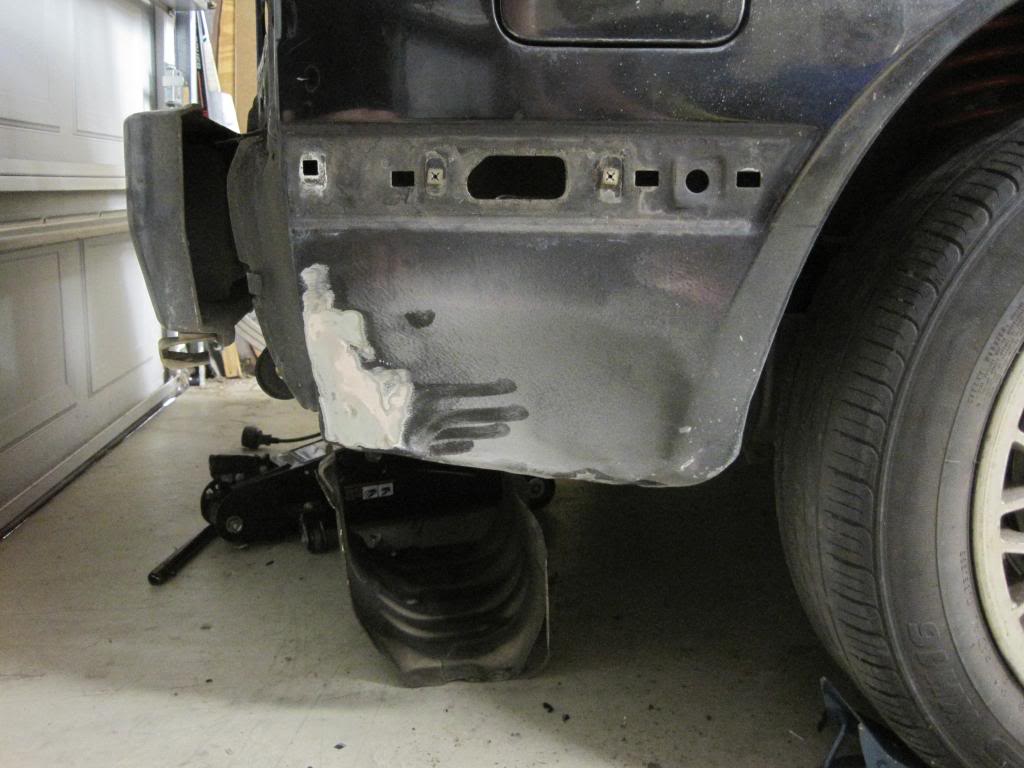
Today, the bodywork recommenced from where I left it ages ago. Took care of two dings and made some major progress in the biggest body blemish of all - the right rear quarter panel.
Perhaps you remember this little doozy from page 1?
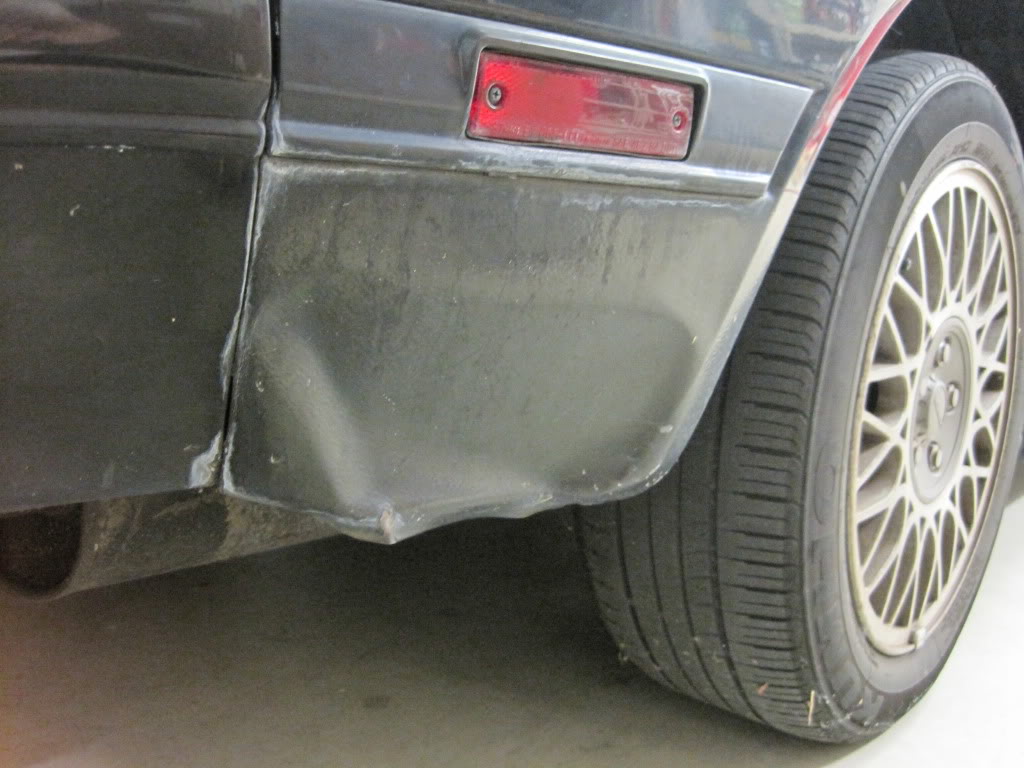
The PO was involved in some sort of accident where they hit a barrier or curb and seriously crinkled this thing. If I wanted to do it right, that would involve some cutting and welding, and I just don't think that's going to happen at the moment. Let's see how presentable I can make it with nothing but the tools currently at my disposal.
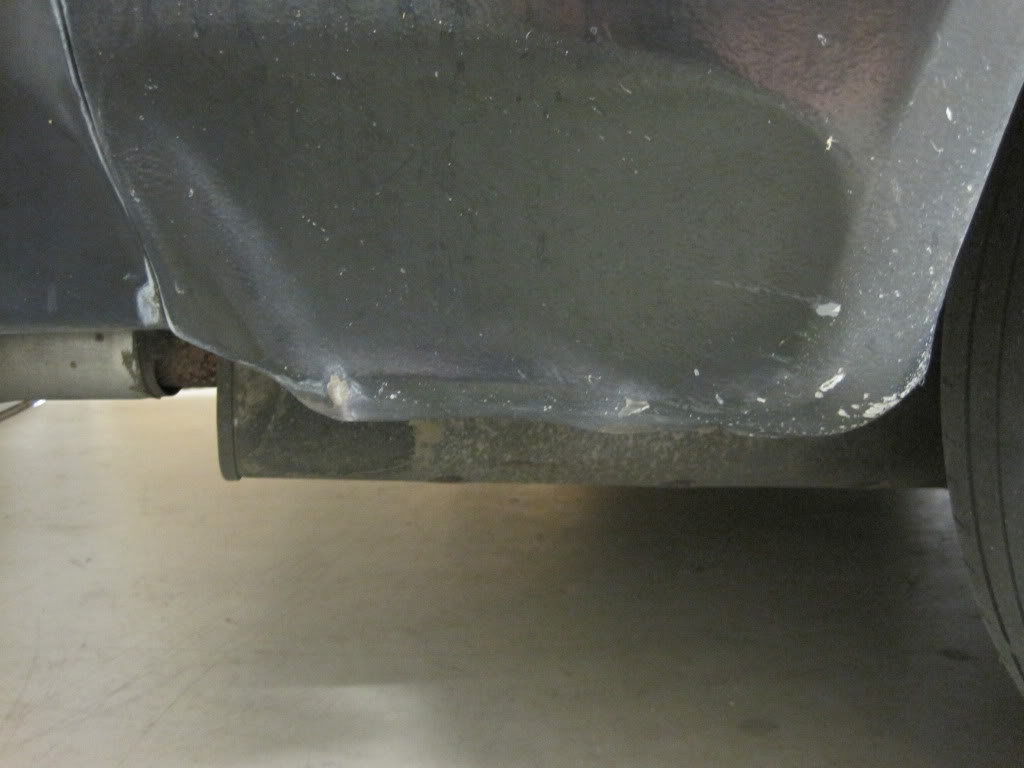
After a good bit of work, it may be possible to get this thing in a presentable shape by myself. Of course, I can't take credit for the work done thus far, as my friend Brad did that while I was filling and sanding some door dings. Here's where it sits right now:

I probably won't post many body work updates as getting in a rhythm really prevents pictures being taken, but I will try to get some pictures of the two main problem areas - the right rear quarter panel and the bracket where the right front fender and nose meet. Everything else is mostly minor dings that simply require a little filling and sanding.
Body work will now progress with some side jobs thrown in to prepare the car for paint.
Today, the bodywork recommenced from where I left it ages ago. Took care of two dings and made some major progress in the biggest body blemish of all - the right rear quarter panel.
Perhaps you remember this little doozy from page 1?
The PO was involved in some sort of accident where they hit a barrier or curb and seriously crinkled this thing. If I wanted to do it right, that would involve some cutting and welding, and I just don't think that's going to happen at the moment. Let's see how presentable I can make it with nothing but the tools currently at my disposal.
After a good bit of work, it may be possible to get this thing in a presentable shape by myself. Of course, I can't take credit for the work done thus far, as my friend Brad did that while I was filling and sanding some door dings. Here's where it sits right now:
I probably won't post many body work updates as getting in a rhythm really prevents pictures being taken, but I will try to get some pictures of the two main problem areas - the right rear quarter panel and the bracket where the right front fender and nose meet. Everything else is mostly minor dings that simply require a little filling and sanding.
Body work will now progress with some side jobs thrown in to prepare the car for paint.
Thread Starter
Joined: Feb 2001
Posts: 2,855
Likes: 225
From: Tampa, FL
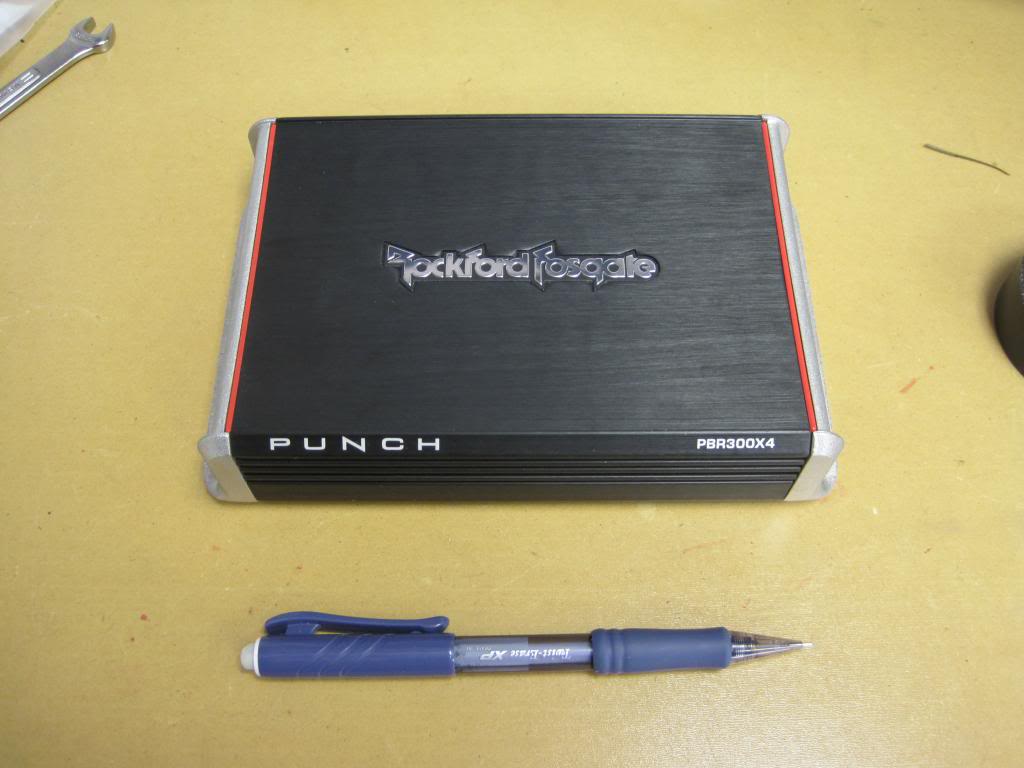
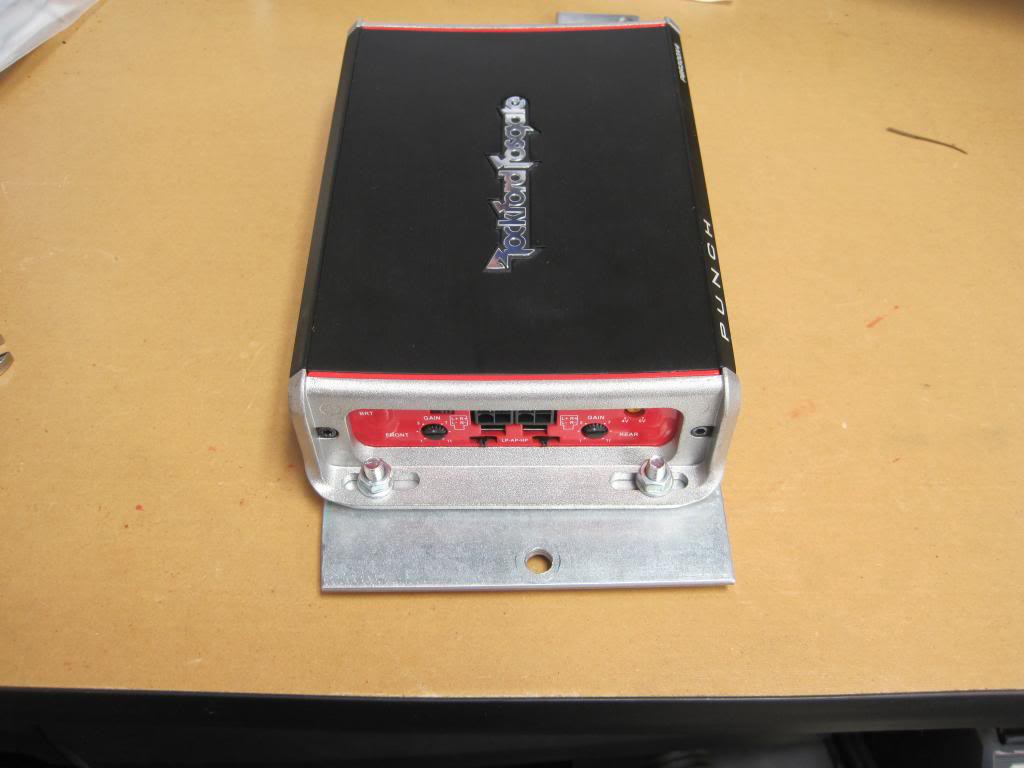
Back to a quick side project. I did some research, and it seems as long as I am careful with my wire routing, there should not be any negative effects from mounting my amplifier next to the ECU. However, I'm certainly open to input on the subject. The one issue I may have is cooling, but I have an idea for that.
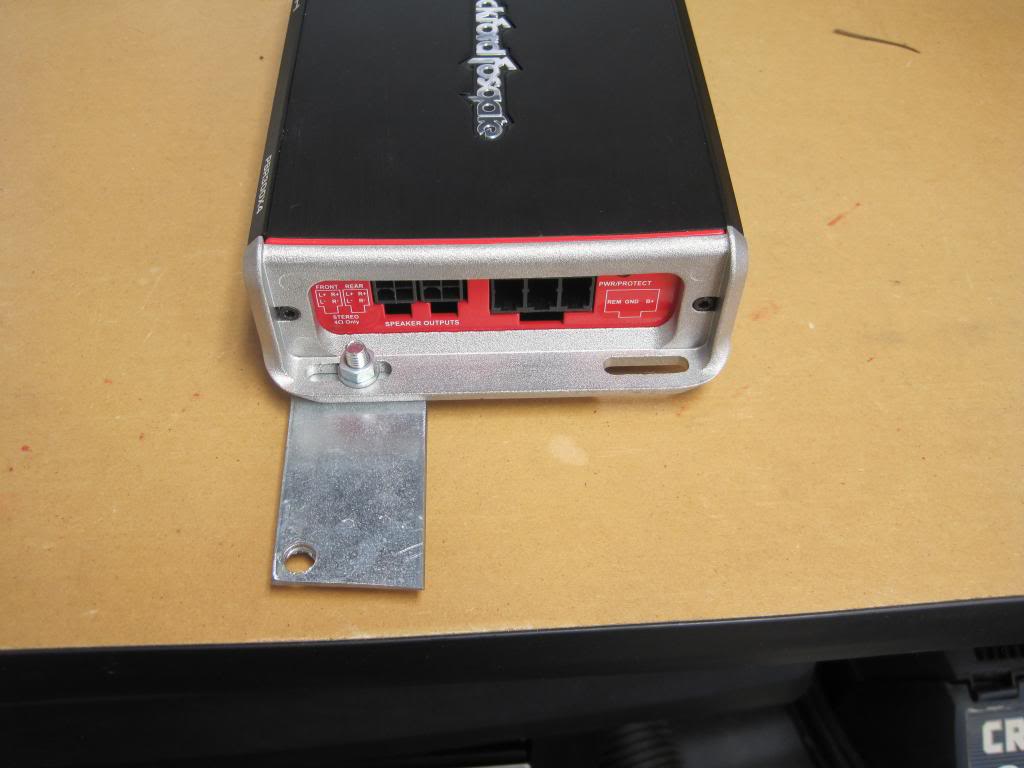
Anyhow, here is the amplifier (mechanical pencil for scale):
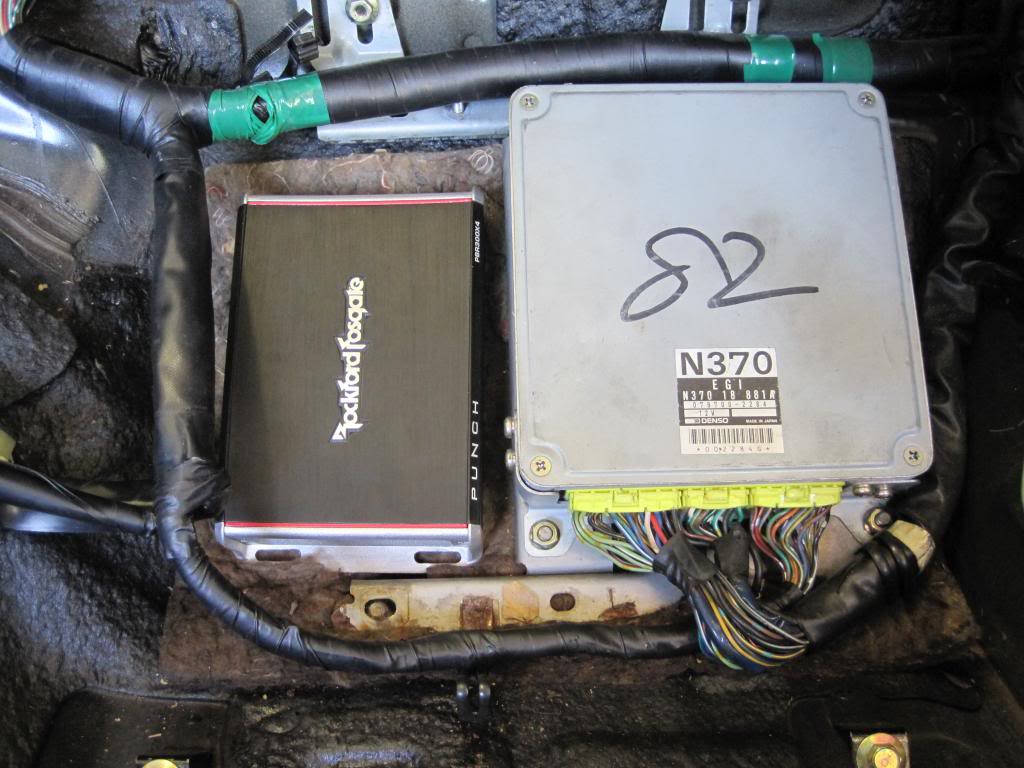
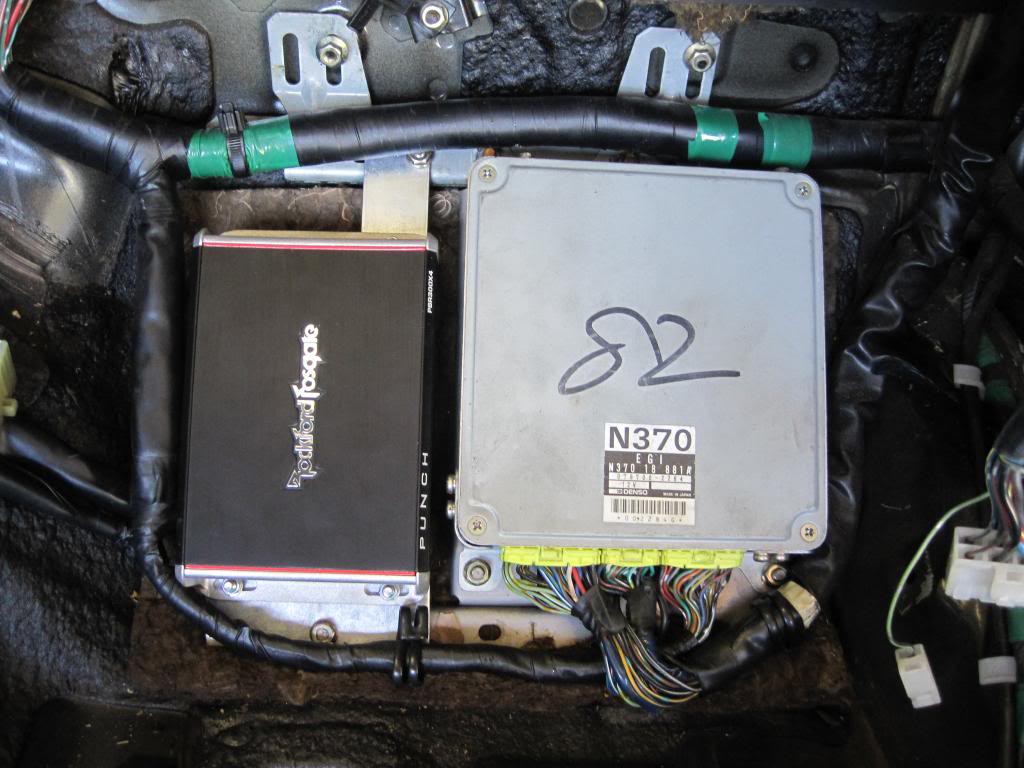
And here is where I'd like to mount it:
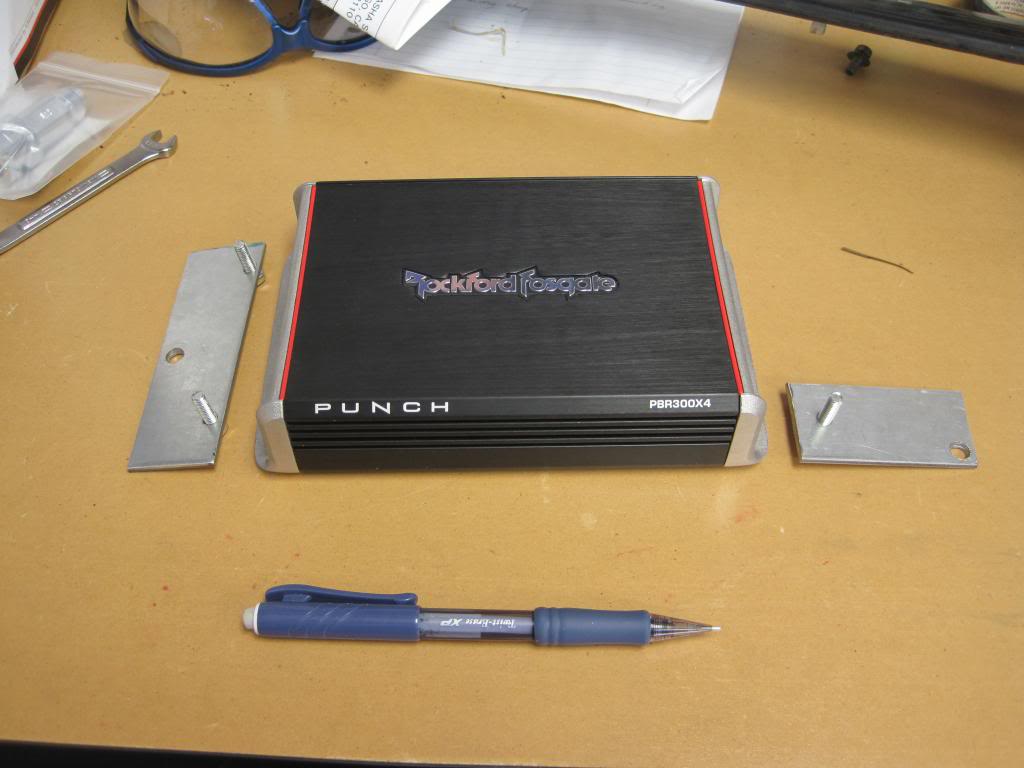
A quick trip to Home Depot provided me with some steel plate and some M5 bolts, washers and nuts. Here is what I fabbed up:
And mounted in the car:
Anyhow, here is the amplifier (mechanical pencil for scale):
And here is where I'd like to mount it:
A quick trip to Home Depot provided me with some steel plate and some M5 bolts, washers and nuts. Here is what I fabbed up:
And mounted in the car:
Thread Starter
Joined: Feb 2001
Posts: 2,855
Likes: 225
From: Tampa, FL
I have not updated the thread lately, but work has been ongoing. As of now, all amplifier and speaker wiring is finished and I have mounted my battery tray (which I then took out for final mounting later). I have also fixed a couple of broken mounting points on the dash by grafting in the appropriate pieces from an S4 I found in the junkyard.
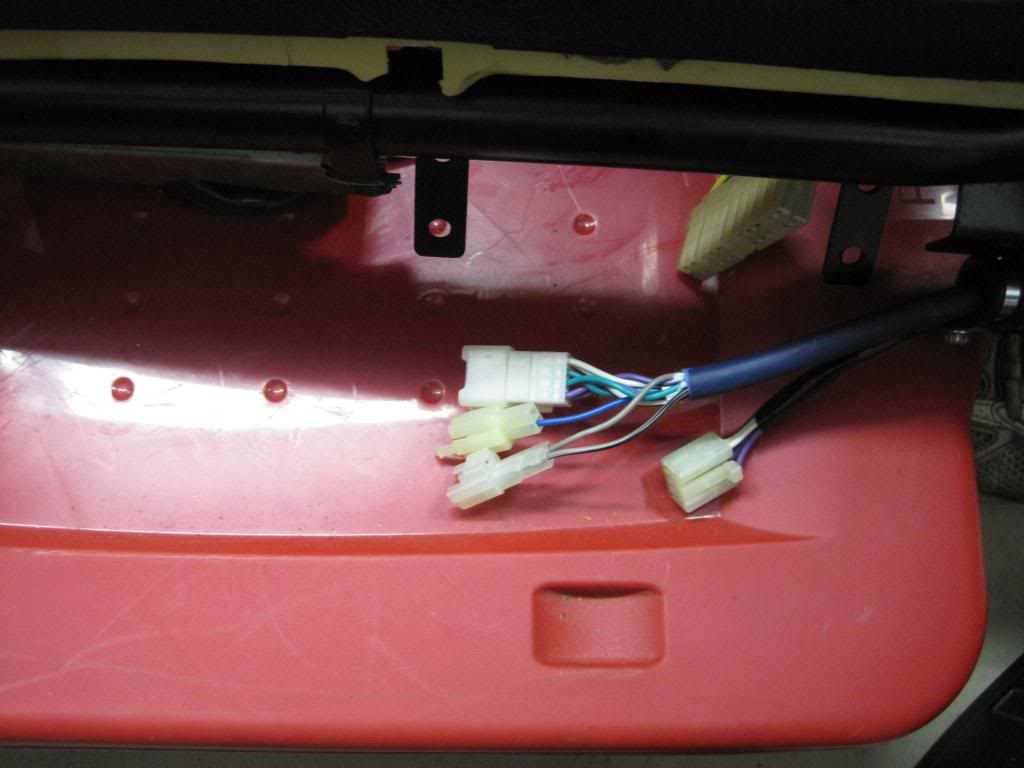
First up, here is my amplifier harness. It includes a pair of connectors that comes from the dash that has inputs and the remote turn on. It also includes the speaker outputs and the power and ground wires. The somewhat neat thing I did with my wiring is I am able to bypass the amp if needed by simply unplugging and plugging back in the appropriate input/output connections.
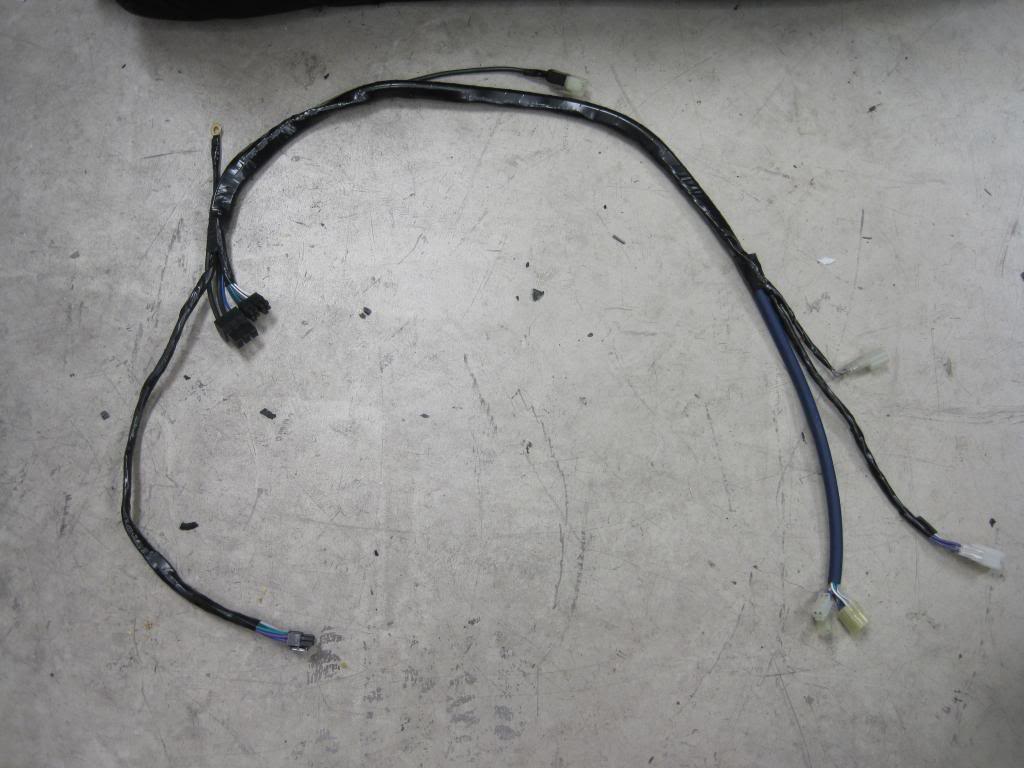
The amp outputs lead back through the dash from the passenger's side to the driver's side. The passenger's side connections are shown.
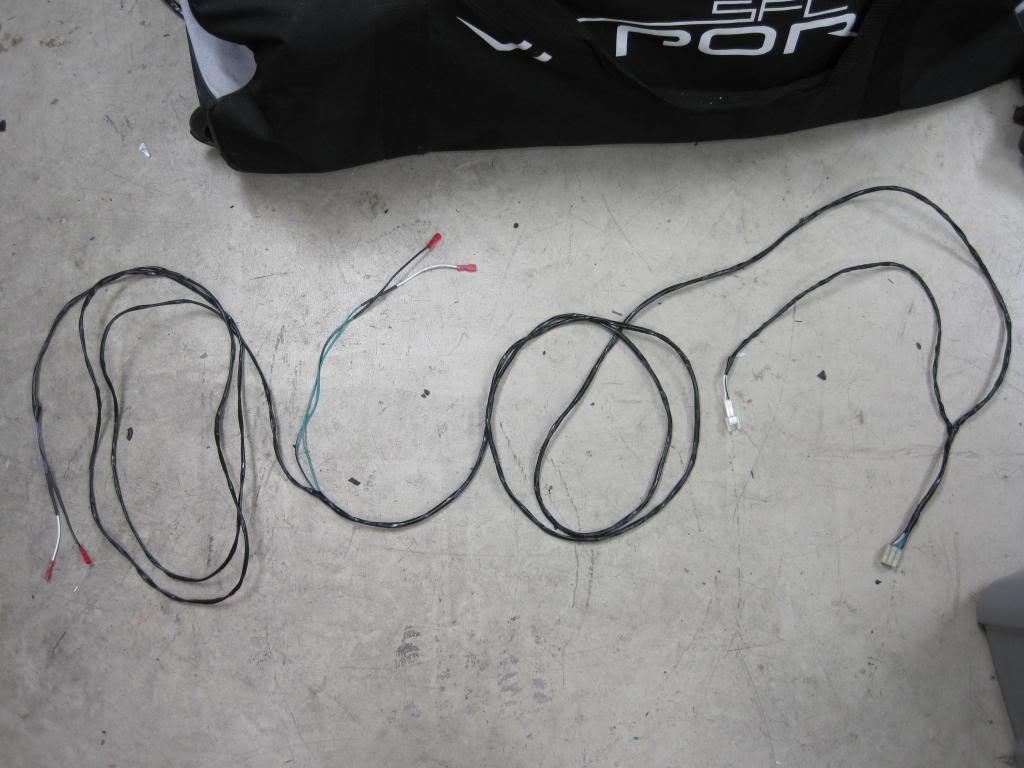
This is the rest of the speaker output harness. It will plug in at the driver's side of the dashboard and has breakouts for all remaining speakers. Appropriate connectors have already been put in on the driver's and passenger's side door harnesses.
Here are my repaired dash mounting points for the shift bezel and instrument hood:
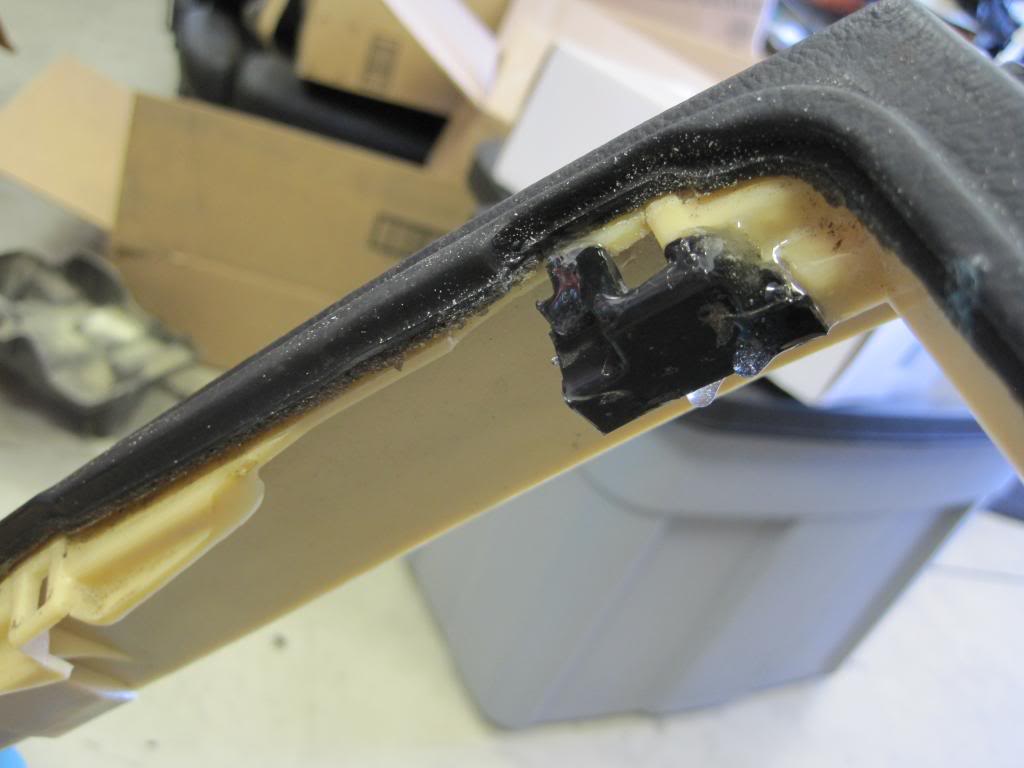
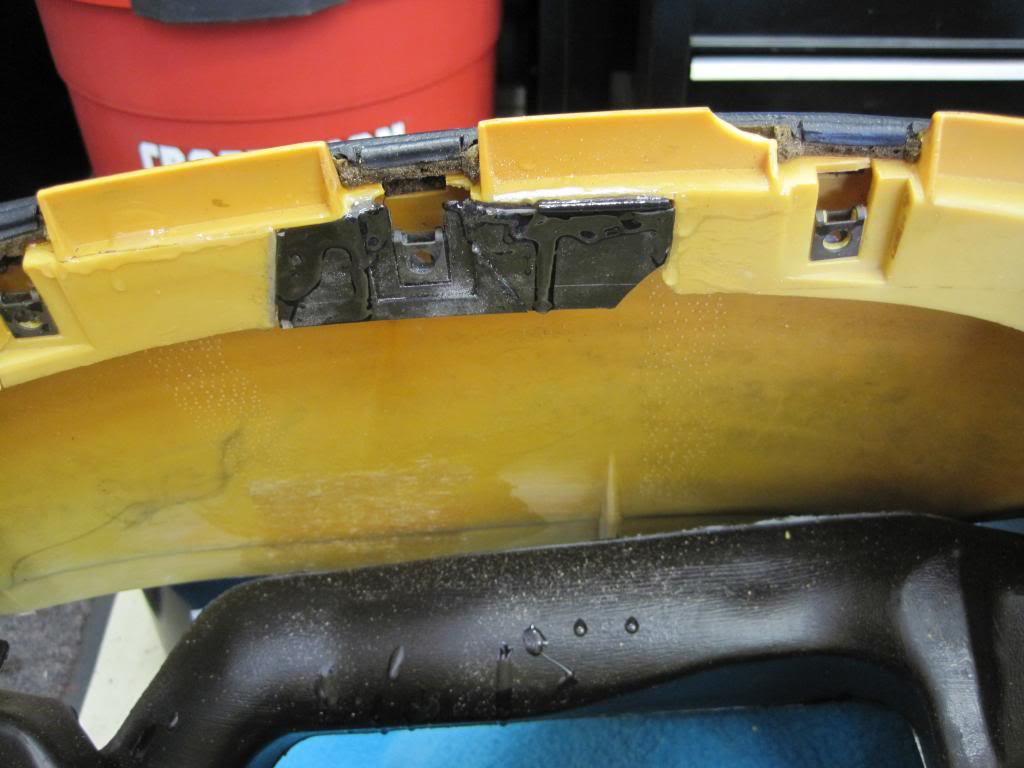
They are not pretty by any means, but they are very strong.
First up, here is my amplifier harness. It includes a pair of connectors that comes from the dash that has inputs and the remote turn on. It also includes the speaker outputs and the power and ground wires. The somewhat neat thing I did with my wiring is I am able to bypass the amp if needed by simply unplugging and plugging back in the appropriate input/output connections.
The amp outputs lead back through the dash from the passenger's side to the driver's side. The passenger's side connections are shown.
This is the rest of the speaker output harness. It will plug in at the driver's side of the dashboard and has breakouts for all remaining speakers. Appropriate connectors have already been put in on the driver's and passenger's side door harnesses.
Here are my repaired dash mounting points for the shift bezel and instrument hood:
They are not pretty by any means, but they are very strong.
Thread Starter
Joined: Feb 2001
Posts: 2,855
Likes: 225
From: Tampa, FL
Next up is the mounting of my battery tray. I have a very nice piece I bought for Optima Batteries:
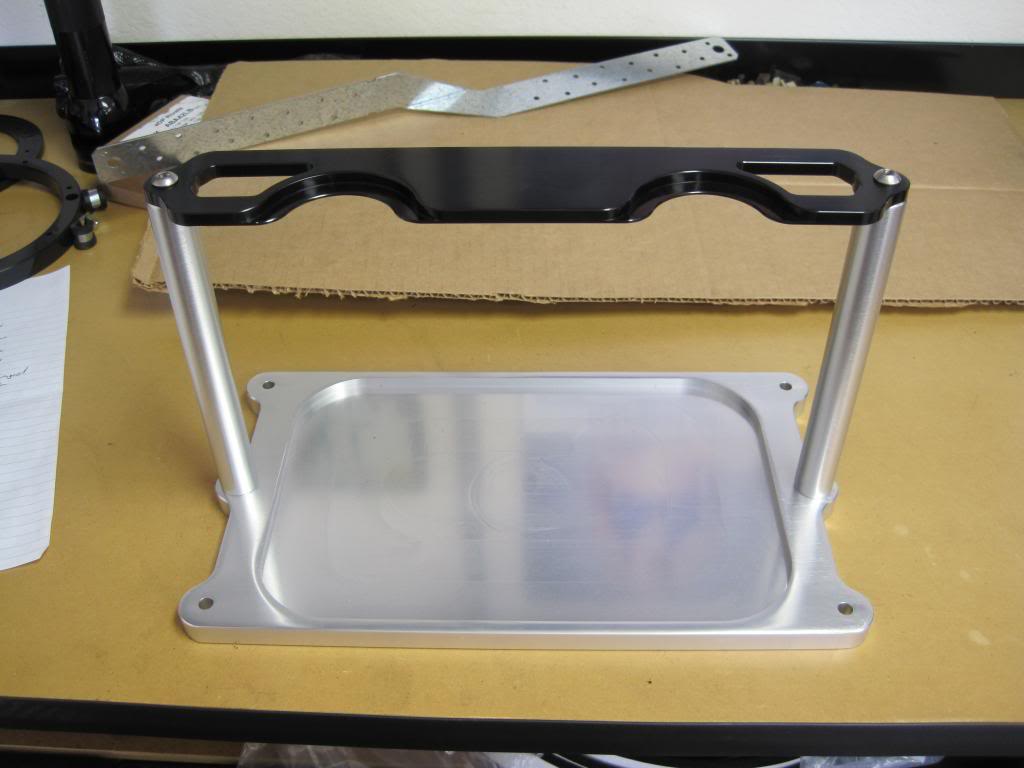
I drug out the hatch frame and bin structure to get and idea of where I wanted it:
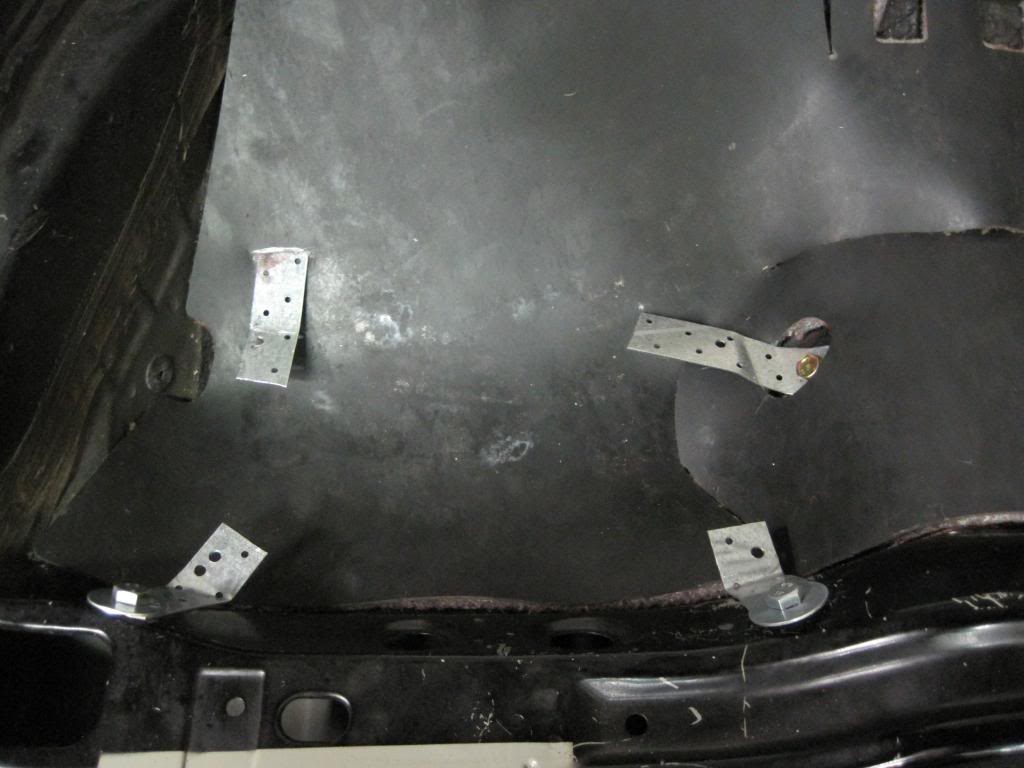
Here are my brackets. They are meant to be used in construction as wood ties. I liked the nice large hole at one end for mounting to the chassis.
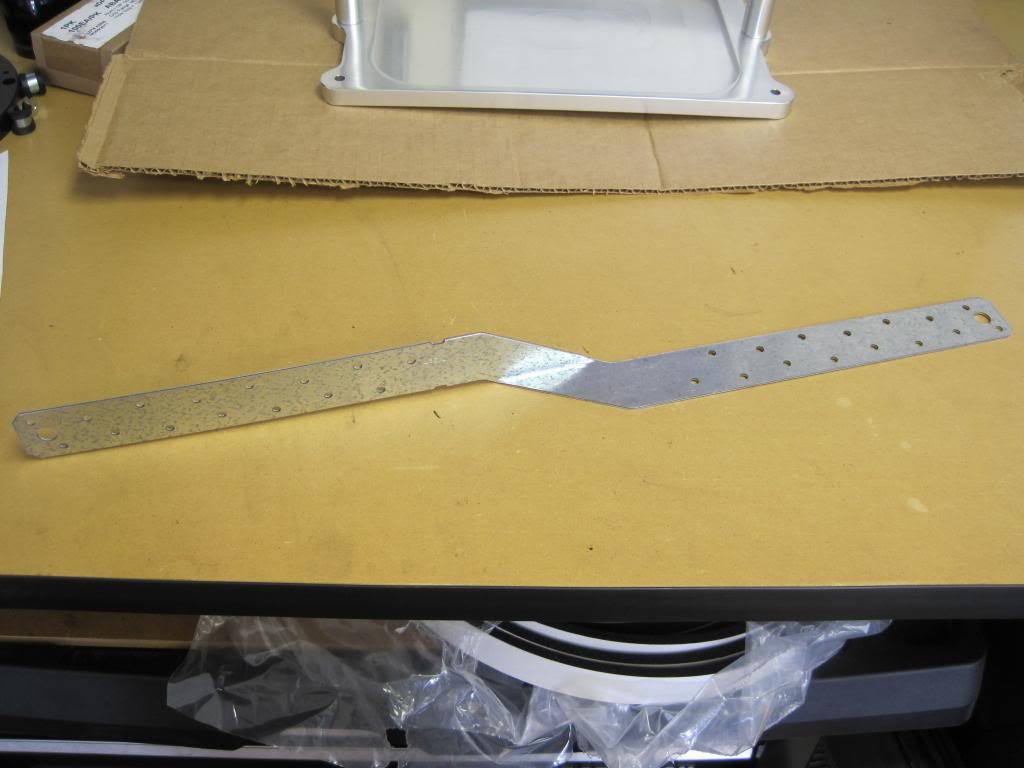
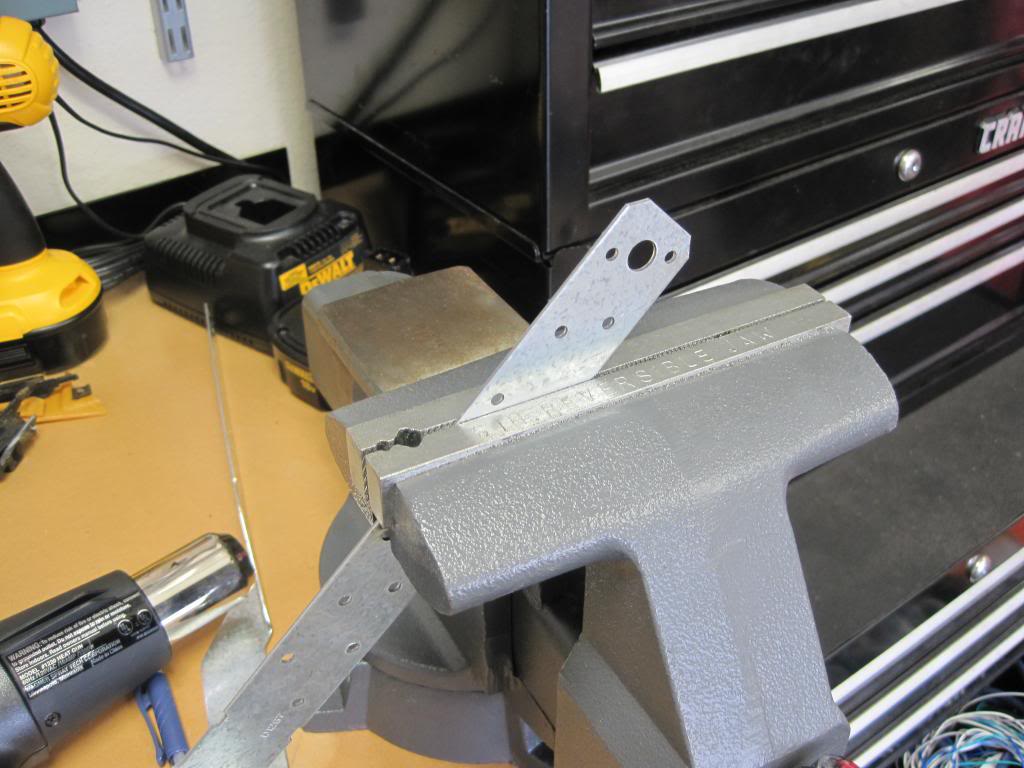
After much measuring, cutting and bending...
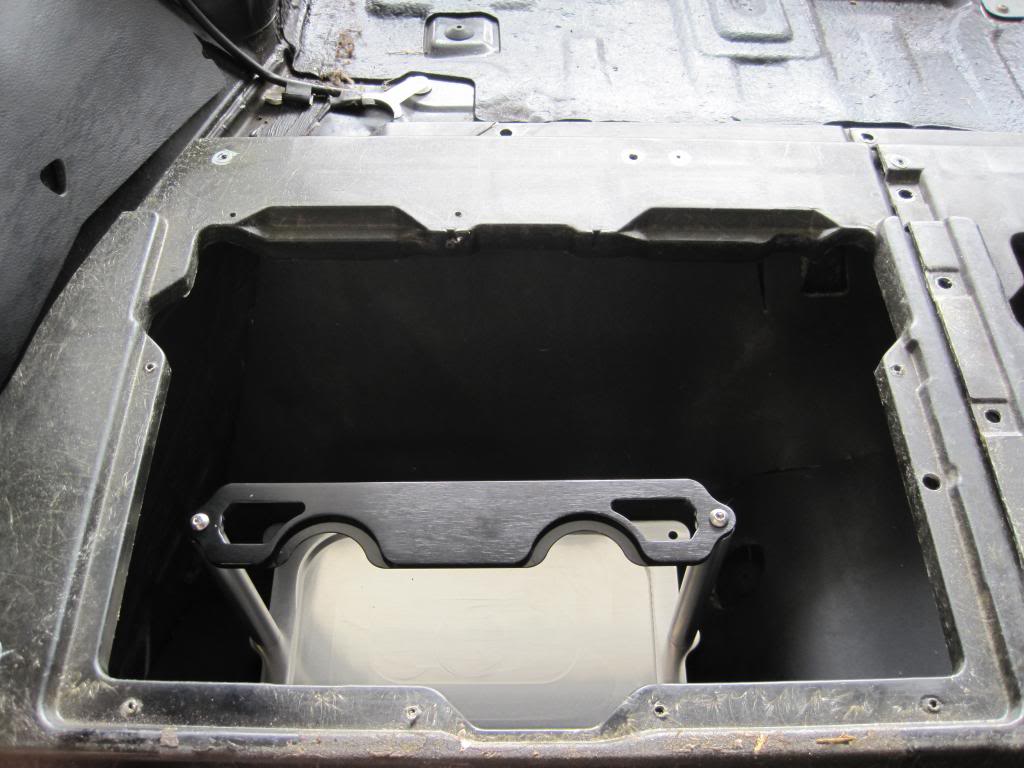
I had this:

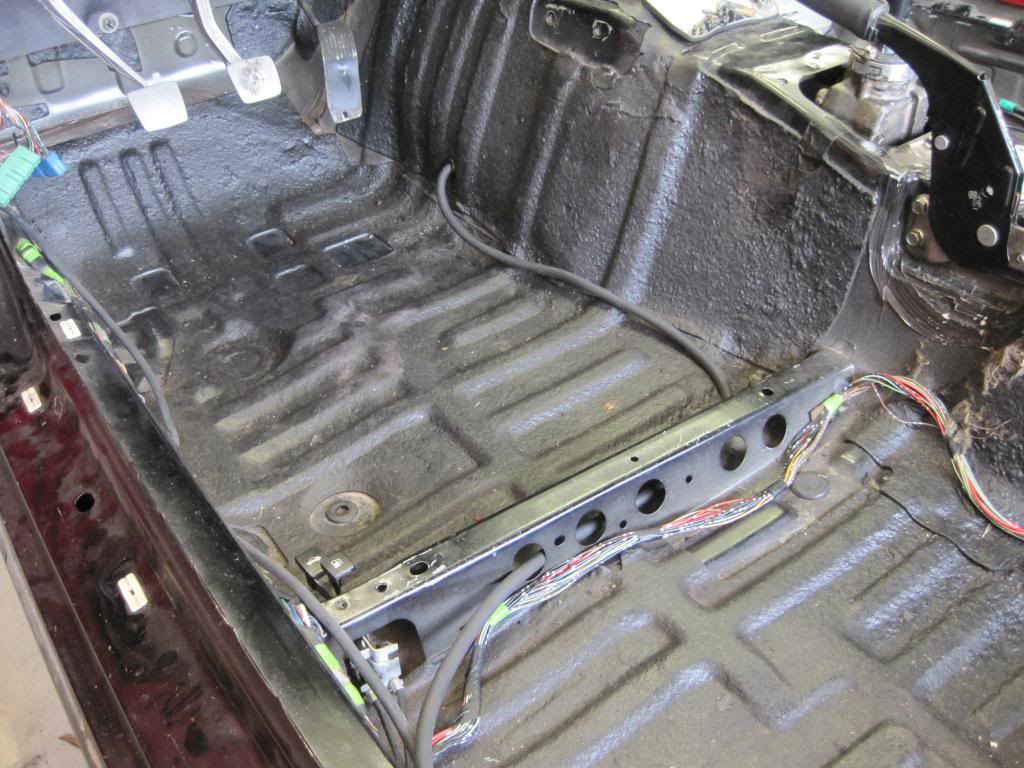
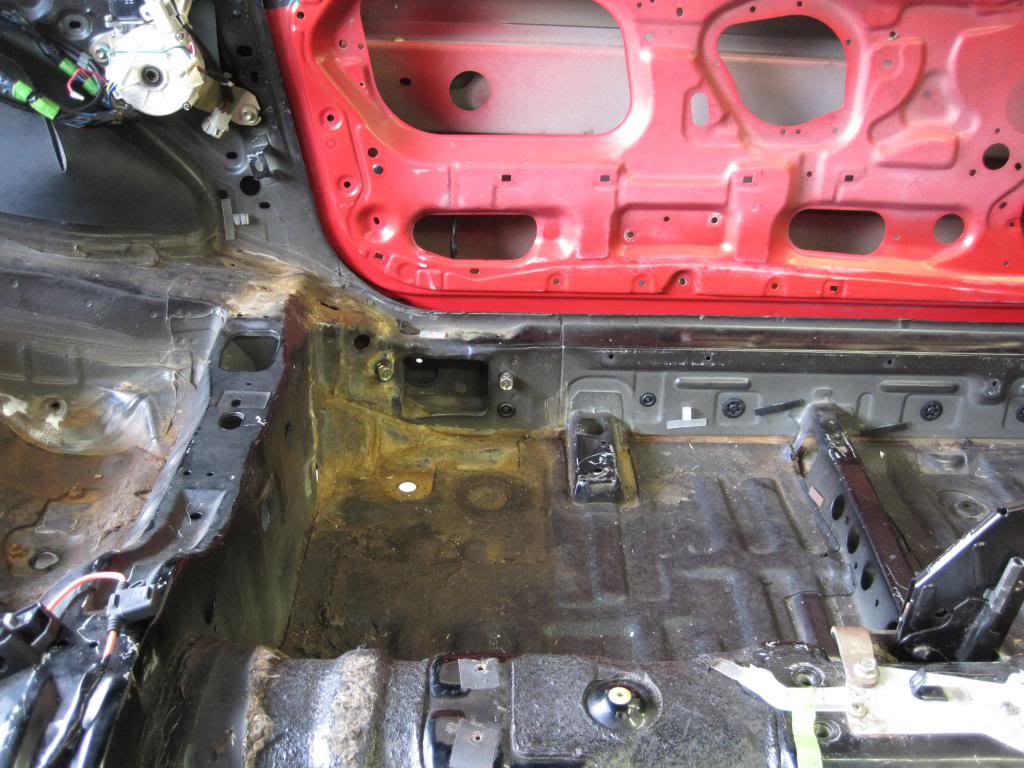
I made use of two tapped holes already in the chassis. The one on the right is for rear seat belts if a car was so equipped. I'm not sure what the one on the left is, but I imagine it is for seats as well, as the hole is on both sides of the car. Despite the odd arrangement, it is extremely strong.
I then took off the tray so I could make a slit in the sound deadening for the rear bracket:
I'll tidy everything up as the car goes back together, but I'm not digging out the hatch carpet right now to cut those holes. I will also mount my circuit breaker and distribution block to the hatch bin piece.
Next up is running the battery wire.
I drug out the hatch frame and bin structure to get and idea of where I wanted it:
Here are my brackets. They are meant to be used in construction as wood ties. I liked the nice large hole at one end for mounting to the chassis.
After much measuring, cutting and bending...
I had this:
I made use of two tapped holes already in the chassis. The one on the right is for rear seat belts if a car was so equipped. I'm not sure what the one on the left is, but I imagine it is for seats as well, as the hole is on both sides of the car. Despite the odd arrangement, it is extremely strong.
I then took off the tray so I could make a slit in the sound deadening for the rear bracket:
I'll tidy everything up as the car goes back together, but I'm not digging out the hatch carpet right now to cut those holes. I will also mount my circuit breaker and distribution block to the hatch bin piece.
Next up is running the battery wire.
Thread Starter
Joined: Feb 2001
Posts: 2,855
Likes: 225
From: Tampa, FL
Continuing on, the battery wiring is now almost complete.
Here is the distribution block mounted:

The wire for the project:
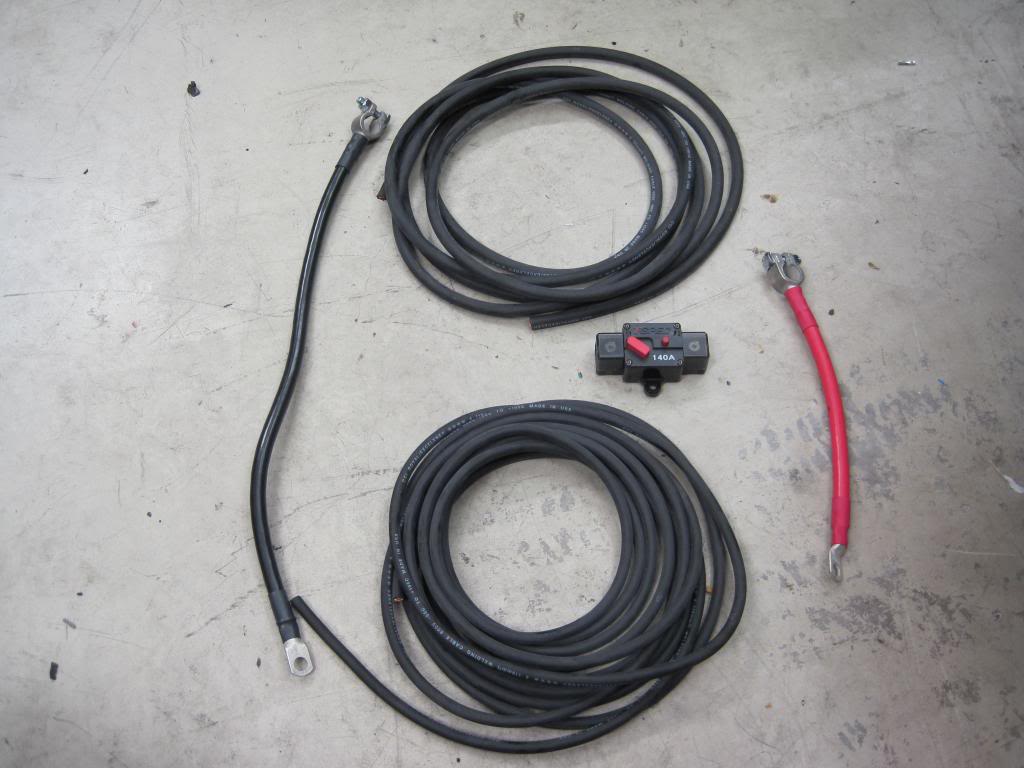
I'm using 1 gauge premade battery cables for the main power and ground. The positive line will then go to a circuit breaker and then to my distribution block. From there, there is a 2 gauge line going to the starter and a 4 gauge wire going to the 100 amp main fuse. This essentially eliminates the stock wiring, but keeps it wired exactly as stock.
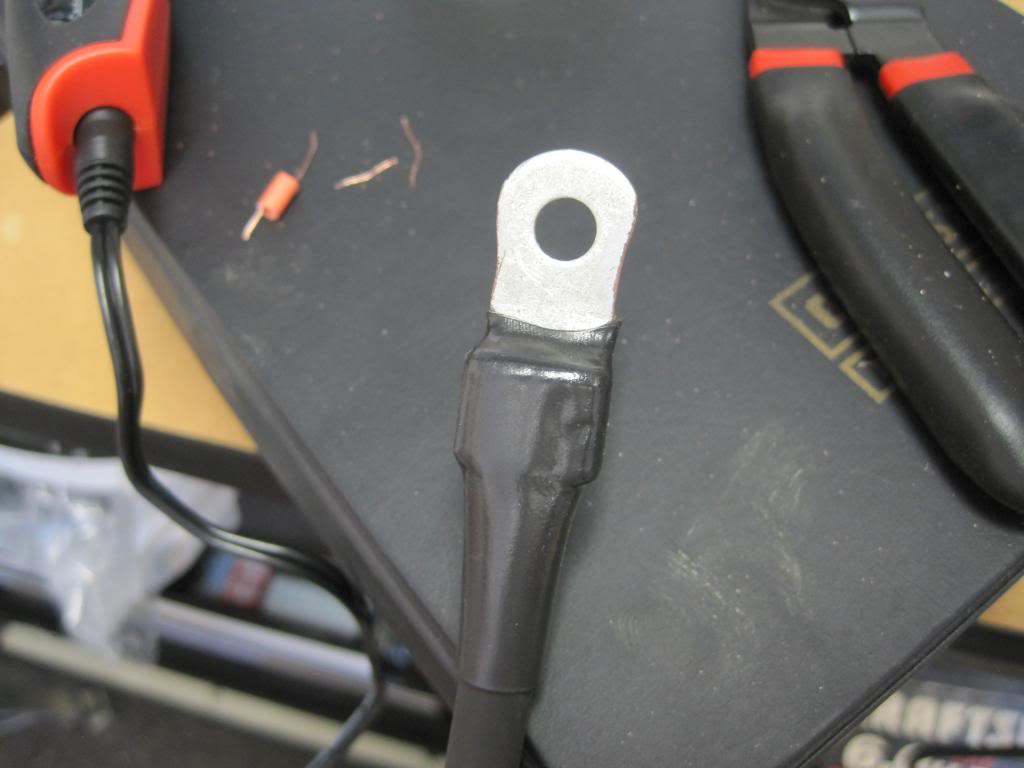
A 1/4" ring terminal for 4 gauge wire crimped on and then adhesive backed heat shrink over the connection:
Bolted in place:
Into the cabin:

Here is the 2 gauge starter wire with bent ring terminal crimped on and adhesive backed heat shrink over that:
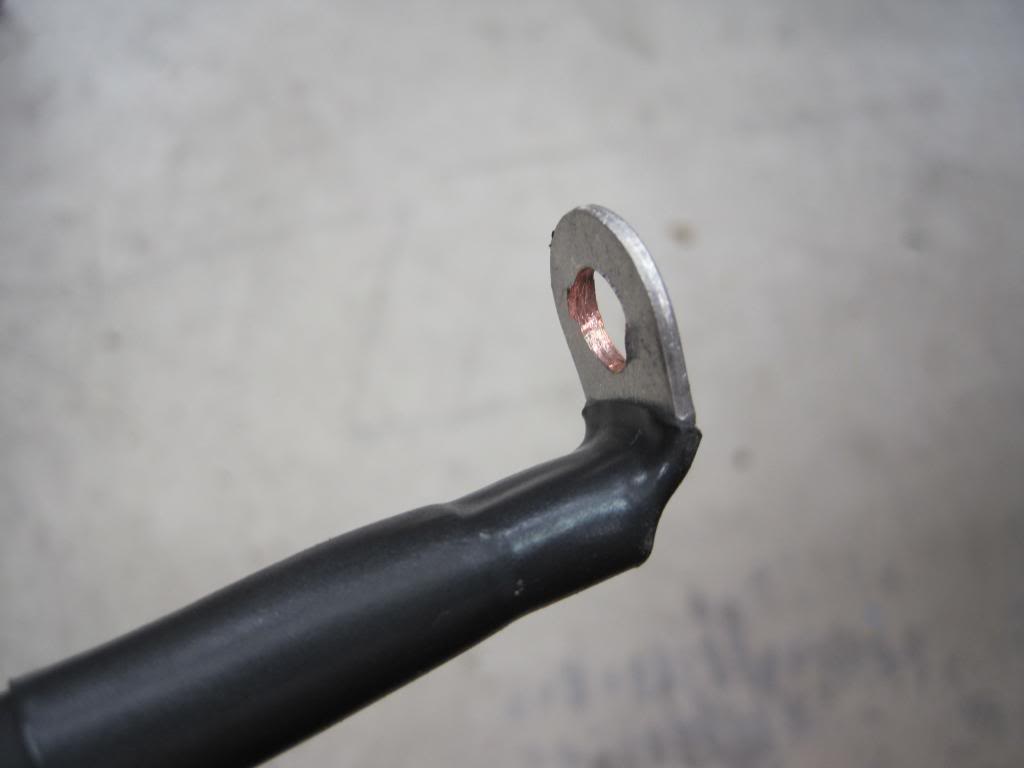
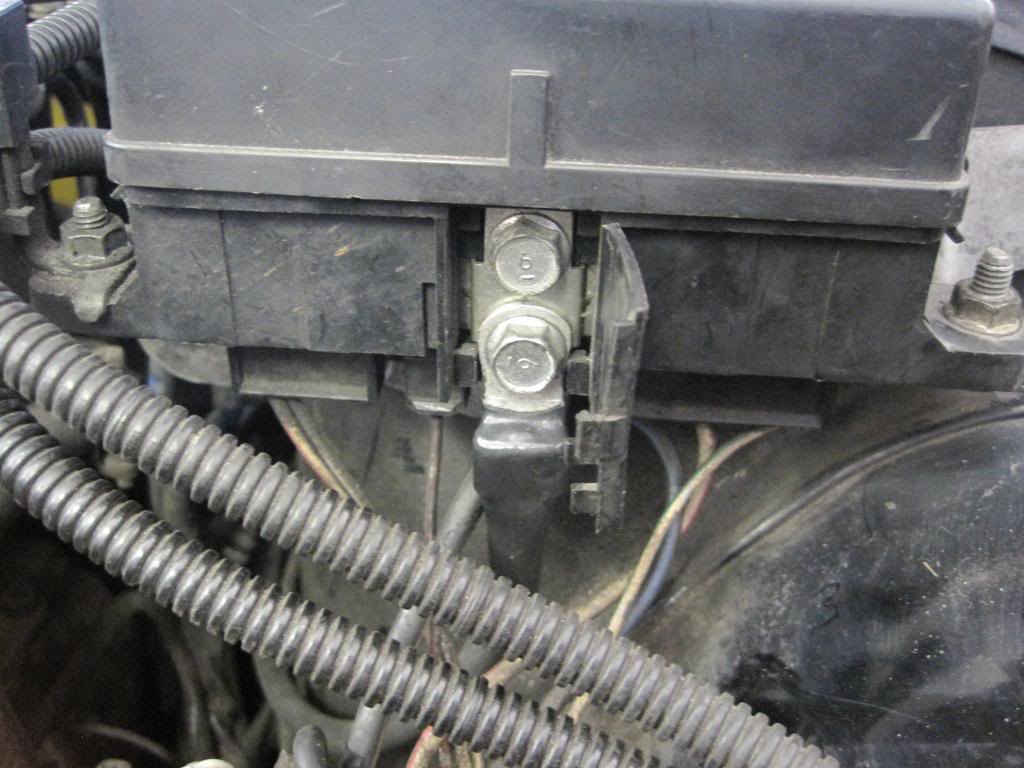
Bolted up to the starter with a 3/8' vacuum cap with a slit cut in it and full of dielectric grease on top of the terminal:

And into the cabin:
I didn't have a good grommet selection locally, so I ended up using a PCV grommet I picked up at the auto parts store. It actually worked really well and was easy to push into my drilled hole. The regular 3/8" grommet I had popped out anytime the wire was moved to reposition it. I'll protect the starter wire as it runs through those channels later. I had to run before I could get to that.
Here is the distribution block mounted:
The wire for the project:
I'm using 1 gauge premade battery cables for the main power and ground. The positive line will then go to a circuit breaker and then to my distribution block. From there, there is a 2 gauge line going to the starter and a 4 gauge wire going to the 100 amp main fuse. This essentially eliminates the stock wiring, but keeps it wired exactly as stock.
A 1/4" ring terminal for 4 gauge wire crimped on and then adhesive backed heat shrink over the connection:
Bolted in place:
Into the cabin:
Here is the 2 gauge starter wire with bent ring terminal crimped on and adhesive backed heat shrink over that:
Bolted up to the starter with a 3/8' vacuum cap with a slit cut in it and full of dielectric grease on top of the terminal:
And into the cabin:
I didn't have a good grommet selection locally, so I ended up using a PCV grommet I picked up at the auto parts store. It actually worked really well and was easy to push into my drilled hole. The regular 3/8" grommet I had popped out anytime the wire was moved to reposition it. I'll protect the starter wire as it runs through those channels later. I had to run before I could get to that.
Thread Starter
Joined: Feb 2001
Posts: 2,855
Likes: 225
From: Tampa, FL
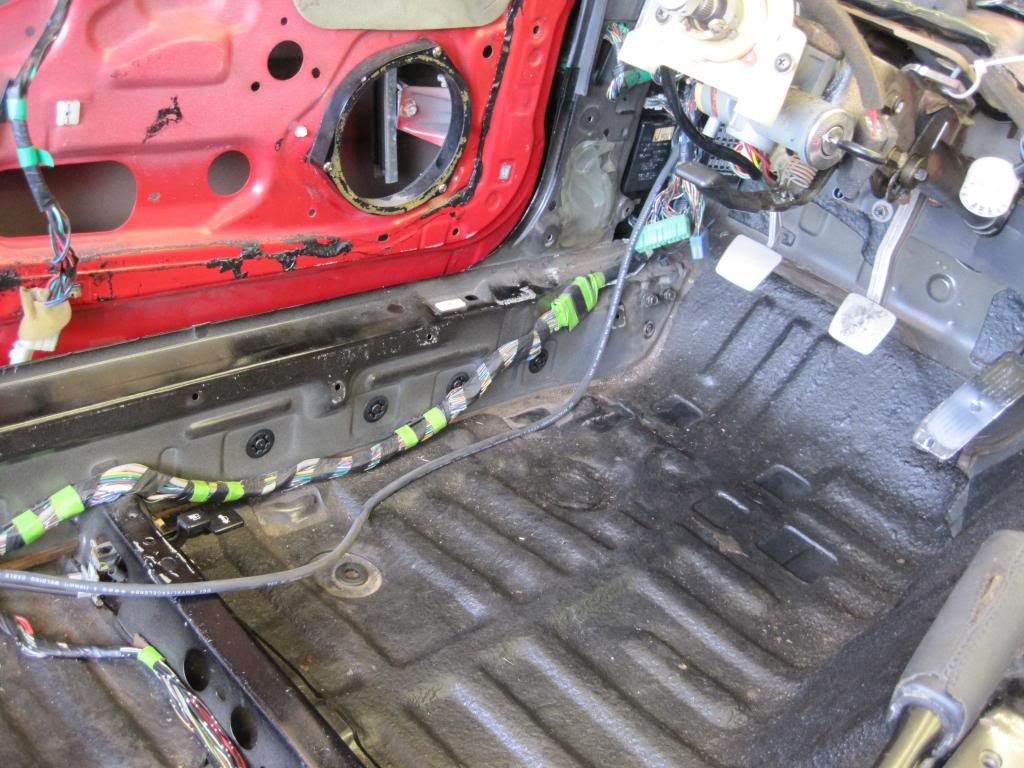
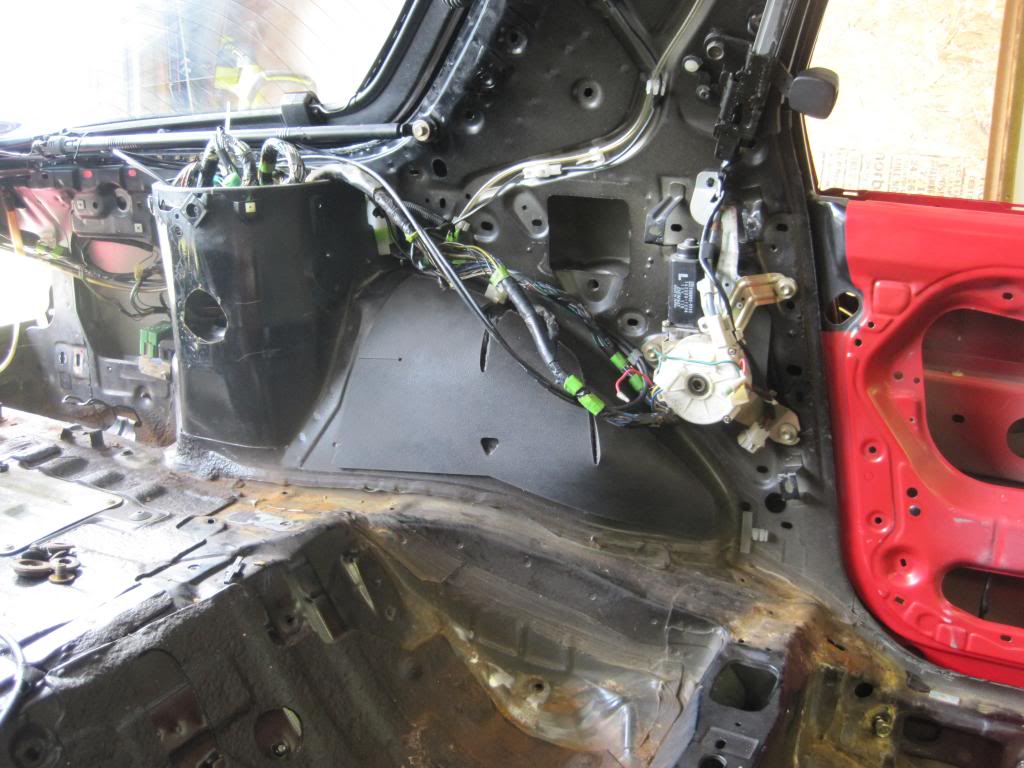
Readily apparent in one of the above pictures is the fairly large amount of surface rust present on the driver's side of the car (Aaron Cake has said he would not call that significant at all - clearly a difference in geography and how our environments treat cars).
I took a wire wheel to it in an isolated spot to see how bad it was and it certainly needs to be addressed:
So, in preparation for removing the rust and then painting over it with POR-15, I needed to get the harness out of my way. Here is my now clean work space:
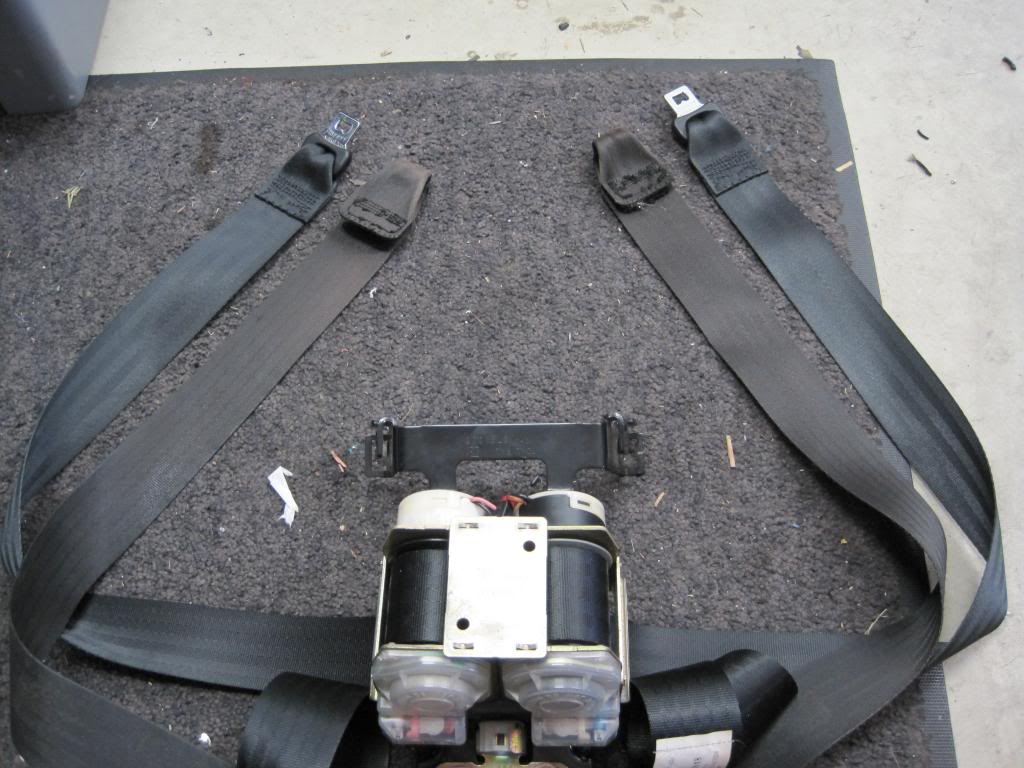
And now for something completely different. I have gathered three sets of shoulder belts over the years that are part of the automatic seat belt system. Given the nature of this system, these belts are virtually always exposed to the light if the car is parked outside and lacks tinted windows - two conditions this car met for the four and a half years I drove it. So, I had the shoulder belts rewebbed and I was very pleased with the results:

I took a wire wheel to it in an isolated spot to see how bad it was and it certainly needs to be addressed:
So, in preparation for removing the rust and then painting over it with POR-15, I needed to get the harness out of my way. Here is my now clean work space:
And now for something completely different. I have gathered three sets of shoulder belts over the years that are part of the automatic seat belt system. Given the nature of this system, these belts are virtually always exposed to the light if the car is parked outside and lacks tinted windows - two conditions this car met for the four and a half years I drove it. So, I had the shoulder belts rewebbed and I was very pleased with the results:

Full Member
Joined: Jun 2011
Posts: 246
Likes: 0
From: NJ
Just Spent a couple hrs looking for this thread, Looking in the wrong places only to have it come up as the first thing in google search. I remember seeing this when you first started, your attention to detail is amazing. Your pics and repairs are a guide for some problems i need to address. thanks