
JerryLH3's RX-7 Turbo II Restoration


Thread Starter

Joined: Feb 2001
Posts: 2,854
Likes: 225
From: Tampa, FL
I soda blasted them. I used a cheap $30-40 spot blaster from Harbor Freight and used regular baking soda from the grocery store. Either be careful around the bearing surfaces or (recommended) tape them off. Soda isn't super abrasive, but no reason to take chances.


Thread Starter
Joined: Feb 2001
Posts: 2,854
Likes: 225
From: Tampa, FL
Has it really been another two months already?
Well, a few things have been accomplished, but they mainly involved cataloging parts and where they were located in the house. Organization has become a huge issue on this project and given that it has now stretched out over many years, my memory has started to fail me on where certain things were located. I spent two days searching for rear shock mounting nuts that happened to be sitting on the floorboard. I couldn't find some screws I needed that happened to be in one of my parts bins. The list goes on. So, I started to make a master list of parts, where they were in the house/garage and if they were ready to be installed or needed more work. That project still continues, but other work has been done.
For the first time in a long time, the car is on all four wheels, has all body panels hanging where they go and I closed both the hatch and the hood. It feels much more like a car this way.
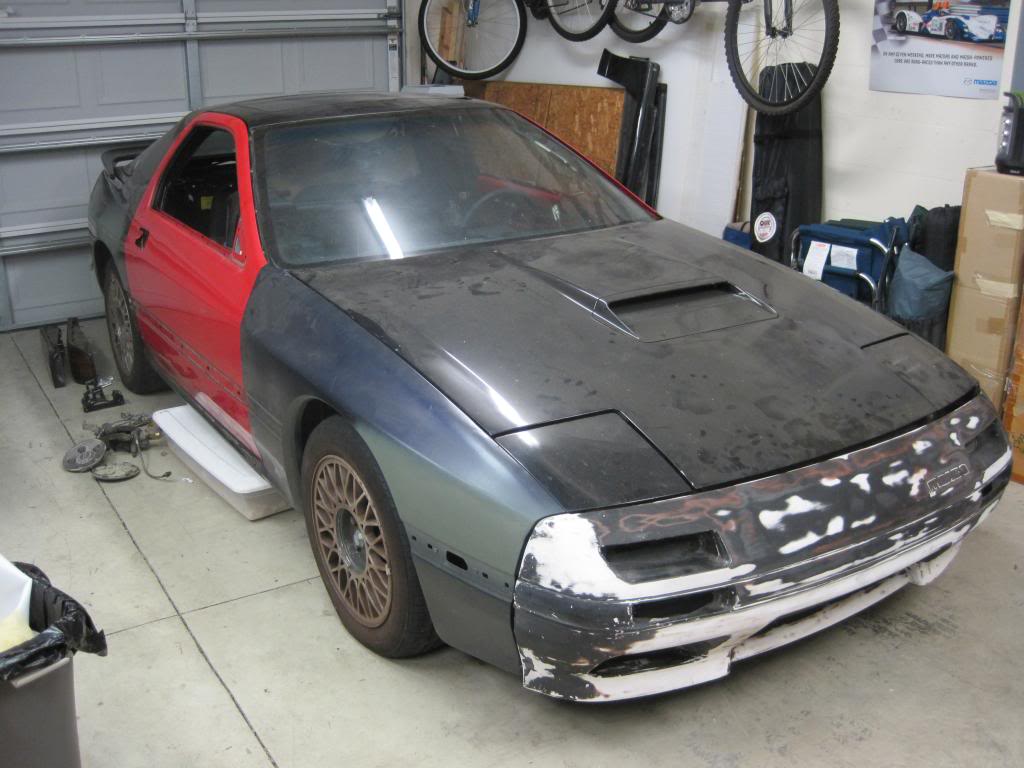
The front and rear suspension and brakes are just about wrapped up. Obviously the subframe is back in the car as it is on four wheels again. More to follow.
Well, a few things have been accomplished, but they mainly involved cataloging parts and where they were located in the house. Organization has become a huge issue on this project and given that it has now stretched out over many years, my memory has started to fail me on where certain things were located. I spent two days searching for rear shock mounting nuts that happened to be sitting on the floorboard. I couldn't find some screws I needed that happened to be in one of my parts bins. The list goes on. So, I started to make a master list of parts, where they were in the house/garage and if they were ready to be installed or needed more work. That project still continues, but other work has been done.
For the first time in a long time, the car is on all four wheels, has all body panels hanging where they go and I closed both the hatch and the hood. It feels much more like a car this way.
The front and rear suspension and brakes are just about wrapped up. Obviously the subframe is back in the car as it is on four wheels again. More to follow.
Thread Starter
Joined: Feb 2001
Posts: 2,854
Likes: 225
From: Tampa, FL
Work progresses at somewhere between a snail's and turtle's pace.
The rear brakes and suspension are complete. The calipers and brackets were painted and put back on the car along with new brake pads and new clips and springs. I finally got a hold of some end links and cleaned them up and pressed in new bushings.
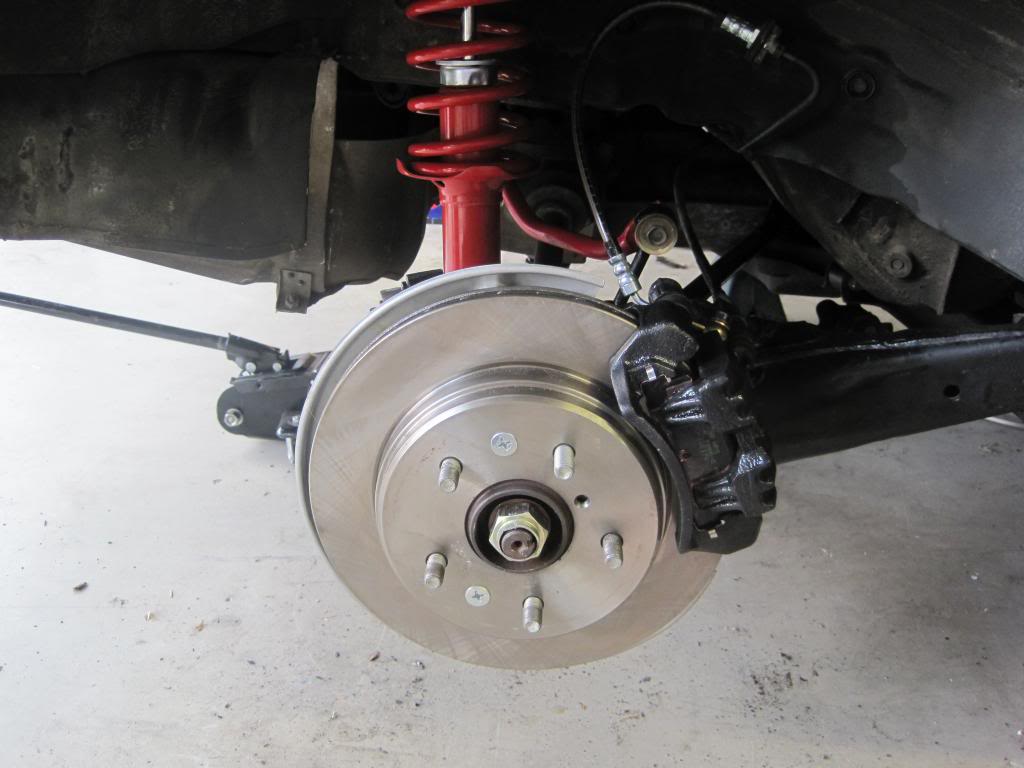
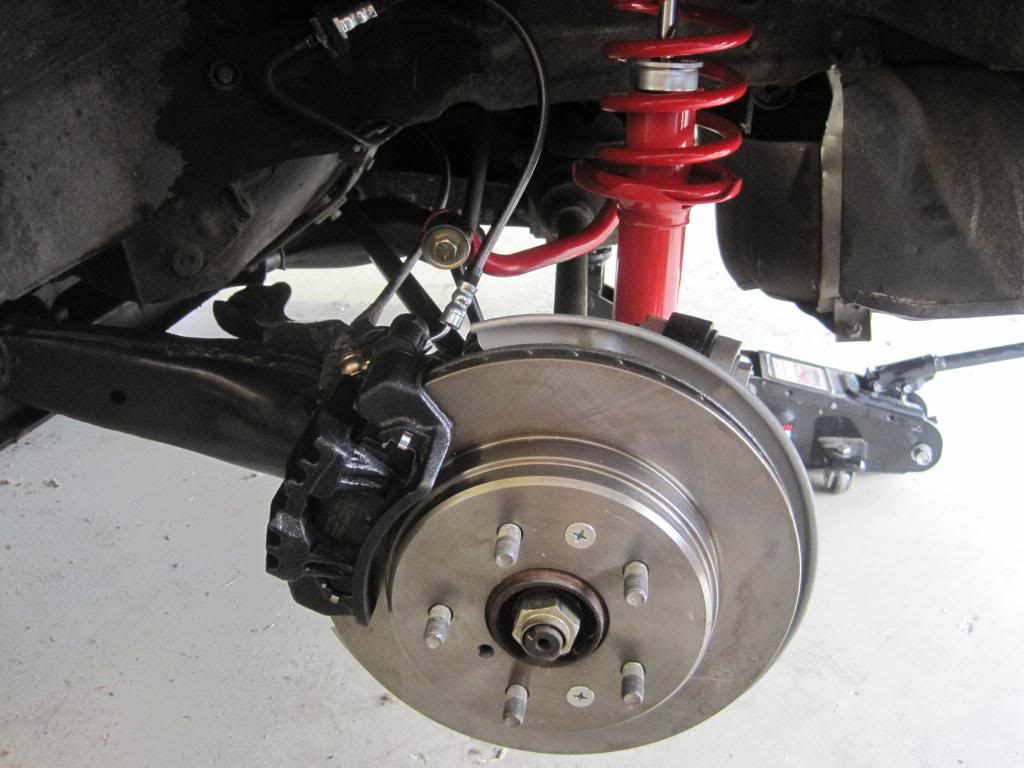
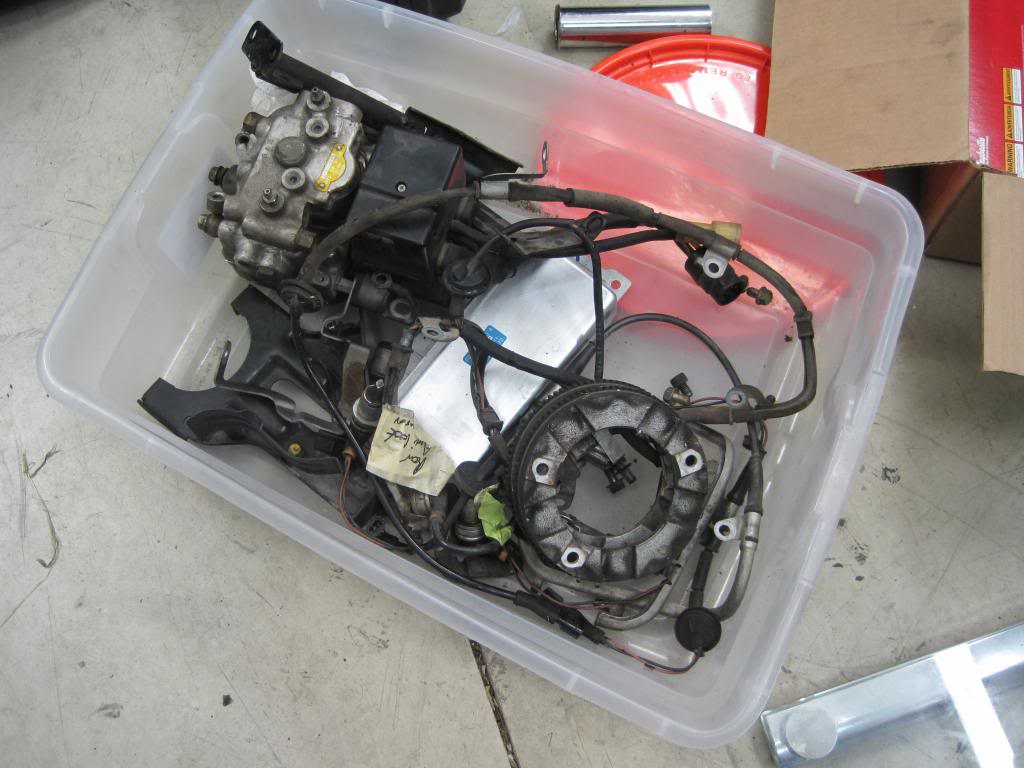
With that finished up, I turned my attention to the ABS delete. The pump and associated brackets, computer, all sensors, and ring wheels for the rear have all been removed. All these parts were weighed and it is an approximate 27 lb weight savings. If I had bothered to take off the front ring wheels, it would be around 28 lbs.
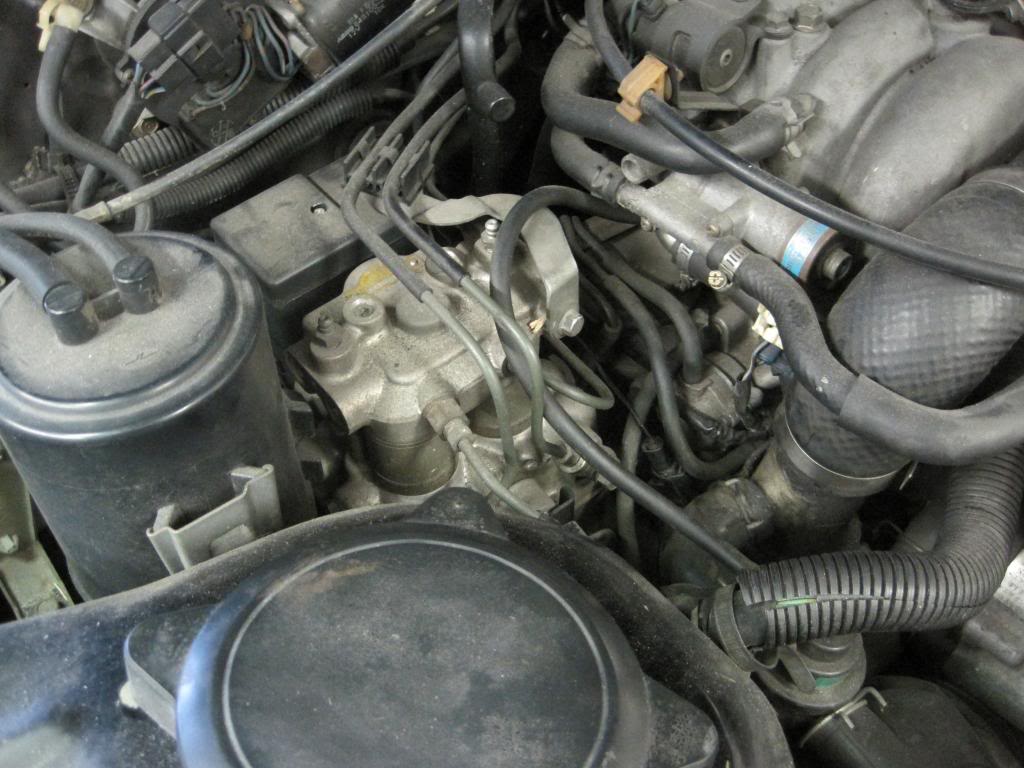
I ordered and already have the proper lines from Mazda for a clean ABS removal. As this link describes, it appears Mazda's stock of the rear line may be for RHD vehicles. More updates on this to follow, but it appears they gave me a RHD rear line as well.
The rear brakes and suspension are complete. The calipers and brackets were painted and put back on the car along with new brake pads and new clips and springs. I finally got a hold of some end links and cleaned them up and pressed in new bushings.
With that finished up, I turned my attention to the ABS delete. The pump and associated brackets, computer, all sensors, and ring wheels for the rear have all been removed. All these parts were weighed and it is an approximate 27 lb weight savings. If I had bothered to take off the front ring wheels, it would be around 28 lbs.
I ordered and already have the proper lines from Mazda for a clean ABS removal. As this link describes, it appears Mazda's stock of the rear line may be for RHD vehicles. More updates on this to follow, but it appears they gave me a RHD rear line as well.
Thread Starter
Joined: Feb 2001
Posts: 2,854
Likes: 225
From: Tampa, FL
Not as much as you might think. I had stands under the frame rails that were probably only seven or so inches off the ground. I did remove the shock/spring from the car before hand though. You would need more height if you wanted to remove the entire subframe/suspension/diff/brake package as one unit.
Full Member
Joined: Jun 2013
Posts: 112
Likes: 0
From: Macon
Would you mind getting some more pics of the custom speaker panels you did in the door, Ive got a s4 base model that didnt come with door speakers and wanted to add some. did you go with using 6.5 speakers?
Also what did you use to restore the FTP? I need to do mine as well and was going to try the tooth past thing but didnt know if it would work.
Do you know if that dupi color trim works well with plastic?
I could have swore Ive seen this car on CL for sale.
Also what did you use to restore the FTP? I need to do mine as well and was going to try the tooth past thing but didnt know if it would work.
Do you know if that dupi color trim works well with plastic?
I could have swore Ive seen this car on CL for sale.
Thread Starter
Joined: Feb 2001
Posts: 2,854
Likes: 225
From: Tampa, FL
Also what did you use to restore the FTP? I need to do mine as well and was going to try the tooth past thing but didnt know if it would work.
Do you know if that dupi color trim works well with plastic?
I could have swore Ive seen this car on CL for sale.
Do you know if that dupi color trim works well with plastic?
I could have swore Ive seen this car on CL for sale.
The trim paint works okay with plastic I believe. I'm about to experiment again, as there are a few pieces that seem to be hard to find and the ones I have are pretty faded.
I did put this car up for sale once back in 2006 or so. I even had a buyer before I pulled out of the deal. My punishment? Deciding to do this restoration.
Full Member
Joined: Aug 2013
Posts: 151
Likes: 1
I like the way you kept up on your progress. It is giving me some guidance on how and what I need to do. How much I the rear's bushings required press to get / and pulled to get out? I want to sand blast like yours, but wondering if I'm going to need to employ some help to get it done since I don't have those tools. Really move work though & appreciate your passion!
Senior Member
Joined: Nov 2002
Posts: 380
Likes: 1
From: Owego NY
Would you mind getting some more pics of the custom speaker panels you did in the door, Ive got a s4 base model that didnt come with door speakers and wanted to add some. did you go with using 6.5 speakers?
Also what did you use to restore the FTP? I need to do mine as well and was going to try the tooth past thing but didnt know if it would work.
Do you know if that dupi color trim works well with plastic?
I could have swore Ive seen this car on CL for sale.
Also what did you use to restore the FTP? I need to do mine as well and was going to try the tooth past thing but didnt know if it would work.
Do you know if that dupi color trim works well with plastic?
I could have swore Ive seen this car on CL for sale.
I put 6.5" (Boston Pro) speakers in my S4 base. They fit right at the bottom corner of the door panels. I cut the hole in the door panel first (leaving just enough materiel in the bottom corner of the door panel to keep it intact). Then I put the panels back on and marked the metal behind that needed to be cut. The speaker was also installed with a spacer (1/2" I think). Worked great like this for 7 years.
Here are some pics: S4 RX7 Door Speakers - Imgur
I also bought speaker baffles and cut them in half to protect the back of the speaker from and water/gunk that may drop down. Like this: http://carphotos.cardomain.com/ride_...0161_large.jpg
For the FTP lenses, like Jerry said, it's just a progression of sandpaper and rubbing compound. If you have never done anything like this before, I recommend one of these They give you all the sandpaper / compound you need, an attachment for your drill, detailed instructions... and they are cheap! I bought one of these kits to restore the headlights on my 350z and had enough stuff left over to do the FTP lenses and all the corner markers on my RX7. For the corner markers, sand off the raised lettering with low grit sandpaper first, then attack them with this kit. They will look brand new after.
Thread Starter
Joined: Feb 2001
Posts: 2,854
Likes: 225
From: Tampa, FL
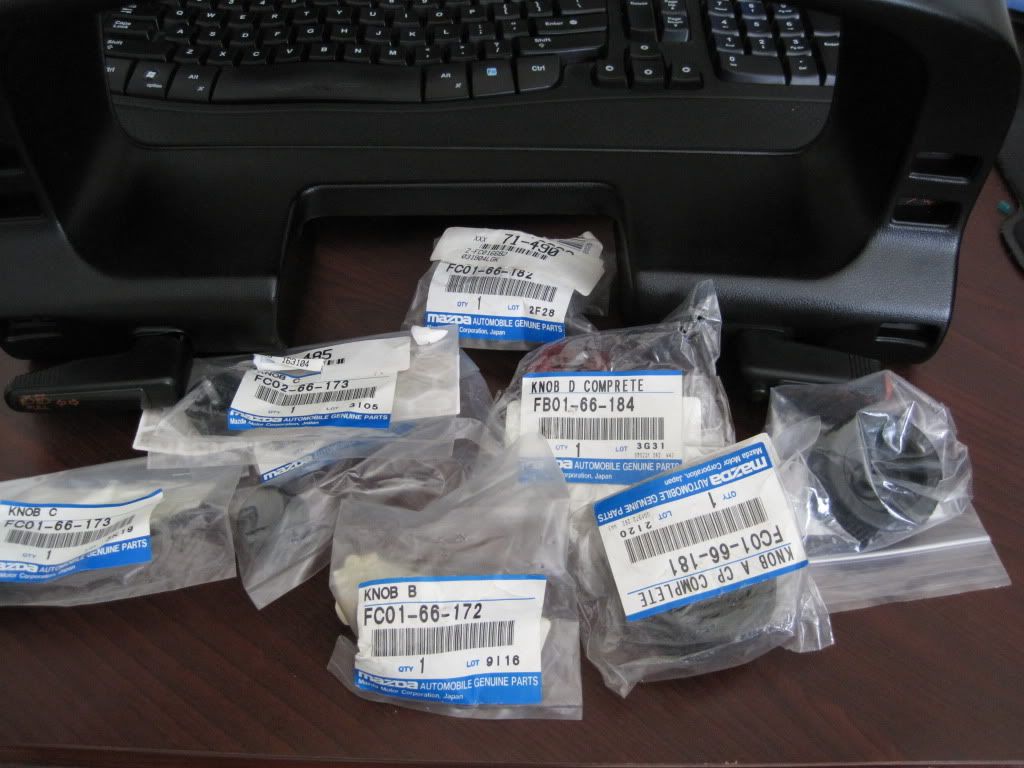
Those happened to come from Black Dragon when they were still selling FC parts. They should still be available from the dealer. Total cost was around $90 for all eight *****.

I dont sleep
Joined: Feb 2005
Posts: 159
Likes: 0
From: Smyrna, Georgia (Cumberland)
The dream of doing a project like this myself is what keeps me going. Unfortunately the dream has to wait until I finish my second degree. By then I might be engaged or married - good to see you still find the time with a wife, child, and house.
Thanks for the (possibly unintended) inspiration and informative thread.
Thanks for the (possibly unintended) inspiration and informative thread.
Thread Starter
Joined: Feb 2001
Posts: 2,854
Likes: 225
From: Tampa, FL
Thanks for the kind words. That helps keep my inspiration up as well.
I haven't been out in the garage too much lately working on the car. I have been out there organizing parts and making sure I have a detailed list of what I have and what I need. After almost four years of this project, parts have started to pile up. I've just about sorted through everything and now need to get rid of the extras I think I will never use.
I'm also finishing a degree myself and graduate in three and a half weeks. Add to that the time in looking for a new job related to my chosen field and it may be a bit longer until the updates with significant work start coming again.

Junior Member
Joined: Nov 2013
Posts: 10
Likes: 0
From: TX
Reading through every page in this thread was like picking up a three part novel at the beginning only to find the third and final book is yet to be released!  You're attention to detail is astonishing. I can only imagine how clean the finished project is going to be. I recently found a original owner 1988 Turbo II for sale locally and am considering buying it as a weekend/project car. Thanks for all the detailed pics and tips! Subscribed!
Also, congrats on the two kids, wedding, and finishing your degree soon! My daughter is 16mo old.
You're attention to detail is astonishing. I can only imagine how clean the finished project is going to be. I recently found a original owner 1988 Turbo II for sale locally and am considering buying it as a weekend/project car. Thanks for all the detailed pics and tips! Subscribed! Also, congrats on the two kids, wedding, and finishing your degree soon! My daughter is 16mo old.


Full Member
Joined: Apr 2013
Posts: 247
Likes: 7
From: Suffolk, Va
I enjoyed reading and seeing how your progress is going. Love the attention to detail. Also gives me some ideas on mine. I have only owned my 88 turbo II for 7 months though and have done a ton to it, but there is still so much I want and need to do as well. Good luck on your progress!
Thread Starter
Joined: Feb 2001
Posts: 2,854
Likes: 225
From: Tampa, FL
A new year brings new challenges and new goals. Or something like that...
I've pretty much cataloged every part I have and its location in my house now and have been able to determine some things I need from all of that work. I have done a couple of projects recently and they are not for the faint of heart.
First up was my OEM stereo. The areas that had a matte film on them were flaking off in certain areas.
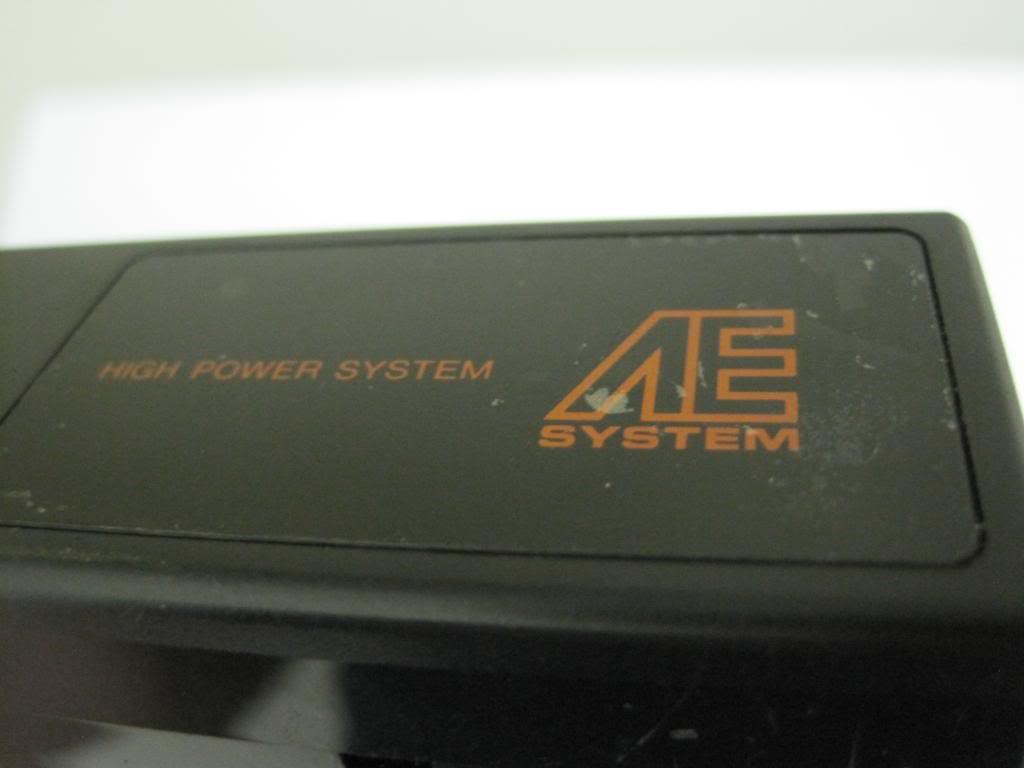
Being the perfectionist that I am, I decided the best course of action was actually just to scrape it all off. I simply used my fingernail and light pressure and I was happy with the results. A little buffing to remove the minor scratches and it will look really good in my opinion. It may not be for everyone, but I'm happy with how it turned out. The piano black is a nice contrast against the flat areas.
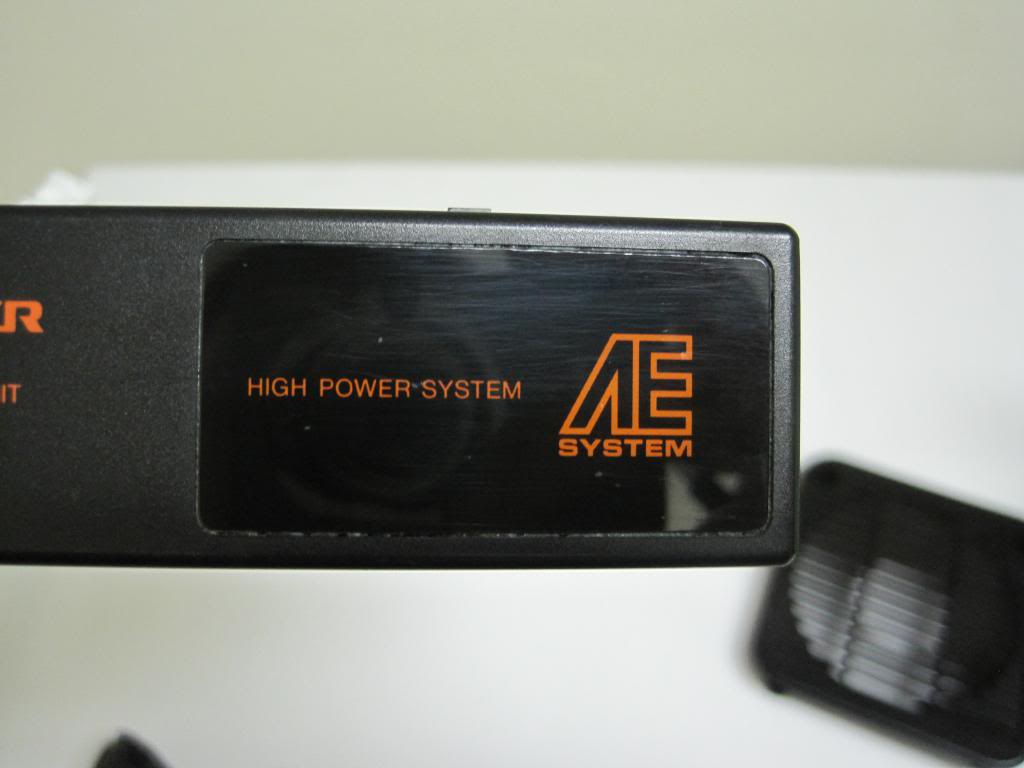
I pictured the AE system here, but I did the same thing for the stock head unit. I'll post some pictures of that later.
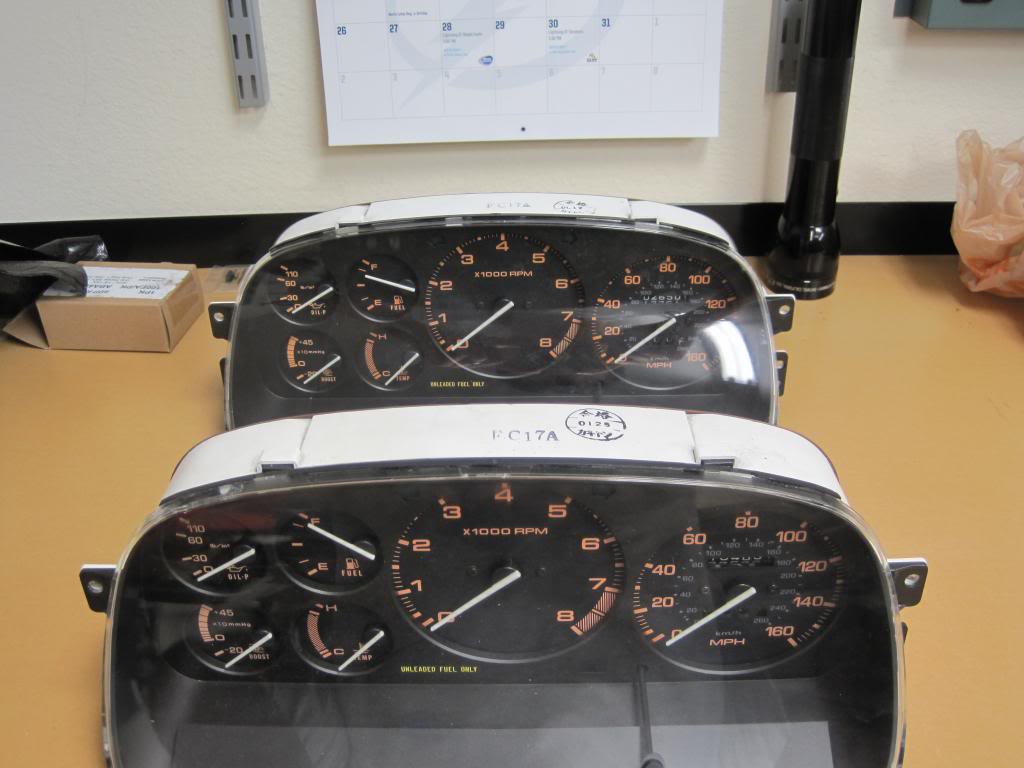
Next up was my gauge cluster. Mine suffered from horrible fading and had the S5 pink look to it. I sourced a great looking cluster that had much less fading, if any. It came from a car with less than 30,000 miles. I wanted to accurately reflect my car's 163,000 miles however, so I swapped in my speedometer into the good cluster and exchanged the faded gauge face for the good one. While not a hard job, extreme care must be taken to not scratch the face and to properly clock the needle so it comes to rest at 0 again.
Here are the two clusters before the swap:
And the work:
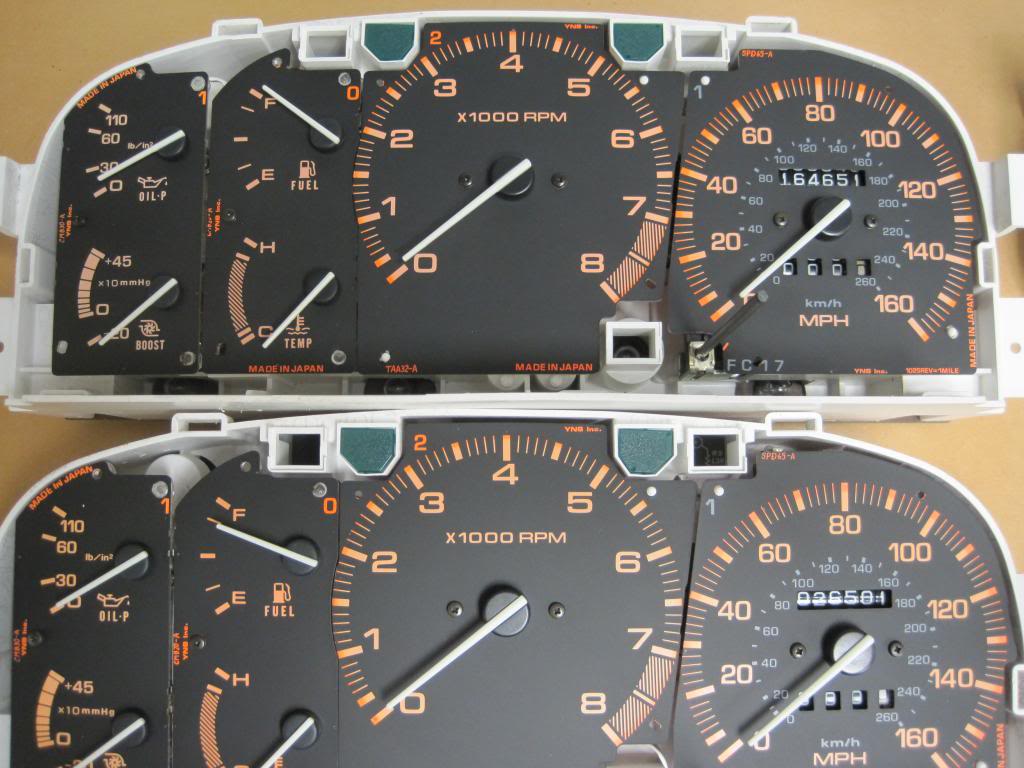
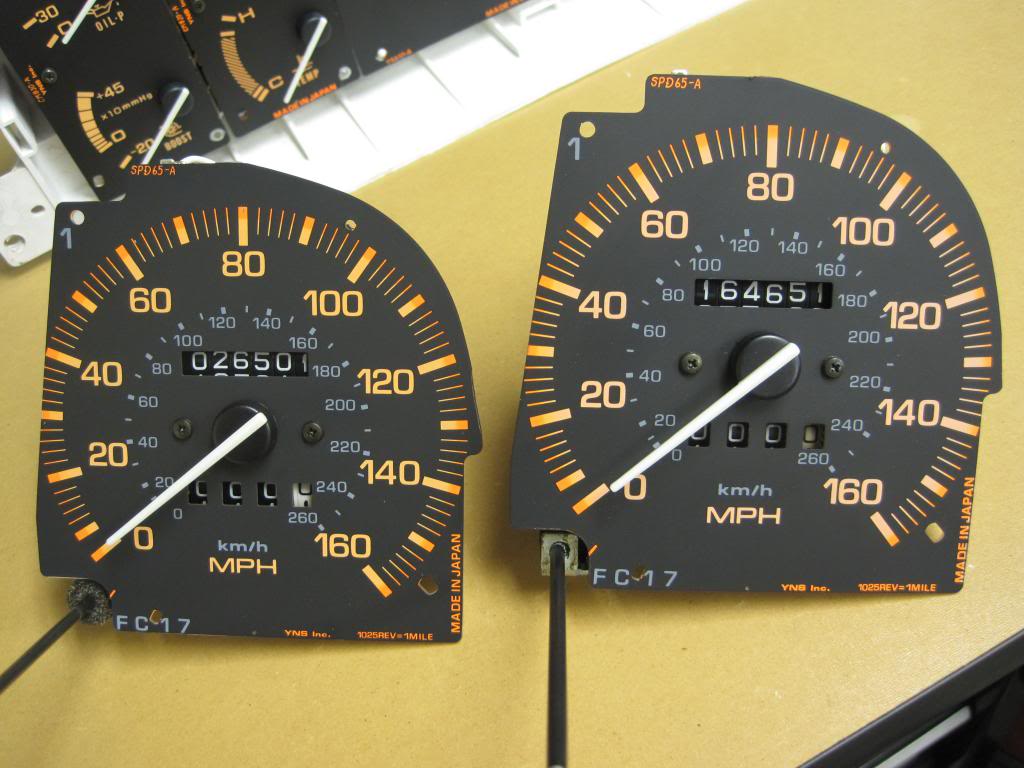
The finished product:

To do the swap, I took out both speedometers from their respective clusters. Six screws hold them in. I then carefully pried each needle off using two precision flathead screwdrivers. I used the two screws holding the face onto the speedometer for leverage. Use anything else and you will scratch the surface of the face. Once the needles were removed, I carefully removed the face of each speedometer using a tiny Phillips head screwdriver being extremely careful not to strip the screws. Then I swapped the faces and put the needles back on. If you're good, you'll put the needle back on exactly where it is supposed to go. Err on the side of getting it to come to rest at more than 0 - this way you can carefully rotate the needle counterclockwise back to 0.
That's it for now. More to come soon. I promise. Really. I'm serious this time.
I've pretty much cataloged every part I have and its location in my house now and have been able to determine some things I need from all of that work. I have done a couple of projects recently and they are not for the faint of heart.
First up was my OEM stereo. The areas that had a matte film on them were flaking off in certain areas.
Being the perfectionist that I am, I decided the best course of action was actually just to scrape it all off. I simply used my fingernail and light pressure and I was happy with the results. A little buffing to remove the minor scratches and it will look really good in my opinion. It may not be for everyone, but I'm happy with how it turned out. The piano black is a nice contrast against the flat areas.
I pictured the AE system here, but I did the same thing for the stock head unit. I'll post some pictures of that later.
Next up was my gauge cluster. Mine suffered from horrible fading and had the S5 pink look to it. I sourced a great looking cluster that had much less fading, if any. It came from a car with less than 30,000 miles. I wanted to accurately reflect my car's 163,000 miles however, so I swapped in my speedometer into the good cluster and exchanged the faded gauge face for the good one. While not a hard job, extreme care must be taken to not scratch the face and to properly clock the needle so it comes to rest at 0 again.
Here are the two clusters before the swap:
And the work:
The finished product:
To do the swap, I took out both speedometers from their respective clusters. Six screws hold them in. I then carefully pried each needle off using two precision flathead screwdrivers. I used the two screws holding the face onto the speedometer for leverage. Use anything else and you will scratch the surface of the face. Once the needles were removed, I carefully removed the face of each speedometer using a tiny Phillips head screwdriver being extremely careful not to strip the screws. Then I swapped the faces and put the needles back on. If you're good, you'll put the needle back on exactly where it is supposed to go. Err on the side of getting it to come to rest at more than 0 - this way you can carefully rotate the needle counterclockwise back to 0.
That's it for now. More to come soon. I promise. Really. I'm serious this time.

Thread Starter
Joined: Feb 2001
Posts: 2,854
Likes: 225
From: Tampa, FL
When I last left the dashboard, it looked something like this:
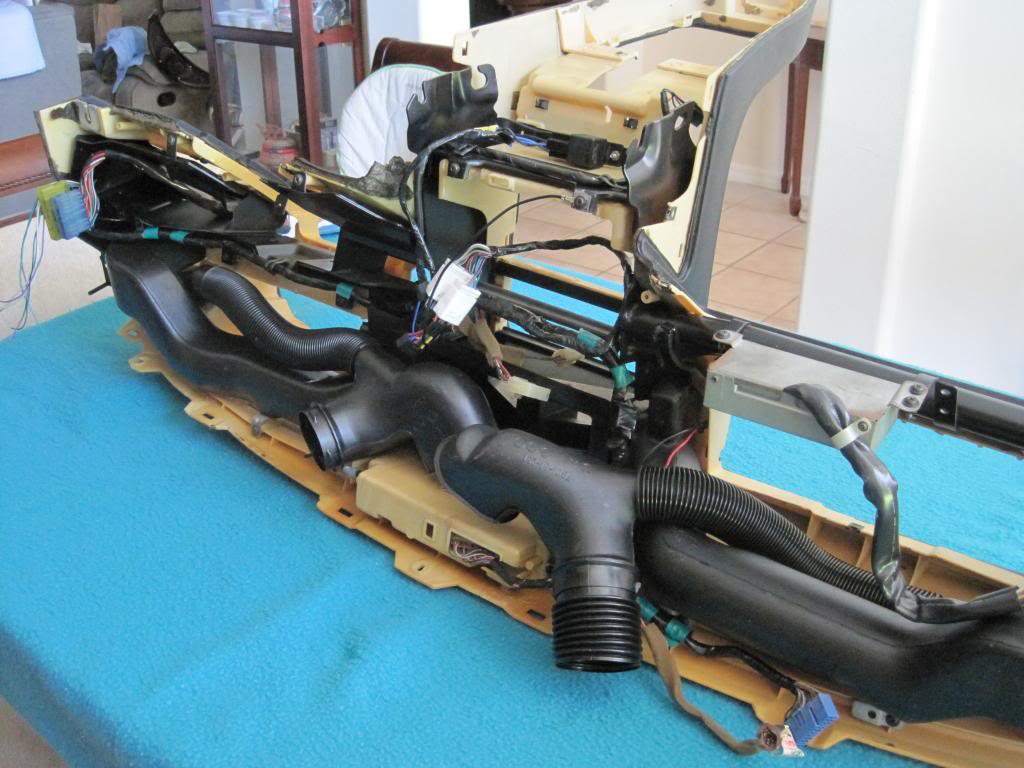
The plan at the time was to use an aftermarket head unit and run new speaker wire. The OEM amplifier was removed as was extraneous wiring. New wiring was ran and the harness was rewrapped. Well, of course things change, and over the years (sad that I have to say that), I have decided to go with the OEM head unit for originality purposes. I will use an aftermarket amplifier now to deliver more power to aftermarket speakers. This changed the needed wiring dramatically.
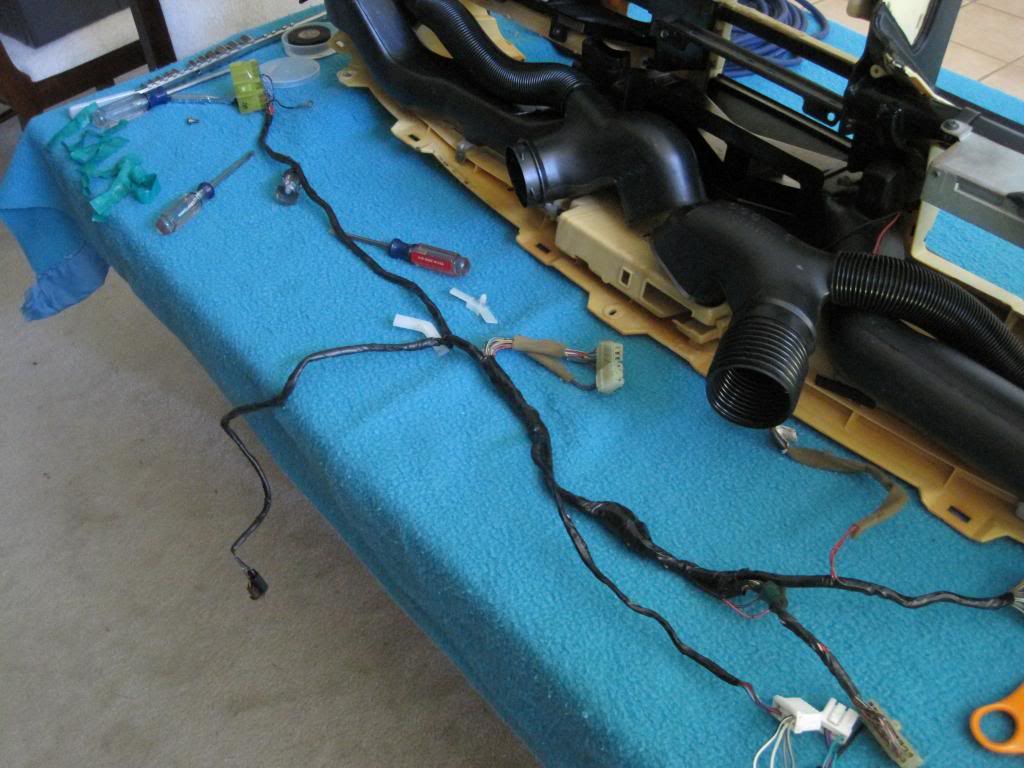
So, I removed the harness and unwrapped it, so I could remove the wiring that was now not needed in its current configuration:
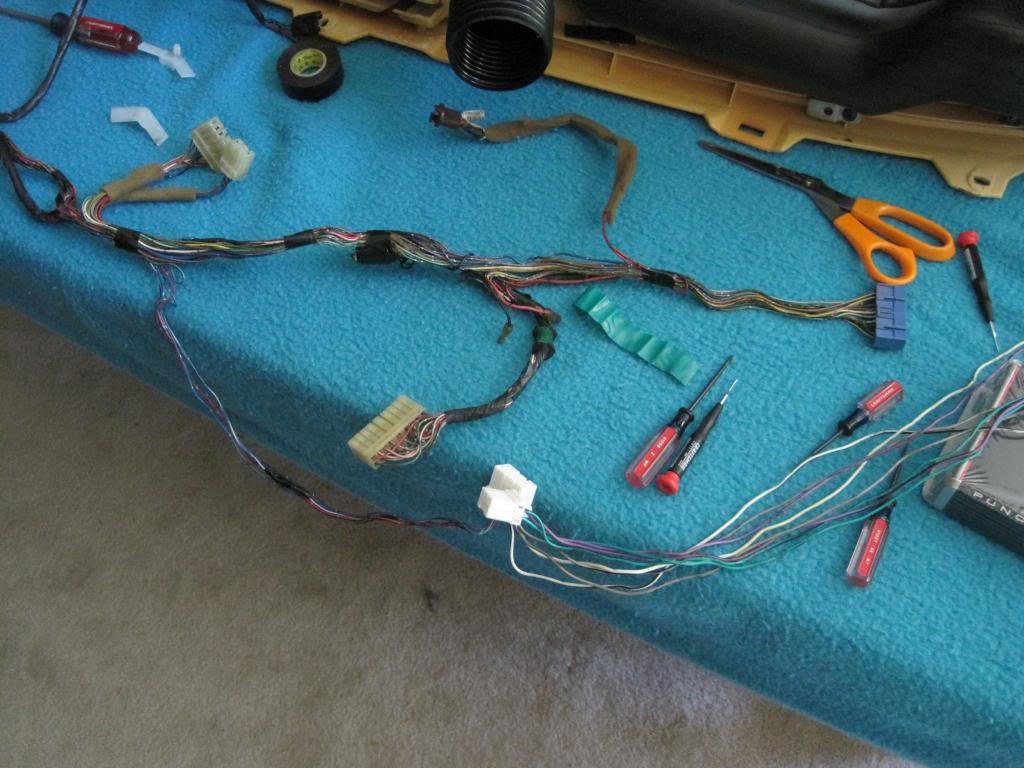
I put the wires I did not need off to the side and rewrapped the harness again:
Next I depinned the unneeded wires and crimped on new terminals to the amplifier "Speedwire", which is now being used for its intended purpose. The terminals were then inserted into the connectors.
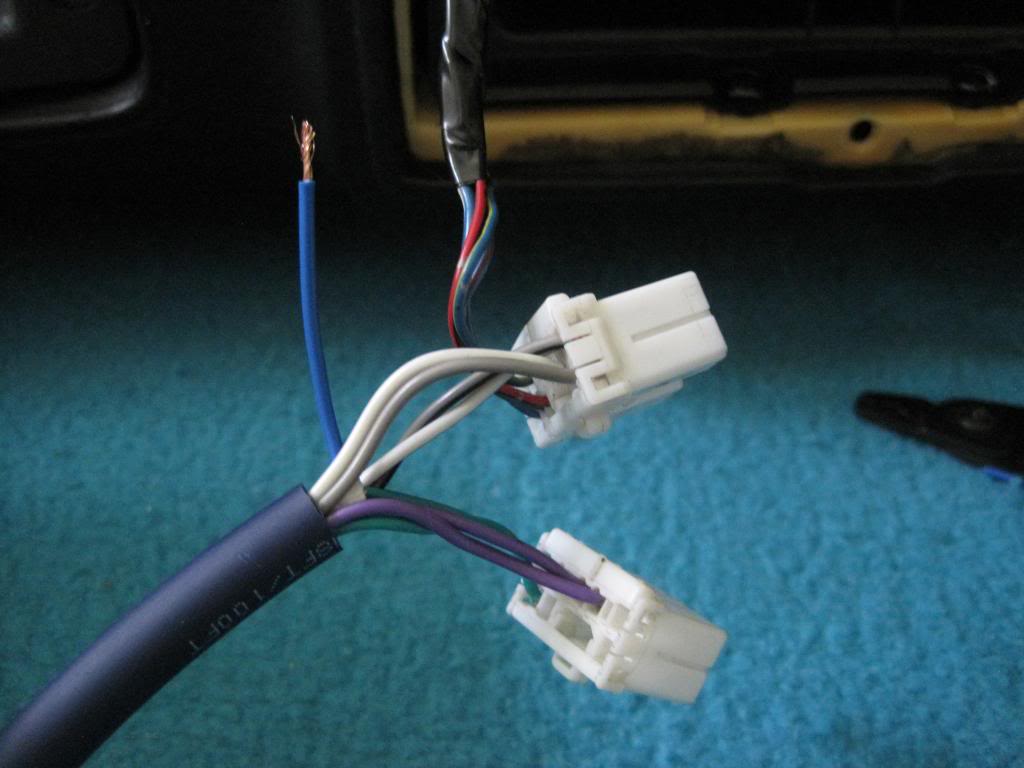
The blue remote turn on wire is left bare because I ran out of terminals. When I get more I will crimp one on and put it back in the proper place in the connector (the OEM head unit obviously has a amp turn on since it had an OEM amplifier).
Here is the amp I will be using. It is a compact four channel unit from Rockford Fosgate.
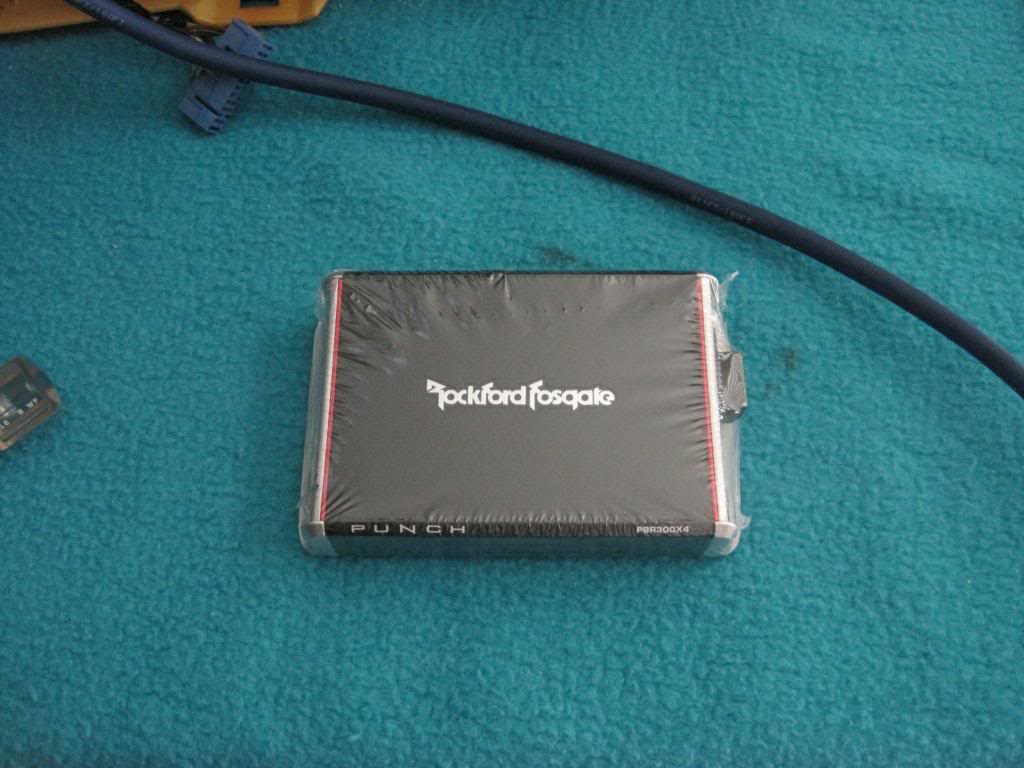
I'm looking at possible mounting spots and would love to keep it in the dash if possible. The area where the stock amplifier was may provide a suitable location given there is some extra space since I will not be using dash speakers.
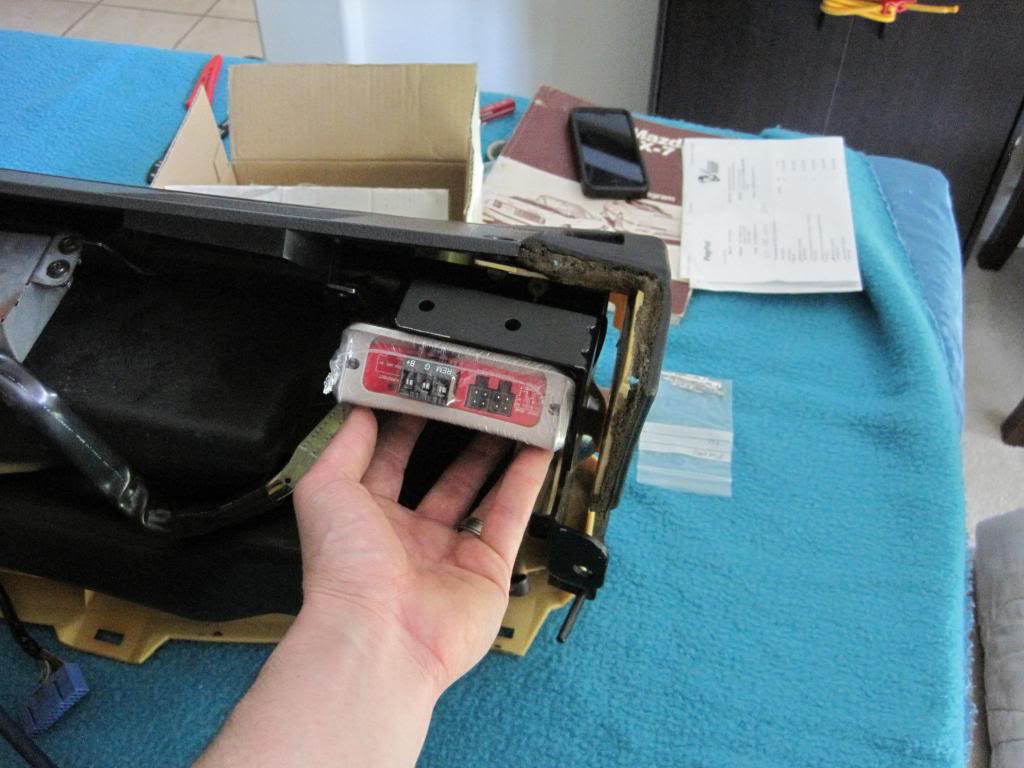
I've also thought about the location where the ABS computer was, but have reservations about mounting an amplifier next to the ECU, especially given the relative lack of airflow to that location.
The plan at the time was to use an aftermarket head unit and run new speaker wire. The OEM amplifier was removed as was extraneous wiring. New wiring was ran and the harness was rewrapped. Well, of course things change, and over the years (sad that I have to say that), I have decided to go with the OEM head unit for originality purposes. I will use an aftermarket amplifier now to deliver more power to aftermarket speakers. This changed the needed wiring dramatically.
So, I removed the harness and unwrapped it, so I could remove the wiring that was now not needed in its current configuration:
I put the wires I did not need off to the side and rewrapped the harness again:
Next I depinned the unneeded wires and crimped on new terminals to the amplifier "Speedwire", which is now being used for its intended purpose. The terminals were then inserted into the connectors.
The blue remote turn on wire is left bare because I ran out of terminals. When I get more I will crimp one on and put it back in the proper place in the connector (the OEM head unit obviously has a amp turn on since it had an OEM amplifier).
Here is the amp I will be using. It is a compact four channel unit from Rockford Fosgate.
I'm looking at possible mounting spots and would love to keep it in the dash if possible. The area where the stock amplifier was may provide a suitable location given there is some extra space since I will not be using dash speakers.
I've also thought about the location where the ABS computer was, but have reservations about mounting an amplifier next to the ECU, especially given the relative lack of airflow to that location.
Thread Starter
Joined: Feb 2001
Posts: 2,854
Likes: 225
From: Tampa, FL
Next up I have turned my attention to the HVAC system.
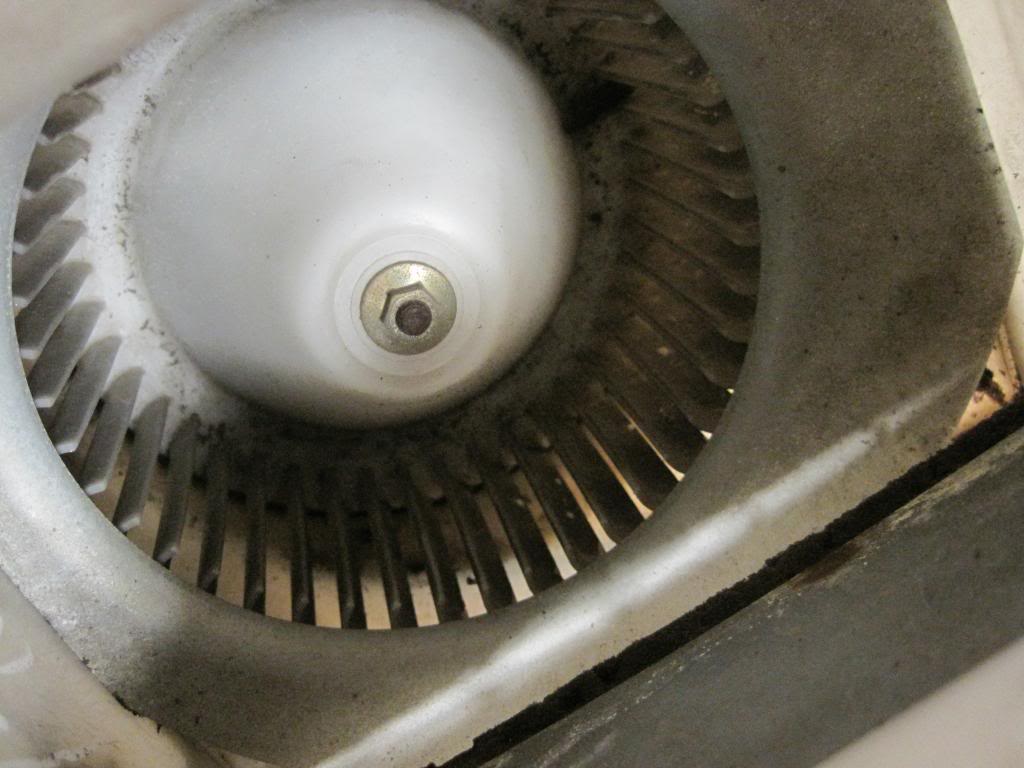
First up is the blower unit. The foam on the fresh/recirculate door has degraded and the whole thing is very dirty from nearly twenty years of use and a few years of sitting in my garage.
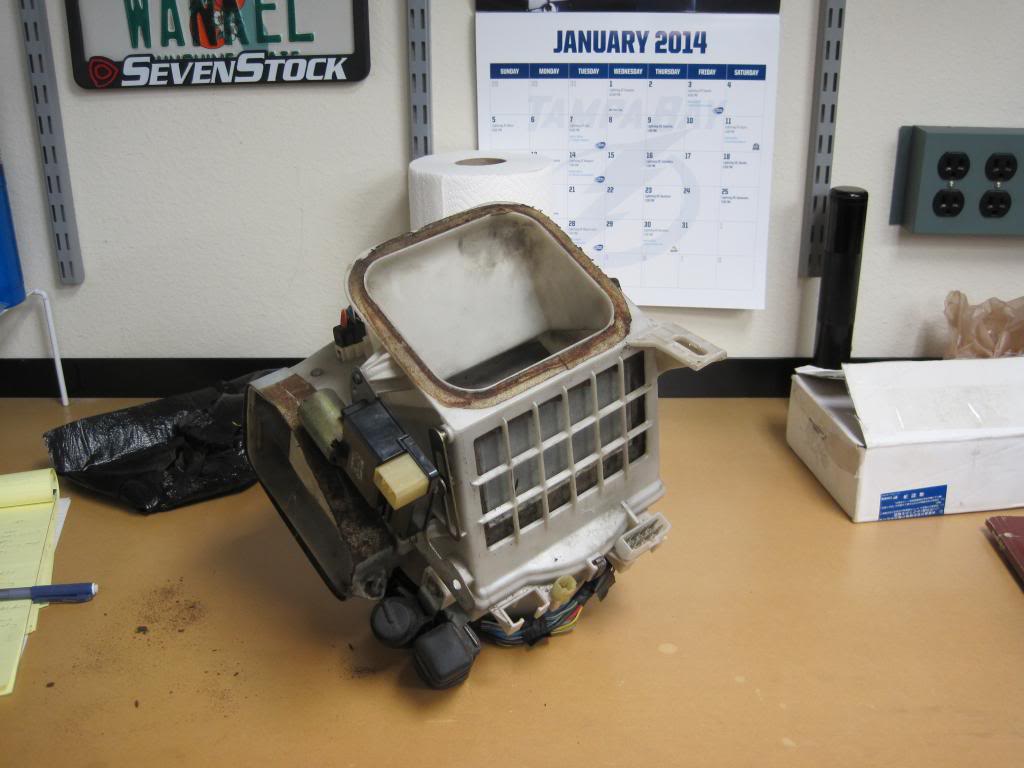
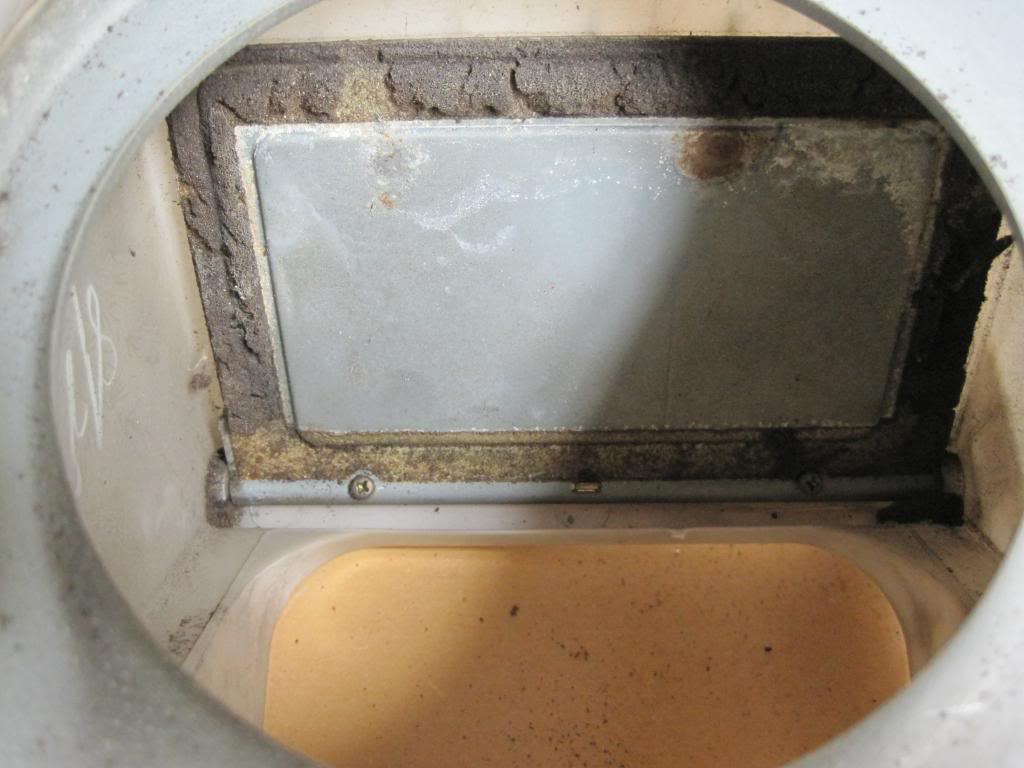
When taking apart something like this, take plenty of pictures to use for reference if you need to later. Also, there are many screws that vary in size. It is best to immediately put them back in their hole so as not to forget where each one goes.
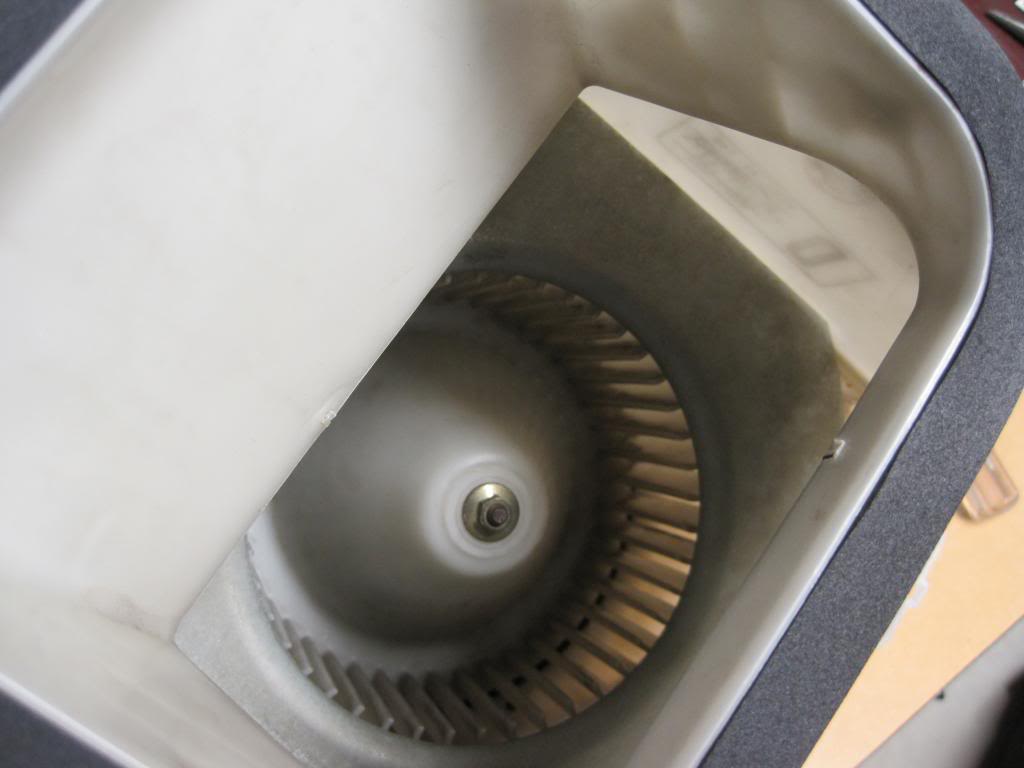
After some disassembly, I could get at all major components:
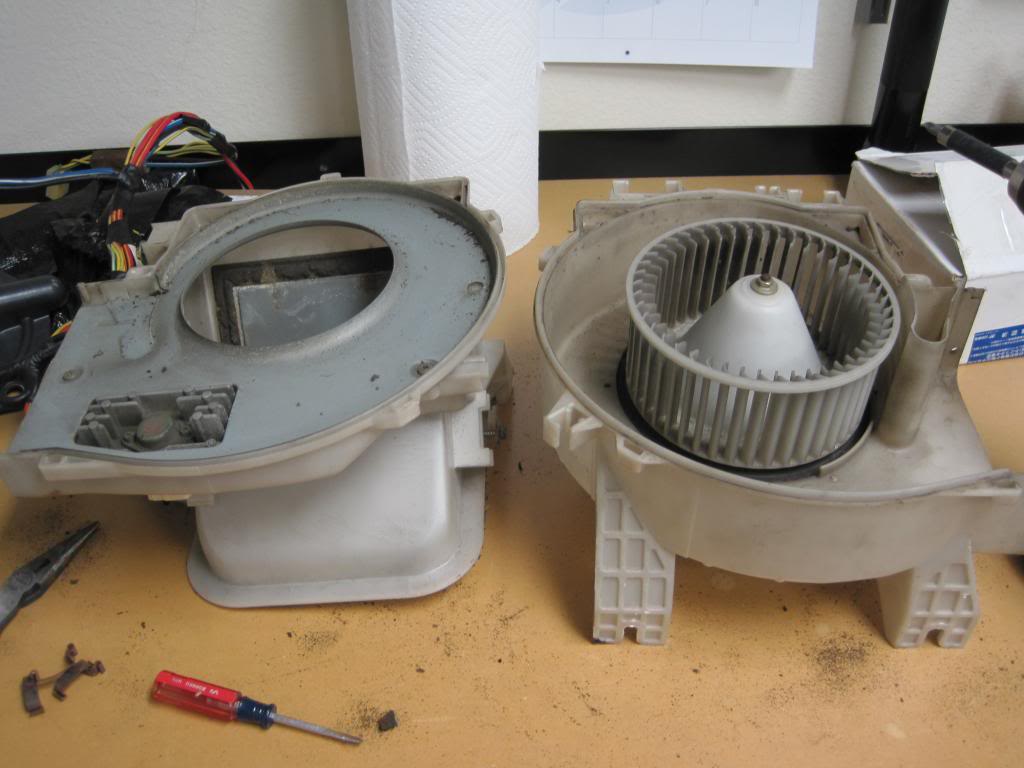
I removed the fresh/recirculate door and used Goo Gone to remove the degraded foam and film. To replace the foam on the door, I will use some closed cell adhesive backed foam I got from McMaster-Carr. All plastic parts were given a thorough cleaning with some warm water and dish soap and thoroughly rinsed and dried.
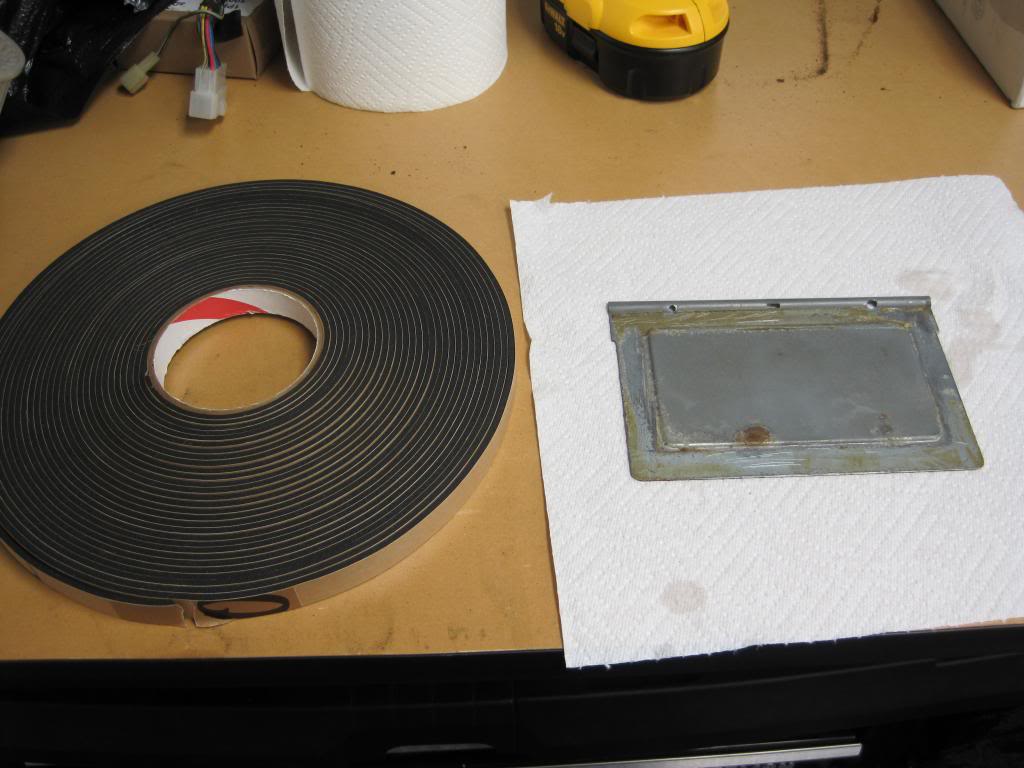
And with new foam:
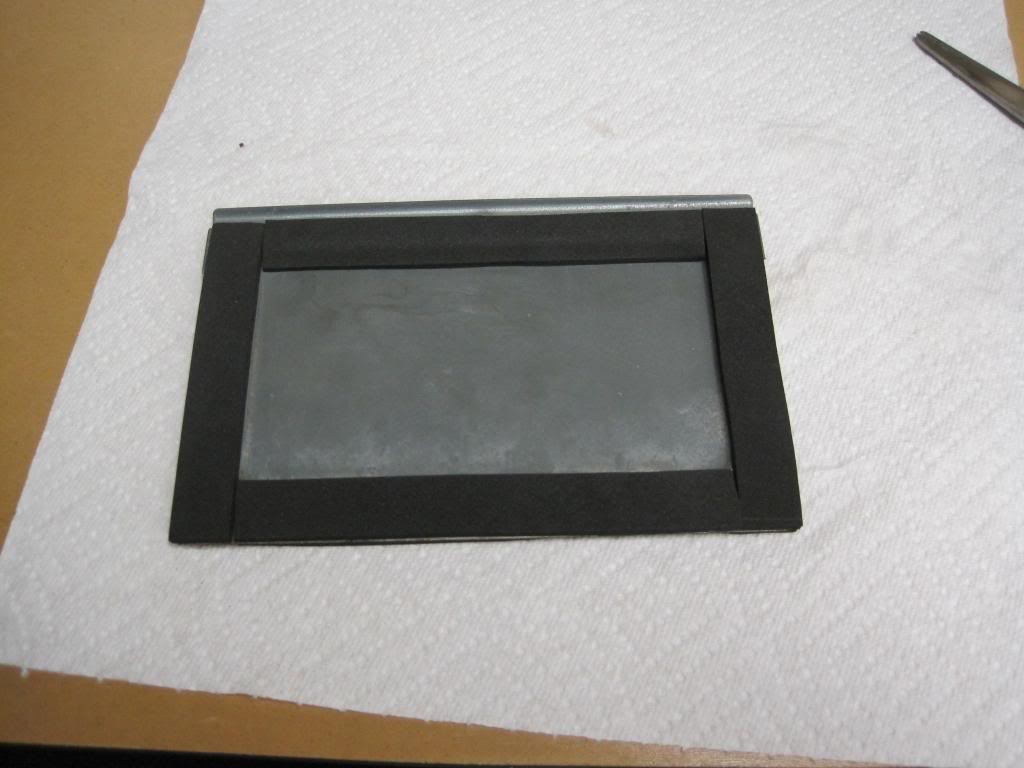
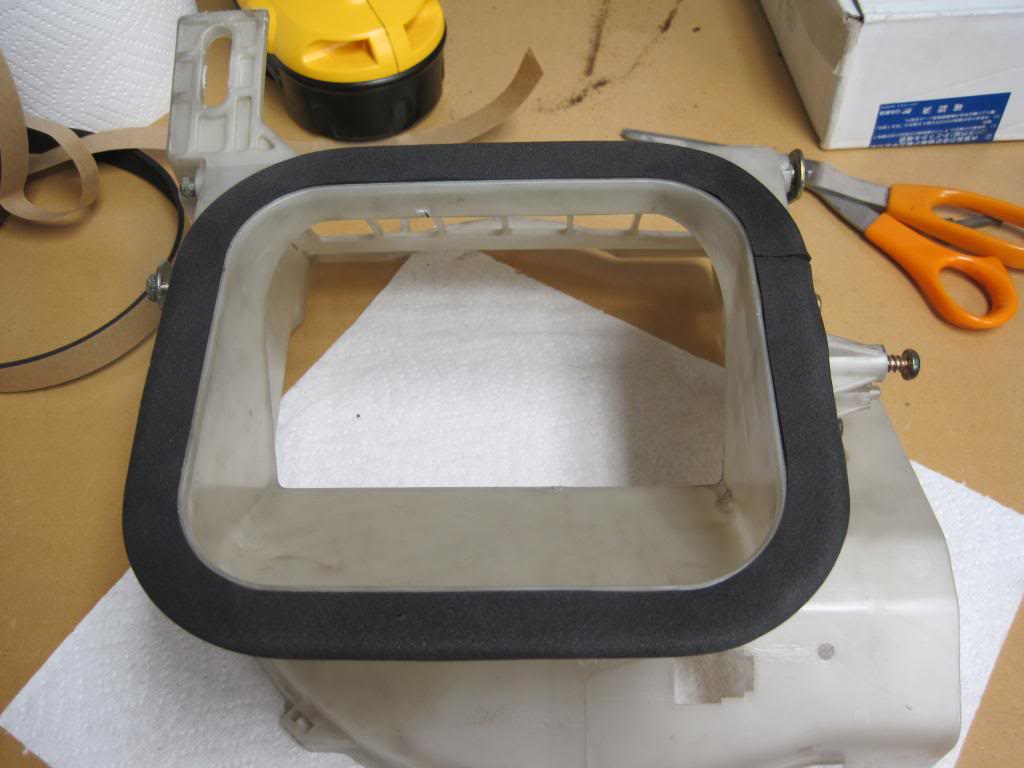
New foam was also put on the flange that seals it to the cowl vent. I was happy that the foam took well to curves so that I could do this in one continuous piece:
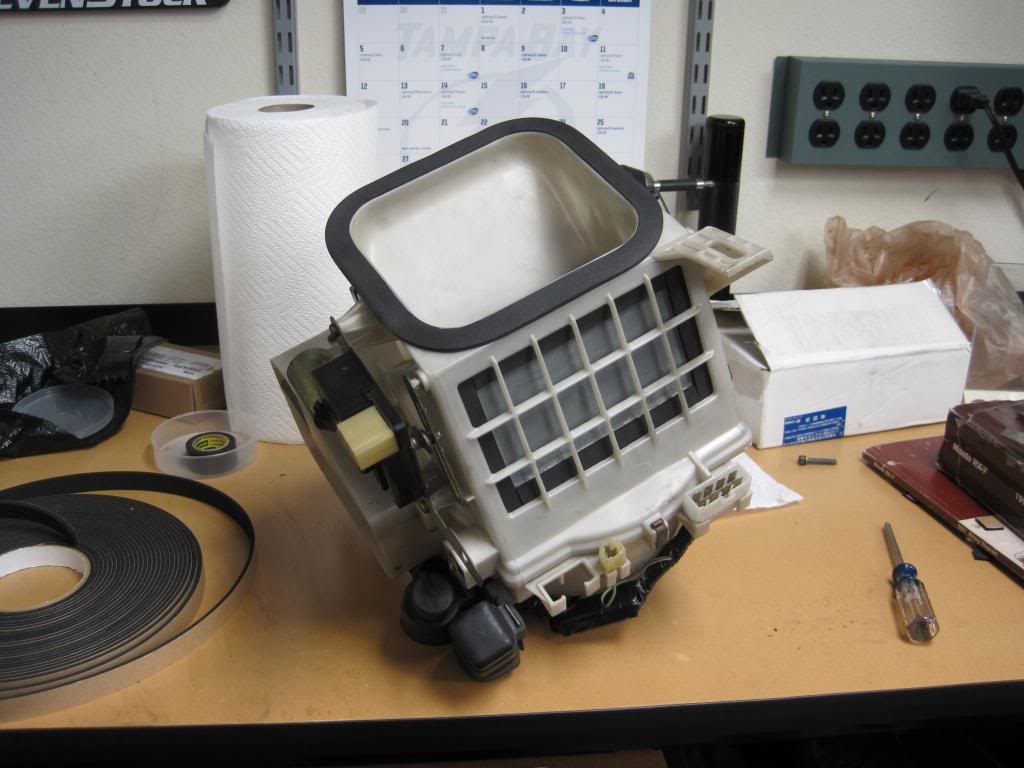
After that, I put everything back together:
Next up is the air mix unit. I have already disassembled it and it is quite filthy. Degraded foam all over the place makes for a nasty HVAC unit.
First up is the blower unit. The foam on the fresh/recirculate door has degraded and the whole thing is very dirty from nearly twenty years of use and a few years of sitting in my garage.
When taking apart something like this, take plenty of pictures to use for reference if you need to later. Also, there are many screws that vary in size. It is best to immediately put them back in their hole so as not to forget where each one goes.
After some disassembly, I could get at all major components:
I removed the fresh/recirculate door and used Goo Gone to remove the degraded foam and film. To replace the foam on the door, I will use some closed cell adhesive backed foam I got from McMaster-Carr. All plastic parts were given a thorough cleaning with some warm water and dish soap and thoroughly rinsed and dried.
And with new foam:
New foam was also put on the flange that seals it to the cowl vent. I was happy that the foam took well to curves so that I could do this in one continuous piece:
After that, I put everything back together:
Next up is the air mix unit. I have already disassembled it and it is quite filthy. Degraded foam all over the place makes for a nasty HVAC unit.