
91 Vert -- Painting in progress Crystal White -- Lots of pictures

Thread Starter
Rotary Enthusiast
Joined: Aug 2002
Posts: 1,273
Likes: 0
From: Kansas
last primered pic....
...and the story begins:
So I had a 91 vert already that I'm already working on. Then last spring sometime I find a local guy that is selling some fenders, bumpers, etc. off of a white 91 vert. Cool, need that stuff, so went and bought those off of him. While there he shows me his 91 vert on a rotisserie that's he's stripped every part off of and is preparing to media blast. He's planning on putting in a small block Ford if I remember correctly.
Fast forward to this spring... I see an add in the paper for a 91 vert, media blasted, primed, and on a rotisserie. Cool... call and wonder of wonders, it's the same guy. So I go and check it out and he's already got all of the body work done on the shell and it's fully primed ready to paint (on the rotisserie still).
I simply can't resist the price, so I drop the cash and tow it home. Takes me a few weeks to find a decent price on a paint job -- most shops to guarantee for life want to strip the primer off and reprime & repaint. That's fine, but they're also talking paint jobs in excess of $5k-$8k. I'm sure it would be a fantastic job, but I can't afford that. Find a place that replaced a door-skin when I had my FD and he quotes me in the ballpark of $3k and he doesn't have to strip it first but still will give me a lifetime guarantee. sweet. Now to pick the color.
This is probably the toughest decision... everywhere from black to white to velocity red to strato blue back to finally deciding on crystal white. Already knew I was going black interior so that finalized the decision. Also decided that I'd paint JUST the shell first so I don't have newly painted doors, hood, trunk, fenders, etc. all laying around getting scratched up for the summer/fall while I reassemble the car.
Anyway, long story thus far but I also ended up going back to the guy I bought it from and bought all of the spare parts that he had also -- basically everything he removed from the car. Again, can't beat the price and when I finally go through all the freaking boxes, I'll have a BUNCH of stuff for sale.
Soooooo, been a couple of weeks, call the paintshop yesterday, car is done, pick it up today... Can't wait to reassemble and get the doors, fenders, hood, trunk etc. painted so I can see the whole pictures.
Thread Starter
Rotary Enthusiast
Joined: Aug 2002
Posts: 1,273
Likes: 0
From: Kansas
Plans for the car??
13b RE swap. Already had that in progress on my other car -- now I have to move parts from Car A to Car B. Freaking lot of work ahead of me, but it will be worth it...
After I get it back in rolling form (maybe even running) then I'll drive it back to the paint shop (baja style!) and have them do the remaining paint job.
Oh, and I'm planning on coating the bottom w/ truck bed coating for ultra protection. Not sure if I'm going to drop the cash on the professional spray-on (Rhino or Line-Ex) -- I think I might experiment w/ the DIY stuff (like Herculiner or DupliColor). Try some little pieces and see if I like the results -- if that works it should save me about $300-$400.
That's all I can think of for the moment... I welcome questions or comments.
13b RE swap. Already had that in progress on my other car -- now I have to move parts from Car A to Car B.
Freaking lot of work ahead of me, but it will be worth it...After I get it back in rolling form (maybe even running) then I'll drive it back to the paint shop (baja style!) and have them do the remaining paint job.
Oh, and I'm planning on coating the bottom w/ truck bed coating for ultra protection. Not sure if I'm going to drop the cash on the professional spray-on (Rhino or Line-Ex) -- I think I might experiment w/ the DIY stuff (like Herculiner or DupliColor). Try some little pieces and see if I like the results -- if that works it should save me about $300-$400.
That's all I can think of for the moment... I welcome questions or comments.
Last edited by Trav; May 20, 2005 at 11:08 PM.
I'm awesome!
Joined: Apr 2004
Posts: 1,311
Likes: 0
From: Greenville, SC & Atlanta, GA & Clovis, NM
OMG, that project is no joke! Good luck man. I cant imagine how longs its going to take to reassembly EVERYTHING! Is this going to be a show car. Looks like the start of one anyway.
If I did that to my car I would never drive it again for fear of something touching it, I'd have it in an air conditioned garage w/ a car cover on it for the rest of its life.
If I did that to my car I would never drive it again for fear of something touching it, I'd have it in an air conditioned garage w/ a car cover on it for the rest of its life.
Trending Topics
Thread Starter
Rotary Enthusiast
Joined: Aug 2002
Posts: 1,273
Likes: 0
From: Kansas
Cars are meant to be driven...I don't believe in trailer queens. No, definitely not a show car. 
(just realized my typo in the title. DOH.. Crystal WHITE -- if a MOD is watching, would you mind correcting that typo? thanks!)
(just realized my typo in the title. DOH.. Crystal WHITE -- if a MOD is watching, would you mind correcting that typo? thanks!)
Former Moderator. RIP Icemark.
Joined: Apr 2001
Posts: 25,896
Likes: 24
From: Rohnert Park CA
Originally Posted by Trav
(just realized my typo in the title. DOH.. Crystal WHITE -- if a MOD is watching, would you mind correcting that typo? thanks!)
The pictures really show well the extra re-enforcement that the verts have to thier structure as well.
Originally Posted by Icemark
Fixed.
The pictures really show well the extra re-enforcement that the verts have to their structure as well.
The pictures really show well the extra re-enforcement that the verts have to their structure as well.
P.S. it also plain to see how one could easily convert to a RHD setup if they where to acuire the parts, the structure is almost (yeah i know not really but you get the point) symmetrical.
Brap Brap Brap
Joined: Oct 2002
Posts: 678
Likes: 0
From: Corpus Christi, TX
Wow. I thought i had a big project ahead of me. Like someone told me, it's always a good thing to have a fresh start. This way you will know exactly what's done to the car, and it will add confidence knowing that you did it.
Good luck, and good find.
-Justin
Good luck, and good find.
-Justin
Very, very cool. If I were rich I'd love to do the same thing to aa poor battered FC (although it's kinda hard to tell the shape yours WAS in before it got stripped down.  ).
).
It's gonna be great to see how this turns out in the future.
). It's gonna be great to see how this turns out in the future.
Thread Starter
Rotary Enthusiast
Joined: Aug 2002
Posts: 1,273
Likes: 0
From: Kansas
would u mind telling us how much u got that thing for
I might let it spill out a little later.The vehicle was a theft recovery out of TX. Someone stole it and ripped the engine & tranny out of it. We did have some very minor welding to do around the tranny tunnel area. You'll see a couple of rusty areas in the pics -- that's where we welded. That was a bit of a trick as the sheet metal was thin to begin with, then when it was stretched, it made it even thinner. Anyway, this is minor in the grand scheme as it was nothing structural -- simply cosmetic and 'environmental'. Just wanted to make sure no elements could get in from underneath.
Thanks for the comments thus far... If there are any closer, more detailed pictures you guys would like to see, let me know and I can take them or host the hi-res versions of the above.
Last edited by Trav; May 21, 2005 at 07:50 AM.
ahhhhhhhhh truck bed liner, a man after my own heart - LOL
i dont wanna toot my own horn but may I ask if my project updates from last summer (patching, blasting and orange bedlining on my spit) have anything to do with the progress made here thus far?
if you are considering some different bedliner options, look into ProForum, they have a single stage that works well (i used the tintable on mine) and as well, we are using a brand spanking new one now...Its called EnviroLiner, and let me tell ya, it makes the proform look like ****...it goes on with a very uniform texture, dries 10 times faster and can be built up thicker. Although it would be a bit more money than the proform stuff, it would do a far nicer job GAURUNTEED
regardless, you are doing a bang up job, perhaps we'll meet when our projects of grand proportion are completed and brought to Seven Stock.....(at least I know im going there as soon as i'm done)
P.S. - What are you going to be using for paint material? (meaning which paint company)
Thread Starter
Rotary Enthusiast
Joined: Aug 2002
Posts: 1,273
Likes: 0
From: Kansas
Originally Posted by classicauto
i dont wanna toot my own horn but may I ask if my project updates from last summer (patching, blasting and orange bedlining on my spit) have anything to do with the progress made here thus far?
P.S. - What are you going to be using for paint material? (meaning which paint company)
P.S. - What are you going to be using for paint material? (meaning which paint company)
I bought the car as you see it in the first pics already blasted and shot w/ Dupont primer. So the paint is also Dupont so I could get the lifetime warranty on it.
Thanks for the advice on the bedliner material... going to do some experimenting and see what I like and has good coverage/thickness.
I'm trying to think of other things that I need to do to the car before I start reassembling. I think now is a good time to run new fuel lines, but aside from that, I haven't really planned out much. Need to do a little research before I dive in.
Thread Starter
Rotary Enthusiast
Joined: Aug 2002
Posts: 1,273
Likes: 0
From: Kansas
Update
Well, it's been a few months and I have a few updates... Figured I'd just continue to update this thread for now.
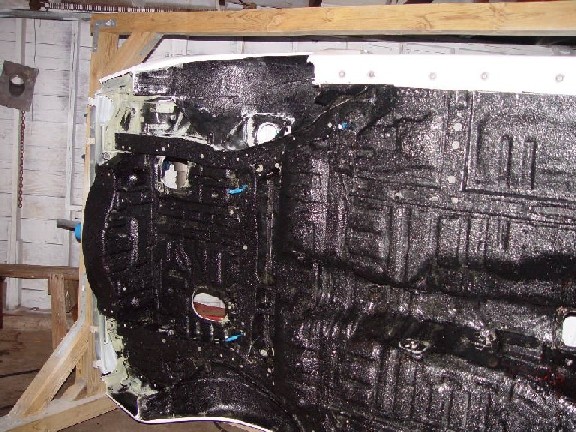
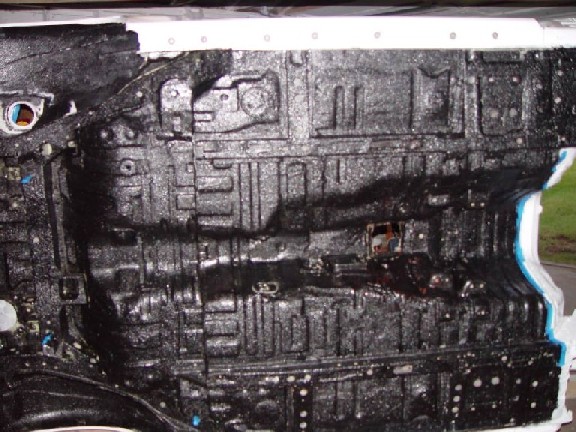
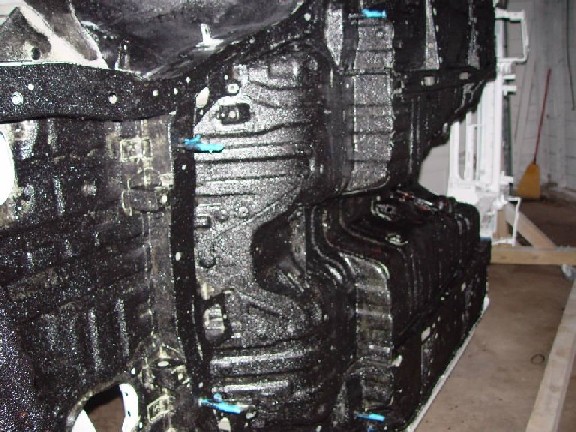
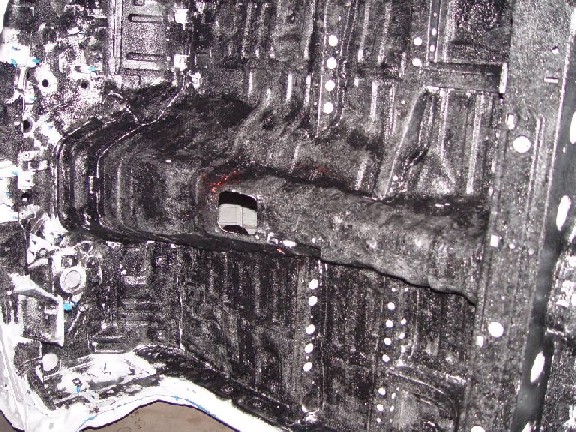
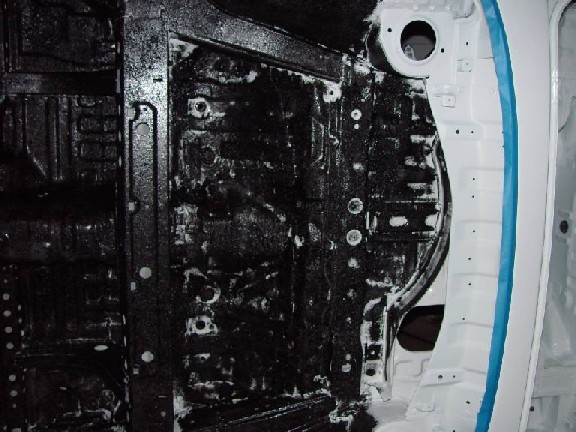
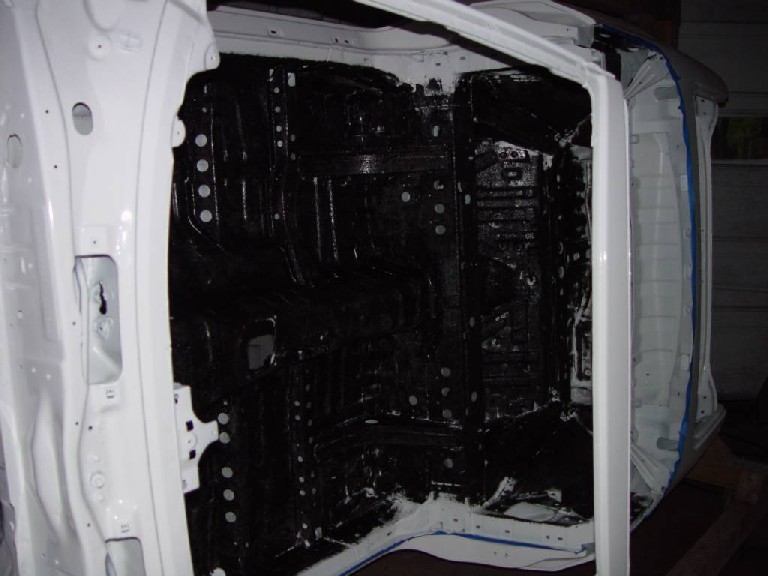
I spent some time putting body plugs in the right holes and whatnot. Cleaned up the surface rust on the welded areas and sprayed a little primer for initial protection. Then I Herculined the major portions of the underside (nice heavy two coat action) and a decent single coat on a lot of the interior as well.
PICS of the underside (after Herculiner application):
Thread Starter
Rotary Enthusiast
Joined: Aug 2002
Posts: 1,273
Likes: 0
From: Kansas
Sorry, pics were taken at night, so some didn't illuminate real great. At any rate, the overall application of the Herculiner was pretty easy. A little messy, but if you keep some solvent & rags handy for goofs and wear rubber gloves, it's really not bad. I also masked a few areas that I knew I'd be close to (so as to avoid major messes and having to clean up a lot).
I worked on the Herculiner for short periods over 3 different days I think. I started later than I should have, so the first night's application was only the first coat on the bottom only (roller #1). I then was out of town for a few days, so came back at it a few nights later and put the second (heavier) coat on the bottom and then put the initial coat on the inside on the same day (roller #2). I let that dry overnight and then came back and finished the touchups with the 2" paint brush.
This stuff dries pretty fast, so you really don't HAVE to wait overnight for drying between coats. Overall, I used an entire 1 gallon kit (2 rollers, 1 brush, and a gallon of the Herculiner stuff). I also picked up a gallon of Xylene (which is the solvent they recommend for cleanup and for thinning). I did use the ENTIRE gallon of Herculiner and actually could probably use a little bit more (quart?) if I wanted to put on a good second coat on the interior and finish the touch ups. I also considered some other areas like in the wheel wells and such, but decided that if I really thought it needed it, I could do that later with the car on the ground. Overall, I think that the Herculiner normally costs about $80-$90 for the gallon. I picked up 2 of the 1 gallon kits on rebate at PepBoys for around $65-$70 each I think. I have LOTS of Xylene left over, so you could easily use a very small container of that, or not even bother if you have a suitable solvent already. Check out the Herculiner instructions as it recommends the use of only certain types of solvents -- I'm not familiar with all of that stuff, so I just bought what it recommended. Anyway, I think the Xylene cost me about $10-$15 for the gallon.
So total cost can be $100 or less and of course the rest of the investment is time/energy. It's really not that bad of a job -- obviously I had an advantage w/ the car on the rotisserie. It's probably not nearly as fun w/ the car on stands or only a few feet off the ground. Also of course, I had a completely clean car -- no dirt or existing undercoating to clean/remove first.
Overall impression is the coating seems very hard and durable. It doesn't feel rubberized like the spray-on type undercoating -- but it is rubber based, so I'm sure there will still be some sound/environmental insulating properties. Of course I won't have real world experiences for quite awhile. Total weight of the gallon of stuff is about 9lbs, so really not too bad for a good coat of protection. Honestly only laziness prevents me from using the second gallon, but if I were really motivated, I probably would use the 2nd one for a really thick coat. I also might use it for something else (either my truck or additional stuff on this car).
Not too bad as the next best alternative I could think of was a professional spray-on like Rhino-lining or LineX. I couldn't get any real good quotes unless I brought them the car and I wasn't really looking forward to loading it up again for that. I think the best guess I got was $300-$500 depending. Also, I was concerned about overspray and the incredible masking job that they would have to perform. I probably would have gotten a little better coverage, a slightly thicker coating, and potentially a higher quality product -- but my concerns & cost outweighed the potential benefits. Overall I probably saved over $300 by doing it myself and I'm pleased w/ the outcome thus far.
Comments? Questions?
Last edited by Trav; Aug 15, 2005 at 08:57 PM.
NA-BOOSTIN
Joined: Oct 2004
Posts: 1,200
Likes: 2
From: austin,tx
did the same thing for under my fender wells,gas tank, and down the frame rails were its scrapped great job so far .i'd like to do that to my fc one day but as of right now its my daily so lil bit by lil bit

Rotary Freak
Joined: Apr 2003
Posts: 2,702
Likes: 1
From: DC Area
I have to do the same thing with my vert. I have some rust on the floor boards behind the seats that need to be cut out and then I am going to treat the interior to a little bed liner action to total rust proofing.