91 Vert -- Painting in progress Crystal White -- Lots of pictures
 10-03-05, 09:07 PM
#51
Mechanical Engineering
WOW i am very happy to see that someone has posted pictures of a bare FC i have always wanted to see one completely bare, makes me wanna re-weld every single spot welded seam.
Wow i just cant wait until mine is in that stage
Wow i just cant wait until mine is in that stage
 10-28-05, 09:21 PM
#54
Rotary Enthusiast
Thread Starter
Join Date: Aug 2002
Location: Kansas
Posts: 1,273
Likes: 0
Received 0 Likes
on
0 Posts
I'll take a few more pics and post them. Not much has changed although I do have the dash in now. Probably looking at getting it off the rotis. in a few weeks if all goes well. As soon as I have time, I'll drop it onto some jackstands and bolt the suspension to it. The trick is I need to enlist some help from some of my friends. At the moment, my only idea for getting it down is to simply have 10 guys grab it, unbolt, and lower onto the stands...
Might be an experience...
Might be an experience...
12-13-05, 09:22 PM
#55
Rotary Enthusiast
Thread Starter
Join Date: Aug 2002
Location: Kansas
Posts: 1,273
Likes: 0
Received 0 Likes
on
0 Posts
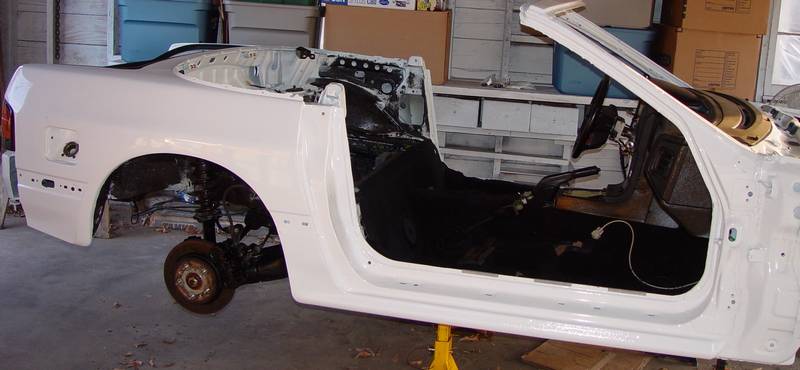
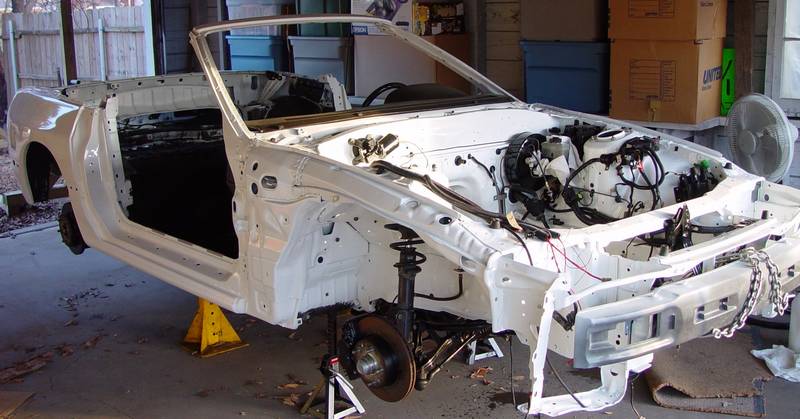
Okay, more pictures first then some updates.
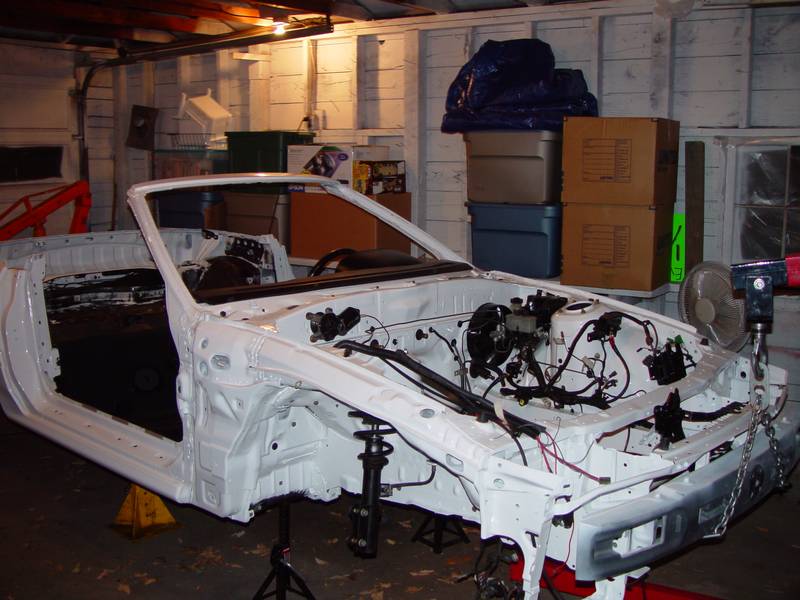
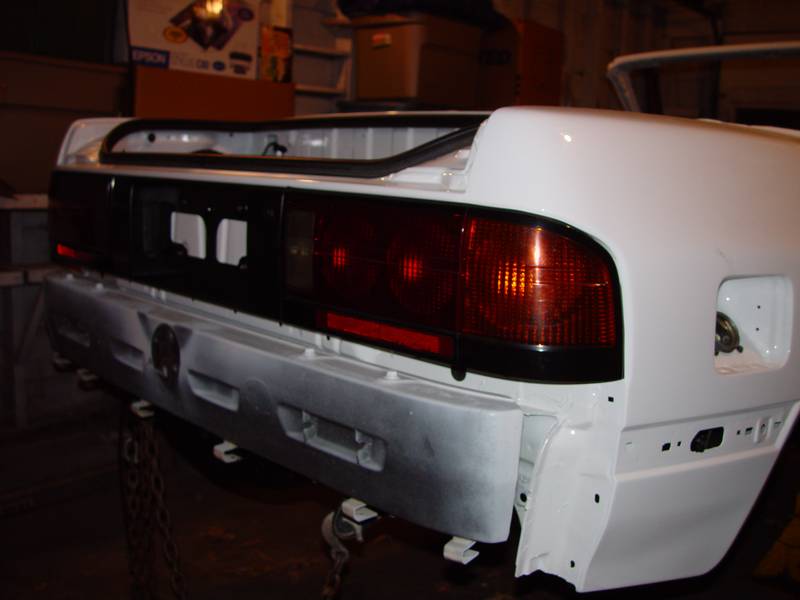
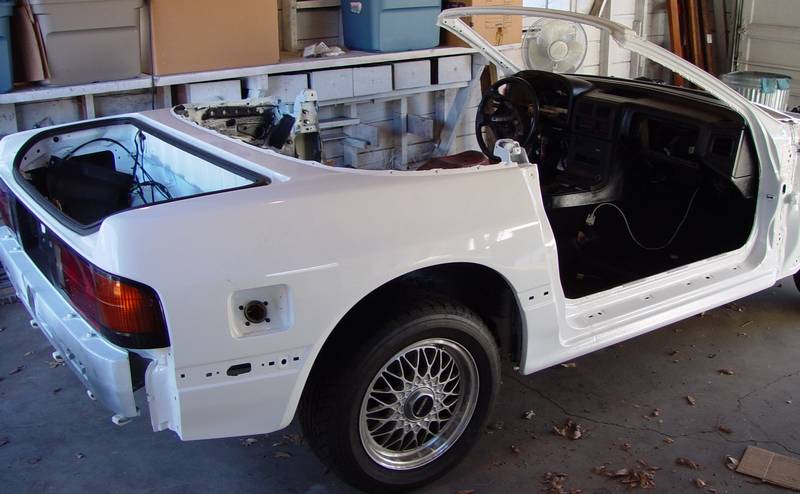
Got the car off of the rotisserie -- a few pics of that although most of the work seen here was done before I took it down.
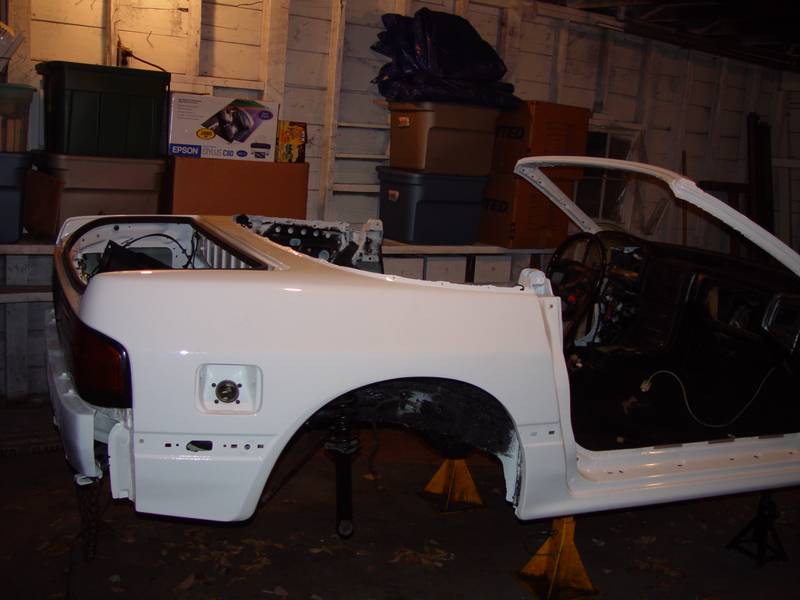
With the rotis out of the way, I was able to put the taillights back on.
Got the car off of the rotisserie -- a few pics of that although most of the work seen here was done before I took it down.
With the rotis out of the way, I was able to put the taillights back on.
12-13-05, 09:28 PM
#56
Mechanical Engineering
oncea again WOW, by the time this is done you'll know everysingle bolt on that car whether you like it or not. What are you using for undercoating?
12-13-05, 09:43 PM
#58
Rotary Enthusiast
Thread Starter
Join Date: Aug 2002
Location: Kansas
Posts: 1,273
Likes: 0
Received 0 Likes
on
0 Posts
The task of getting the car off of the rotisserie was an adventure I will soon not repeat. Honestly, it was a big pain in the butt and I made some "poor decisions" initially that thankfully didn't result in any disasterous consequences.
I thought initially that I could probably do most of the work myself although I knew a couple of the tasks might require an additional hand. I got started by myself, knowing occasionally my neighbor (or wife) might have to help. My plan was to use my engine hoist to lower each end of the car one at a time. I started at the front and realized that the cherry picker legs were too tall to fit under the rotisserie. SO, I had to get a floor jack to raise it up -- and of course the floor jack was about a half-inch too tall as well. My hoist folds up and the legs are removable, so one leg was great for leverage to slide the jack in under the rotis. So, remove the leg, raise it up, slide the jack in, put the leg back on, raise the rotis w/ the jack, slide the hoist in, hook up the chain for the hoist, raise the car. Again, I mention this was a pain in the butt.
All was working well at that point except the bolts to remove the rotis from the car were a little difficult to get to and remove since they were slightly bent and in a cramped space. Got those removed, slid the car off the rotis and the hoist was holding it nicely.
Now what do I put the car down on?
Okay, this is where I probably get flamed, but it makes for a funny story anyway. I preface all of this with the fact that at no time did I EVER get UNDER the car and risk any bodily injury or death -- HOWEVER, my impatience will shine through here as an obvious lack of common sense (at least for a short period of time).
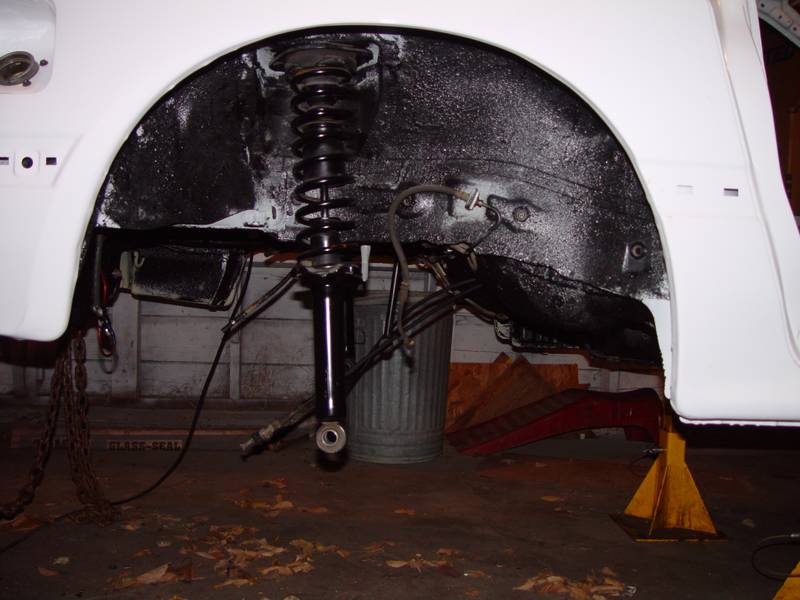
I had jack stands, but my problem was they really weren't tall enough -- especially given the fact that I was lowering only 1 end of the car at a time and didn't really want that much "rake" in the car while I was trying to lower it end by end. Anyway, I had been supporting my donor car (skeleton) by a nice tall trash can under the front bumper, and thought "hey, I could use another tall trash can for this, right?". I had my neighbor at this point, so I blame him for not slapping me on that idea.
Here is the result of that no-brained idea:
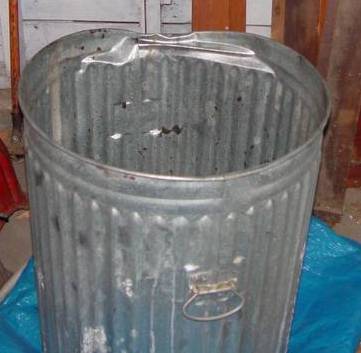
To make a long story short, we used a 4x4 on the front trash can -- and it would have worked except the car was "left-heavy", so that put too much strain on one side of the can and ended up causing a few scary moments. Mostly because the car wanted to slide off the board and onto the ground -- and I really didn't want my nice paint job screwed up that quickly. All of this of course happened after I had already removed the hoist from the front, and jacked up the back end in the same fashion. So hurriedly I set the back-end back down, moved the hoist back to the front for support and then contemplated another solution to my problem.
Keep in mind each time I need to move the hoist from front to back or vice versa, I have to slip the jack in under the rotis first (using the hoist leg for leverage), jack it up, slip the hoist in, hook it up, etc. etc. etc. In the process I also strip a bolt in my bumper for support -- so needless to say, things were not going well and most of it was my own fault for trying to do things in a hurry.
At this point, I knew my afternoon was going to be chewed up and contemplated my options...
<continued in the next post>
I thought initially that I could probably do most of the work myself although I knew a couple of the tasks might require an additional hand. I got started by myself, knowing occasionally my neighbor (or wife) might have to help. My plan was to use my engine hoist to lower each end of the car one at a time. I started at the front and realized that the cherry picker legs were too tall to fit under the rotisserie. SO, I had to get a floor jack to raise it up -- and of course the floor jack was about a half-inch too tall as well. My hoist folds up and the legs are removable, so one leg was great for leverage to slide the jack in under the rotis. So, remove the leg, raise it up, slide the jack in, put the leg back on, raise the rotis w/ the jack, slide the hoist in, hook up the chain for the hoist, raise the car. Again, I mention this was a pain in the butt.
All was working well at that point except the bolts to remove the rotis from the car were a little difficult to get to and remove since they were slightly bent and in a cramped space. Got those removed, slid the car off the rotis and the hoist was holding it nicely.
Now what do I put the car down on?
Okay, this is where I probably get flamed, but it makes for a funny story anyway. I preface all of this with the fact that at no time did I EVER get UNDER the car and risk any bodily injury or death -- HOWEVER, my impatience will shine through here as an obvious lack of common sense (at least for a short period of time).
I had jack stands, but my problem was they really weren't tall enough -- especially given the fact that I was lowering only 1 end of the car at a time and didn't really want that much "rake" in the car while I was trying to lower it end by end. Anyway, I had been supporting my donor car (skeleton) by a nice tall trash can under the front bumper, and thought "hey, I could use another tall trash can for this, right?". I had my neighbor at this point, so I blame him for not slapping me on that idea.
Here is the result of that no-brained idea:
To make a long story short, we used a 4x4 on the front trash can -- and it would have worked except the car was "left-heavy", so that put too much strain on one side of the can and ended up causing a few scary moments. Mostly because the car wanted to slide off the board and onto the ground -- and I really didn't want my nice paint job screwed up that quickly. All of this of course happened after I had already removed the hoist from the front, and jacked up the back end in the same fashion. So hurriedly I set the back-end back down, moved the hoist back to the front for support and then contemplated another solution to my problem.
Keep in mind each time I need to move the hoist from front to back or vice versa, I have to slip the jack in under the rotis first (using the hoist leg for leverage), jack it up, slip the hoist in, hook it up, etc. etc. etc. In the process I also strip a bolt in my bumper for support -- so needless to say, things were not going well and most of it was my own fault for trying to do things in a hurry.
At this point, I knew my afternoon was going to be chewed up and contemplated my options...
<continued in the next post>
Last edited by Trav; 12-13-05 at 09:46 PM.
12-13-05, 09:53 PM
#59
Rotary Enthusiast
Thread Starter
Join Date: Aug 2002
Location: Kansas
Posts: 1,273
Likes: 0
Received 0 Likes
on
0 Posts
Ultimately the engine hoist was working great but I quickly realized I needed two of them to lower both ends at the same time. Otherwise I'm going to have the same sorts of issues with shifting of weight etc. Honestly, although the trash can was a really really dumb idea, I think I would have had very similar problems with jack stands -- and hey, a jack stand just tips over and that's all she wrote -- so maybe the trash can saved me some. (Okay, so maybe I'm just trying to convince myself that it wasn't as dumb as it seems now).
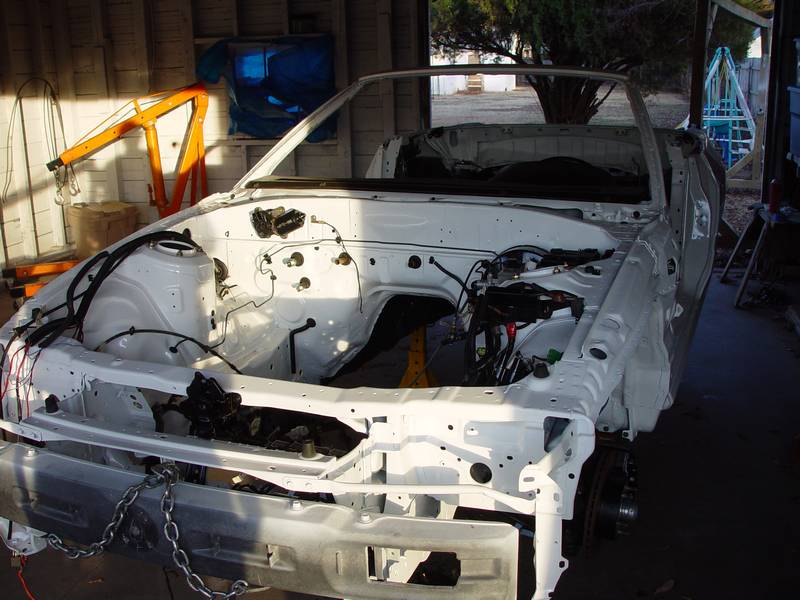
Regardless, I'll spare you the details but finally figured out my brother had another cherry picker and so I went and picked that up, brought it home, did the same hookup to the back and this time I got smart and just sawzalled the back bolts off the rotis. Rotis completely disconnected, car is a little left heavy, but at this point I do have help from another friend to stabilize so things are going very smoothly. With the car off the ground still, I simply slide the rotis out from under it out of the way and slowly lower the car onto 4 jackstands. The results of which you see in those first 4 pics.
Now, time to work on the suspension -- and more pics to post...
Last edited by Trav; 12-13-05 at 10:06 PM.
12-13-05, 10:13 PM
#60
Rotary Enthusiast
Thread Starter
Join Date: Aug 2002
Location: Kansas
Posts: 1,273
Likes: 0
Received 0 Likes
on
0 Posts
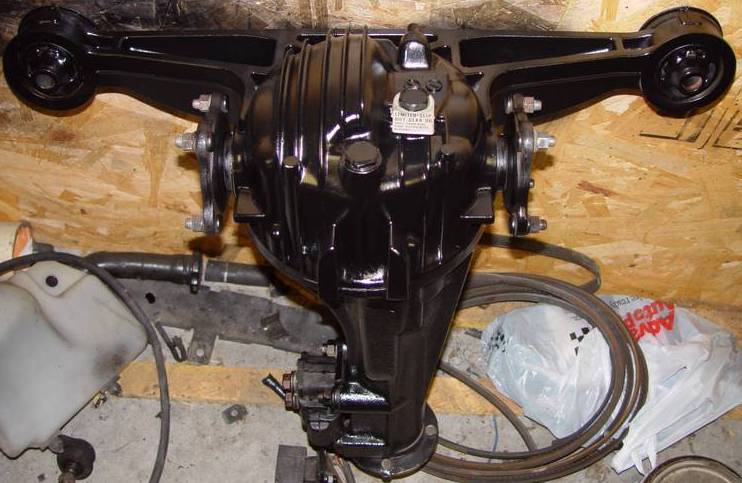
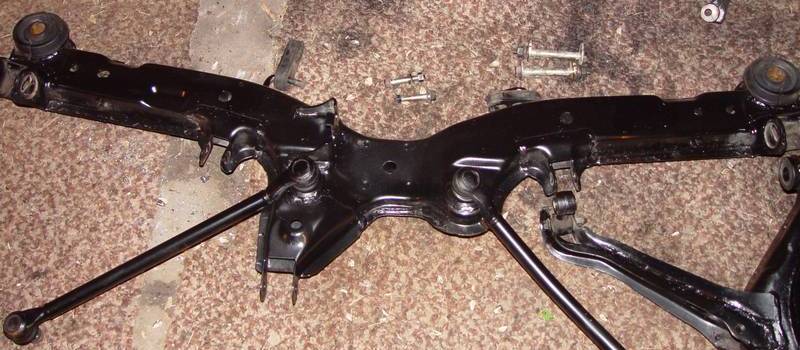
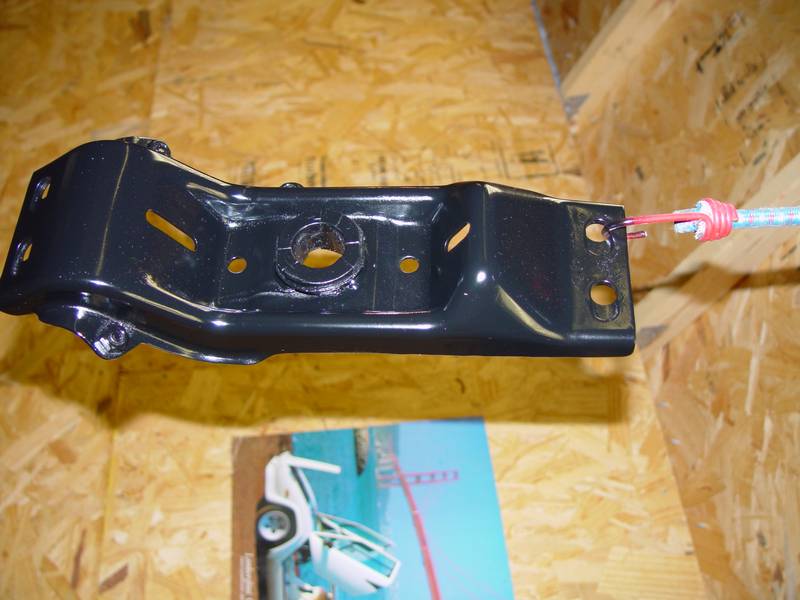
I've spent a lot of time over the last few weeks just cleaning and painting parts. Specifically I've been focusing on suspension related pieces that you see below such as front and rear control arms, front & rear subframes, differential, etc.
Front control arms:

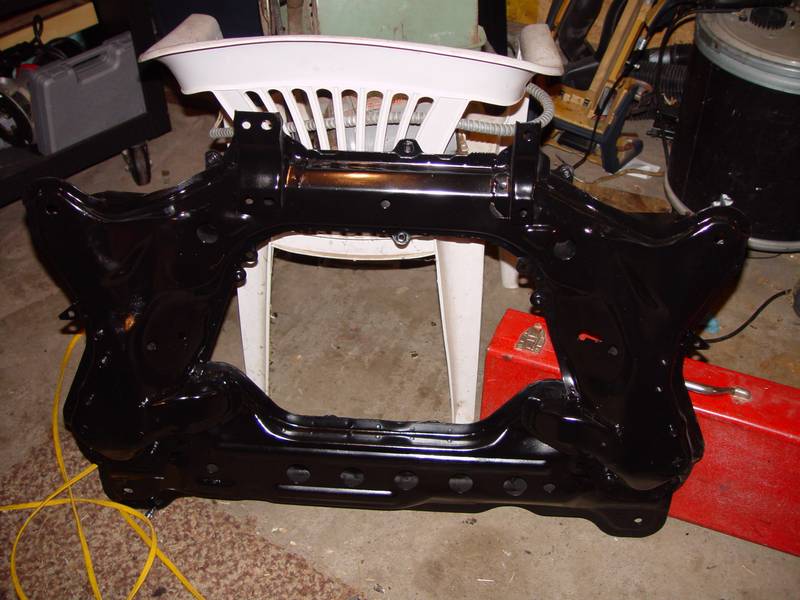
Front subframe:
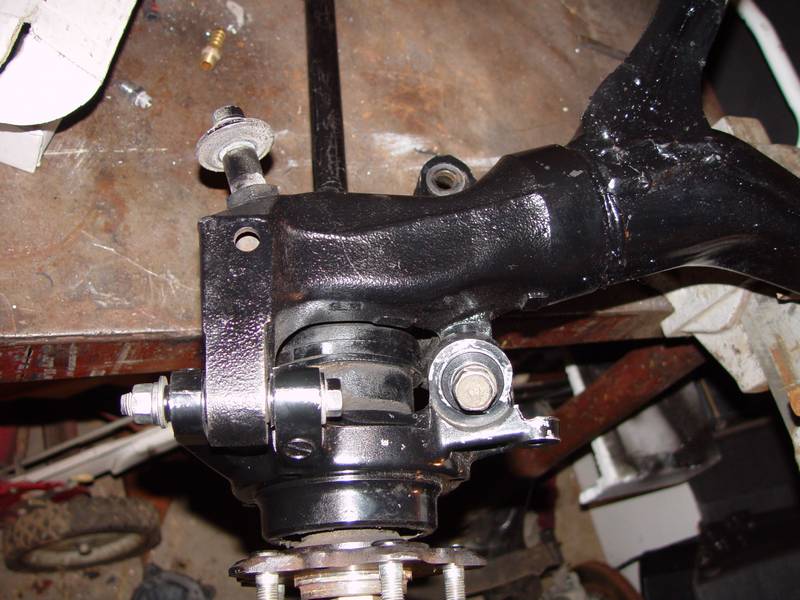
Rear Hub assembly:
Differential (4.33 LSD from GTUs)
Rear subframe (control arms not attached)
Tranny mounts/brackets:
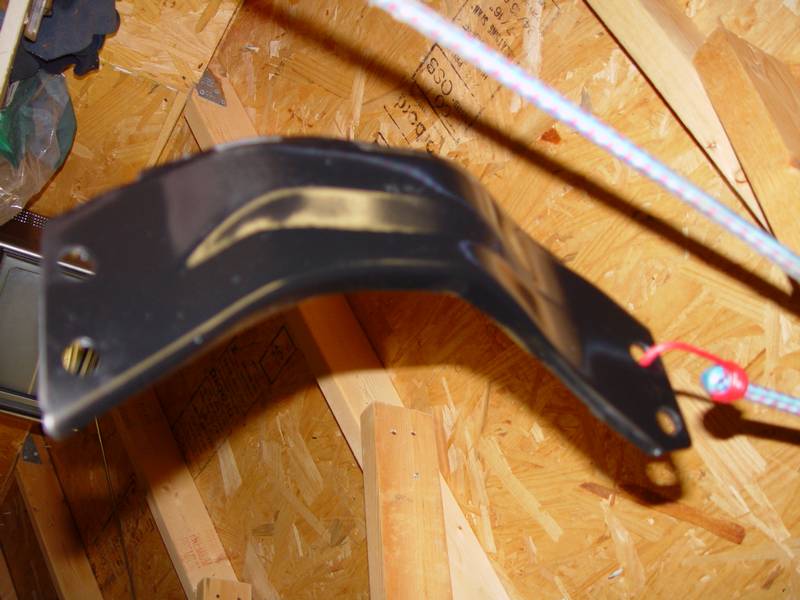
Right Rear control arm:
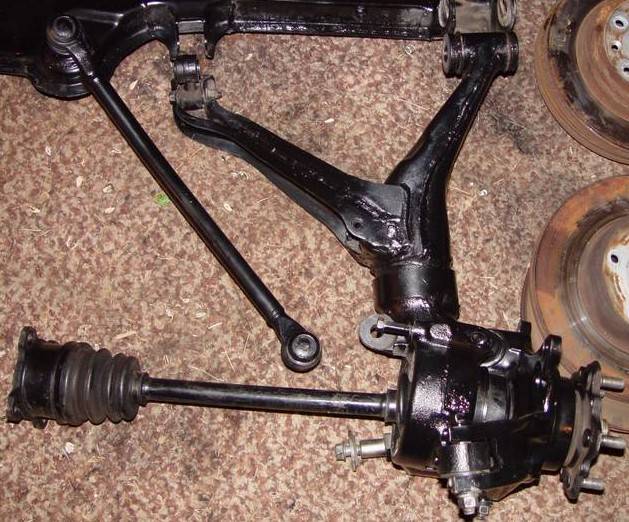
Rotors & calipers removed (uncleaned and unpainted at this point)
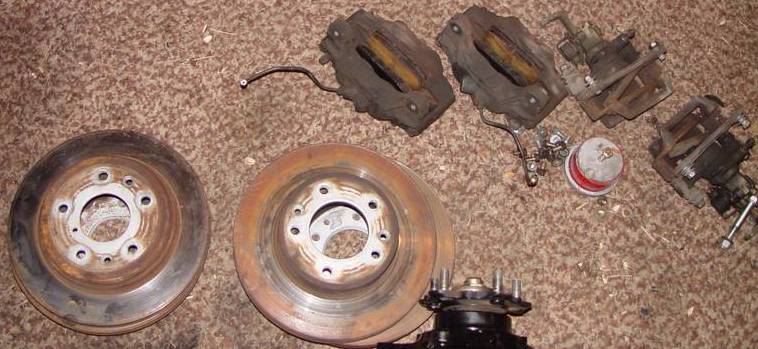
Everything you see painted in these pics was a gloss black, high-temp engine enamel. Don't recall the brand off-hand, but it seems decent and should hold up nicely. I'm not extremely concerned about most of these parts since they'll end up covered with dirt anyway, but I just couldn't bolt them to the car w/o doing something to them at least once.
Also during this process I bought the Energy Suspension bushing kit and have been getting all of those bushings installed (all DIY btw) and also bought the DTSS elim bushings and the tranny y-block mounts from Mazdatrix to replace mine that fell apart. That process could probably deserve it's own thread, but ultimately I was able to do everything with vices and/or loaner pullers from Advance Auto Parts. I talked to the tire shop down the road from me and they wanted $40 just to push in the DTSS bushings -- so I opted to try it myself first and have had decent luck on that whole process. The rear control arm bushings are probably the hardest, but overall it was worth my time and not having to spend the cash to get it done -- especially since I was cleaning and painting everything at the same time anyway.
Front control arms:
Front subframe:
Rear Hub assembly:
Differential (4.33 LSD from GTUs)
Rear subframe (control arms not attached)
Tranny mounts/brackets:
Right Rear control arm:
Rotors & calipers removed (uncleaned and unpainted at this point)
Everything you see painted in these pics was a gloss black, high-temp engine enamel. Don't recall the brand off-hand, but it seems decent and should hold up nicely. I'm not extremely concerned about most of these parts since they'll end up covered with dirt anyway, but I just couldn't bolt them to the car w/o doing something to them at least once.
Also during this process I bought the Energy Suspension bushing kit and have been getting all of those bushings installed (all DIY btw) and also bought the DTSS elim bushings and the tranny y-block mounts from Mazdatrix to replace mine that fell apart. That process could probably deserve it's own thread, but ultimately I was able to do everything with vices and/or loaner pullers from Advance Auto Parts. I talked to the tire shop down the road from me and they wanted $40 just to push in the DTSS bushings -- so I opted to try it myself first and have had decent luck on that whole process. The rear control arm bushings are probably the hardest, but overall it was worth my time and not having to spend the cash to get it done -- especially since I was cleaning and painting everything at the same time anyway.
Last edited by Trav; 12-13-05 at 10:18 PM.
12-13-05, 10:20 PM
#61
Rotary Enthusiast
Thread Starter
Join Date: Aug 2002
Location: Kansas
Posts: 1,273
Likes: 0
Received 0 Likes
on
0 Posts
Originally Posted by capn
oncea again WOW, by the time this is done you'll know everysingle bolt on that car whether you like it or not. What are you using for undercoating?
12-13-05, 10:26 PM
#62
Rotary Enthusiast
Thread Starter
Join Date: Aug 2002
Location: Kansas
Posts: 1,273
Likes: 0
Received 0 Likes
on
0 Posts
Next plans are to finish up the bushing installs and start bolting in the subframes, control arms, differential, etc. Hopefully soon after that I can get the car on rolling rubber. At that point it will probably be dormant for a period of time while I sort out how to get that car in the back shed and get the donor car out of the way. Ideally I'd put the donor on the rotisserie for storage, but I'm not sure if I'm that motivated.
Either way, next steps beyond that are to clean up the RE engine, paint where I feel motivated, and get it dropped in. I still need to get the doors, front fenders, front & rear bumpers, and hood painted -- so it's still very far from complete. But it's definitely starting to take shape and resemble a real car.
Since I saw these sitting lonely in my garage, I thought I'd post up a pic. I'll ultimately sit on these DAD racing seats:
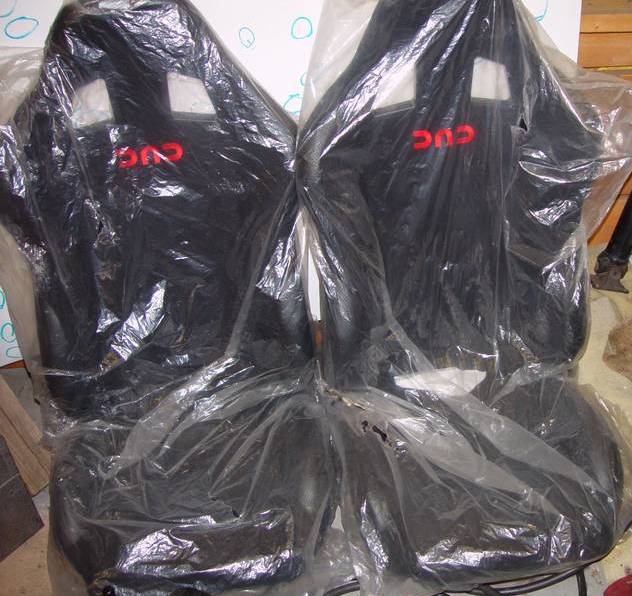
I think that's all for now. Obviously I'll just keep posting in this thread as I have more updates. Probably won't be until after New Years though.
As always, I'll entertain any questions, comments, or smart remarks you may have.
Thanks for looking!
Either way, next steps beyond that are to clean up the RE engine, paint where I feel motivated, and get it dropped in. I still need to get the doors, front fenders, front & rear bumpers, and hood painted -- so it's still very far from complete. But it's definitely starting to take shape and resemble a real car.
Since I saw these sitting lonely in my garage, I thought I'd post up a pic. I'll ultimately sit on these DAD racing seats:
I think that's all for now. Obviously I'll just keep posting in this thread as I have more updates. Probably won't be until after New Years though.
As always, I'll entertain any questions, comments, or smart remarks you may have.
Thanks for looking!
12-14-05, 09:12 AM
#64
90RXHeaven

Join Date: Mar 2005
Location: Geneseo, NY
Posts: 284
Likes: 0
Received 0 Likes
on
0 Posts
OMFG I love RX-7s and you are my hero. My dream is to be able to do that but it seems that my chance is a long way off. I'm a college student so I'm broke; I have no garage to work in; I only have 1 car, my 7, and I have to drive it all year round; Upstate NY is not exactly rotary heaven and the car I build will only last me 3 months a year if I went through that much trouble. I would want 2 7s, a daily driver T2 and my dream rebuild to have as a collector. I quote John Lennon - "You may say I'm a dreamer. But I've got an RX-7" (slightly altered). Great job man. You're an inspiration and I'll give you a bazillion dollars to rebuild mine like that.
12-14-05, 12:14 PM
#65
Rotary Enthusiast
Thread Starter
Join Date: Aug 2002
Location: Kansas
Posts: 1,273
Likes: 0
Received 0 Likes
on
0 Posts
Originally Posted by snowball
are you going to use TII breaks?
and that is an amazingly clean build great job.
and that is an amazingly clean build great job.
12-14-05, 12:17 PM
#66
Rotary Enthusiast
Thread Starter
Join Date: Aug 2002
Location: Kansas
Posts: 1,273
Likes: 0
Received 0 Likes
on
0 Posts
Originally Posted by 1990RXHeaven
You're an inspiration and I'll give you a bazillion dollars to rebuild mine like that.
12-14-05, 12:47 PM
#67
IFO Forced Induction Slo
iTrader: (3)
Join Date: Mar 2004
Location: Houston
Posts: 1,315
Likes: 0
Received 0 Likes
on
0 Posts
It looks really good. I mean, there is hardly any compliment that justifies the effort you have put into the 7. I'm a couple of years from doing this to my S5 vert, and your project has really shown what actually has to happen. Great job!

 12-14-05, 05:05 PM
#69
Junior Member

Join Date: Nov 2005
Location: Ohio
Posts: 35
Likes: 0
Received 0 Likes
on
0 Posts
That is awesome. I love seeing build ups like this. Same thing I'm doing with my Drop top camaro.
I was gonna use a bedliner like you did till I found and seen this stuff 1st hand at a PRI show.
Its called LIZARD SKIN.
http://www.coollizard.com/default.html
Its sand-able,paint-able, a sounddeadner and thermal insolent all in one.
They had a hotplate for cooking at the PRI show with 2 sides of it coated and the middle uncoated. They tosses some ice cubes on the plate. the middle melted with in seconds. The two coated parts took a few minutes.
If someone would have told me this story id be like ya right. but seeing it 1st hand I was like dammm. Sold. I'll take 2 gallons. So I'm doing the complete Int. engine bay, and under the car also. Then I'll sand the bay smooth and paint it.
awesome RX man. can't wait to see the final product.
02-01-06, 09:16 PM
#70
Rotary Enthusiast
Thread Starter
Join Date: Aug 2002
Location: Kansas
Posts: 1,273
Likes: 0
Received 0 Likes
on
0 Posts
OK, time for more updates
More updates, pics, and commentary. As always, comments, questions, criticisms, & smart remarks welcome.
I left off with finishing up the Energy Suspension bushing installs on the various suspension components. I tell you, I did it all myself -- using pullers, vice, blood, sweat, and cursing... It was a lot of work and definitely a PITA -- however, it's done. Would I do it again? Maybe, maybe not. Definitely not anytime soon, but I just didn't have the trust in a local shop to do it the way I wanted and the quote I got just to push the old DTSS bushings out and push the new ones in was too high. So I did save quite a bit of money on this...
Anyway, on to pics:
Rear subframe & rear-end completely assembled (painted) and ready to install
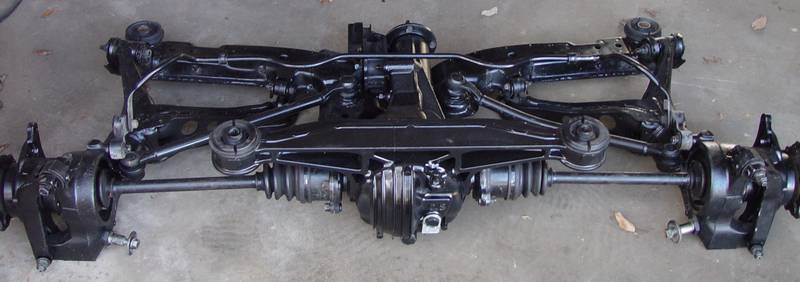
I enlisted my neighbor to come help me install the rear-end. I actually have done this once before by myself on the donor car, but since I had it painted now, I wanted to at least make a small attempt at not scratching the crap out of it right away. Plus, it's significantly easier to have an extra couple of hands to help balance it and raise the jack. This only took about 15 minutes to install. Took longer to get everything to line up. Since the whole system was disassembled, things needed to shift around a bit before all of the holes lined up. Anyway, here it is installed.
From the rear, underneath:
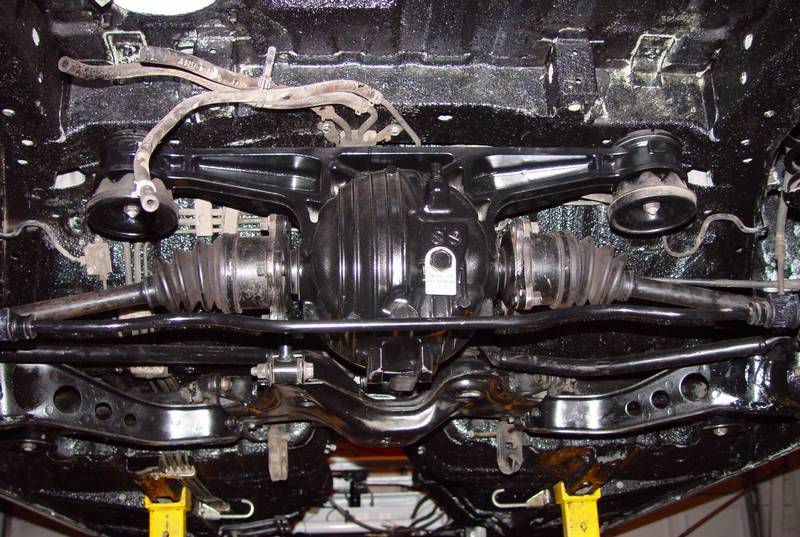
Right rear corner showing some different detail
Left rear detail
on to the front...
I left off with finishing up the Energy Suspension bushing installs on the various suspension components. I tell you, I did it all myself -- using pullers, vice, blood, sweat, and cursing... It was a lot of work and definitely a PITA -- however, it's done. Would I do it again? Maybe, maybe not. Definitely not anytime soon, but I just didn't have the trust in a local shop to do it the way I wanted and the quote I got just to push the old DTSS bushings out and push the new ones in was too high. So I did save quite a bit of money on this...
Anyway, on to pics:
Rear subframe & rear-end completely assembled (painted) and ready to install
I enlisted my neighbor to come help me install the rear-end. I actually have done this once before by myself on the donor car, but since I had it painted now, I wanted to at least make a small attempt at not scratching the crap out of it right away. Plus, it's significantly easier to have an extra couple of hands to help balance it and raise the jack. This only took about 15 minutes to install. Took longer to get everything to line up. Since the whole system was disassembled, things needed to shift around a bit before all of the holes lined up. Anyway, here it is installed.
From the rear, underneath:
Right rear corner showing some different detail
Left rear detail
on to the front...
02-01-06, 09:28 PM
#71
Rotary Enthusiast
Thread Starter
Join Date: Aug 2002
Location: Kansas
Posts: 1,273
Likes: 0
Received 0 Likes
on
0 Posts
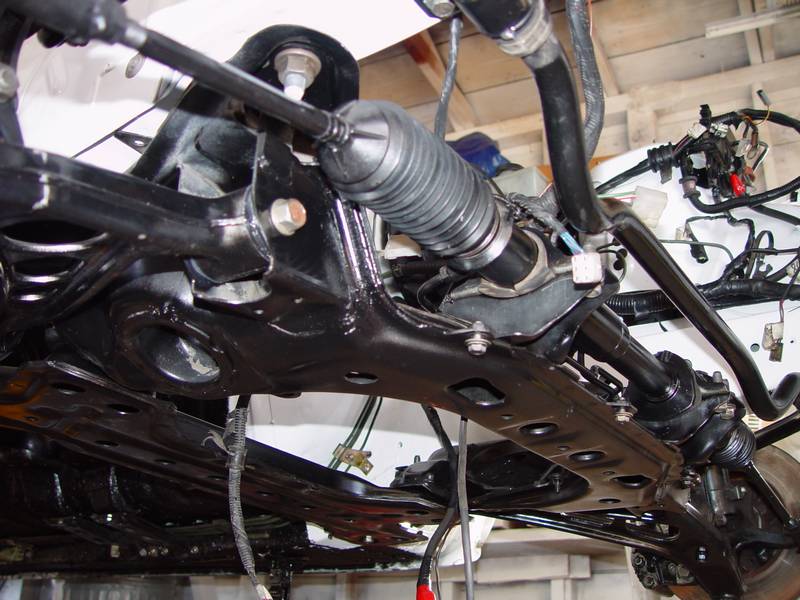
The front subframe is pretty uneventful also -- just bolt it up and bolt on the control arms. I actually realized I didn't get many pictures of this step, but for what it's worth, here are a couple.
Overhead shot of front subframe installed
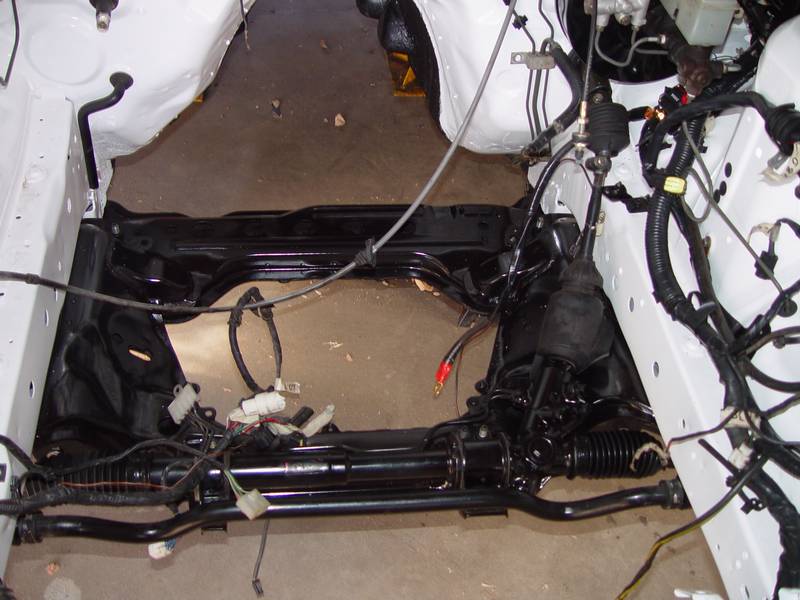
Right Front corner of front subframe installed
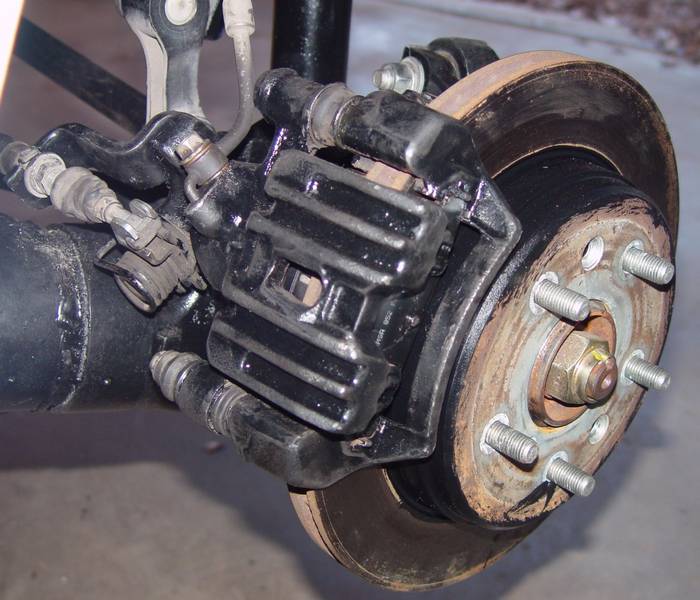
After the front and rear subframes were installed, I could move on to the brakes. I really hate messing with brakes -- for some reason I've become the brake "expert" among my friends. How I don't know, but that's another story. Anyway, I spent some time cleaning up the calipers and painting them. I bought Dupli-Color Caliper Paint with Ceramic (black) and painted all of the visible parts of the calipers. I also painted around the rotors the areas that might be somewhat visible through the wheels. I thought this "ceramic" paint might be a little more heat tolerant and durable -- but at the moment, I'm not impressed. As you'll see in some of the pictures, it seemed pretty easy to scuff it up -- and at that point I was irritated and didn't want to repaint them again.
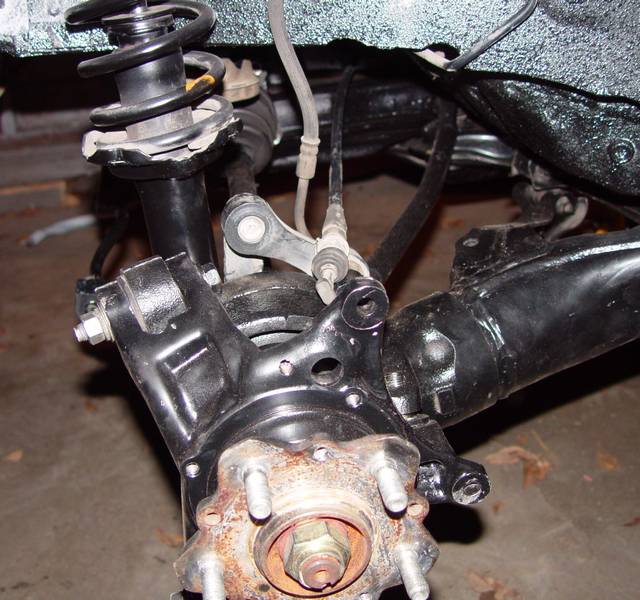
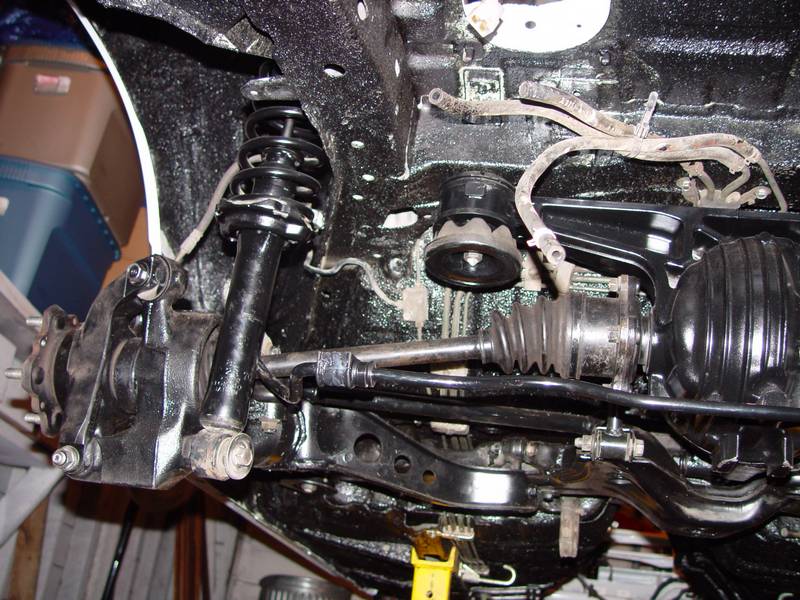
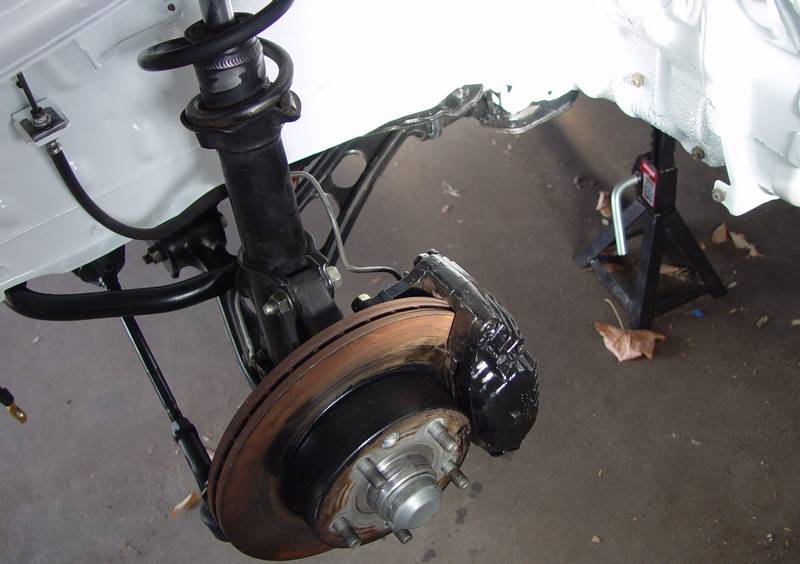
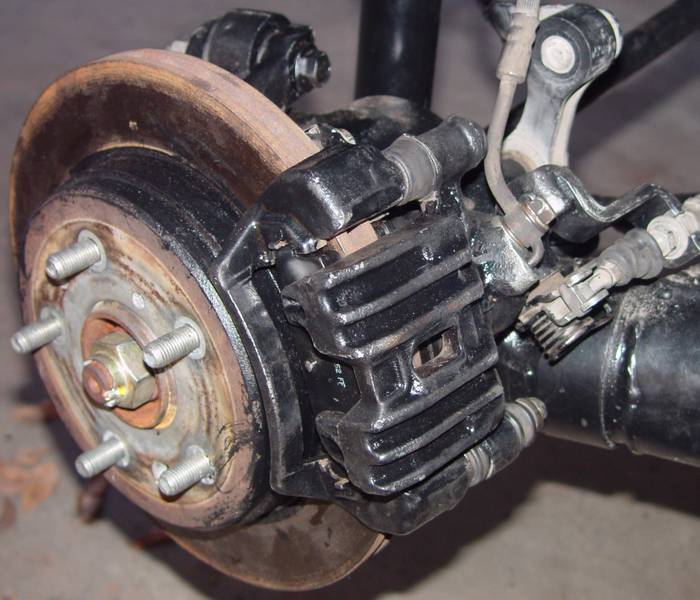
Here are a few shots of the front brakes installed.
Right Front:
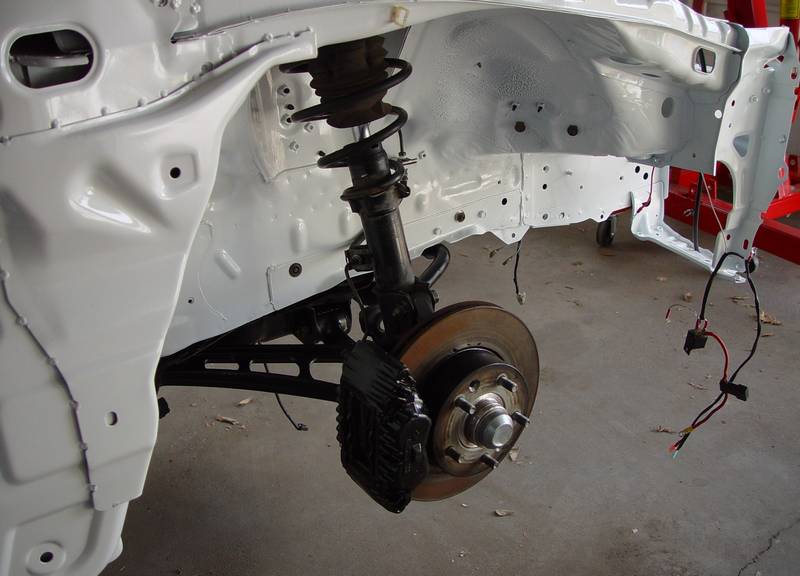
Right Front -- better detail:
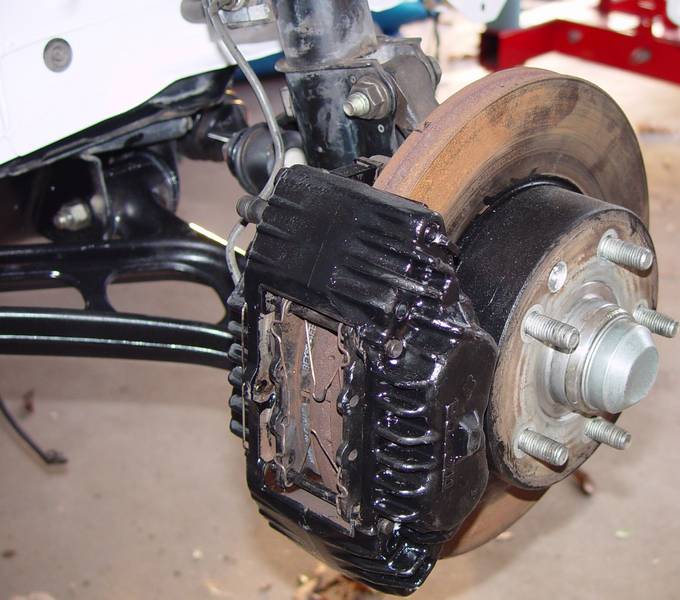
Left Front:
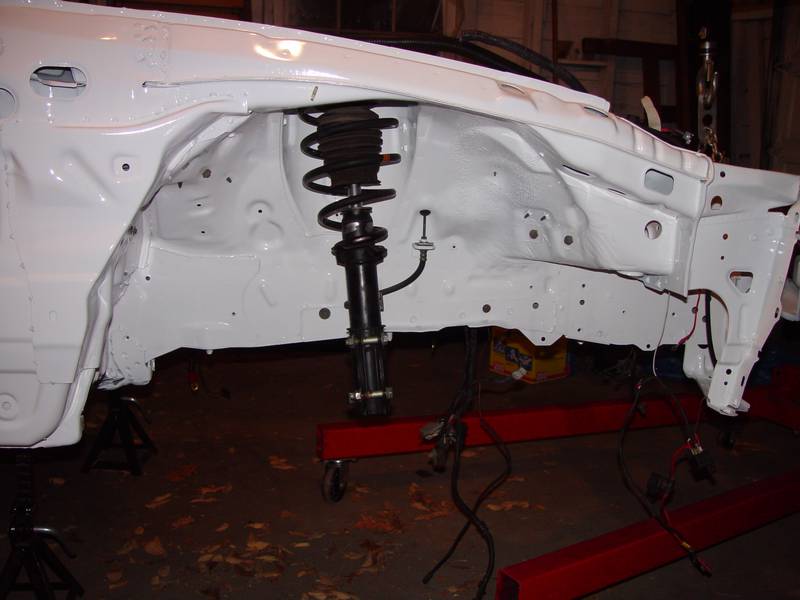
Through the course of this brake adventure I did learn a few things though. One of them being the ability to recognize the difference in the left and right front shocks. The mounting tab for the brake line actually does need to face in a certain direction. I put them on the wrong side a few weeks back, so I had to swap them -- no biggie, just one of those light-bulbs that went off. doh!
Overhead shot of front subframe installed
Right Front corner of front subframe installed
After the front and rear subframes were installed, I could move on to the brakes. I really hate messing with brakes -- for some reason I've become the brake "expert" among my friends. How I don't know, but that's another story. Anyway, I spent some time cleaning up the calipers and painting them. I bought Dupli-Color Caliper Paint with Ceramic (black) and painted all of the visible parts of the calipers. I also painted around the rotors the areas that might be somewhat visible through the wheels. I thought this "ceramic" paint might be a little more heat tolerant and durable -- but at the moment, I'm not impressed. As you'll see in some of the pictures, it seemed pretty easy to scuff it up -- and at that point I was irritated and didn't want to repaint them again.
Here are a few shots of the front brakes installed.
Right Front:
Right Front -- better detail:
Left Front:
Through the course of this brake adventure I did learn a few things though. One of them being the ability to recognize the difference in the left and right front shocks. The mounting tab for the brake line actually does need to face in a certain direction.
I put them on the wrong side a few weeks back, so I had to swap them -- no biggie, just one of those light-bulbs that went off. doh!
 02-01-06, 09:45 PM
#74
Rotary Enthusiast
Thread Starter
Join Date: Aug 2002
Location: Kansas
Posts: 1,273
Likes: 0
Received 0 Likes
on
0 Posts
Back to the rear brakes... I wish I could have said this went off as uneventful as the front brakes did, but I can't. I bought new pads for the rears because the old ones were definitely thin -- and I really didn't want to have to take them back off after a few months of driving. Okay, so swap the pads, smack them onto the rotors and install, right? Right! Riiiiiiiiight......
I've never had this much problem installing new pads before -- I began to think I was an idiot. The freaking pads were too thick -- or more specifically, I couldn't get the piston compressed enough to spread the pads enough to fit on the rotor. What the heck?! This doesn't make sense! For something that should have taken me about 15 minutes to do, I finally after a couple of days got it finished. I jacked with a big c-clamp trying to push the piston down with quite a bit of effort -- but to no avail. I even went and bought one of those cheapo piston compressors and that didn't work either (took it back). I remembered reading a thread recently about someone who rebuilt their calipers by popping the pistons out w/ compressed air. (Sorry, can't remember who that was, so take credit for it if it was you.) I figured what the heck, I can't get them compressed enough anyway, so might as well try it. After I popped them out, I realized that the rod they attach to was threaded, so I tried threading it back on -- and lo-and-behold, they went almost all the way into the caliper this time. Crap, all that time wasted and getting ticked and all I had to do was turn the freaking piston a couple of turns. Oh, and to make it even better, I realized THE NEXT DAY, that the shop manual says to do exactly that -- turn the pistons in. Ohwell, live and learn -- the moral of the story is even for the simplest tasks, it doesn't hurt to consult the shop manual.
Anyway, on to the pictures...
Left rear brakes installed
Right rear brakes installed
Side shot of car with brakes installed
Right front shot of car with brakes installed
The rear brakes went on fine after the piston compressing incident. They fit right on the rotor, bolted them up to the car fine, attached the lines, and attached the e-brake. All of that was nice and easy.
After all brakes were installed I obviously needed to fill and bleed the system. Since the system was completely dry, I knew this would take awhile and figured it would be a great husband/wife bonding experience! Okay, maybe not. My wife got pretty bored, but she didn't complain too much and I certainly appreciated the help. The fill and bleeding process went fairly smoothly -- fill the master cylinder, open the bleed screw, pump the pedal, and repeat. I won't bore you with the details, just went to each corner in order of distance from the master cylinder and bled until I had nice clean fliud coming out. Actually went back the next day and got more air out -- I think they're pretty firm now. Might need to get a few miles on them and do it again, but they're good enough for the moment.
Once the brakes were installed, there was only 2 things left -- put some rubber on that sucker and stick it on the ground!!
02-01-06, 10:00 PM
#75
Rotary Enthusiast
Thread Starter
Join Date: Aug 2002
Location: Kansas
Posts: 1,273
Likes: 0
Received 0 Likes
on
0 Posts
So that's what I did! And then being the impatient guy that I am realized crap, I forgot to put the gas tank under it first. Ohwell, no big deal, I'll just jack it up and bolt it up and lower it back down. I gave the tank a good brushing to clear the loose dirt -- sprayed a couple of spots with undercoating for protection and bolted it up and hooked up the lines. A couple of minor issues, but overall fairly uneventful.
And here is how it looks today -- right front, rubber on the ground
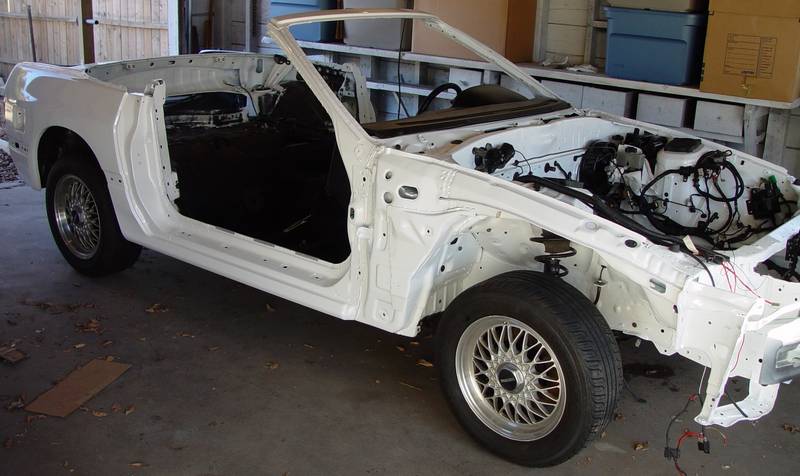
Right rear:
Oh, this was a shot I took before I put it on the ground, but thought it was mildly cool with the shadows -- so just a bonus shot for you.
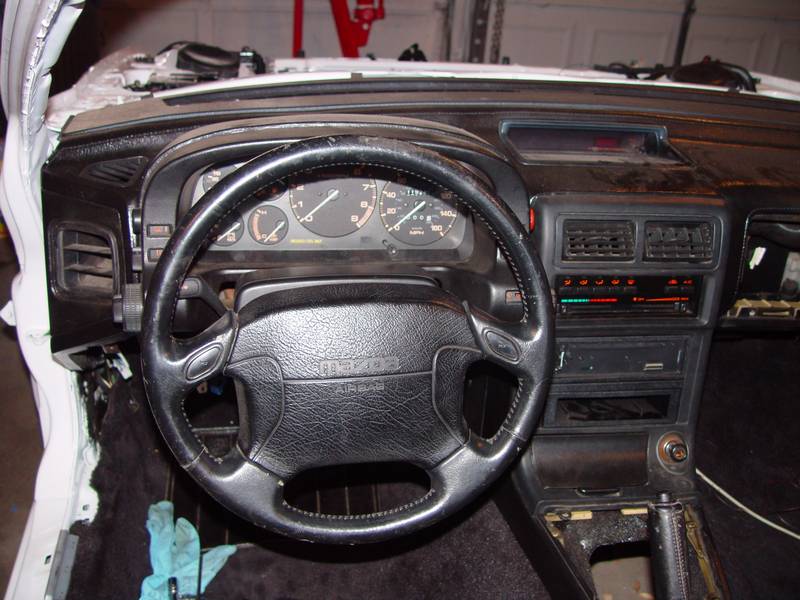
I also spent a few minutes and finished putting the guage cluster in the dash. Here's a pic of that:
Next steps are to finish putting the trunk plastic in place and then continue on the interior. There are also some things I can do in the engine bay, but I'm debating on when to actually drop the motor in. I need to clean it up a bit and I'm debating on painting it at that time too. Anyway, it's starting to look like a real car now -- at some point I'm going to have to bite the bullet and take the rest of the body panels in for paint, but that might be later this year when I have all of the interior and engine work done. I have a lot more details in the engine bay to figure out and fabricate than anywhere else, so I have a feeling that I'm going to get to a point again soon where visibly it looks like very little progress is being made. That's always a tough time because you don't see the fruits of your labor -- but I'll be sticking with it.
Thanks for looking so far -- if you have any questions or comments, let me know.
...and as always, I'll continue to update this thread with progress when I make it.
And here is how it looks today -- right front, rubber on the ground
Right rear:
Oh, this was a shot I took before I put it on the ground, but thought it was mildly cool with the shadows -- so just a bonus shot for you.
I also spent a few minutes and finished putting the guage cluster in the dash. Here's a pic of that:
Next steps are to finish putting the trunk plastic in place and then continue on the interior. There are also some things I can do in the engine bay, but I'm debating on when to actually drop the motor in. I need to clean it up a bit and I'm debating on painting it at that time too. Anyway, it's starting to look like a real car now -- at some point I'm going to have to bite the bullet and take the rest of the body panels in for paint, but that might be later this year when I have all of the interior and engine work done. I have a lot more details in the engine bay to figure out and fabricate than anywhere else, so I have a feeling that I'm going to get to a point again soon where visibly it looks like very little progress is being made. That's always a tough time because you don't see the fruits of your labor -- but I'll be sticking with it.
Thanks for looking so far -- if you have any questions or comments, let me know.
...and as always, I'll continue to update this thread with progress when I make it.