
Another head unit installation


Thread Starter
Full Member
Joined: Oct 2008
Posts: 66
Likes: 0
From: Costa Rica
Another head unit installation
Hi people.
Even if it was simple to do and there is nothing special with it, I'm posting this thread to show the stereo installation I did, just because I'm proud of having my car and every thing I do to it
Let start with the why... When I bought my car it had a very old, scratched and half functional JVC stereo and a horrible "walkie talkie" fixed antenna.
The old stereo was installed using the proper installation kit, but the frame was broken and the wiring was not that good. That caused the radio to dance all around the center console and some times it just shut off with the potholes.

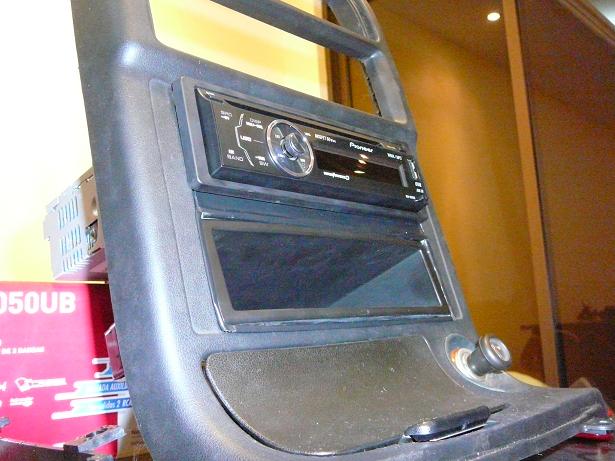
I wanted to get rid of both of them as soon as possible. What I really want to install is a "carputer", but as I don't have enough money or time right now, I decided to buy a Pioneer DEH-3050UB that is a good and dependable headunit to use in the meantime.

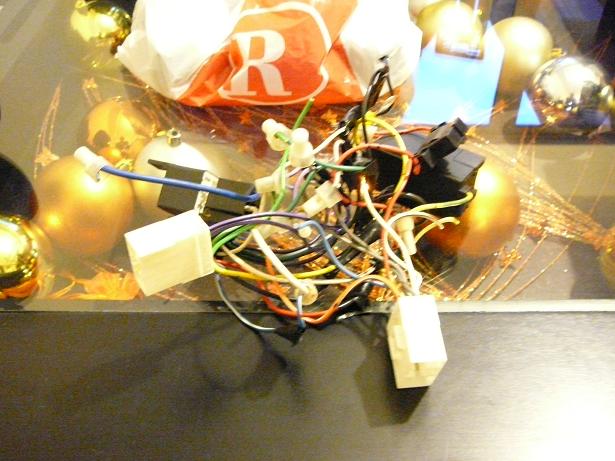
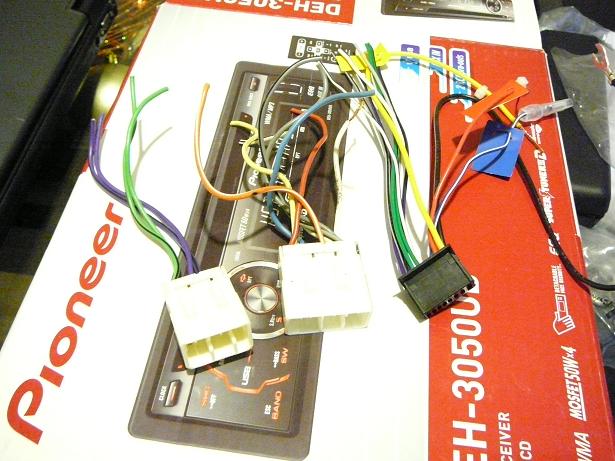
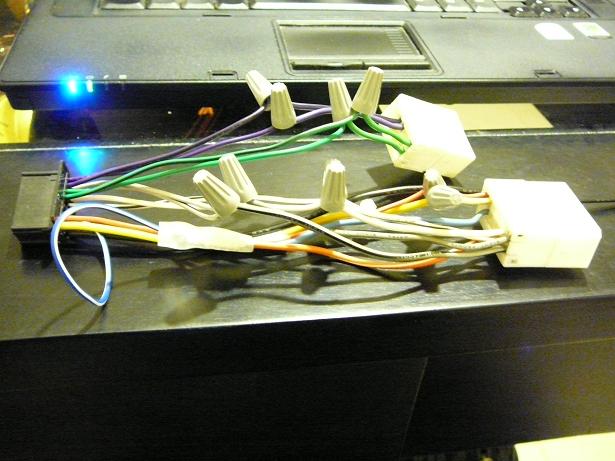
First thing I did was to do the wiring. I took off the radio and wiring and cut and cleaned the wires attached to the harness-end-connectors. As I will eventually change the headunit I decided not to solder the wires, but used screw-on wire connectors. These pictures show the original wire mess, the cut and cleaned wires and the finished radio-to-harness harness
Even if it was simple to do and there is nothing special with it, I'm posting this thread to show the stereo installation I did, just because I'm proud of having my car and every thing I do to it
Let start with the why... When I bought my car it had a very old, scratched and half functional JVC stereo and a horrible "walkie talkie" fixed antenna.
The old stereo was installed using the proper installation kit, but the frame was broken and the wiring was not that good. That caused the radio to dance all around the center console and some times it just shut off with the potholes.
I wanted to get rid of both of them as soon as possible. What I really want to install is a "carputer", but as I don't have enough money or time right now, I decided to buy a Pioneer DEH-3050UB that is a good and dependable headunit to use in the meantime.
First thing I did was to do the wiring. I took off the radio and wiring and cut and cleaned the wires attached to the harness-end-connectors. As I will eventually change the headunit I decided not to solder the wires, but used screw-on wire connectors. These pictures show the original wire mess, the cut and cleaned wires and the finished radio-to-harness harness
Thread Starter
Full Member
Joined: Oct 2008
Posts: 66
Likes: 0
From: Costa Rica
Then I tested the set up and everything worked right. The old harness had two different fuses, one for the memory line and the other for the power line. The memory line doesn't have high loads and the power line is already fused (factory fuse) so I didn't use those fuses in my harness.
Other unused item was a relay that was used to invert the signal from the stereo from positive to ground. That means that this stereo was used with the stock antenna for some time. As both my stereo and power antenna use a positive signal, no relay is needed.
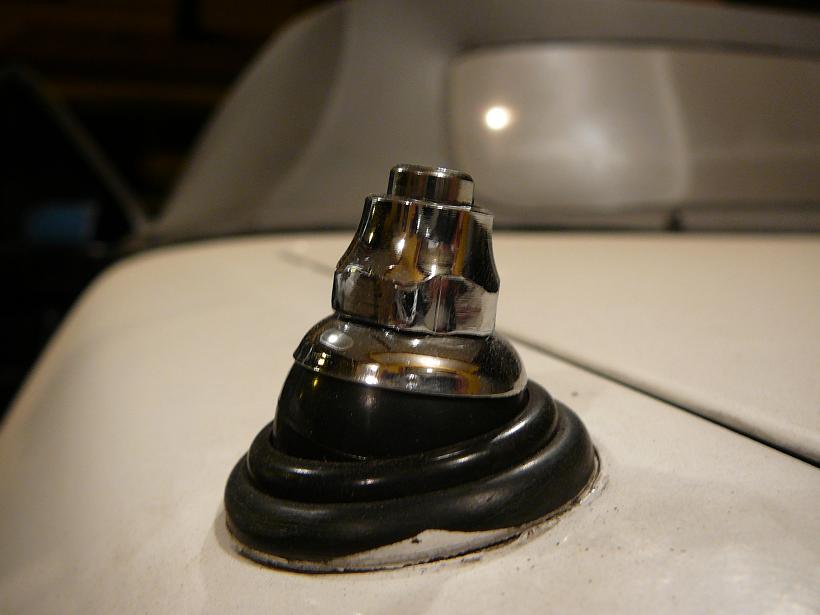
The next thing I did was to remove the crappy "walkie-talkie" antenna and install the generic power antenna I bought.
I found just one little detail, It seems that the car was painted and the antenna wasn't removed to do that, just masked with tape. When I removed the old antenna I found that the paint under the weather proof o-ring is in very very bad shape, so I decided to keep that o-ring and put the new ones on top of it. They fit fine and from a distance there is no way to know there are three o-rings.
I didn't have proper terminals at the time of the installation, so I took all the wire excess and hid it in the remaining space.
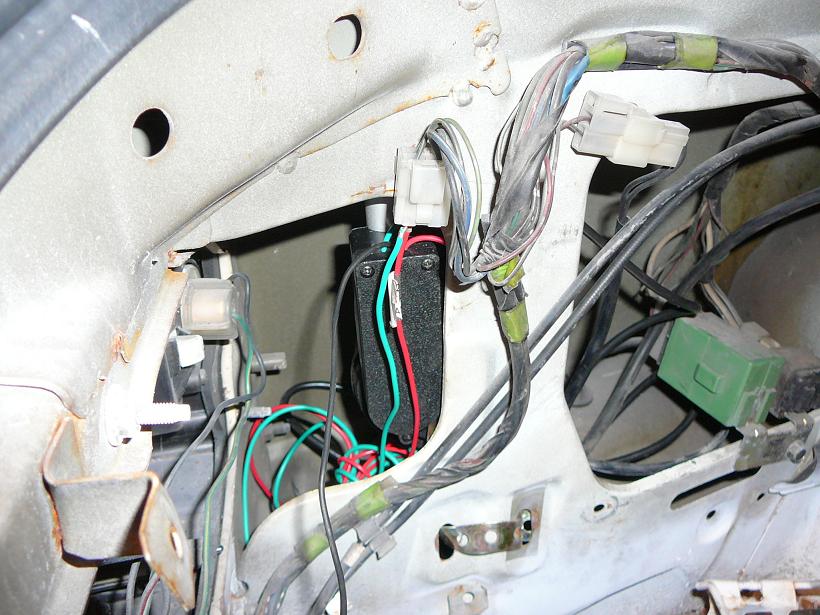
Other unused item was a relay that was used to invert the signal from the stereo from positive to ground. That means that this stereo was used with the stock antenna for some time. As both my stereo and power antenna use a positive signal, no relay is needed.
The next thing I did was to remove the crappy "walkie-talkie" antenna and install the generic power antenna I bought.
I found just one little detail, It seems that the car was painted and the antenna wasn't removed to do that, just masked with tape. When I removed the old antenna I found that the paint under the weather proof o-ring is in very very bad shape, so I decided to keep that o-ring and put the new ones on top of it. They fit fine and from a distance there is no way to know there are three o-rings.
I didn't have proper terminals at the time of the installation, so I took all the wire excess and hid it in the remaining space.
Thread Starter
Full Member
Joined: Oct 2008
Posts: 66
Likes: 0
From: Costa Rica
Having tested all electrical components I proceeded to build the central console. The previous installation had a flat cover in the unused DIN space. I hate dead spaces so I found a usable DIN pocket that I was able to fit with some cutting.
I used the old stereo external frame (the one that's put on the console and the stereo slides into) to snuggly hold the pocket and then secured it with some extra tape. I used black electrical tape to cover the frame borders, that are metallic and thus seem out of place if left that way.
This is a picture of the muck up I did to test fit both stereo and pocket in the center console.
Thread Starter
Full Member
Joined: Oct 2008
Posts: 66
Likes: 0
From: Costa Rica
It's not shown yet in the last picture, but the DIN pocket was drilled to allow a stereo jack extension to be passed trough. The DEH-3050 has a standard audio in plug at the back and a USB at the front, so I needed to pass an audio extension from the back to the front of the console. That way the DIN pocket can hold my GF iPhone and the extension cable without any issue.
Thread Starter
Full Member
Joined: Oct 2008
Posts: 66
Likes: 0
From: Costa Rica
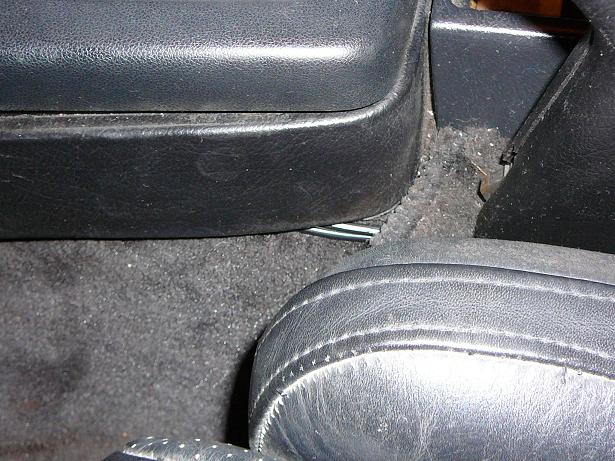
I don't have a subwoofer yet but I will install a little one in the spare tire compartment, so I ran a RCA cable from the center console to the spare tire compartment. It was a little difficult since I didn't want to lift all the carpet, what means that I didn't remove the seat and door rail guards.
I had to remove the rear console and all the "mini-woofers" and back trim to lift the rear of the carpet enough to pass the cable. The cable comes from the center console then goes under the shift lever surroundings and under the rear console, then gets under the carpet at the rear console rear screws. The only part at which the cable is visible is between the shift lever and the rear console, at drivers side... so only I can see it
Some pictures:
At center console
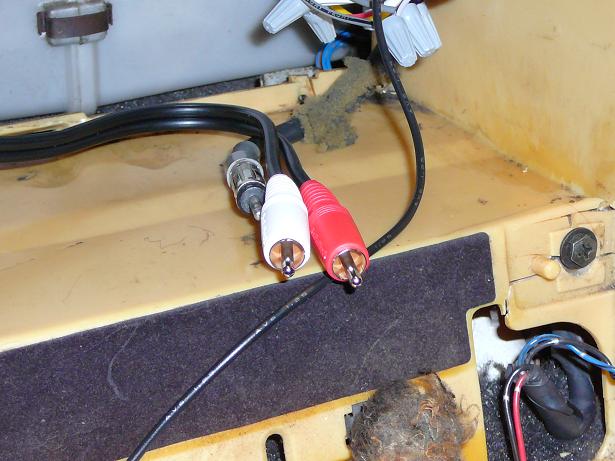
Between center console below shift lever and rear console. (installation was finished)
At spare tire compartment, just hanging over the headrest amplifier.
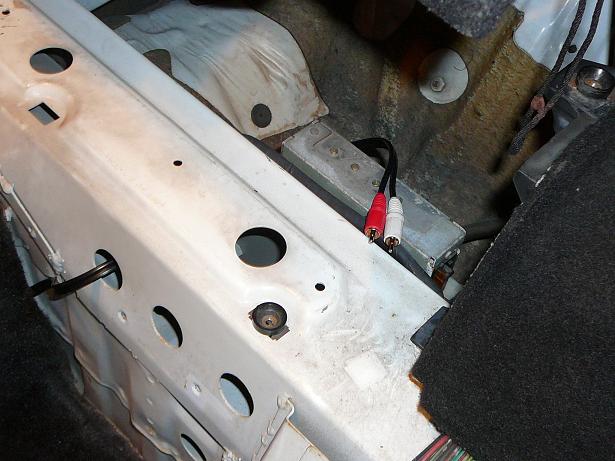
I had to remove the rear console and all the "mini-woofers" and back trim to lift the rear of the carpet enough to pass the cable. The cable comes from the center console then goes under the shift lever surroundings and under the rear console, then gets under the carpet at the rear console rear screws. The only part at which the cable is visible is between the shift lever and the rear console, at drivers side... so only I can see it
Some pictures:
At center console
Between center console below shift lever and rear console. (installation was finished)
At spare tire compartment, just hanging over the headrest amplifier.
Thread Starter
Full Member
Joined: Oct 2008
Posts: 66
Likes: 0
From: Costa Rica
With all that finished... last step was to connect everything and bolt everything up.
As Flash said in his previous post, screw-ons take more space in the intermediate harness and some times they get stuck on things, so I had some fun making everything fit properly.
But at the end everything was a success. These pictures show the almost finished product, since I hadn't the extension cable for the aux-in yet and there where a minor version 1.2 of some details, but the general idea remains the same.
Trending Topics
Thread Starter
Full Member
Joined: Oct 2008
Posts: 66
Likes: 0
From: Costa Rica
Regarding sound quality, even when all stock speakers are "physically fit", the front driver one is making lost of noise when there is some bass, since its membrane is hitting the door panel over it. I'll need to do something to give it more space. All other speakers are working fine for my usual volume settings, but I'm missing some real bass... I hope to install a little bazooka or subwoofer some time soon.
One curiosity about the headrest speakers: They where working fine with the previous stereo and did work fine when I first tested the new one. But some time after finishing the installation, the drivers headrest speaker control became "binary", that is, when I keep pressed the volume control up it goes too full volume or zero volume when I press it down, but don't increase or decrease gradually as used to be. The passenger controls and speakers work fine, increasing and decreasing gradually.
All in all, my new setup is working much better than the old one and I'm happy with it!
Thread Starter
Full Member
Joined: Oct 2008
Posts: 66
Likes: 0
From: Costa Rica

It didn't fit right as it was, I had to cut 4mm on each side and break out some tabs it had behind. To secure it I used the old stereo external case some silicone and tape... that's why you don't see any pictures of the back
pretty ugly!
nice headunit.. the headunit i put in my old car had a usb port too.. wish i pulled it b4 i got the rx7.. I loved that headunit, just get a 2 or 4gb usb memory stick, fill it up with MP3s and your set!
Thread Starter
Full Member
Joined: Oct 2008
Posts: 66
Likes: 0
From: Costa Rica
Thanks for the compliments!
To 10aeRX7, as I plan to change it some time, better not to solder the wires and cut them further when I install the CarPC I want.
To Hypertek, I'll have to buy a new USB memory stick as the one I have big enough is pink/purple with gray (a bargain I found some time ago...)
To 10aeRX7, as I plan to change it some time, better not to solder the wires and cut them further when I install the CarPC I want.
To Hypertek, I'll have to buy a new USB memory stick as the one I have big enough is pink/purple with gray (a bargain I found some time ago...)

Thread
Thread Starter
Forum
Replies
Last Post