
Upgraded Oil Pan?

Thread Starter
Joined: Oct 2006
Posts: 6,604
Likes: 17
From: Toronto, Canada
Upgraded Oil Pan?
I'm curious if anyone makes an upgraded oil pan with larger capacity and built baffles for the 20b? I'm gonna be moving my engine back with a custom frame so I no longer have to worry about fitting an oil pan in the stock frame.
thewird
thewird


Xcessive has an adapter for their FD pan. I have not used it so I can't comment on the fitment or quality. Just a little concerned about leaks since there is the introduction of another seam.
Online Store - Xcessive Manufacturing

Atkins offers a marine oil pan http://atkinsrotary.com/store/20B-Marine-Oil-Pan.html

Online Store - Xcessive Manufacturing
Atkins offers a marine oil pan http://atkinsrotary.com/store/20B-Marine-Oil-Pan.html
Last edited by Banzai-Racing; Feb 16, 2014 at 10:31 AM.

Full Member
Joined: Jun 2007
Posts: 195
Likes: 0
From: chch
Have you considered just having one built? it shouldn't cost you any more than an off the shelf item.
if your fitment means that you cant run a rear sump grab an s6 oil pickup and run a front sump.
Define large capacity? my one is 9L up to the flange on the sump
if your fitment means that you cant run a rear sump grab an s6 oil pickup and run a front sump.
Define large capacity? my one is 9L up to the flange on the sump
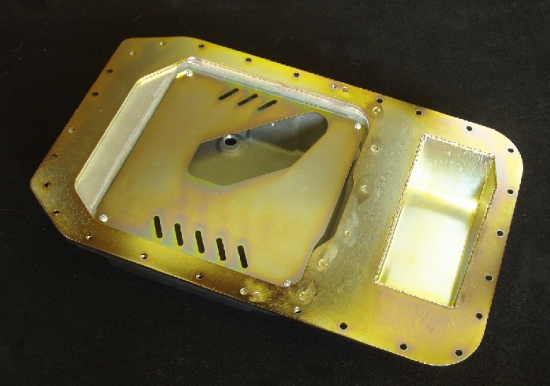
At some point. Will post pics of the one I built for my 20b a couple years ago. I built the base with a thick 1/2" aluminum plate that's designed to help support the block. I even reinstalled the factory low oil level sensor inside it. Overall capacity with my dual 24 row oil coolers is 12 quarts. It looks very similar to the Atkins marine unit. Yep my oil changes are nice and expensive.

Sooooo you decided to move the engine back huh????
Thread Starter
Joined: Oct 2006
Posts: 6,604
Likes: 17
From: Toronto, Canada
Yah, I want to fix the balance of the car. The center of gravity is too forward and high. I want to move the engine back maybe 6 inches and drop it by 2 inches or more.
thewird
thewird
Good for you. I guarantee you that difference will be very noticeably as you will have an even lower center of gravity than when stock since the engine will he sitting lower and you will have more weight towards the vehicles center of rotation with the tranny being back also. Plus its nice to have room for V-mounts and such.

Are you still running the T56? If so, I'm very curious as too the fitment of that tranny when you get started? It's something I wanna install myself. I already made clearance near my firewall for the fd auto bellhousing. I just need to make sure the bulkier tranny body will fit within the tunnel and that I can move its shifter as well. I just wish I had a junk tranny for test fitting purposes.
Trending Topics

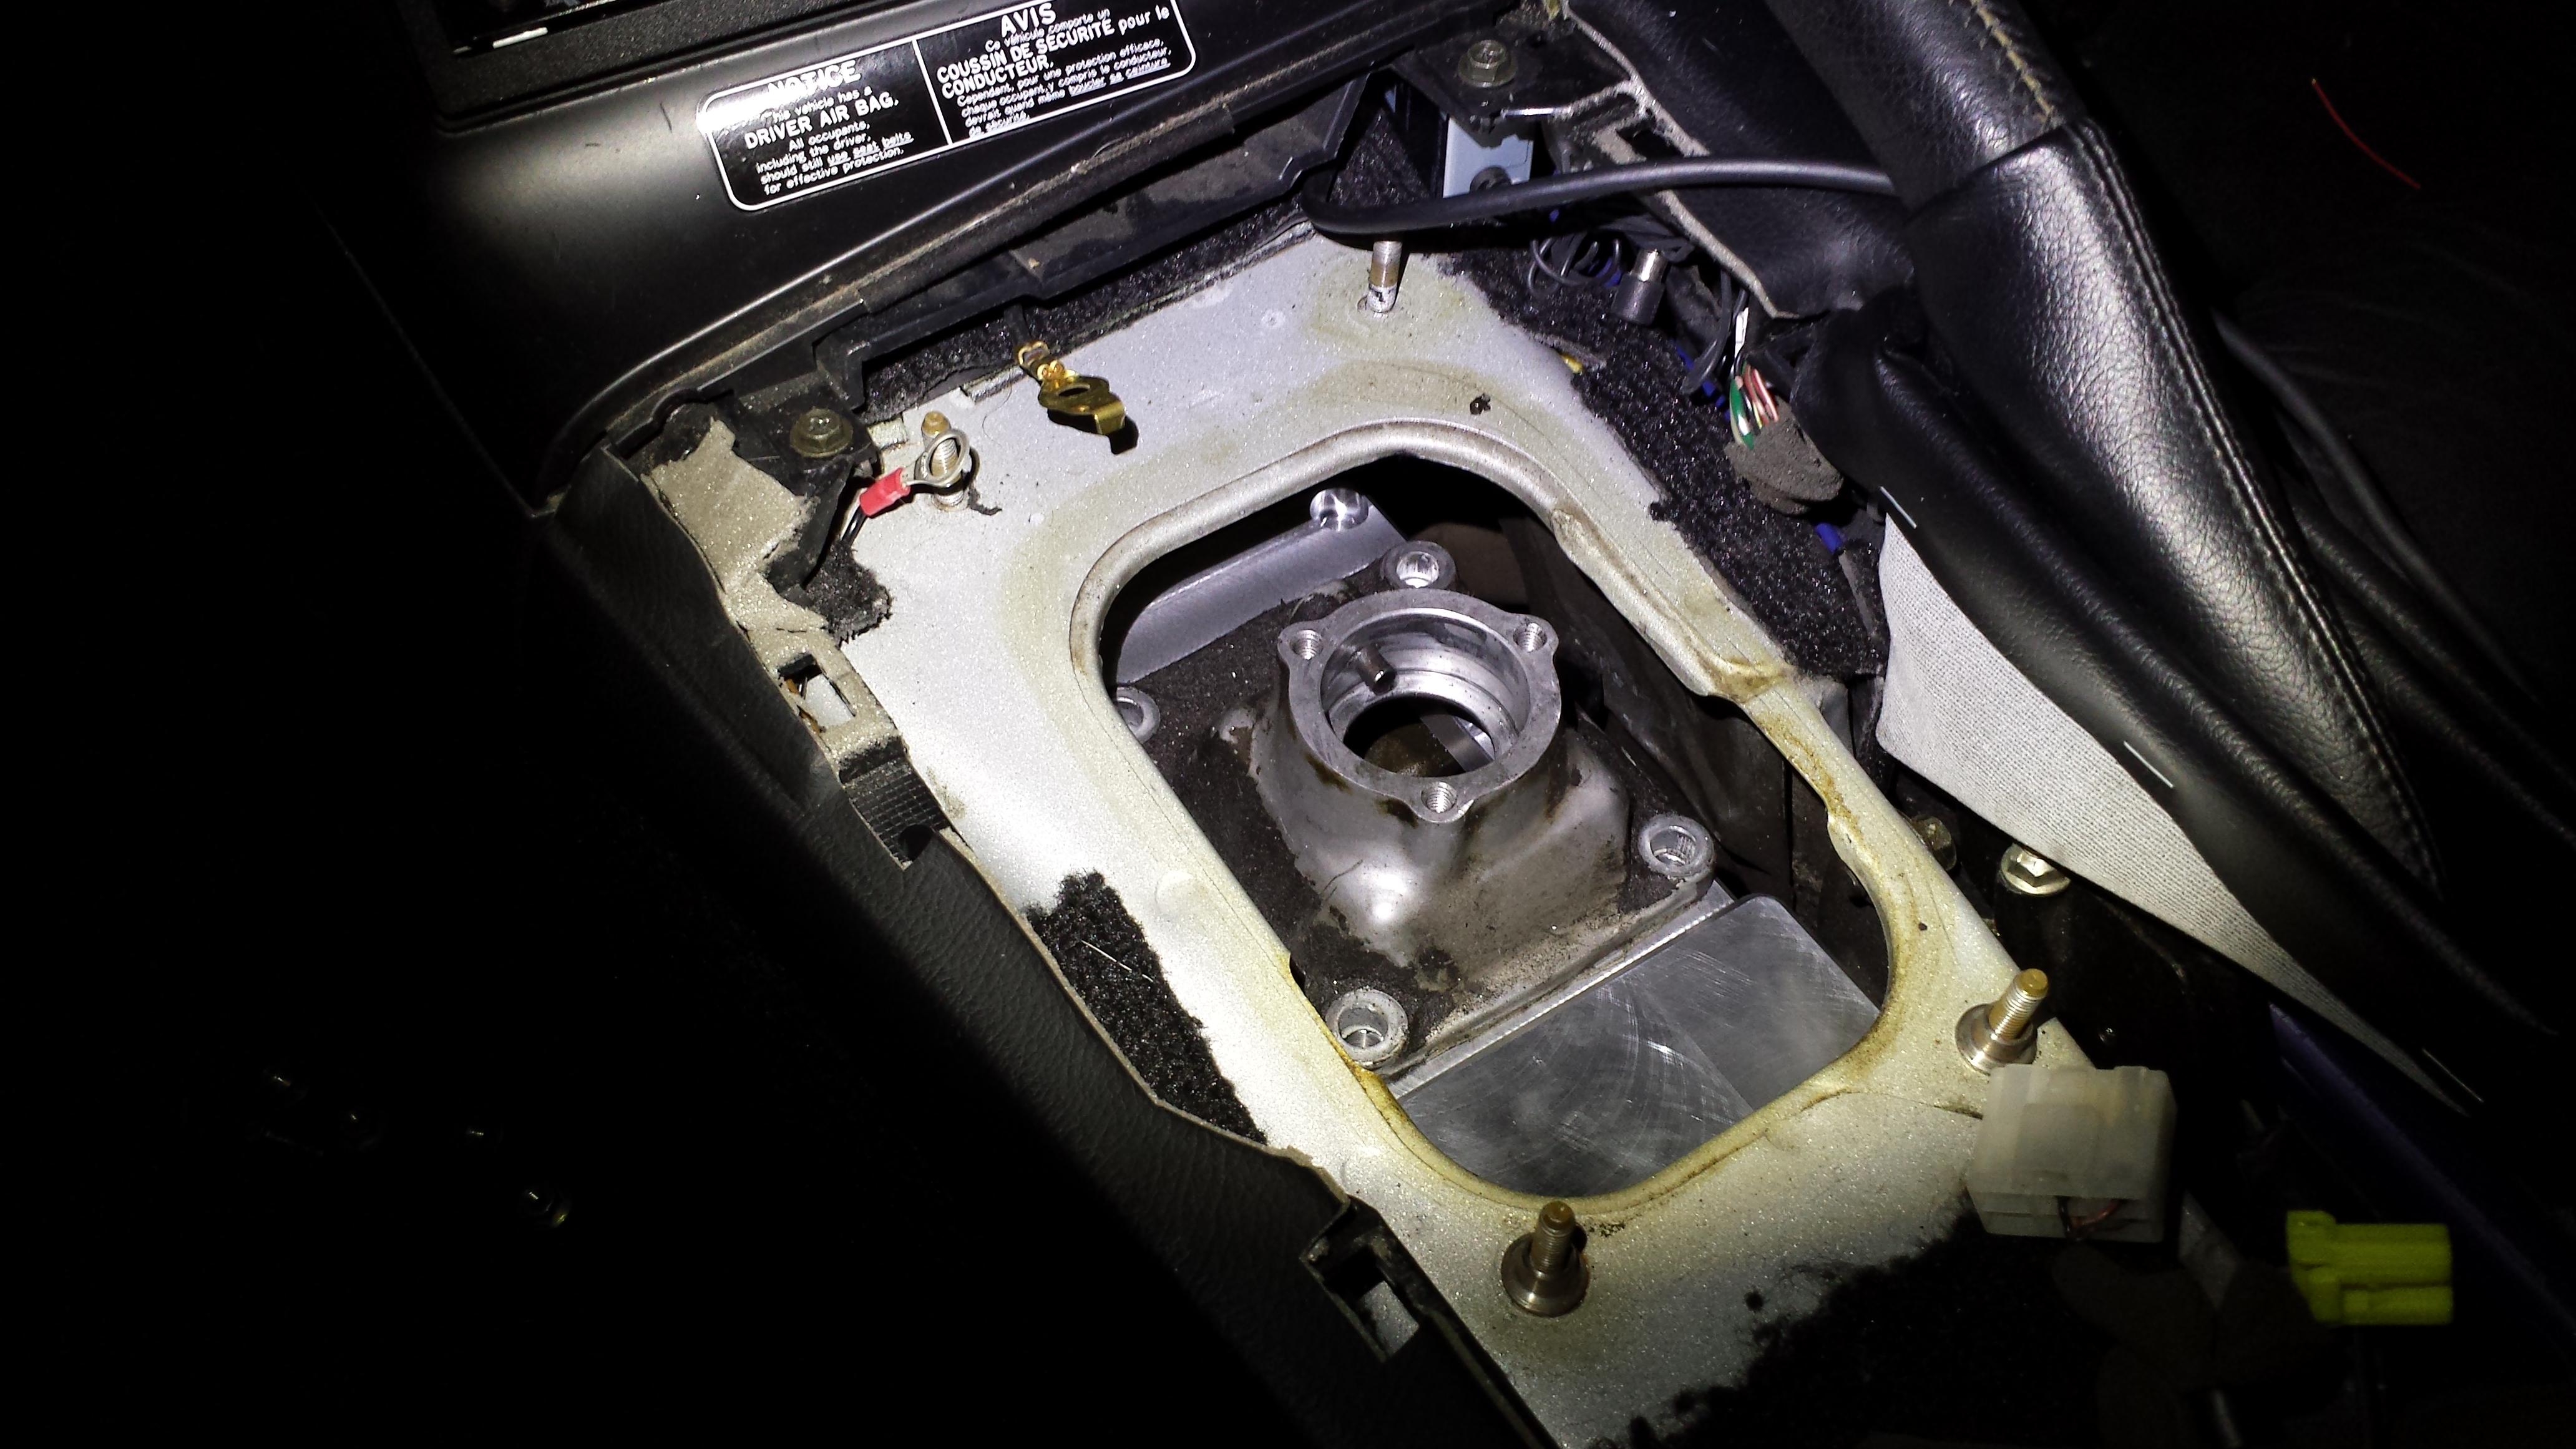
I should have done a write up years ago when I relocated mine (which was back in 2007 when I started my conversion). I did it the easy way with a Miata short shifter. Once you remove the front access cover, you will see a pivot mechanism with a role pin on top. I took the miata shifter and nylon bushing and found a 12 point ratchet socket that would perfectly fit the bushing. U then cut the bottom of the socket out so it would fit the contours of the pivot mechanism. I centered and welded the socket over that roll pin so it could still be removed if you needed to disassembled the transmission. I then took a secondary shifter mounting plate with the Miata shifter installed, rotated it 180degrees, and placed it in the socket. This left about 3/8" gap between the shifting plate and upper tranny mounting surface. From here, you can have a spacer made to fill the gap.


My engine is moved back pretty far so I had to move the shifter up front a bit to re-center it within the console.

My engine is moved back pretty far so I had to move the shifter up front a bit to re-center it within the console.
Weird. I just picked up 1/2 plate of aluminum. Im going to have it cut out if you need one pm me and i will see what i can do if your interested.
I didnt go back as car with my build so i had to make a adapter plate.

here is what i got my idea from after considering t-von's method but i had to modify the firewall to go back that far so i didnt want to do that.
This was teachermechanics idea from years ago that im reincarnating.
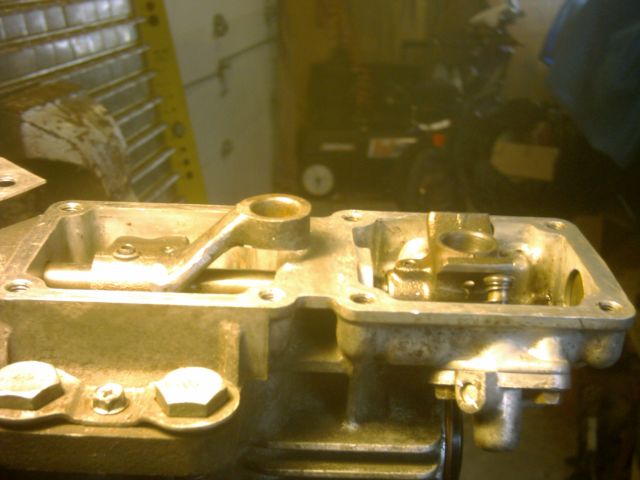

I didnt go back as car with my build so i had to make a adapter plate.


here is what i got my idea from after considering t-von's method but i had to modify the firewall to go back that far so i didnt want to do that.
This was teachermechanics idea from years ago that im reincarnating.


At 1st, I built separate tranny and diff mounts. While driving, I could never get rid of some vibrations (even with rubber bushings) so I wanted the refinement back and shortened the PPF.

Thread
Thread Starter
Forum
Replies
Last Post
rocker1337
2nd Generation Specific (1986-1992)
16
Sep 6, 2015 11:28 PM