
CMonakar Mandeville 20B GT42R Project


Joined: Mar 2001
Posts: 30,818
Likes: 656
From: FL-->NJ/NYC again!
Originally Posted by johnrxt2
that paint is very slick, did they block down the orange peel and buff? very cool car
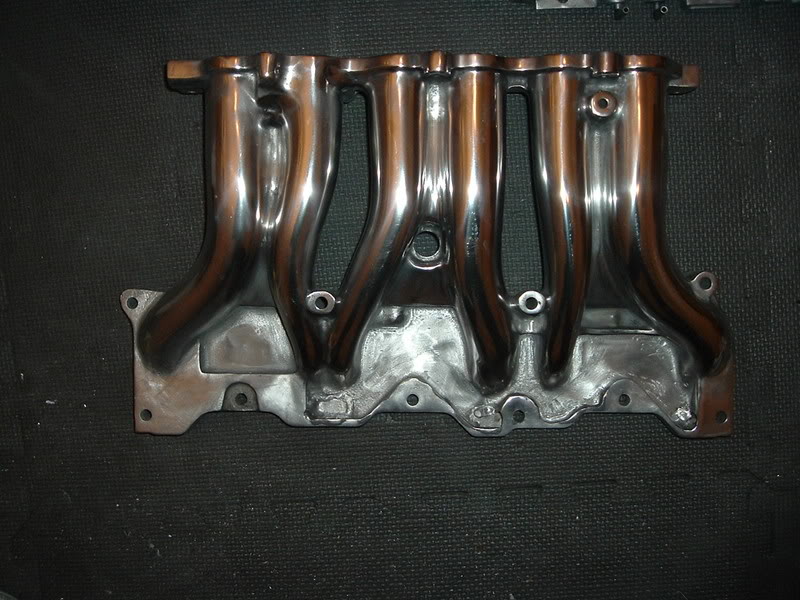
Re: the LIM, it's 'Chris Custom Modified' with lots of hours spent grinding away. He actually broke one of my die grinders in the process, it was difficult and time consuming.
John, pretty sure he's sticking with those seats.
Rotary Enthusiast
Joined: Jan 2003
Posts: 1,349
Likes: 2
From: planet earth
Originally Posted by GoodfellaFD3S
Not sure if I should steal Chris' thunder here, hehe. The car was stripped down to the metal, completely new paint job starting from scratch.
Re: the LIM, it's 'Chris Custom Modified' with lots of hours spent grinding away. He actually broke one of my die grinders in the process, it was difficult and time consuming.
John, pretty sure he's sticking with those seats.
Re: the LIM, it's 'Chris Custom Modified' with lots of hours spent grinding away. He actually broke one of my die grinders in the process, it was difficult and time consuming.
John, pretty sure he's sticking with those seats.
just kidding ......looks bitching though
Thread Starter
rebreaking things
Joined: Apr 2006
Posts: 866
Likes: 0
From: Manhattan
Originally Posted by felix_is_alive
dude .....very nice !!
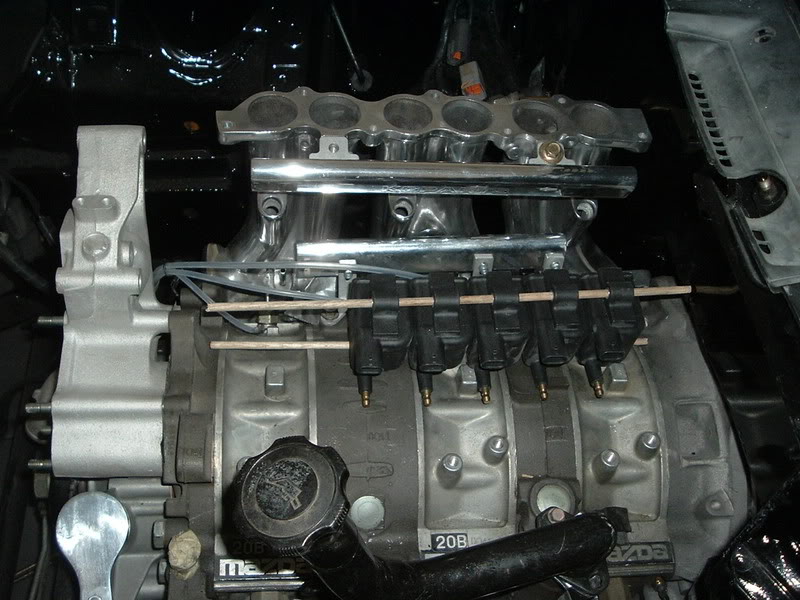
i also noticed that the 20B manifold is missing a port for PCV valve
 .
.
anyways nice setup .....also whats up with your`e LIM ...looks a bit different from mine ??
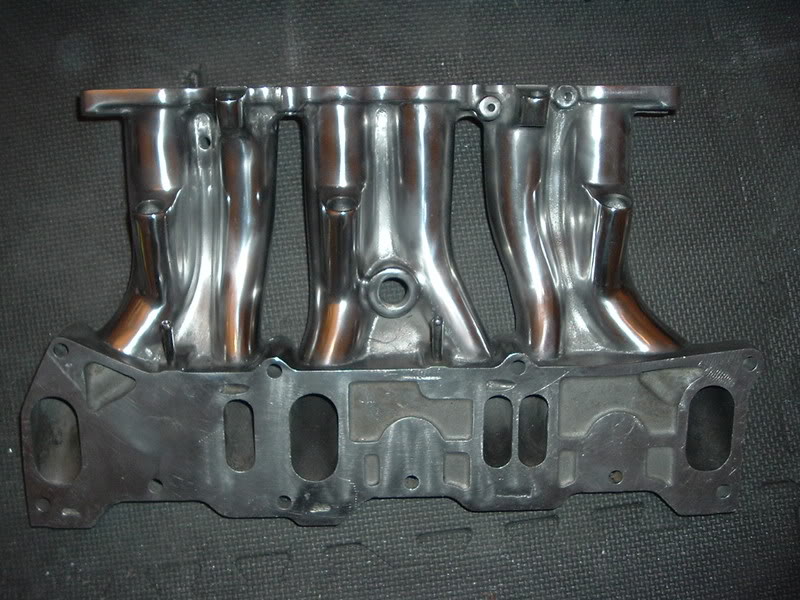
Here are a few incomplete shots of it below. I wasn't happy with how the finish was between the runners and on the flange, so I decided to send it off to be professional polished. I should have it back in a few weeks.


you wouldn`t happen to have any of those pre-modified manifolds lying around would ya ?? just kidding ......looks bitching though
johnrxt2 that paint is very slick, did they block down the orange peel and buff? very cool car

Here is a shot of the coils that I forgot to insert in my previous post:
Originally Posted by gmonsen
Is it really only two years? There were two pieces of **** in my garage for at least a year and to think they gave birth to this. What will you have to bith about? What will you have to think about. No more solutions to dream up.
Paint job looks awesome. Headers came out even better than in your drawings. Turbo mount will help torquing it over into the fender. Best overall engineered 20b I've seen. Carpets beautiful. Nice binding. Marine or leather? Now, if you'll just do something about the seats. Just kiddin'...
Beautiful work, Chris. And so frugal, too.
G
wow...been a while since i have seen you around. where is your old car?
Thread Starter
rebreaking things
Joined: Apr 2006
Posts: 866
Likes: 0
From: Manhattan
Originally Posted by gmonsen
Is it really only two years? There were two pieces of **** in my garage for at least a year and to think they gave birth to this.
What will you have to bith about? What will you have to think about. No more solutions to dream up.
Paint job looks awesome. Headers came out even better than in your drawings. Turbo mount will help torquing it over into the fender. Best overall engineered 20b I've seen. Carpets beautiful. Nice binding. Marine or leather? Now, if you'll just do something about the seats. Just kiddin'...
Beautiful work, Chris. And so frugal, too.
Thanks for the nice words Gordon. Glad you like it.

Thread Starter
rebreaking things
Joined: Apr 2006
Posts: 866
Likes: 0
From: Manhattan
Thanks. I ordered all the materials to make the wiring harness. The oil coolers, t-stat, and all the lines should arrive this weekend. All the polished parts are on in the mail. My goal is to have it running in one for or another in 6 weeks!
what is your oil cooler setup?
Joined: Mar 2001
Posts: 30,818
Likes: 656
From: FL-->NJ/NYC again!


Thread Starter
rebreaking things
Joined: Apr 2006
Posts: 866
Likes: 0
From: Manhattan
-2 Earl's 25 row coolers (13" wide) with -10AN inlets. The Mocal coolers are more expensive. I don't see how they are any better. I have to admit Mocal sounds cooler than Earl's though
-Mocal T-stat -10AN
-Mocal remote filter mount. -10AN fittings (that was difficult to find!)
-Earl's premium hose.
My goal for the weekend is to run fuel line from the two fuel pumps to the firewall, remove the stock fuel filter, mount the new aftermarket filters, mount the oil cooler cores, and filter mount.

Thread Starter
rebreaking things
Joined: Apr 2006
Posts: 866
Likes: 0
From: Manhattan
Any more pics for us?[/QUOTE]
I didn't get much done this weekend, but I did mount the oil coolers. It took a lot of time to get them to fit with the fittings on the top without compromising on ground clearance, wheel well clearance, depth (important for duct work), butchering the 99 spec rebar or contorting the oil lines. On Saturday I was about to give up and mount the fittings on the bottom. I decided to take a break and when I came back to it on Sunday I found a combination of angle, depth and height that worked . . .just barely.
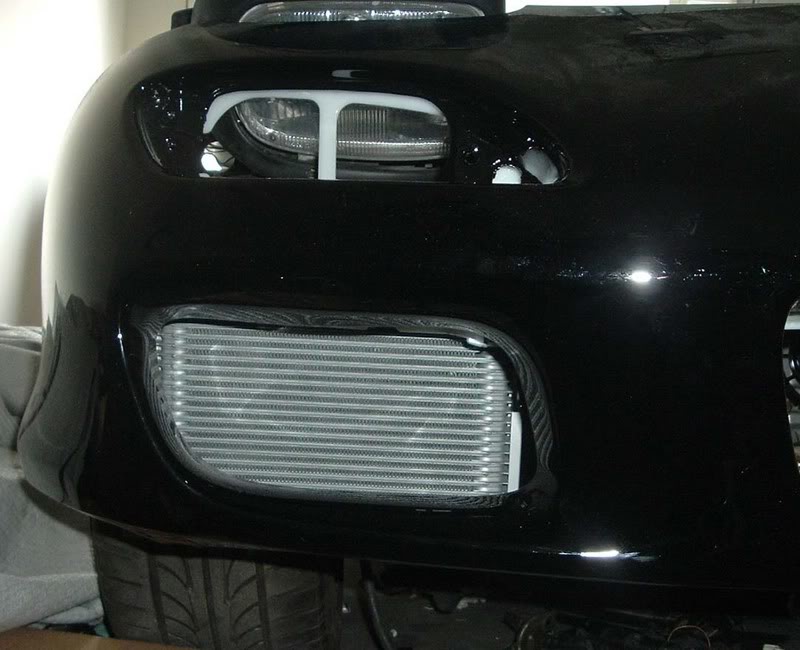
The headlight surrounds comes within a few mm of the inside oil fittings, but do not make contact. The headlight in the picture below is in the middle of the pop up stroke.
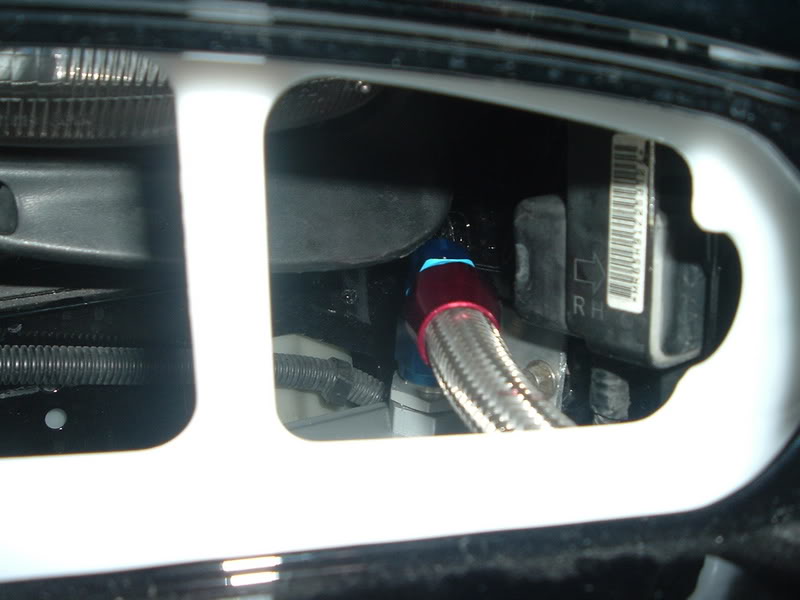
One of the things I didn't realize about the Earls coolers when I purchased them is that they have female ports with thread-in male adaptors. This adds a few mm of height to the fittings. The supplier said they switched to female style outlets because the male outlets have less surface area where they join to the cores and tend to break off from line tension on Earls and mocal cores. Today I ordered new 90 deg male fittings with 0-ring seals that can be connected directly to the female ports in the cores. This will provide a bit more clearance, reduce the weight, and eliminate 4 potential leak points.
I cut a little bit of material out of the rebar under the combo light openings so inside fittings did not have to be in contact with airbag sensors. Otherwise I did not modify it. The white part of the rebar is pretty soft. I hope it has a relatively high melting point, because the lines will be in direct contact with it in places.
More to come . . .
Thread Starter
rebreaking things
Joined: Apr 2006
Posts: 866
Likes: 0
From: Manhattan
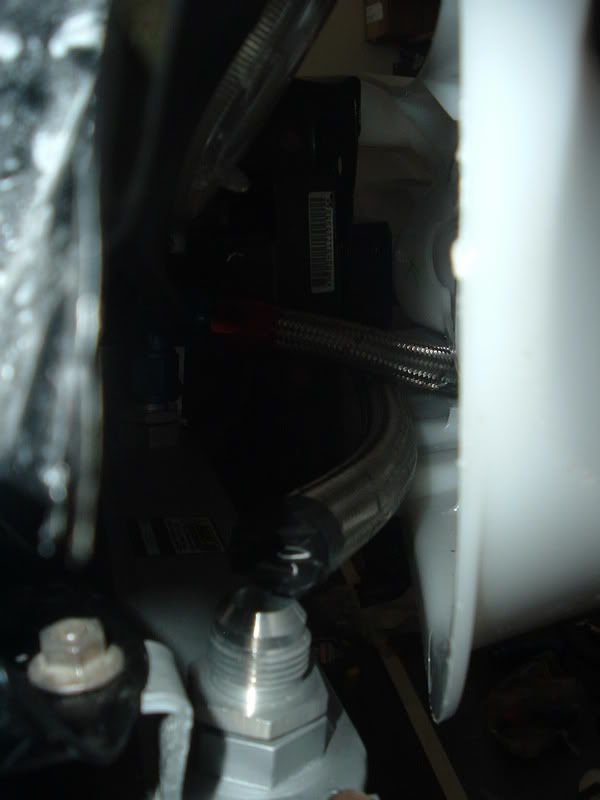
The new lower profile oil cooler fittings finally arrived today. They really improved the clearance between the fittings and headlights.
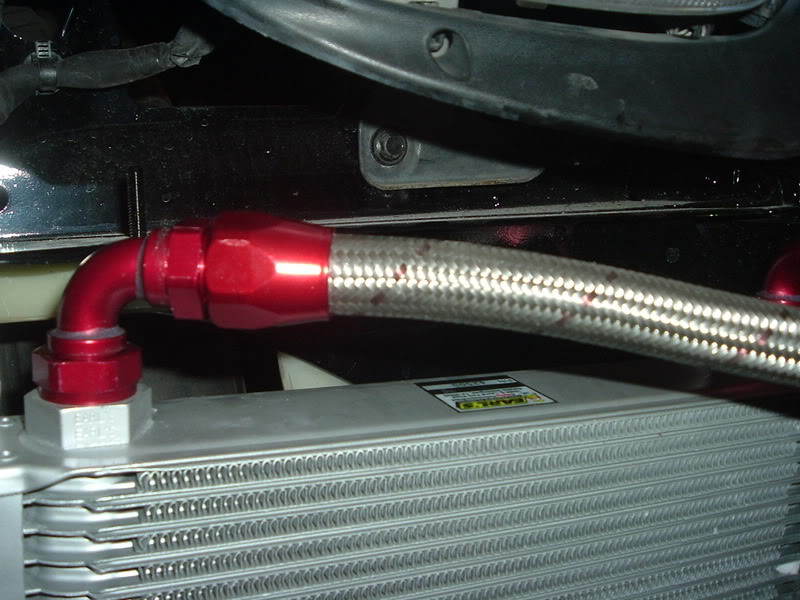
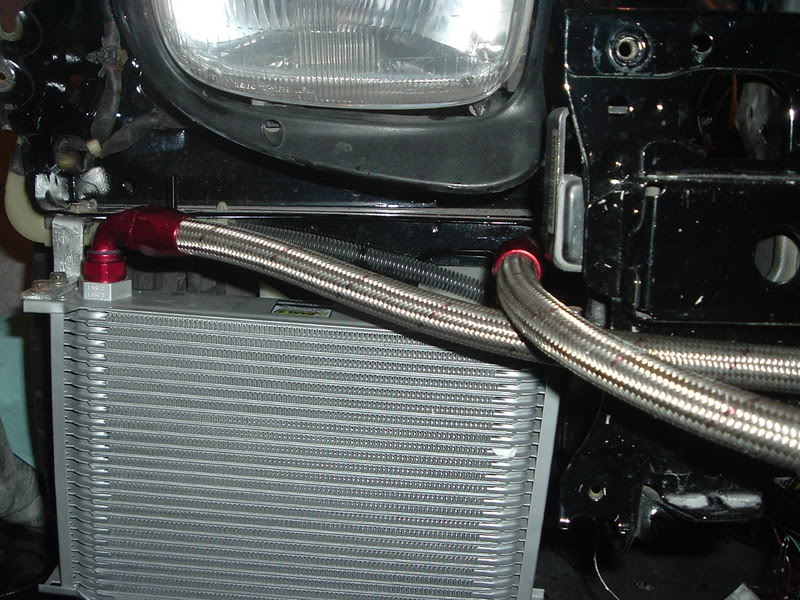
Here is a shot of the lines with the rebar off. The lines obviously look pretty long, but with the bar in place there are no sharp bends and there isn't much slack. The oil cooler lines go into the engine compartment at the end of the driver side frame rail. I am planning on mounting the T-stat where the stock battery was located. I don't have any room between the frame rails because the radiator and intercooler take up all the space.
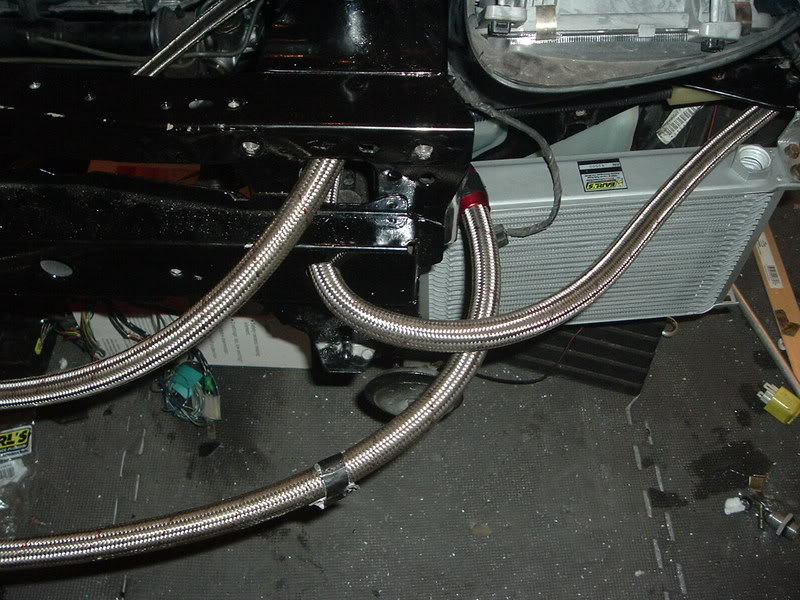
Here is a shot of the lines with the rebar off. The lines obviously look pretty long, but with the bar in place there are no sharp bends and there isn't much slack. The oil cooler lines go into the engine compartment at the end of the driver side frame rail. I am planning on mounting the T-stat where the stock battery was located. I don't have any room between the frame rails because the radiator and intercooler take up all the space.
Last edited by CMonakar; May 19, 2007 at 09:58 PM.
Thread Starter
rebreaking things
Joined: Apr 2006
Posts: 866
Likes: 0
From: Manhattan
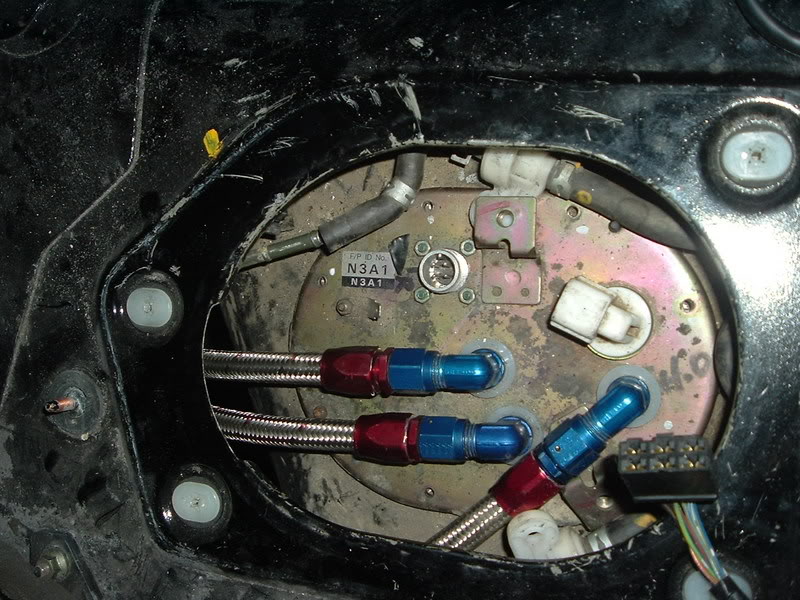
I also did some work on the fuel system. I removed the stock fuel lines and installed the two feed lines, the return, and the fuel filters.
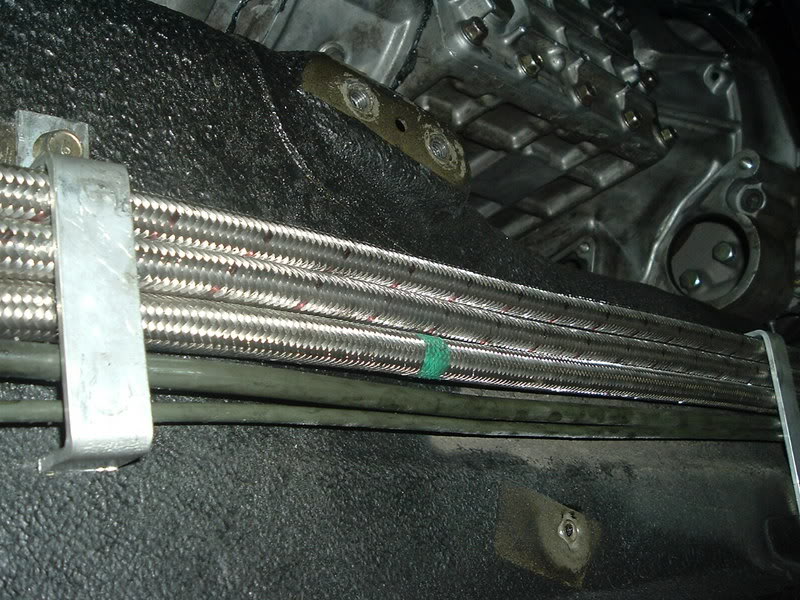
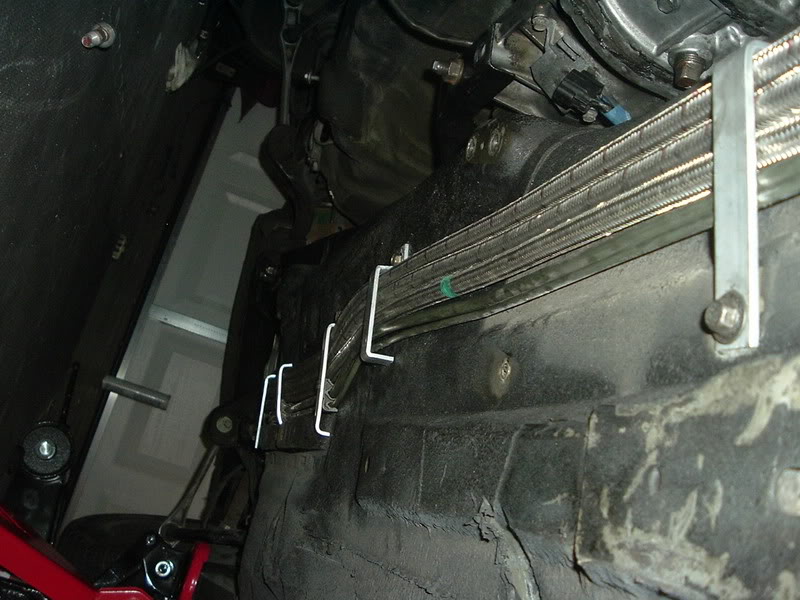
I removed the stock nylon line separators from the stock brackets, removed the portion that was for the feed and return lines and installed them on the new brackets to make sure the brake line doesn't rub against the remaining hard line.
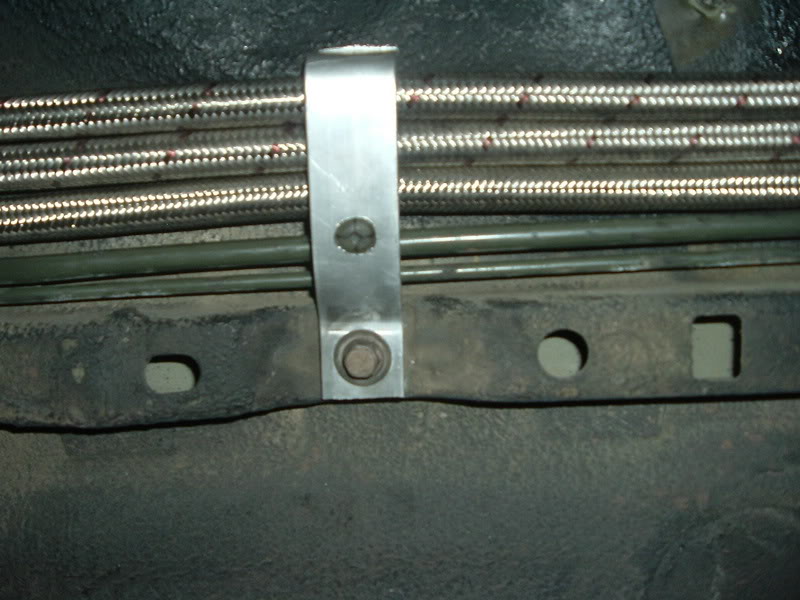
To avoid confusion I used a different style line for the feed(s) and return. The feed lines have a bronze stripe and the return is solid. The fuel filters are mounted on the firewall a few inches below where the stock hard line ends were. Unfortunately my camera ran out of batteries before I could snap a photo of them.
I removed the stock nylon line separators from the stock brackets, removed the portion that was for the feed and return lines and installed them on the new brackets to make sure the brake line doesn't rub against the remaining hard line.
To avoid confusion I used a different style line for the feed(s) and return. The feed lines have a bronze stripe and the return is solid. The fuel filters are mounted on the firewall a few inches below where the stock hard line ends were. Unfortunately my camera ran out of batteries before I could snap a photo of them.
Last edited by CMonakar; May 19, 2007 at 10:03 PM.
Thread Starter
rebreaking things
Joined: Apr 2006
Posts: 866
Likes: 0
From: Manhattan


Senior Member
Joined: Jun 2001
Posts: 599
Likes: 0
From: Austin, TX
Looks really nice, Chris. Glad to see you went with the stainless braided hose.
Question - are the two stock lines you left in place (alongside the new fuel lines) for the ABS system?
Question - are the two stock lines you left in place (alongside the new fuel lines) for the ABS system?
I also did some work on the fuel system. I removed the stock fuel lines and installed the two feed lines, the return, and the fuel filters.


I removed the stock nylon line separators from the stock brackets, removed the portion that was for the feed and return lines and installed them on the new brackets to make sure the brake line doesn't rub against the remaining hard line.

To avoid confusion I used a different style line for the feed(s) and return. The feed lines have a bronze stripe and the return is solid. The fuel filters are mounted on the firewall a few inches below where the stock hard line ends were. Unfortunately my camera ran out of batteries before I could snap a photo of them.
I removed the stock nylon line separators from the stock brackets, removed the portion that was for the feed and return lines and installed them on the new brackets to make sure the brake line doesn't rub against the remaining hard line.
To avoid confusion I used a different style line for the feed(s) and return. The feed lines have a bronze stripe and the return is solid. The fuel filters are mounted on the firewall a few inches below where the stock hard line ends were. Unfortunately my camera ran out of batteries before I could snap a photo of them.
Thread Starter
rebreaking things
Joined: Apr 2006
Posts: 866
Likes: 0
From: Manhattan
All my polished parts arrived. Here is a teaser shot. I will post more later.
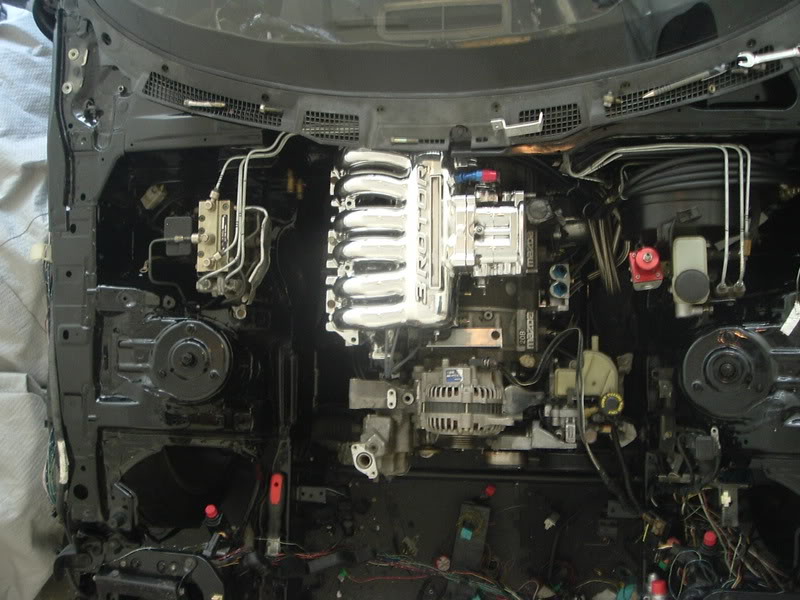
It's actually starting to look like a car rather than a pile of parts. My goal is to get it started before the end of June.