
20b Turbo track car build (England)


Love the fab work but really hate the exhaust. seems unnecessary to have two mufflers and it looks like it chokes down quite a bit at the point where it splits into the mufflers. Also, seems like there isn't any means of the radiant heat from the mufflers escaping which would make the cabin quite warm.
Thread Starter
Grippin' not Driftin'
Joined: Jul 2011
Posts: 149
Likes: 0
From: England
Love the fab work but really hate the exhaust. seems unnecessary to have two mufflers and it looks like it chokes down quite a bit at the point where it splits into the mufflers. Also, seems like there isn't any means of the radiant heat from the mufflers escaping which would make the cabin quite warm.
There are a few tracks over here that require 90 decibel limits, believe me, if we didn't have to have them we wouldn't, on
the plus point we've used v-clamps and have two straight through pipes to take the cans place for the shows and mega noise events !

With regard to the heat issues, they are still outside the car, we've kinda just raised the floorpan over them.
Last edited by Sicknote; Jun 5, 2013 at 02:46 PM.


Thread Starter
Grippin' not Driftin'
Joined: Jul 2011
Posts: 149
Likes: 0
From: England
Thread Starter
Grippin' not Driftin'
Joined: Jul 2011
Posts: 149
Likes: 0
From: England
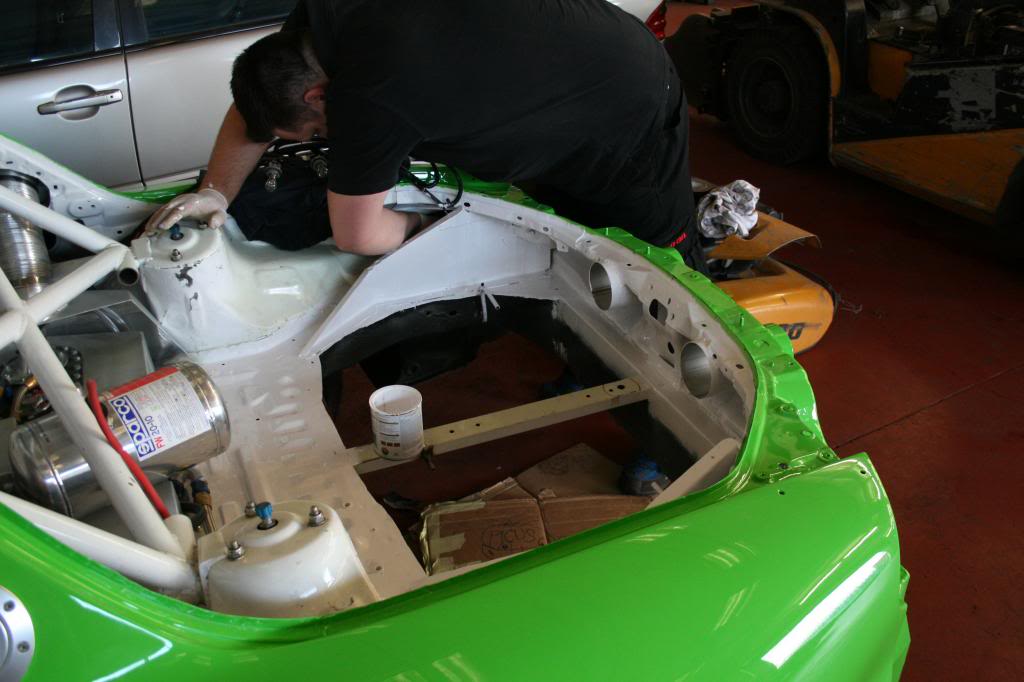
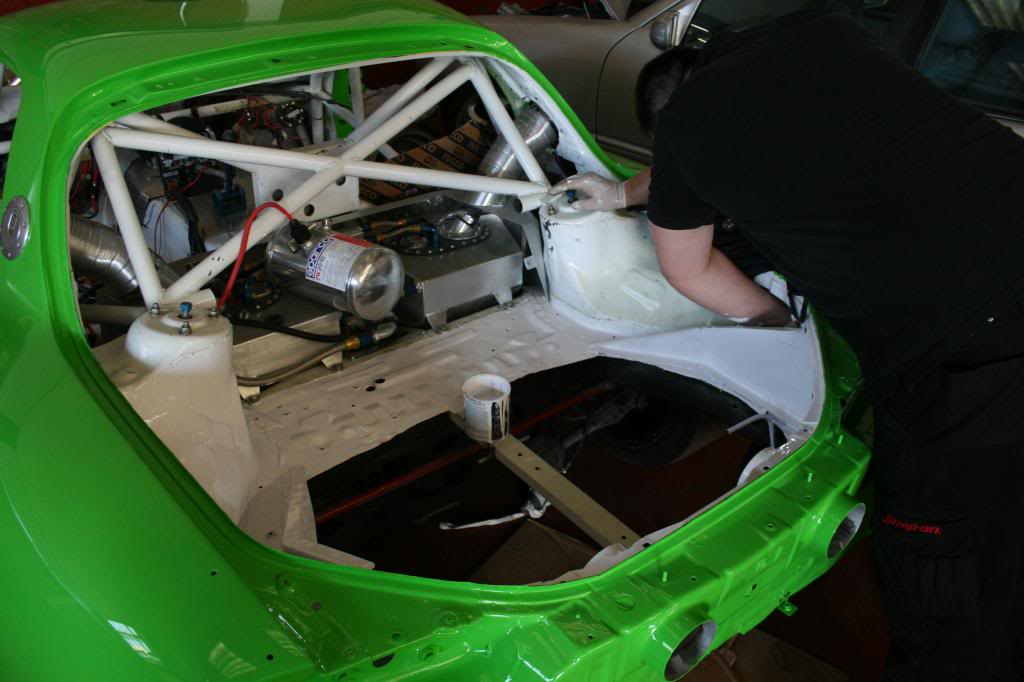
Started a little bit of work today, door brackets, fuel filler pipes and caps fitted and the roof scoop is now
bonded to the roof, the black and green theme is gunna look epic.
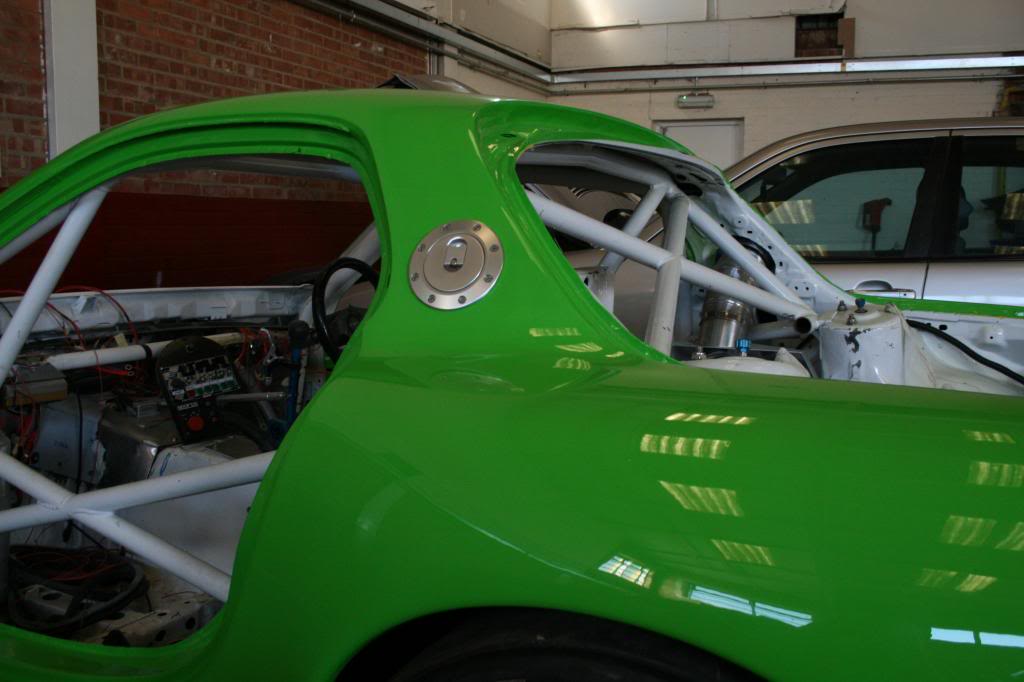
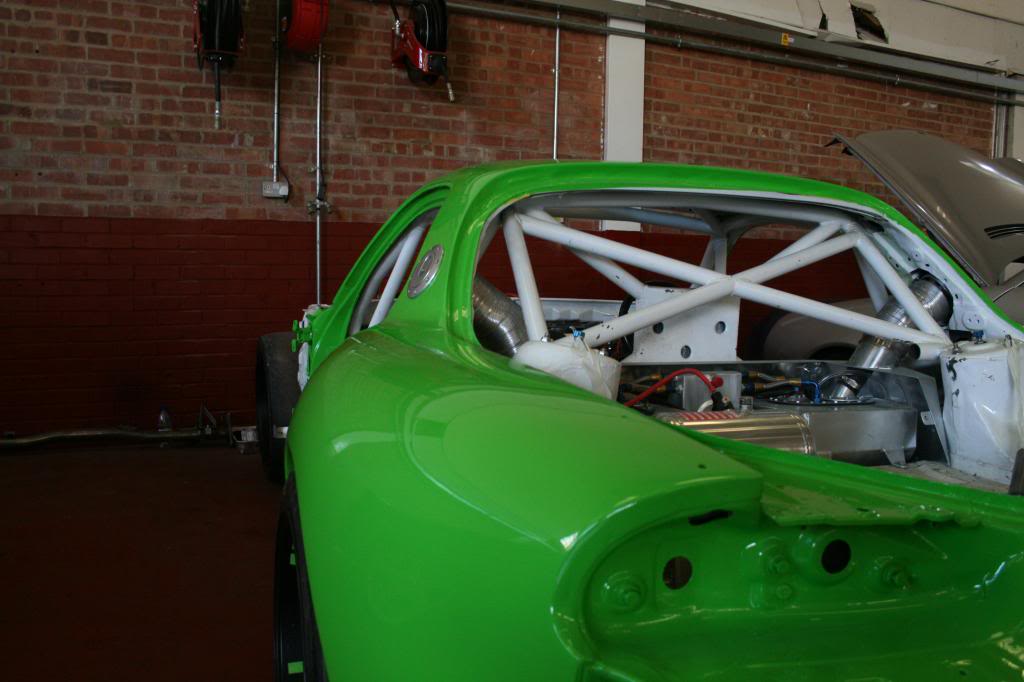
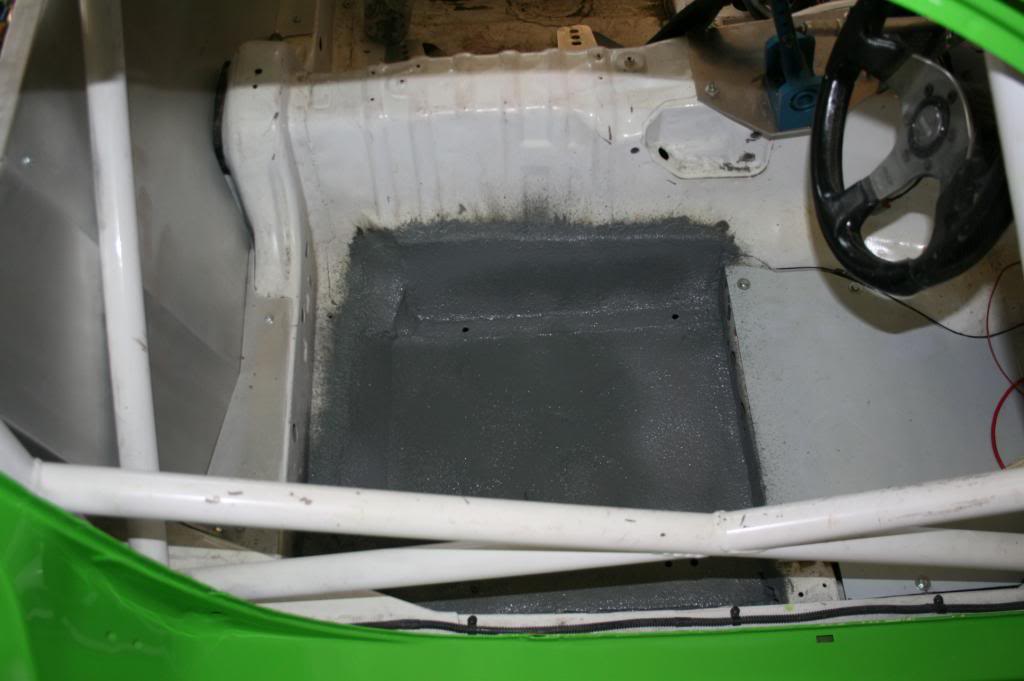
The drivers floor has been prepped and sealed.
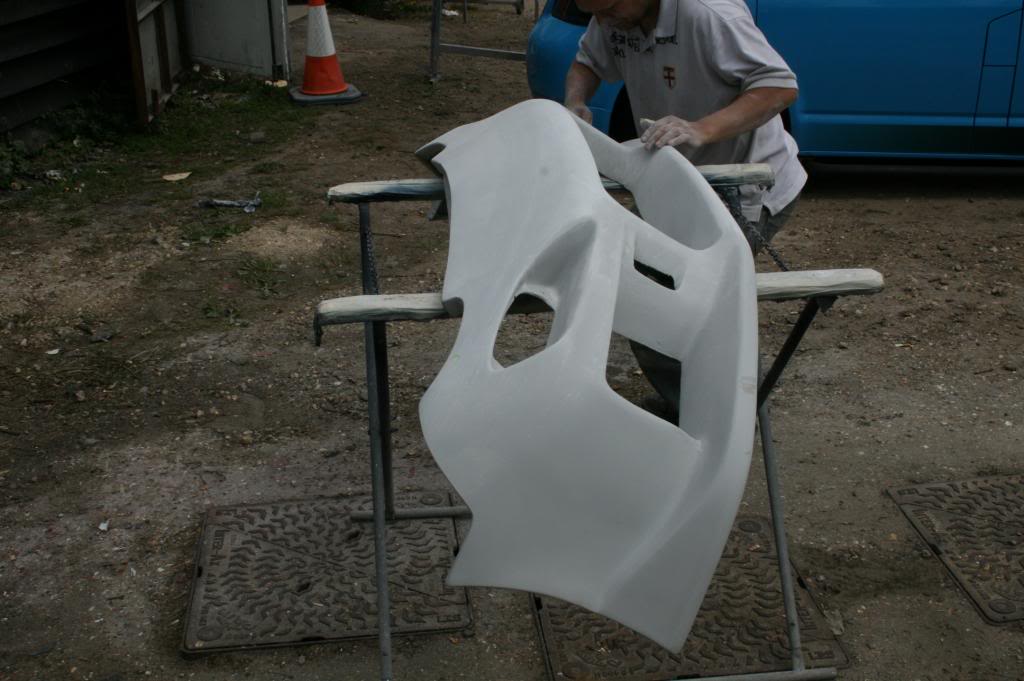
I wandered over the bodyshop to get some spray cans to find one of the guys finishing the front bumper for spraying.

bonded to the roof, the black and green theme is gunna look epic.


The drivers floor has been prepped and sealed.

I wandered over the bodyshop to get some spray cans to find one of the guys finishing the front bumper for spraying.


Thread Starter
Grippin' not Driftin'
Joined: Jul 2011
Posts: 149
Likes: 0
From: England
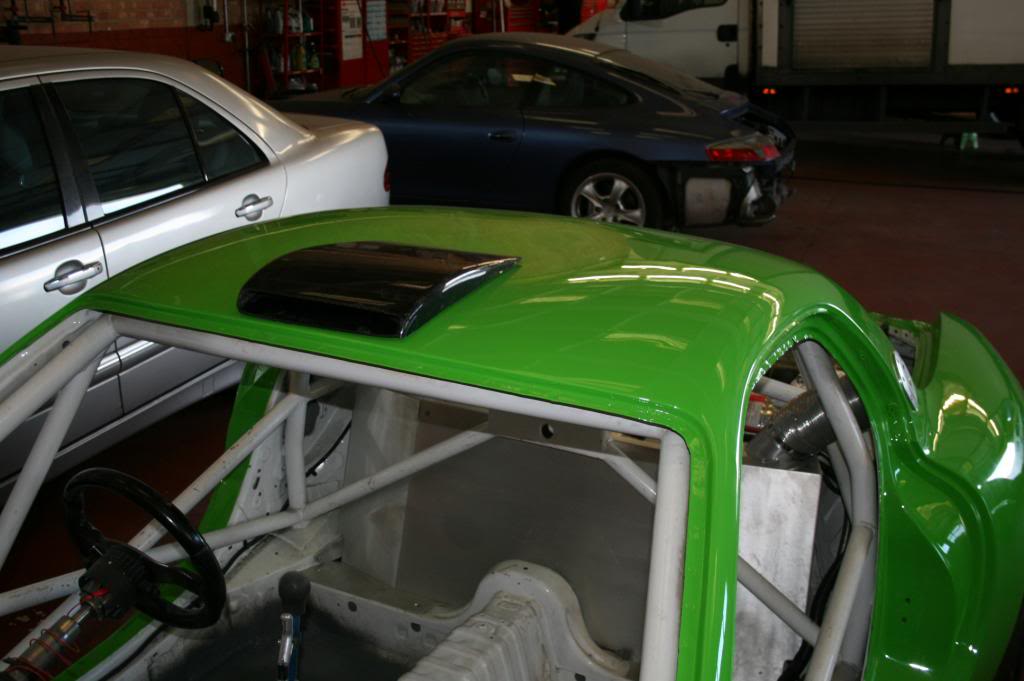
OK, back on it tonight.
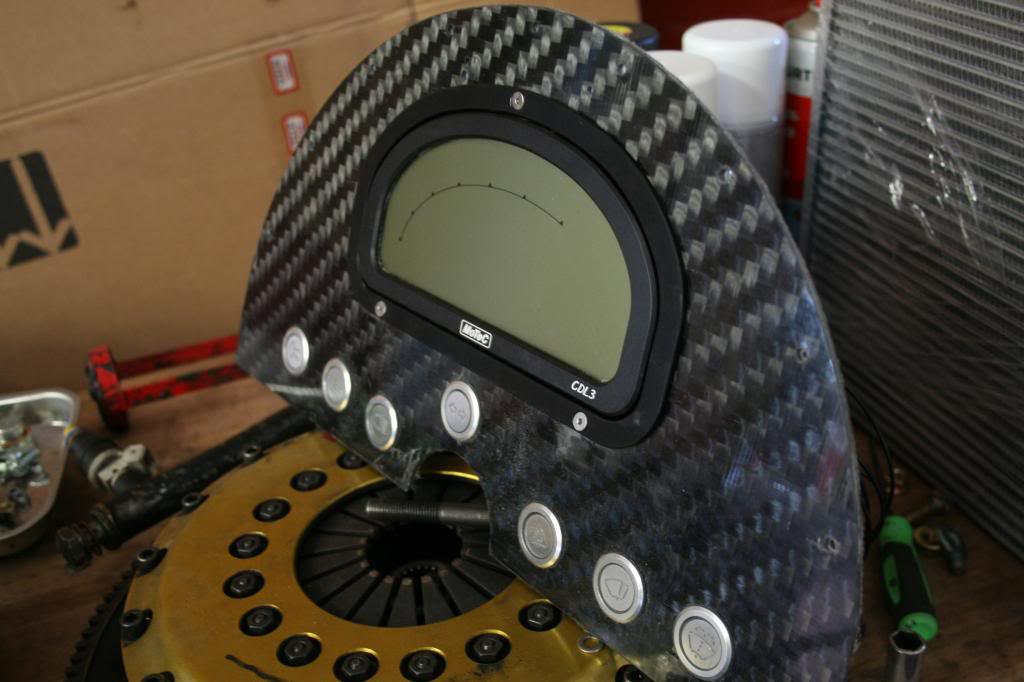
Cut the hole for the Motec Bezel I got from the states, happy now the dash sits flush.
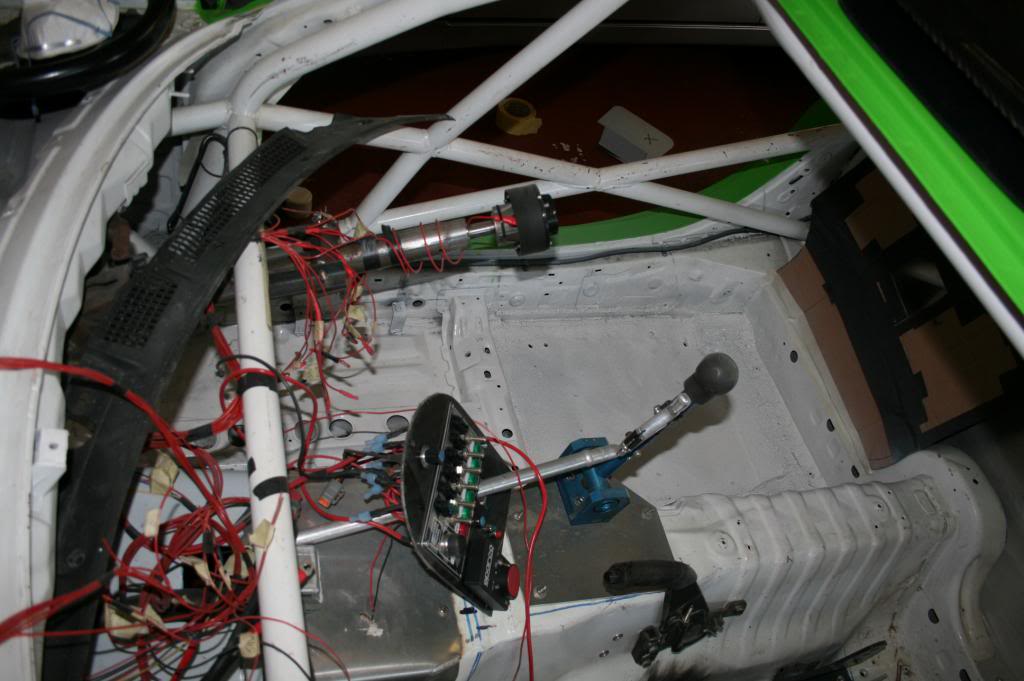
Painted the drivers floor and rear interior areas
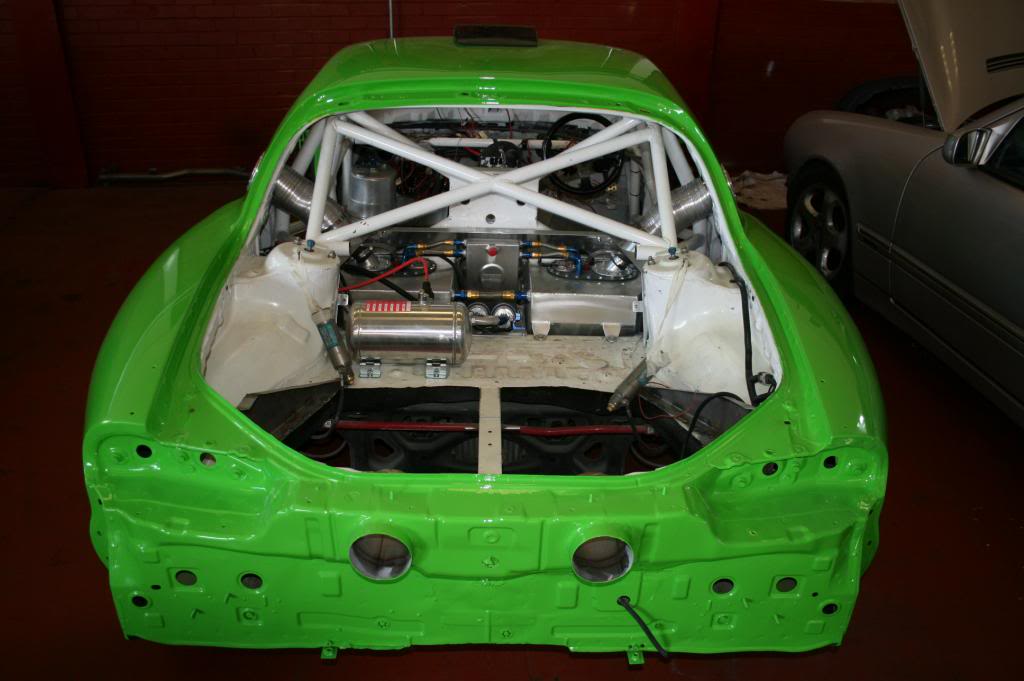
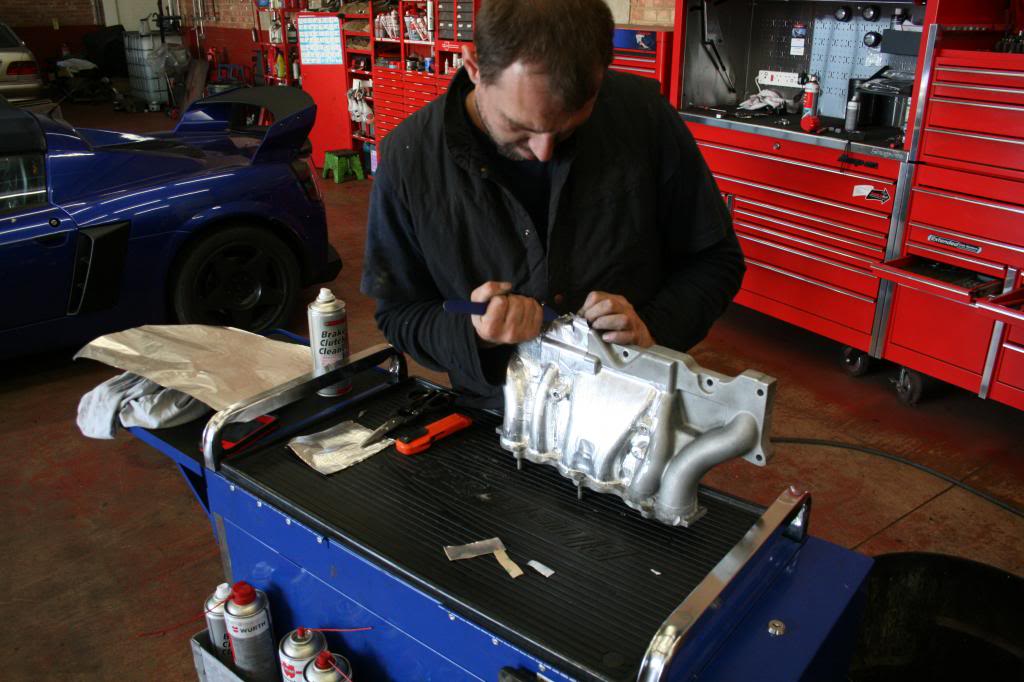
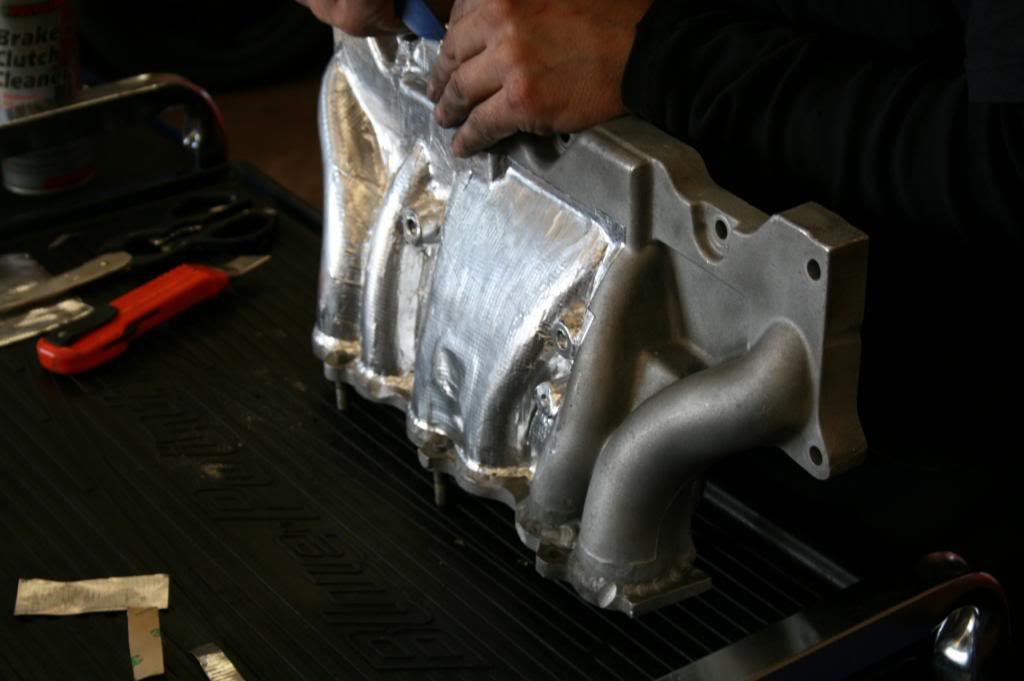
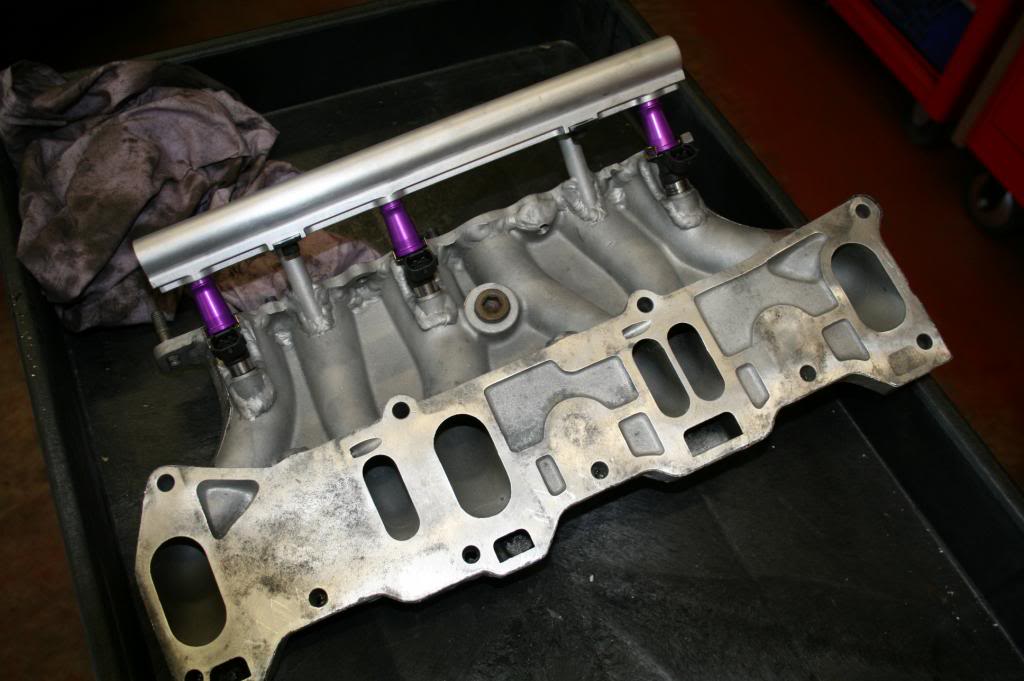
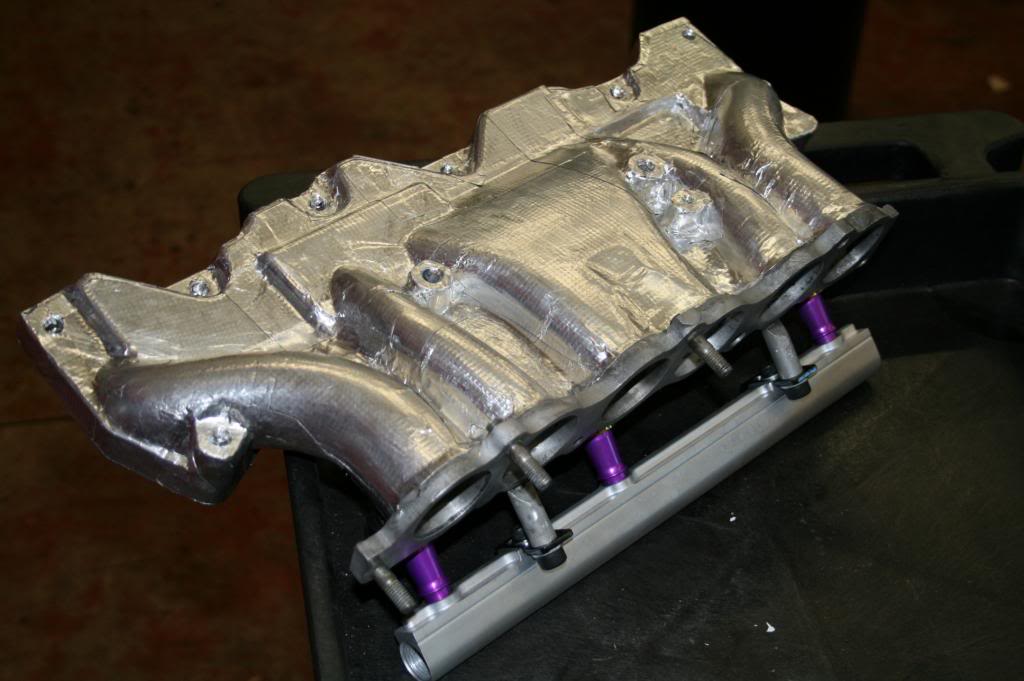
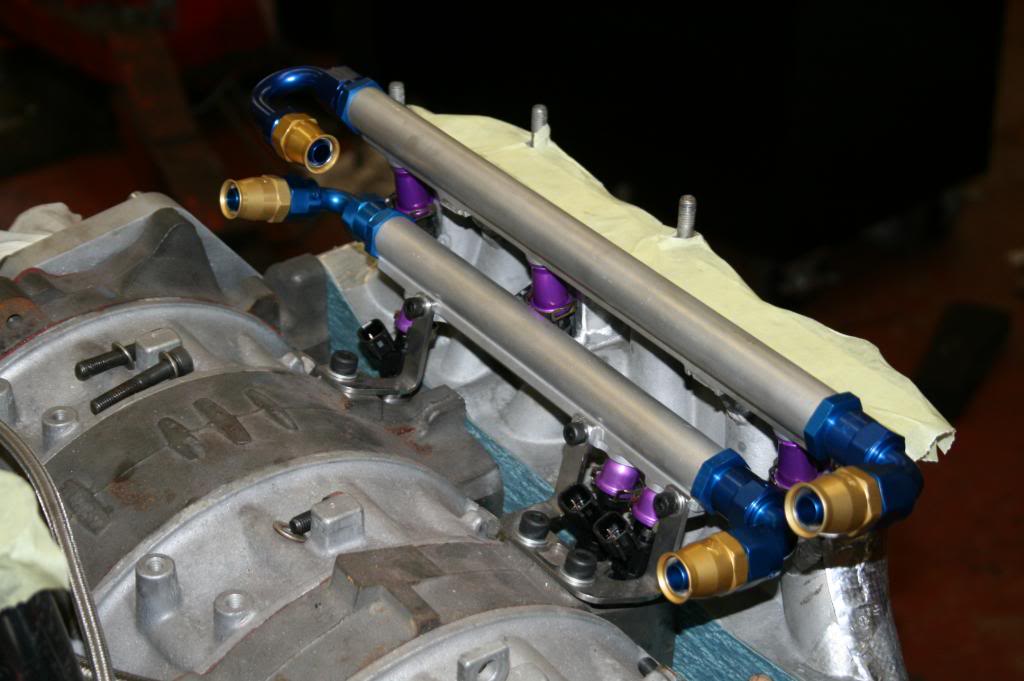
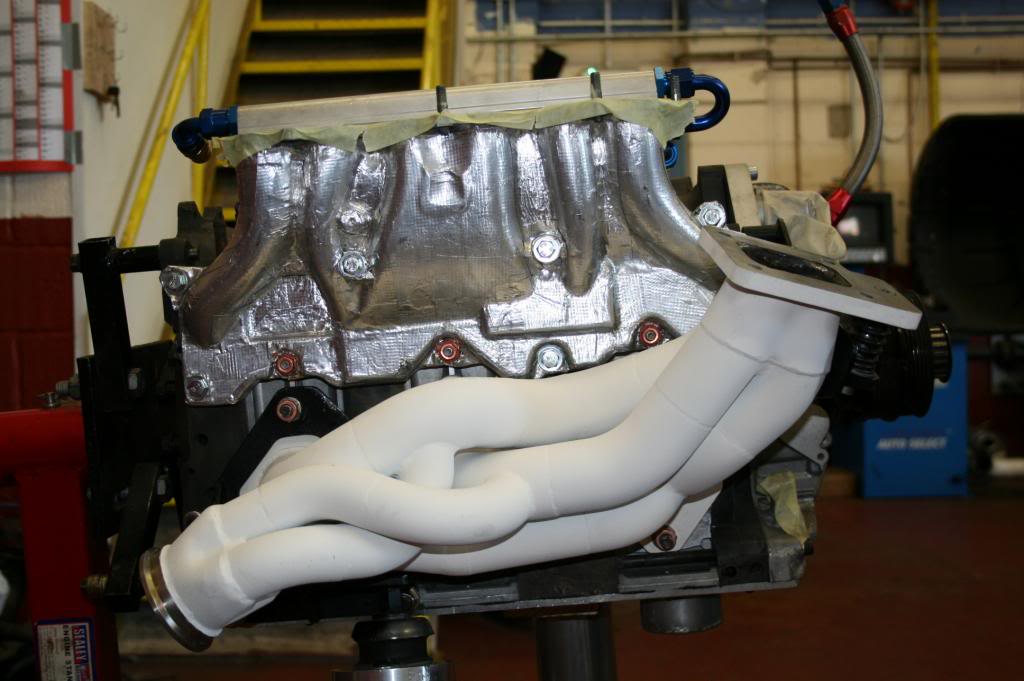
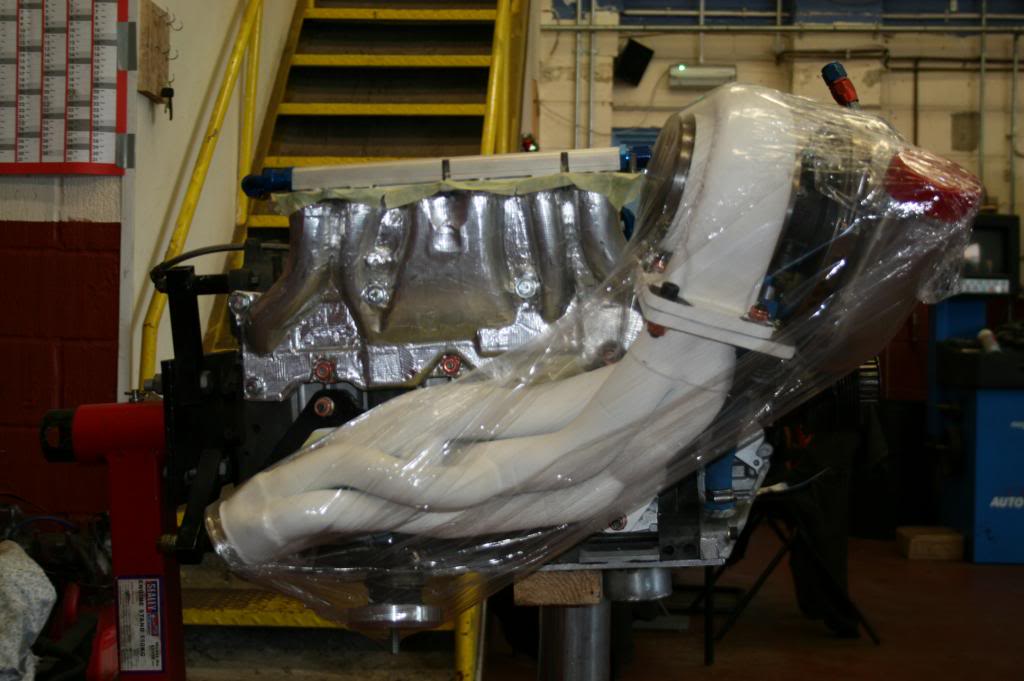
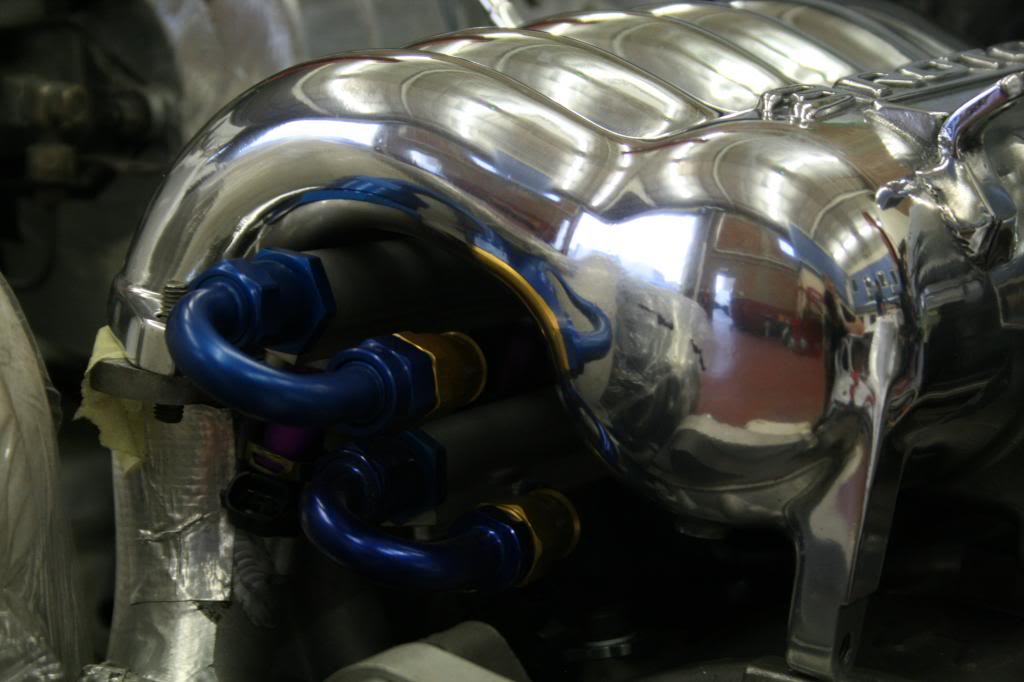
Whilst Ejo used the Zircotec Flex heatshielding to cover the LIM
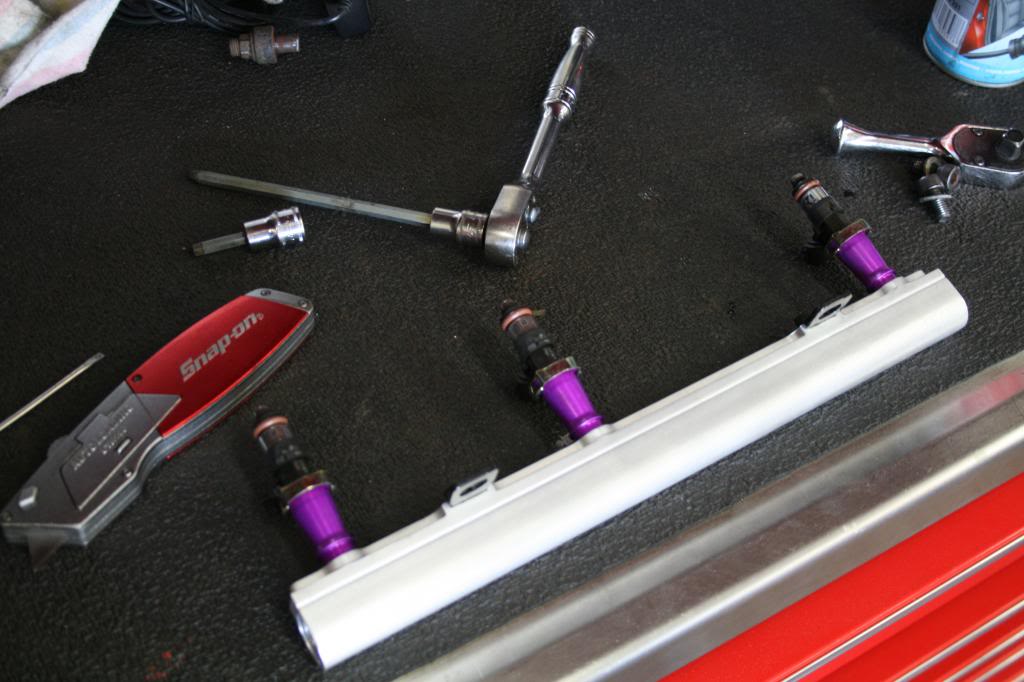
Primary fuel rail and 1000cc injectors
Secondary rail with 2000cc injectors
The secondary rail now on the Lim
Cut the hole for the Motec Bezel I got from the states, happy now the dash sits flush.

Painted the drivers floor and rear interior areas


Whilst Ejo used the Zircotec Flex heatshielding to cover the LIM


Primary fuel rail and 1000cc injectors

Secondary rail with 2000cc injectors

The secondary rail now on the Lim


Thread Starter
Grippin' not Driftin'
Joined: Jul 2011
Posts: 149
Likes: 0
From: England
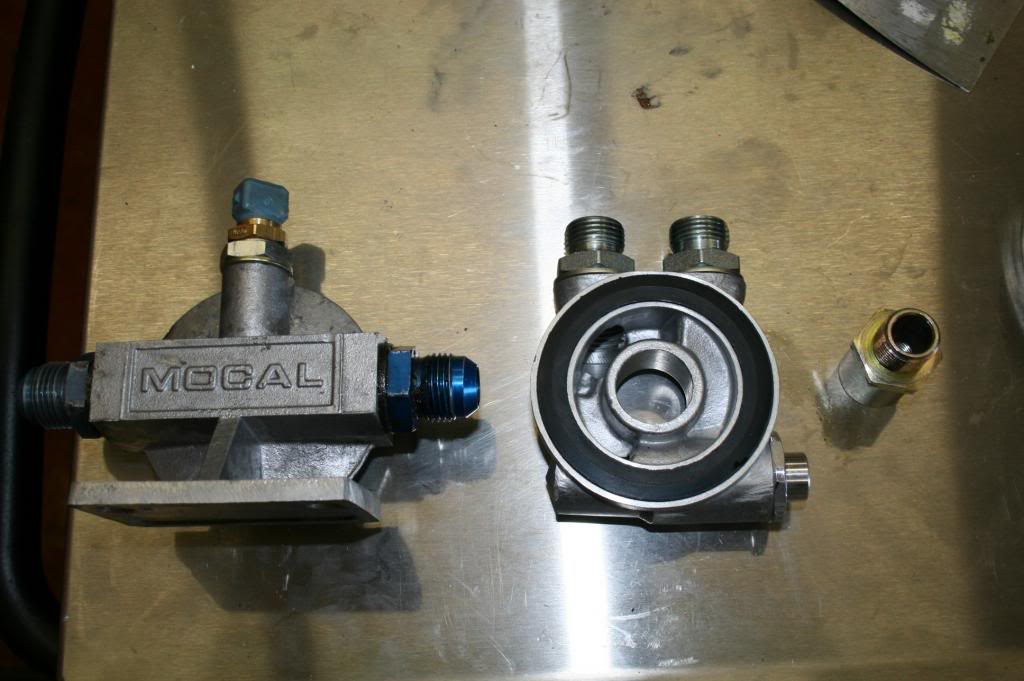
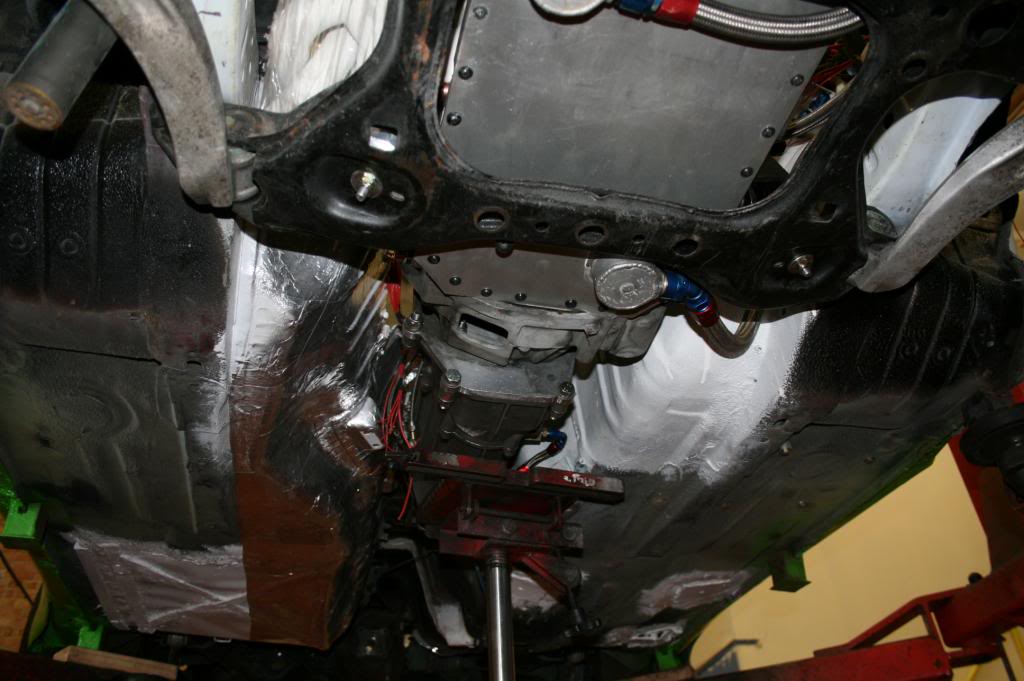
Not much to report tonight as we're waiting for the inlet gasket set to come in from Chris at ReWorx (life saver, thanks mate)
so just a solitary pic of the gearbox oil cooler that Demon Tweeks kindly sent me today.
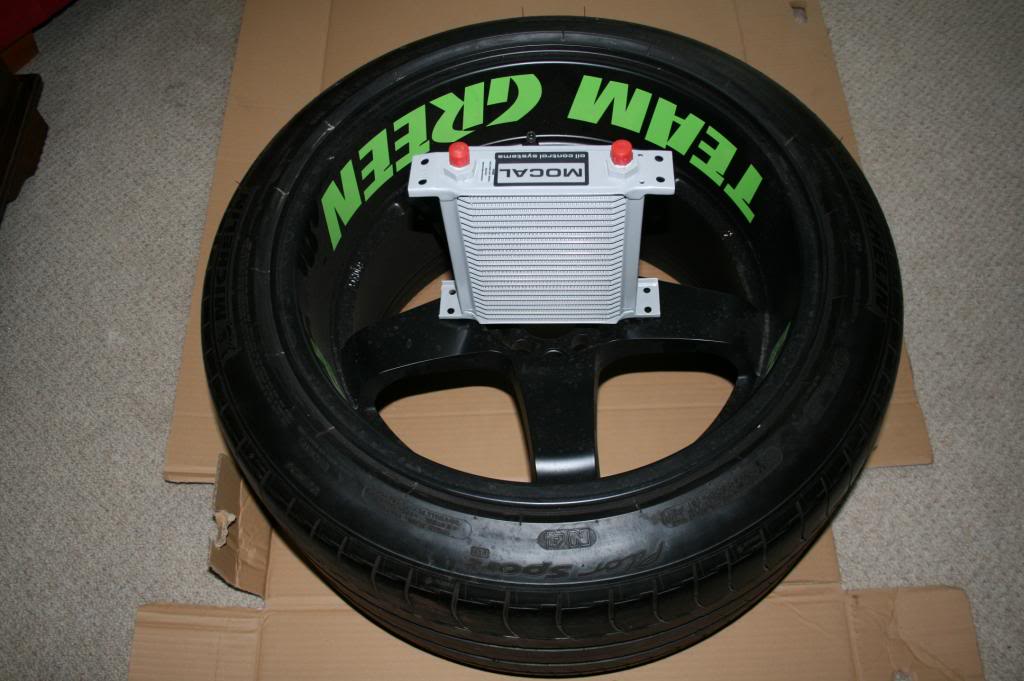
so just a solitary pic of the gearbox oil cooler that Demon Tweeks kindly sent me today.


Thread Starter
Grippin' not Driftin'
Joined: Jul 2011
Posts: 149
Likes: 0
From: England
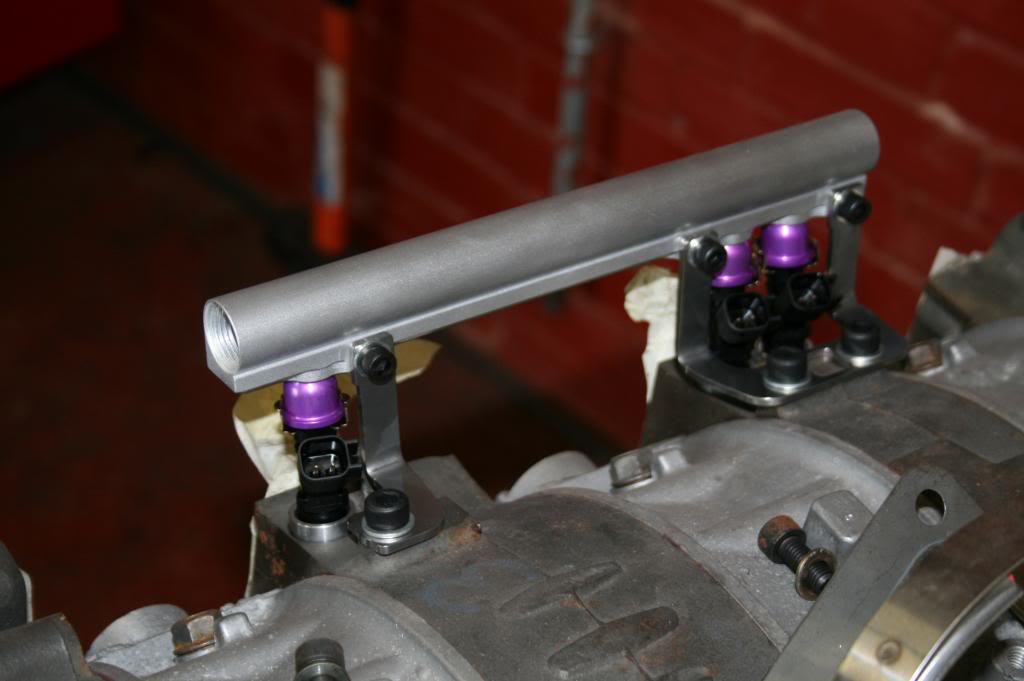
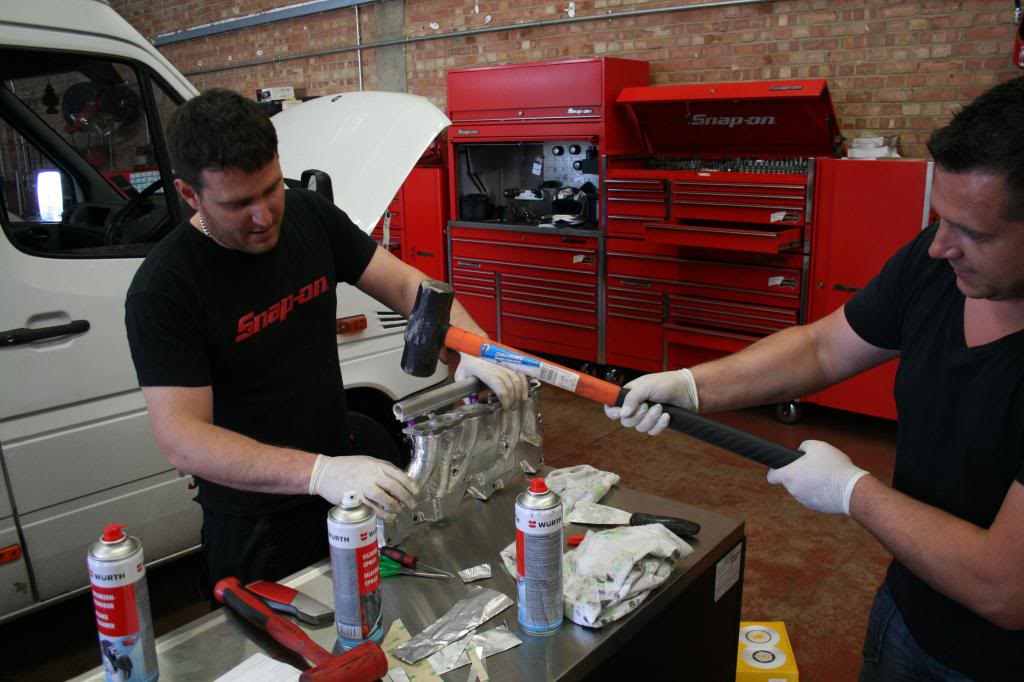
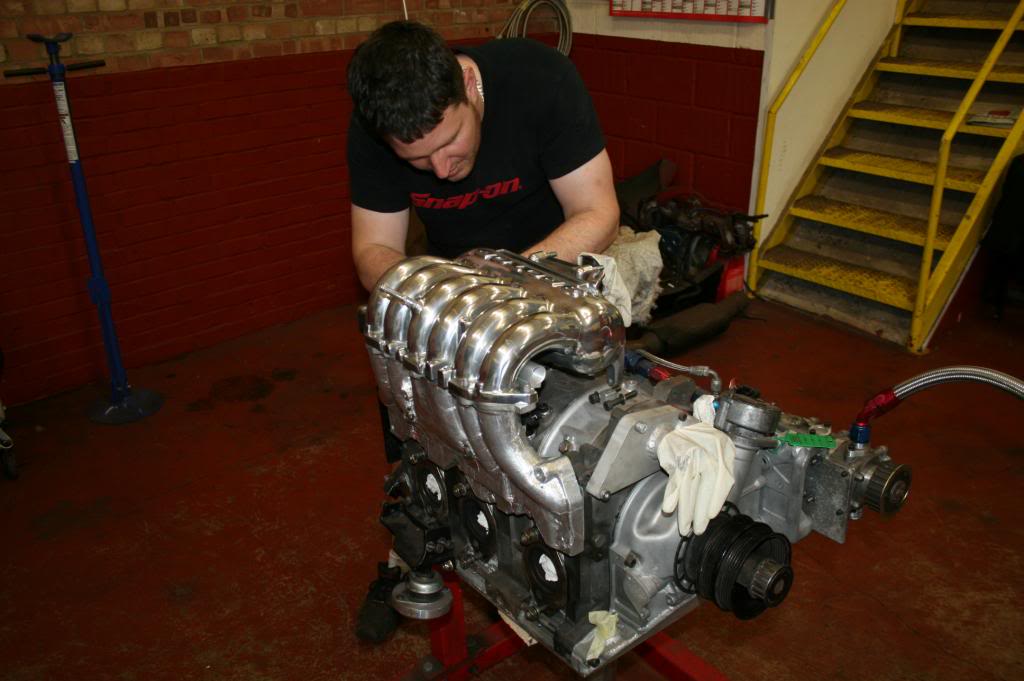
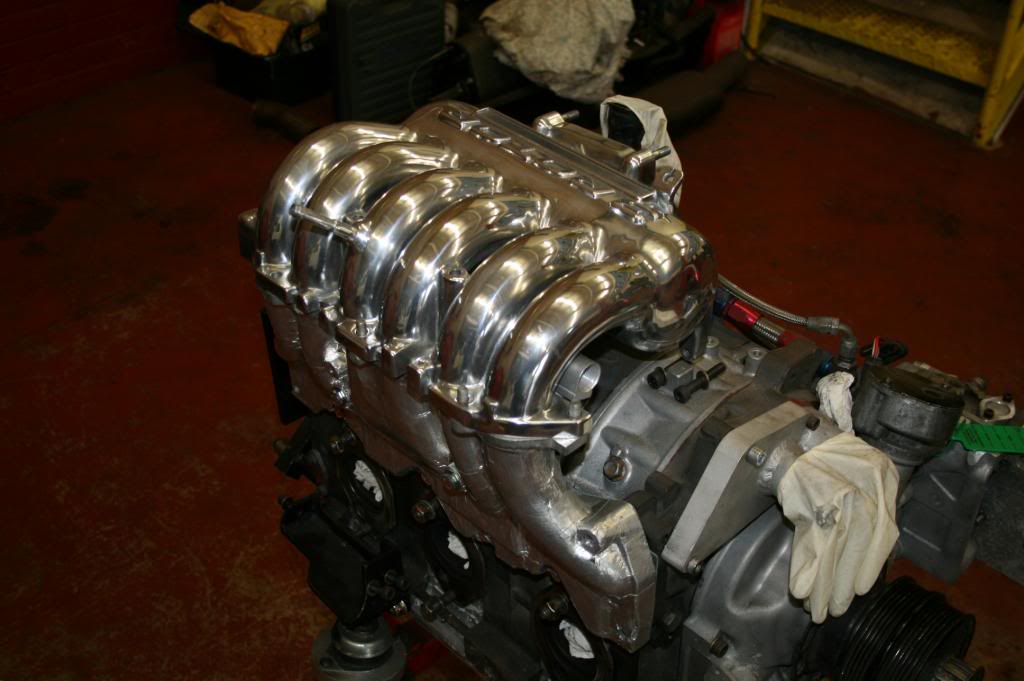
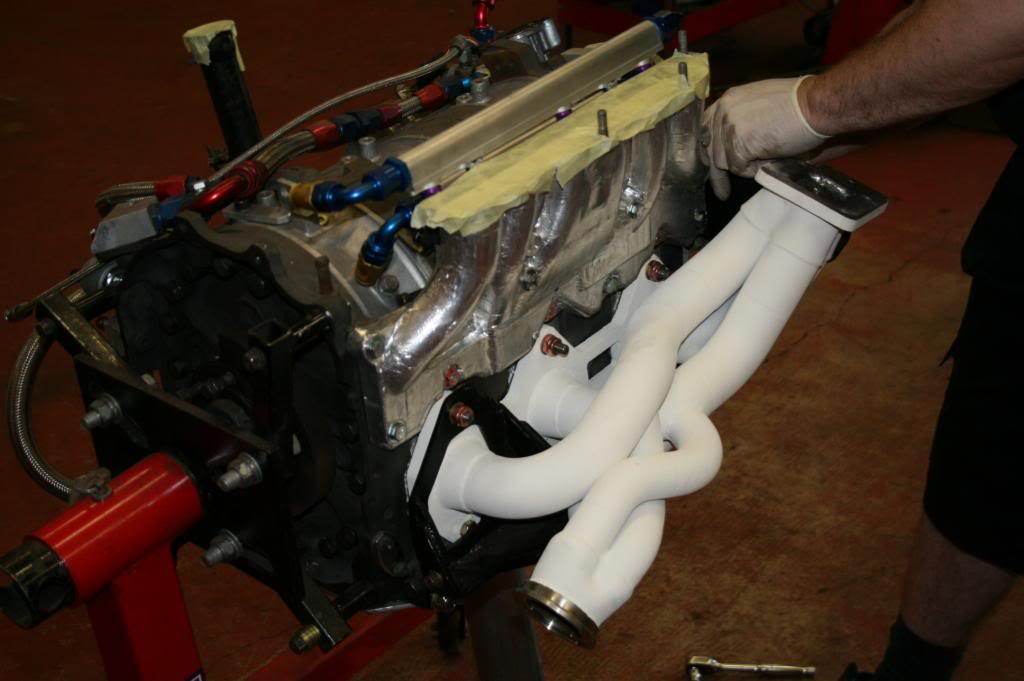
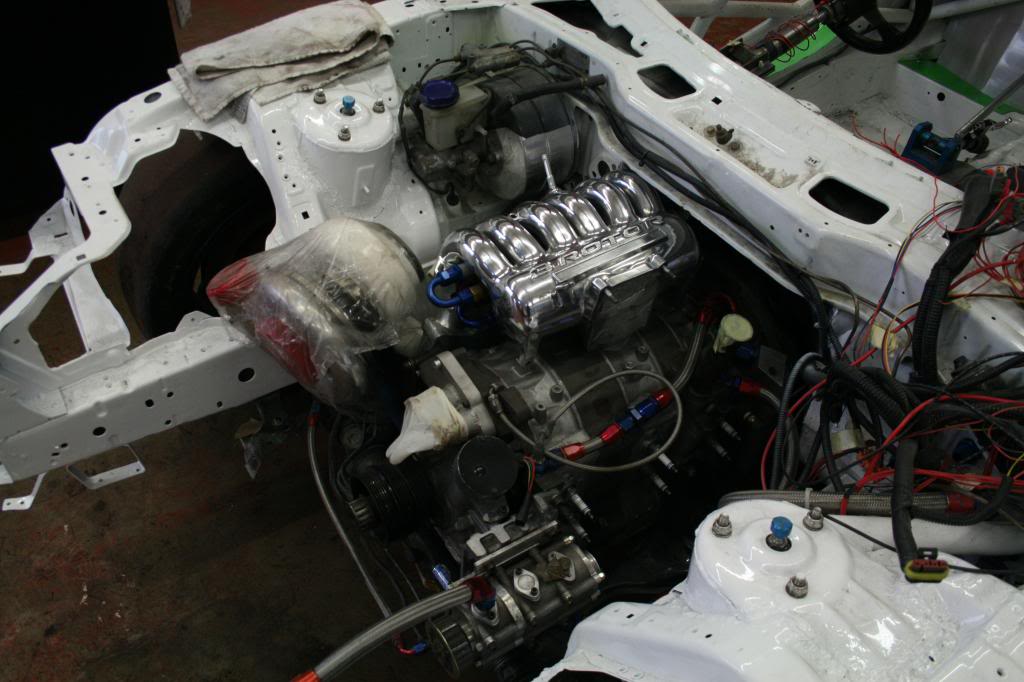
Tonight we wanted to get the engine in but we still had a few problems seating the injectors but this is something that
couldn't be rushed as we don't want to have to take the engine back out to sort the problem of a leak, we dry fitted
the joins and connectors to make sure of clearances, we're quite chuffed with the results, the engine goes in tomorrow evening.
Our first idea to seat the injectors was rejected !!
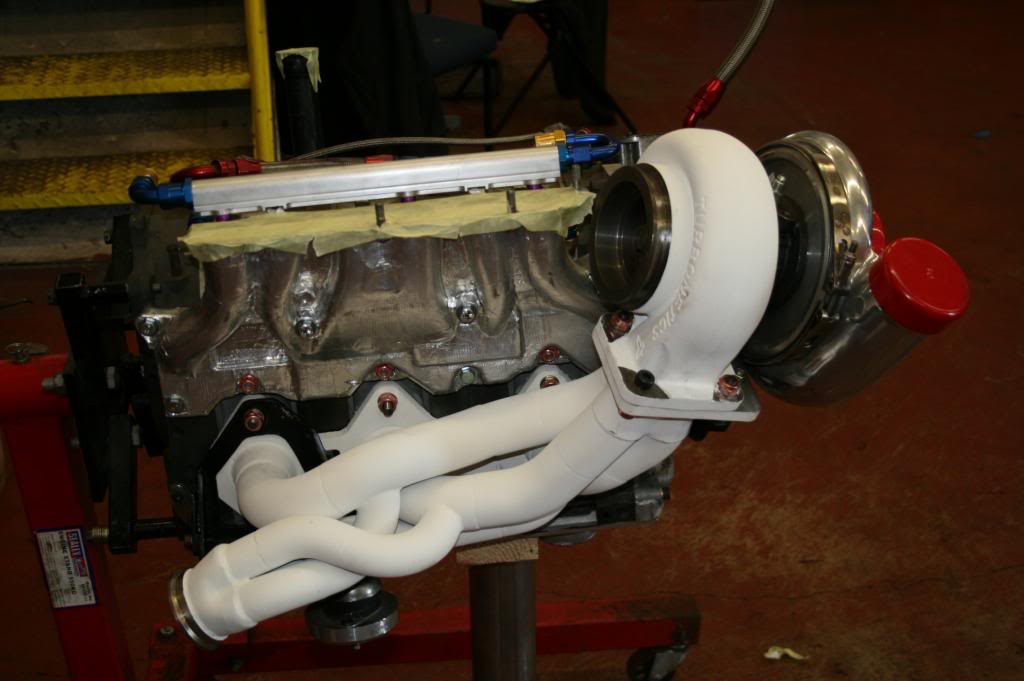
The rails, injectors and fittings in place.
And checking clearances for the UIM.
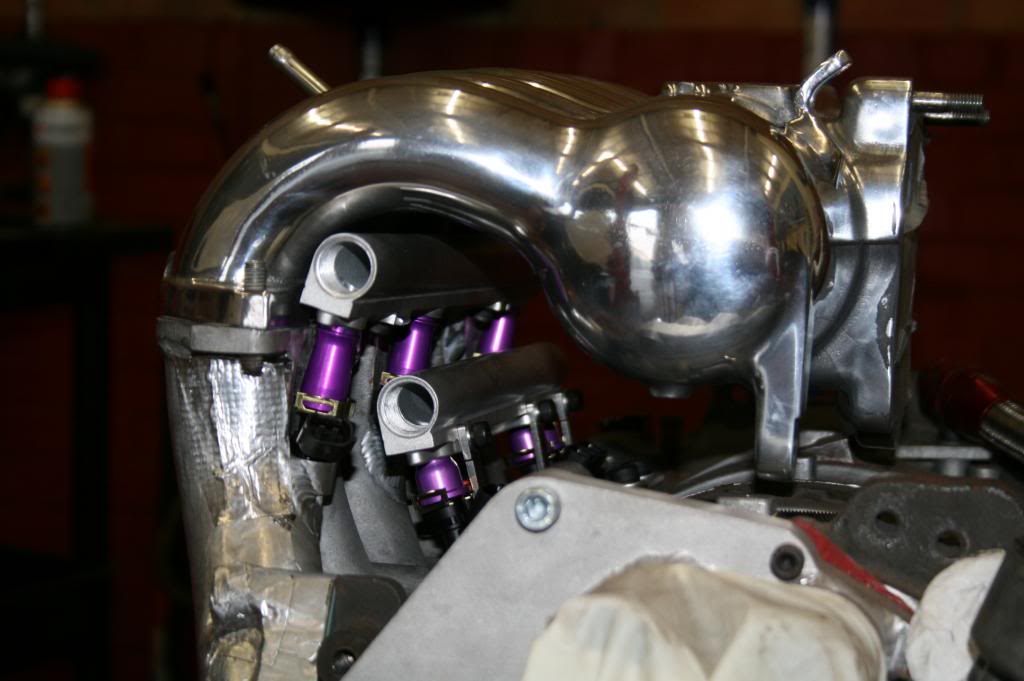
And just a couple of arty shots as the set up looks rather sexy. :thumbsup:
couldn't be rushed as we don't want to have to take the engine back out to sort the problem of a leak, we dry fitted
the joins and connectors to make sure of clearances, we're quite chuffed with the results, the engine goes in tomorrow evening.
Our first idea to seat the injectors was rejected !!

The rails, injectors and fittings in place.

And checking clearances for the UIM.

And just a couple of arty shots as the set up looks rather sexy. :thumbsup:


Thread Starter
Grippin' not Driftin'
Joined: Jul 2011
Posts: 149
Likes: 0
From: England
lol, not after tonight matt, a bit frustrating to say the least.
We built the engine up and yes we DID put the engine in the car but the oil pressure sensor AND the connector at the
end of the secondary fuel rail caught on the bulkhead, the only option was to cut the bulkhead, that was the easy bit, the
pain in the **** bit will be to weld in some box section, the engine will need to be removed again for the welding. **** !!!!
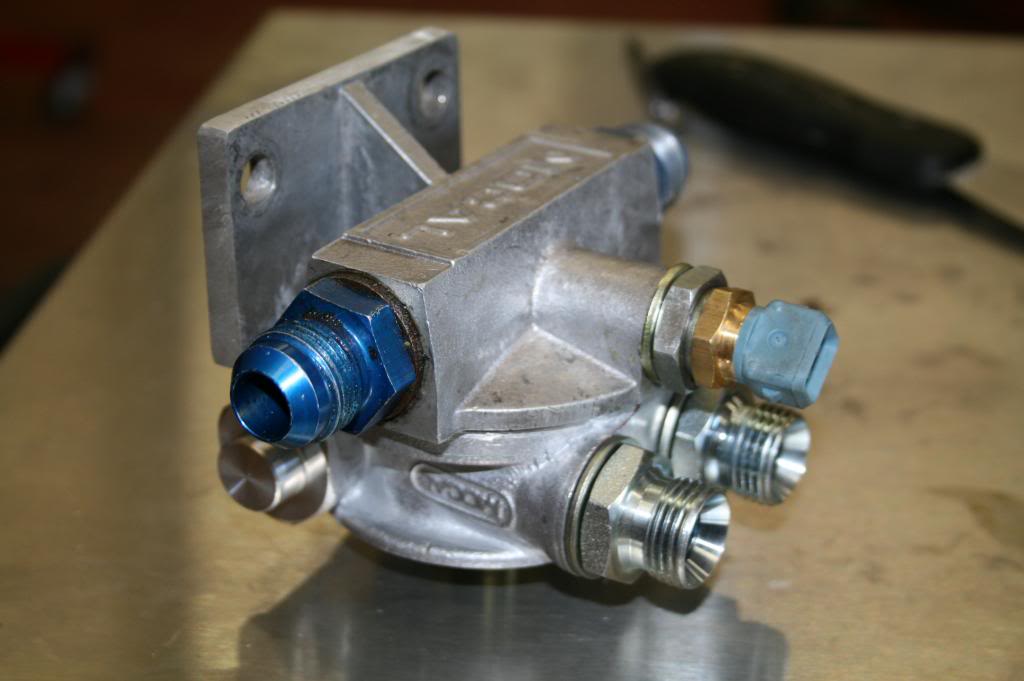
Re-tapped the thread on the retaining nut for the sandwich plate for the oil thermostat and cooler splitter.
Fitted the connectors to the FPR

Next we started building the engine back up.

Covered the ceramic coating for protection whilst inserting engine back into the car.
We built the engine up and yes we DID put the engine in the car but the oil pressure sensor AND the connector at the
end of the secondary fuel rail caught on the bulkhead, the only option was to cut the bulkhead, that was the easy bit, the
pain in the **** bit will be to weld in some box section, the engine will need to be removed again for the welding. **** !!!!
Re-tapped the thread on the retaining nut for the sandwich plate for the oil thermostat and cooler splitter.


Fitted the connectors to the FPR

Next we started building the engine back up.


Covered the ceramic coating for protection whilst inserting engine back into the car.


Thread Starter
Grippin' not Driftin'
Joined: Jul 2011
Posts: 149
Likes: 0
From: England
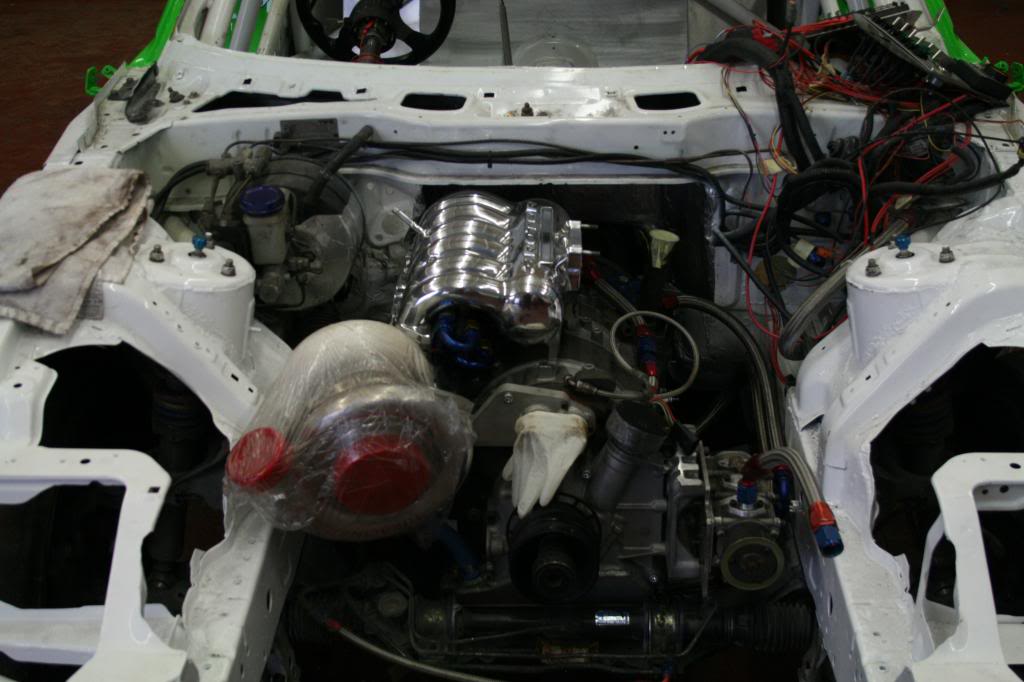
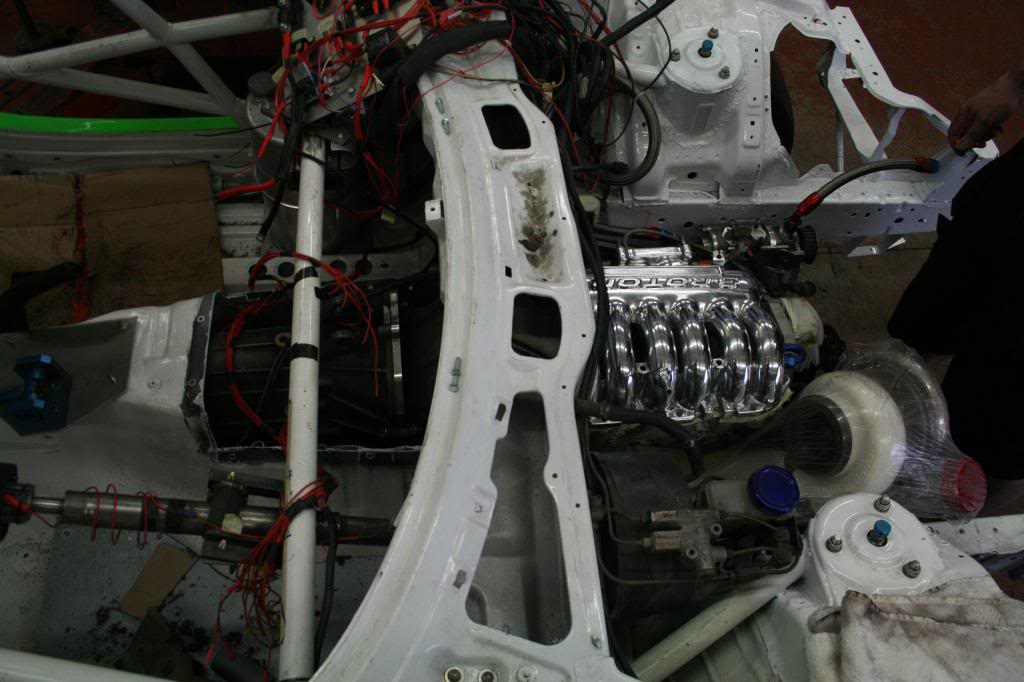
Tonight was a good example, engine in, clutch in, gearbox and the entire drive train is in, all works and fits great.
Engine in
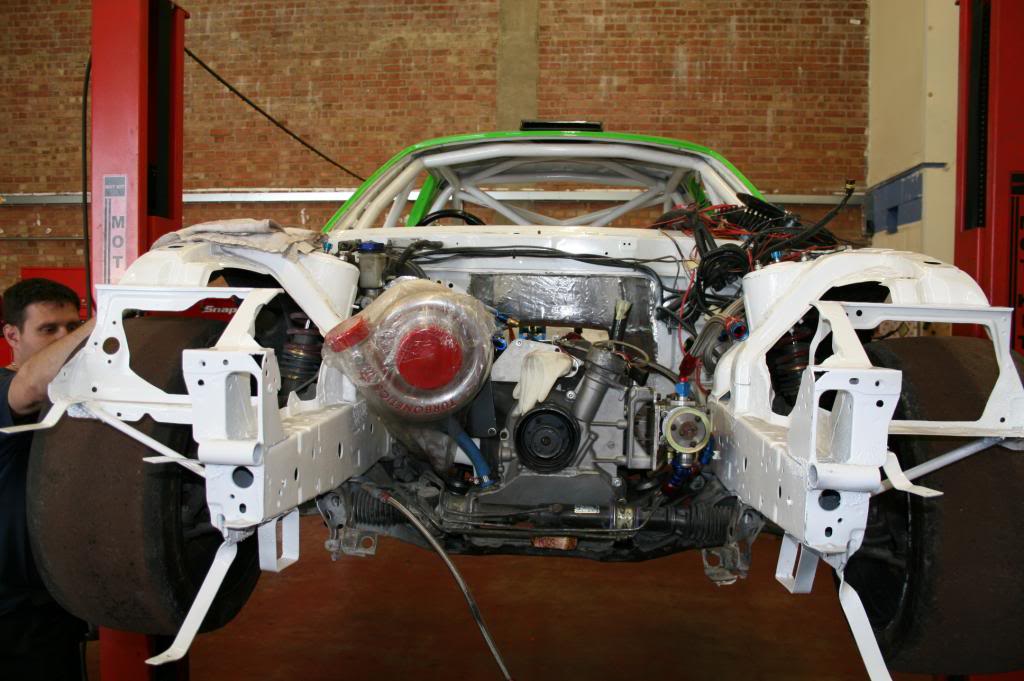
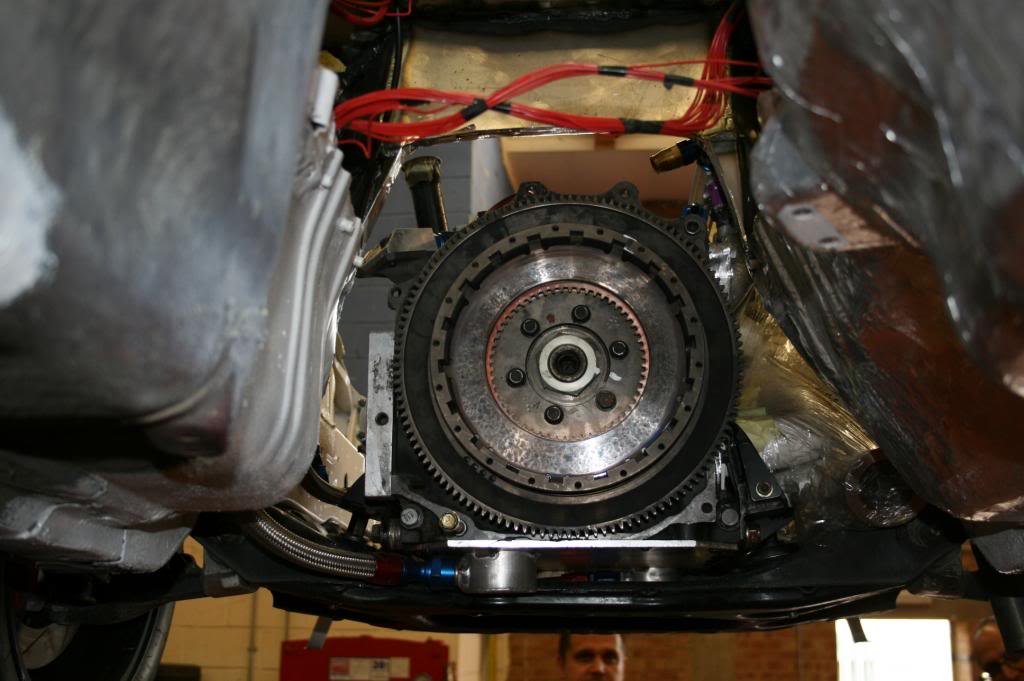
Clutch assembly
Gearbox
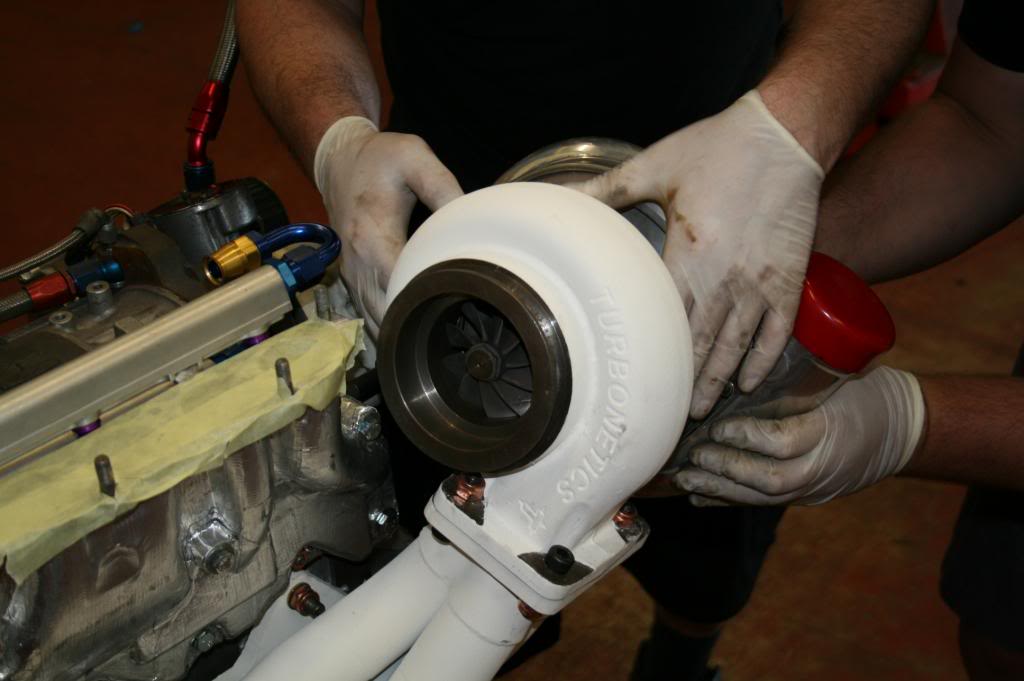
And we popped the UIM on to make sure it fits good and for a few arty shots.
Engine in

Clutch assembly

Gearbox

And we popped the UIM on to make sure it fits good and for a few arty shots.


