20b Turbo track car build (England)

Thread Tools
 
Search this Thread
 
Old 03-28-13, 02:26 PM
  #51  
Will TIG for 20b

iTrader: (1)
 
jaggermouth's Avatar
 
Join Date: Mar 2008
Location: Nanaimo
Posts: 1,422
Likes: 0
Received 2 Likes on 2 Posts
Love the Rad and IC setup, looks great
Old 04-02-13, 03:07 AM
  #52  
Full Member

 
Darryl C's Avatar
 
Join Date: Mar 2013
Location: New Zealand
Posts: 66
Received 0 Likes on 0 Posts
Well done on the big effort so far. Love the exhausts out the back. Will look good when they are sending some flames out from up there.
Old 04-02-13, 02:38 PM
  #53  
Rotating

 
Jimbo II's Avatar
 
Join Date: Jan 2008
Location: New Zealand
Posts: 604
Received 6 Likes on 2 Posts
Awesome stuff!

I assume the mounting of the exhausts is so you can install a big *** diffuser?
Old 04-02-13, 03:50 PM
  #54  
Grippin' not Driftin'

Thread Starter
 
Sicknote's Avatar
 
Join Date: Jul 2011
Location: England
Posts: 149
Likes: 0
Received 0 Likes on 0 Posts
Originally Posted by jaggermouth
Love the Rad and IC setup, looks great
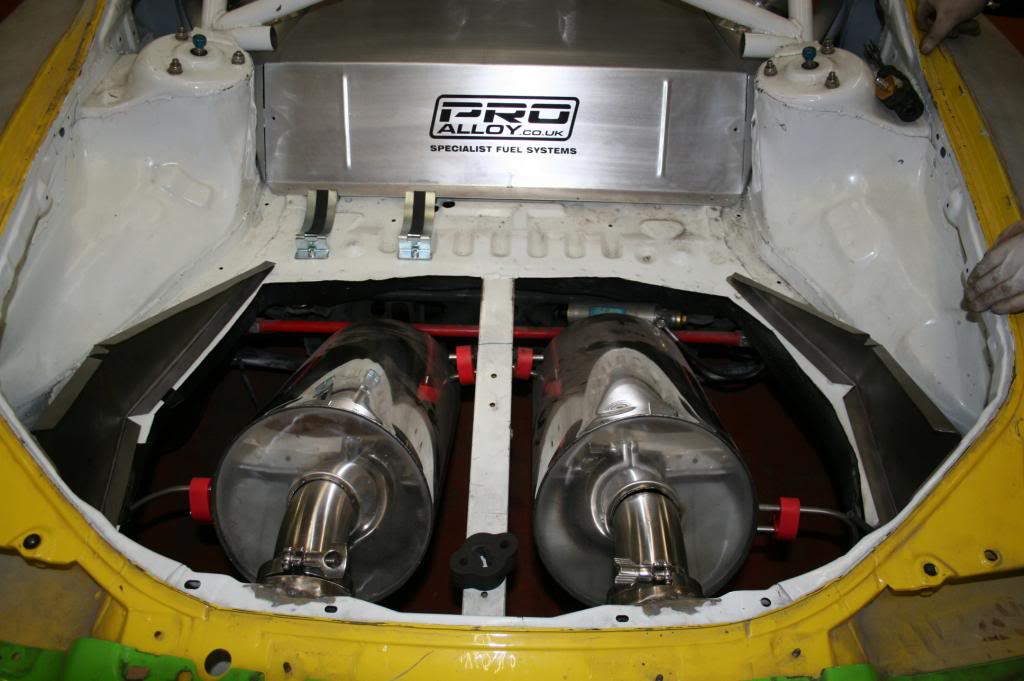
Thanks fella, took a fair bit of jiggery pokery to get it really low.

Originally Posted by Darryl C
Well done on the big effort so far. Love the exhausts out the back. Will look good when they are sending some flames out from up there.
Thanks Darryl, should be entertaining, as the left pipe is slightly longer it should be phased flamage too !! lol

Originally Posted by Jimbo II
Awesome stuff!

I assume the mounting of the exhausts is so you can install a big *** diffuser?
Hi Jimbo, exactly for that very reason, a complete flat floor with big diffuser !!
Old 04-02-13, 04:16 PM
  #55  
Water Injection Specialist

 
Erdin's Avatar
 
Join Date: Apr 2003
Location: UK
Posts: 479
Likes: 0
Received 0 Likes on 0 Posts
Look good Dave
Old 04-02-13, 04:46 PM
  #56  
Grippin' not Driftin'

Thread Starter
 
Sicknote's Avatar
 
Join Date: Jul 2011
Location: England
Posts: 149
Likes: 0
Received 0 Likes on 0 Posts
Originally Posted by Erdin
Look good Dave
lol, thanks my good man.
Old 04-04-13, 05:25 PM
  #57  
Grippin' not Driftin'

Thread Starter
 
Sicknote's Avatar
 
Join Date: Jul 2011
Location: England
Posts: 149
Likes: 0
Received 0 Likes on 0 Posts
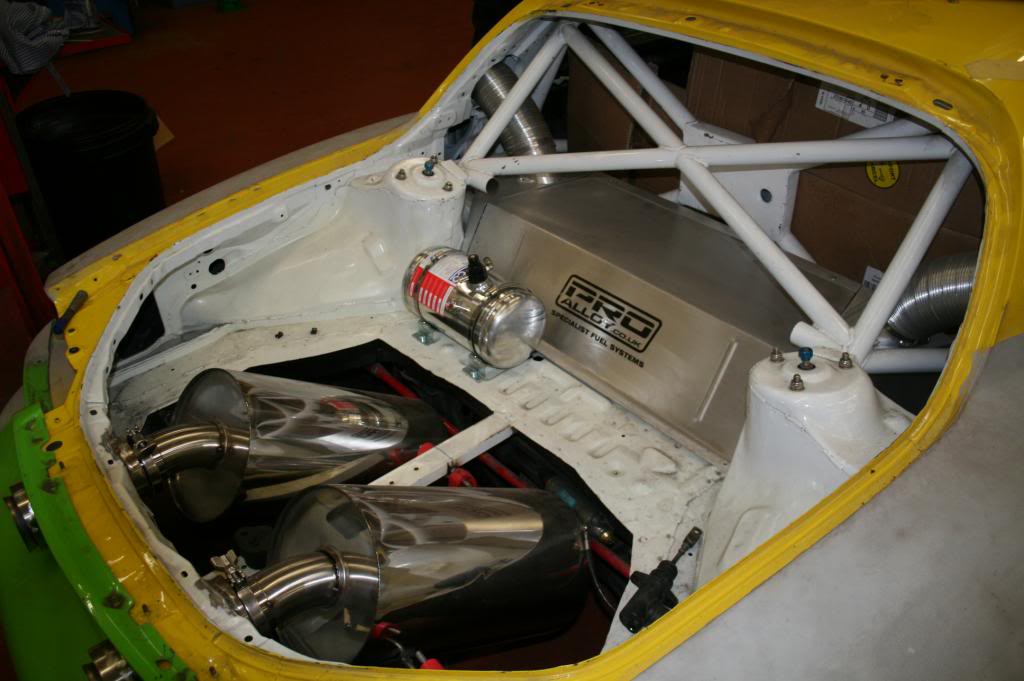
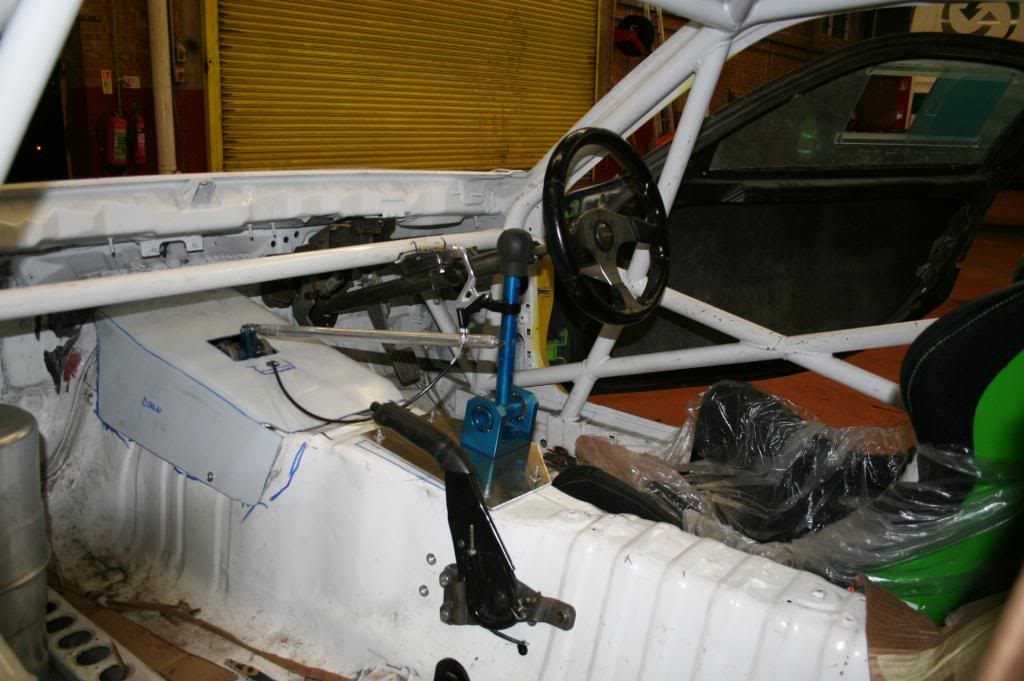
Righty, First tonight was to position the extinguisher bottle and prep the gearstick to accept the Shimano neutral release


Name:  1_zps5bb7ee3a.jpg
Views: 688
Size:  76.8 KB


Name:  2_zpsd6a897c9.jpg
Views: 706
Size:  37.9 KB


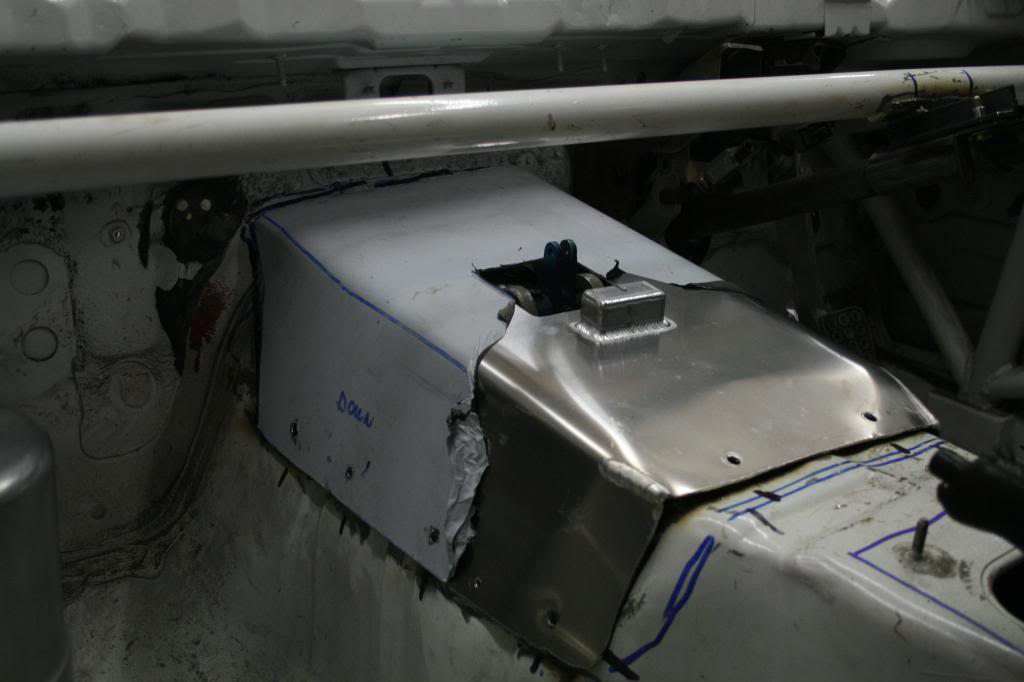
Then started the fabrication for the exhaust covers.


Name:  3_zpse5032a85.jpg
Views: 681
Size:  82.8 KB


Name:  4_zps3e9cce62.jpg
Views: 683
Size:  76.9 KB


Name:  5_zps4b9b8cf0.jpg
Views: 682
Size:  69.0 KB


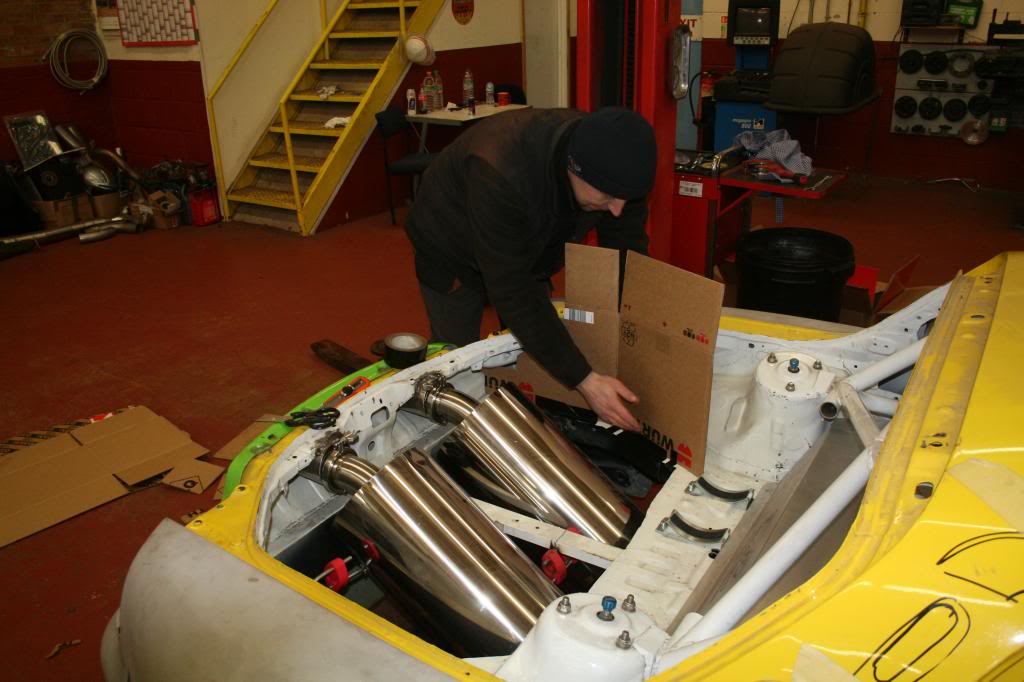
And voila, these are the sides that will be welded down and the cover will be bolted to them when we make them tomorrow.
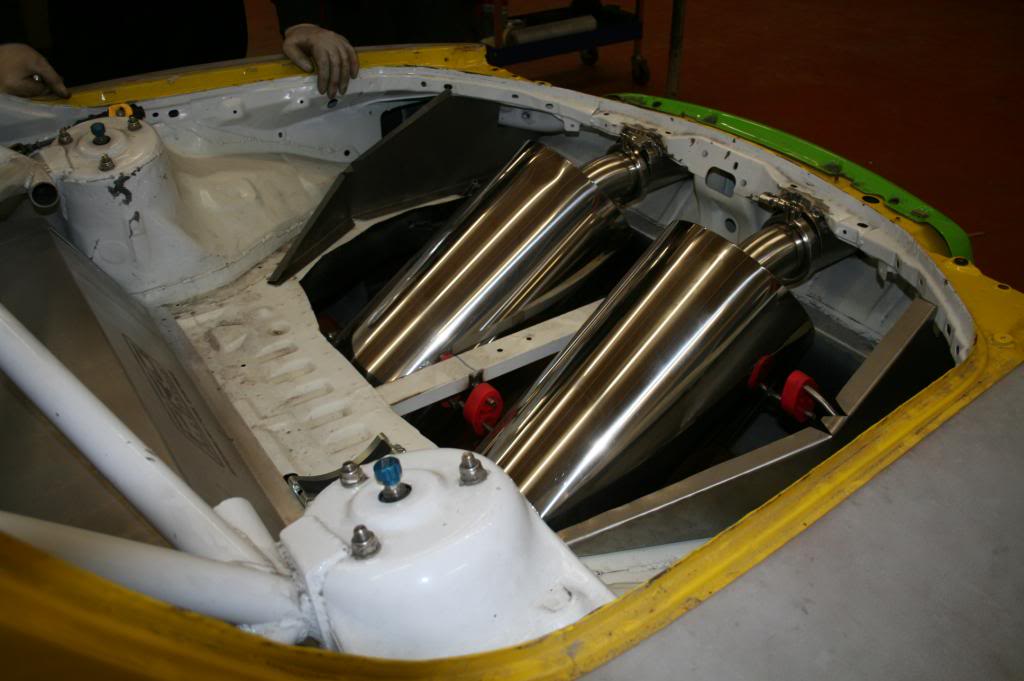
Name:  6_zps662e63b5.jpg
Views: 692
Size:  78.0 KB


Name:  7_zps51625de6.jpg
Views: 686
Size:  71.4 KB
Old 04-04-13, 05:26 PM
  #58  
Grippin' not Driftin'

Thread Starter
 
Sicknote's Avatar
 
Join Date: Jul 2011
Location: England
Posts: 149
Likes: 0
Received 0 Likes on 0 Posts
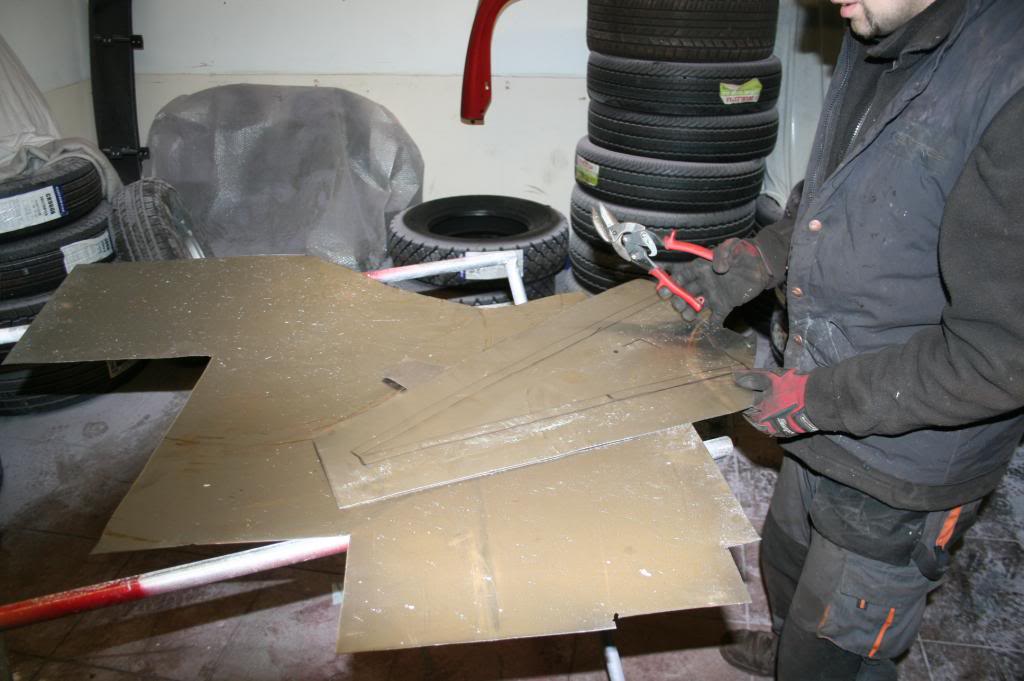
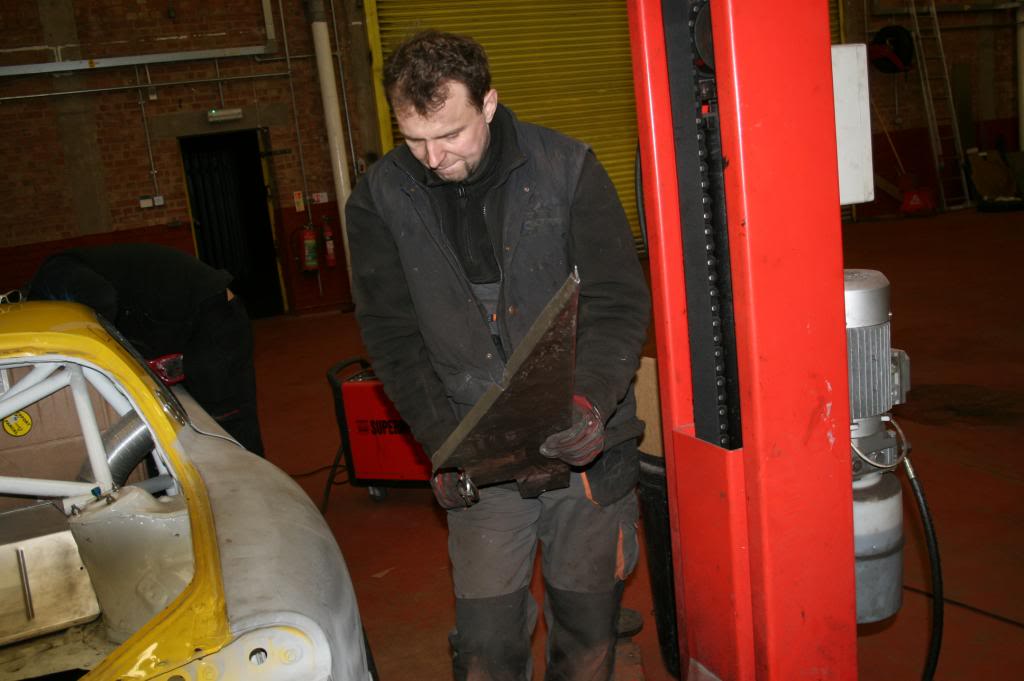
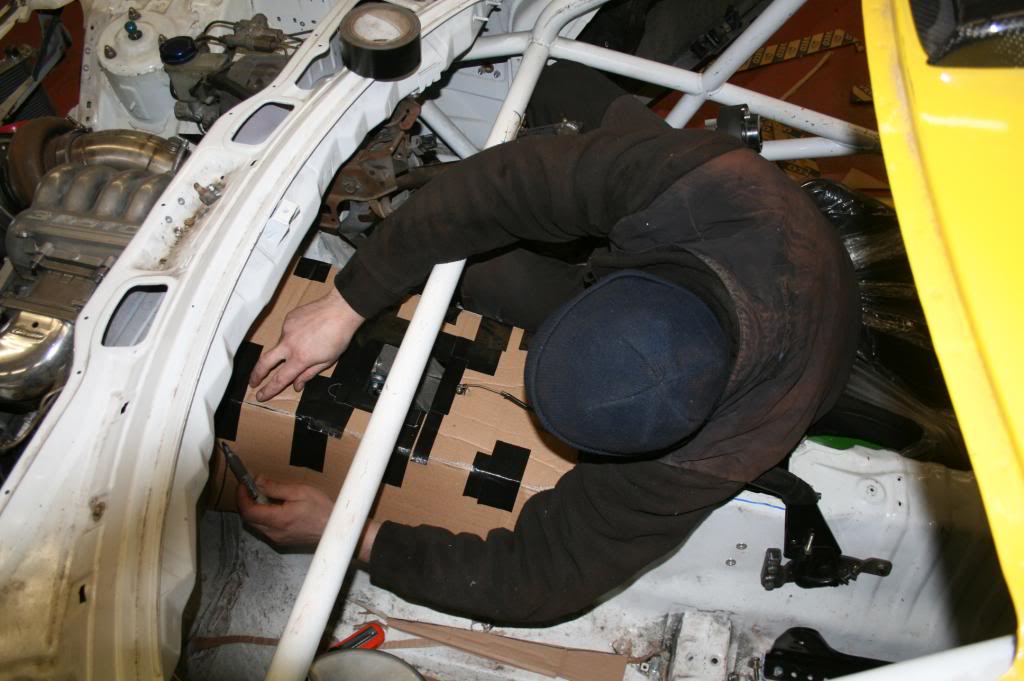
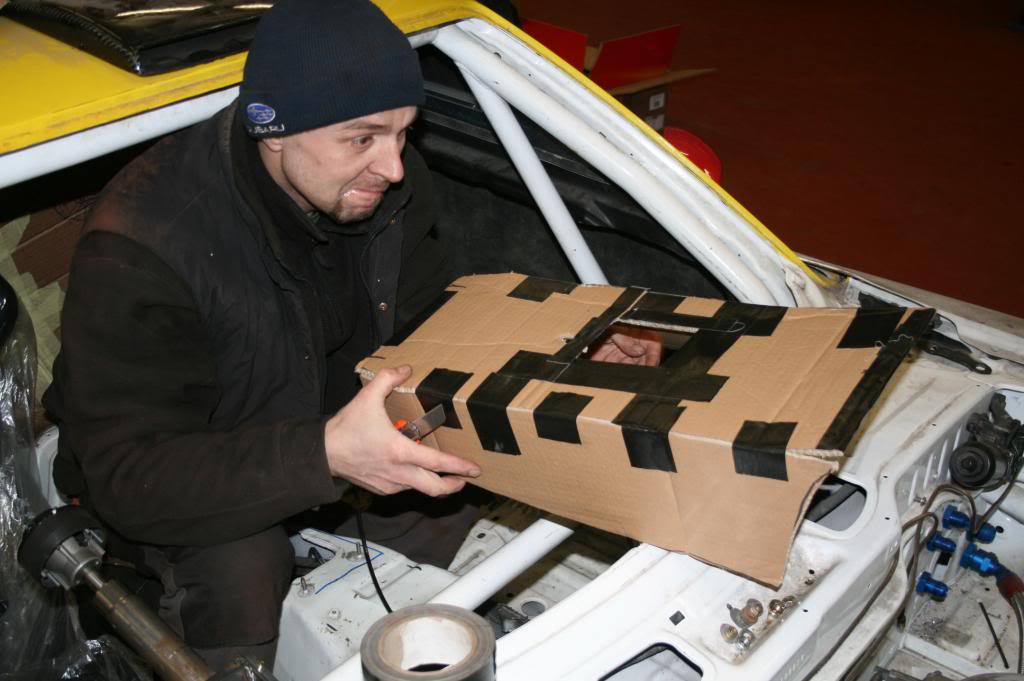
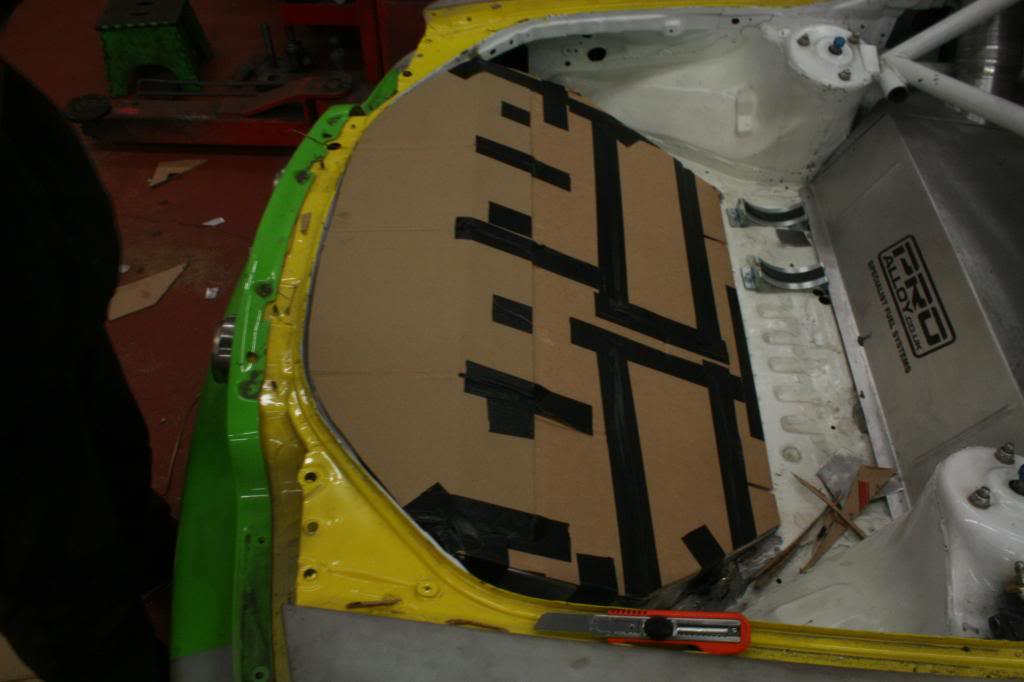
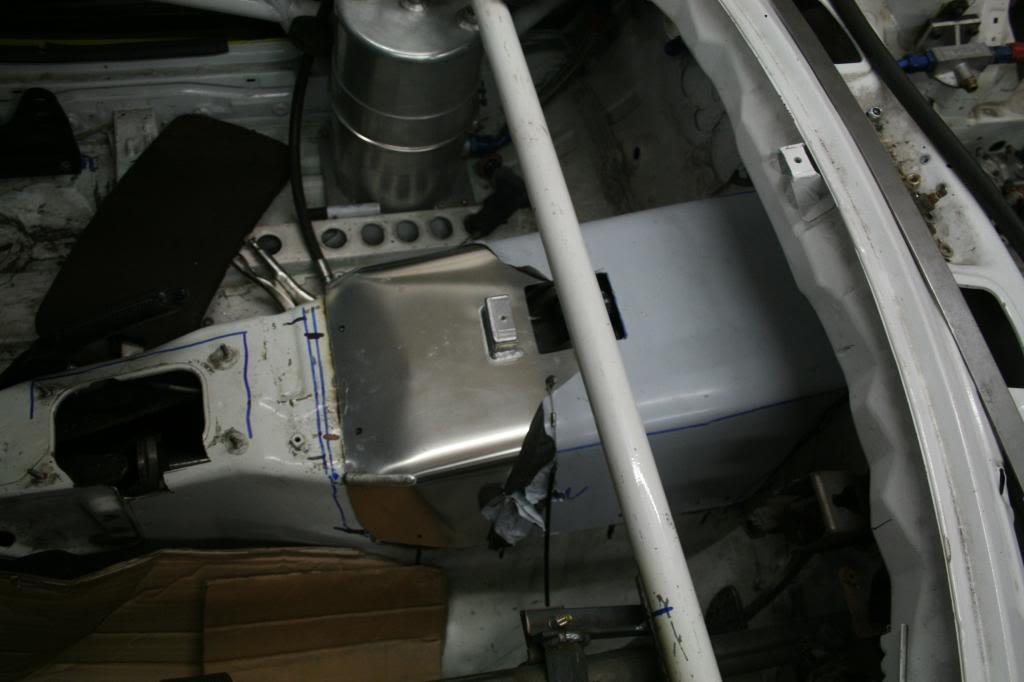
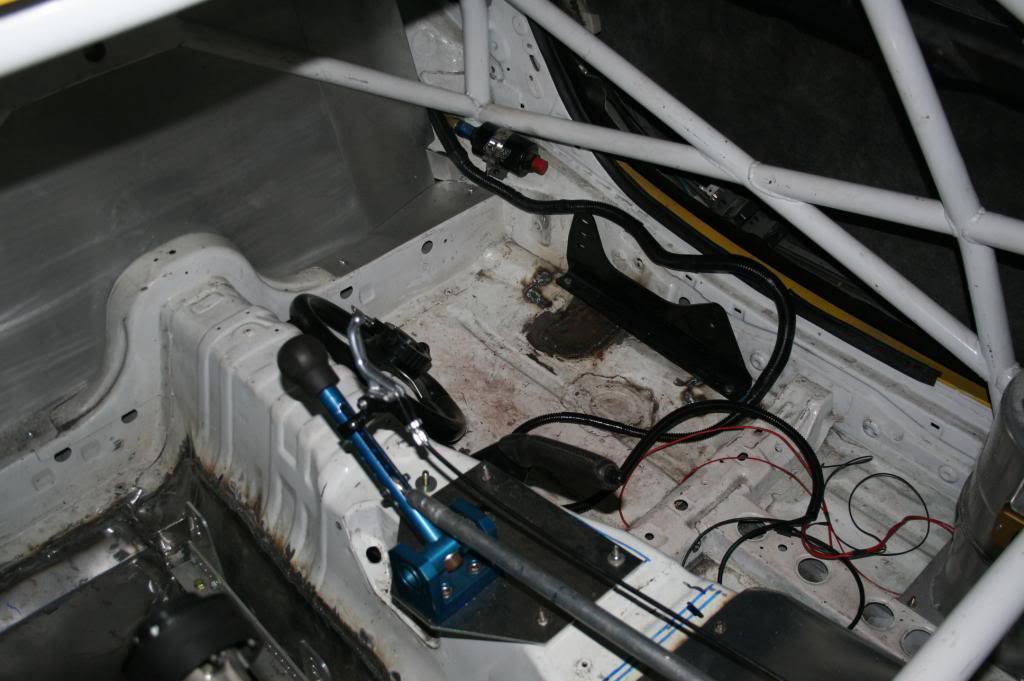
And another bigish job was to fabricate the gearbox tunnel cover.... more cardboard !!


Name:  8_zps1a14fb01.jpg
Views: 689
Size:  84.6 KB


Name:  9_zpsdeb5d38d.jpg
Views: 690
Size:  76.8 KB


I've cut a lot of the process out but here was the end result and the almost completed cockpit including the transfer of
the handbrake lever to the other side. :thumbsup:


Name:  10_zps2adc1744.jpg
Views: 698
Size:  85.6 KB
Old 04-05-13, 02:25 AM
  #59  
Senior Member
iTrader: (2)
 
ryan2949's Avatar
 
Join Date: Jun 2012
Location: Azilda, Ontario
Posts: 672
Likes: 0
Received 2 Likes on 2 Posts
This is one of the most bad *** cars/builds I've ever seen and I read through build threads on all the forums I'm on.

I really wish I had money.
Old 04-05-13, 04:44 PM
  #60  
Grippin' not Driftin'

Thread Starter
 
Sicknote's Avatar
 
Join Date: Jul 2011
Location: England
Posts: 149
Likes: 0
Received 0 Likes on 0 Posts
Thanks very much, it's comments like that that keep my enthusiasm up and want to carry on !!
Old 04-05-13, 04:45 PM
  #61  
Grippin' not Driftin'

Thread Starter
 
Sicknote's Avatar
 
Join Date: Jul 2011
Location: England
Posts: 149
Likes: 0
Received 0 Likes on 0 Posts
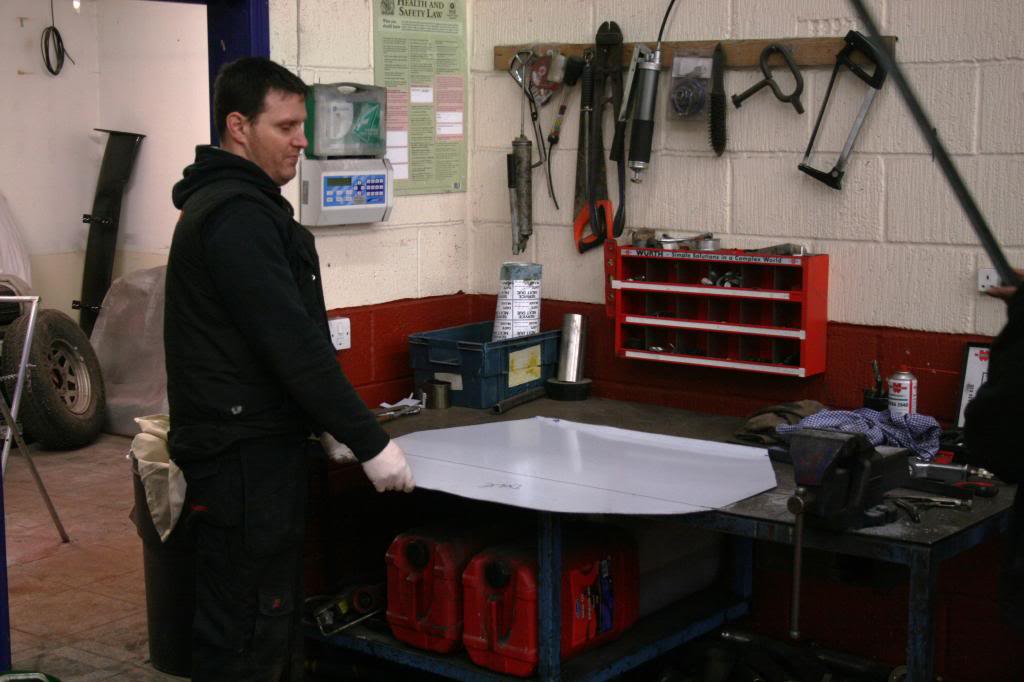
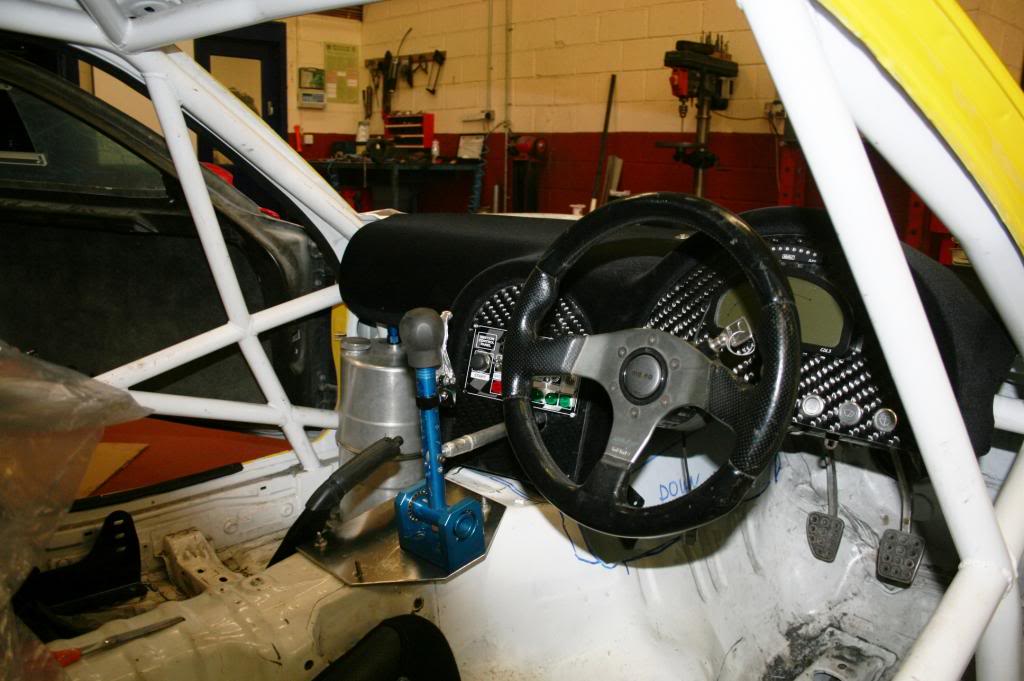
OK, tonight was dedicated to the exhaust cans cover, positioning the dash to accept the gear select lever and
the passenger footwell floor (no pics yet).

The Exhaust cover


Name:  1_zps97b287ac.jpg
Views: 697
Size:  54.9 KB


Name:  2_zpsbe4fa5fe.jpg
Views: 678
Size:  74.8 KB


Name:  3_zps474ab0ae.jpg
Views: 667
Size:  52.3 KB


Name:  4_zps40daebec.jpg
Views: 678
Size:  55.6 KB


Name:  5_zpscb2bc470.jpg
Views: 692
Size:  68.7 KB


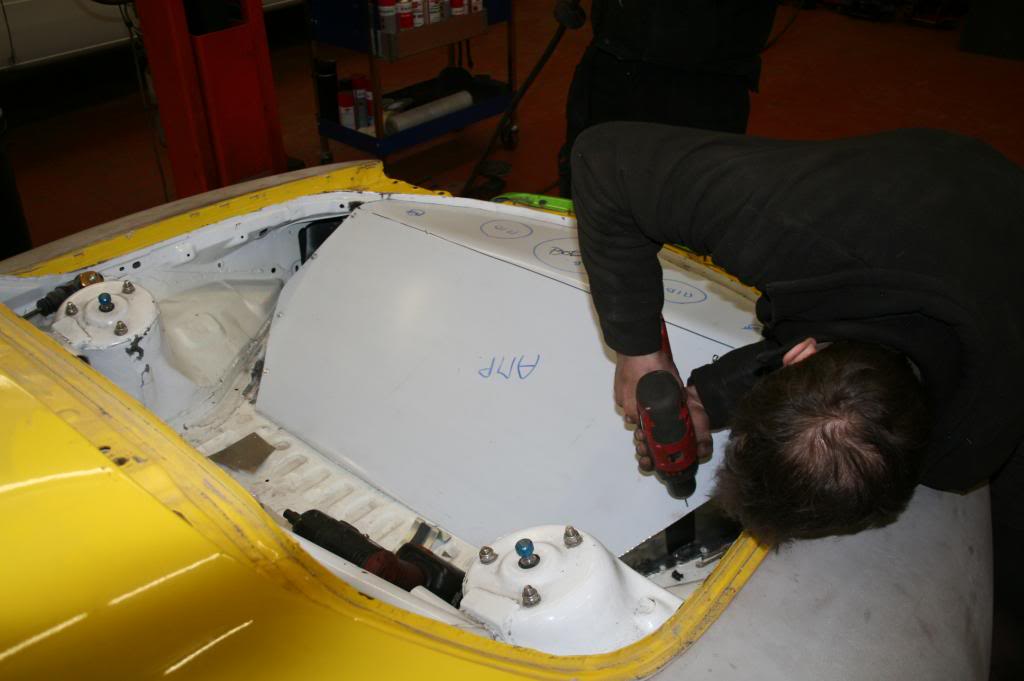
And the dash work to accept the gear selector lever.


Name:  6_zpsc55be615.jpg
Views: 689
Size:  77.6 KB


And the almost finished article with all the controls now in place.


Name:  7_zpseefe0ea4.jpg
Views: 696
Size:  90.6 KB


And a slightly out of focus one from the other side.


Name:  8_zps7dcf6498.jpg
Views: 673
Size:  65.0 KB
Old 04-09-13, 07:20 AM
  #62  
Senior Member

 
Iwan's Avatar
 
Join Date: May 2003
Location: Munich, Germany
Posts: 250
Likes: 0
Received 1 Like on 1 Post
Hi m8,

what gear box are using for your project please?

REgards,
Old 04-09-13, 04:44 PM
  #63  
Grippin' not Driftin'

Thread Starter
 
Sicknote's Avatar
 
Join Date: Jul 2011
Location: England
Posts: 149
Likes: 0
Received 0 Likes on 0 Posts
Originally Posted by Iwan
Hi m8,

what gear box are using for your project please?

REgards,

Hi Iwan, this is a MakTrak sequential gearbox.

http://maktrak.com/
Old 04-09-13, 04:46 PM
  #64  
Grippin' not Driftin'

Thread Starter
 
Sicknote's Avatar
 
Join Date: Jul 2011
Location: England
Posts: 149
Likes: 0
Received 0 Likes on 0 Posts
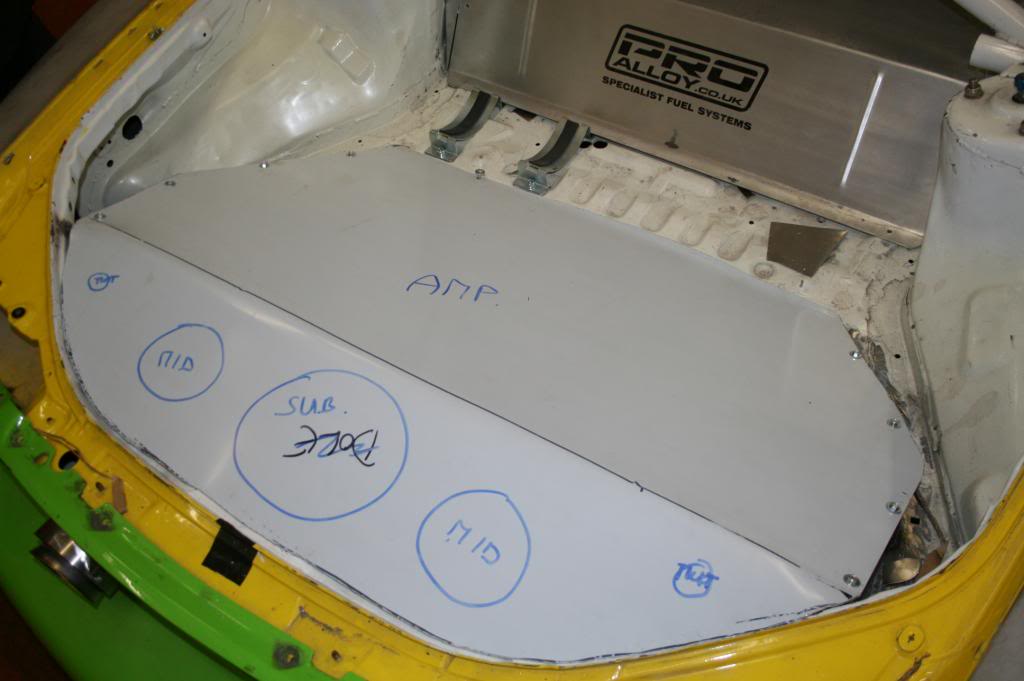
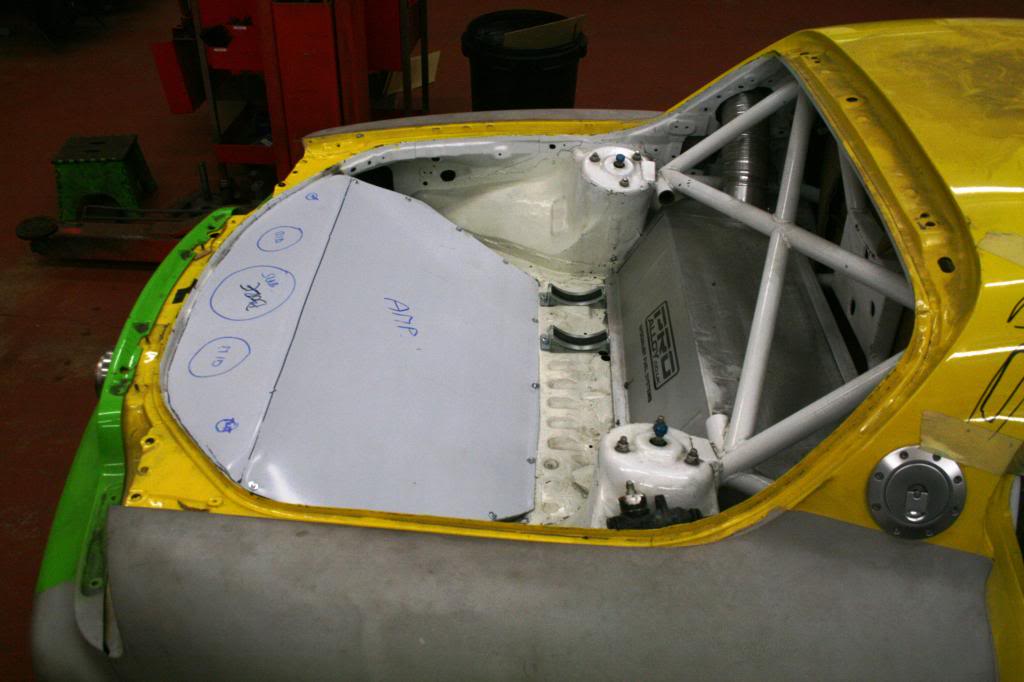
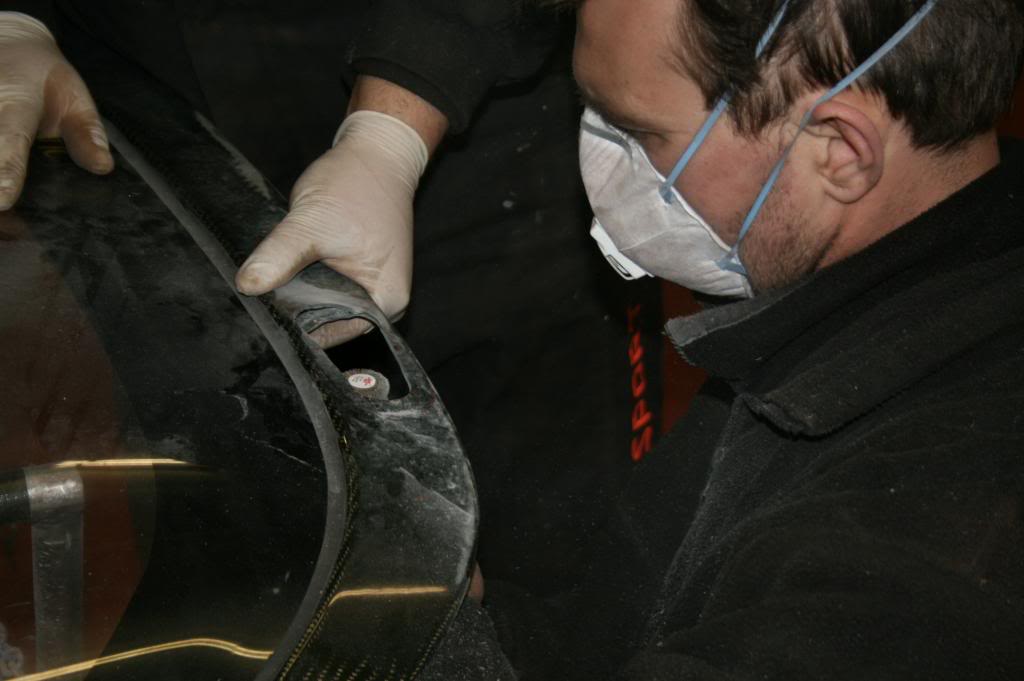
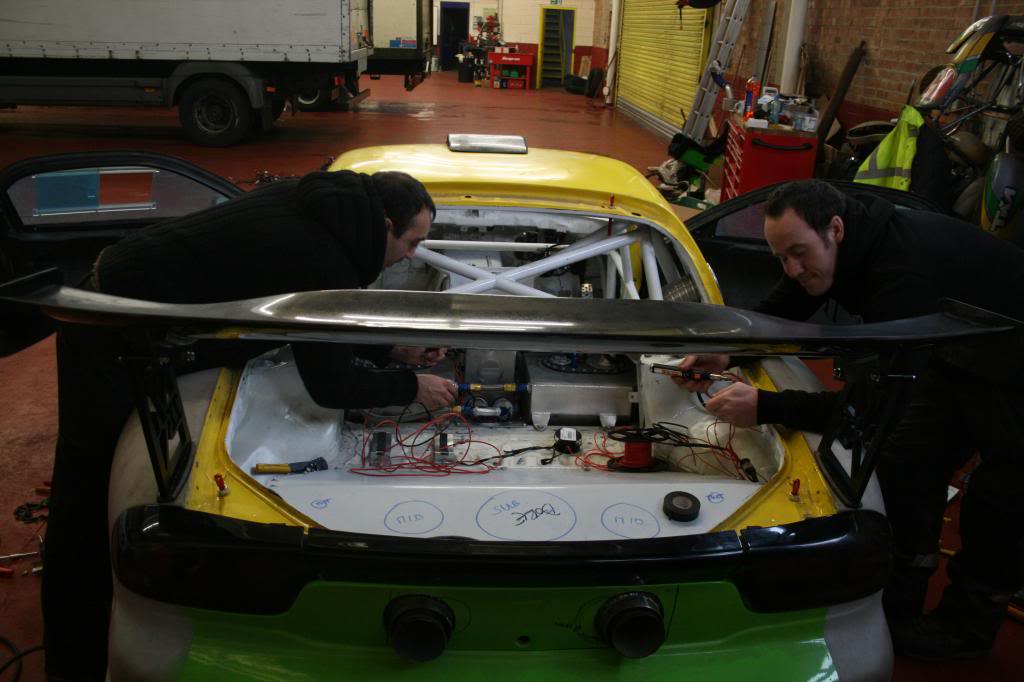
Right, another few jobs done tonight, we needed to get the rear hatch sorted so Stando and Eyo got to work on that
horrible job.

Plenty of Aerocatch's to go on :thumbsup:


Name:  1_zpsda47280f.jpg
Views: 689
Size:  59.4 KB


Name:  2_zps2bb1d1c8.jpg
Views: 672
Size:  53.8 KB


Name:  4_zpsddab11bf.jpg
Views: 695
Size:  71.8 KB


Name:  3_zpsc3fd5755.jpg
Views: 671
Size:  76.1 KB


Name:  5_zps5d6cb57f.jpg
Views: 689
Size:  74.7 KB


Name:  6_zps7c4b57d4.jpg
Views: 670
Size:  46.2 KB


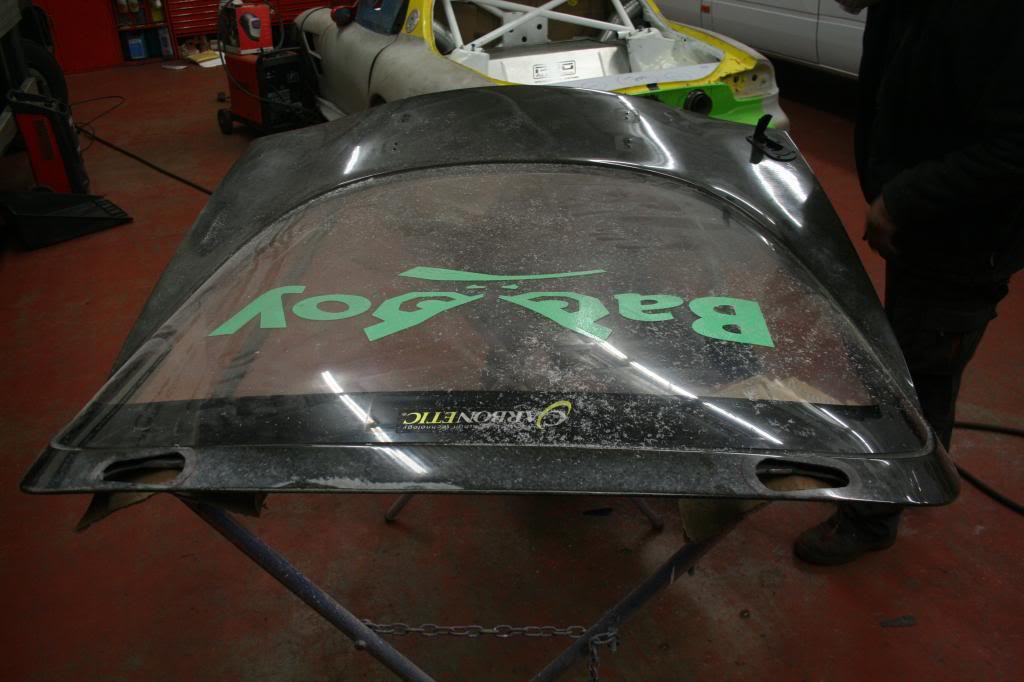
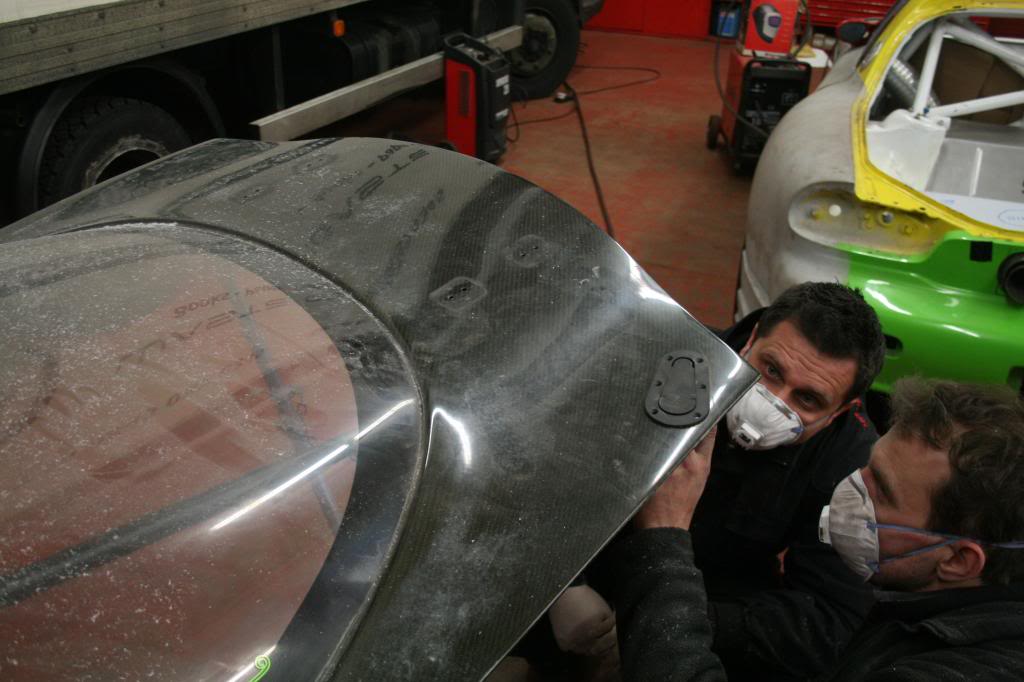
And the finished article......


Name:  7_zpscd949658.jpg
Views: 673
Size:  57.3 KB
Old 04-09-13, 04:46 PM
  #65  
Grippin' not Driftin'

Thread Starter
 
Sicknote's Avatar
 
Join Date: Jul 2011
Location: England
Posts: 149
Likes: 0
Received 0 Likes on 0 Posts
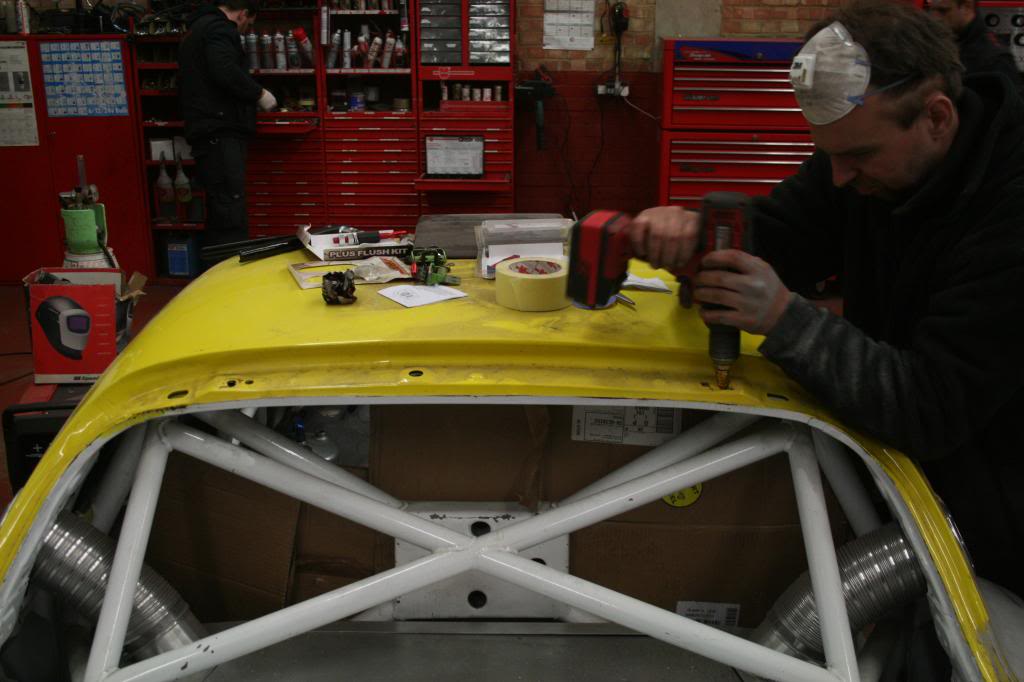
The other job was to fix the gearbox cover into place, Balky is our welding man for the job. :thumbsup:


Name:  10_zps4802b515.jpg
Views: 685
Size:  90.0 KB


Name:  11_zps179cdd7c.jpg
Views: 677
Size:  61.1 KB


Name:  12_zps1839c945.jpg
Views: 673
Size:  59.3 KB


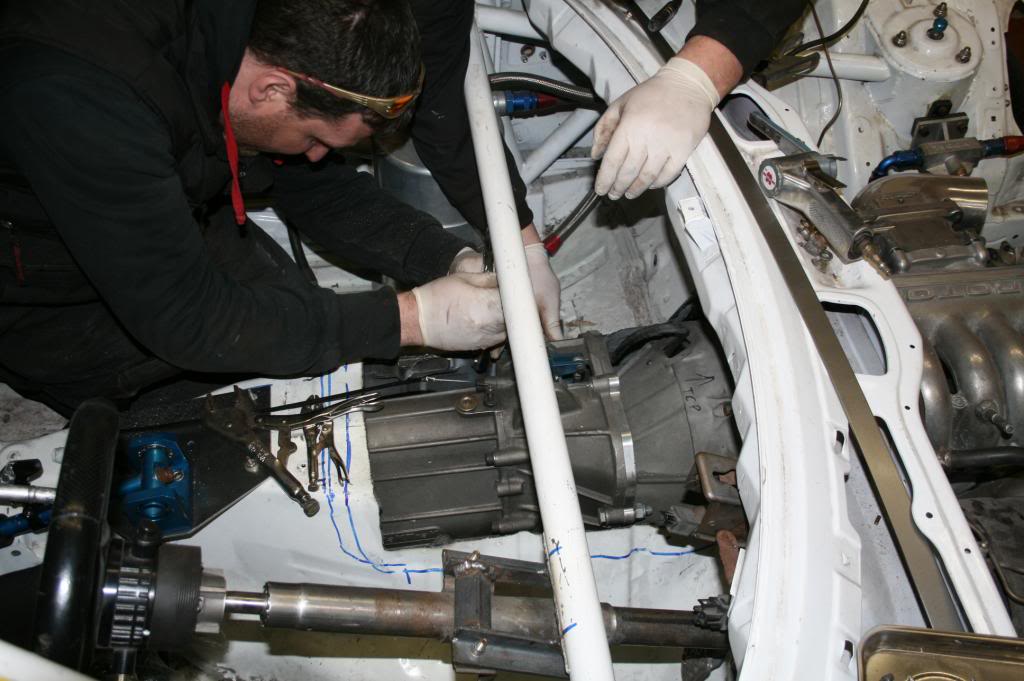
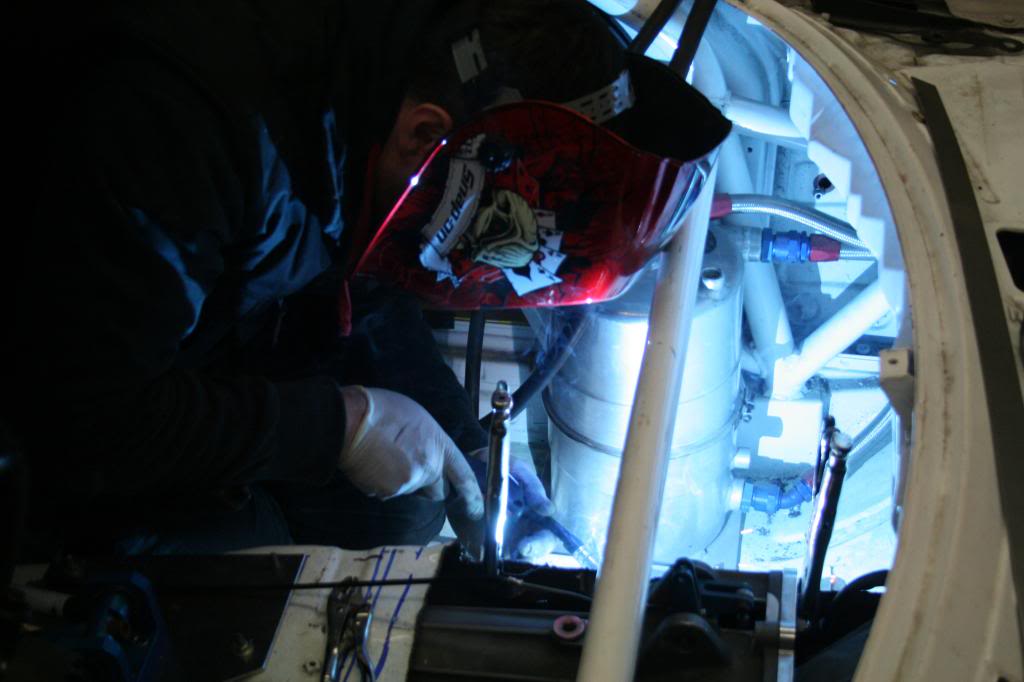
I had Roger tig weld the selector release bracket that we made a few days earlier onto the tunnel cover this morning.


Name:  13_zps87dd3cd8.jpg
Views: 694
Size:  51.9 KB
Old 04-09-13, 04:58 PM
  #66  
Water Injection Specialist

 
Erdin's Avatar
 
Join Date: Apr 2003
Location: UK
Posts: 479
Likes: 0
Received 0 Likes on 0 Posts
Loving fab work,as per usual. gear box looks great too
Old 04-10-13, 04:28 PM
  #67  
Grippin' not Driftin'

Thread Starter
 
Sicknote's Avatar
 
Join Date: Jul 2011
Location: England
Posts: 149
Likes: 0
Received 0 Likes on 0 Posts
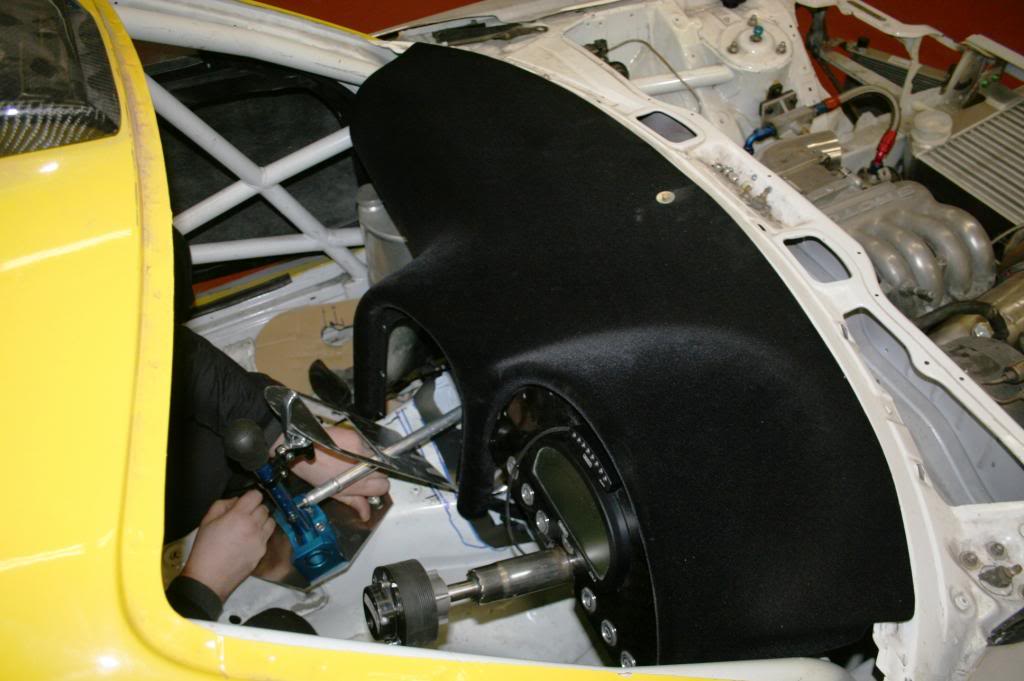
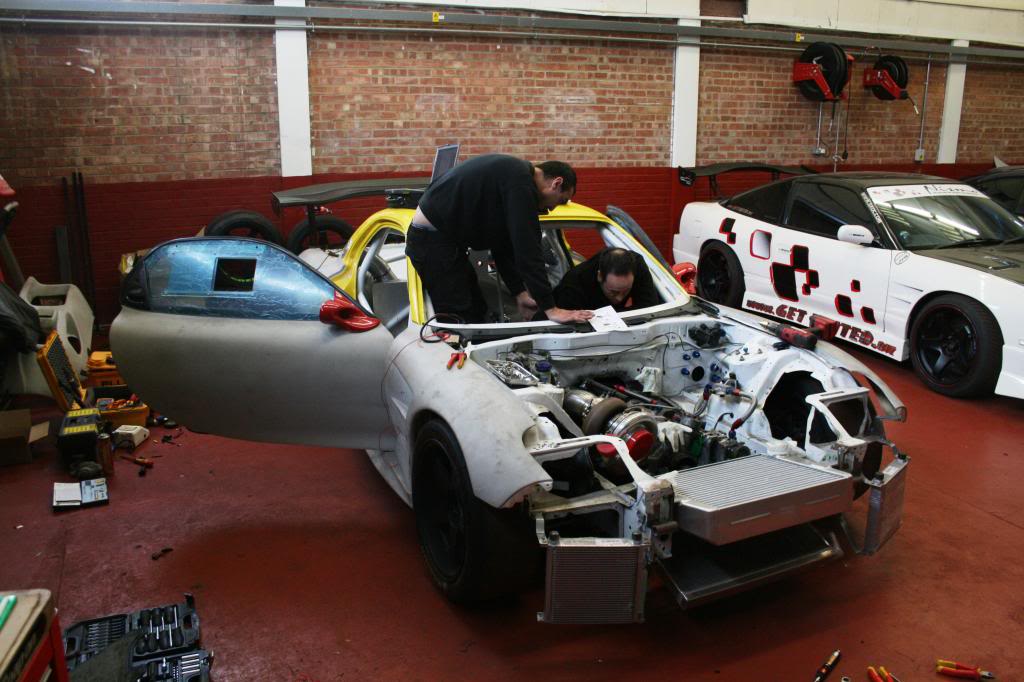
The throttle pedal went on today (no pics as I started feeling ill)

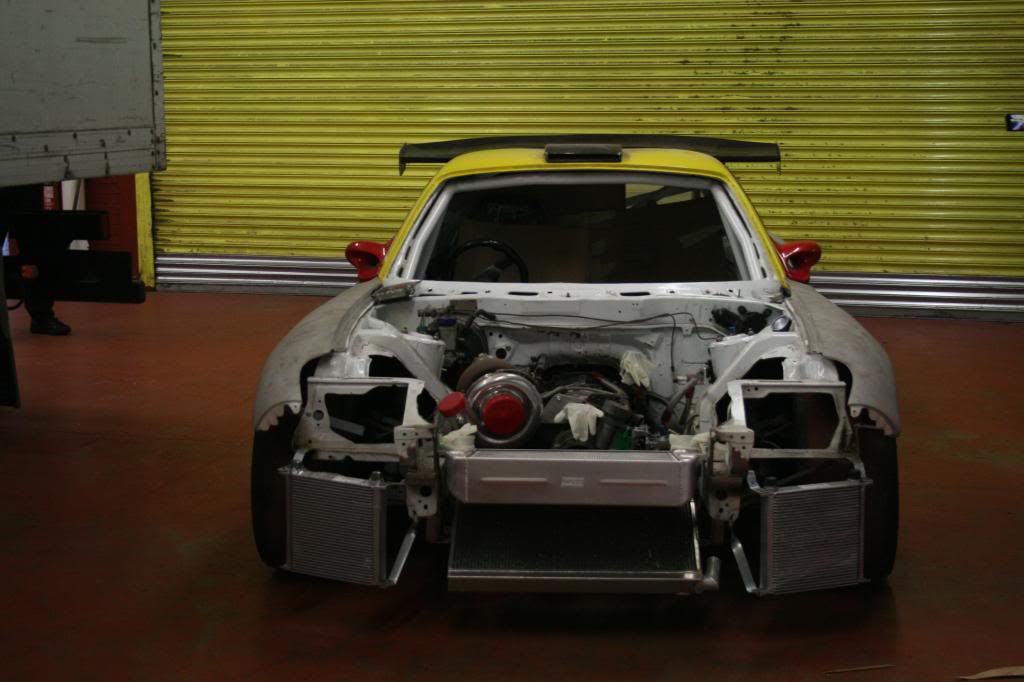
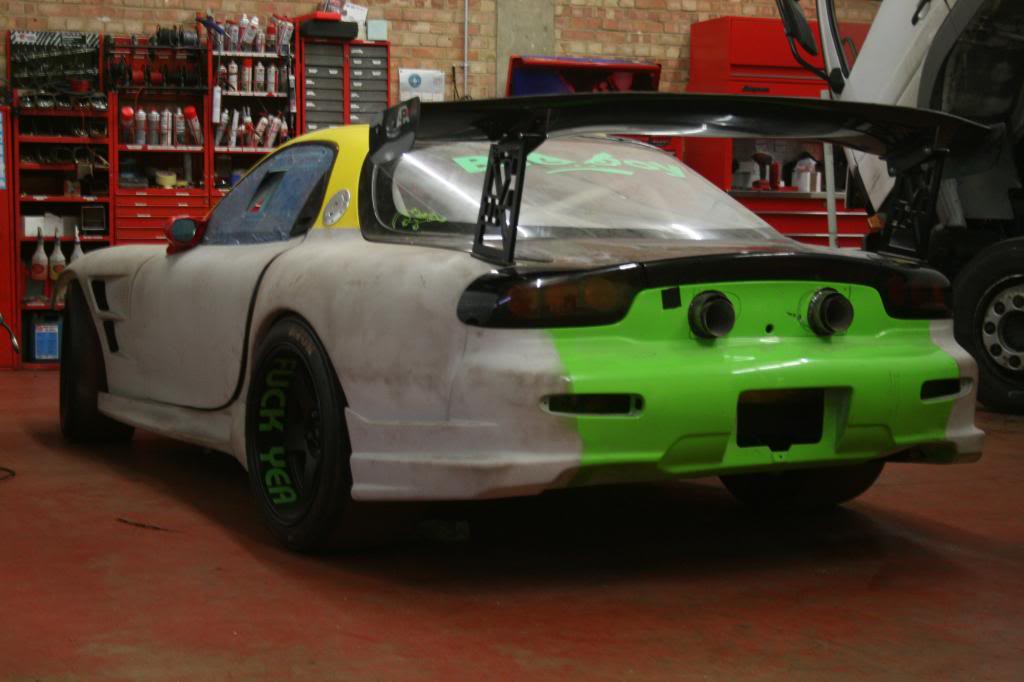
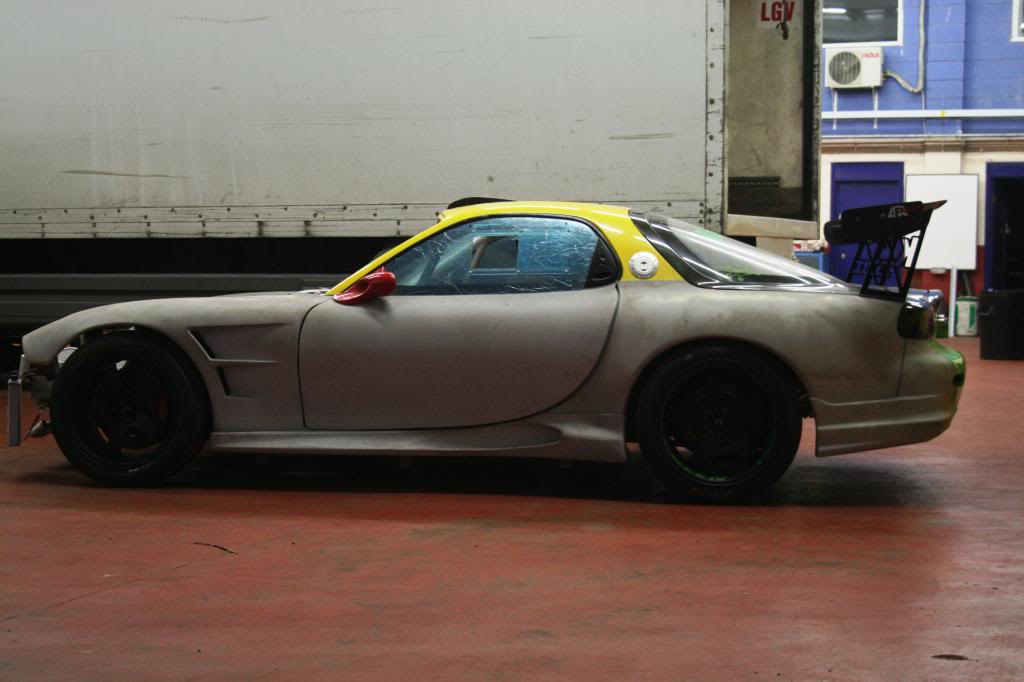
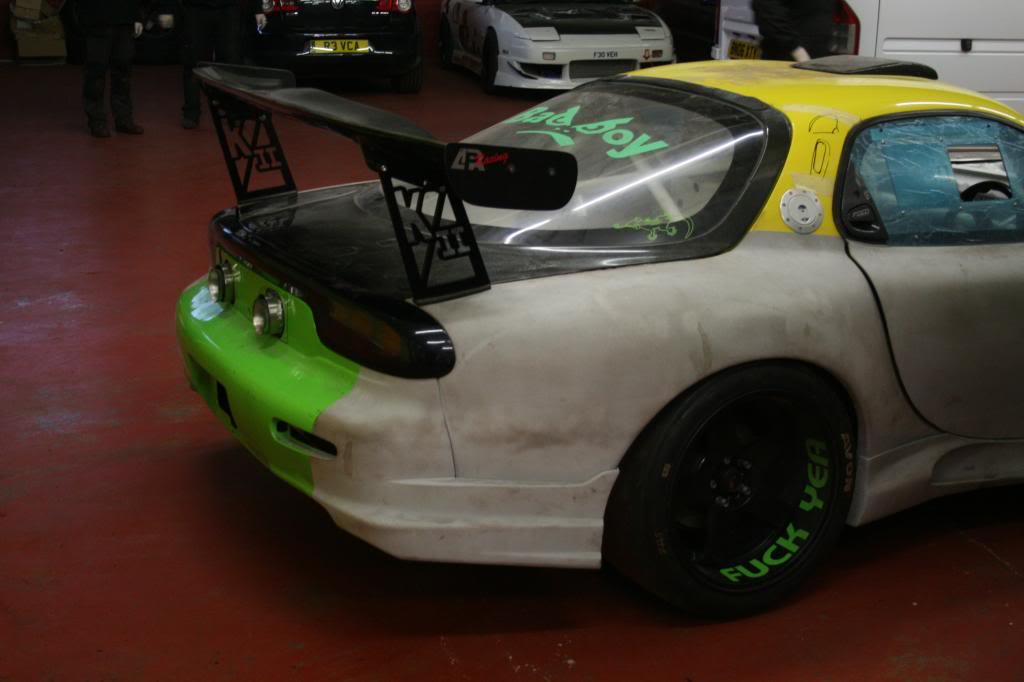
We put the rear stansions and wing on together with the rear lights... starting to look like a car again !! :thumbsup:

Only prob is we're not happy with the way the rear wing sits so the stansions will have to be re-made with a more aggressive angle.


Name:  Picture1026_zpsa7490d59.jpg
Views: 681
Size:  73.8 KB


Name:  Picture1025_zpsfd01545a.jpg
Views: 678
Size:  65.7 KB


Name:  Picture1033_zps7cc6c616.jpg
Views: 680
Size:  58.1 KB


Name:  Picture1028_zps7d2597ab.jpg
Views: 673
Size:  52.8 KB
Old 04-12-13, 10:07 AM
  #68  
PM no worky

 
Join Date: Sep 2003
Location: Maryland
Posts: 158
Likes: 0
Received 0 Likes on 0 Posts
Very cool build!
Old 04-12-13, 01:09 PM
  #69  
Garage Hero

iTrader: (93)
 
mannykiller's Avatar
 
Join Date: Aug 2009
Location: Quartz Hill
Posts: 4,205
Likes: 0
Received 17 Likes on 14 Posts
what wing is that? I'm not happy with the way the wing sits either haha. Looks plenty strong....but a little tooo "erect"
Old 04-21-13, 10:20 AM
  #70  
Grippin' not Driftin'

Thread Starter
 
Sicknote's Avatar
 
Join Date: Jul 2011
Location: England
Posts: 149
Likes: 0
Received 0 Likes on 0 Posts
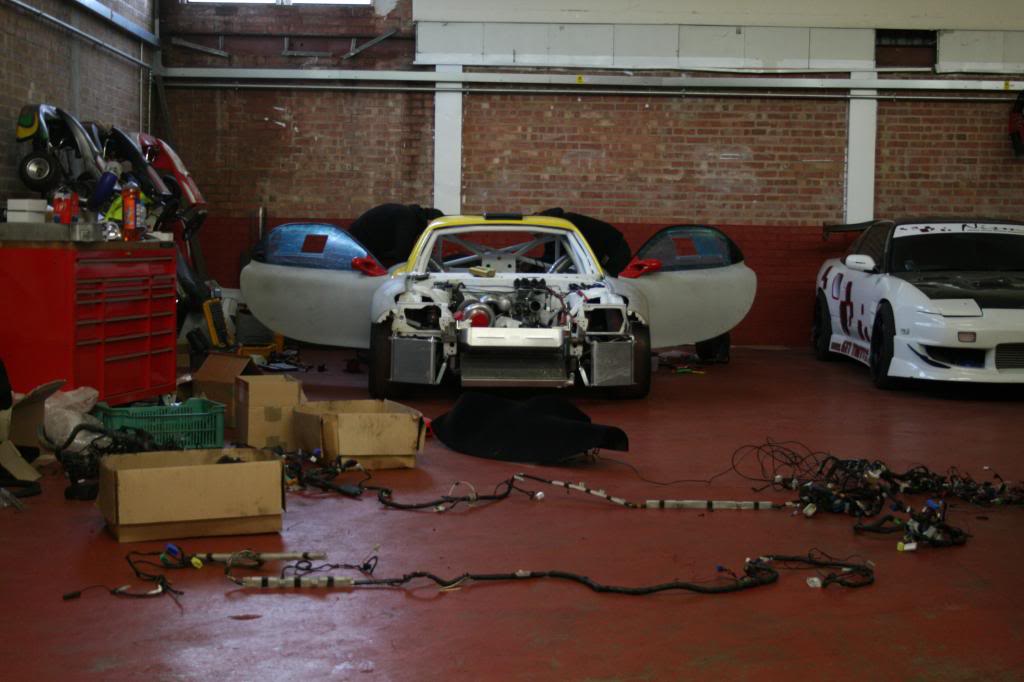
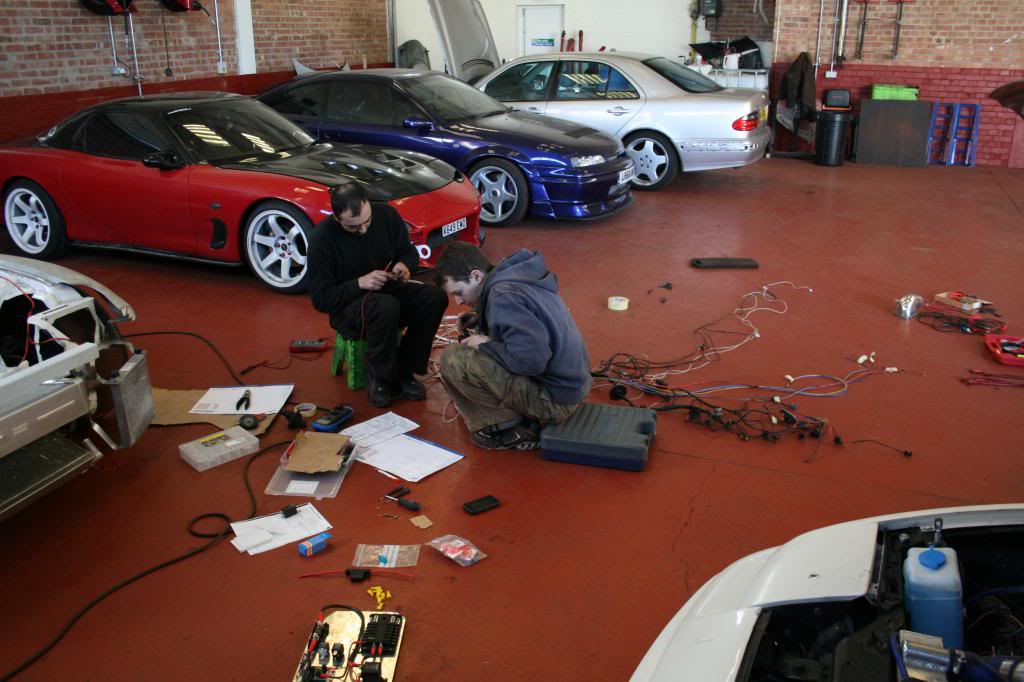
This weekend the wiring commenced. :thumbsup:


Most of this on the floor is being binned, we just strung it all out incase there are any connectors that are required.


Name:  3_zps5c841465.jpg
Views: 676
Size:  77.8 KB


Name:  4_zpsa5d6c812.jpg
Views: 666
Size:  88.1 KB


Name:  5_zps35ad4266.jpg
Views: 689
Size:  71.5 KB


These are the two protagonists on the wiring case 1!! :thumbsup:


Name:  6_zpsa6ab9bb4.jpg
Views: 671
Size:  75.5 KB


Name:  7_zps53590920.jpg
Views: 674
Size:  80.7 KB


Sooo neat, you can't really make out that the fueling system wiring is complete.

Name:  8_zpse65d039d.jpg
Views: 669
Size:  79.8 KB


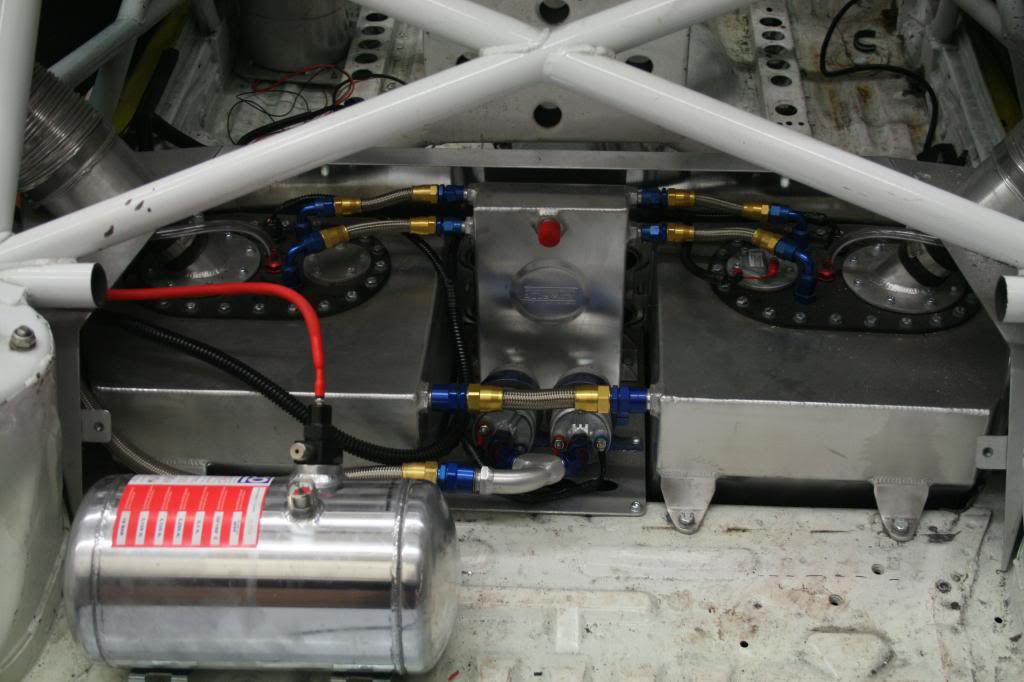
And it all continues today.
Old 04-21-13, 10:21 AM
  #71  
Grippin' not Driftin'

Thread Starter
 
Sicknote's Avatar
 
Join Date: Jul 2011
Location: England
Posts: 149
Likes: 0
Received 0 Likes on 0 Posts
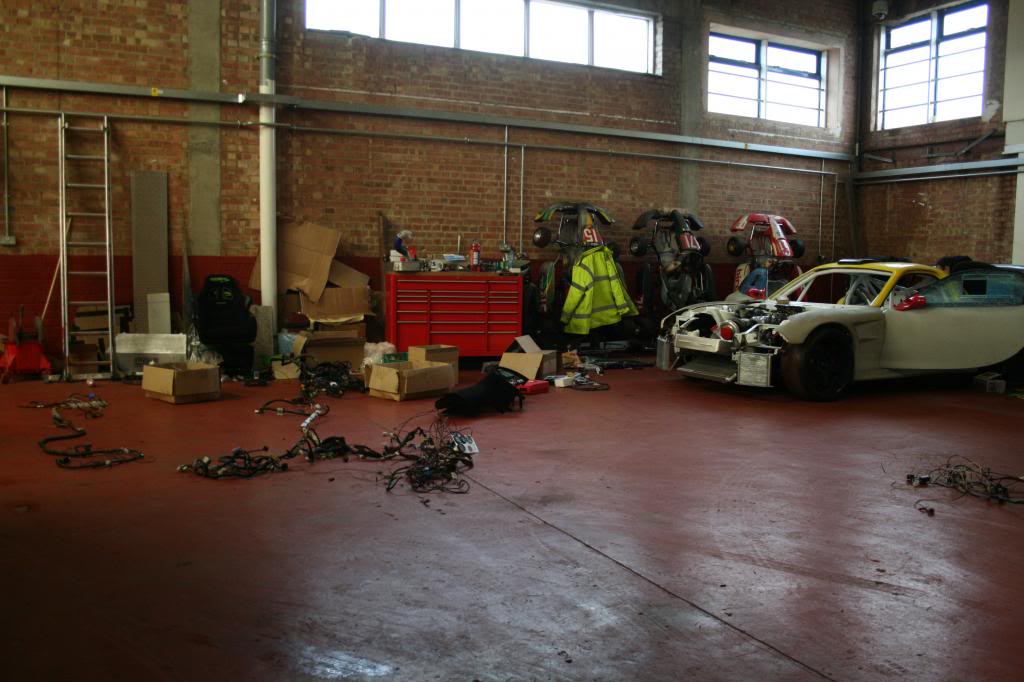
Not many pics for a lot of wiring work.. soz.


This is obviously the best way to wire an FD !!!


Name:  1_zps9e4d0811.jpg
Views: 666
Size:  101.6 KB


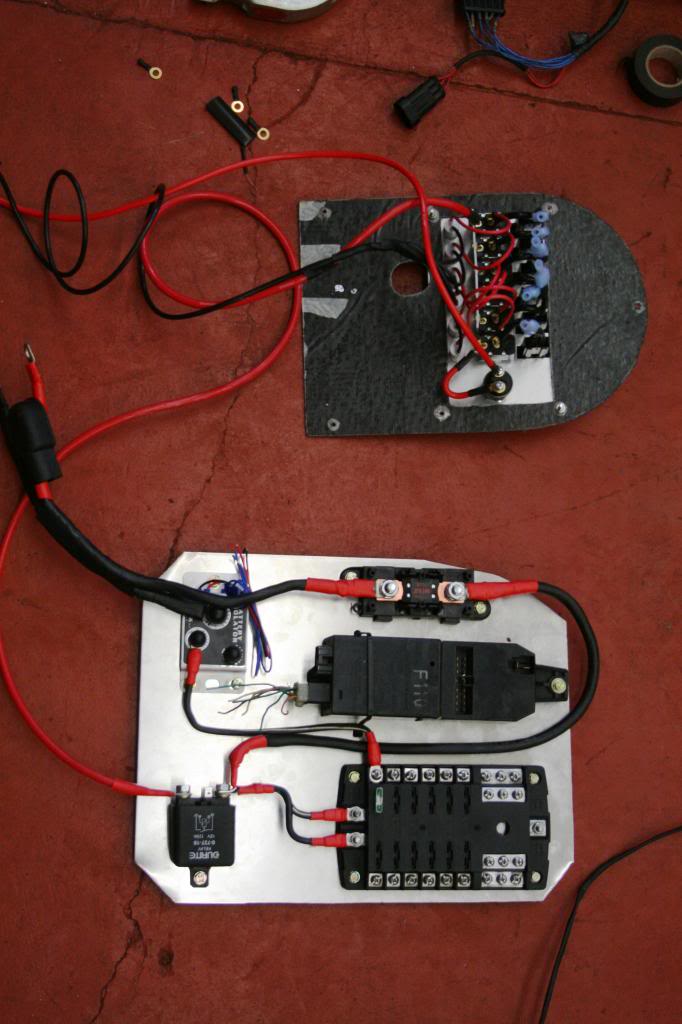
This is the hub of the wiring, took plenty of working out and planning. :thumbsup:


Name:  2_zps5bc57e0d.jpg
Views: 675
Size:  79.7 KB


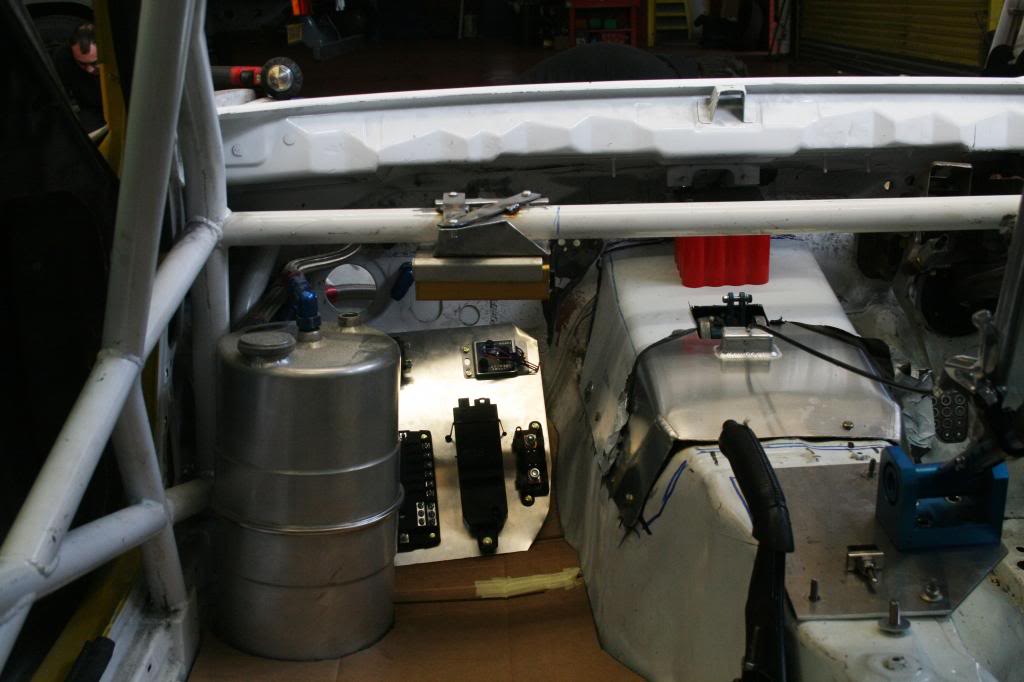
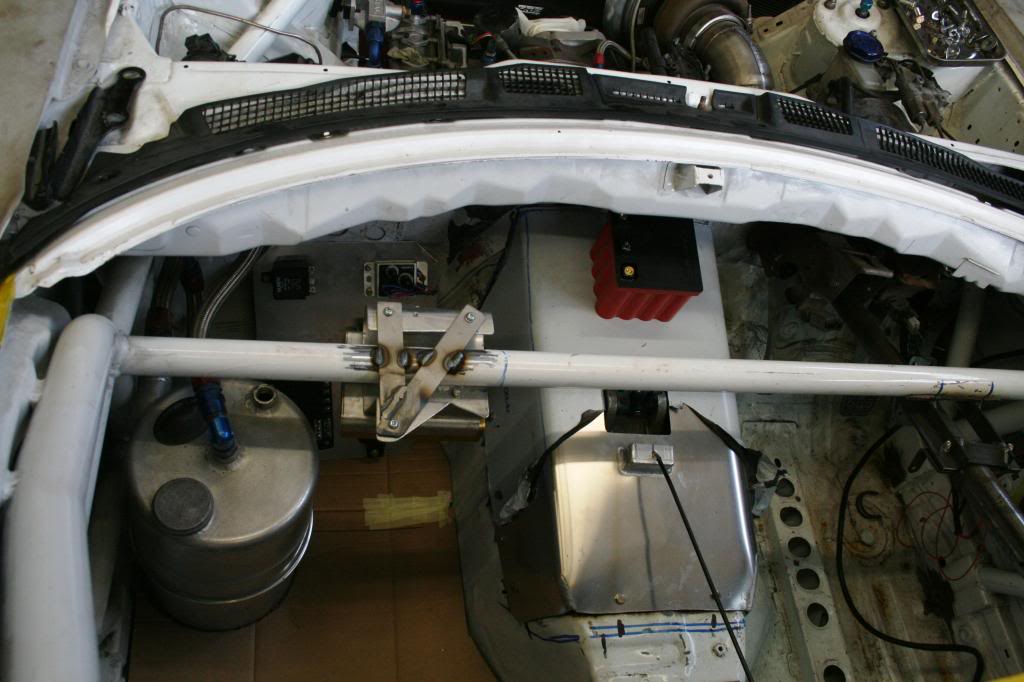
And laid in the car (will be higher and fixed to the bulkhead) together with the battery nicely positioned on the tunnel.

Name:  3_zps69a74571.jpg
Views: 672
Size:  70.4 KB


Name:  4_zpsd57e96a3.jpg
Views: 665
Size:  84.2 KB
Old 04-21-13, 10:21 AM
  #72  
Grippin' not Driftin'

Thread Starter
 
Sicknote's Avatar
 
Join Date: Jul 2011
Location: England
Posts: 149
Likes: 0
Received 0 Likes on 0 Posts
Originally Posted by ducman77
Coming along nicely - wiring (like everything else on this car) looks top drawer:thumbsup:

Thanks David, much appreciated. :thumbsup:


This will keep us busy this weekend, the full MoTeC wiring loom and to the right is the MoTeC rotary switch for 10 boost settings.


Name:  Picture1062_zps1f372763.jpg
Views: 654
Size:  96.8 KB
Old 04-21-13, 10:22 AM
  #73  
Grippin' not Driftin'

Thread Starter
 
Sicknote's Avatar
 
Join Date: Jul 2011
Location: England
Posts: 149
Likes: 0
Received 0 Likes on 0 Posts
This is the new lighter and smaller race alternator, would have been MUCH smaller if K-II wasn't going to be
road legal, but this little baby still knocks out 120 amps.


Name:  Picture1069_zps9da21c8b.jpg
Views: 666
Size:  49.9 KB
Old 04-21-13, 10:22 AM
  #74  
Grippin' not Driftin'

Thread Starter
 
Sicknote's Avatar
 
Join Date: Jul 2011
Location: England
Posts: 149
Likes: 0
Received 0 Likes on 0 Posts
Phase II of the wiring proved to be VERY problematic

The new MoTeC looms don't match up to the older ECU's even though theyre still labeled M600 and M800, thus ALL the pins had to be
taken out of the blocks, tested and re-routed, this took UBBER amounts of time.


Name:  Picture1072_zps40cba631.jpg
Views: 691
Size:  91.1 KB


This was Geoffs re-routing diagram. loooooool !!!


Name:  Picture1080_zpsf09e5fd1.jpg
Views: 713
Size:  52.0 KB
Old 04-21-13, 10:23 AM
  #75  
Grippin' not Driftin'

Thread Starter
 
Sicknote's Avatar
 
Join Date: Jul 2011
Location: England
Posts: 149
Likes: 0
Received 0 Likes on 0 Posts
Once all the pins were put back in the correct places the loom could then be prepared for installation


Name:  Picture1073_zpse2a69e34.jpg
Views: 670
Size:  87.9 KB


And in it goes


Name:  Picture1083_zpsb96c406f.jpg
Views: 673
Size:  101.6 KB


Name:  Picture1076_zps365d74ed.jpg
Views: 689
Size:  109.1 KB


Quick Reply: 20b Turbo track car build (England)


All times are GMT -5. The time now is 08:39 PM.