20b Turbo track car build (England)

Thread Tools
 
Search this Thread
 
Old 02-03-13, 05:24 PM
  #1  
Grippin' not Driftin'

Thread Starter
 
Sicknote's Avatar
 
Join Date: Jul 2011
Location: England
Posts: 149
Likes: 0
Received 0 Likes on 0 Posts
20b Turbo track car build (England)

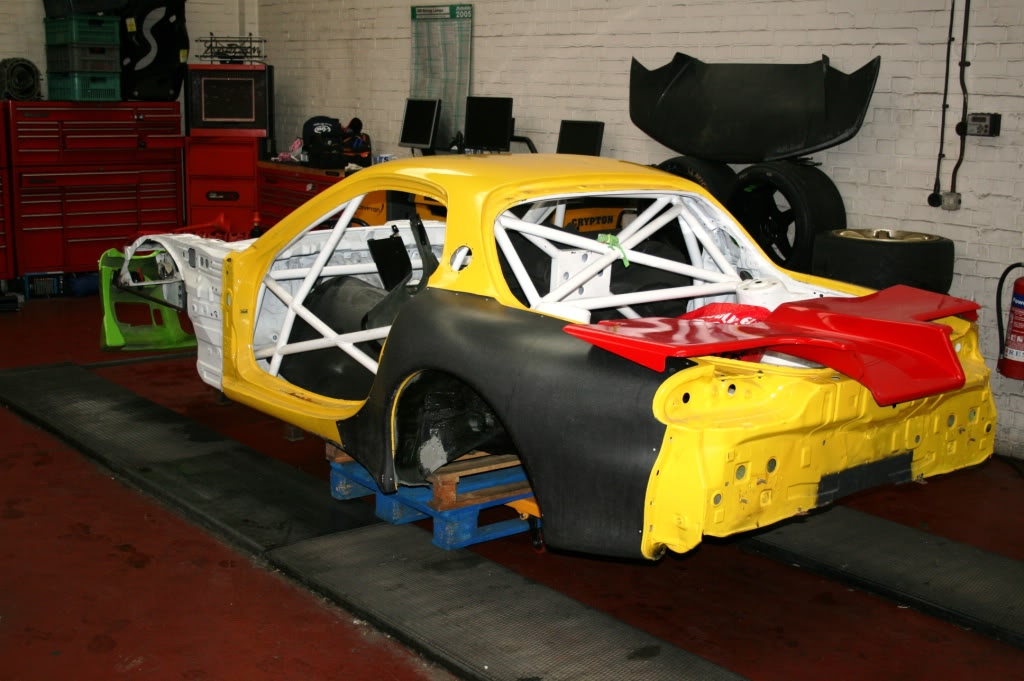
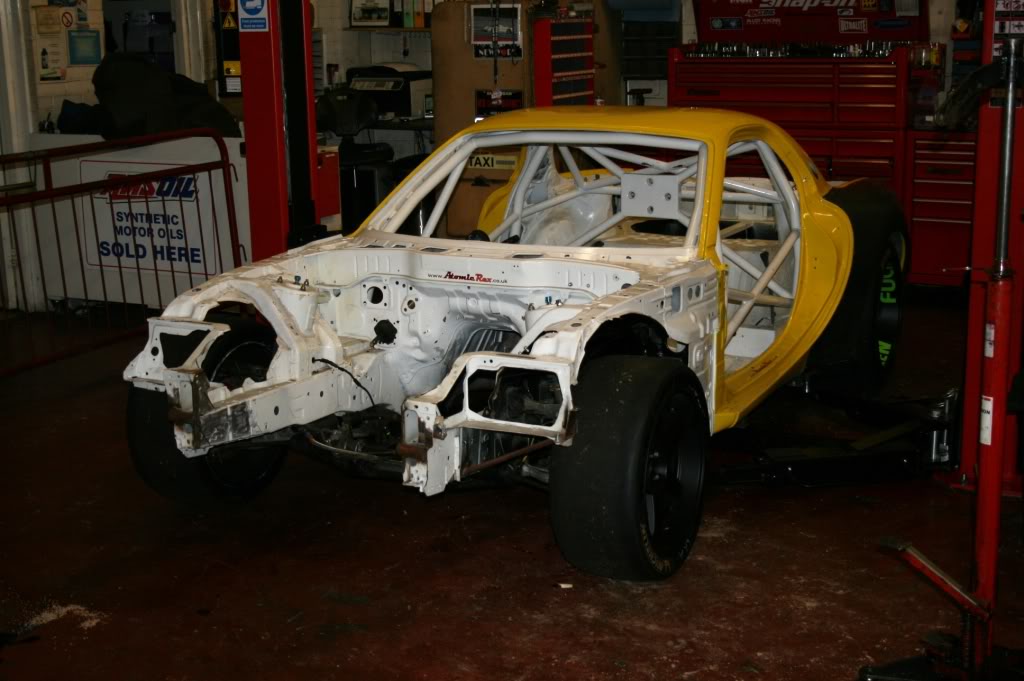
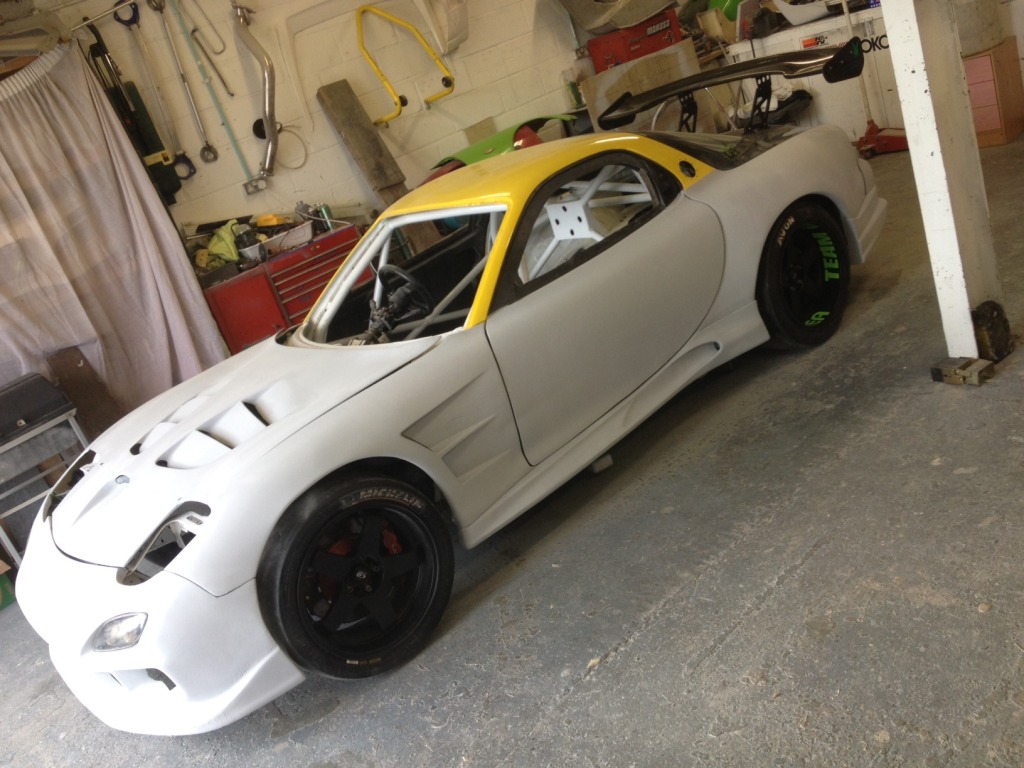
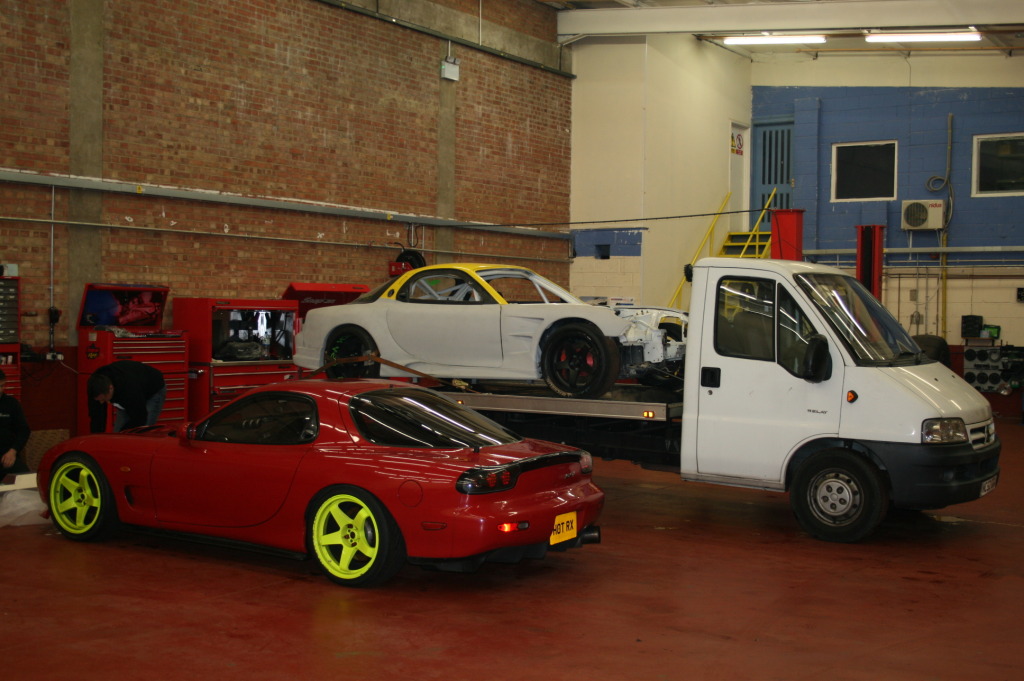
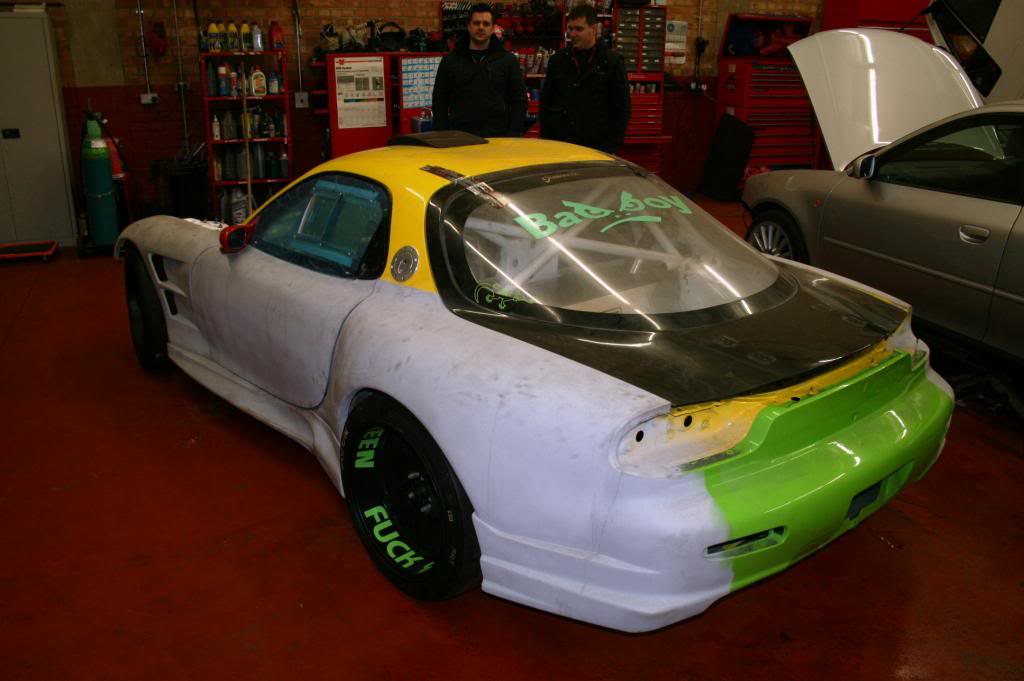
We've been building a 20b track (and road legal) car for the last few months, thought I'd better share some build photos
for all 20b enthusiasts.


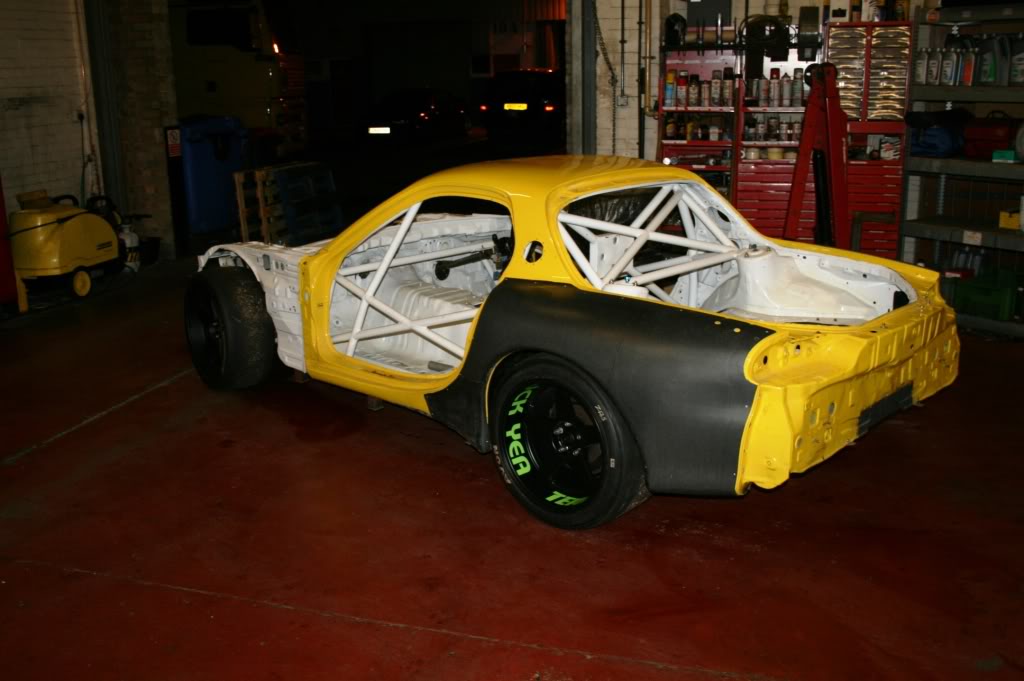
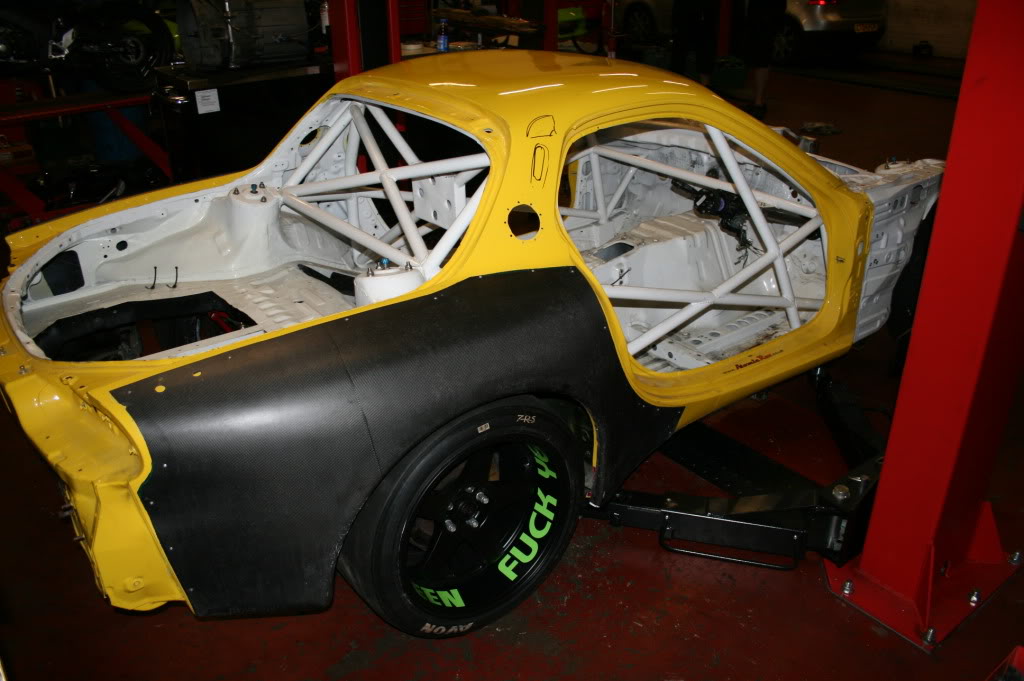
The build for K-II has commenced after Sundays run around Rockingham, here's just a few early pics.

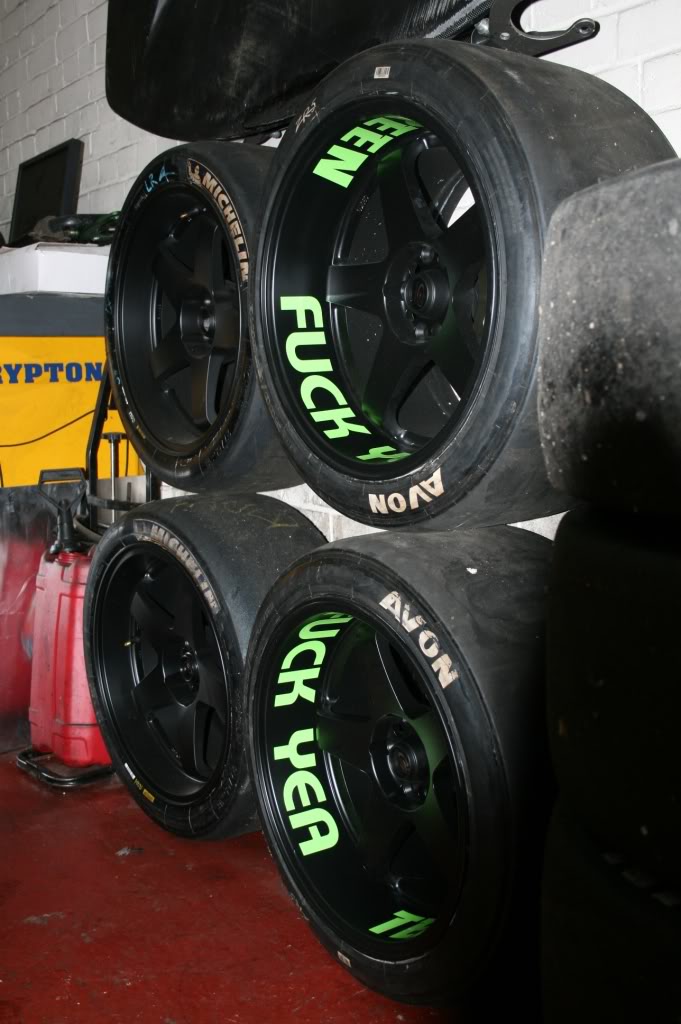
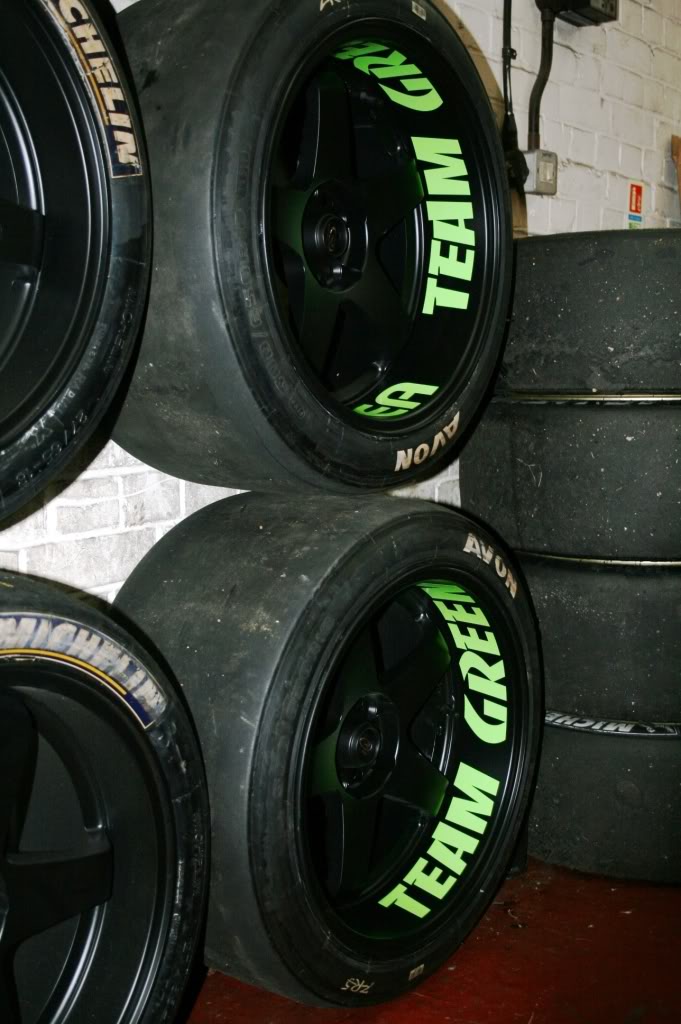
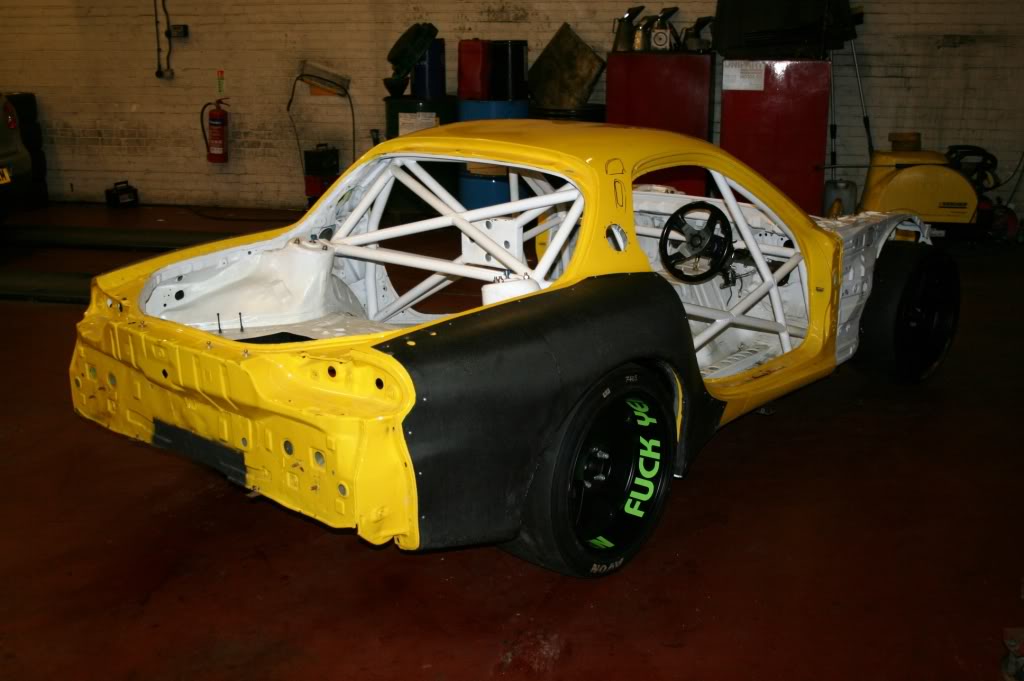
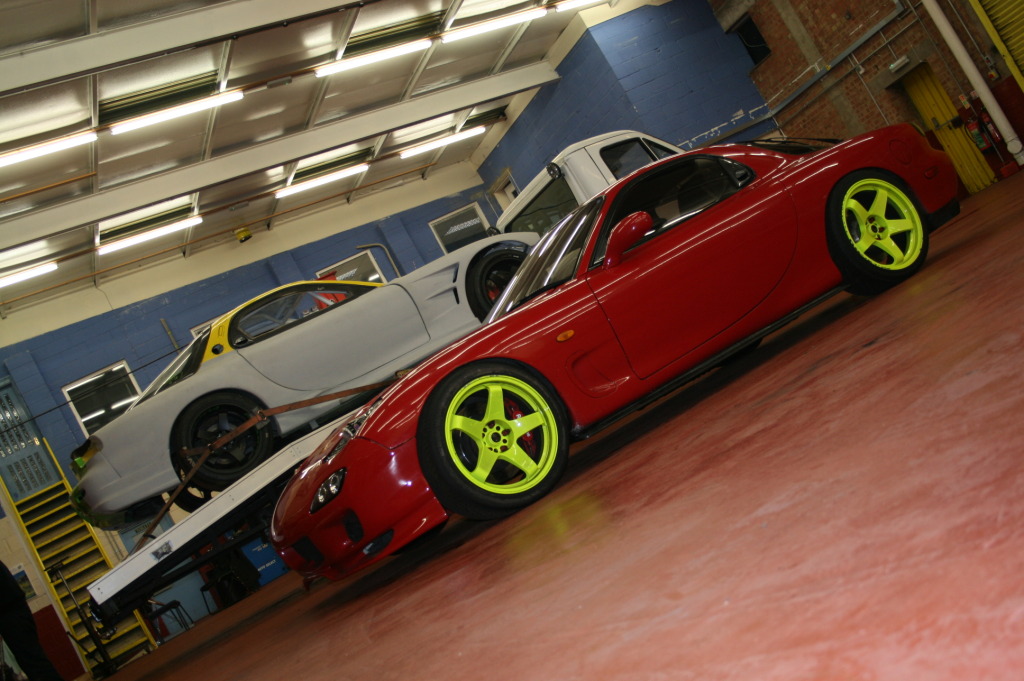
Inspiration for the wheels... Team America... FDUK Yeah !!

Name:  Picture322.jpg
Views: 769
Size:  92.0 KB

Name:  Picture321.jpg
Views: 711
Size:  98.1 KB

Name:  Picture323.jpg
Views: 836
Size:  120.5 KB

Name:  Picture336.jpg
Views: 1013
Size:  150.5 KB

Name:  Picture339.jpg
Views: 635
Size:  93.8 KB

Name:  Picture359.jpg
Views: 697
Size:  90.4 KB

Name:  Picture362.jpg
Views: 793
Size:  76.4 KB

Name:  Picture363.jpg
Views: 707
Size:  76.5 KB

Name:  Picture366.jpg
Views: 692
Size:  124.0 KB

Name:  Picture361.jpg
Views: 660
Size:  98.5 KB

Last edited by Sicknote; 02-03-13 at 05:27 PM.
Old 02-03-13, 05:29 PM
  #2  
Grippin' not Driftin'

Thread Starter
 
Sicknote's Avatar
 
Join Date: Jul 2011
Location: England
Posts: 149
Likes: 0
Received 0 Likes on 0 Posts
A bit of front bumper widening and fettling.

Name:  KermitBumperwidening.jpg
Views: 670
Size:  97.3 KB

Name:  Kermitbumperwidening1.jpg
Views: 667
Size:  97.8 KB

A few pics of the new bodywork in progress.

Name:  K-II3.jpg
Views: 667
Size:  124.6 KB


Name:  K-II2.jpg
Views: 587
Size:  63.9 KB


Name:  K-II1.jpg
Views: 672
Size:  114.2 KB


Name:  K-II4.jpg
Views: 653
Size:  104.9 KB
Old 02-03-13, 05:32 PM
  #3  
Grippin' not Driftin'

Thread Starter
 
Sicknote's Avatar
 
Join Date: Jul 2011
Location: England
Posts: 149
Likes: 0
Received 0 Likes on 0 Posts
Most of the prep done now.

Name:  K-II5.jpg
Views: 657
Size:  157.9 KB

Here are the newley modded Re-A sideskirts. Just a bit of adjustment to
the front wings to do and I'll bring her home tonight.

Name:  K-II6.jpg
Views: 676
Size:  211.7 KB

A side shot.

Name:  K-II7.jpg
Views: 670
Size:  191.8 KB
Old 02-03-13, 05:34 PM
  #4  
Grippin' not Driftin'

Thread Starter
 
Sicknote's Avatar
 
Join Date: Jul 2011
Location: England
Posts: 149
Likes: 0
Received 0 Likes on 0 Posts
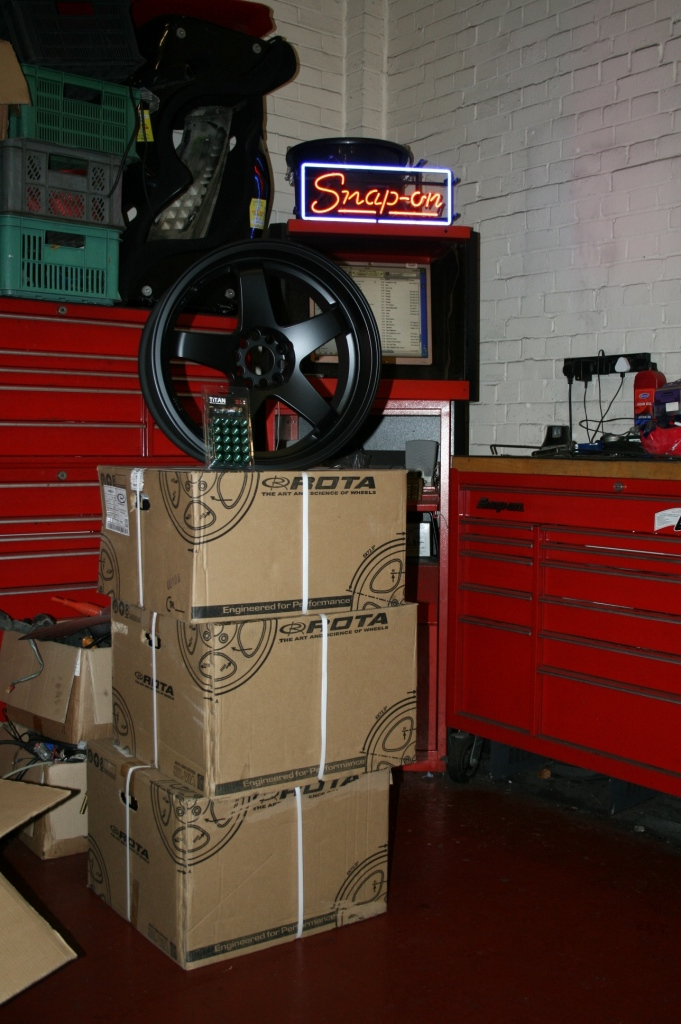
The second set of Rota GTR-D's have arrived, these are for the wet/road tyres.... asked for green wheel nuts this time.

And the 25mm spacers for the rear from Danny at DM Motorsports... eeez a good lad. :thumbsup:

Name:  Picture410.jpg
Views: 669
Size:  336.3 KB


Name:  Picture411.jpg
Views: 681
Size:  174.7 KB


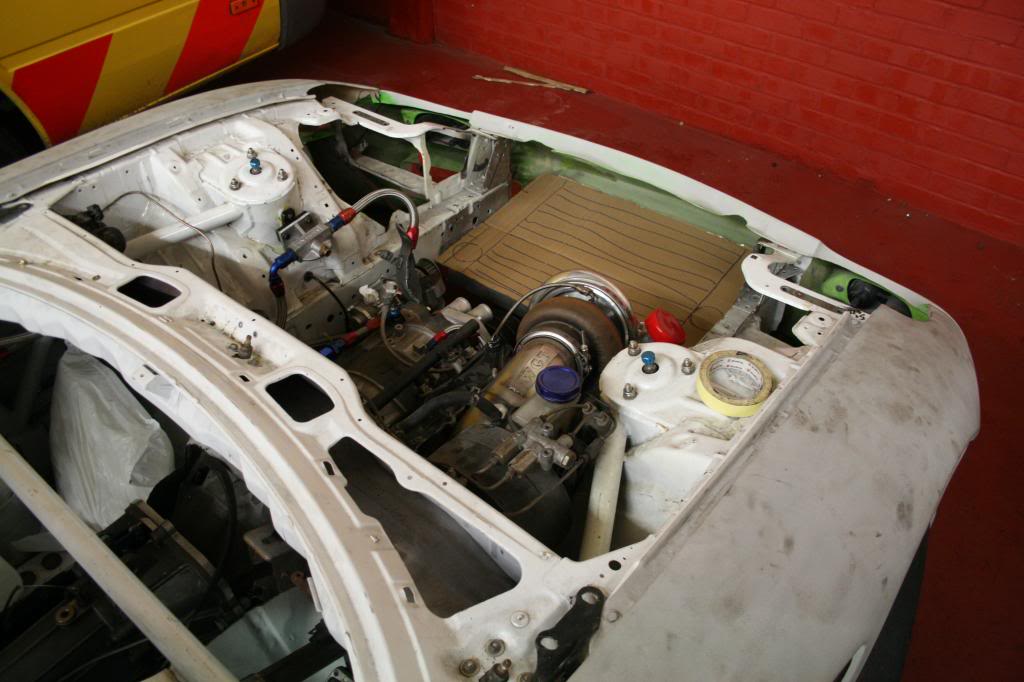
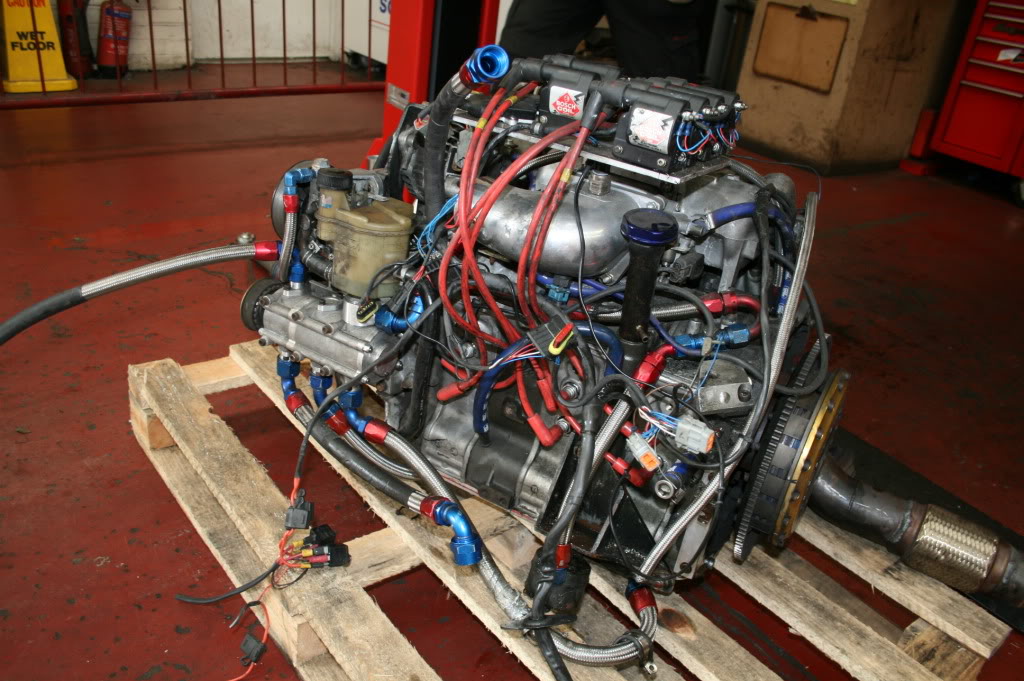
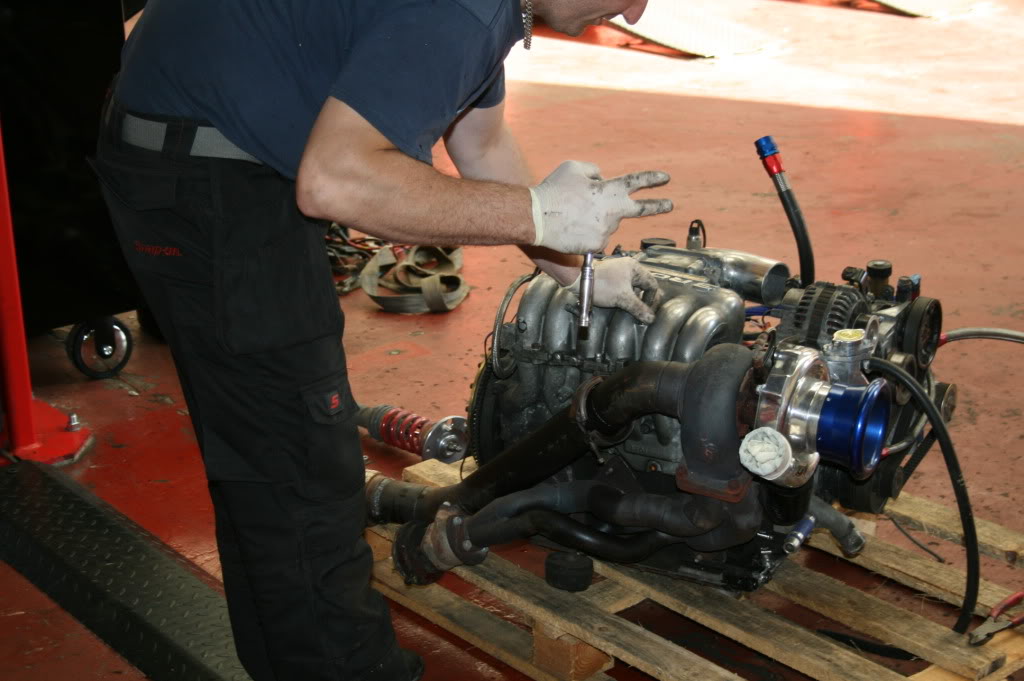
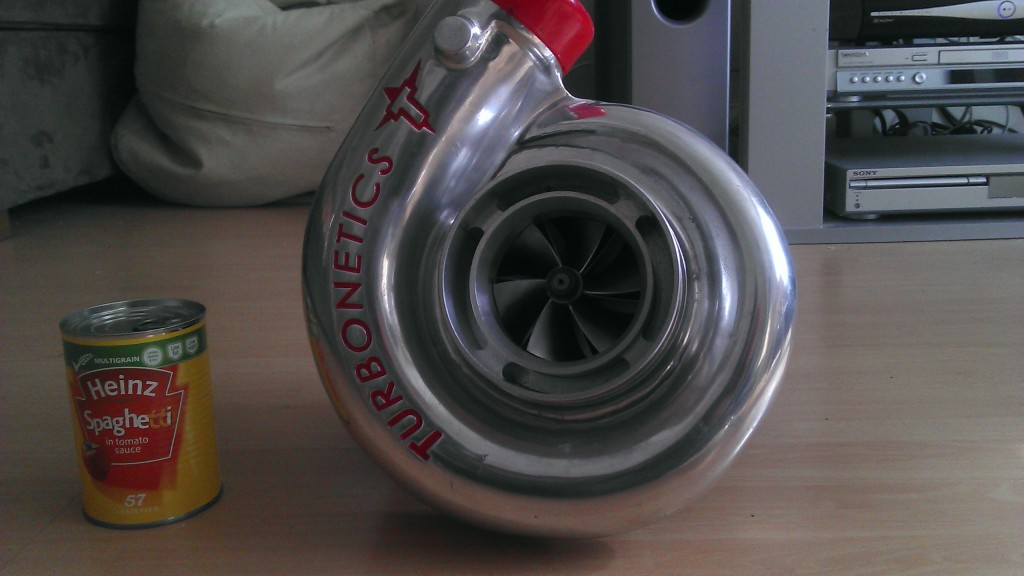
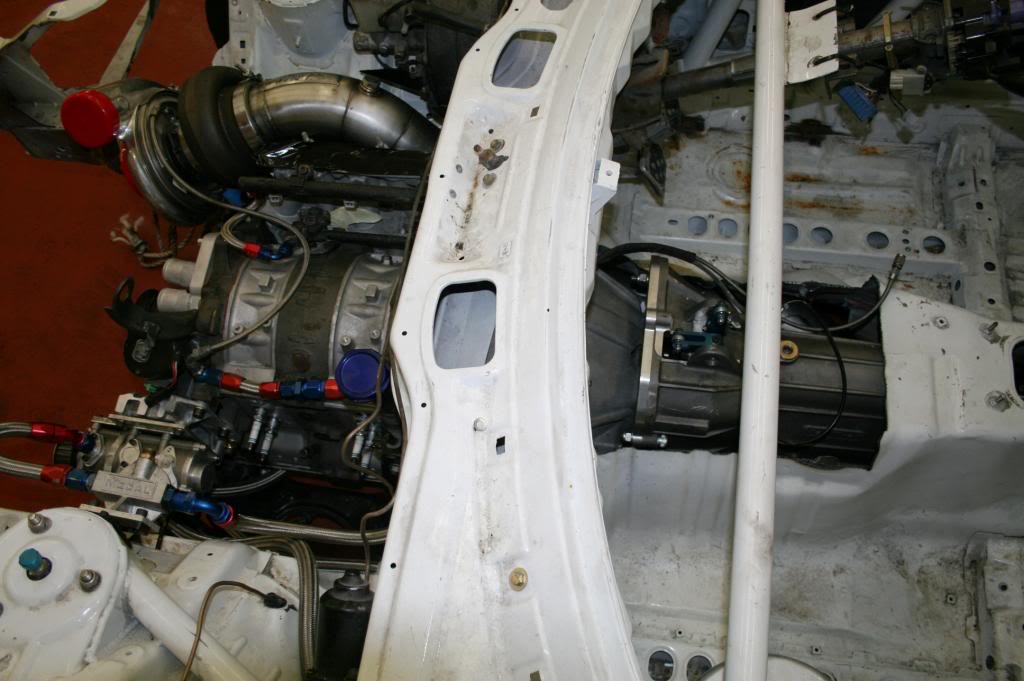
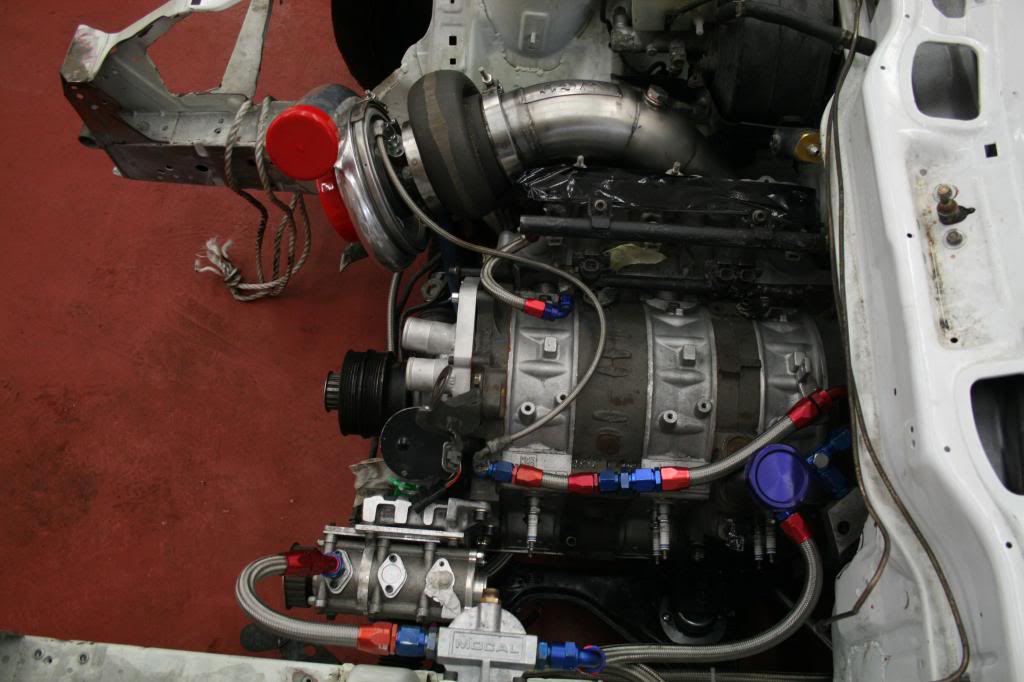
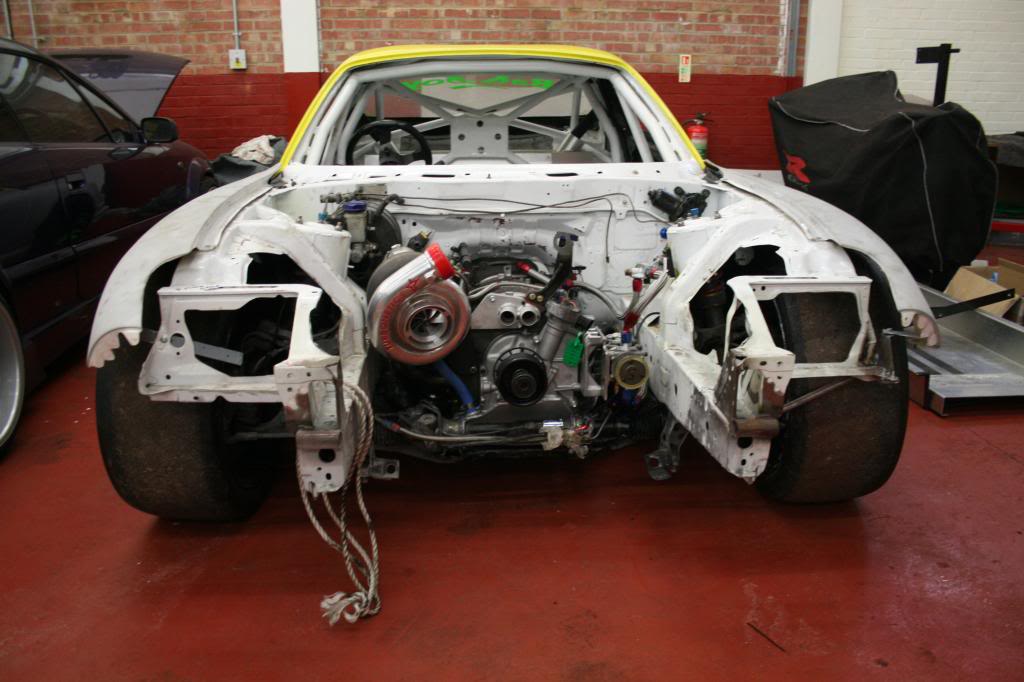
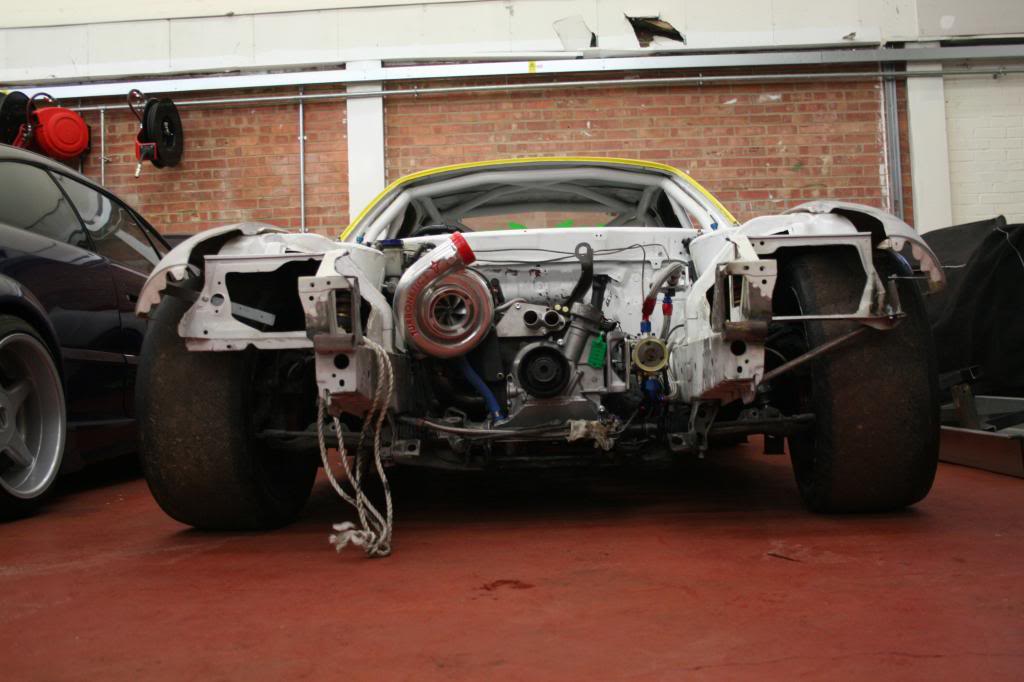
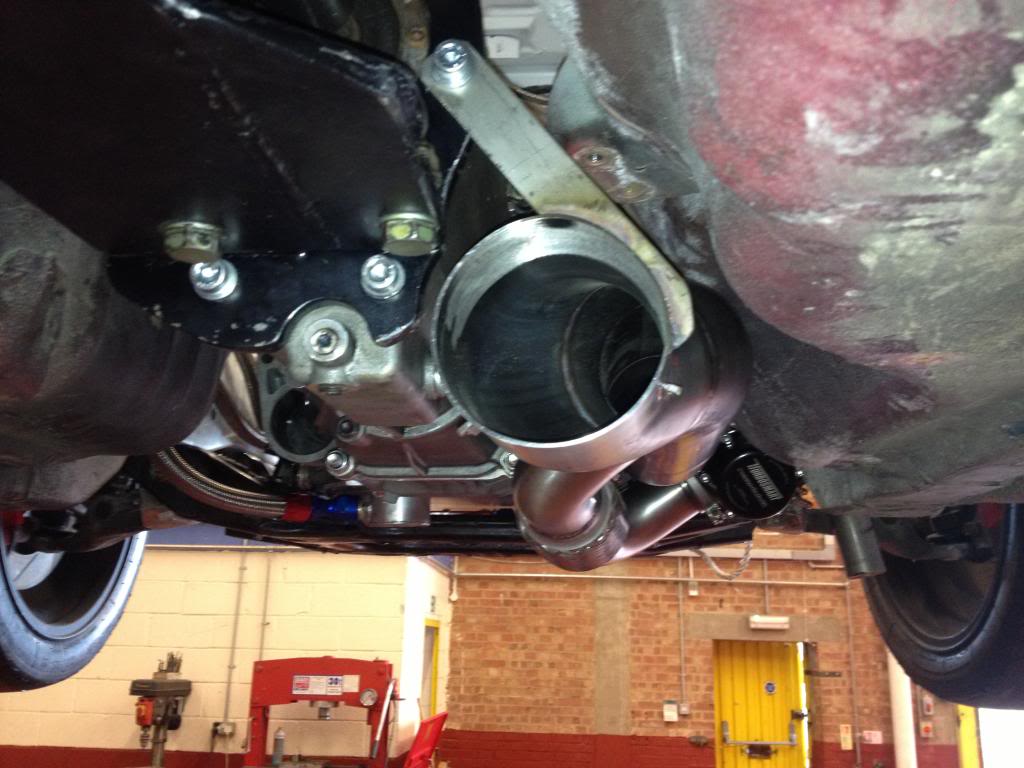
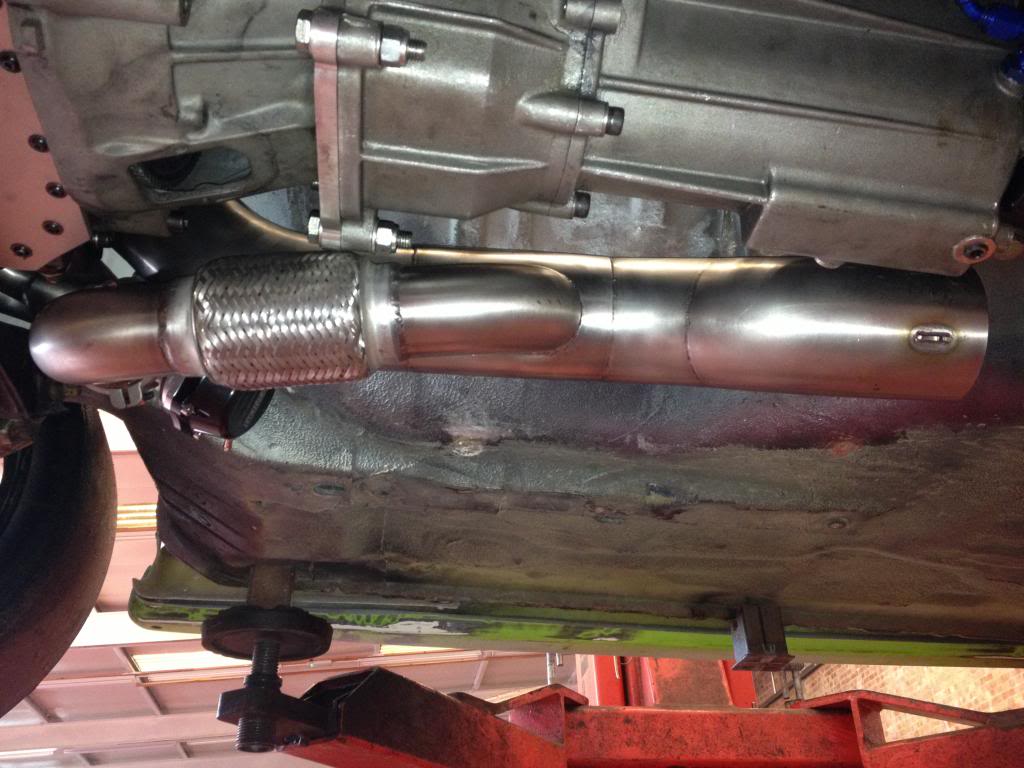
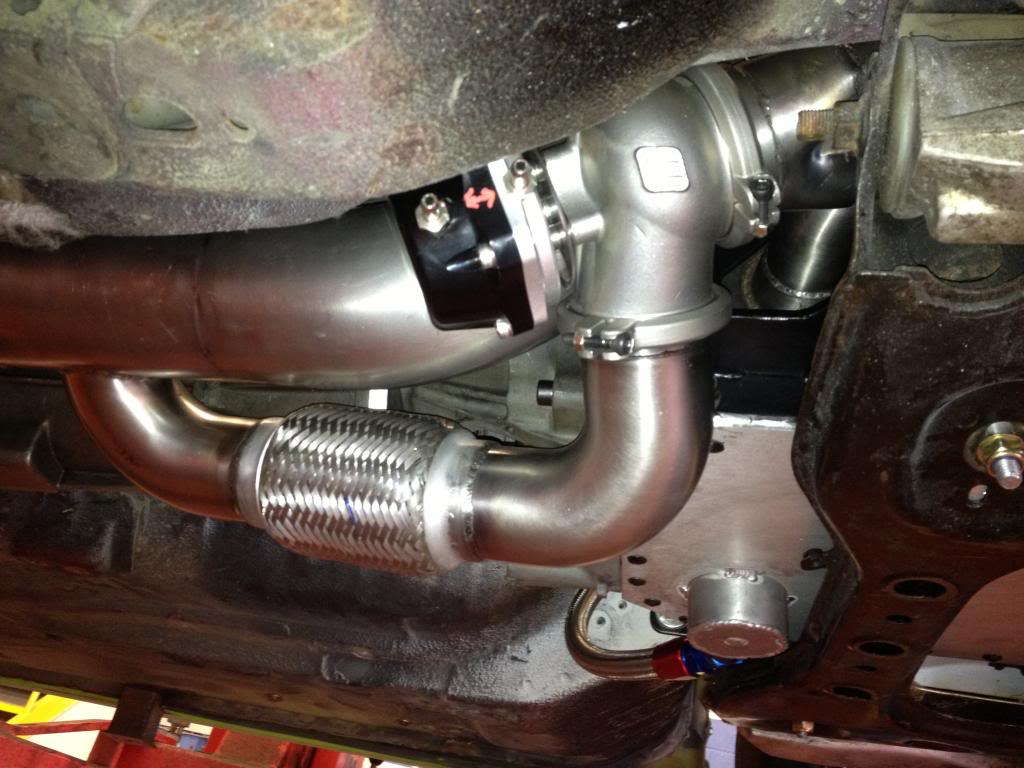
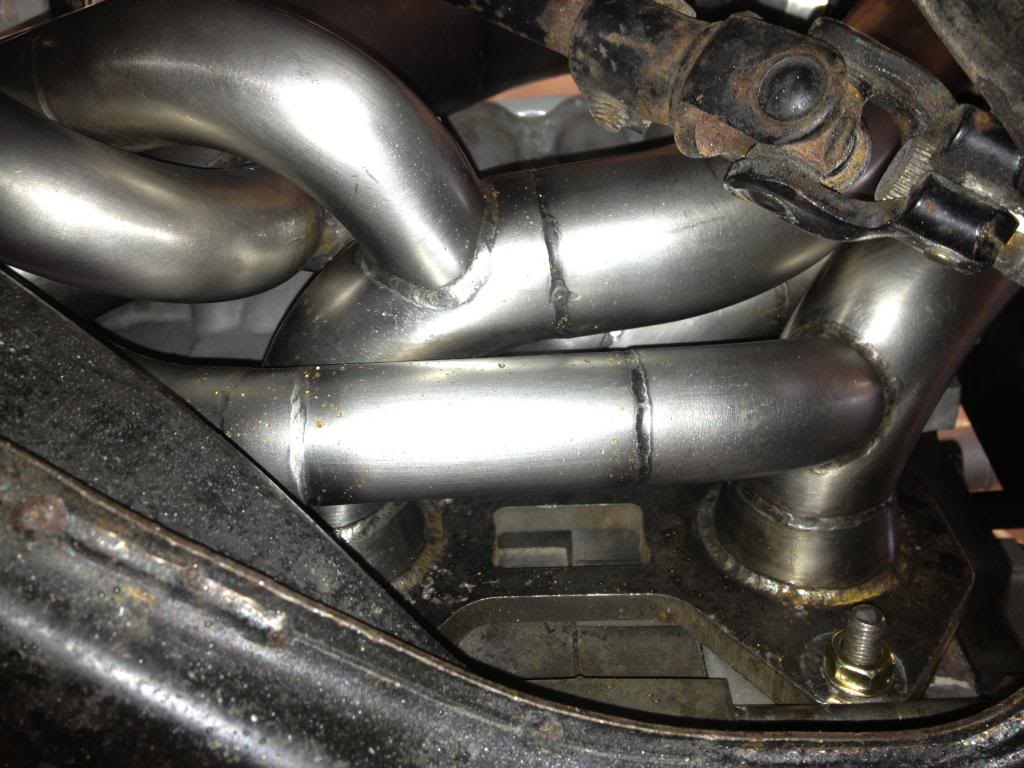
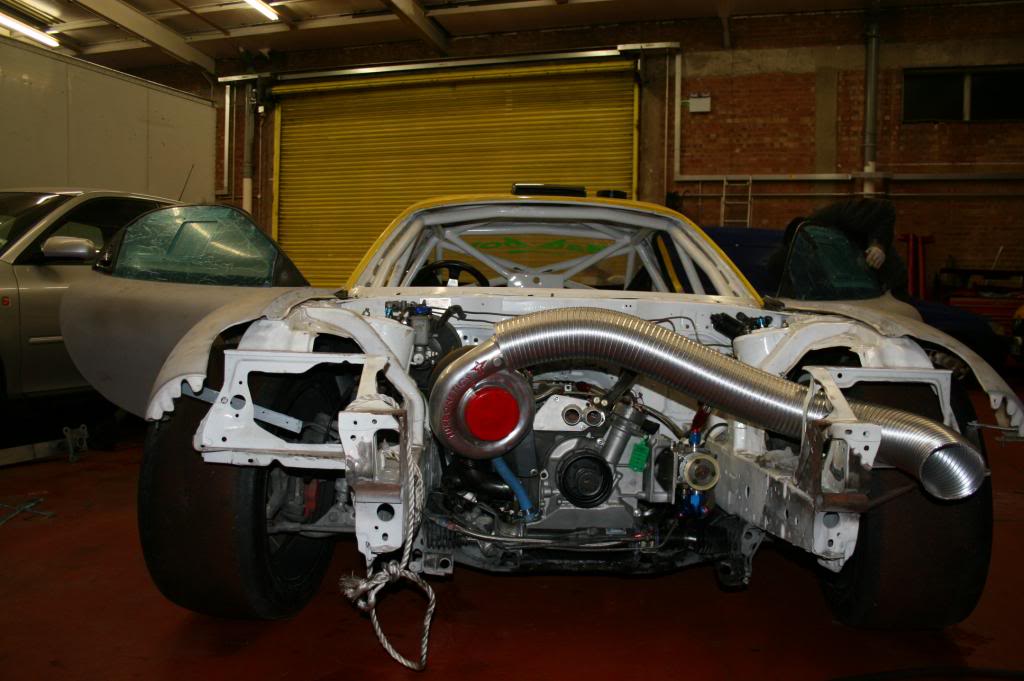
K-II's new insane snail !!!!!!!!!

Name:  New%20Turbo_zpse336e224.jpg
Views: 671
Size:  130.6 KB
Old 02-03-13, 05:35 PM
  #5  
Grippin' not Driftin'

Thread Starter
 
Sicknote's Avatar
 
Join Date: Jul 2011
Location: England
Posts: 149
Likes: 0
Received 0 Likes on 0 Posts
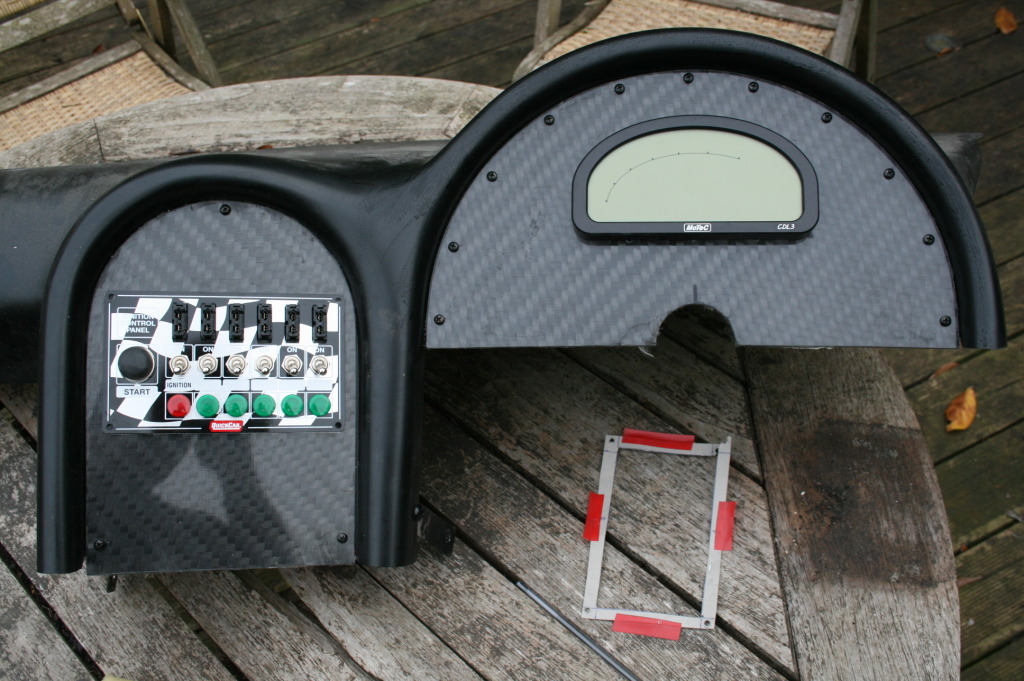
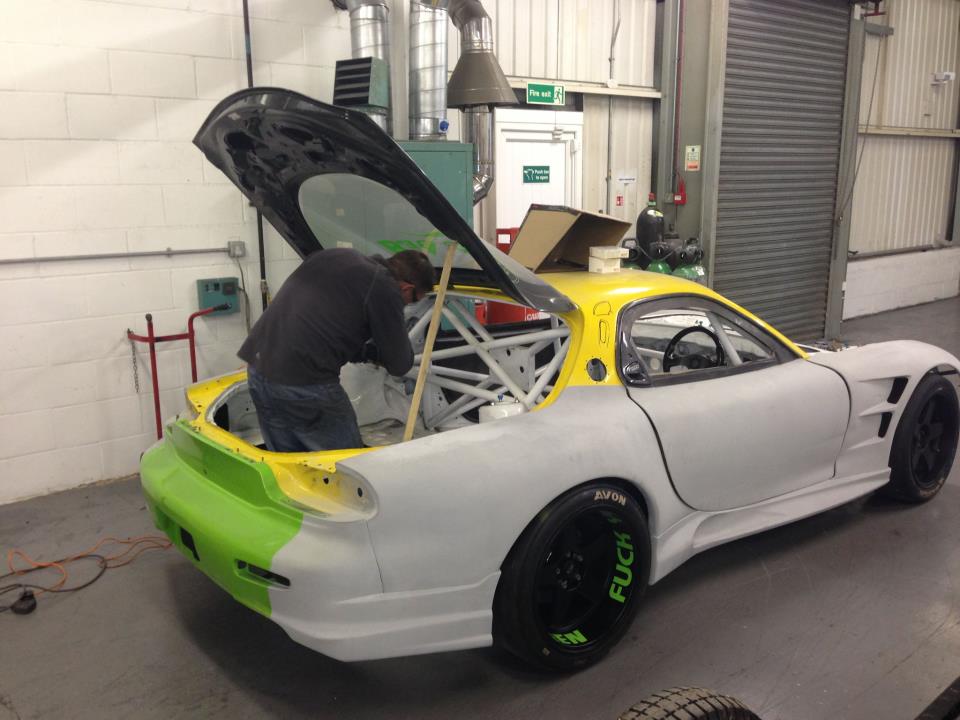
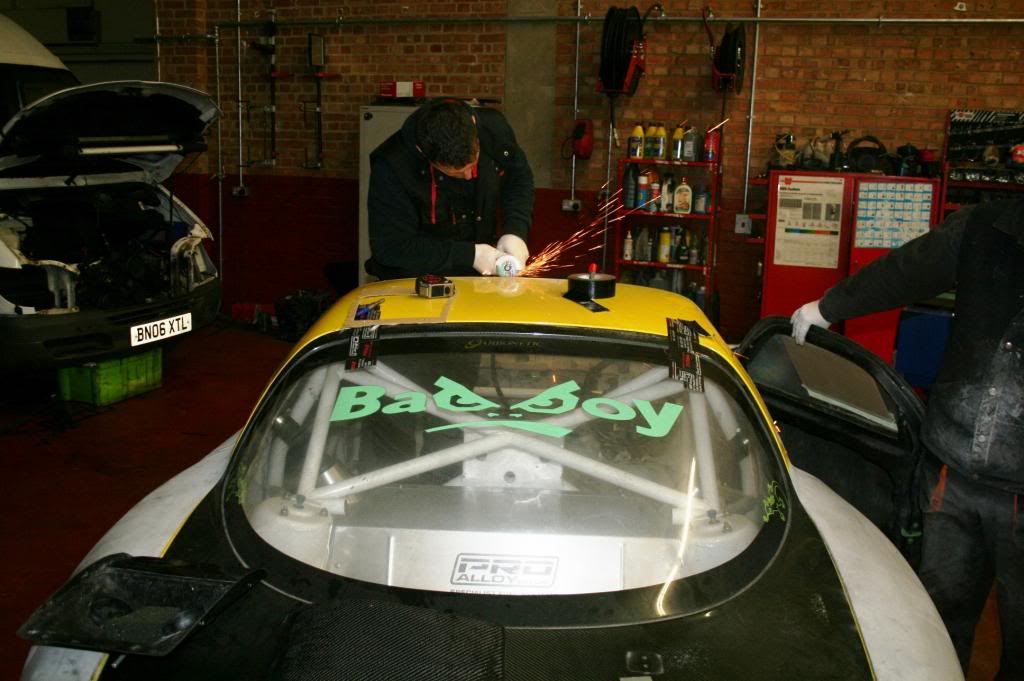
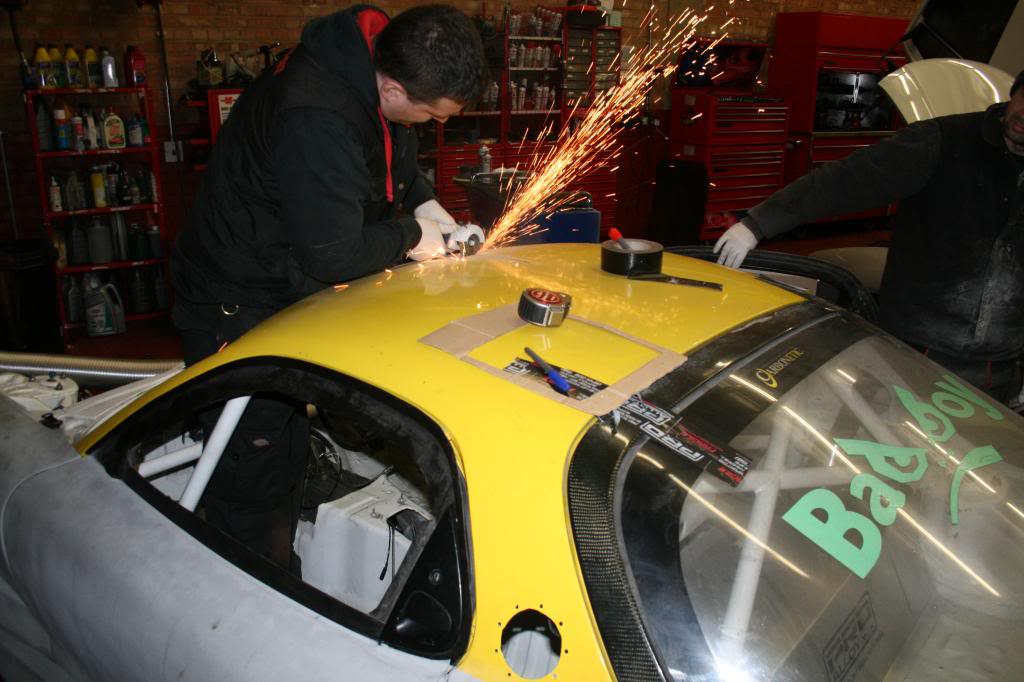
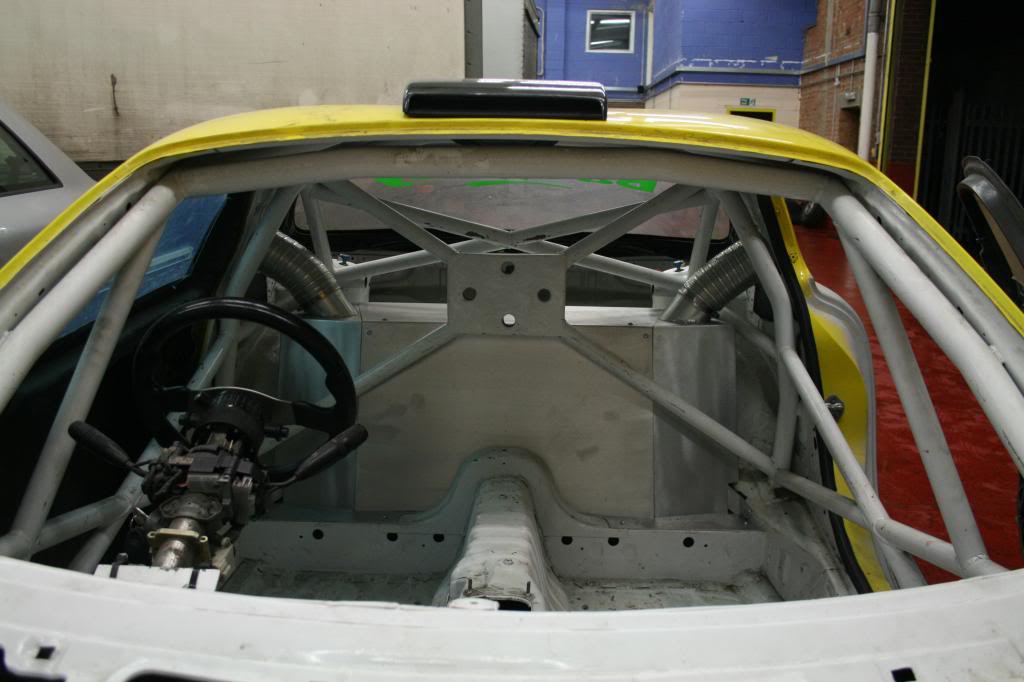
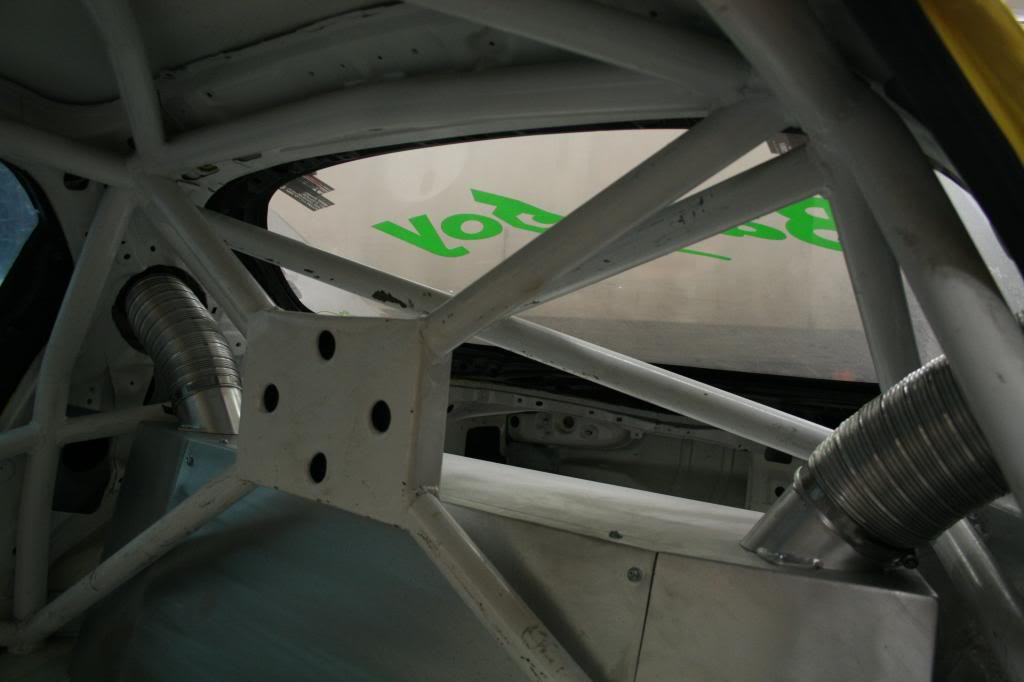
Got home to work on the dash this evening

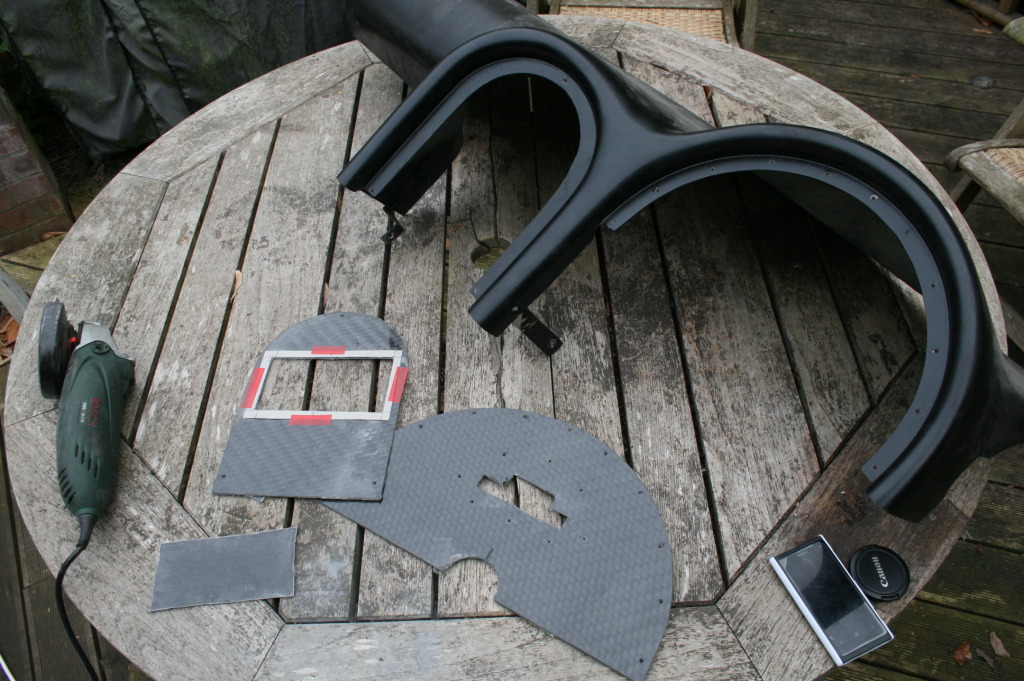
Cutting out the templates to then cut them on the carbon panels for the FRP dash.

Name:  IMG_2723_zps242a65fd.jpg
Views: 687
Size:  245.0 KB


Oooohh Ahhh !! Star ship Enterprise...eat ya heart out !!!

Name:  IMG_2725_zps0cf8ac89.jpg
Views: 663
Size:  218.3 KB


Name:  IMG_2724_zps42b5dbd6.jpg
Views: 667
Size:  235.3 KB


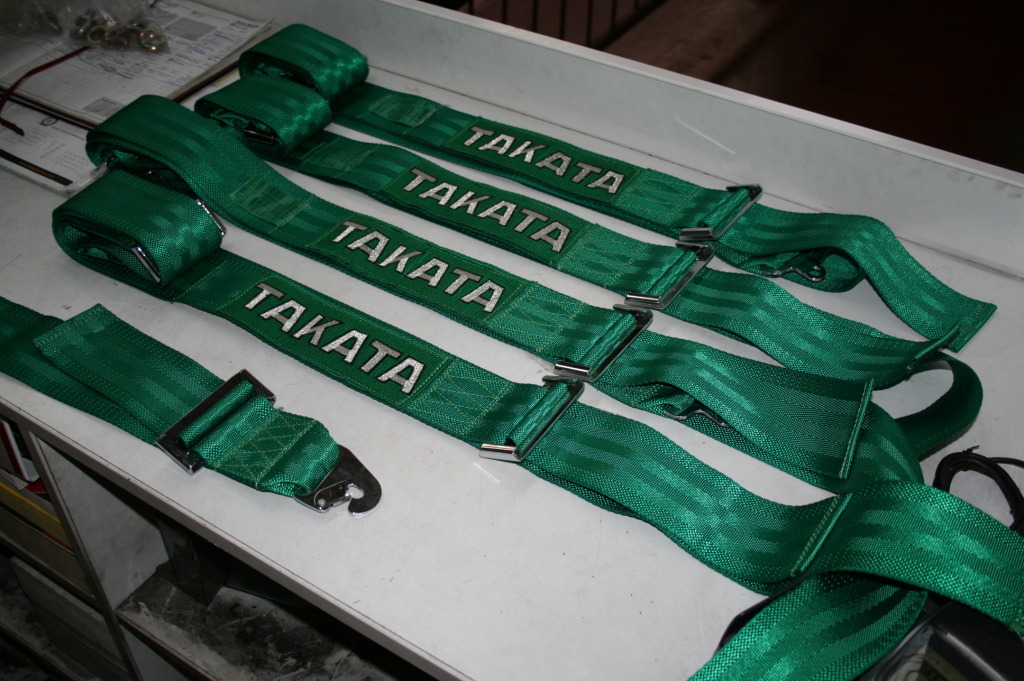
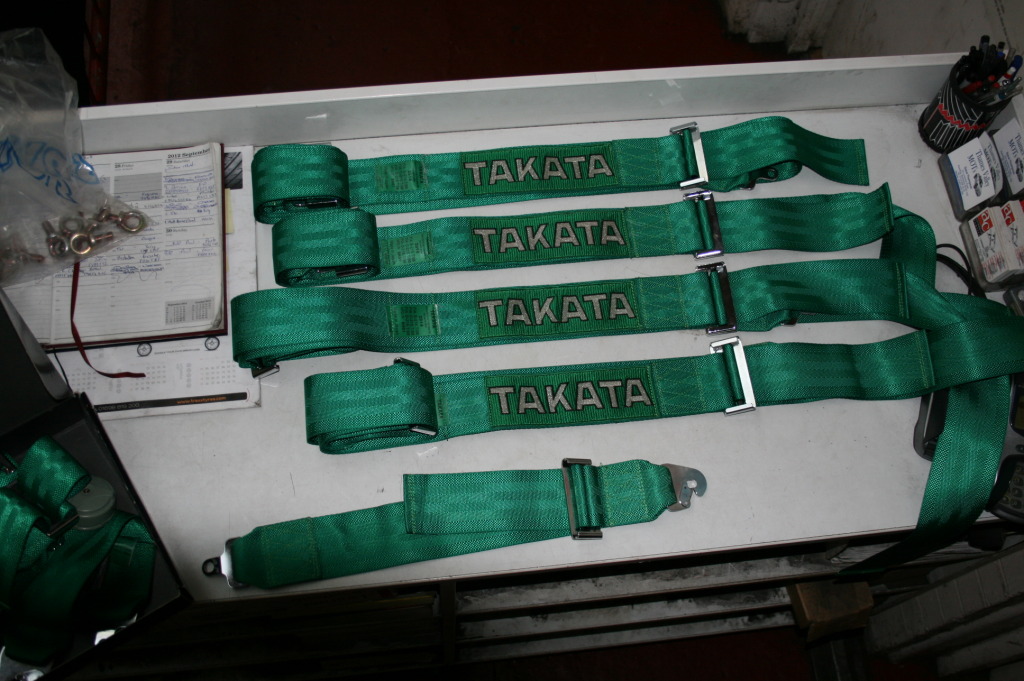
The Takata's arrived today

NOT.. Because Race Car.... but .... Because GREEN !!!

Name:  Takata.jpg
Views: 664
Size:  223.0 KB


Name:  Takata1.jpg
Views: 654
Size:  197.5 KB
Old 02-03-13, 05:43 PM
  #6  
Grippin' not Driftin'

Thread Starter
 
Sicknote's Avatar
 
Join Date: Jul 2011
Location: England
Posts: 149
Likes: 0
Received 0 Likes on 0 Posts
I've heard of lightweight fuel tanks but surely not !!!

Name:  FuelTank1.jpg
Views: 636
Size:  108.3 KB


Name:  FuelTank2.jpg
Views: 689
Size:  108.3 KB


Here are a few pics of the tanks being built.

Name:  FuelTank5.jpg
Views: 624
Size:  84.7 KB


Name:  FuelTank4.jpg
Views: 641
Size:  92.4 KB


Name:  FuelTank6.jpg
Views: 648
Size:  82.3 KB
Old 02-03-13, 05:43 PM
  #7  
Grippin' not Driftin'

Thread Starter
 
Sicknote's Avatar
 
Join Date: Jul 2011
Location: England
Posts: 149
Likes: 0
Received 0 Likes on 0 Posts
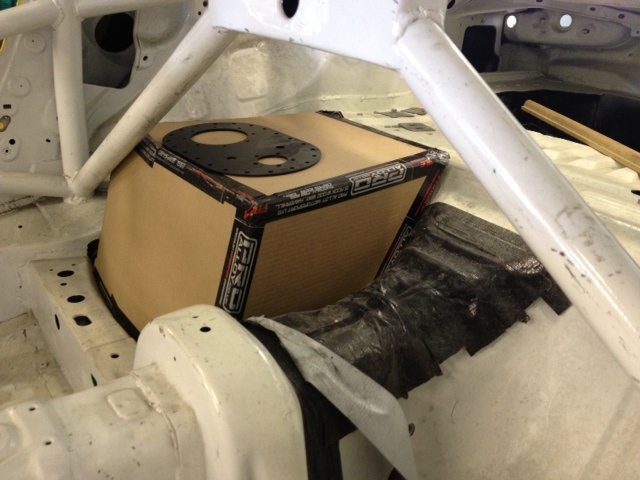
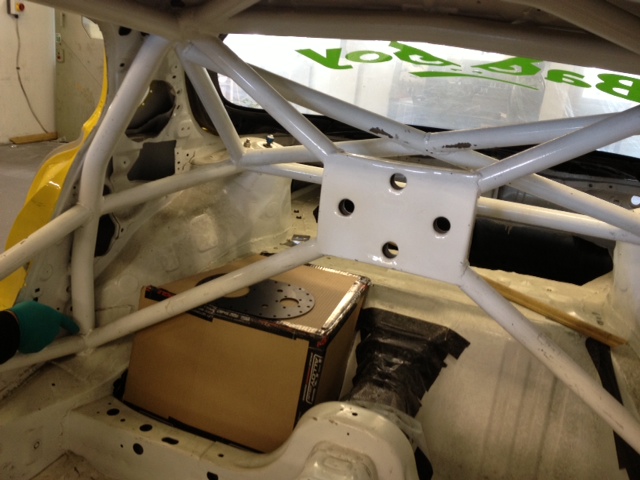
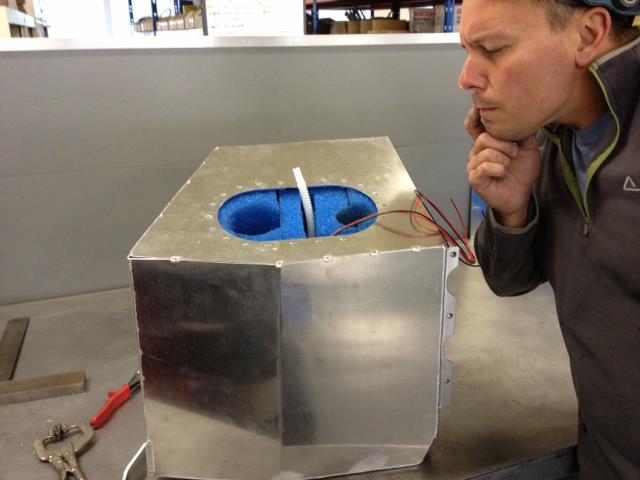
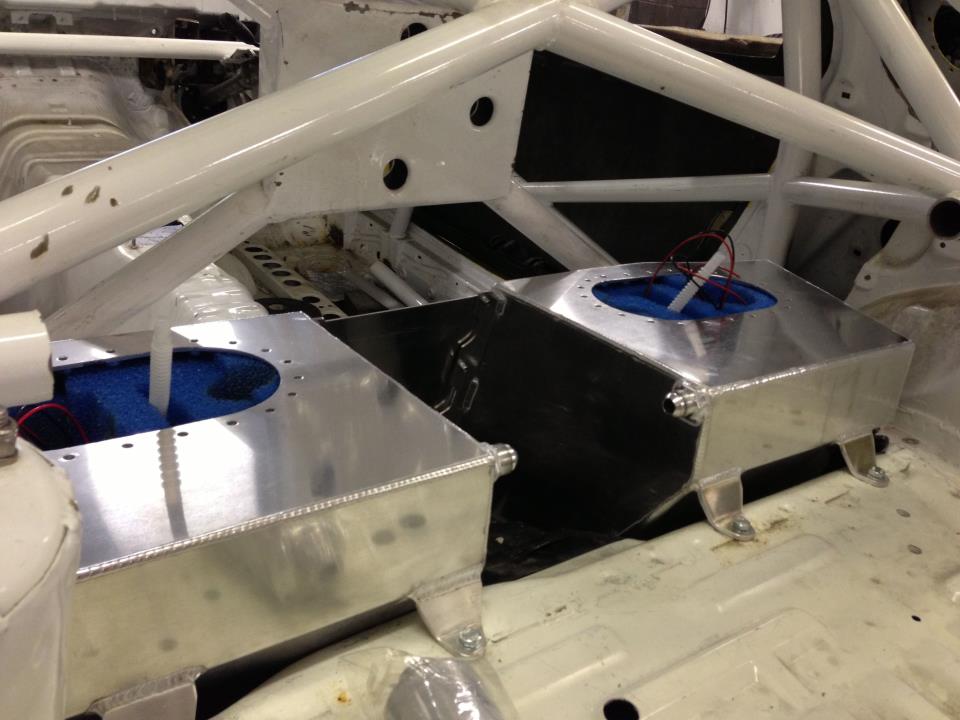
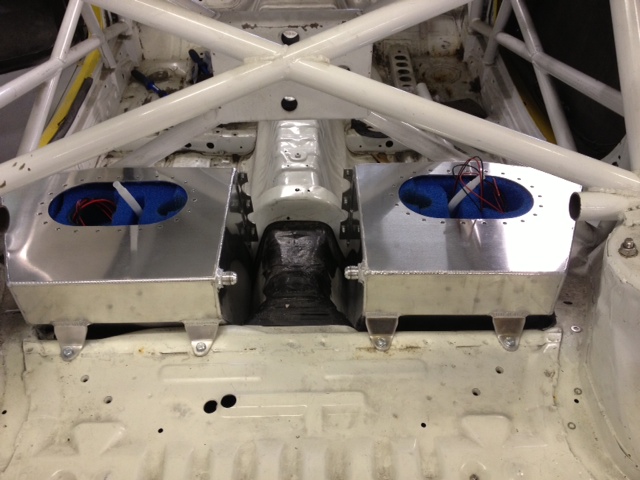
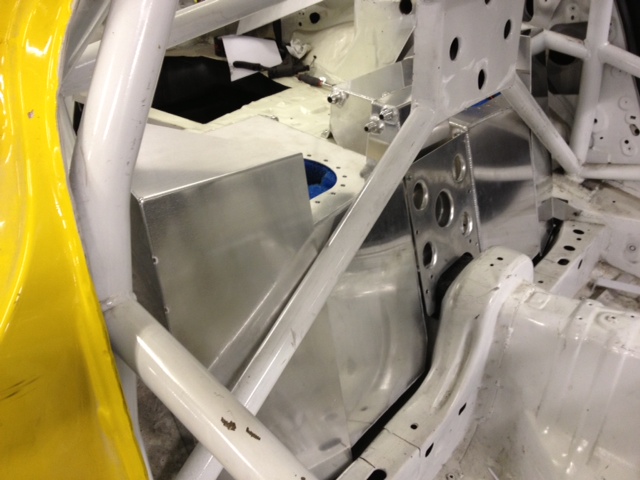
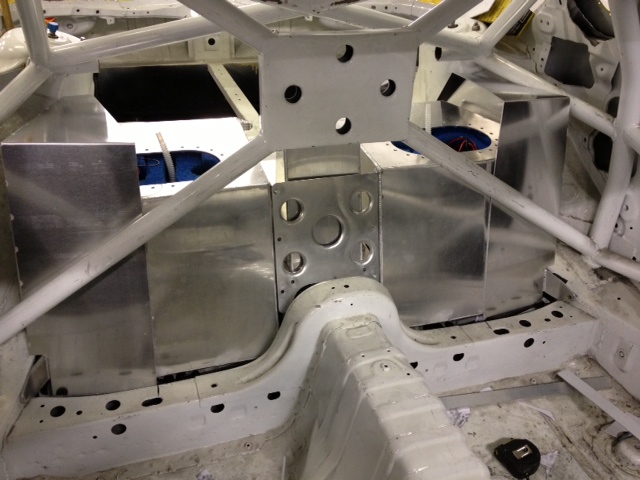
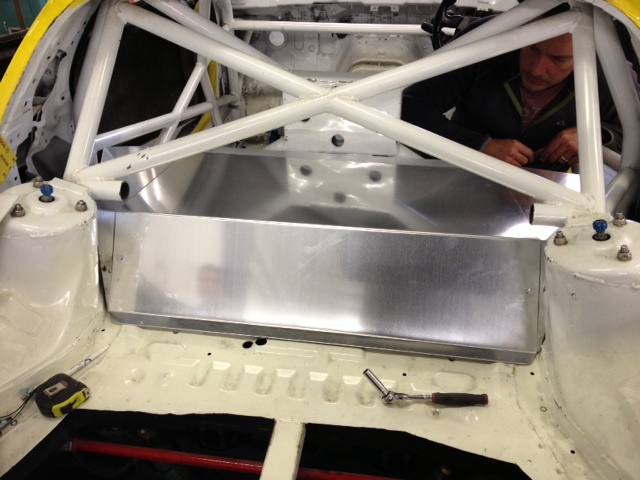
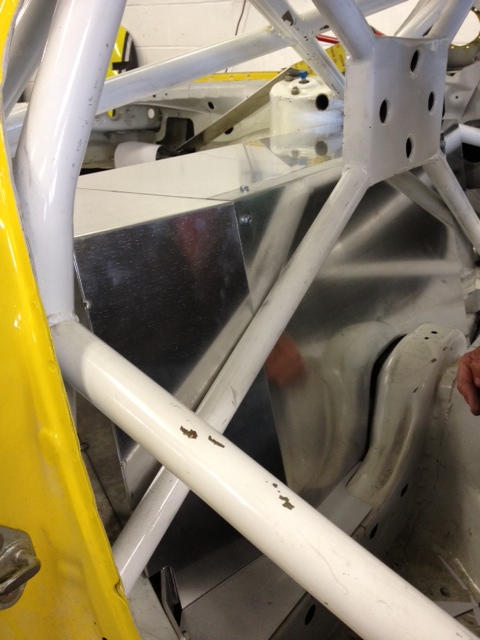
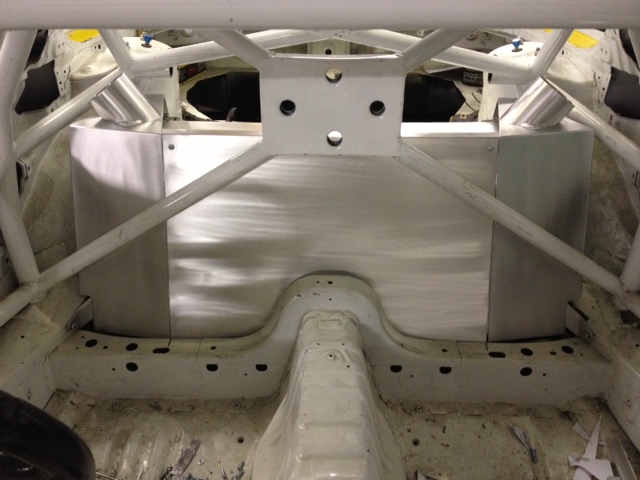
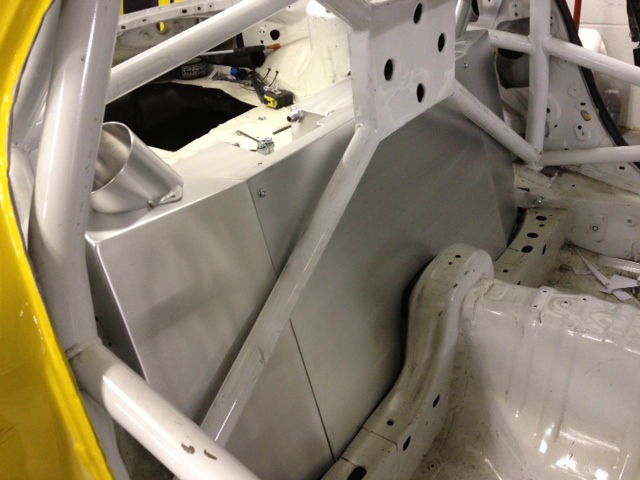
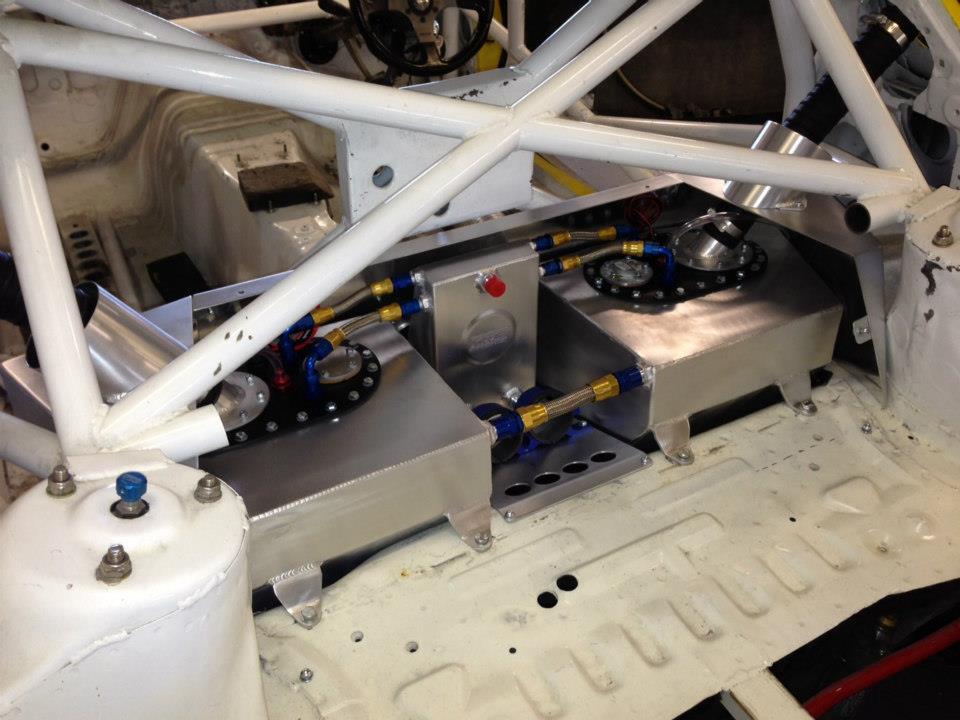
Starting prep on the tanks

Name:  Startingpreponthetanks.jpg
Views: 671
Size:  75.1 KB

Cutting the rear bar in the roll cage to fit the new tanks

Name:  Cuttingrearbarinrollcage.jpg
Views: 621
Size:  83.4 KB

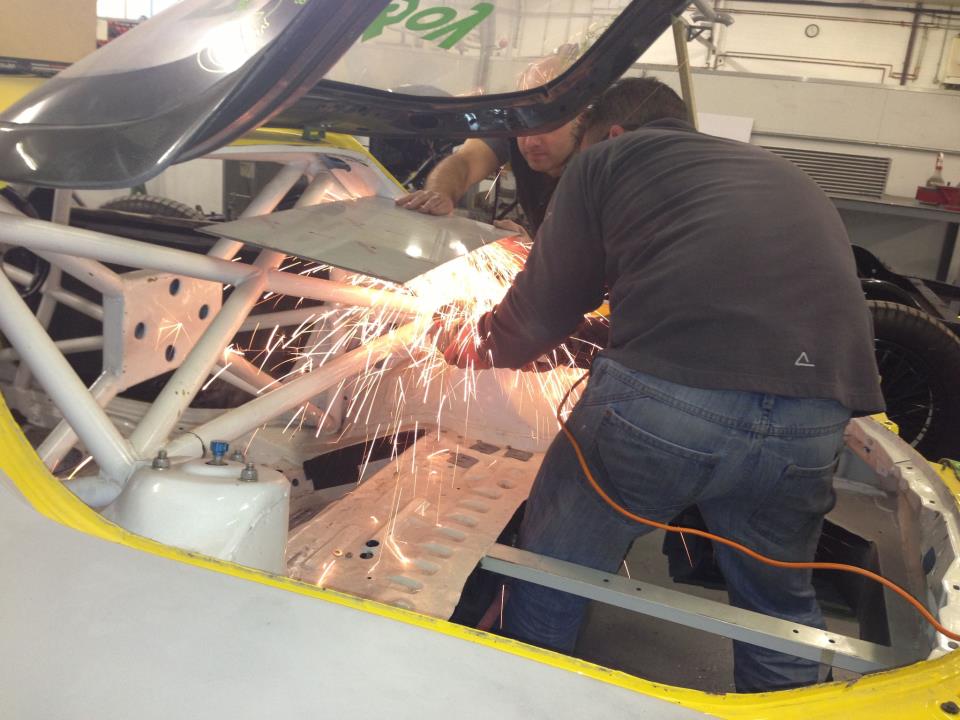
Pondering a few problems

Name:  FuelTank7.jpg
Views: 605
Size:  30.7 KB

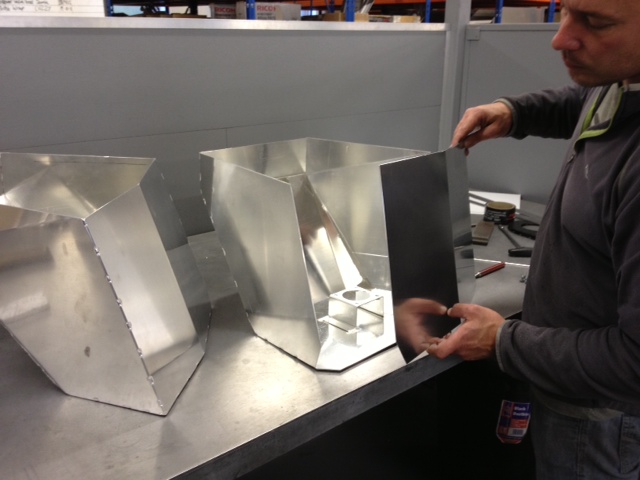
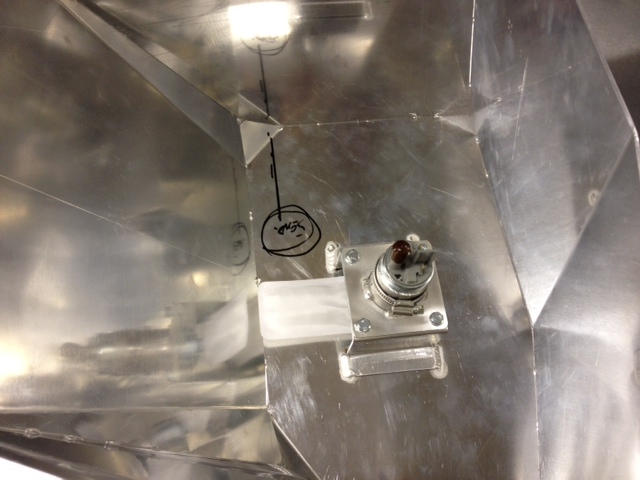
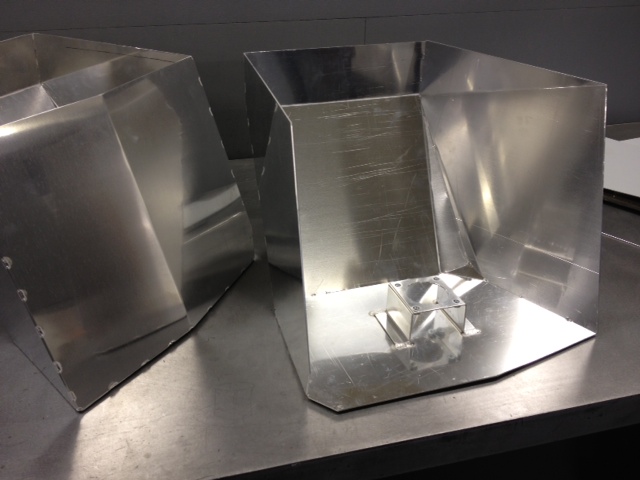
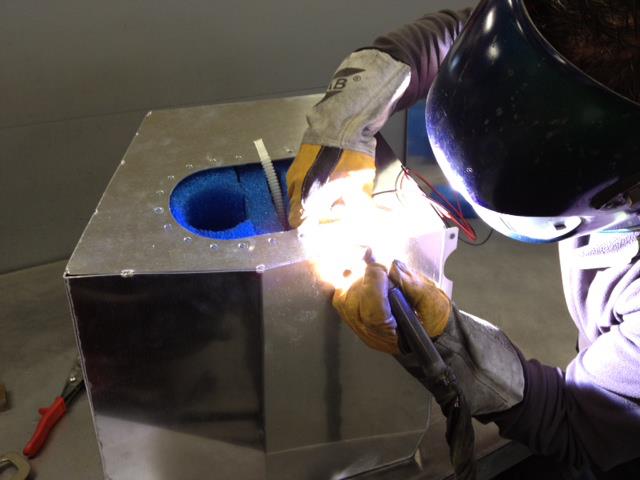
Welding the tanks up

Name:  FuelTank8.jpg
Views: 627
Size:  30.5 KB

The finished tanks in situe
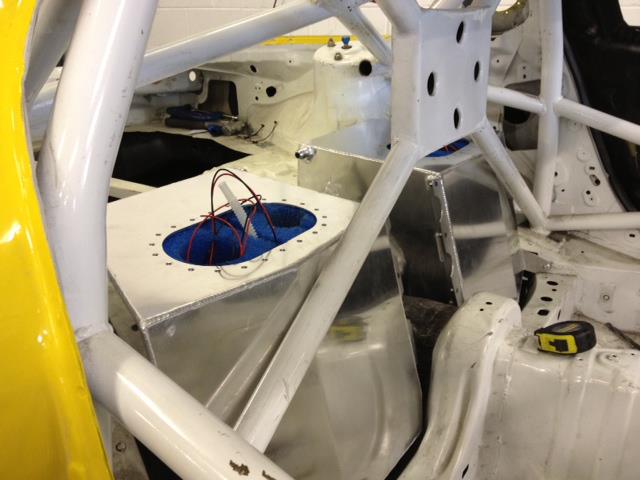
Name:  FuelTank9.jpg
Views: 622
Size:  38.7 KB


And from the back

Name:  FuelTank11.jpg
Views: 646
Size:  69.5 KB

Name:  FuelTank10.jpg
Views: 685
Size:  110.4 KB
Old 02-03-13, 05:45 PM
  #8  
Grippin' not Driftin'

Thread Starter
 
Sicknote's Avatar
 
Join Date: Jul 2011
Location: England
Posts: 149
Likes: 0
Received 0 Likes on 0 Posts
New swirl pot made and positioned

Name:  FuelTank13.jpg
Views: 659
Size:  105.5 KB


Fuel Pump brackets positioned in front of the swirl pot

Name:  FuelTank12.jpg
Views: 649
Size:  103.3 KB


The Firewall starting to be built to cover the entire assembly

Name:  FuelTank14.jpg
Views: 635
Size:  101.9 KB


Name:  FuelTank15.jpg
Views: 662
Size:  111.6 KB
Old 02-03-13, 05:47 PM
  #9  
Grippin' not Driftin'

Thread Starter
 
Sicknote's Avatar
 
Join Date: Jul 2011
Location: England
Posts: 149
Likes: 0
Received 0 Likes on 0 Posts
And the Firewall is complete


Name:  Picture074.jpg
Views: 653
Size:  112.9 KB


Name:  Picture075.jpg
Views: 650
Size:  112.1 KB


Just a few more bits to go, these pics show the completed firewall and funnels through the top for the filler neck and pipes.

Name:  FuelTank22.jpg
Views: 663
Size:  103.5 KB


Name:  FuelTank21.jpg
Views: 679
Size:  104.2 KB
Old 02-03-13, 05:47 PM
  #10  
Grippin' not Driftin'

Thread Starter
 
Sicknote's Avatar
 
Join Date: Jul 2011
Location: England
Posts: 149
Likes: 0
Received 0 Likes on 0 Posts
Name:  FuelTank19.jpg
Views: 663
Size:  113.8 KB


Name:  FuelTank18.jpg
Views: 656
Size:  120.9 KB


I'll have my own pics later but this is the finished article.

Name:  TheFinishedFueltank.jpg
Views: 666
Size:  76.3 KB


And here is now what hides beneath the cover .

Name:  FuelTank25.jpg
Views: 662
Size:  85.5 KB
Old 02-03-13, 05:49 PM
  #11  
Grippin' not Driftin'

Thread Starter
 
Sicknote's Avatar
 
Join Date: Jul 2011
Location: England
Posts: 149
Likes: 0
Received 0 Likes on 0 Posts
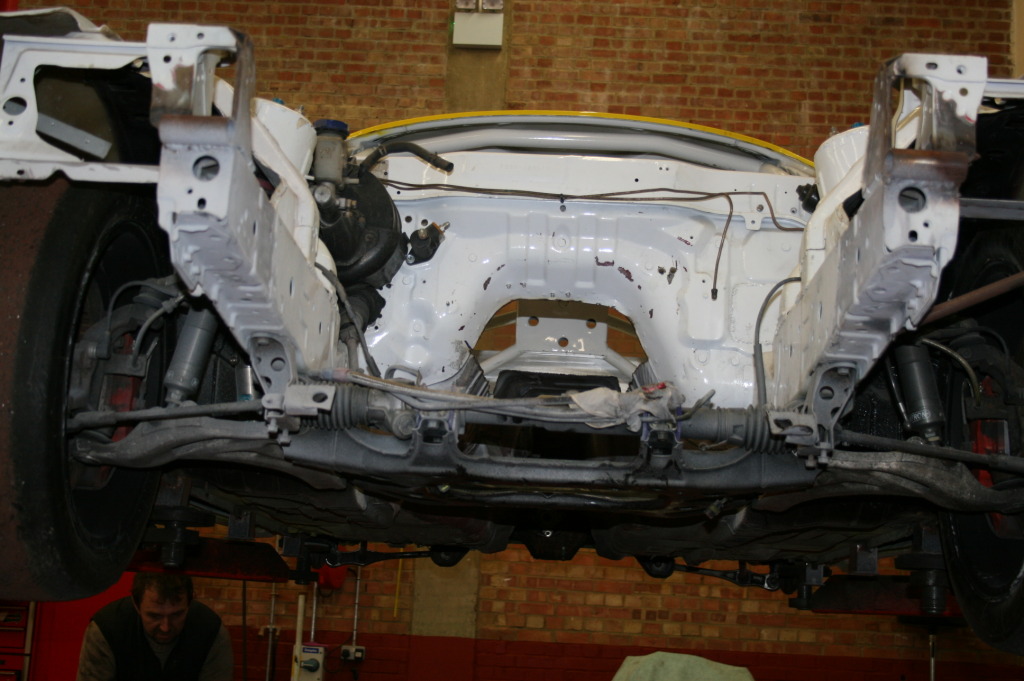
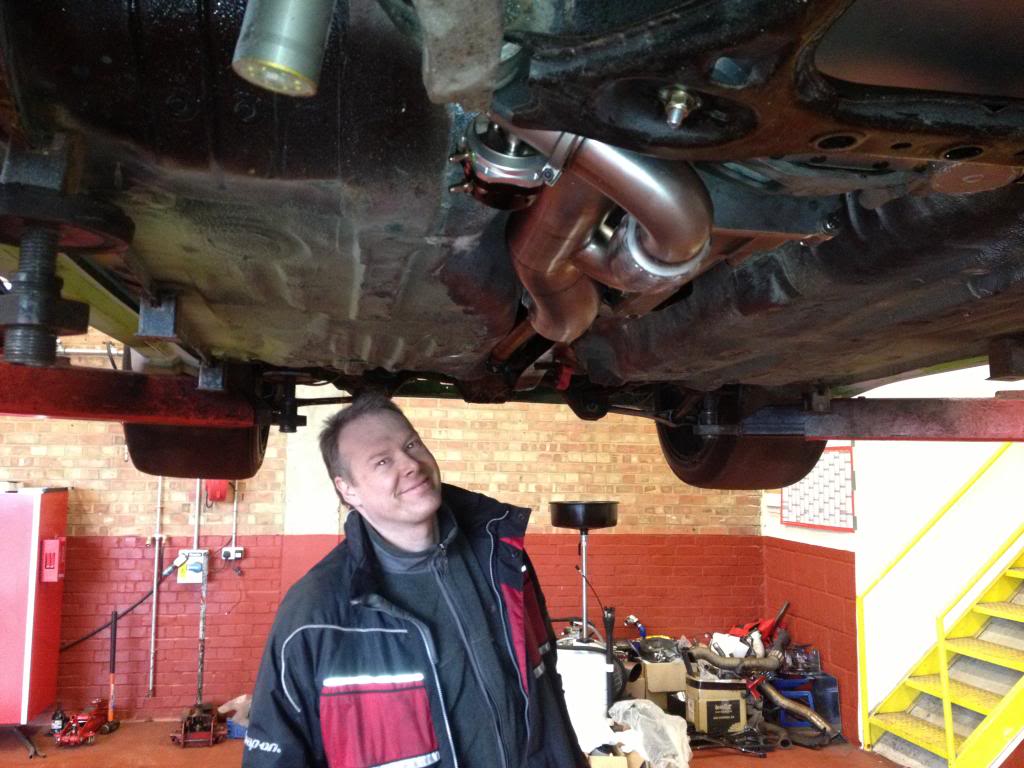
A few delvelopments tonight in preparation for his trip to Pip at WGT tomorrow morning.


Up on the ramp ready for surgery


Name:  Picture010.jpg
Views: 666
Size:  177.4 KB


In goes the brand new Kaaz diff


Name:  Picture013.jpg
Views: 599
Size:  170.5 KB


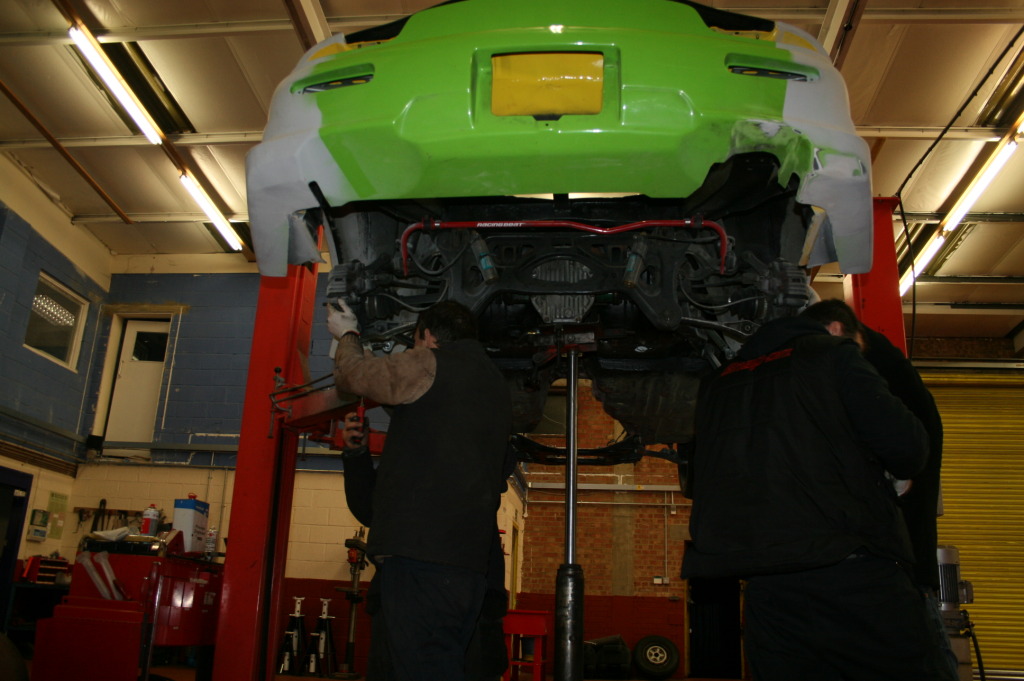
Out comes the plasma cutter to remove a section of tunnel for easier access to the gearbox


Name:  Picture019.jpg
Views: 685
Size:  187.1 KB

Cut section in hand


Name:  Picture021.jpg
Views: 615
Size:  165.7 KB

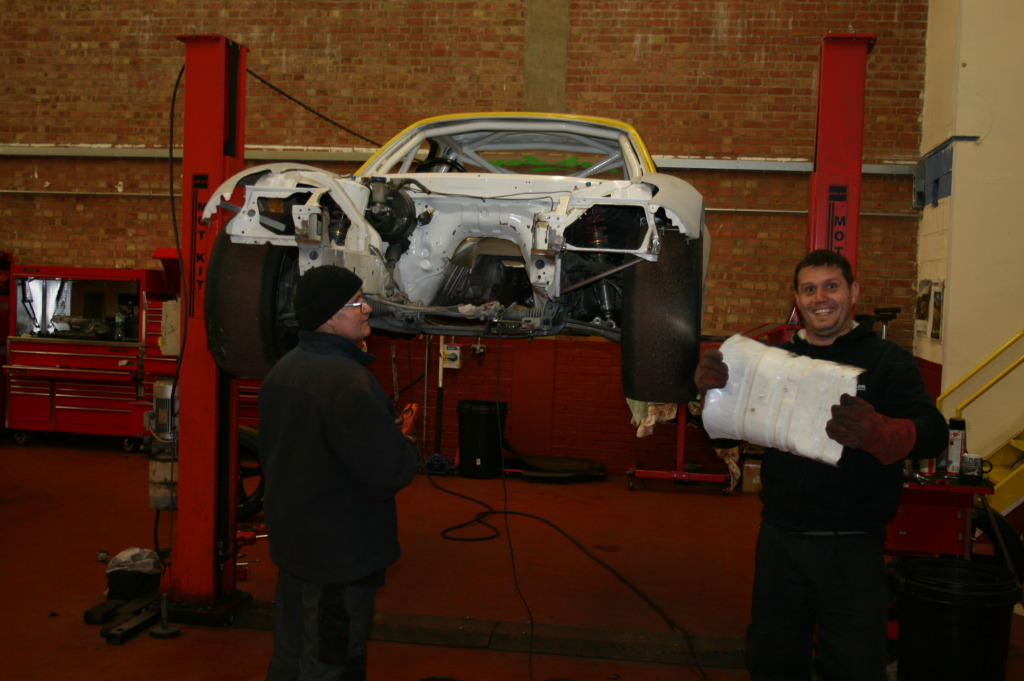
The hole left behind


Name:  Picture024.jpg
Views: 648
Size:  175.5 KB
Old 02-03-13, 05:50 PM
  #12  
Grippin' not Driftin'

Thread Starter
 
Sicknote's Avatar
 
Join Date: Jul 2011
Location: England
Posts: 149
Likes: 0
Received 0 Likes on 0 Posts
All loaded up ready for her travels tomorrow.


Name:  Picture030.jpg
Views: 607
Size:  185.3 KB


Name:  Picture026.jpg
Views: 672
Size:  199.7 KB


Name:  Picture031.jpg
Views: 663
Size:  185.7 KB


And one last arty shot of Roxy and K-II


Name:  Picture038.jpg
Views: 671
Size:  206.1 KB
Old 02-03-13, 05:54 PM
  #13  
Grippin' not Driftin'

Thread Starter
 
Sicknote's Avatar
 
Join Date: Jul 2011
Location: England
Posts: 149
Likes: 0
Received 0 Likes on 0 Posts
Thanks Phil.

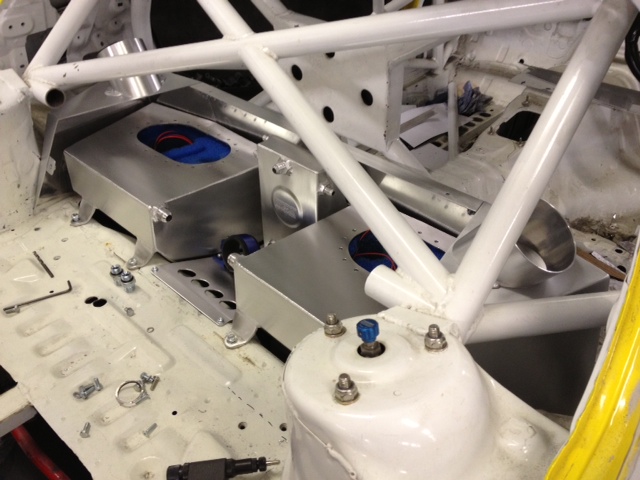
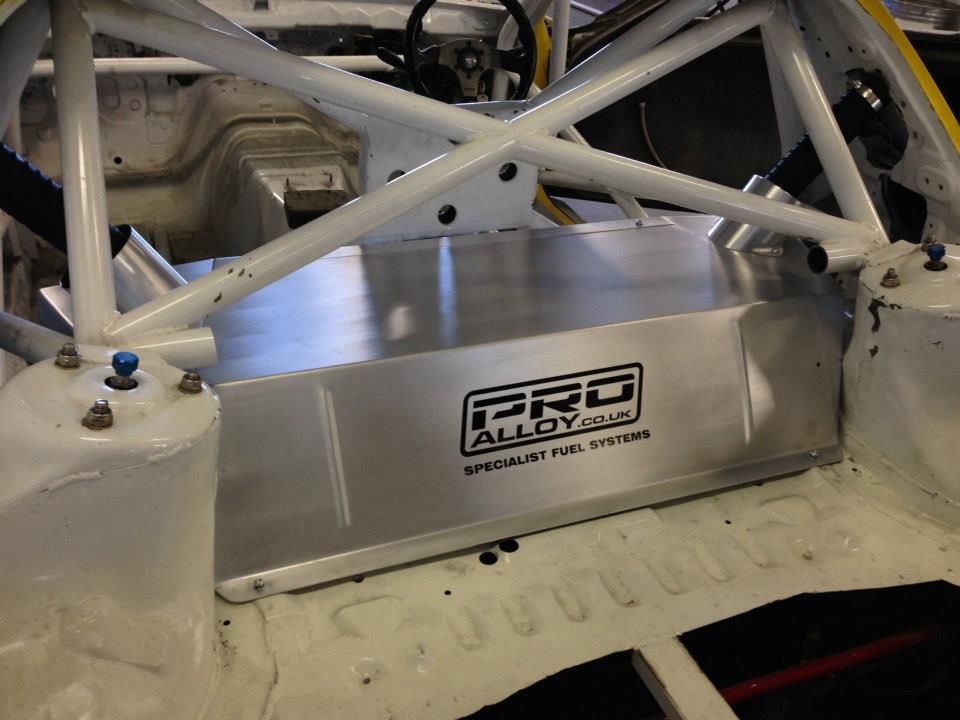
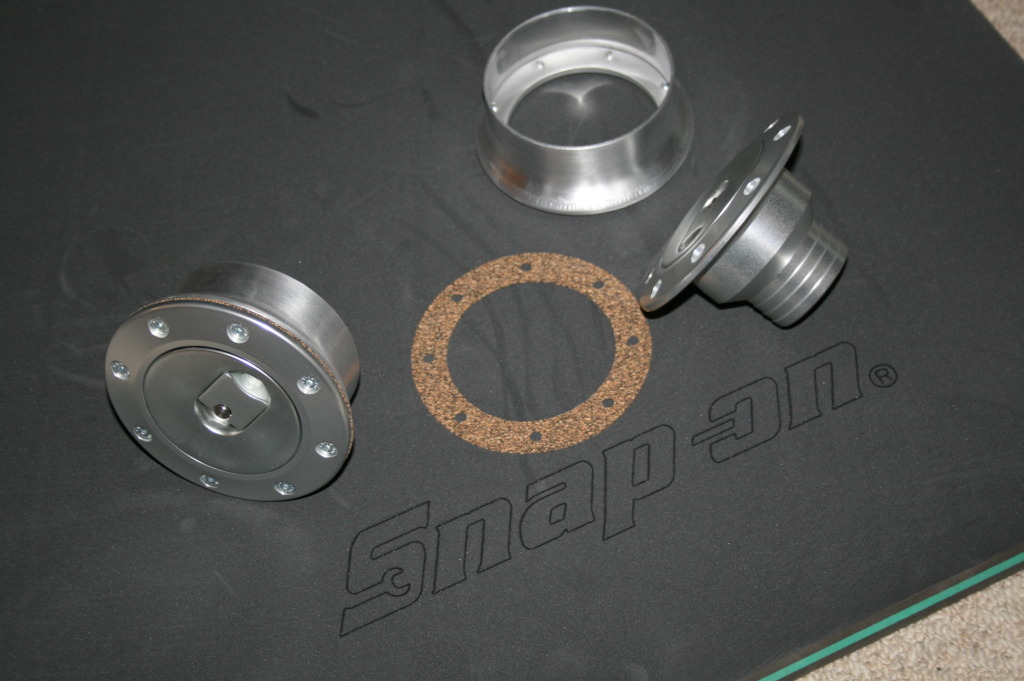
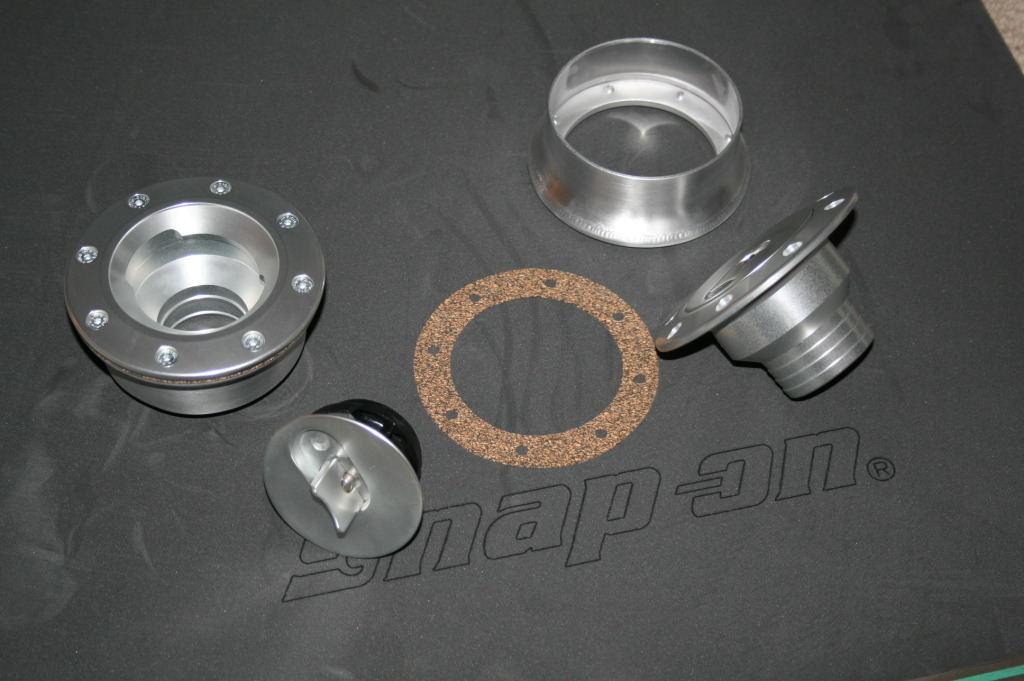
And another parcel from Pro Alloy

The filler covers and fabricated funnel inserts ( one assembled and one broken down)


Name:  Picture044.jpg
Views: 668
Size:  142.6 KB


Name:  Picture046.jpg
Views: 666
Size:  162.0 KB


Not too much to report until Pip sorts his phone out and retrieves his pics.

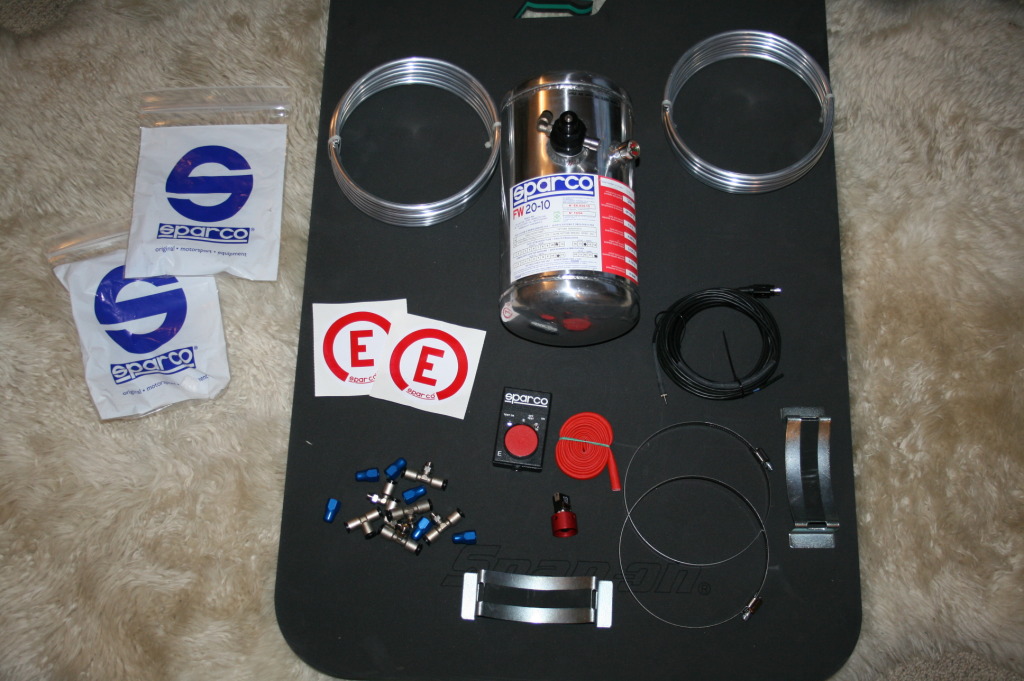
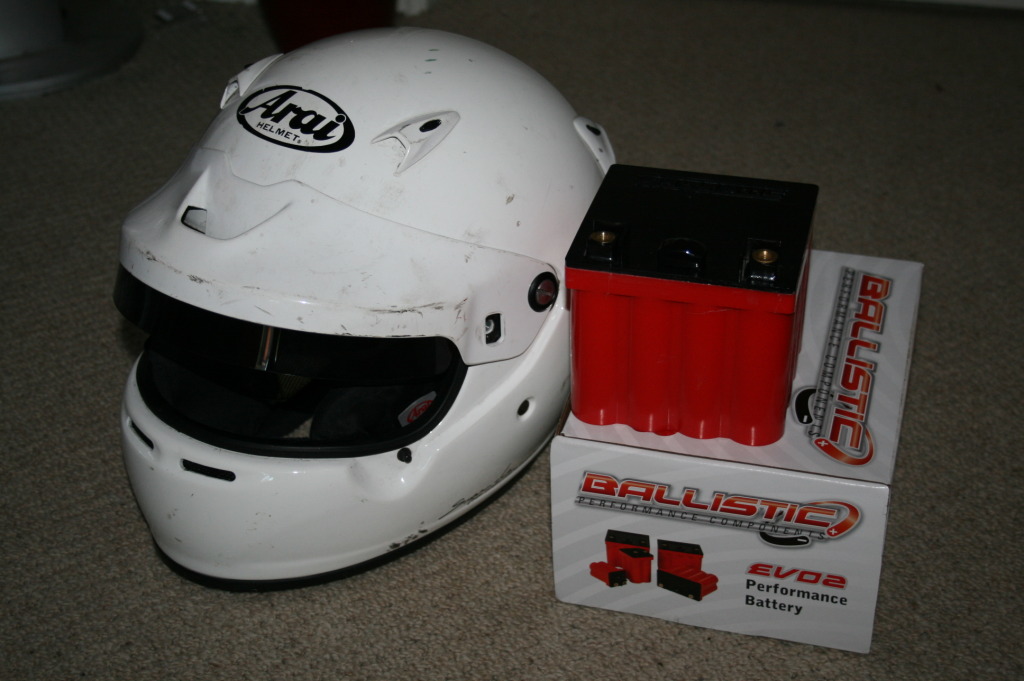
Here is one of the last bits of kit to arrive for the build, a lightweight ally Sparco remote fire extinguisher kit.


Name:  Picture077.jpg
Views: 694
Size:  185.7 KB


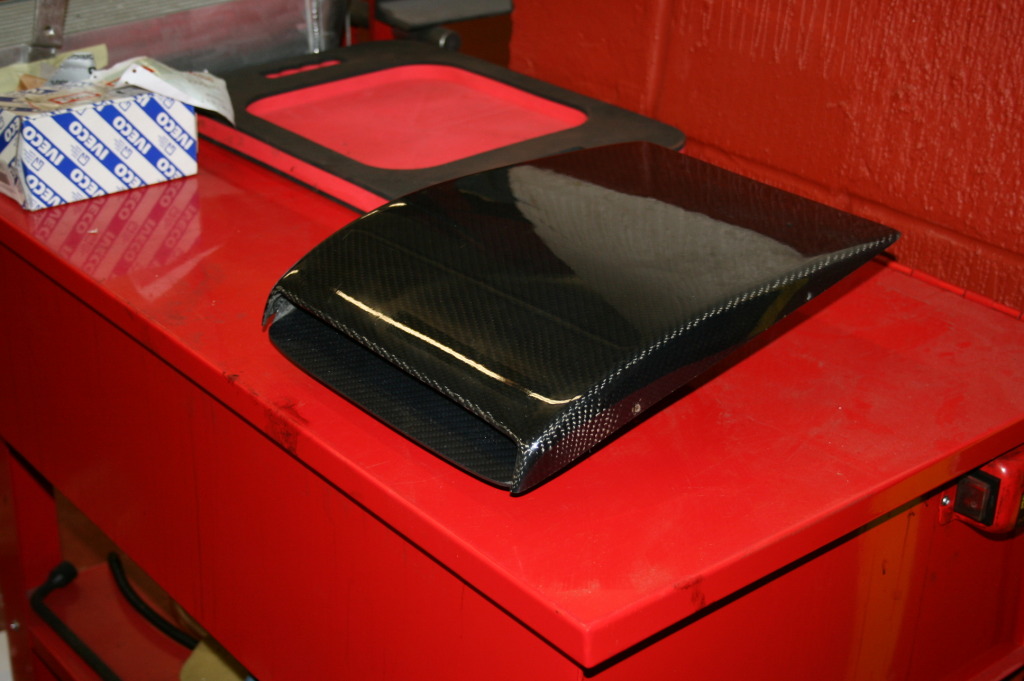
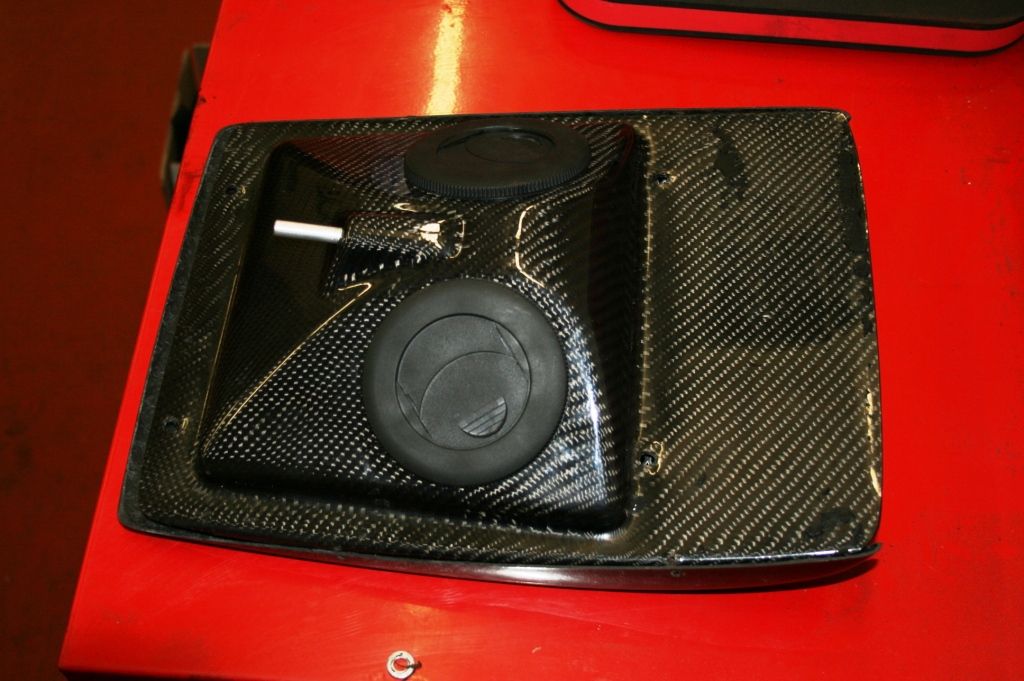
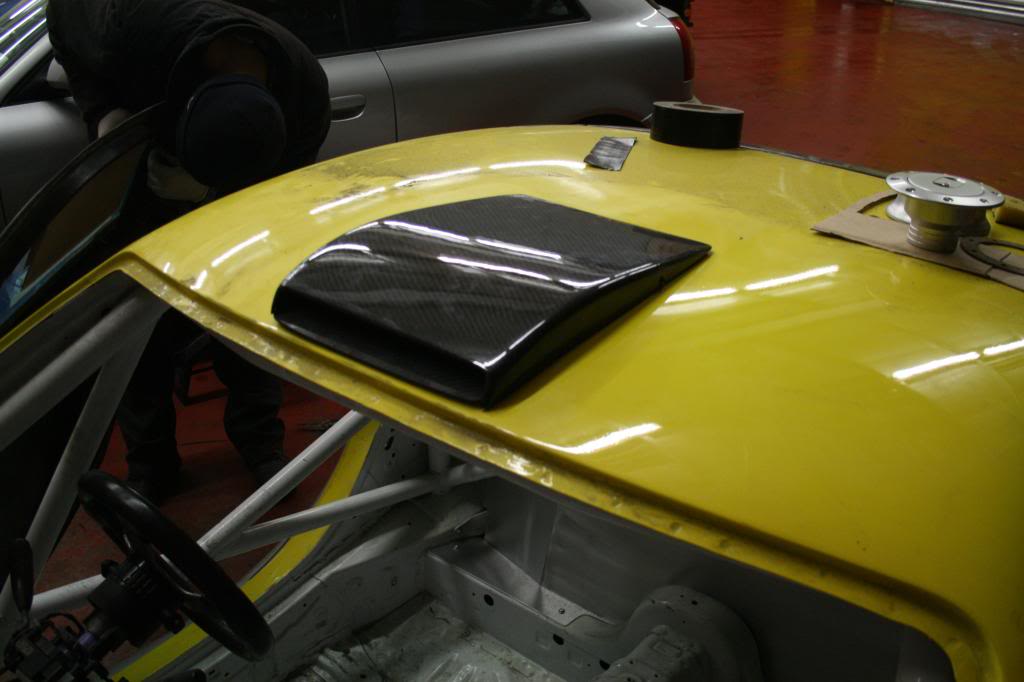
The new carbon roof scoop arrived today.


Name:  Picture432.jpg
Views: 661
Size:  147.6 KB


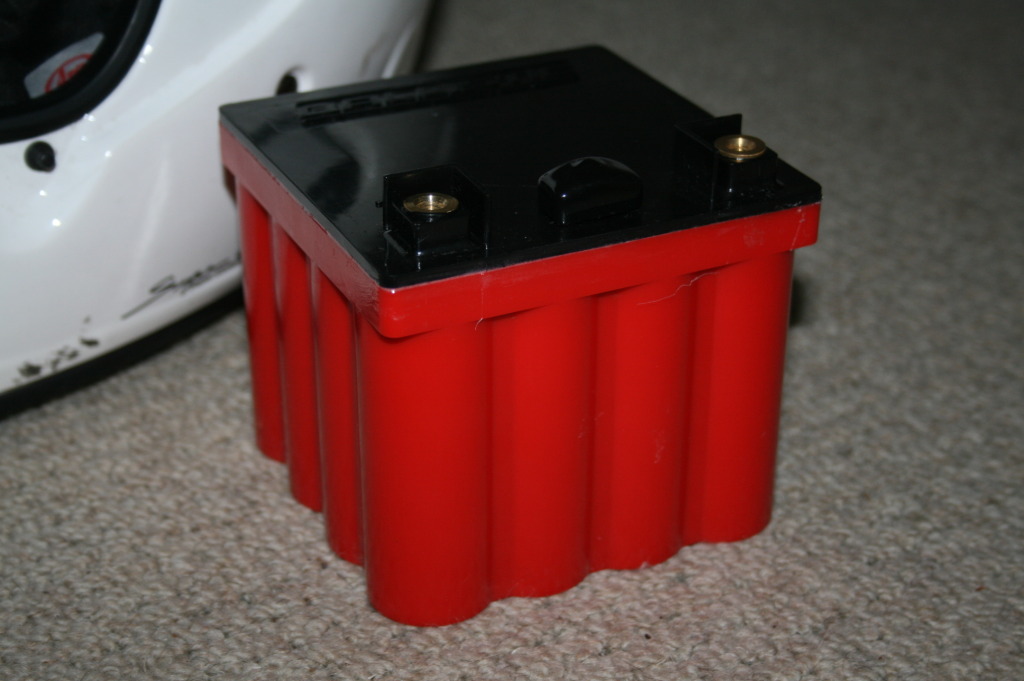
Well, pretty much my last bit of expensive kit arrived yesterday and HAVE to say... it's fecking amazeballs !!!

This race battery is only 1.5 kg and is about the same as an oversized rubics cube with big power output,
considering it's JUST a battery..... it's ubber cool.


Name:  Picture448.jpg
Views: 658
Size:  122.4 KB


Name:  Picture449.jpg
Views: 665
Size:  140.4 KB
Old 02-03-13, 05:57 PM
  #14  
Grippin' not Driftin'

Thread Starter
 
Sicknote's Avatar
 
Join Date: Jul 2011
Location: England
Posts: 149
Likes: 0
Received 0 Likes on 0 Posts
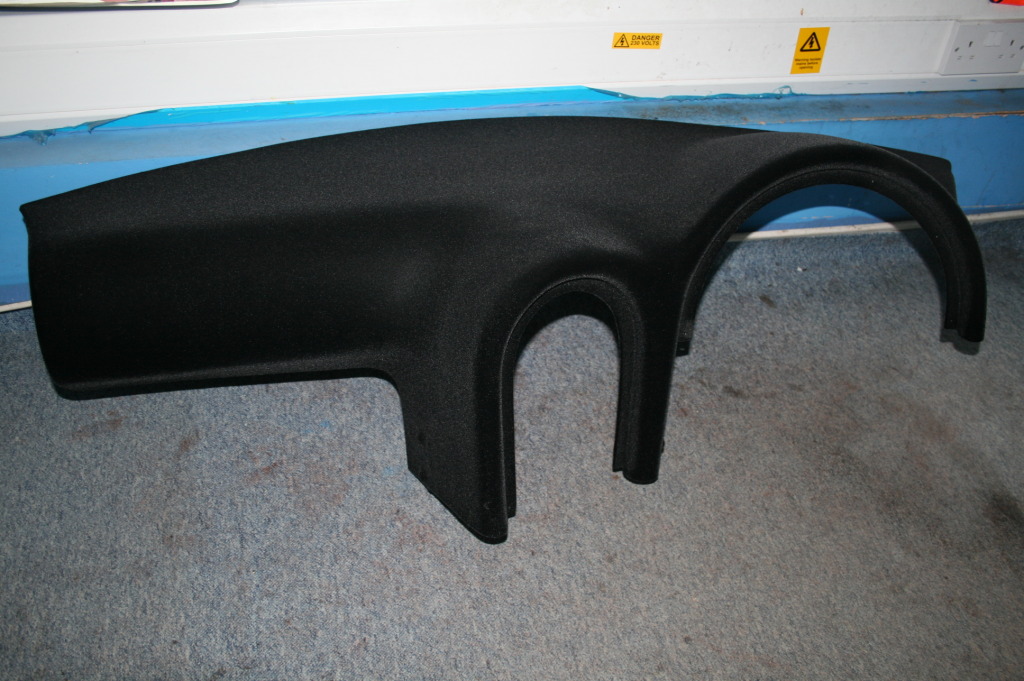
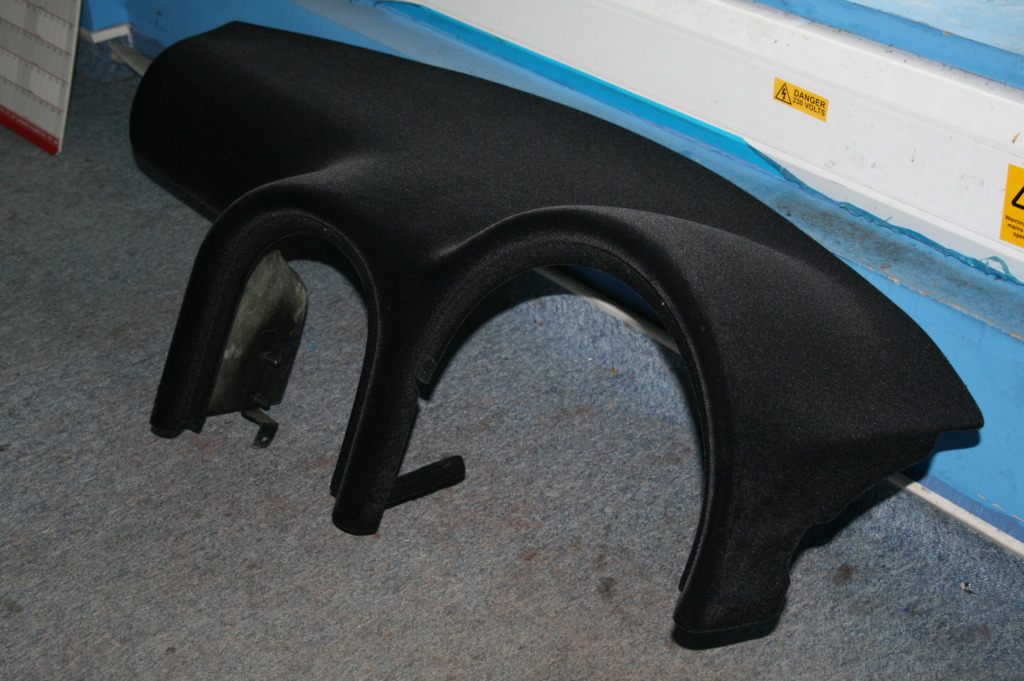
I'm VERY limited in what I can do without the shell but I had the dashboard flocked today.


Name:  Picture501.jpg
Views: 667
Size:  195.3 KB


Name:  Picture502.jpg
Views: 672
Size:  192.4 KB


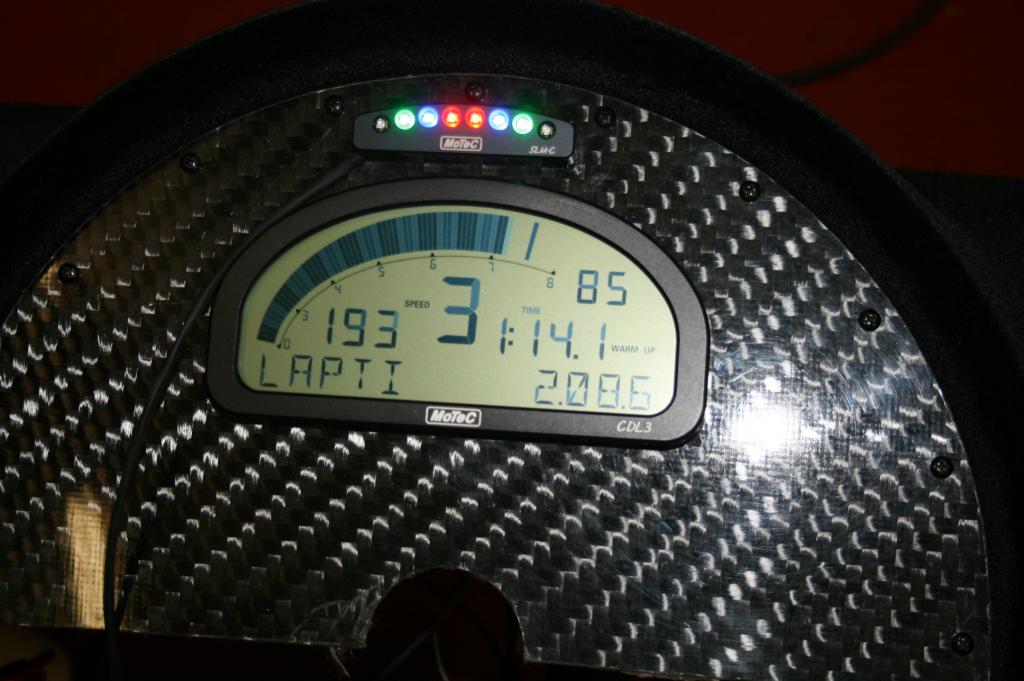
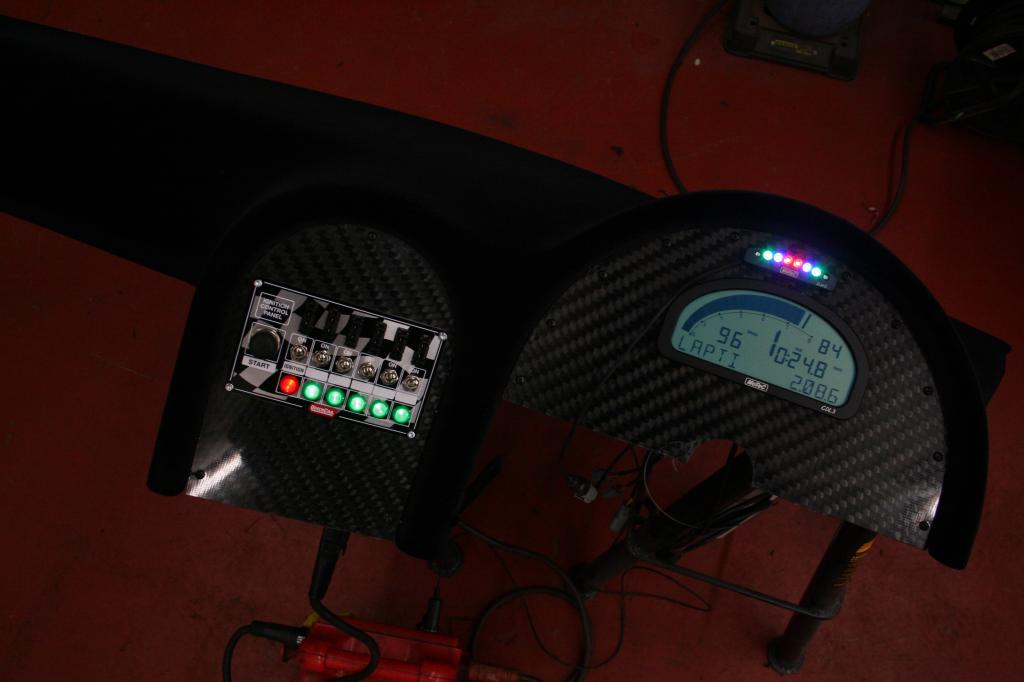
Righty, again, without the car I'm limited with what I can do but today I've secured the switch panel and MoTeC
digi dash to the flocked dash, we couldn't resist to fire them up using a jump pack to see what they looked like......
...... OMG, FDUKing awesome !!!!


Name:  Picture507_zps556102d5.jpg
Views: 642
Size:  88.4 KB


Name:  Picture512_zpsec650937.jpg
Views: 633
Size:  47.4 KB
Old 02-03-13, 06:00 PM
  #15  
Grippin' not Driftin'

Thread Starter
 
Sicknote's Avatar
 
Join Date: Jul 2011
Location: England
Posts: 149
Likes: 0
Received 0 Likes on 0 Posts
A few better photos now shes back at her home.


Name:  Picture563_zpsc7b549ab.jpg
Views: 661
Size:  83.2 KB


Name:  Picture591_zps54f5ccfd.jpg
Views: 669
Size:  81.1 KB


Name:  Picture588_zpsdd0b8bba.jpg
Views: 642
Size:  83.9 KB


Name:  Picture587_zpsba4c6feb.jpg
Views: 647
Size:  78.4 KB
Old 02-03-13, 06:02 PM
  #16  
Grippin' not Driftin'

Thread Starter
 
Sicknote's Avatar
 
Join Date: Jul 2011
Location: England
Posts: 149
Likes: 0
Received 0 Likes on 0 Posts
Here are a few manifold pics... and a rare pic of me in the process.


Name:  Manifold1_zps9921857f.jpg
Views: 671
Size:  91.4 KB


Name:  Manifold2_zps9070710e.jpg
Views: 671
Size:  97.1 KB


Name:  Manifold4_zps7aec751b.jpg
Views: 645
Size:  97.4 KB


Name:  Manifold5_zpsbca7b4c3.jpg
Views: 647
Size:  105.3 KB


Name:  Manifold6_zps7aff6ddd.jpg
Views: 616
Size:  106.7 KB
Old 02-03-13, 06:03 PM
  #17  
Grippin' not Driftin'

Thread Starter
 
Sicknote's Avatar
 
Join Date: Jul 2011
Location: England
Posts: 149
Likes: 0
Received 0 Likes on 0 Posts
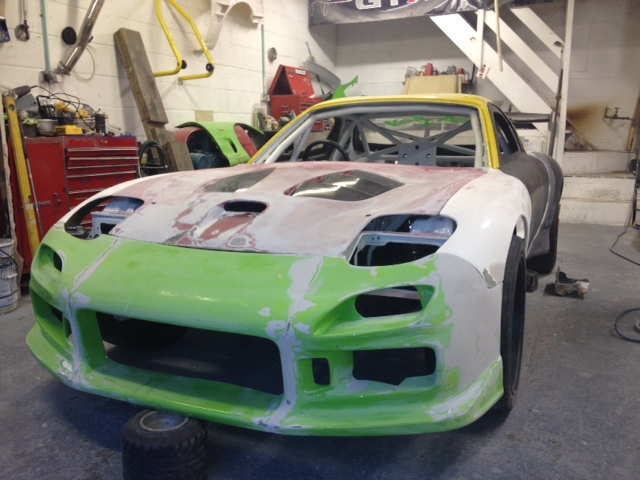
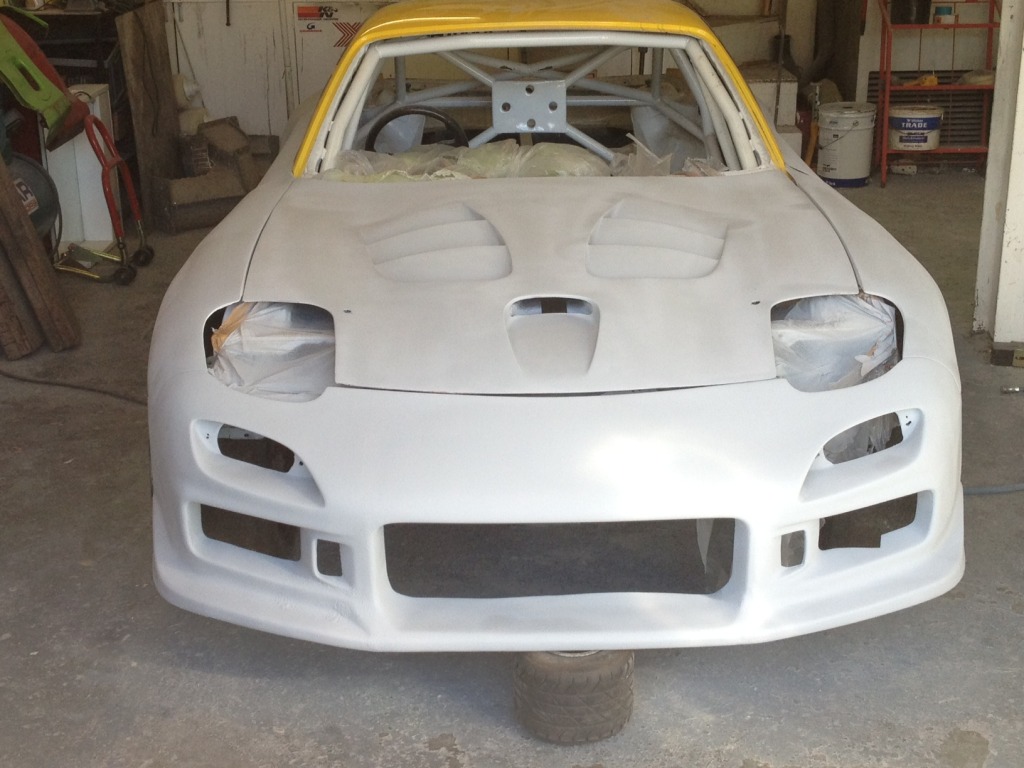
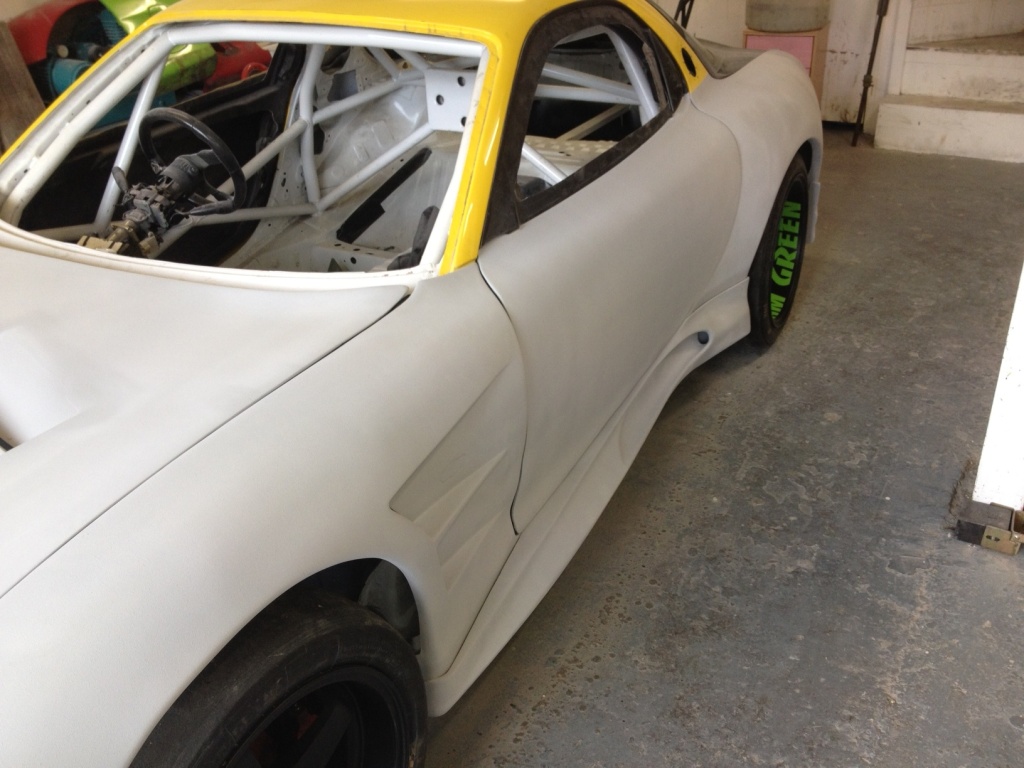
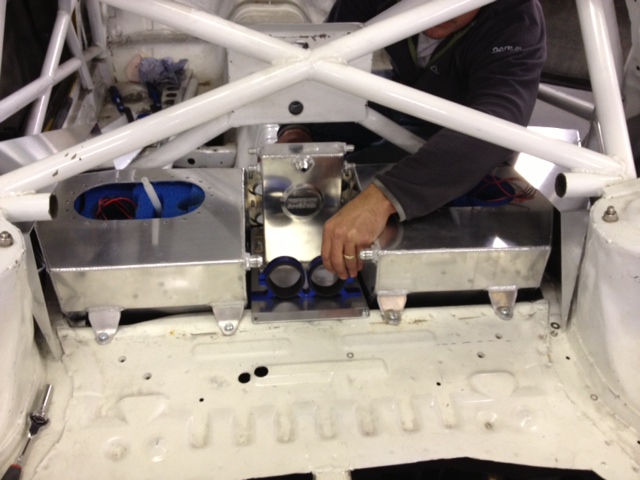
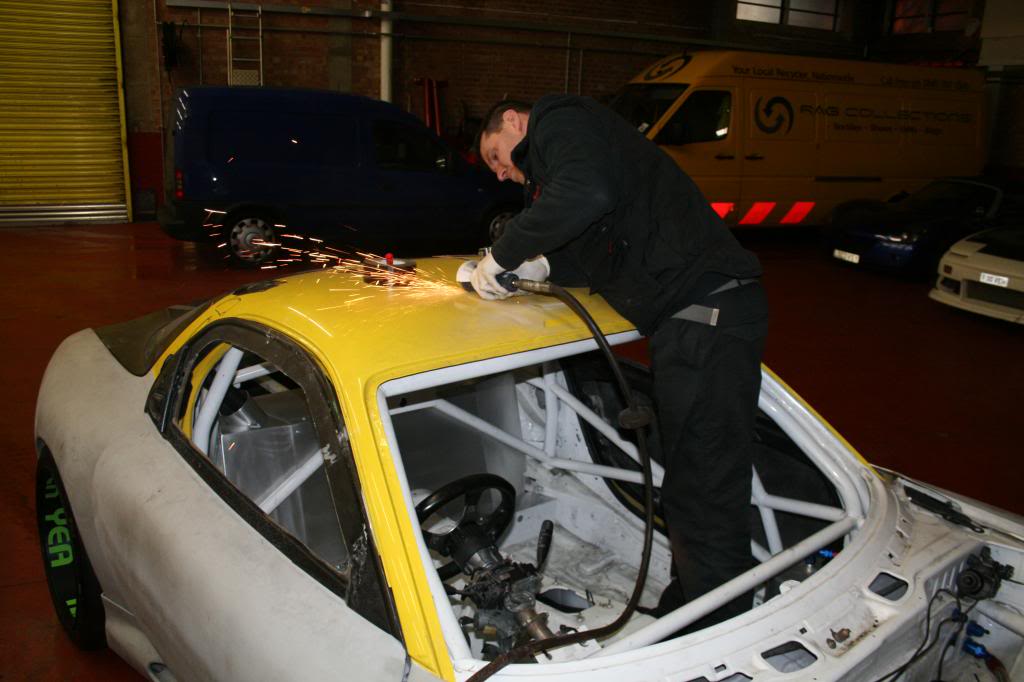
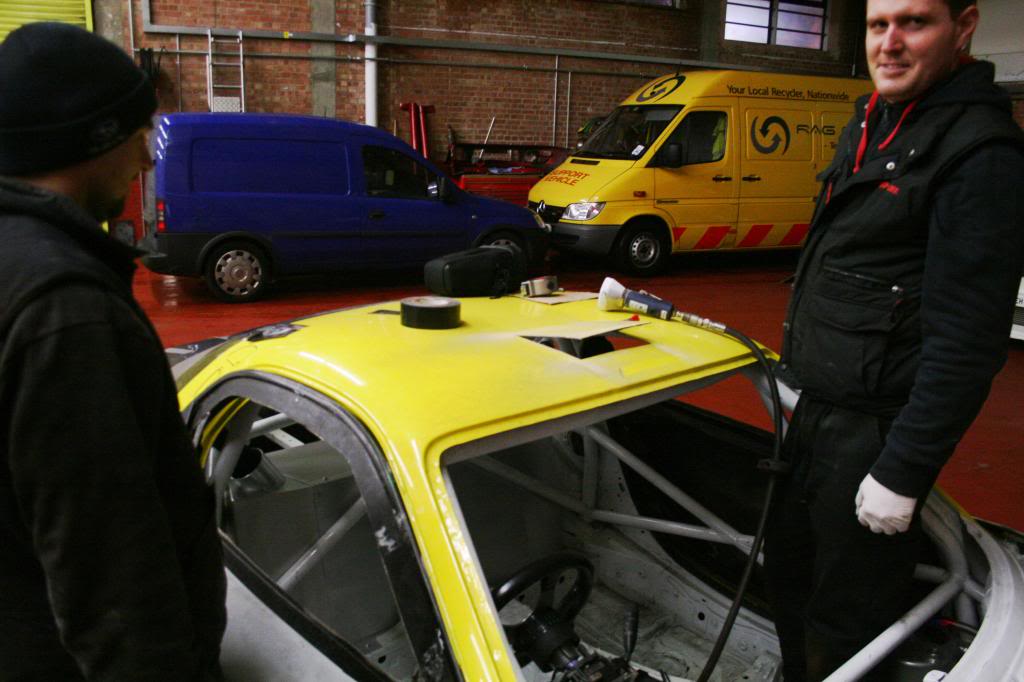
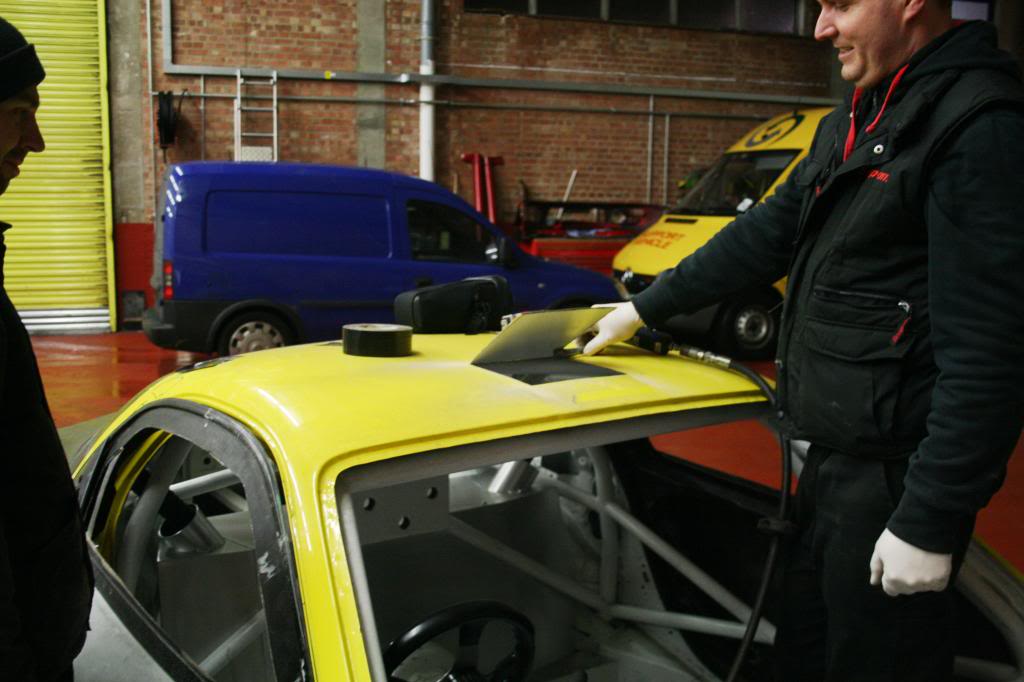
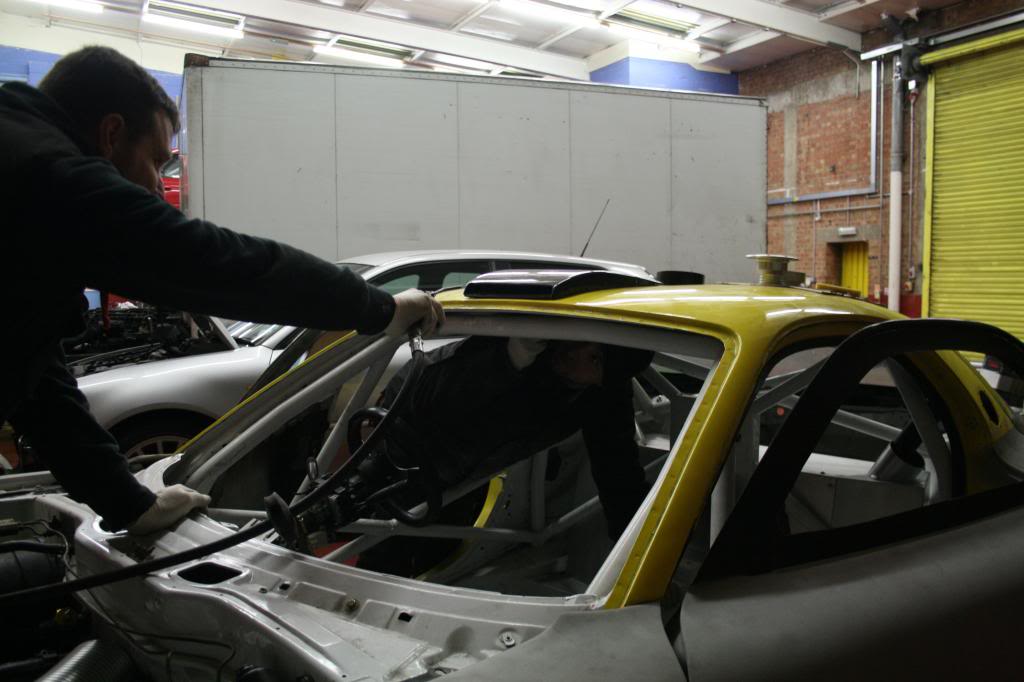
Ok guys, now the car is back the photos will come thick and fast, here is tonights work, the focus tonight was
the windows, wing mirrors, roof scoop and fuel filler caps and necks.

Enjoy.


Name:  1_zps3d660c26.jpg
Views: 578
Size:  86.0 KB


Name:  2_zps4b0d3790.jpg
Views: 606
Size:  84.7 KB


Name:  3_zpsf57d9193.jpg
Views: 606
Size:  74.2 KB


Name:  4_zpscd6a1ceb.jpg
Views: 610
Size:  77.1 KB


Name:  5_zpsd89a7be3.jpg
Views: 599
Size:  73.1 KB


Name:  8_zpsc89bd5ff.jpg
Views: 603
Size:  78.9 KB


Name:  6_zpse80fda00.jpg
Views: 575
Size:  72.6 KB


Name:  7_zps1fce279f.jpg
Views: 629
Size:  60.2 KB
Old 02-03-13, 06:04 PM
  #18  
Grippin' not Driftin'

Thread Starter
 
Sicknote's Avatar
 
Join Date: Jul 2011
Location: England
Posts: 149
Likes: 0
Received 0 Likes on 0 Posts
A few more :-


Name:  9_zpsa21e027b.jpg
Views: 603
Size:  73.7 KB


Name:  10_zps25edd343.jpg
Views: 670
Size:  61.0 KB


Name:  11_zps7955673e.jpg
Views: 561
Size:  84.9 KB


Name:  12_zps04f74ce8.jpg
Views: 632
Size:  43.4 KB


Name:  13_zpsbd4eb496.jpg
Views: 632
Size:  65.4 KB


Name:  91_zps23b5845d.jpg
Views: 573
Size:  48.5 KB


And the finished article for tonight, onto the exhaust tomorrow.

Name:  14_zps37389e63.jpg
Views: 640
Size:  65.3 KB
Old 02-03-13, 06:07 PM
  #19  
Grippin' not Driftin'

Thread Starter
 
Sicknote's Avatar
 
Join Date: Jul 2011
Location: England
Posts: 149
Likes: 0
Received 0 Likes on 0 Posts
As we were working on the Scoobie to sort out an oil leak on the gearbox and the fact that were waiting
for parts we didn't work on Kermy, I just finished off the fuel filler necks and firewall tubing.


Name:  Picture652_zps89816618.jpg
Views: 632
Size:  72.7 KB


Name:  Picture653_zps2223feb4.jpg
Views: 596
Size:  49.8 KB


Apparently we're just about to build a church organ !!!


Name:  Picture654_zpse8bb1e37.jpg
Views: 599
Size:  69.9 KB
Old 02-03-13, 06:09 PM
  #20  
Grippin' not Driftin'

Thread Starter
 
Sicknote's Avatar
 
Join Date: Jul 2011
Location: England
Posts: 149
Likes: 0
Received 0 Likes on 0 Posts
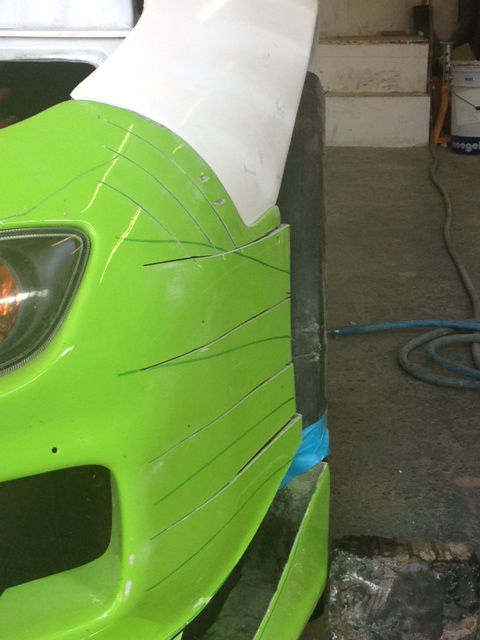
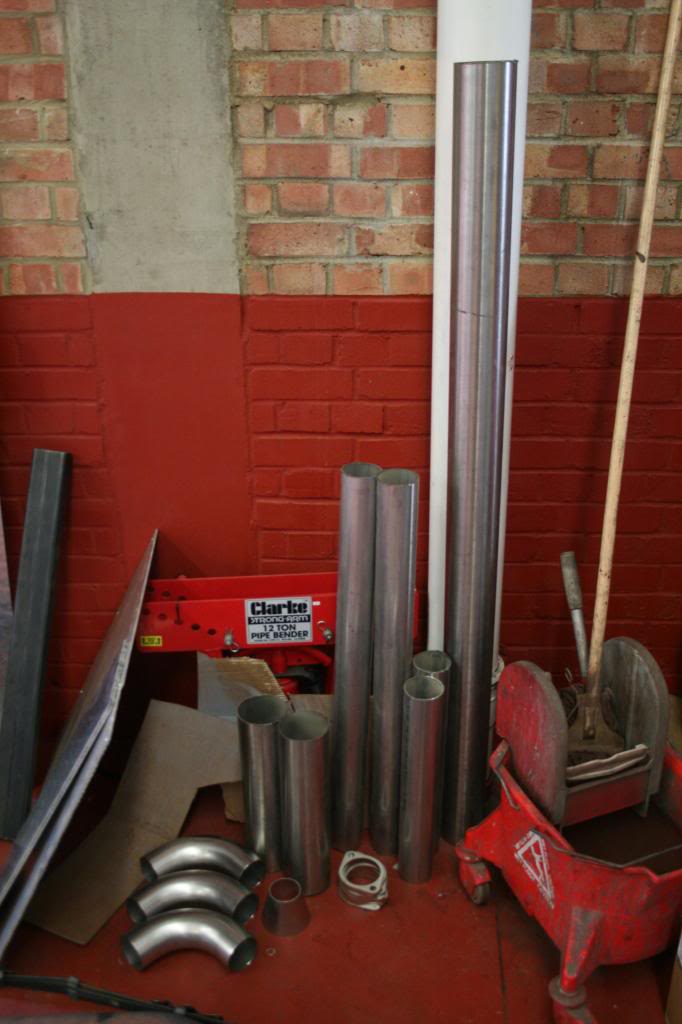
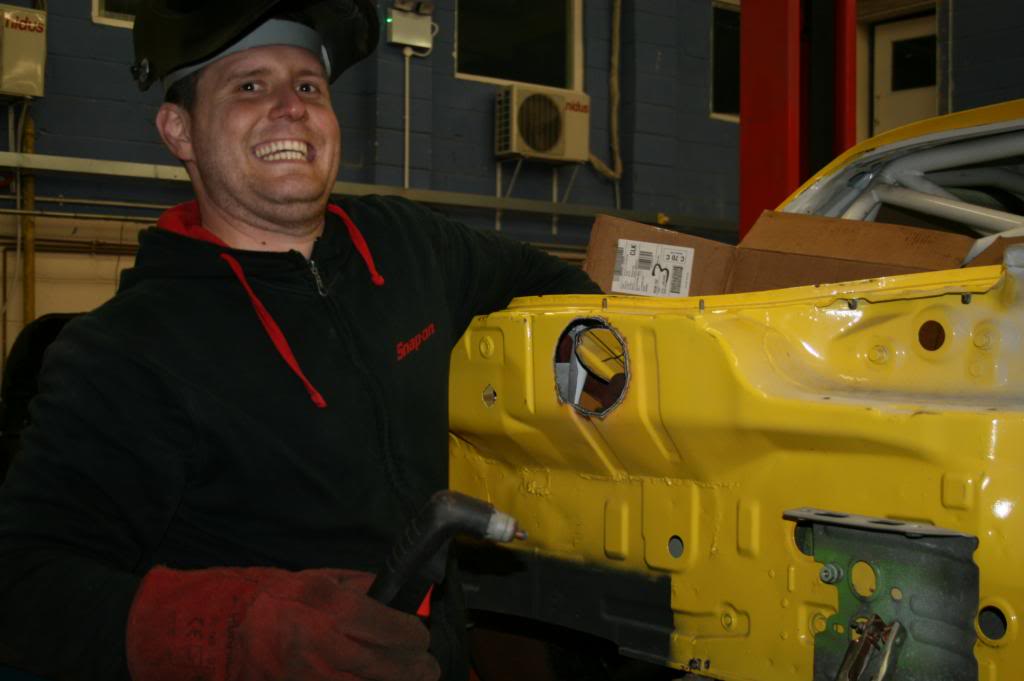
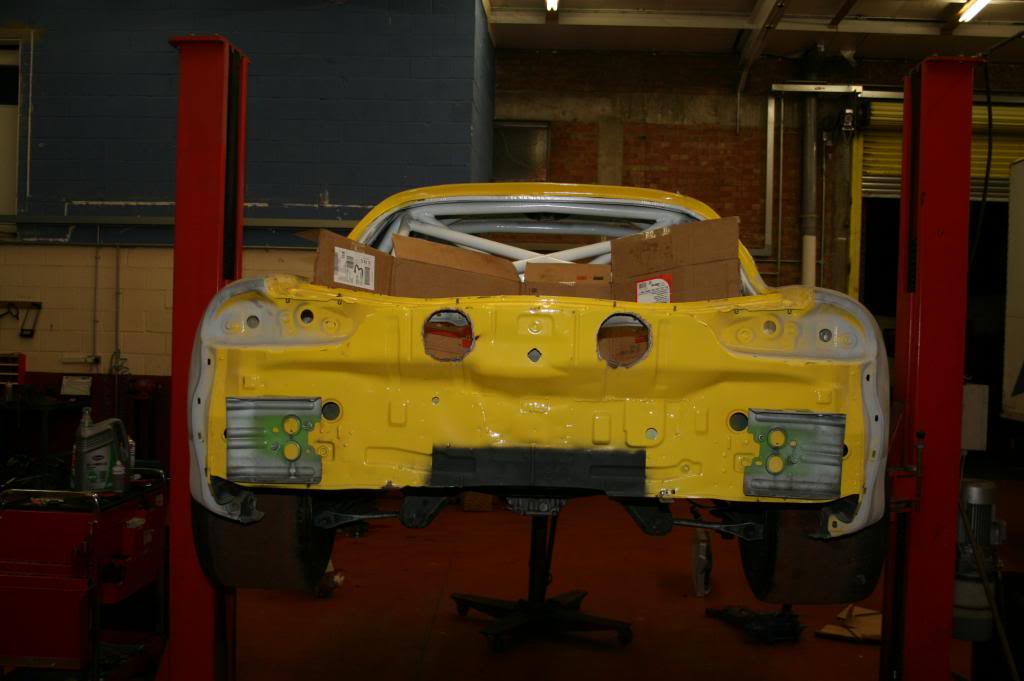
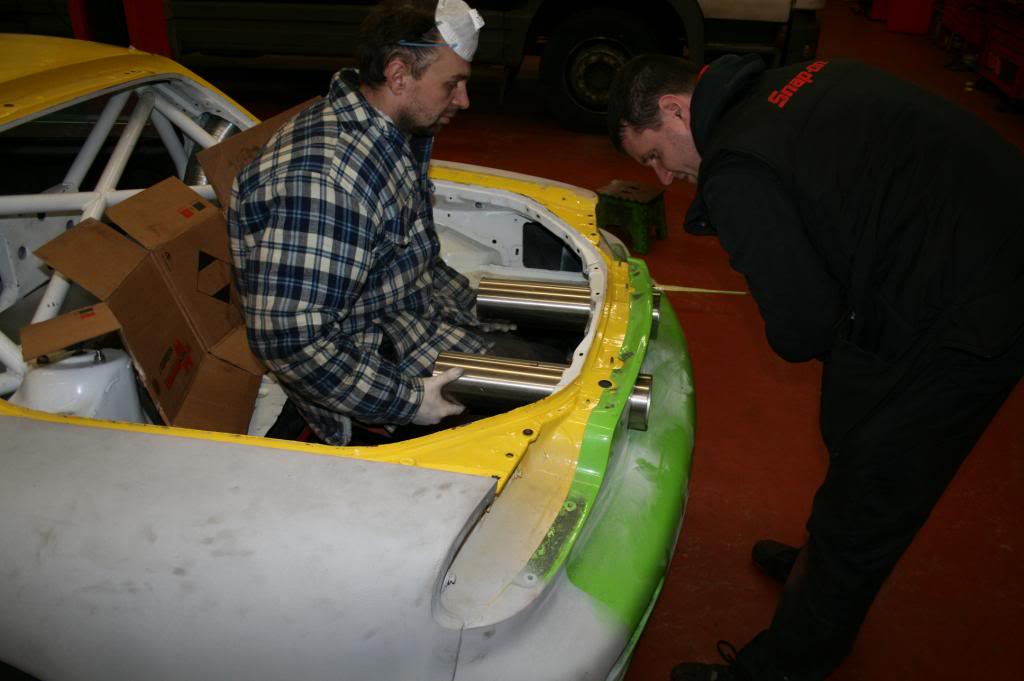
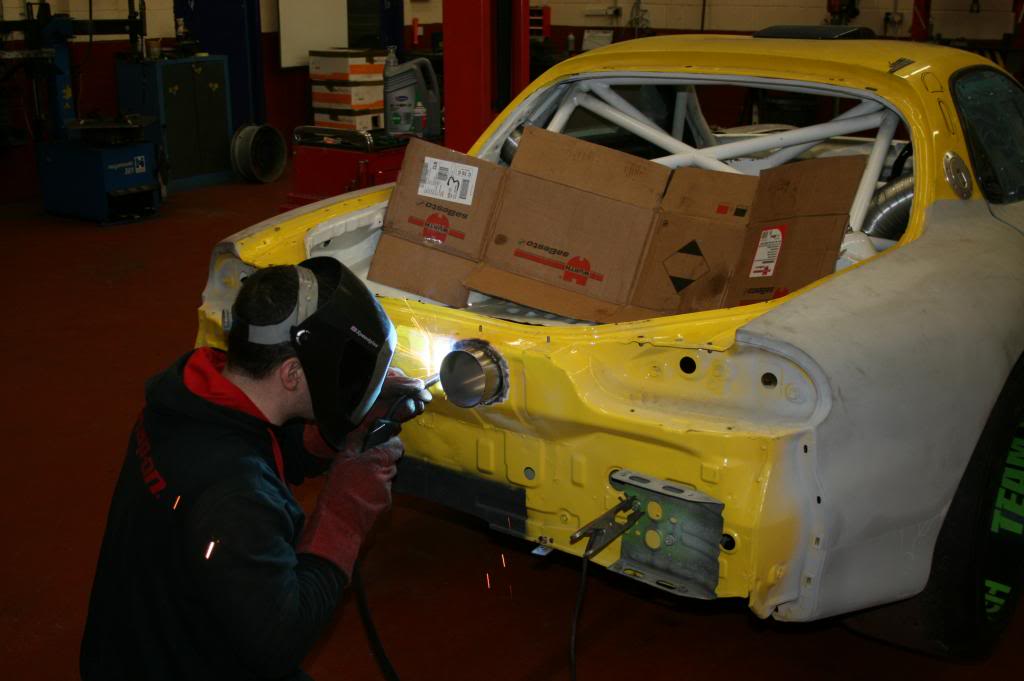
Righty, there were two jobs going on this evening... the first was the exits for the exhaust.

Lining em up
Name:  Picture656_zps7ac72e44.jpg
Views: 579
Size:  76.9 KB

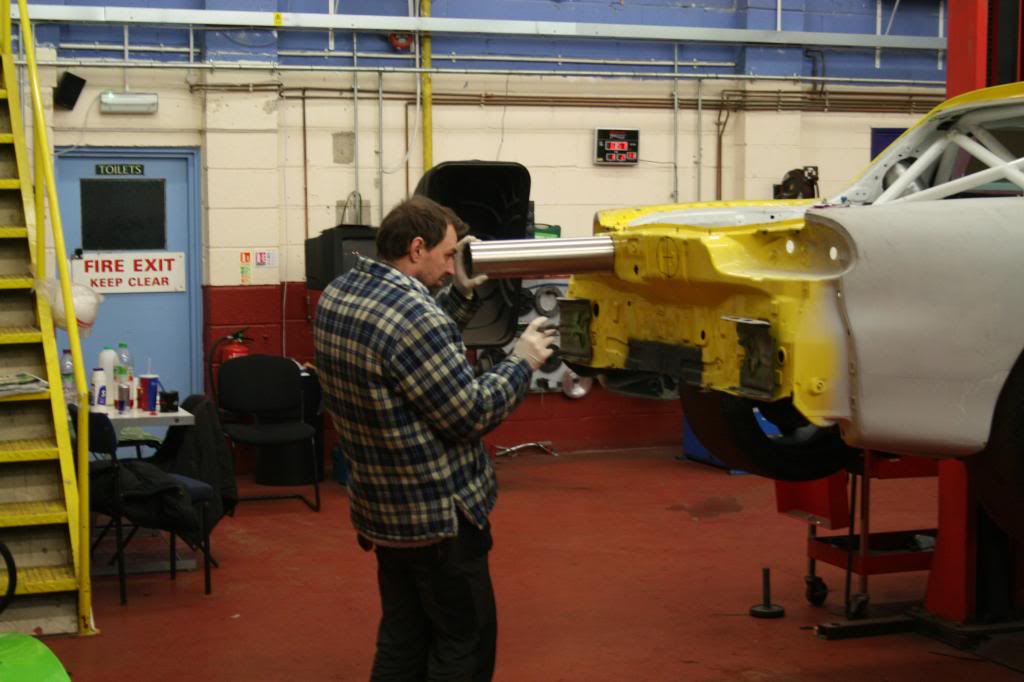
Plasma cutting the holes
Name:  Picture667_zps76f2003d.jpg
Views: 574
Size:  49.8 KB

Voila !!
Name:  Picture669_zpsb1d5c912.jpg
Views: 566
Size:  53.5 KB


Name:  Picture671_zpsa5c66f38.jpg
Views: 550
Size:  56.3 KB

Mmmm, maybe a bit too long !!
Name:  Picture673_zps63d725f4.jpg
Views: 602
Size:  57.3 KB

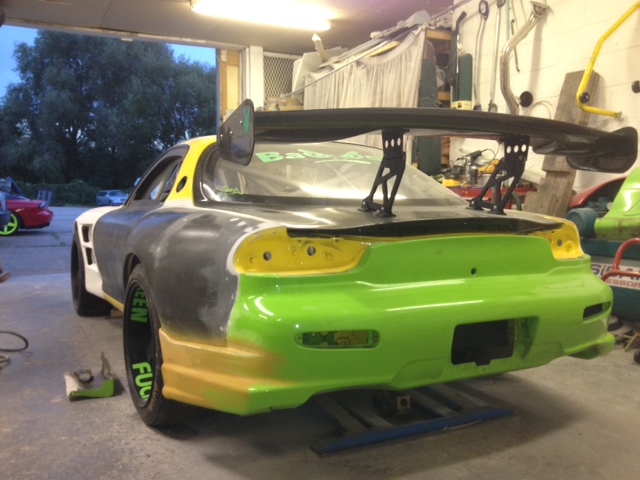
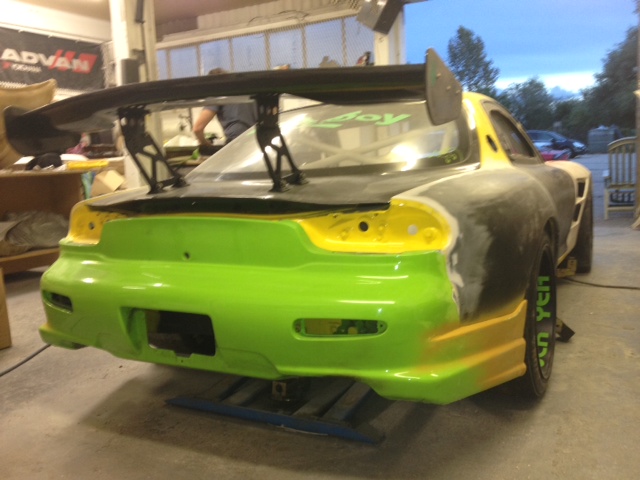
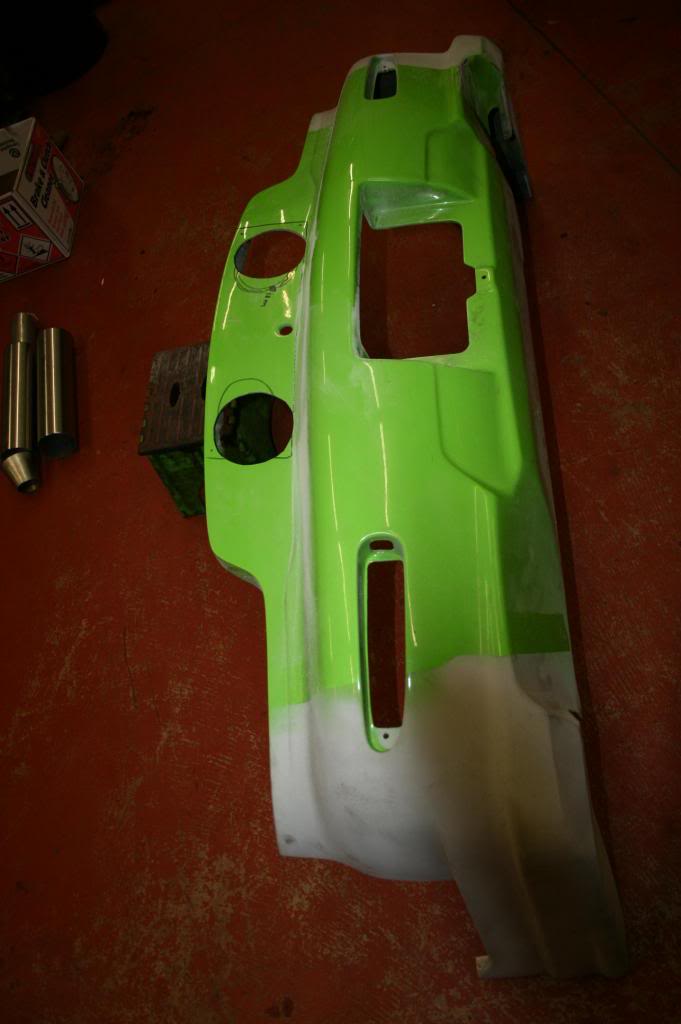
She has a rather nice smily face on her **** !!
Name:  Picture676_zps3c6d0a16.jpg
Views: 573
Size:  58.0 KB

Machine guns at the ready !!
Name:  Picture679_zpsac7bf39b.jpg
Views: 585
Size:  55.6 KB

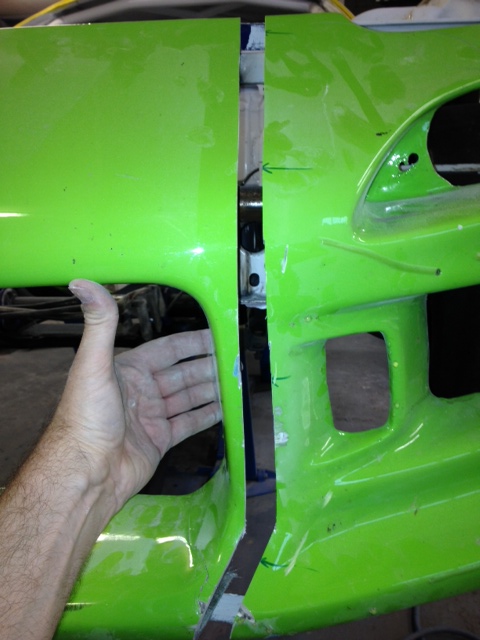
More mods to what used to be a nice C-West bumper
Name:  Picture681_zps92422844.jpg
Views: 584
Size:  47.9 KB


Name:  Picture684_zpsee66404e.jpg
Views: 580
Size:  54.2 KB


Name:  Picture687_zps7b73cb20.jpg
Views: 554
Size:  62.2 KB
Old 02-03-13, 06:12 PM
  #21  
Grippin' not Driftin'

Thread Starter
 
Sicknote's Avatar
 
Join Date: Jul 2011
Location: England
Posts: 149
Likes: 0
Received 0 Likes on 0 Posts
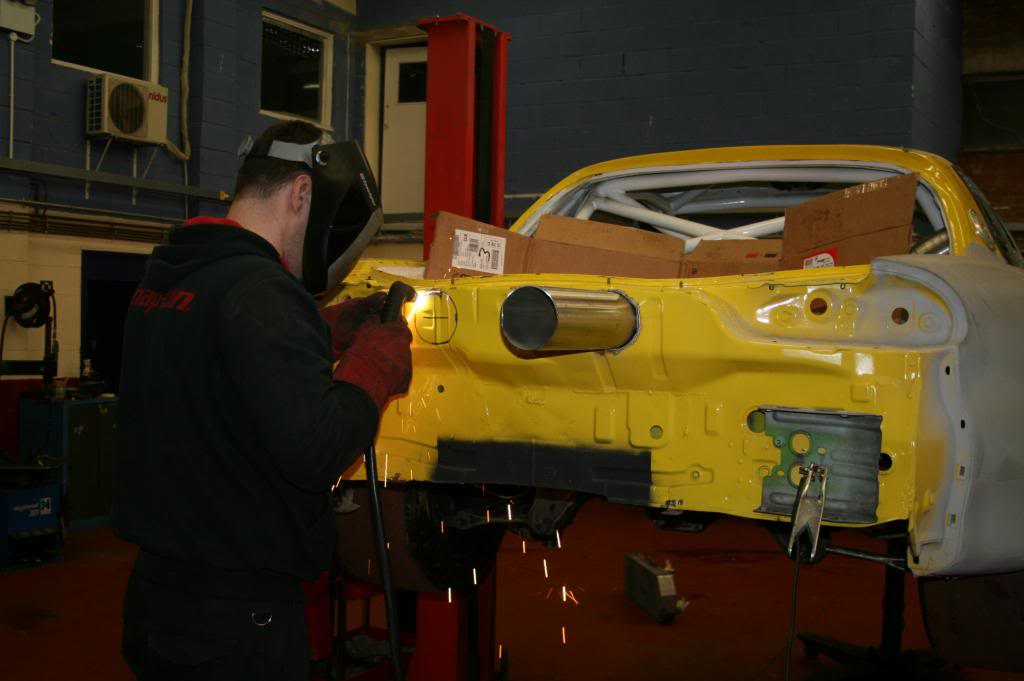
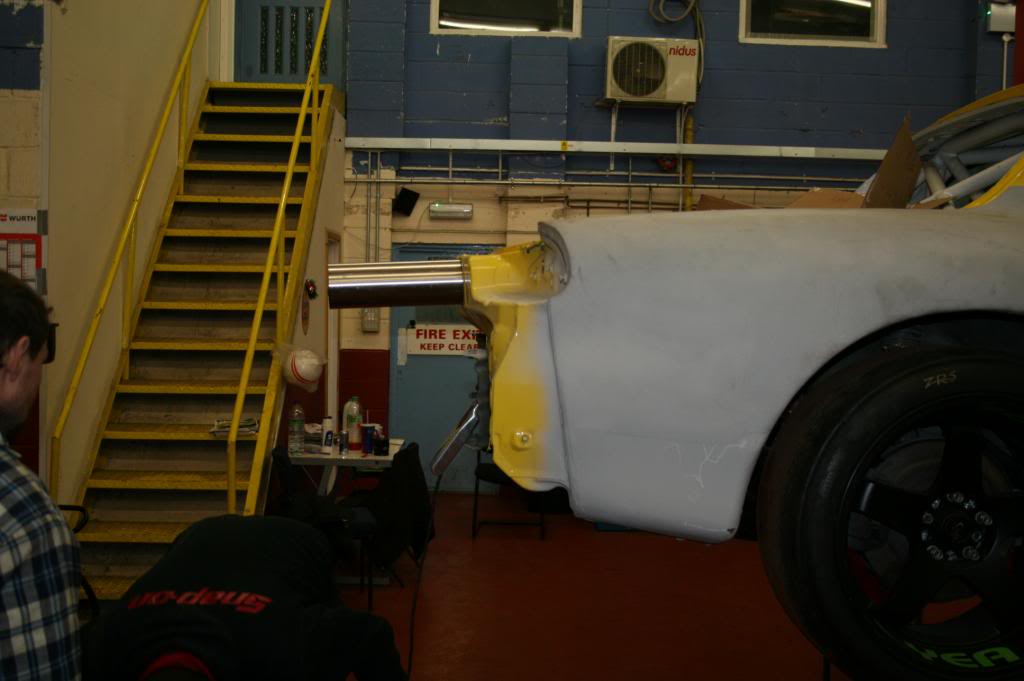
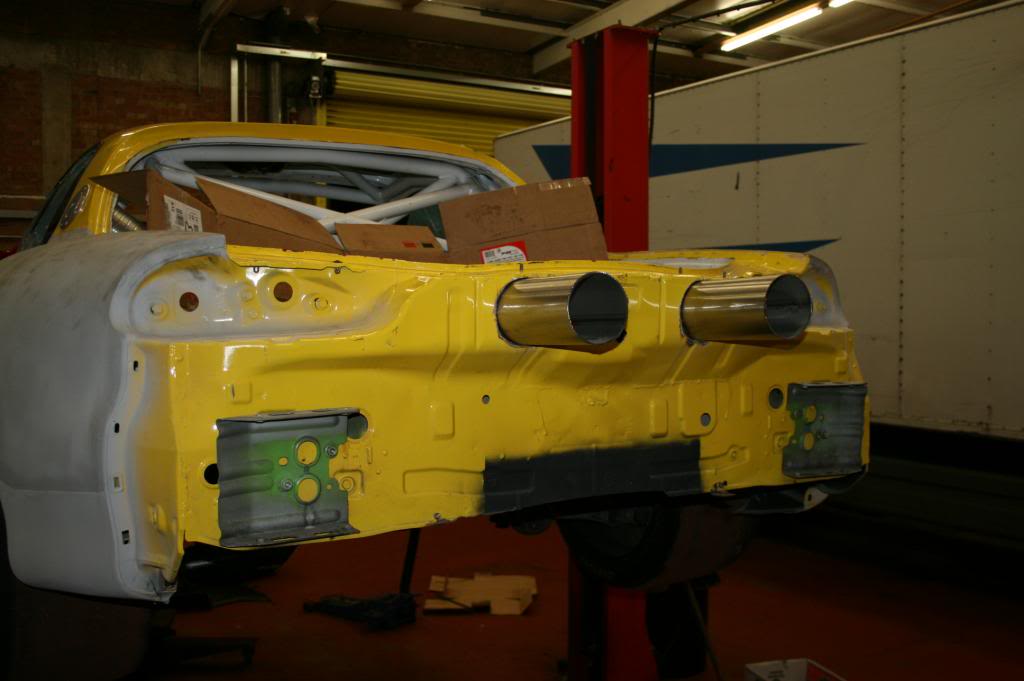
Welding them in place
Name:  Picture692_zps412924cf.jpg
Views: 567
Size:  59.2 KB

The finished holes.
Name:  Picture695_zpscb31a29f.jpg
Views: 591
Size:  44.2 KB


Name:  Picture707_zpsbbf52814.jpg
Views: 595
Size:  55.3 KB


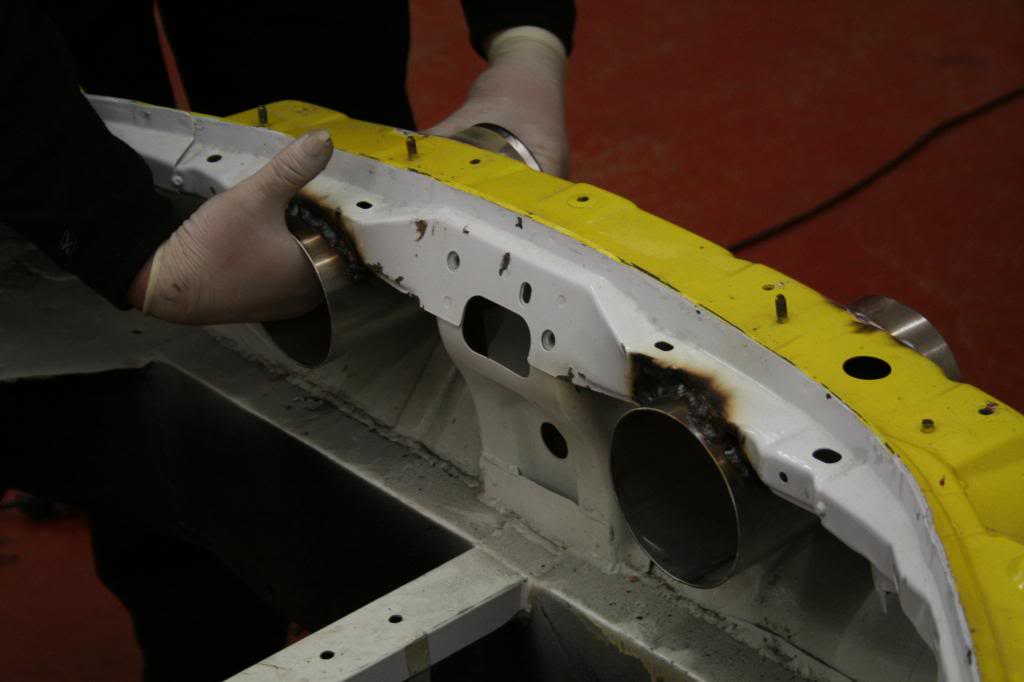
The holes will have a custom carbon cover and the 3" pipes that come through the holes will have a reducer
pipe welded on to make a 4" exit.


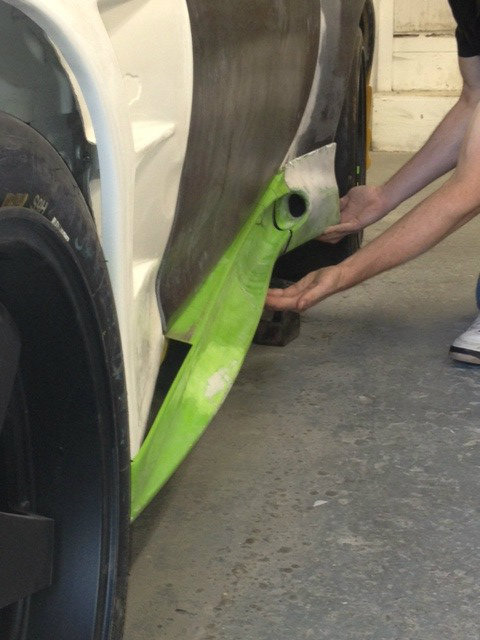
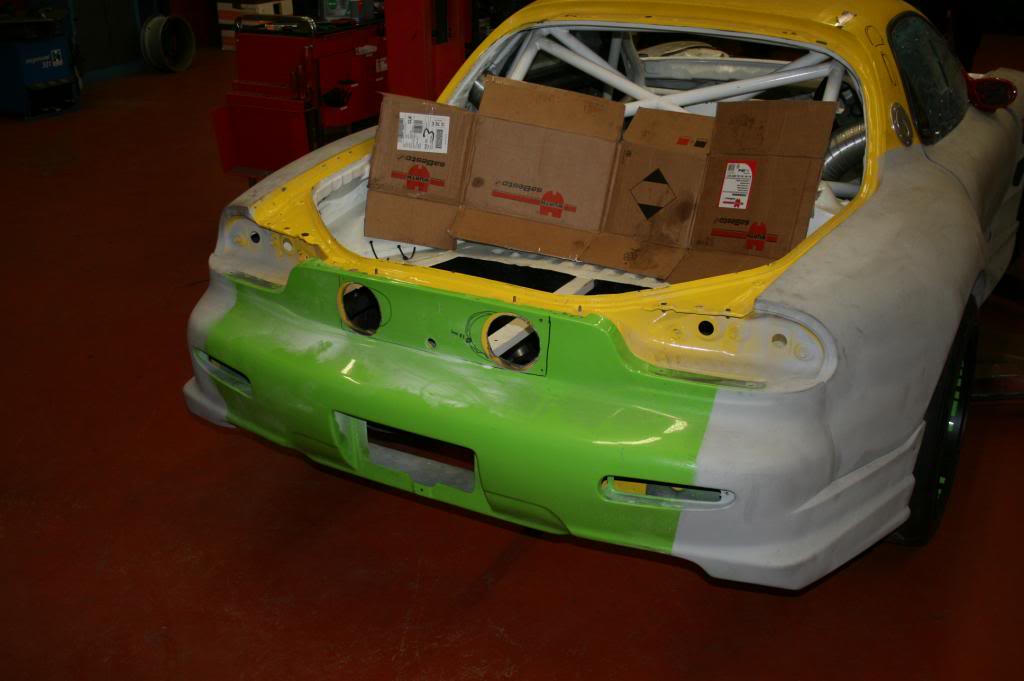
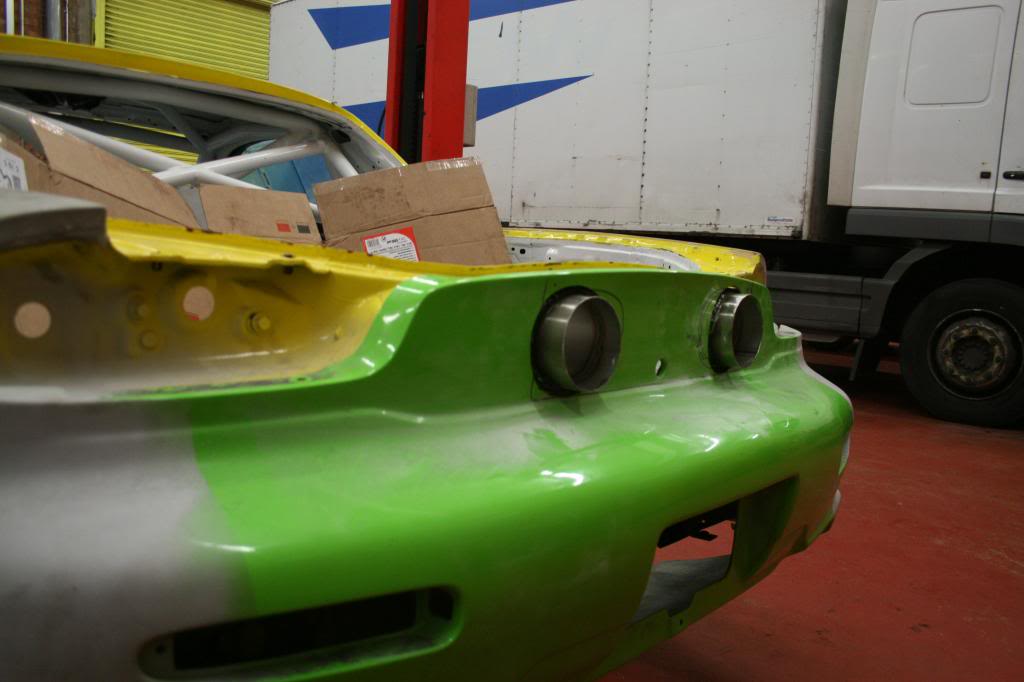
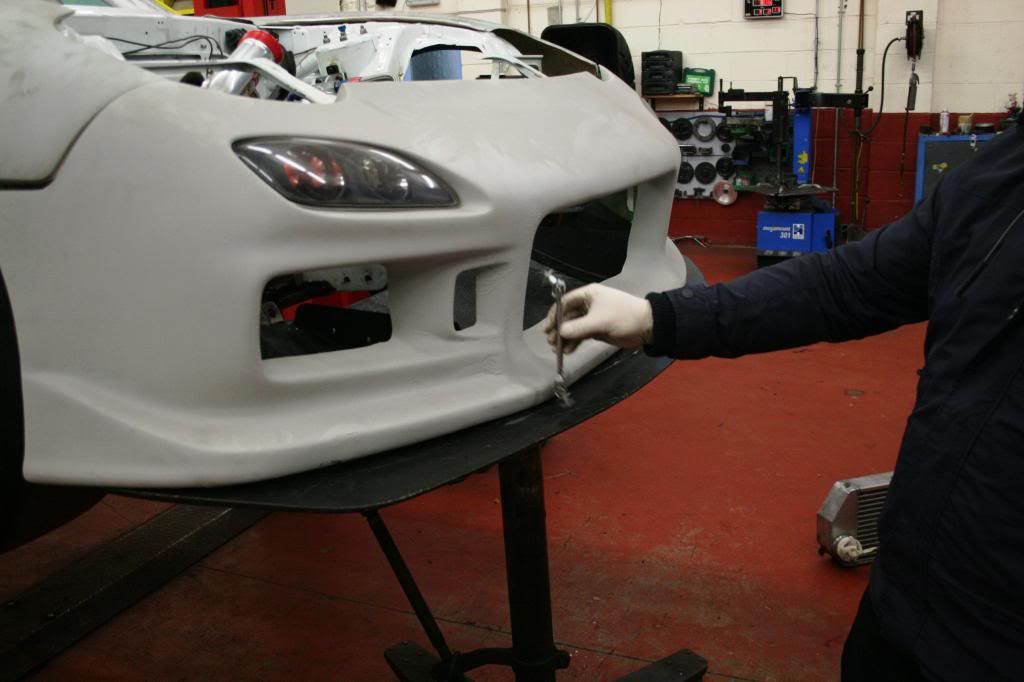
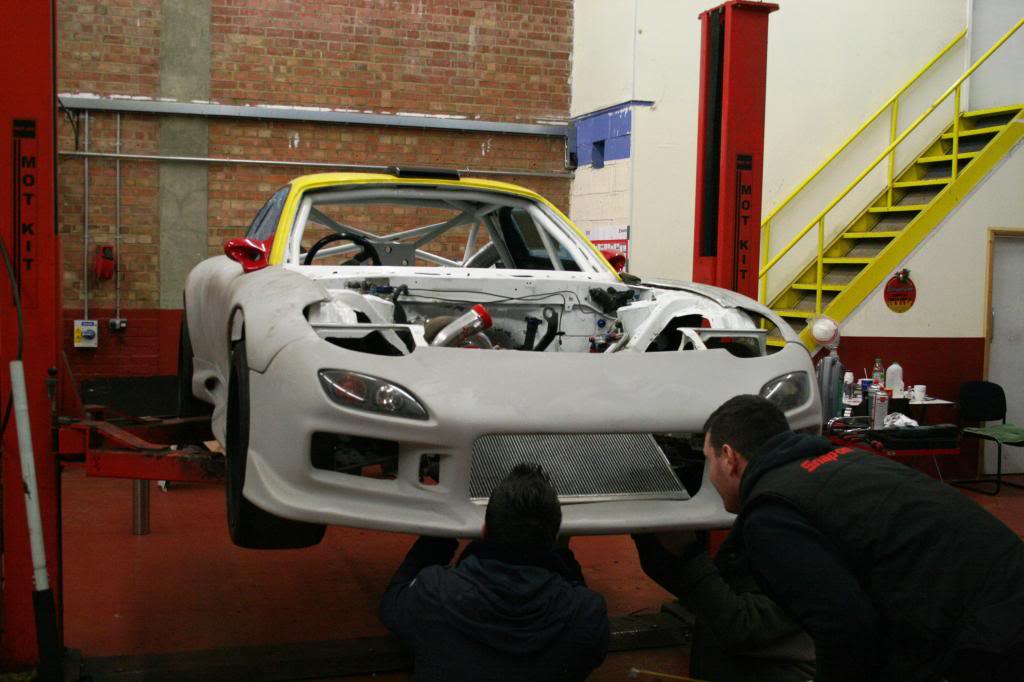
The seond job tonight was to position the radiator and intercooler so that we can make the brackets.

Temporarily securing the bumper to check for clearances
Name:  Picture658_zps0c20e9bd.jpg
Views: 572
Size:  80.3 KB


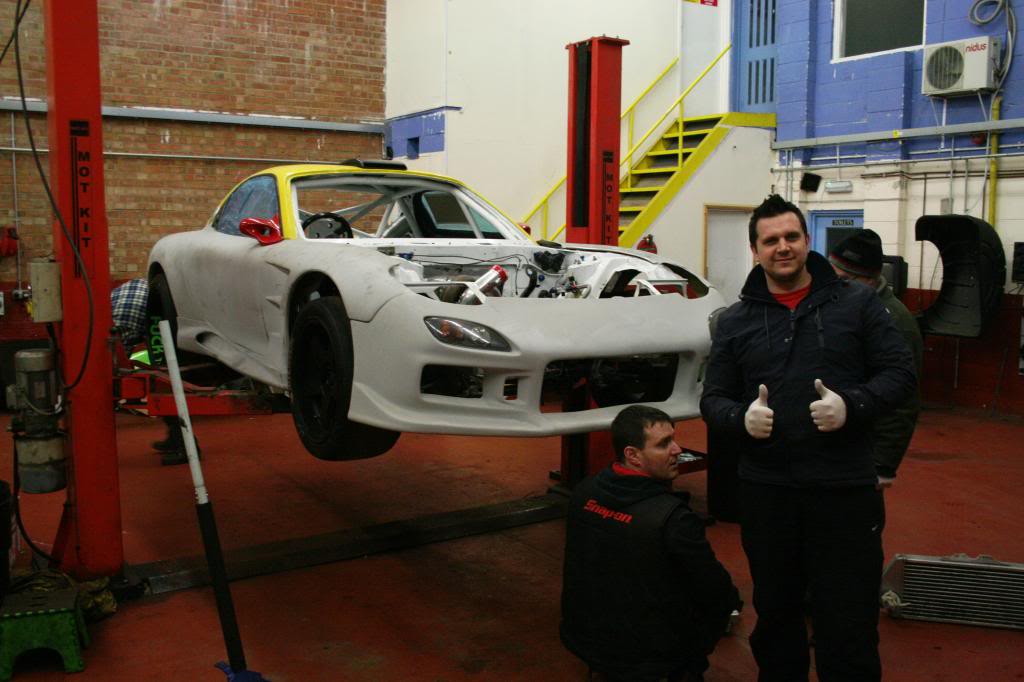
Securing the splitter in place to check fitment with the wider bumper.
Name:  Picture664_zpsd114d175.jpg
Views: 549
Size:  59.5 KB


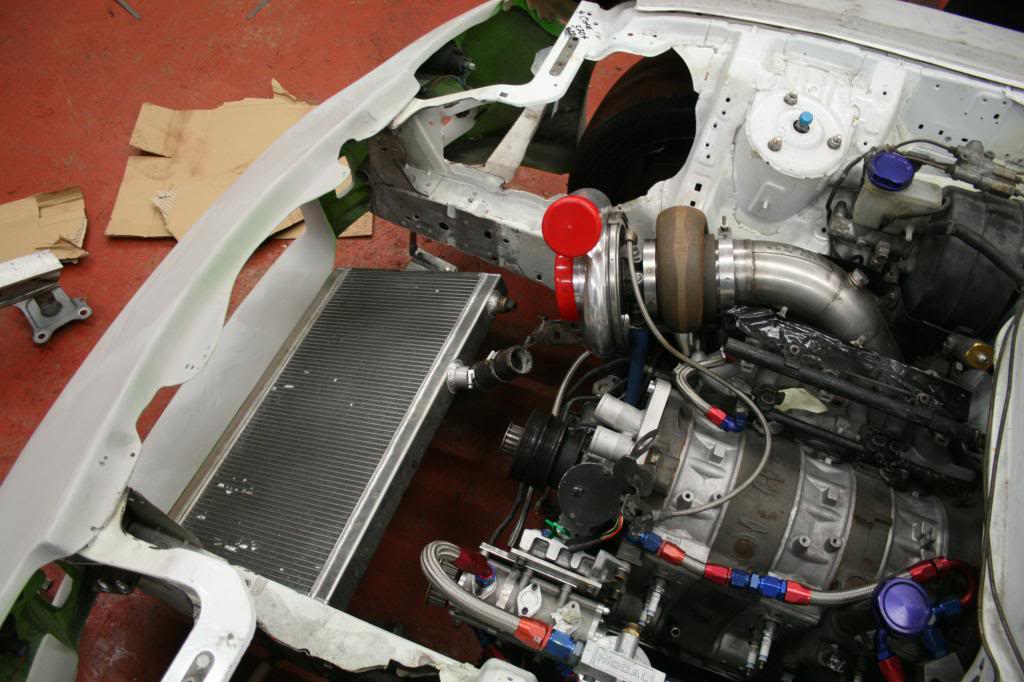
Positioning the radiator to make the brackets
Name:  Picture659_zps681081e4.jpg
Views: 613
Size:  82.9 KB


And overhead view of the newley sited Rad.
Name:  Picture705_zpsec49decf.jpg
Views: 587
Size:  98.3 KB
Old 02-05-13, 10:08 AM
  #22  
Garage Hero

iTrader: (93)
 
mannykiller's Avatar
 
Join Date: Aug 2009
Location: Quartz Hill
Posts: 4,205
Likes: 0
Received 17 Likes on 14 Posts
...this is sick!!! Good stuff man!! keep it up!!!
Old 02-05-13, 04:50 PM
  #23  
Grippin' not Driftin'

Thread Starter
 
Sicknote's Avatar
 
Join Date: Jul 2011
Location: England
Posts: 149
Likes: 0
Received 0 Likes on 0 Posts
Originally Posted by mannykiller
...this is sick!!! Good stuff man!! keep it up!!!
Thank you my good man, we aim to have the car ready for paint in 4 weeks.
Old 02-05-13, 04:56 PM
  #24  
Grippin' not Driftin'

Thread Starter
 
Sicknote's Avatar
 
Join Date: Jul 2011
Location: England
Posts: 149
Likes: 0
Received 0 Likes on 0 Posts
Aha, the new Intercooler is in place... single core and VERY VERY lightweight, I brought it home for a bit of trimming !!


Name:  Picture716_zps9019bbd9.jpg
Views: 606
Size:  83.2 KB


Name:  Picture719_zps2739715f.jpg
Views: 594
Size:  80.2 KB
Old 02-14-13, 09:51 AM
  #25  
Grippin' not Driftin'

Thread Starter
 
Sicknote's Avatar
 
Join Date: Jul 2011
Location: England
Posts: 149
Likes: 0
Received 0 Likes on 0 Posts
The sexy oil coolers arrived today, unfortunately I had to order these new ones coz I need the dash 12 fittings. :thumbsup:


Name:  Picture723_zpscf2e5e84.jpg
Views: 587
Size:  94.4 KB


Quick Reply: 20b Turbo track car build (England)


All times are GMT -5. The time now is 12:09 PM.