
Timing/Ignitors

Thread Starter
Full Member
Joined: Feb 2013
Posts: 126
Likes: 0
From: Portales, NM
Timing/Ignitors
I'm currently having starting issues with my 84 GS. After replacing both ignition coils, spark plug wires, spark plugs, distributor cap, and distributor rotor, the car still will not start. Upon cranking, it sounds like it wants to catch, but never actually starts up.
So now I have two questions.
First, which j109 ignitor is the leading ignitor? I ask because I was under the impression the forward mounted ignitor was the leading ignitor. While replacing the coils, I noticed that the leading coil had a white plug and the trailing coil had a blue plug. The forward (leading?) ignitor had a blue plug and the side (trailing?) ignitor had a white plug. Not knowing the history of the car, and buying it as a non runner, I'm curious if they were swapped.
Second, can I set a zero split timing without the car running? Going through the archives, I stumbled upon a thread by blwfly where he set a zero split timing and ran direct fire like this, where he simply ran a spark plug wire direct from each coil to a leading spark plug, and essentially had two leading coils.
I would really like to get this car running, so I'm looking for some quick troubleshooting ideas to help with the process of elimination. Thanks for any help.
Front ignitor is leading. Rear coil is leading. If it has not been started in a while, a tablespoon or two of oil in each main barrel of the carb will help build compression. When it starts a significant cloud of smoke will come out of the exhaust. Sometimes neighbors get excited and call the Fire department. I'd get it running with the stock ignition before trying direct fire.
Thread Starter
Full Member
Joined: Feb 2013
Posts: 126
Likes: 0
From: Portales, NM
I'll try and take a video of me trying to start it.
How do I set timing with a car that won't start? All of the instructions I've found have been setting the timing at 4,000 RPM, which I can't do because the car won't start.
How do I set timing with a car that won't start? All of the instructions I've found have been setting the timing at 4,000 RPM, which I can't do because the car won't start.
Trending Topics
Thread Starter
Full Member
Joined: Feb 2013
Posts: 126
Likes: 0
From: Portales, NM
Thread Starter
Full Member
Joined: Feb 2013
Posts: 126
Likes: 0
From: Portales, NM
Okay, here is a video of the first start attempt.
http://i1281.photobucket.com/albums/...pse297e8db.mp4
And here is the second attempt.
http://i1281.photobucket.com/albums/...ps71fe8c01.mp4
Also, I took an air compressor to the inside of the dizzy, and a small file to the little magnets inside of the dizzy.

Is there a way to disassemble the dizzy internals and clean them up nice?
http://i1281.photobucket.com/albums/...pse297e8db.mp4
And here is the second attempt.
http://i1281.photobucket.com/albums/...ps71fe8c01.mp4
Also, I took an air compressor to the inside of the dizzy, and a small file to the little magnets inside of the dizzy.
Is there a way to disassemble the dizzy internals and clean them up nice?
Thread Starter
Full Member
Joined: Feb 2013
Posts: 126
Likes: 0
From: Portales, NM
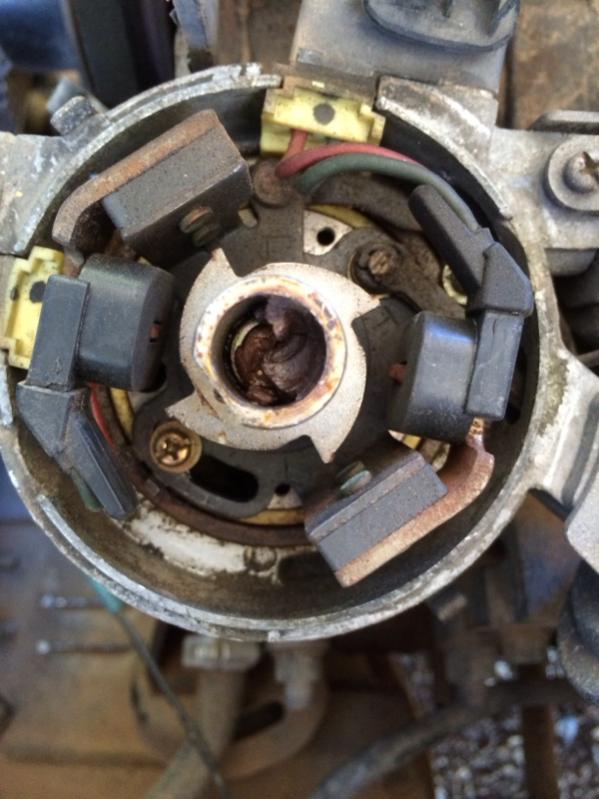
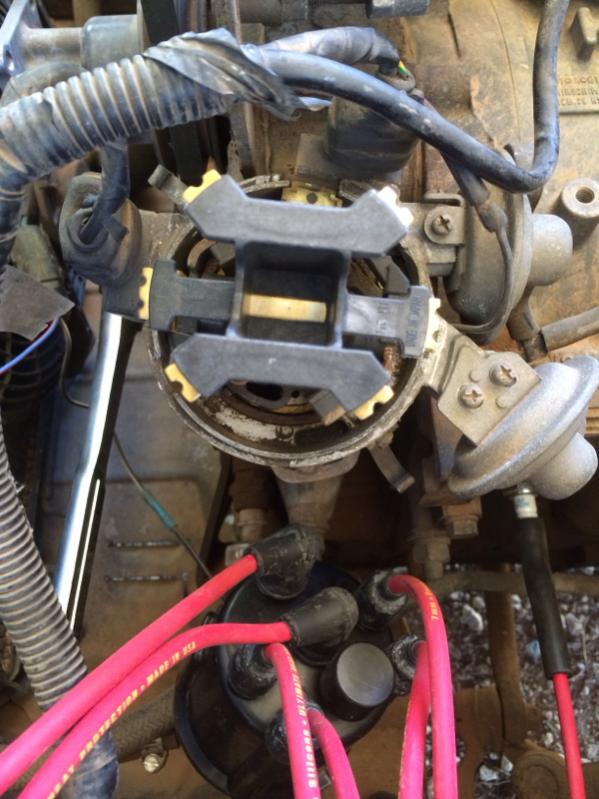
Took the right side inspection plate off, pulled a spark plug, and used a 19mm socket to spin the front pulley till I got the flat spot in the window. Checked the front pulley, and the little needle was right in the very first hash mark, with two more hash marks about 1130 on the pulley. You can sort of see the hash marks in this pic, or at least in the shadow you can. This is with the needle in the very first hash mark.
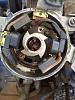
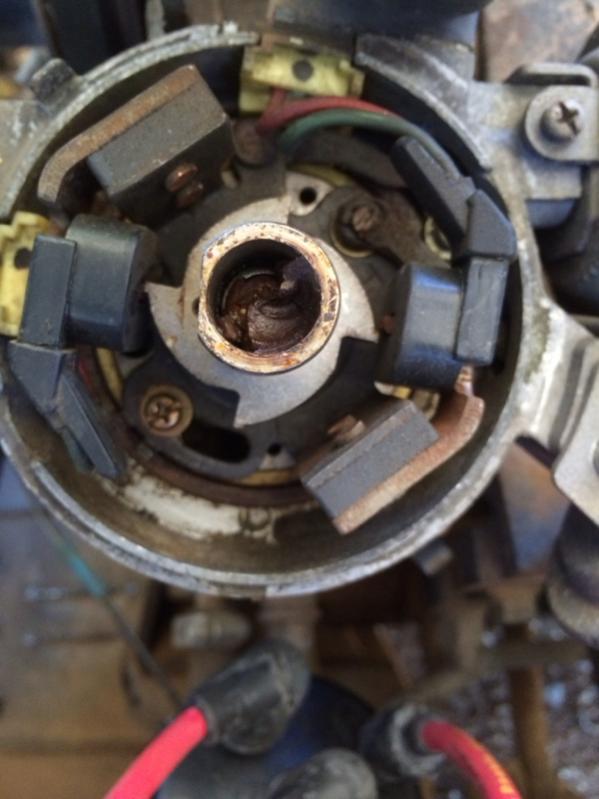
Here is the orientation of the dizzy rotor with engine at TDC. The rotor lines up with the L1 post inside the cap.

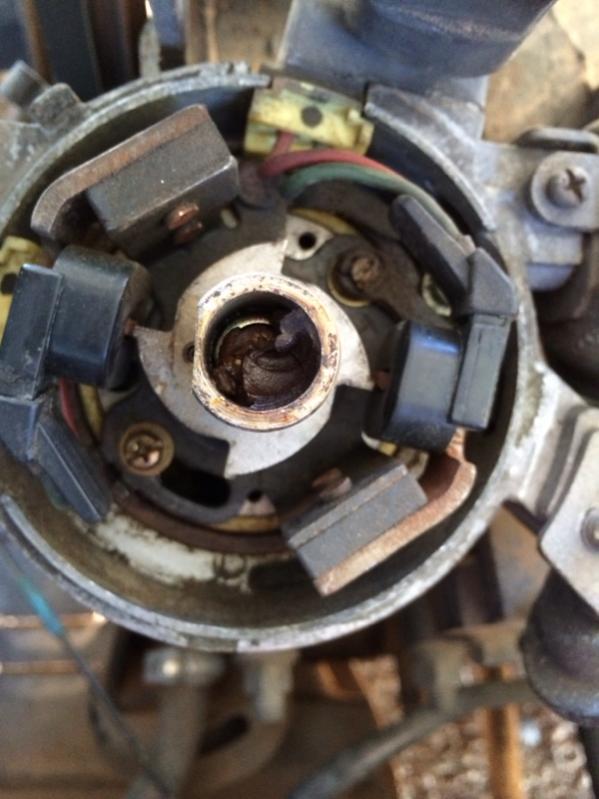
Here is a pic of the contacts with rotor removed, engine is the same configuration. Does this all look correct?

I'm dumb when it comes to all this, but shouldn't the peaks of the post, be closest to the two metal contacts, instead of the metal contacts being about halfway up the "ramps"? Sorry about my nomenclature, I'm bad with electrics.

Here is the orientation of the dizzy rotor with engine at TDC. The rotor lines up with the L1 post inside the cap.
Here is a pic of the contacts with rotor removed, engine is the same configuration. Does this all look correct?
I'm dumb when it comes to all this, but shouldn't the peaks of the post, be closest to the two metal contacts, instead of the metal contacts being about halfway up the "ramps"? Sorry about my nomenclature, I'm bad with electrics.
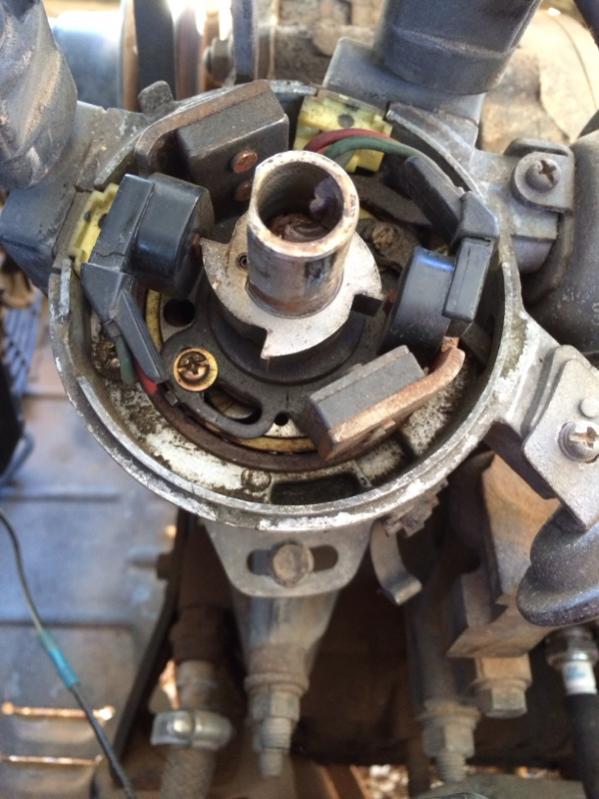
i see a problem ur dizzy istoo retarded. its easier to drop the dizzy without the rotor, both thumb on the magnetic pickup to prevent the shaft from moving while reinstalling.also be sure that the 10mm will sit in the middle of base plate; see attached. otherwise you will have problems with adjusting the timing.
Thread Starter
Full Member
Joined: Feb 2013
Posts: 126
Likes: 0
From: Portales, NM
i see a problem ur dizzy istoo retarded. its easier to drop the dizzy without the rotor, both thumb on the magnetic pickup to prevent the shaft from moving while reinstalling.also be sure that the 10mm will sit in the middle of base plate; see attached. otherwise you will have problems with adjusting the timing.
I think you have the distributor shaft 180* off. The rotor has an arrow on it, when installed the arrow is right above the flat side of the distributor shaft. I was always told to install the distributor with the arrow pointing towards the rear of the car ( like the lock for the hatch). With the pulley at 0*.
You have the flat side of the distributor facing the front of the car, which would point the arrow towards the front of the car.
I also had some no start issues with my REPU lately, this may or may not help
- Every spark plug had the fitting on the end, where the plug wire connects to, unthreaded. Some by a few turns.
- The rotor and cap contacts were hazy and corroded. Cleaned up with a small wire wheel.
- Plug wire ends, where they connect to the plug, were loose. Crimped them tighter with a set of pliers. Now they go on with a reasurring *snick*.
- Accelerator pump squirter on rear rotor was plugged. No fuel was pumping thru either pump squirter at all. I think the whole circuit got air locked.
Fixed all that and runs like a scalded ape. Did a nice burnout last night.
Last edited by DriveFast7; Nov 8, 2013 at 01:32 PM. Reason: Added more troubleshooting tips.
Thread Starter
Full Member
Joined: Feb 2013
Posts: 126
Likes: 0
From: Portales, NM
I think you have the distributor shaft 180* off. The rotor has an arrow on it, when installed the arrow is right above the flat side of the distributor shaft. I was always told to install the distributor with the arrow pointing towards the rear of the car ( like the lock for the hatch). You have the flat side of the distributor facing the front of the car, which would point the arrow towards the front of the car.

I would expect you probably need to make sure and deflood the engine after all this thrashing
about getting the things lined all up and intermittent cranking etc.
If you don't know about deflooding just go to the 1st gen stickies, its detailed in a link
somewhere. Easy to do and sometimes makes a world of difference.
about getting the things lined all up and intermittent cranking etc.
If you don't know about deflooding just go to the 1st gen stickies, its detailed in a link
somewhere. Easy to do and sometimes makes a world of difference.