
Tail Lights - Best Adhesives

Thread Starter
Joined: Apr 2012
Posts: 560
Likes: 0
From: Virginia Beach
Tail Lights - Best Adhesives
My right side tail light clear cover recently came off. It is still in good shape and I have the rubber seal that goes around it on the perimeter. What glues/adhesives has anyone tried to put the tail light back together? I need one to glue the cover on and I guess another to attach the rubber seal.
I have the same issue. I was planning to use urethane (the black stuff that holds windshields in place). It sticks to almost everything, it's strong, and it's semi-flexible when cured.
I believe there is a thread in the archives where someone tinted or cleared the lense and then used silicone to seal them again. Afik you don't need the rubber seal on the light. It is mostly cosmetic. The real seal for the taillights is made of foam I believe.


Joined: Mar 2001
Posts: 31,857
Likes: 3,243
From: https://www2.mazda.com/en/100th/
its been so long since i did this, i'm not sure, but i think i just used a clear silicon, similar to the factory. its not a very high stress joint, and you don't want to see the sealer.
Trending Topics
Don't use clear silicone - it will look white under the lens!!
You need to use black silicone. Fill the trough around the outer edge of the lens, not full, but pull your finger down it to smooth the caulk out and create a uniform subtle "U" shape. You don't want TOO much caulk - it will ooze out and not look clean - but you need enough to create a continuous seal around the assembly.
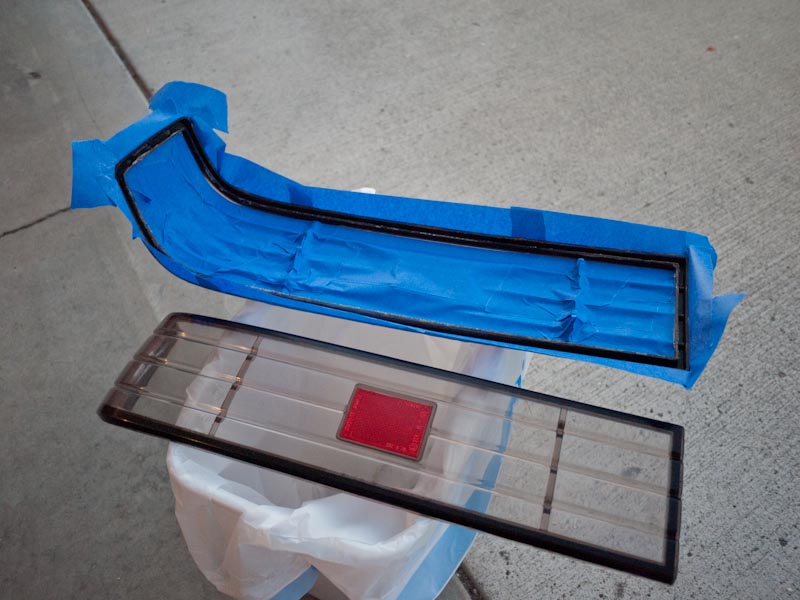
Fill the area around the outer lens only (The area masked out above), don't fill the trough on the assembly for the center lines, it won't look right
Then carefully set the lens onto the housing, starting with the outer rounded edge. Next make sure to line up the center divider pins, and lastly the inside square edge.
Immediately clamp with medium size binder clips - it will take about 20 (avail at walmart for like three fiddy for pack of 12). Put one ever inch or so around the entire lens. The picture only shows the bottom here, but do the whole thing at once.
(Note: if you want to put the rubber trim back on, its now or never, if you do you'll probably need large binder clips to clear the trim)
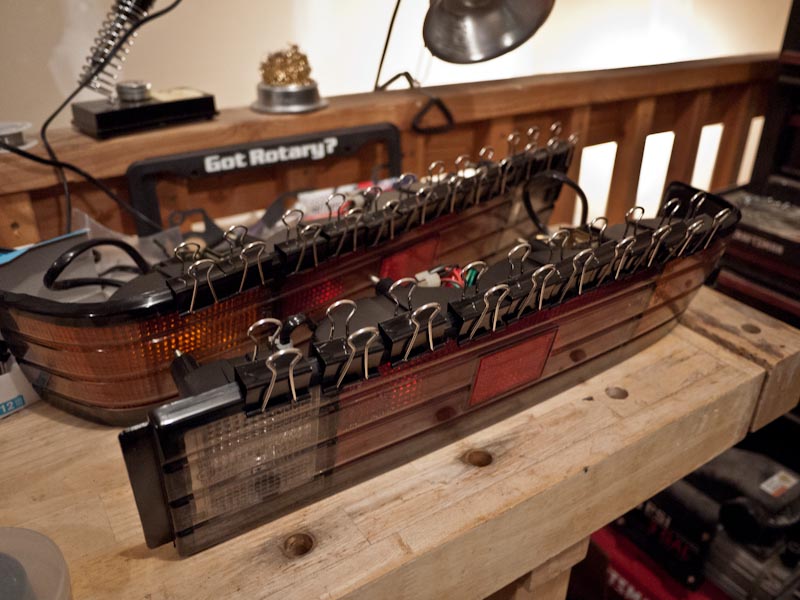
You'll need to let this sit clamped for 2-3 days to fully cure, otherwise if the lens is warped it will pull the caulk out, and set warped.
If you leave it clamped for several days, you can straighten out a warped lens.
---
While your working on your tails - i highly suggest giving them a refresh. Sealing them up like this will probably hermetically lock these things for the remainder of time. Or maybe not - but while you're in there...
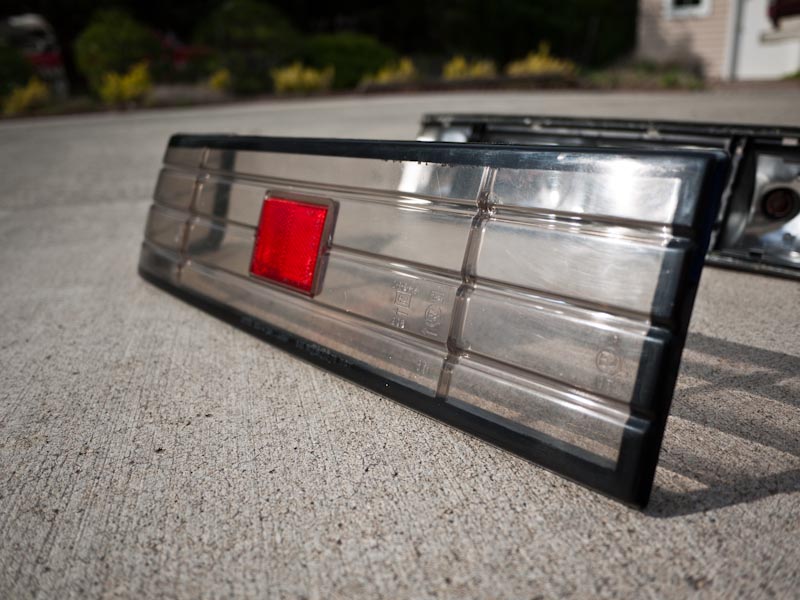
For starters, ditch the rubber surrounding trim. The lines look very clean without them, and the actual seal is made by the foam gasket behind the assembly. I opted not to put them back on as it would be too much a pain in the *** to put on AND have the lens held tight by the clips. Personally, I like the look a lot better - it matches all the other body panel spacing and lines.
Get a headlight polishing kit - with the compound and the ball polisher - and really bring the shine back to the lights. The kit is $30 and restores the lights to as-new luster. It also works charms on the center trim.
Before:
After:

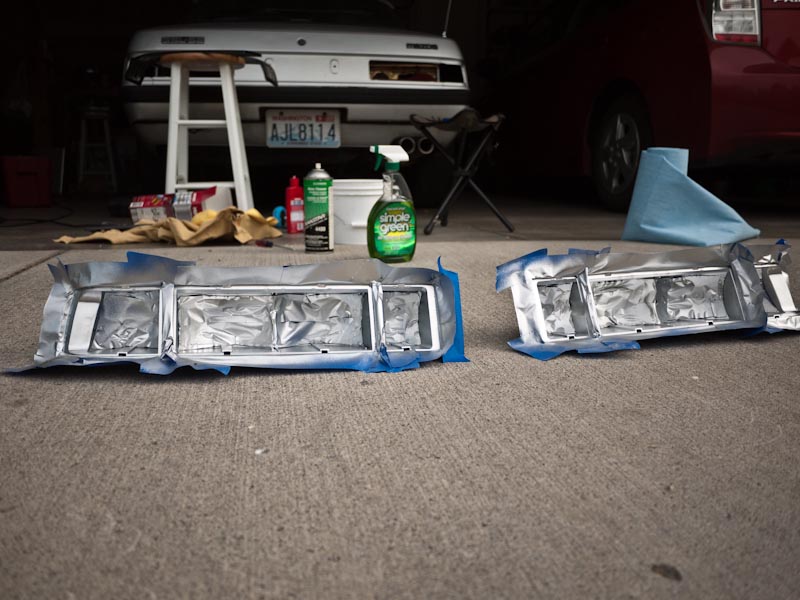
Cleaning and painting the light assembly itself can also add another layer of pop to the lights - creating a more even color dispersion during both day and night conditions. Silver for luster, white for bright:
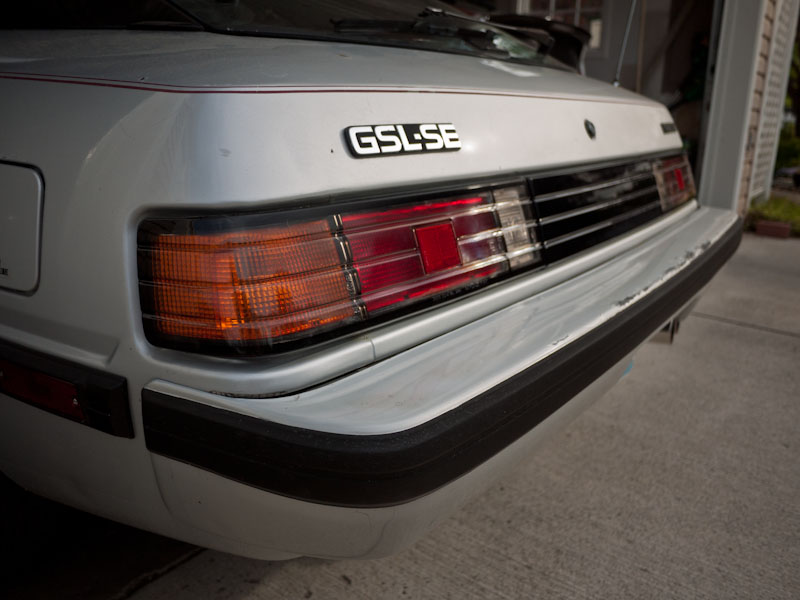
Here's the final product, of course starting with before:

After:
You need to use black silicone. Fill the trough around the outer edge of the lens, not full, but pull your finger down it to smooth the caulk out and create a uniform subtle "U" shape. You don't want TOO much caulk - it will ooze out and not look clean - but you need enough to create a continuous seal around the assembly.
Fill the area around the outer lens only (The area masked out above), don't fill the trough on the assembly for the center lines, it won't look right
Then carefully set the lens onto the housing, starting with the outer rounded edge. Next make sure to line up the center divider pins, and lastly the inside square edge.
Immediately clamp with medium size binder clips - it will take about 20 (avail at walmart for like three fiddy for pack of 12). Put one ever inch or so around the entire lens. The picture only shows the bottom here, but do the whole thing at once.
(Note: if you want to put the rubber trim back on, its now or never, if you do you'll probably need large binder clips to clear the trim)
You'll need to let this sit clamped for 2-3 days to fully cure, otherwise if the lens is warped it will pull the caulk out, and set warped.
If you leave it clamped for several days, you can straighten out a warped lens.
---
While your working on your tails - i highly suggest giving them a refresh. Sealing them up like this will probably hermetically lock these things for the remainder of time. Or maybe not - but while you're in there...
For starters, ditch the rubber surrounding trim. The lines look very clean without them, and the actual seal is made by the foam gasket behind the assembly. I opted not to put them back on as it would be too much a pain in the *** to put on AND have the lens held tight by the clips. Personally, I like the look a lot better - it matches all the other body panel spacing and lines.
Get a headlight polishing kit - with the compound and the ball polisher - and really bring the shine back to the lights. The kit is $30 and restores the lights to as-new luster. It also works charms on the center trim.
Before:
After:
Cleaning and painting the light assembly itself can also add another layer of pop to the lights - creating a more even color dispersion during both day and night conditions. Silver for luster, white for bright:
Here's the final product, of course starting with before:
After: