
Stock Nikki reference photos


Stock Nikki reference photos
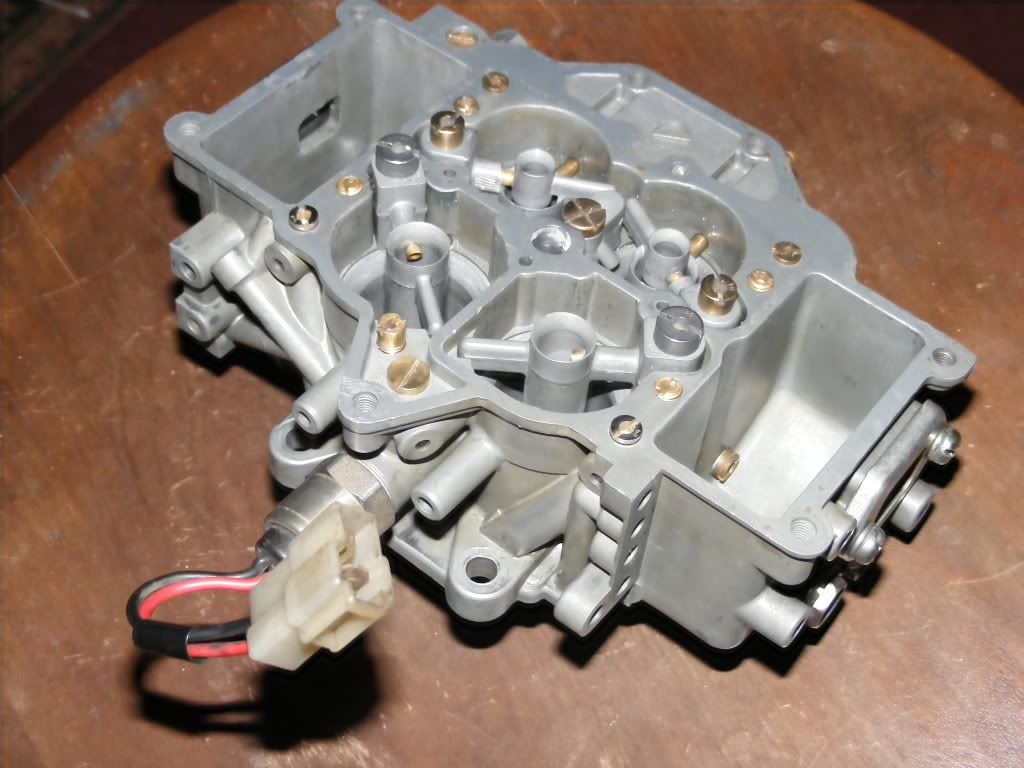
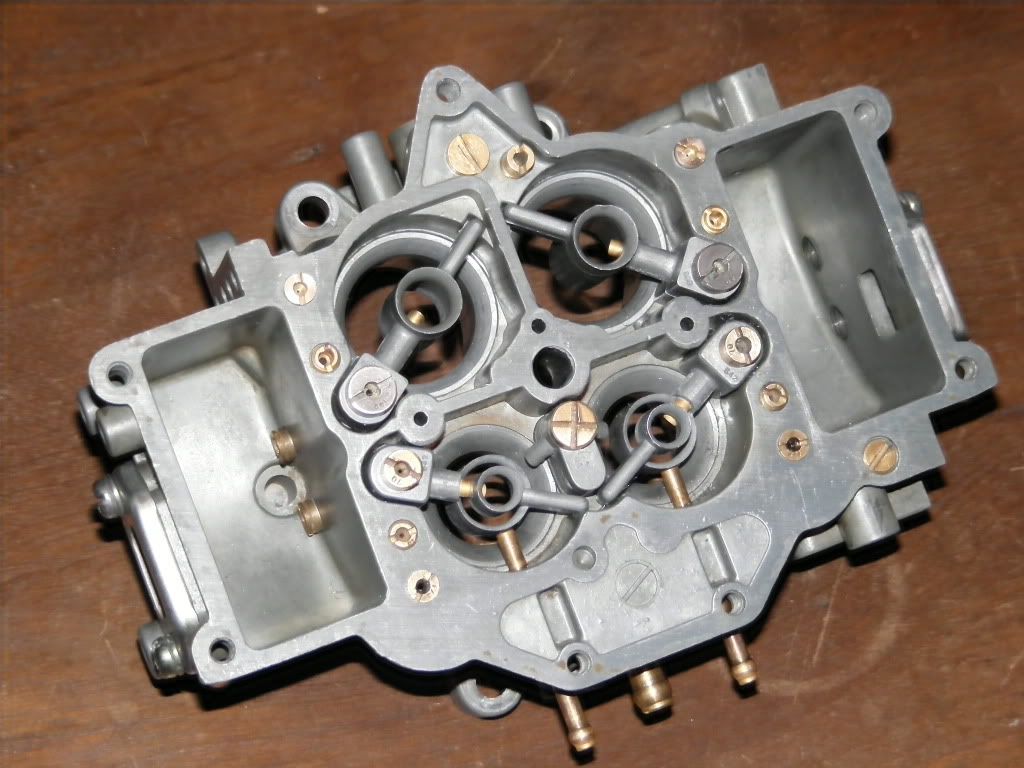
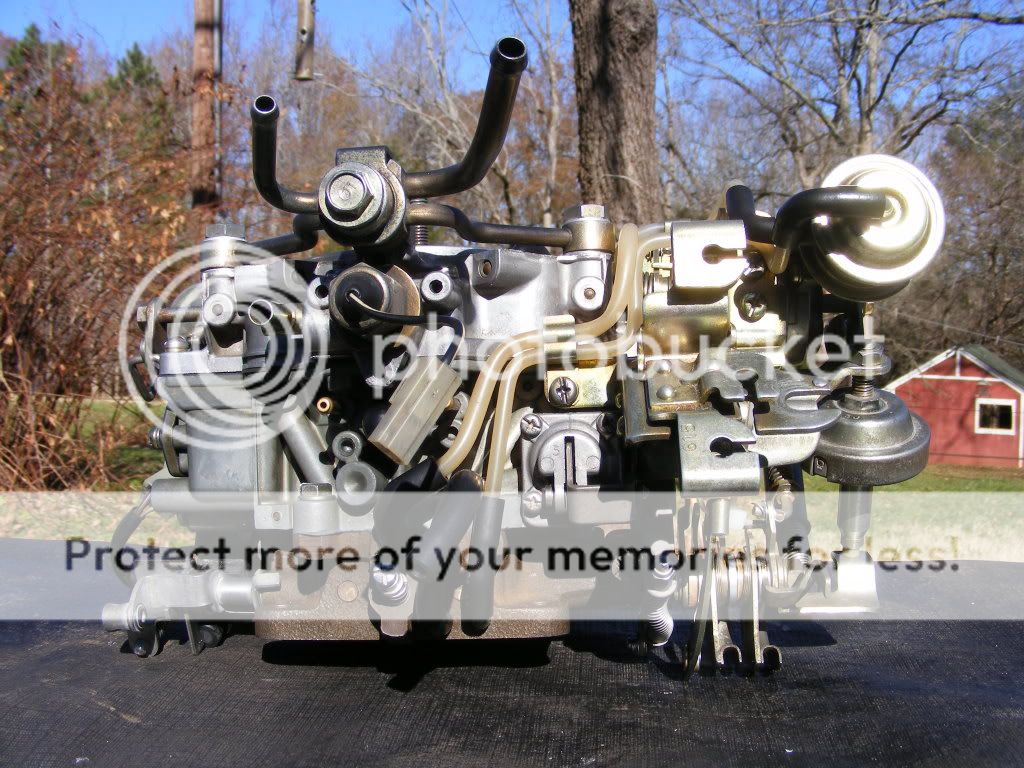
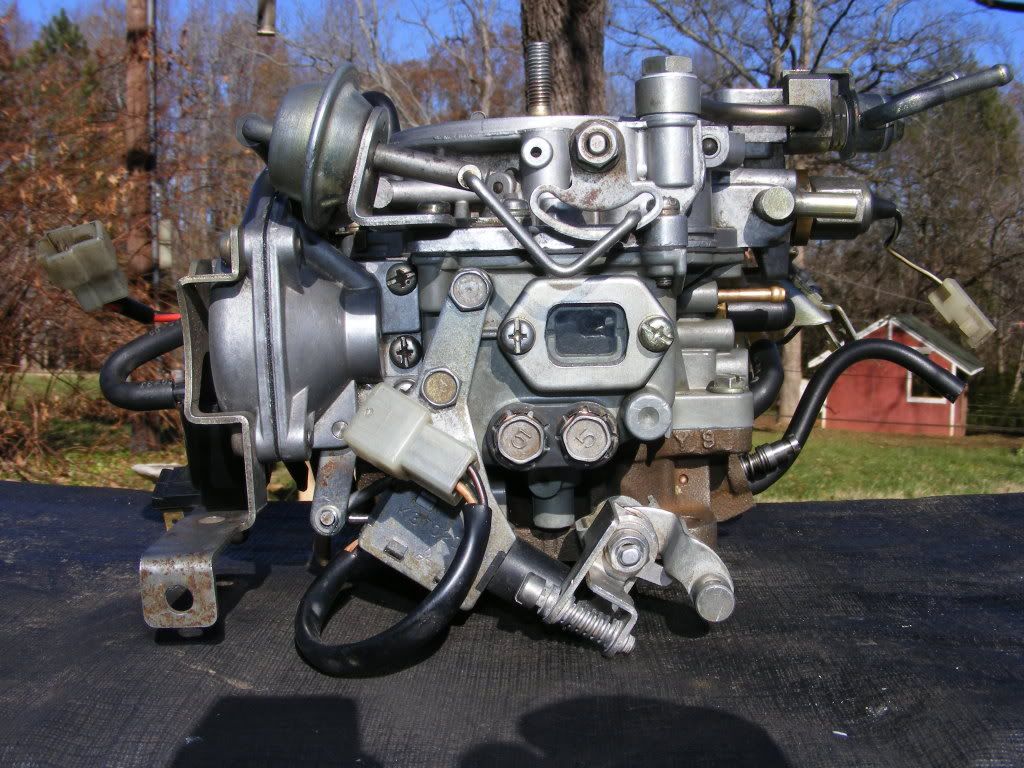
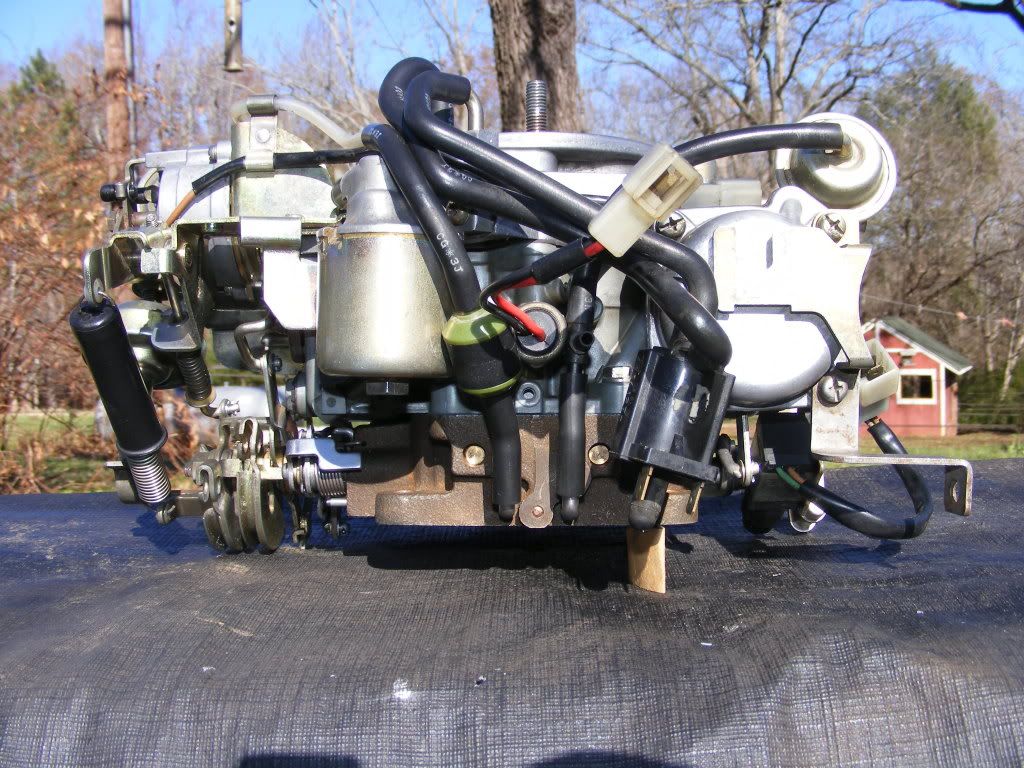
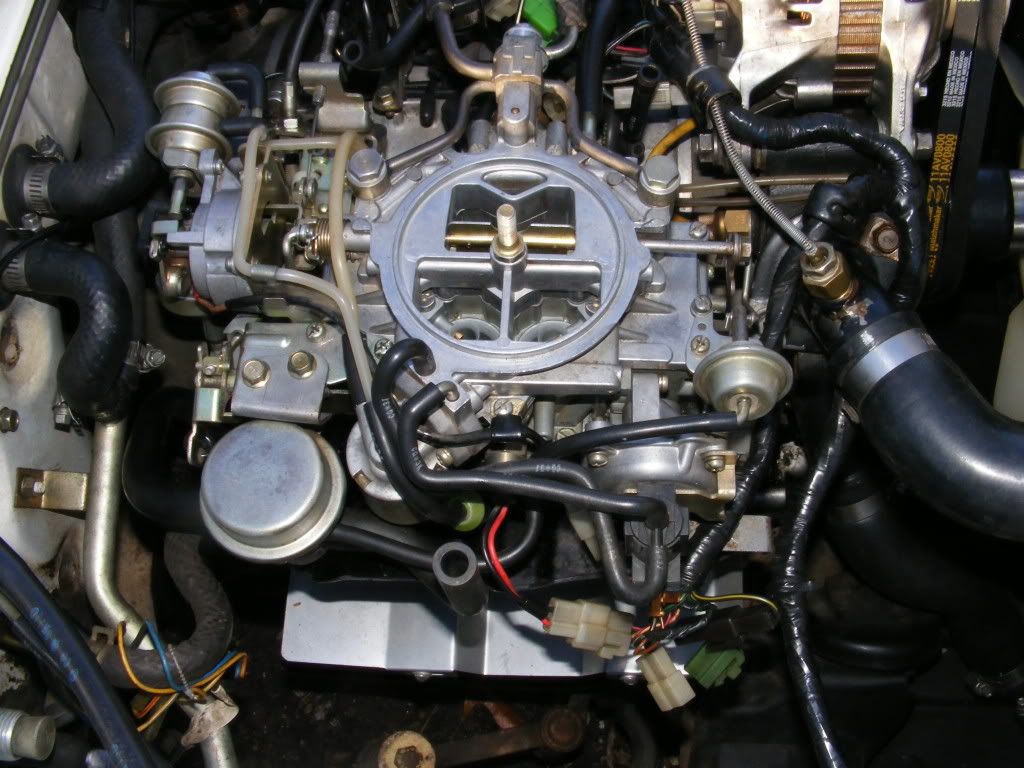
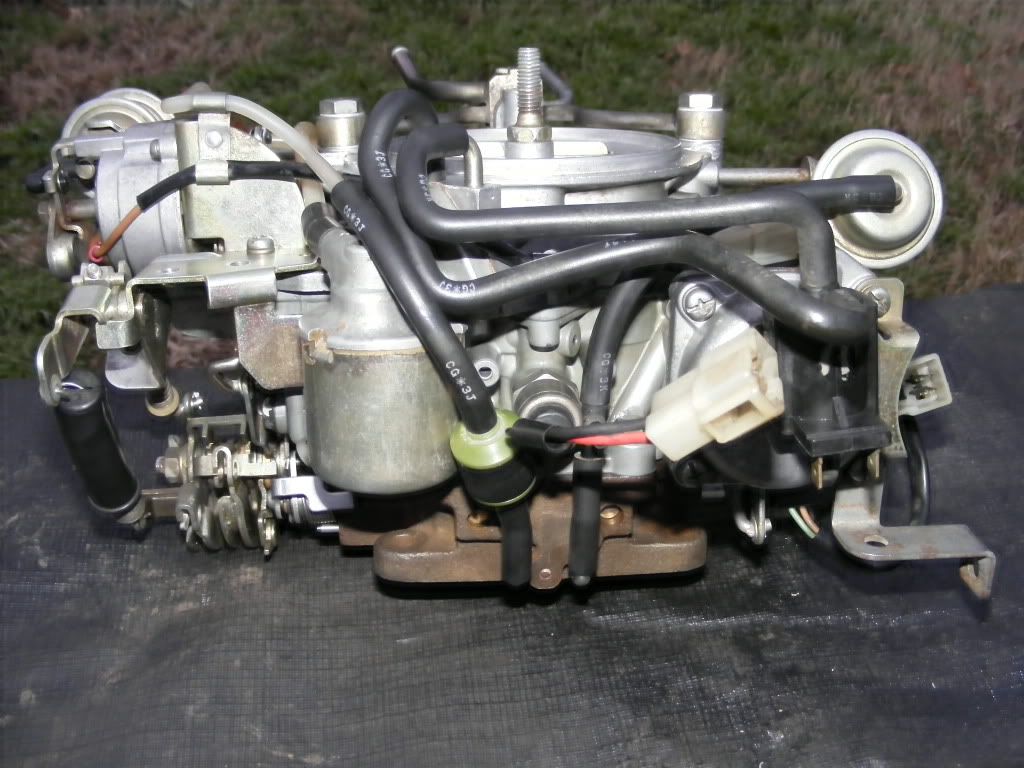
I rebuilt my stock Nikki and it's so pretty I took some pictures:
Jets:
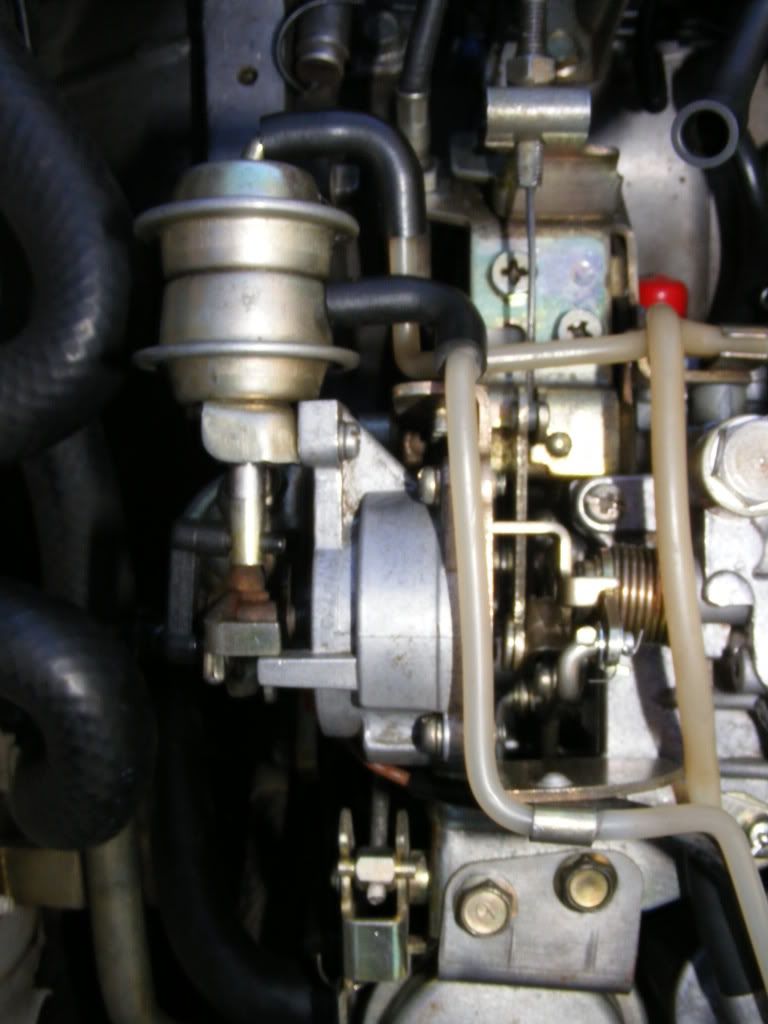
Driver's side:
Front:
Rear:

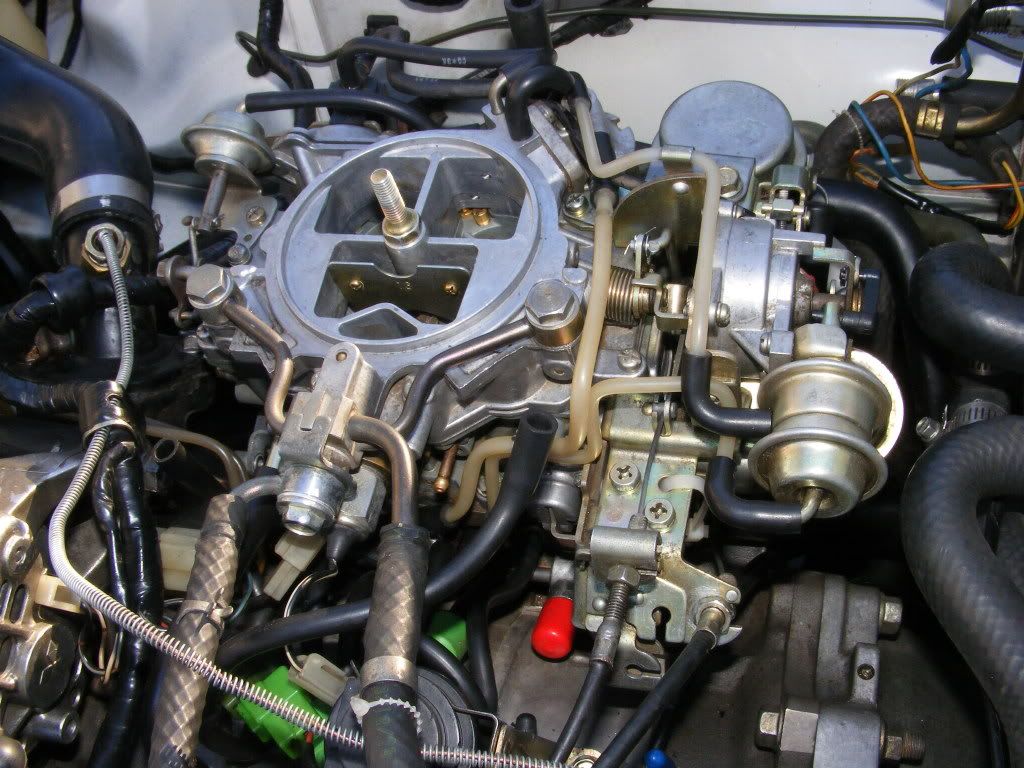
Passenger's side:
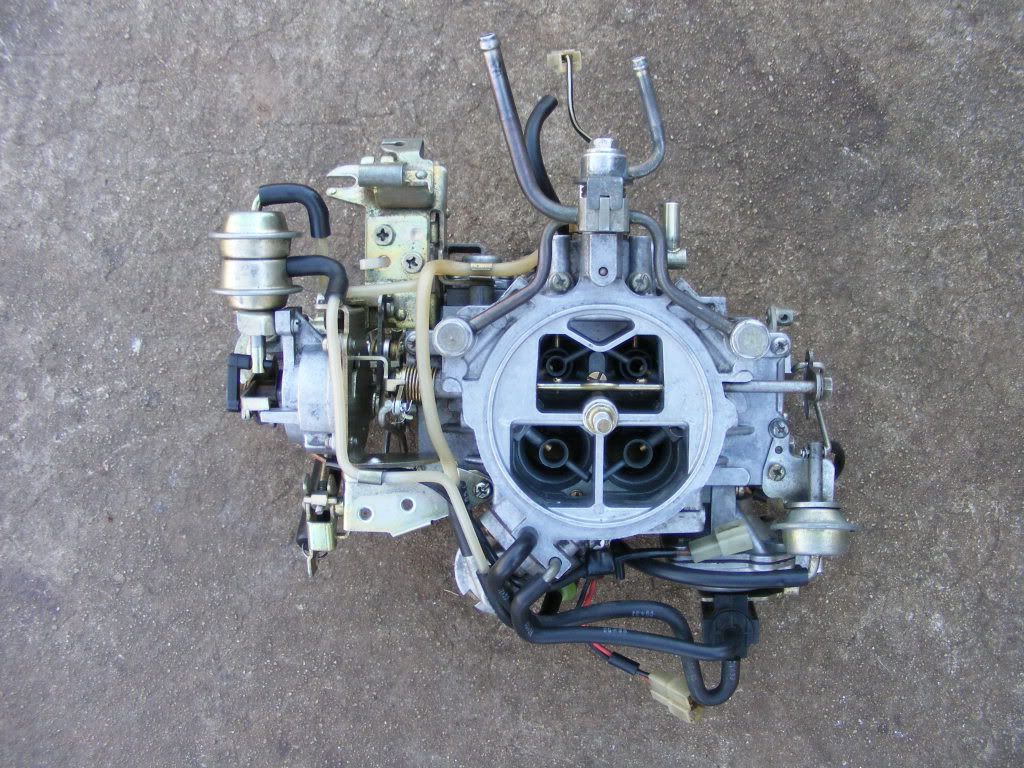
From above:
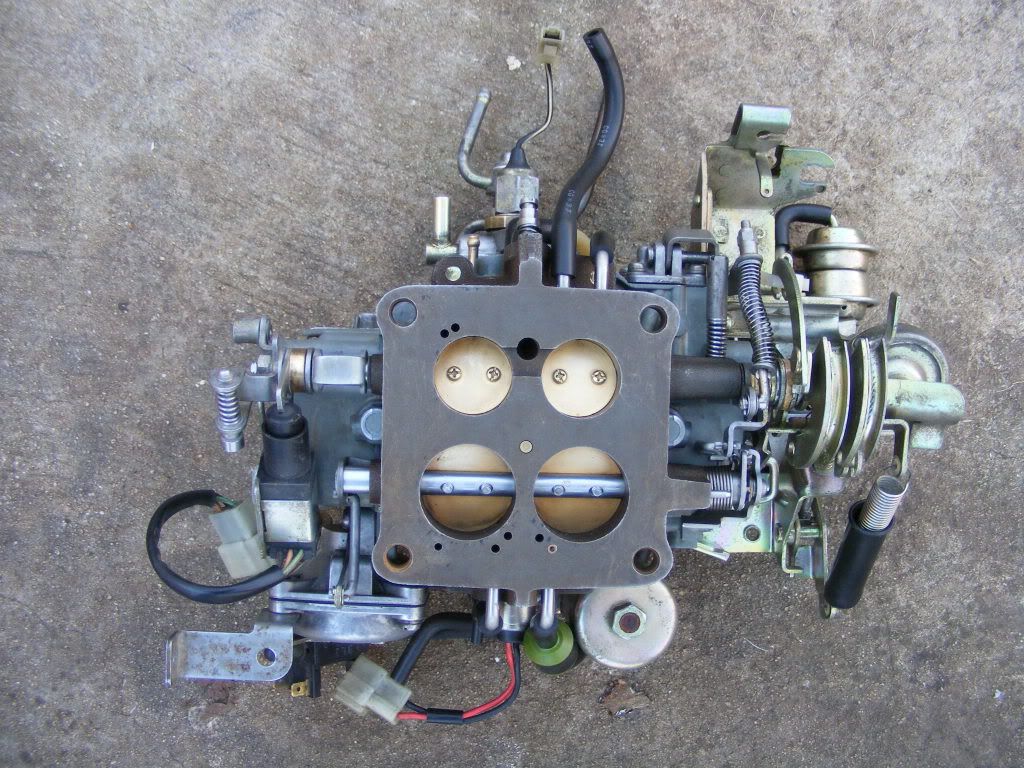
From below:
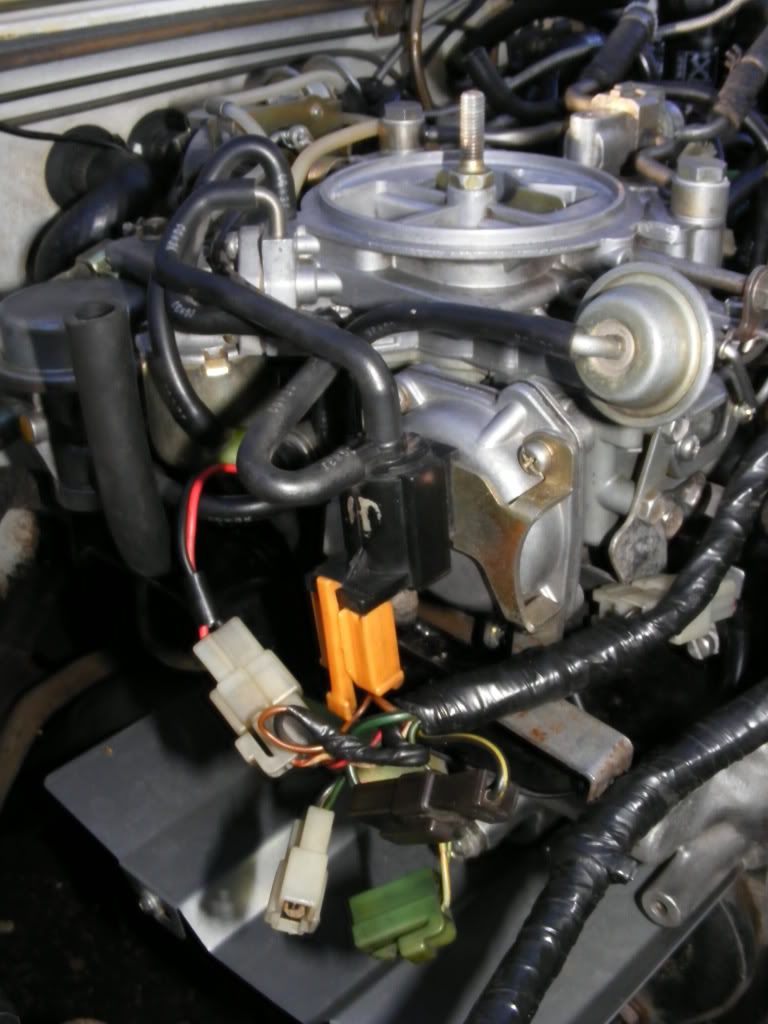
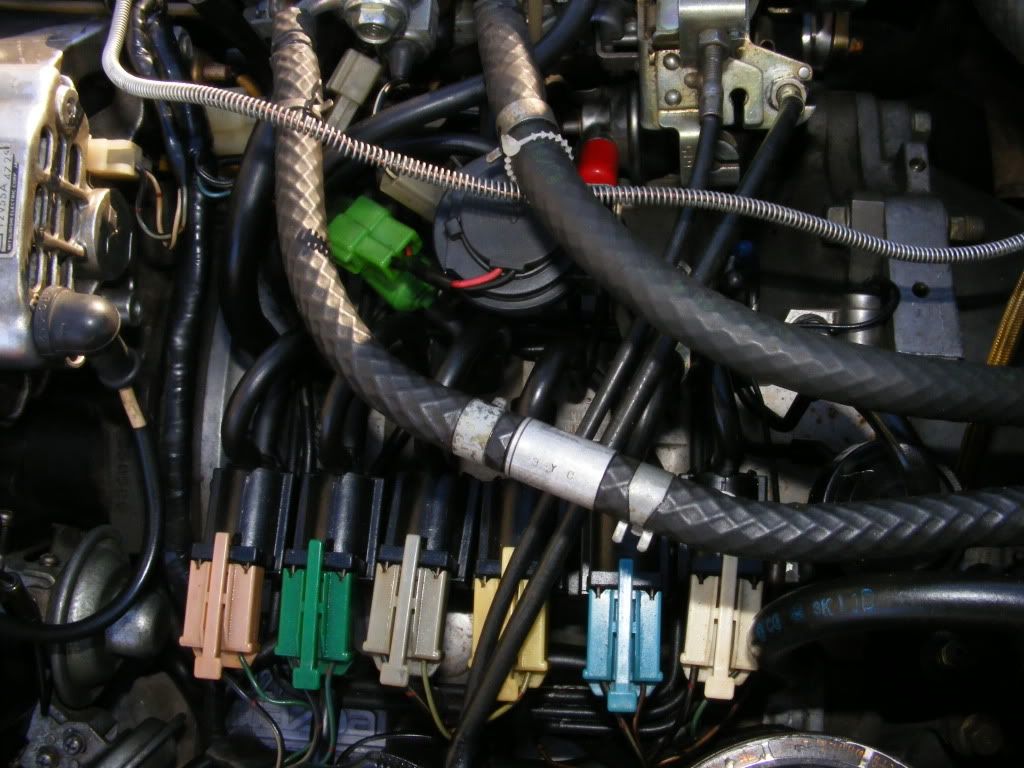
In the car:
Jets:
Driver's side:
Front:
Rear:
Passenger's side:
From above:
From below:
In the car:
Last edited by vipernicus42; Dec 7, 2008 at 10:46 PM.

Whoops, must of been all those solvent fumes. For the record, turn those two photos around. Any more errors? I got to drive that thing into work tomorrow.
Thanks guys, rebuilding Nikki's is fun.
Thanks guys, rebuilding Nikki's is fun.

Trending Topics
Thanks for the fix Mr. Mod!
Come on FirebirdSlayer, I took some of the emissions off. The only ones left are the ones that make it run better!
Anybody good with photoshop and Nikki anatomy that can label up the important stuff in the photos?
Come on FirebirdSlayer, I took some of the emissions off. The only ones left are the ones that make it run better!
Anybody good with photoshop and Nikki anatomy that can label up the important stuff in the photos?

Almost as much fun as aftermarket, eh Tim?
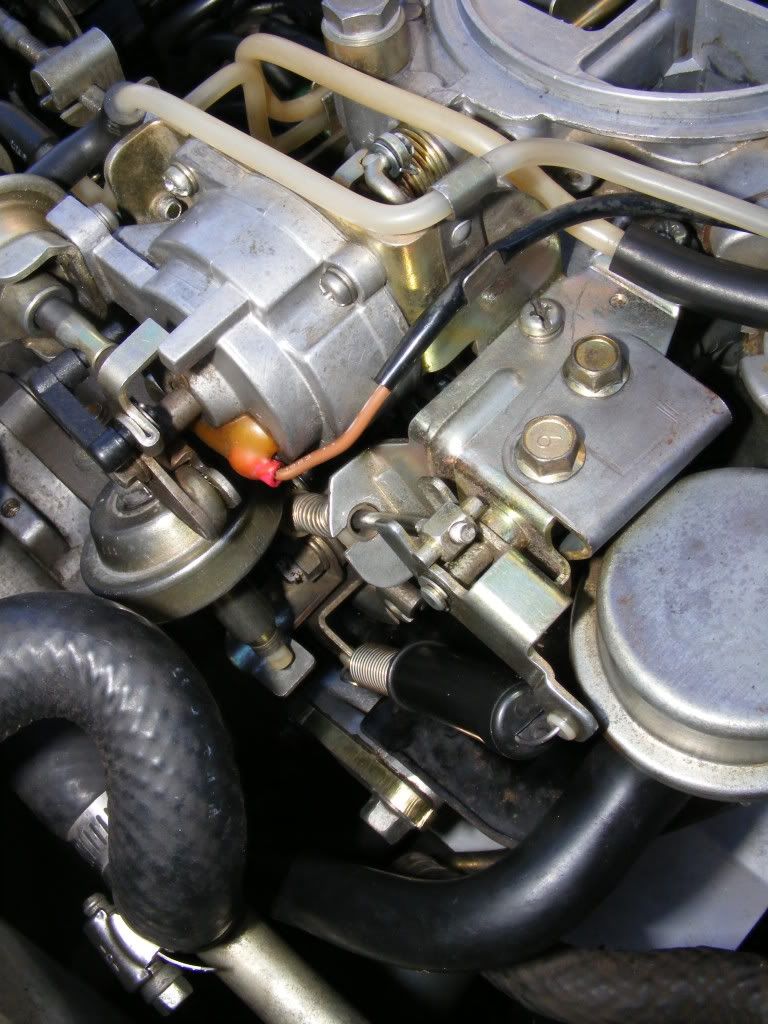
I see I knocked the main air bleed control solenoid valve (that black thing on the right with the two electrical prongs) out of its slot on the passenger's side photo. Here's another from the night before:
I see I knocked the main air bleed control solenoid valve (that black thing on the right with the two electrical prongs) out of its slot on the passenger's side photo. Here's another from the night before:
Joined: Jun 2008
Posts: 8,376
Likes: 28
From: Chino Hills, CA
Very nice work, sir!
For reference purposes, what's the exact year and model build this Nikki comes from? There's a lot of variation in the dress-out, year-to-year. I see several visbile differences from my '80.
For reference purposes, what's the exact year and model build this Nikki comes from? There's a lot of variation in the dress-out, year-to-year. I see several visbile differences from my '80.
Thanks, good point DD, this is from an 84/85 GSL (not sure exactly which, I swap them in and out between cars).
Here's the mods:
1. Removed AC idle increase module (or whatever it's called) along with AC.
2. Removed hot start assist unit and tied up the connecting lever at the carb.
3. Removed the cruise control.
4. Disabled the shutter valve but left it in place to make it a conservative (reversible) mod. Also there is this from trochoid:
"Peejay's right, removing the shutter valve entirely changes the cross sectional diameter of that port runner. This causes an imbalance between it and the front one. You either leave the shutter valve in and locked in the open position or port the other runner, which takes a flow bench to get right."


perhaps one of the cleanest home jobs i've seen. good work.
on a sidenote, i gotta see if i can locate that Berryman Chem Dip and figure out how to use it for cleaning my engine parts. watching your video clips that stuff yields phenomenal results and it would cut down some of the time i spend with toothbrushes and emory cloth.
on a sidenote, i gotta see if i can locate that Berryman Chem Dip and figure out how to use it for cleaning my engine parts. watching your video clips that stuff yields phenomenal results and it would cut down some of the time i spend with toothbrushes and emory cloth.
Yes the Berryman's is a big improvement over elbow grease and solvent (I always used gasoline before). The crap just dissolves off in the Berryman's or in the soapy wash afterward. At $20/gallon it's a bit pricey but it's reusable and has me convinced.
Rebuilding a Nikki is always a learning experience. This time I learned how to clean the parts!
Rebuilding a Nikki is always a learning experience. This time I learned how to clean the parts!
Very nice work Ray, carb looks new. Most of the one's I've rebuilt never come out that nice, too much prior corrosion. The last gallon of Berrymans that I bought came with a sieved pail that fit in the can. Great for dropping in all the small parts and not having to fish them out of the bottom of the can. I never thought about a 'swish wash' for getting the parts cleaner. 
I have a secret on getting the parts to come out "without much prior corrosion": I am using the best parts from the 5 carbs I have out in my shed to build one clean carb (actually two, I'm doing the Nikki in my silver GSL next).
The swisher is fun, but pretty much just a gimmic I think. Plain soaking or better Kentetsu's sonicator method probably works just as well. (And thanks to Crit for originally suggesting the Berryman's)
My Berryman's can has the sieve in it too, which I used for the small parts. But you need to be careful with really small parts like the little washers, ball bearings and those pins that hold the floats in place - all these things manage to find ways to get through the holes in the screen or in between the screen and the outside of the sieve. I had to fish several of these things out of the Berryman's can.
this is effin great!!! but i have an 83 and well my carb seems quite a bit different.. has anyone seem a good reference like this one for my carb it still a nikki but just not the same as this one.. a few differences ive seen..
There should only be a few differences. Have you downloaded the 79-85 Carb Manual? Starting on page 57 of the manual (103 of the pdf) it groups the 83-85 Nikkis together. It details the differences between 83 and 84-85 models.
Great job Ray. Good pictures too.
Great job Ray. Good pictures too.

Thanks Stu, I clean my engine bay more often than I brush my teeth so it should keep shining.
I don't think there are any significant differences between the 83 and 84/85 nikki's, maybe a couple of peripherals that can be easily interchanged.
Wacky, we know you love stock, you just won't admit it.
Is there a Nikki guru who is willing to label up those photos?
I don't think there are any significant differences between the 83 and 84/85 nikki's, maybe a couple of peripherals that can be easily interchanged.
Wacky, we know you love stock, you just won't admit it.
Is there a Nikki guru who is willing to label up those photos?
Joined: Jun 2008
Posts: 8,376
Likes: 28
From: Chino Hills, CA
One thing I found really interesting, Ray, is that your Nikki doesn't have power valve piston actuators or valves/jets in it (they go in those pits in the bottom of the bowls). Big difference between your build and mine. The power valve actuators and jets seem to come and go across a range of builds.
Getting the power valve jets clean and working right was the #1 headache in my last rebuild.
Getting the power valve jets clean and working right was the #1 headache in my last rebuild.