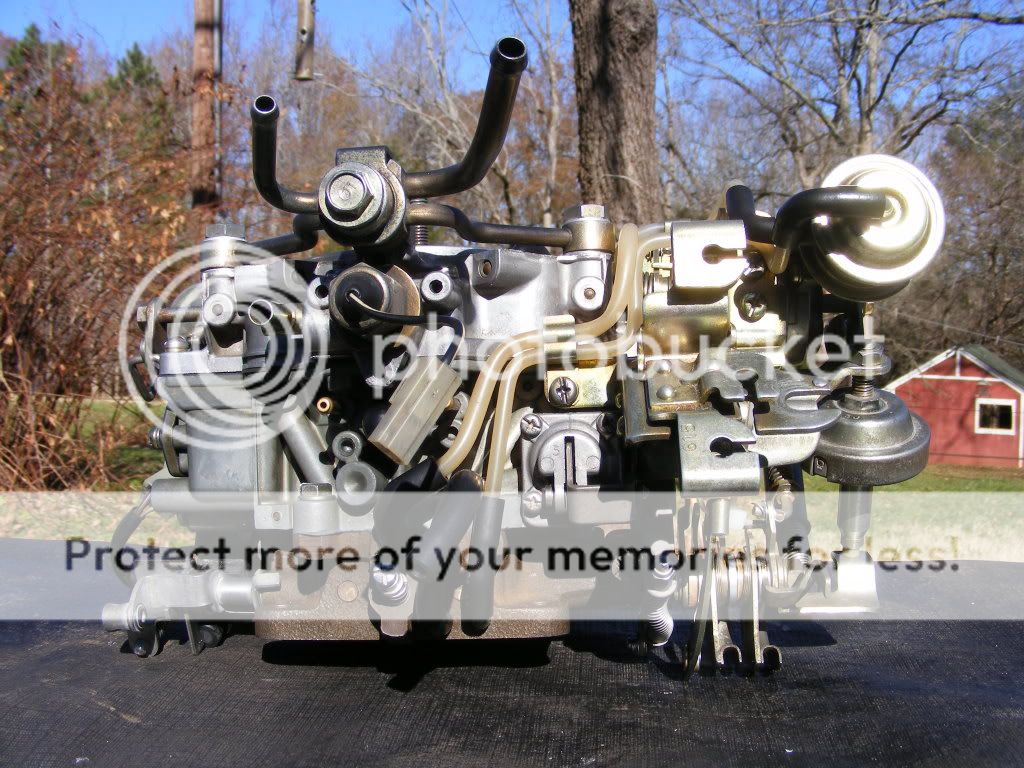
Stock Nikki reference photos
 12-11-08, 10:28 AM
#26

That is interesting DD, I had no idea there was such a thing although I was wondering why those little cups were there, I figured they must just be a design feature to trap any sediment and remove it from the bowl.
So what do these power valve piston actuators or valves/jets do? Now I want some.
So what do these power valve piston actuators or valves/jets do? Now I want some.
 12-11-08, 02:01 PM
#28
Some mannytranny builds have them, too, Jeff; mine does (80 Cali-spec 5-speed build).
Essentially, the pistons (in the top plate) are held open by vacuum. When vacuum drops below a specific level, the pistons drop and push down on the valve stems on top of the power valve jets, opening up an additional fuel flow path. Net result; richer mix whenever vacuum transitions lower, as with sudden throttle opening.
The system is also the reason the floats have that half-circle arc missing from their outboard sides; the piston hangs down from the top cover, thru that space, tothe bottom of the bowl where the valve / jets go.
Seems like that's whet they end up doing, too, heh; mine were completely gummed up with fuel residue; had to boil them in hot water to get all the "tar" out so they'd operate properly.
Carb manual has the pattern of which carbs have 'em, which don't, if you look at the jet table.
If the pistons wear out or jam, you end up having to replace the entire top cover assembly; they are swaged in, not repairable.
Essentially, the pistons (in the top plate) are held open by vacuum. When vacuum drops below a specific level, the pistons drop and push down on the valve stems on top of the power valve jets, opening up an additional fuel flow path. Net result; richer mix whenever vacuum transitions lower, as with sudden throttle opening.
The system is also the reason the floats have that half-circle arc missing from their outboard sides; the piston hangs down from the top cover, thru that space, tothe bottom of the bowl where the valve / jets go.
I figured they must just be a design feature to trap any sediment and remove it from the bowl.
Carb manual has the pattern of which carbs have 'em, which don't, if you look at the jet table.
If the pistons wear out or jam, you end up having to replace the entire top cover assembly; they are swaged in, not repairable.
12-12-08, 01:14 AM
#31
Senior Member
iTrader: (-1)
Join Date: May 2006
Location: hamilton ohio
Posts: 265
Likes: 0
Received 0 Likes
on
0 Posts
WHAT IS THIS ON THE DIAPHRAM AND WHAT DOES IT DOO? MY CARB DONT HAVE ONE BUT I HAVE AN EXTRA CARB THAT I WANT TO USE THAT DOES???

THE DIFFERENCE ALSO IS THAT MY CARB HAS TWO OPEN WHOLE WHERE THE MAIN JET IS ON THE ONE SPECIFIED IN THE THREAD? WILL THIS CARB WORK
THREADS CARB

MY CARB

THE DIFFERENCE ALSO IS THAT MY CARB HAS TWO OPEN WHOLE WHERE THE MAIN JET IS ON THE ONE SPECIFIED IN THE THREAD? WILL THIS CARB WORK
THREADS CARB
MY CARB
12-14-08, 12:47 AM
#32
Hey Ray;
Since I ended up having to pull the air horn off (crai, whine) of mine in order to deal with a stuck needle, I grabbed some shots for you of what the power valve setup actually looks like.
By the way, this is the first time I've tried taking the air horn off while leaving the rest of the carb in place. Actually, it's not the pain I thought it would be. The big trick is to undo the "T" nut on top the teeter totter, but leave the jamb nut for it in place. That way, the teeter totter comes off along with the air horn; no e-clips to putz with! Much simpler than pulling the carb itself.
Anyway, here's the pix:
Air horn side, inverted. Power valve pistons are the long skinny rods with springs around them.
You can see how he floats actually half-surround the pistons.
Bowl side (front bowl shown, both identical. You can see the valve/jet in the bottom. The tiny valve stem on top is pressed by the mushroomed foot on the piston.
Just FYI, so you can see both ways.
12-14-08, 09:44 AM
#33
Wow that's the cleanest carb I've ever seen DD, great photos. In fact, the whole car shines like new and that Tornado Silver is to die for.
There really are some significant differences there in the earlier model Nikki's. I'm still curious about what those plunger things do, but it looks like they are specific to the earlier carb, I've never seen it set up that way in the five or six 84/85 Nikki's I've torn down.
A friend of mine has an 85 automatic, maybe next time he's over I'll talk him into taking the top half off and having a look to see if the autos have them.
Thanks for posting!
12-14-08, 11:18 AM
#34
Thanks, Ray; now I've just got to get the damn thing running, you know? (smile)
The plunger things are normally drawn up about a half-inch into the air horn by vacuum. When vacuum drops, they drop down and hit the little valvestem on top the valve/jet in the bottom of the bowl, which turns on an additional fuel path.
From reading in the Carb Manual, the purpose was twofold; added power under open-throttle conditions, and a richer mix to (ironically) make the Thermal Reactor work better for NoX and HC reductions.
Apparently, without enough unburned fuel going into the Thermal Reactor, it gets too cold and doesn't burn up the (normal) emissions properly. So, it needs to be "fed" even more fuel under some conditions to keep it hot enough to work right.
Based on the jetting chart in the Carb Manual, all '79's and '80's had these, with the exception of the '79 Non-California federal manual-transmission build. Two different jet sizes were used.
12-14-08, 03:35 PM
#36
Yeah, first Nikki I put together I put the gasket in backwards (beer). Didn't notice until I tore it down later, maybe explained why it wasn't working right (although it worked pretty good).
RX7 Boss, this thing is the "the main air bleed control solenoid valve". I have no idea what it does.

Also too you probably need to put some of these little brass things in those holes you got:


PS, I've got some if you need them
RX7 Boss, this thing is the "the main air bleed control solenoid valve". I have no idea what it does.
Also too you probably need to put some of these little brass things in those holes you got:
PS, I've got some if you need them
Last edited by ray green; 12-14-08 at 03:43 PM.
12-17-08, 12:04 PM
#38
Rotary Enthusiast
iTrader: (4)
Join Date: Jan 2003
Location: Bryan, TX
Posts: 766
Likes: 0
Received 0 Likes
on
0 Posts
Ok, more info on the "richer Air Bleed and Richer Jet". I was going through the Carb manual and found the page on them.
They are controled byt the richer solenoid. The solenoid operates for 30 seconds durring deceleration below 1100 rpm. This opens a passage that allows more fuel to enrich the mixture. This is to imporve emissiosn control and driveability durring deceleration.
While that system would prob help me on cold days at stop lights, a bit more throttle should do the same.
12-19-08, 09:37 AM
#41
Apathy Isn't Laziness
Join Date: Oct 2007
Location: Edmonton
Posts: 344
Likes: 0
Received 0 Likes
on
0 Posts
^^ Your carb isn't supposed to have those jets/air bleed. Not all of the nikki's had them, the rx7 carb manual tells you exactly which years and models had them. If you look in the holes they are not even threaded to accept anything anyways, which means that circuit within the carb was never functional from the factory.
Long story short, not all manual 1st gens had those and your carb looks normal.
Long story short, not all manual 1st gens had those and your carb looks normal.
 12-29-08, 02:01 PM
#44
The idle adjust is the screw near the base of the carb on the right, with the "X" slot on it. It is best to have a long screw driver to make this adjustment. The screw on the left, which is more visible in this picture and easier to get to when the carb is installed, is the mixture adjust.
12-29-08, 02:33 PM
#45
Hey, that's another component that changed a lot over the years:
On the 1980 Nikki, idle speed is adjusted by the Air Adjust Screw (large round-headscrew, top) and mixture is adjusted by the Mixture Adjust Screw, (small, bottom, x-head... and on some years, covered by a metal or plastic cap, and with a pin in the center):
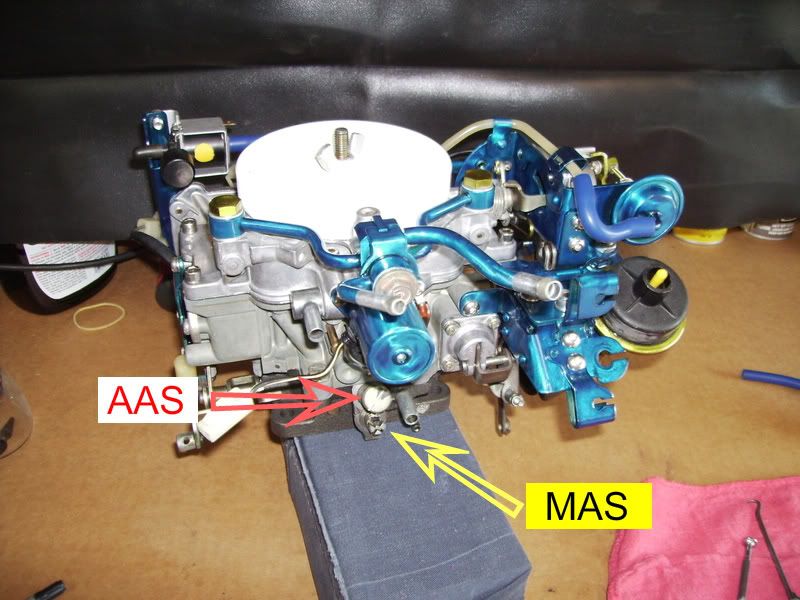
On the 1980 Nikki, idle speed is adjusted by the Air Adjust Screw (large round-headscrew, top) and mixture is adjusted by the Mixture Adjust Screw, (small, bottom, x-head... and on some years, covered by a metal or plastic cap, and with a pin in the center):
12-30-08, 02:56 PM
#49
DupliColor MetalCast paint... rattlecan paint that duplicates anodized look pretty closely. Supposed to be good to 500F. I started using it years ago on parts that had corroded away the original chromate coating.
And a lot of stripping and sanding, as it's a transparent paint. There's a metallic silver basecoat you can use, but I normally just strip, fine sand, and colorcoat.
And a lot of stripping and sanding, as it's a transparent paint. There's a metallic silver basecoat you can use, but I normally just strip, fine sand, and colorcoat.