
Sloppy Steering

Thread Starter
82, 83, 88, 82 RX-7again!
Joined: Mar 2006
Posts: 372
Likes: 1
From: Upstate New York
Sloppy Steering
For those that don't know, there is very little reason to have "wonder steer" in these cars....
Start with this...
https://www.rx7club.com/showthread.p...light=steering
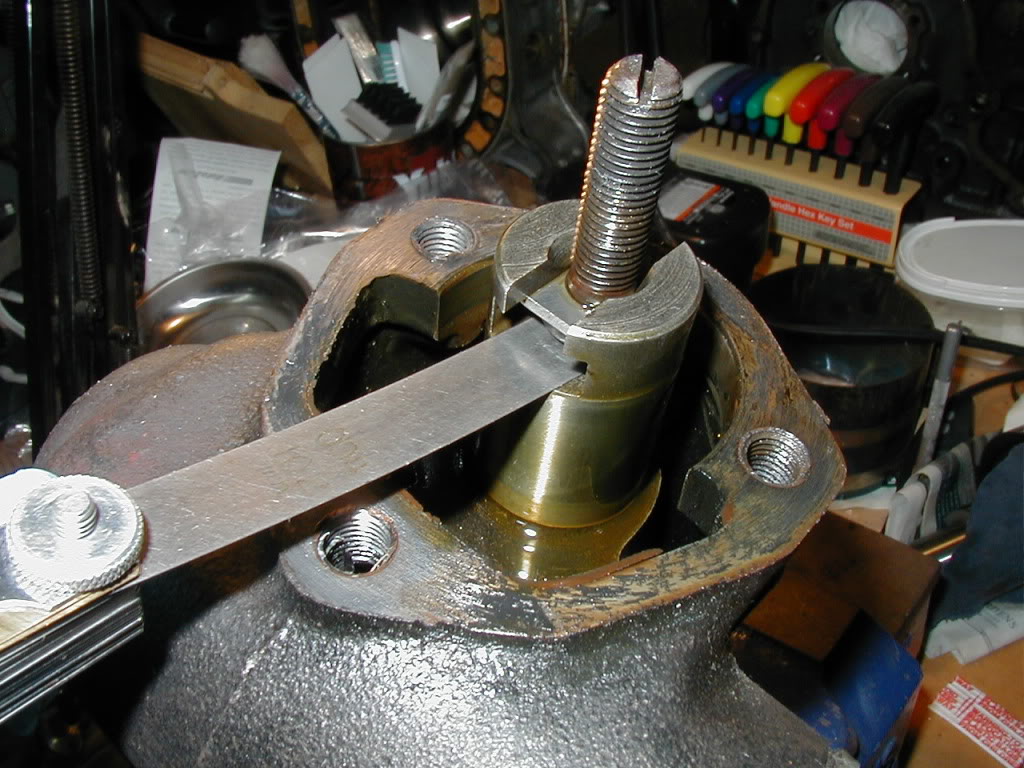
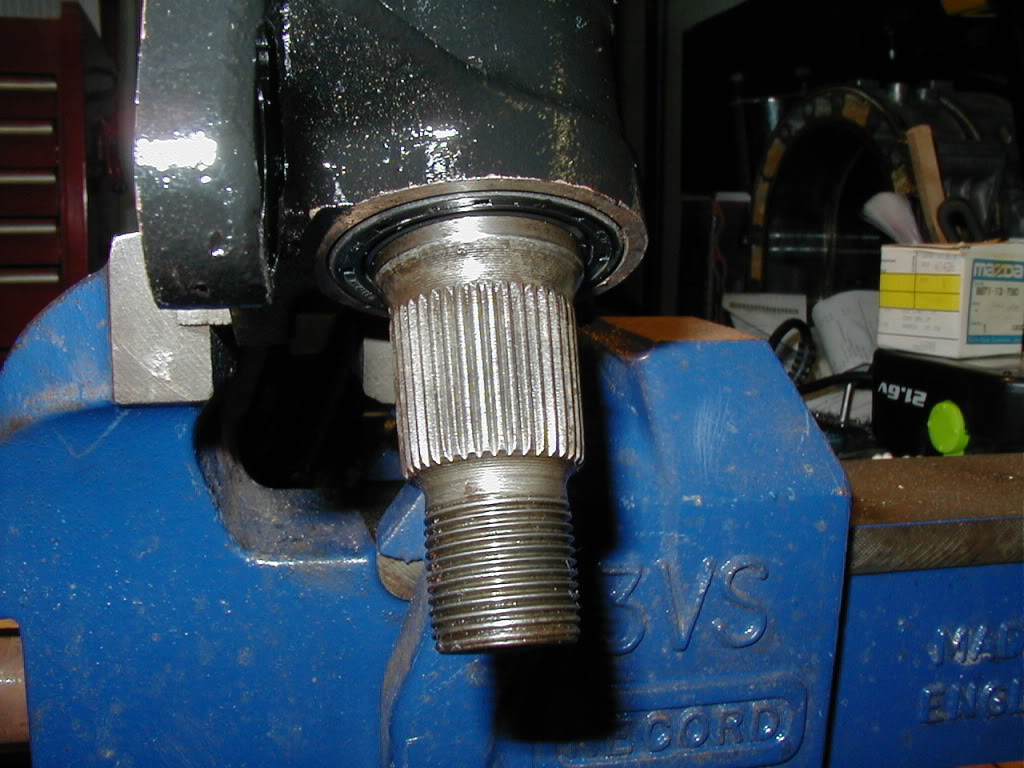
But most importantly, having just replaced a sector, it becomes crystal clear as to why steering gets bad AND why the screw adjuster on top should rarely be touched.
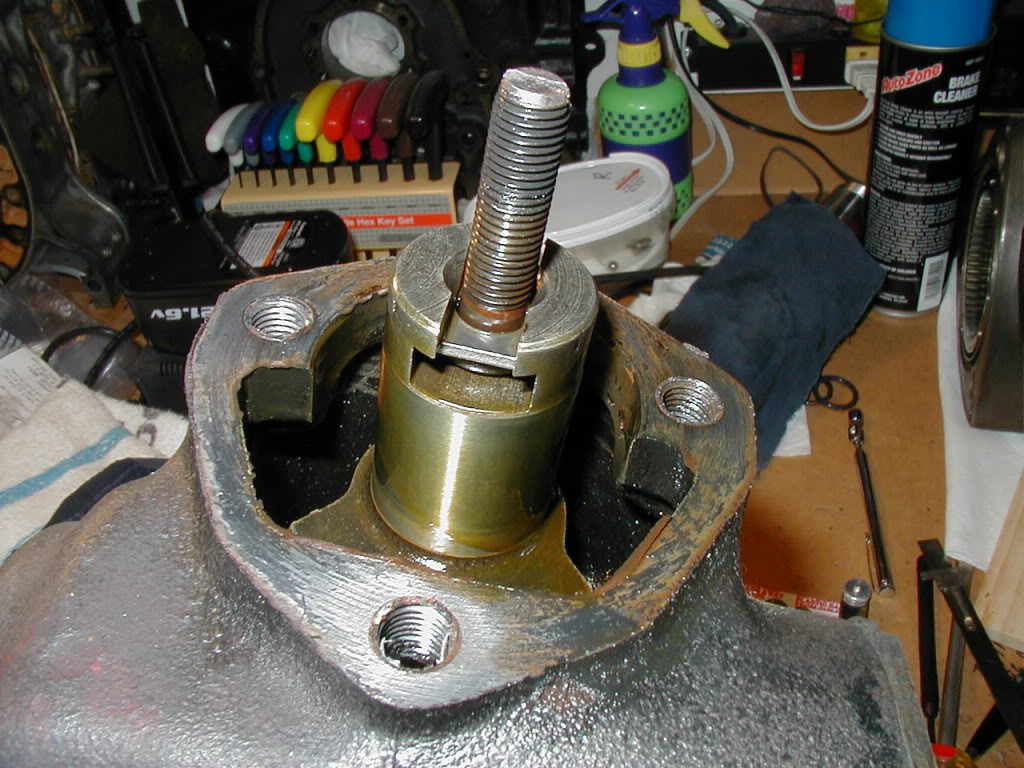
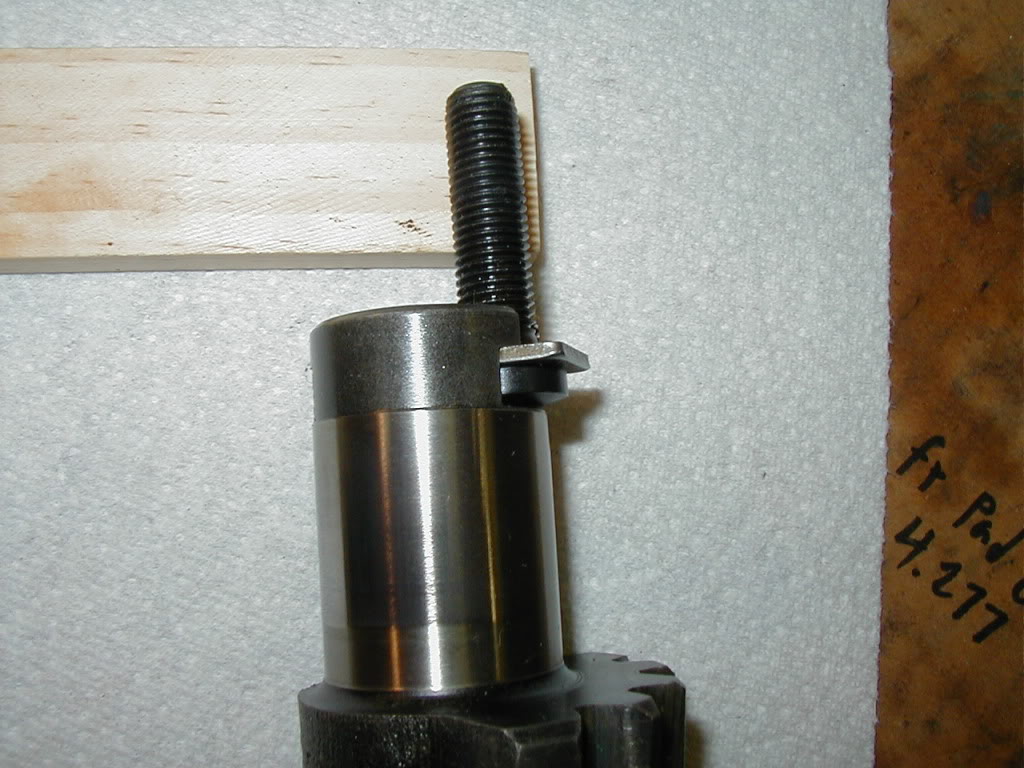
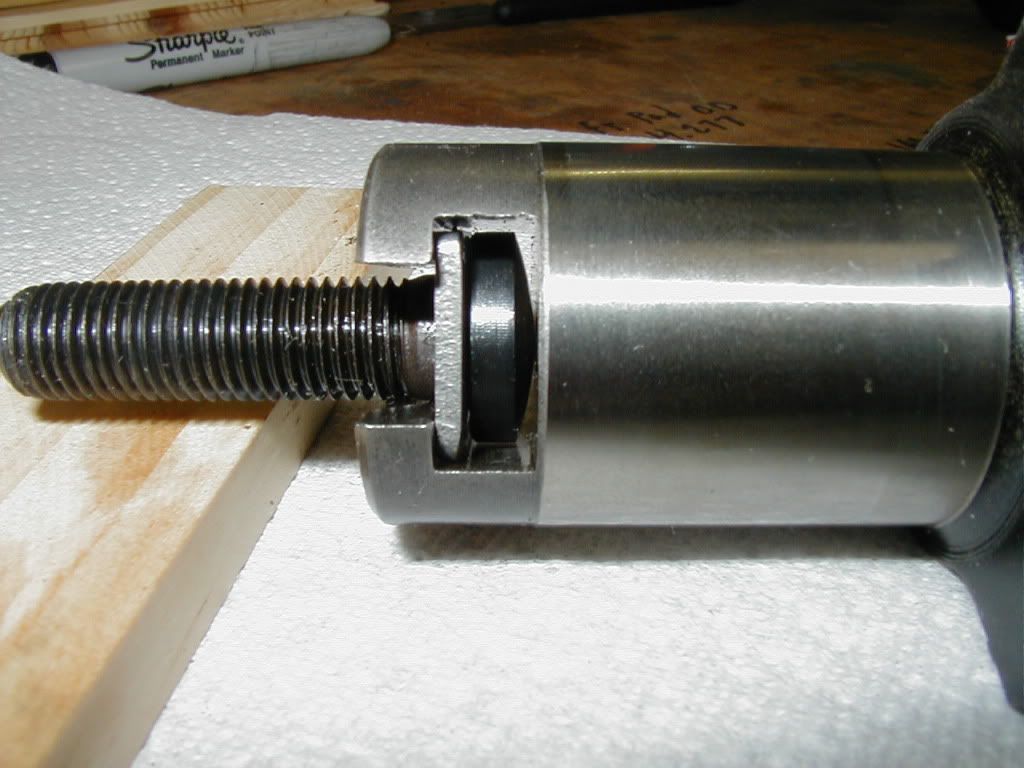
Here is what the top of the sector looks like! Note that that screw adjuster (locked in by the 14mm nut) really just adjusts the free play of the bearing (only one) at the top of the sector and can (should?) actually be bench adjusted - too tight and the assembly will bind - too loose and you will get huge amounts of wonder steer as the bearing allows the sector to move around way too much. I highly recommend bench setting this bearing pre-load and then leaving it alone! Note that this is just like a wheel bearing - too loose and you get wobble, too tight and it binds. In any case the bearing preload comes at the expense of drag due to the center adjuster bolt not having a bearing so don't put in too much pre-load. And you don't have to actually remove the sector assembly to do this - just remove the top of the steering box and clean all parts so that they turn freely - put in some gear oil on that threaded adjuster - mine was bone dry.
What we really should be adjusting (after verifying the items in the link - idler arm okay, all joints ok, pitman joints ok - etc) is the sector to worm gear mesh which is principally controlled by the vertical placement of the sector assembly. This is adjusted by turning the the large bearing cap (has the 40mm lock washer). The sector gear uses tapered teeth, hence adjusting the bearing cap does the job. In my case, as I screwed in the bearing cap in, the backlash went away.
Hopefully this picture and description will help others. I have had 3 82/83 RX-7's, all of them have had very good steering after this adjustment - certainly no issues compared to any other normal car (sorry, not like a rack and pinion in my BMW). Follow tips in first link and use this picture to guide you. PS - the good news is you can adjust the bearing cap and feel the steering freeplay at same time - which makes life so easy.
Start with this...
https://www.rx7club.com/showthread.p...light=steering
But most importantly, having just replaced a sector, it becomes crystal clear as to why steering gets bad AND why the screw adjuster on top should rarely be touched.
Here is what the top of the sector looks like! Note that that screw adjuster (locked in by the 14mm nut) really just adjusts the free play of the bearing (only one) at the top of the sector and can (should?) actually be bench adjusted - too tight and the assembly will bind - too loose and you will get huge amounts of wonder steer as the bearing allows the sector to move around way too much. I highly recommend bench setting this bearing pre-load and then leaving it alone! Note that this is just like a wheel bearing - too loose and you get wobble, too tight and it binds. In any case the bearing preload comes at the expense of drag due to the center adjuster bolt not having a bearing so don't put in too much pre-load. And you don't have to actually remove the sector assembly to do this - just remove the top of the steering box and clean all parts so that they turn freely - put in some gear oil on that threaded adjuster - mine was bone dry.
What we really should be adjusting (after verifying the items in the link - idler arm okay, all joints ok, pitman joints ok - etc) is the sector to worm gear mesh which is principally controlled by the vertical placement of the sector assembly. This is adjusted by turning the the large bearing cap (has the 40mm lock washer). The sector gear uses tapered teeth, hence adjusting the bearing cap does the job. In my case, as I screwed in the bearing cap in, the backlash went away.
Hopefully this picture and description will help others. I have had 3 82/83 RX-7's, all of them have had very good steering after this adjustment - certainly no issues compared to any other normal car (sorry, not like a rack and pinion in my BMW). Follow tips in first link and use this picture to guide you. PS - the good news is you can adjust the bearing cap and feel the steering freeplay at same time - which makes life so easy.
Thread Starter
82, 83, 88, 82 RX-7again!
Joined: Mar 2006
Posts: 372
Likes: 1
From: Upstate New York
There are for the '82 up - I believe '79-80 and possibly 81 are different... I have never had the new 84 or 85 
Here is a reference to the link:
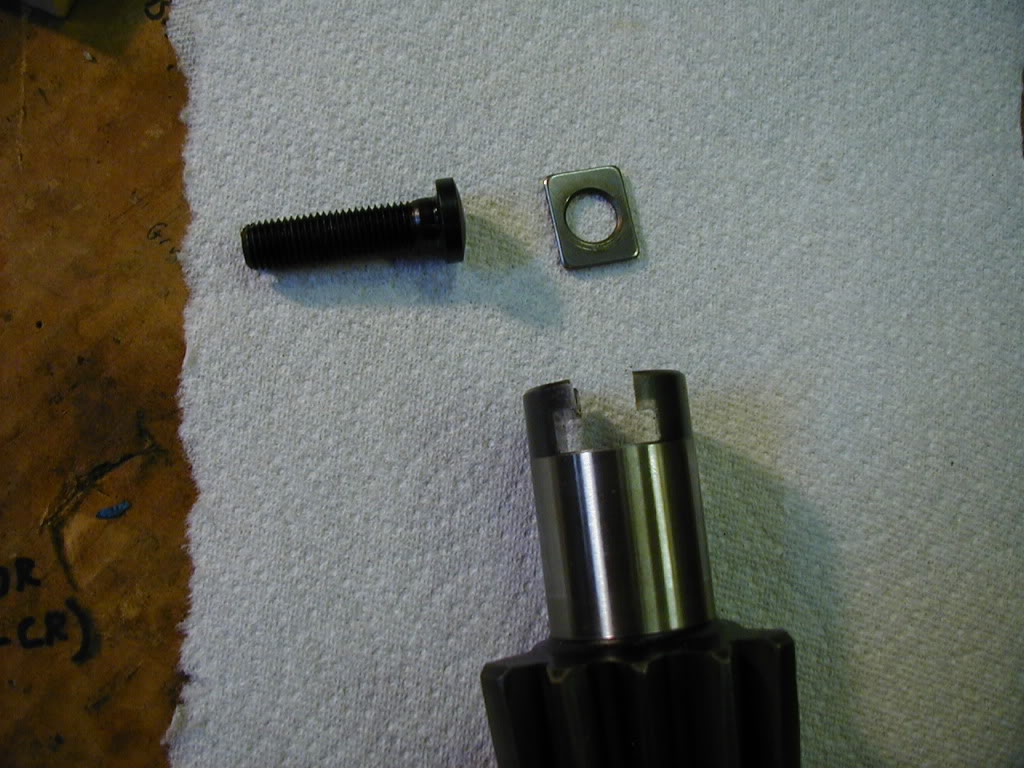
On all 81 � to 85 manual gears, there are two separate adjustments on the sector shaft. The large 40 mm nut and adjusting plug, sets the preload on the sector shaft bearing. The 14mm nut and adjusting screw is used to set the sector shaft and ball nut mesh clearance (This is the only sector adjustment on 79 – 81 � cars.). The 14 mm nut is covered by a metal cap from the factory. Pop the cap off with a pair of pliers and throw it in the neighbor’s front yard. Loosen the 14 mm nut, then snug it in place for now. Loosen the 40 mm nut. This requires that you maintain a very straight alignment on the nut since it’s very thin. If you round it off, you’re screwed. Thus the need to grind the chamfer out of the socket opening. Remove the nut and turn it upside down. The bottom side has square corners and is easier to grip in the future. Turn the large adjusting plug counter clockwise � turn.
And what I am saying is that adjusting the standard adjuster "can" lead to bigger problems. Turning it up too tight can result in quick wear to the adjuster, turning it "down" can lead to way too much bearing freeplay which is bad as well.
The other adjustments are in the link. The worm drive can have bearing pre-load adjusted - I have not had to do that one.
What I really wanted people to see is how the sector works and then keep that in mind when they do their adjustments.
Here is a reference to the link:
On all 81 � to 85 manual gears, there are two separate adjustments on the sector shaft. The large 40 mm nut and adjusting plug, sets the preload on the sector shaft bearing. The 14mm nut and adjusting screw is used to set the sector shaft and ball nut mesh clearance (This is the only sector adjustment on 79 – 81 � cars.). The 14 mm nut is covered by a metal cap from the factory. Pop the cap off with a pair of pliers and throw it in the neighbor’s front yard. Loosen the 14 mm nut, then snug it in place for now. Loosen the 40 mm nut. This requires that you maintain a very straight alignment on the nut since it’s very thin. If you round it off, you’re screwed. Thus the need to grind the chamfer out of the socket opening. Remove the nut and turn it upside down. The bottom side has square corners and is easier to grip in the future. Turn the large adjusting plug counter clockwise � turn.
And what I am saying is that adjusting the standard adjuster "can" lead to bigger problems. Turning it up too tight can result in quick wear to the adjuster, turning it "down" can lead to way too much bearing freeplay which is bad as well.
The other adjustments are in the link. The worm drive can have bearing pre-load adjusted - I have not had to do that one.
What I really wanted people to see is how the sector works and then keep that in mind when they do their adjustments.

Joined: Jun 2008
Posts: 8,376
Likes: 30
From: Chino Hills, CA
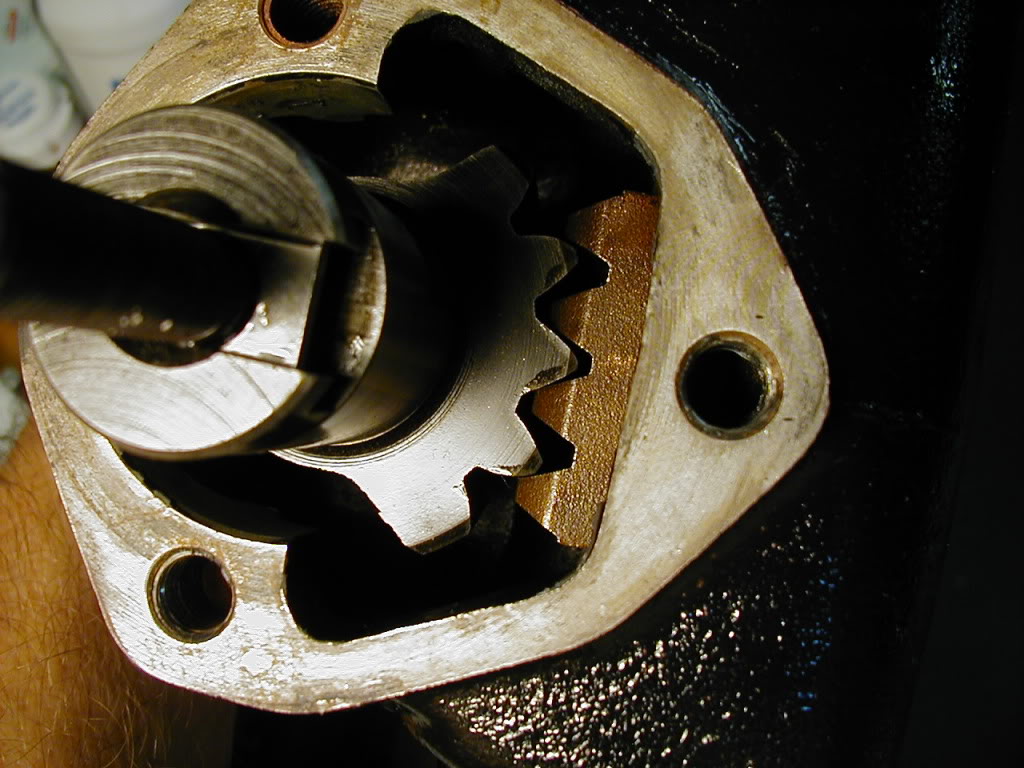
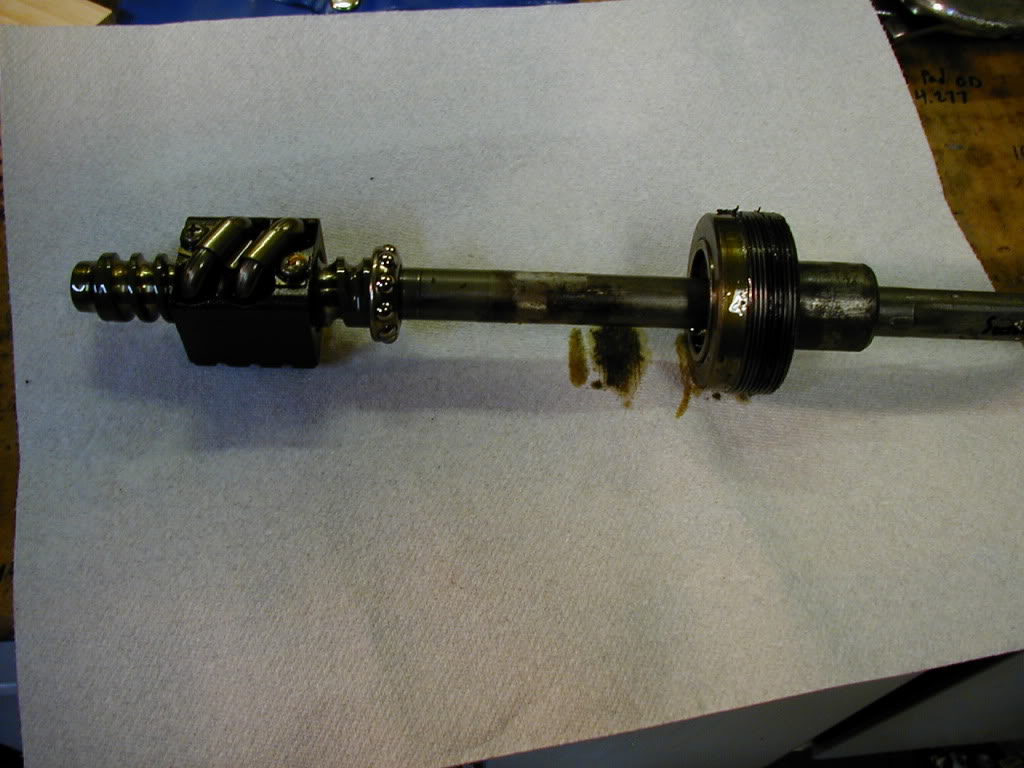
The top adjustment on the SA box does not pertain to bearing preload; the SA sector shaft uses a vertical needle bearing at the top and has no preload. Instead, the top adjustment adjusts the height of engagement between the wedge-shaped sector gears and the straight-cut teeth on the worm nut.
By adjusting this height, the free play of the engagement between the sector and the nut is adjusted. Overtightening leads to premature gear wear, undertightening allows slop.
The other 'adjustment' on the SA box is the preload for the steering shaft bearings, which is set by tightening or loosening the end cap that the steering shaft goes through. It's held in place by a locknut with more than 100ftlbs of torque on it.
Pics of SA box internals:
Top cover removed:
Top Adjustment screw engagement
Checking wear in adjustment screw assembly
Gear engagement
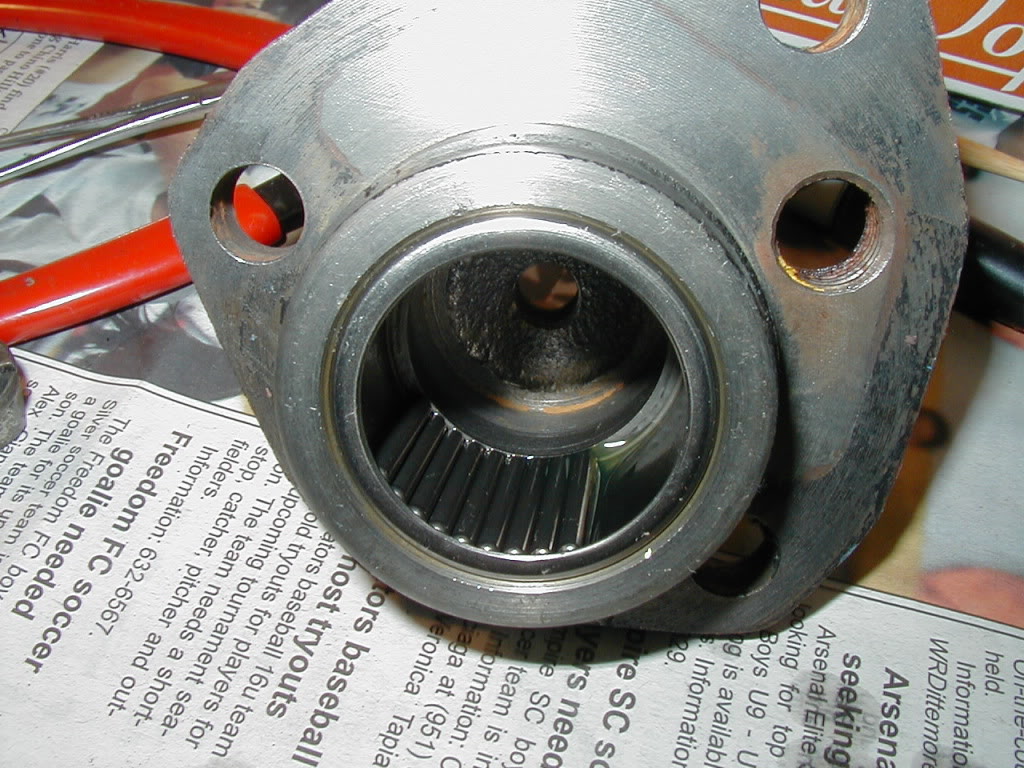
Reassembling needle bearing inside top cover
Shaft position with top adjustment "all the way out (sector at top of travel)" - - note amount of shaft visible just below the seal:
& "All the way in" (sector bottomed out)
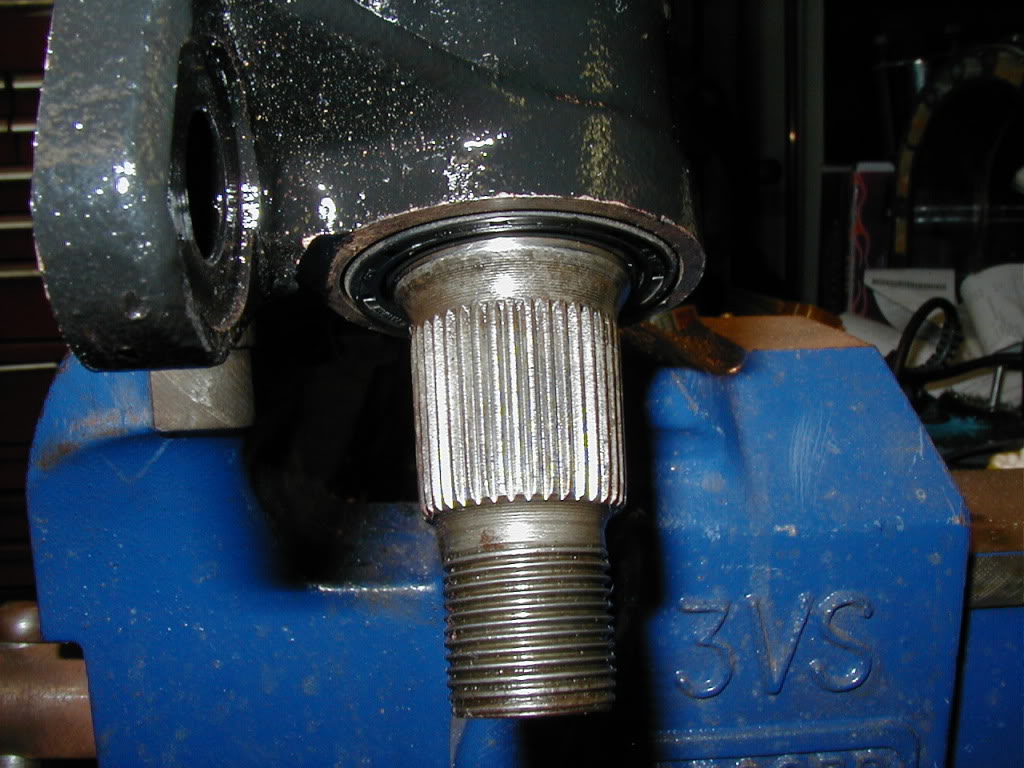
Worm nut and steering shaft & bearing:
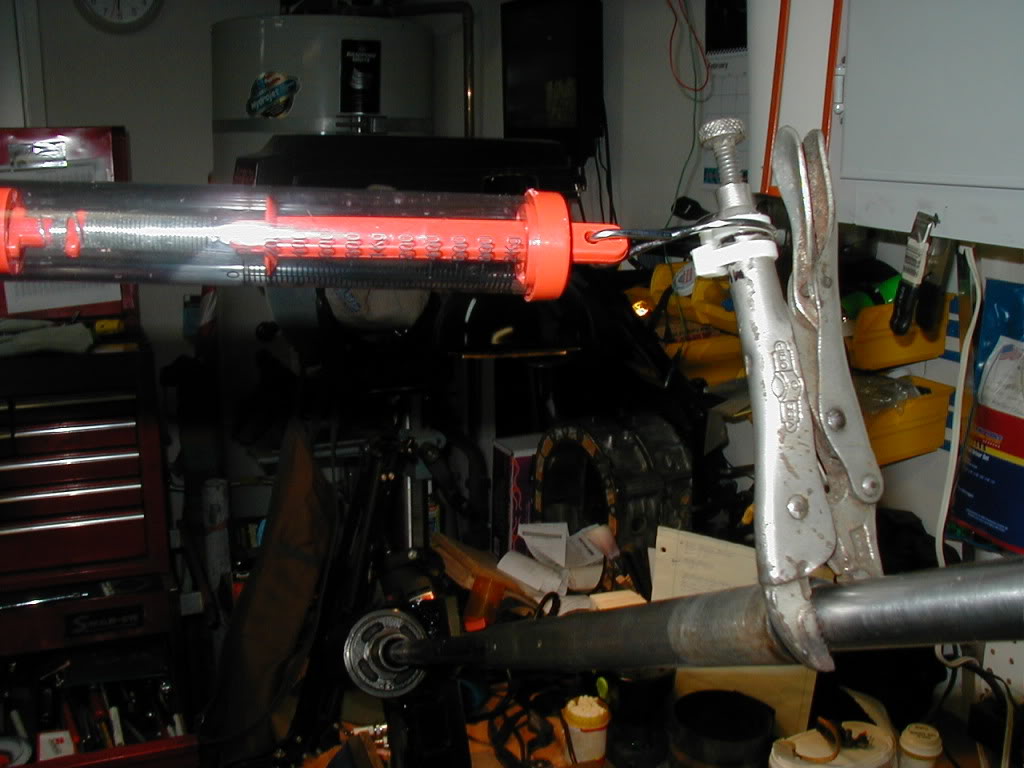
Giant seriously-tight locknut for the steering shaft cover.

Adjusting steering shaft pre-load:
By adjusting this height, the free play of the engagement between the sector and the nut is adjusted. Overtightening leads to premature gear wear, undertightening allows slop.
The other 'adjustment' on the SA box is the preload for the steering shaft bearings, which is set by tightening or loosening the end cap that the steering shaft goes through. It's held in place by a locknut with more than 100ftlbs of torque on it.
Pics of SA box internals:
Top cover removed:
Top Adjustment screw engagement
Checking wear in adjustment screw assembly
Gear engagement
Reassembling needle bearing inside top cover
Shaft position with top adjustment "all the way out (sector at top of travel)" - - note amount of shaft visible just below the seal:
& "All the way in" (sector bottomed out)
Worm nut and steering shaft & bearing:
Giant seriously-tight locknut for the steering shaft cover.
Adjusting steering shaft pre-load:
Trending Topics
Joined: Jun 2008
Posts: 8,376
Likes: 30
From: Chino Hills, CA
The SA steering shaft preload is a bitch to set mainly because the locknut is damn difficult to loosen even on the workbench; high torque and has sealant under it too.
I needed a 12" pipe wrench and a 3 lb sledge to turn it, and nearly ripped my vise off the bench in the process. You then need a punch and hammer (or the special Mazda tool) to turn the actual end cover to set the load.
With it mounted in the car & the engine installed, I don't see how you'd get access to it to grip and turn it. The locknut itself is of soft mild steel, not hardened at all; trying to drive it with a punch would probably just tear it up.
Maybe on a lift, with access and reach from below, you could do something. You'd want something like a smooth-jawed, old-fashioned "mechanic's (monkey) wrench" capable of a 2 3/4" opening to do it proper. Using a pipe wrench risks ripping up the locknut due to the teeth on it, and the flex joint.
The sector shaft doesn't have an independent preload setting. Something they changed in the later design.
Junior Member
Joined: Feb 2011
Posts: 5
Likes: 0
From: Golden
Hey guys I am in the process of rebuilding my manual steering box on my 85. I am looking for a seal kit for it, anyone have any suggestions on where to find them? Any cross references? I saw in another thread the part number for the seal by the pitman arm, but what about the seal on the worm gear shaft?
Thanks in advance for any and all help.
Thanks in advance for any and all help.
Joined: Jun 2008
Posts: 8,376
Likes: 30
From: Chino Hills, CA
The worm shaft top seal?
I'm not sure if there's any way to replace it - - at least not without drilling out the shear pins that hold the two shaft halfs together at the collapse point. The cam for the ignition lock is welded to the top half-shaft, and both it and the top half are way too large to go through that little hole in the seal to let you separate the cover from the shaft.
I'm not sure if there's any way to replace it - - at least not without drilling out the shear pins that hold the two shaft halfs together at the collapse point. The cam for the ignition lock is welded to the top half-shaft, and both it and the top half are way too large to go through that little hole in the seal to let you separate the cover from the shaft.
Junior Member
Joined: Feb 2011
Posts: 5
Likes: 0
From: Golden
Ok, you got me. I sent out a box to be rebuilt to Steer and Gear in Ohio. They are having problems finding the seals to put it all back together. They said the old seals where dry rotted, and they can't find replacement seals. I don't know if they disassembled the collapsable shaft or not. I've checked Rock Auto, and only see a seal kit for a power box. Has anyone took apart both boxes before? Could I order the power seal kit, and dispose of the unused power seals?
Thanks again
Thanks again
