(Seats) Mounted Miata seats
 01-06-07, 03:01 PM
#1
Onward thru the fog!
Thread Starter
(Seats) Mounted Miata seats
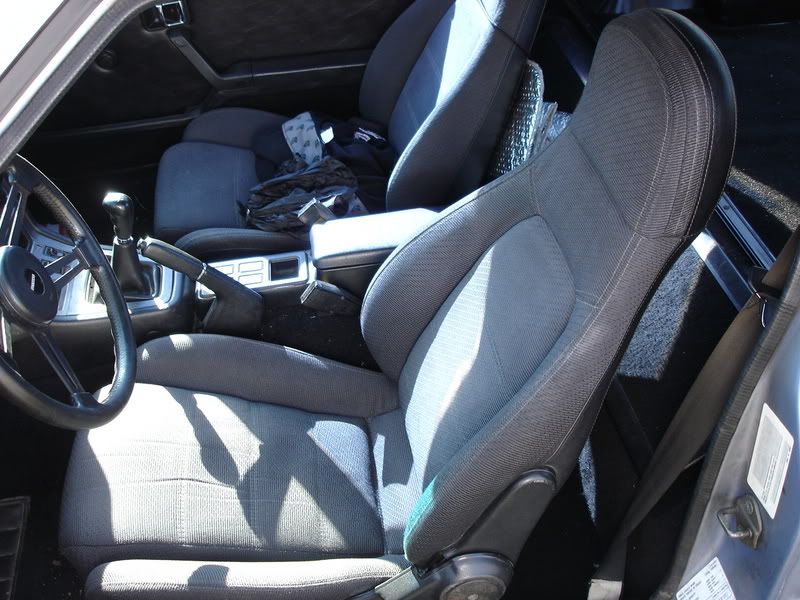
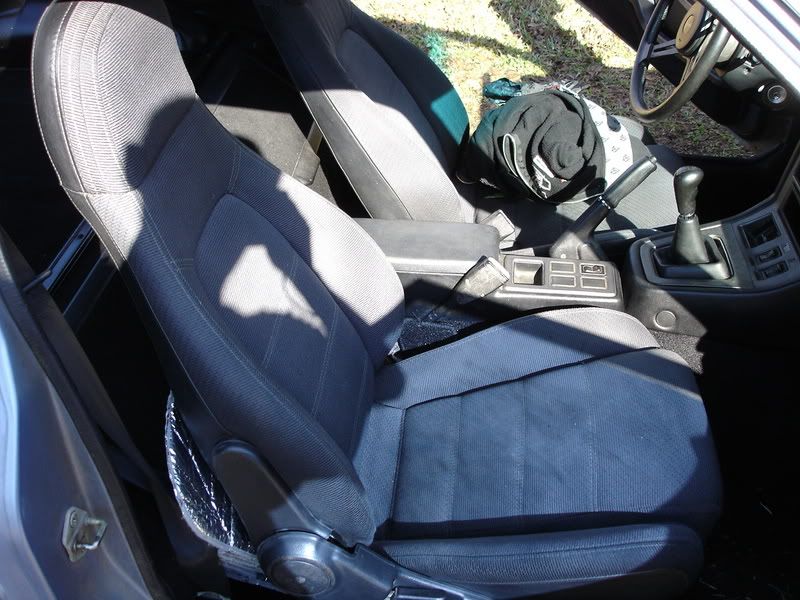
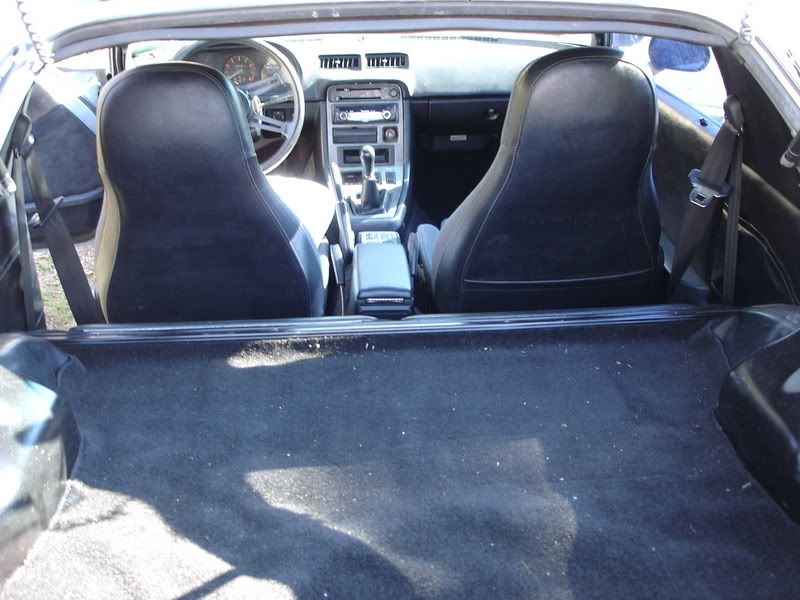
So we bought these Mazdaspeed Miata seats from Jeezus here on the forum and had the usual and expected "hell of a time" (note the irony...Jeezus and hell) getting the passenger side to fit because of the infamous hump on the passenger side floorboard.
Here's what we bought and here's how they look. The driver's side was an easy fit using an "extension" piece of metal that had holes at about 2" apart (cut 2 pieces). Oh yeah, also bought some longer bolts and some lock washers and nuts.
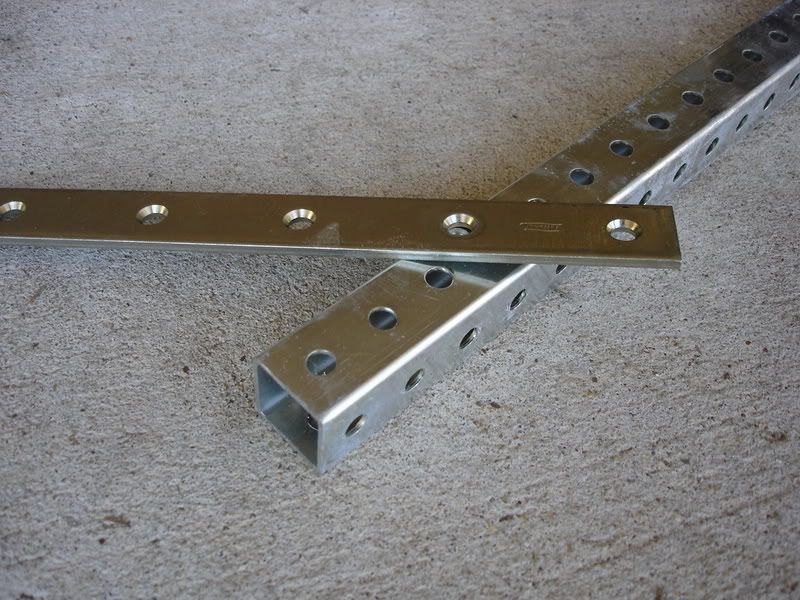
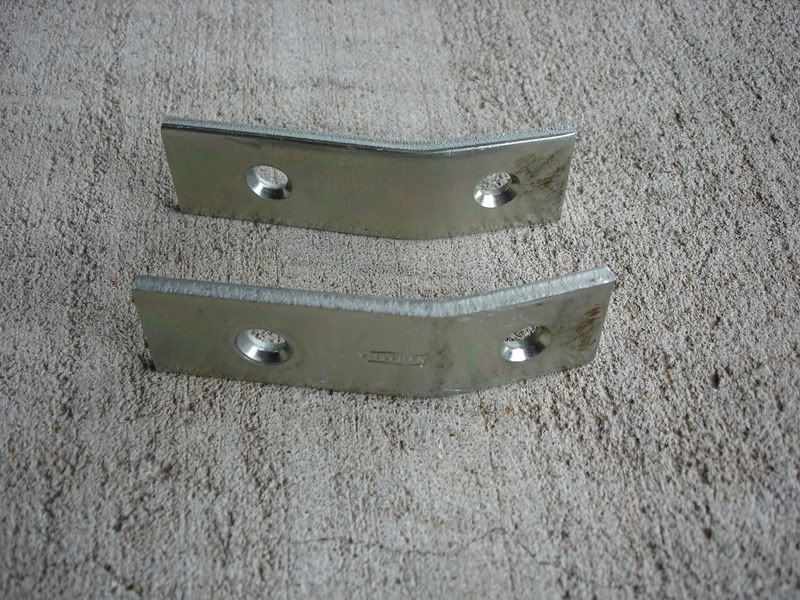
The passenger side also had 2 extension pieces, bent to correct the angle of the RX-7seats and slanted mount, and a a square piece of tubing (if tubing can be square?) cut off to raise the right side and secure the rail. Very solid and very strong.
Pix from different angles:
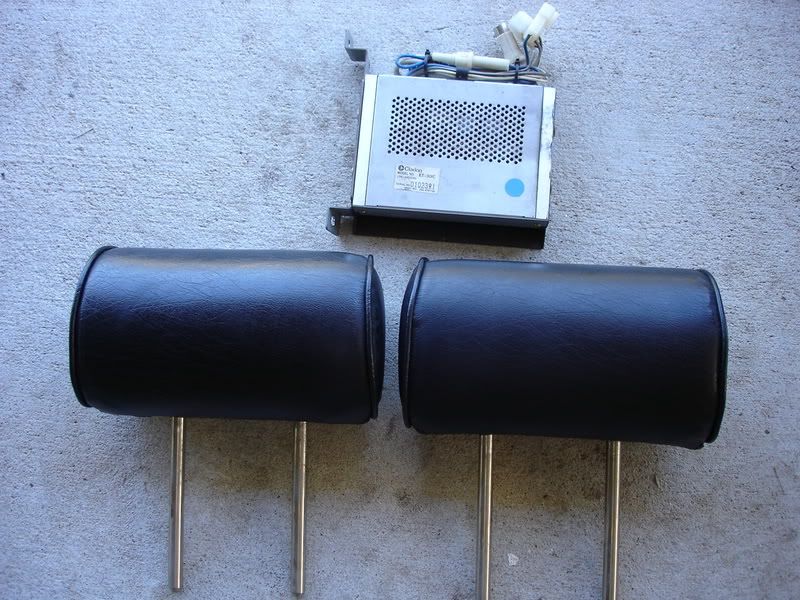
And then we ended up with the only salvagable pieces from the original seats, a couple of headrests and the Clarion amp from the driver's side. Let me know if you want them. Just pay shipping.
DD
Here's what we bought and here's how they look. The driver's side was an easy fit using an "extension" piece of metal that had holes at about 2" apart (cut 2 pieces). Oh yeah, also bought some longer bolts and some lock washers and nuts.
The passenger side also had 2 extension pieces, bent to correct the angle of the RX-7seats and slanted mount, and a a square piece of tubing (if tubing can be square?) cut off to raise the right side and secure the rail. Very solid and very strong.
Pix from different angles:
And then we ended up with the only salvagable pieces from the original seats, a couple of headrests and the Clarion amp from the driver's side. Let me know if you want them. Just pay shipping.
DD

 01-06-07, 03:42 PM
#4
Looks good in there, I tried putting a pair of those seats in my car, but they never seemed to sit right. Ended up finding a good pair of FC seats and went with those. Do you have any more pics of the install itself? I'm curious to see how you did it....
01-06-07, 04:59 PM
#7
Onward thru the fog!
Thread Starter
Apology
Doh!!!
My apologies!!!!
I bought the seats from RXn407!!! I buy too much . Sorry to both of you! I bought the side molding trim from Jeezus.
Again, I apologize.
DD
My apologies!!!!
I bought the seats from RXn407!!! I buy too much
. Sorry to both of you! I bought the side molding trim from Jeezus.Again, I apologize.
DD
Trending Topics
01-07-07, 03:40 PM
#8
Onward thru the fog!
Thread Starter
Follow up
I didn't originally post this as a "How to" because it may not be the best way. It was more of a "How I" did it.
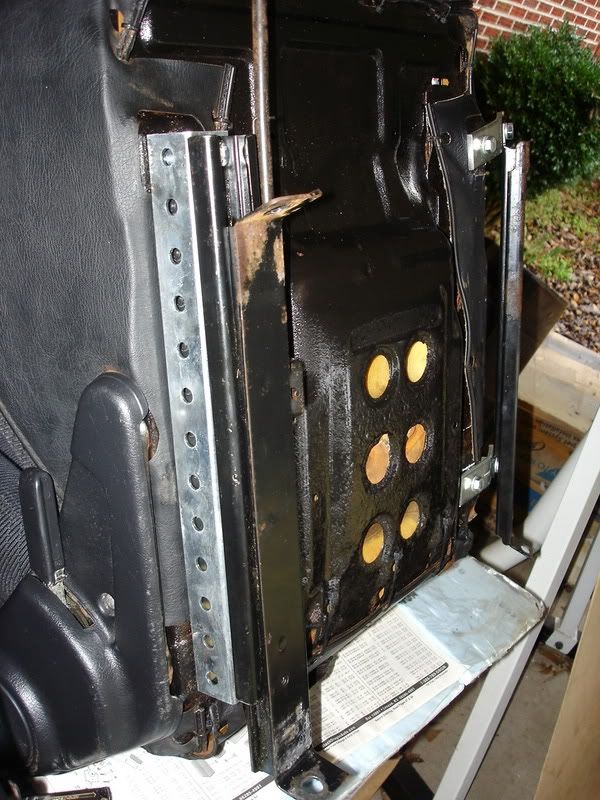
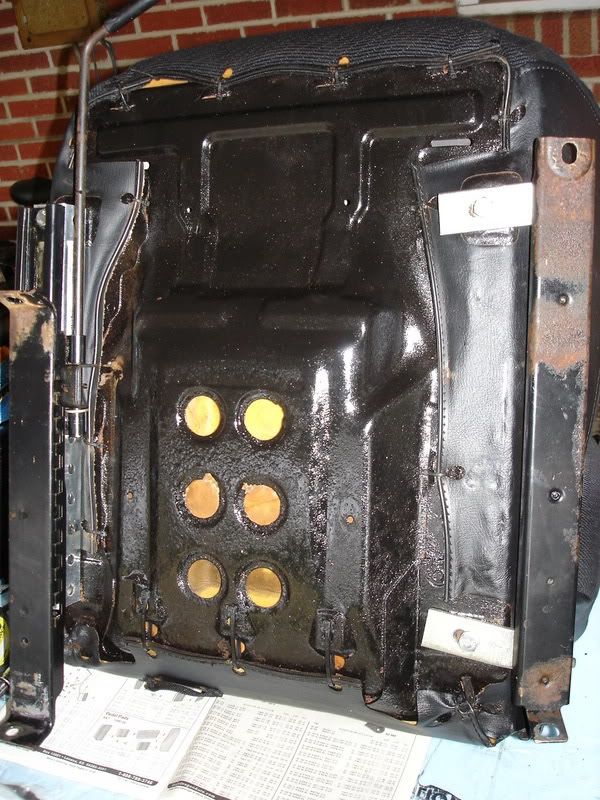
OK, nick812, I removed the passenger seat to take pictures just for you. The driver's seat is a "no brainer" so I didn't remove it. (BTW, did you send my moonroof mechanism? )
)
The only seat rails I had were the ones that came with the original seats and I didn't want to alter them or drill holes in them etc. I may redo this installation and do it differently when I get a spare set of rails to play with.
I used the original rails and I mounted them in the original locations on the floor. (Next time I may mount all 4 rails directly to the seats and use other means to reach the floor mounts.)
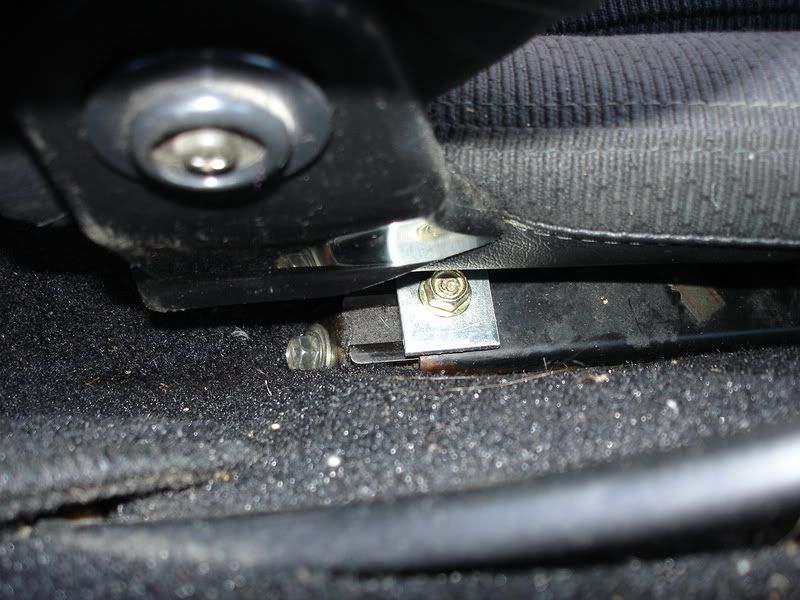
Also, on both seats, I mounted the "door" side rails straight to their original positions on the seats (but on the passenger side I used square tubing between the rail and the seat to raise that side up. I didn't want to just use a bunch of washers to get the height I needed. I figured this way was much sturdier and stronger in case of an accident.)
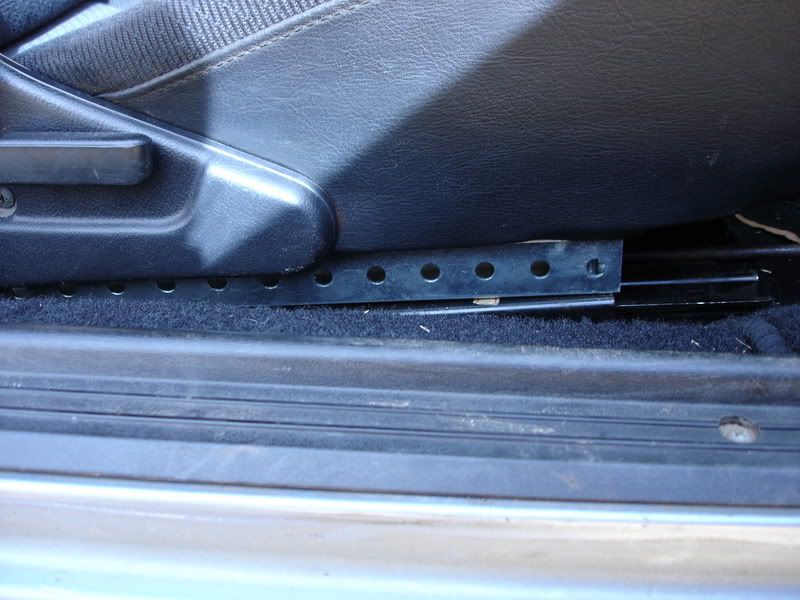
Passenger seat: I bent 2 pieces of metal slightly because of the hump in the floor and mounted them from the inside (near the shifter and hand brake) to the rail and then to the seat. The distance between the holes on the original seat and the Miata seat on the inside rail were different and that's why the metal braces or extensions aren't quite at 90 degree angles to the seat. The other 3 rails all had the same distance apart. Go figure. Other seats may vary.
Driver's seat: Easy. Also used 2 metal extensions but didn't need to be bent or angled. But I did use a couple of washers on the "door" side to compensate for the thickness of the metal extension on the inside rail.
(RXn407 - The seat bases look different now because they were rusted and I completely removed them from the seat bottoms and used POR-15 on both sides. I also used black zip-ties instead of hog rings to secure the seat covers to the metal base.)
The only reason I did it all this way was because I searched extensively but couldn't find pictures of a better way to do it so I had to make something up.
I also didn't simply mount the passenget seat to the floor because I still wanted the rails to be functional and have the ability to slide both seats forward and back.
You can read all this or just look at the pictures...
Whew.
DD
OK, nick812, I removed the passenger seat to take pictures just for you. The driver's seat is a "no brainer" so I didn't remove it. (BTW, did you send my moonroof mechanism?
)The only seat rails I had were the ones that came with the original seats and I didn't want to alter them or drill holes in them etc. I may redo this installation and do it differently when I get a spare set of rails to play with.
I used the original rails and I mounted them in the original locations on the floor. (Next time I may mount all 4 rails directly to the seats and use other means to reach the floor mounts.)
Also, on both seats, I mounted the "door" side rails straight to their original positions on the seats (but on the passenger side I used square tubing between the rail and the seat to raise that side up. I didn't want to just use a bunch of washers to get the height I needed. I figured this way was much sturdier and stronger in case of an accident.)
Passenger seat: I bent 2 pieces of metal slightly because of the hump in the floor and mounted them from the inside (near the shifter and hand brake) to the rail and then to the seat. The distance between the holes on the original seat and the Miata seat on the inside rail were different and that's why the metal braces or extensions aren't quite at 90 degree angles to the seat. The other 3 rails all had the same distance apart. Go figure. Other seats may vary.
Driver's seat: Easy. Also used 2 metal extensions but didn't need to be bent or angled. But I did use a couple of washers on the "door" side to compensate for the thickness of the metal extension on the inside rail.
(RXn407 - The seat bases look different now because they were rusted and I completely removed them from the seat bottoms and used POR-15 on both sides. I also used black zip-ties instead of hog rings to secure the seat covers to the metal base.)
The only reason I did it all this way was because I searched extensively but couldn't find pictures of a better way to do it so I had to make something up.
I also didn't simply mount the passenget seat to the floor because I still wanted the rails to be functional and have the ability to slide both seats forward and back.
You can read all this or just look at the pictures...
Whew.
DD
01-07-07, 04:53 PM
#10
13b P-port on a budget
Join Date: Nov 2004
Location: Louisville KY
Posts: 3,003
Likes: 0
Received 0 Likes
on
0 Posts
I didnt send it but it was sent out friday via USPS. Thanks for the pics. I know the drivers seat is just a stright swap just wanted to see the brackets you made. Looks very good how do they fill?

Thread
Thread Starter
Forum
Replies
Last Post