RE-Speed steering kit! It's here!


 03-14-08, 06:10 PM
#178
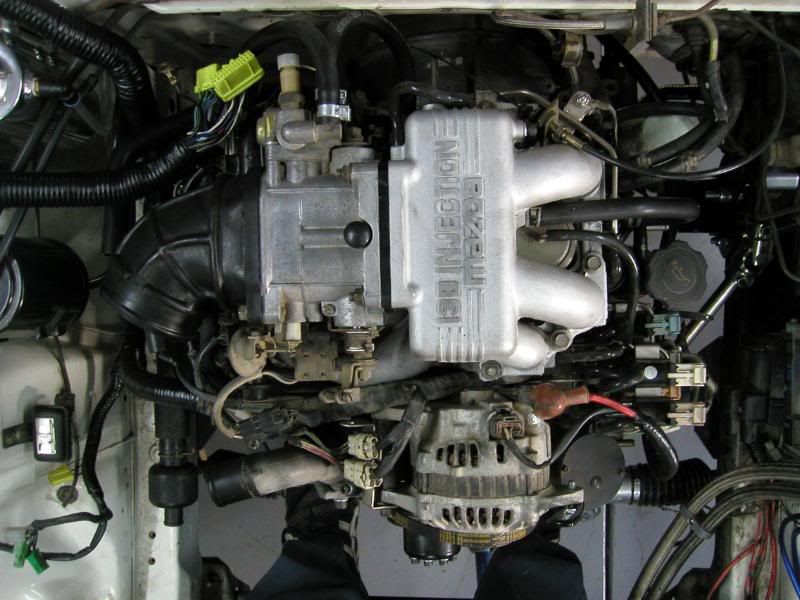
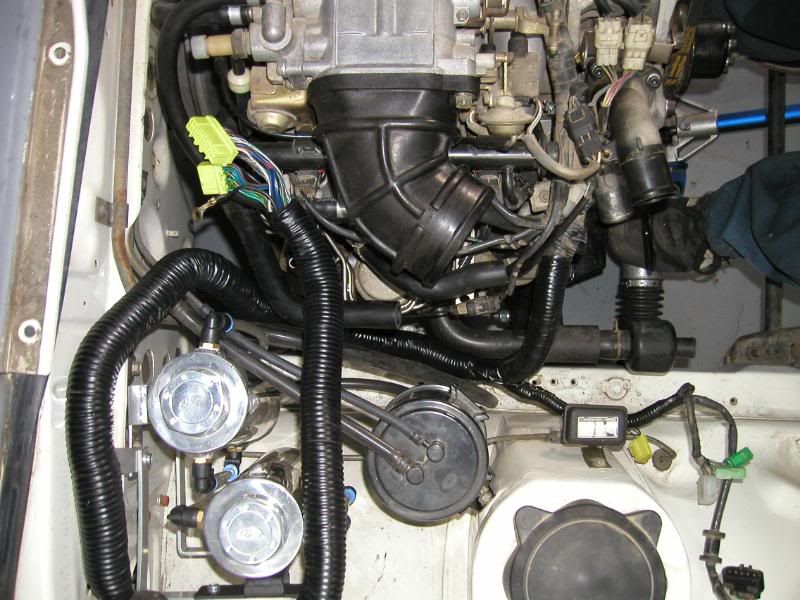
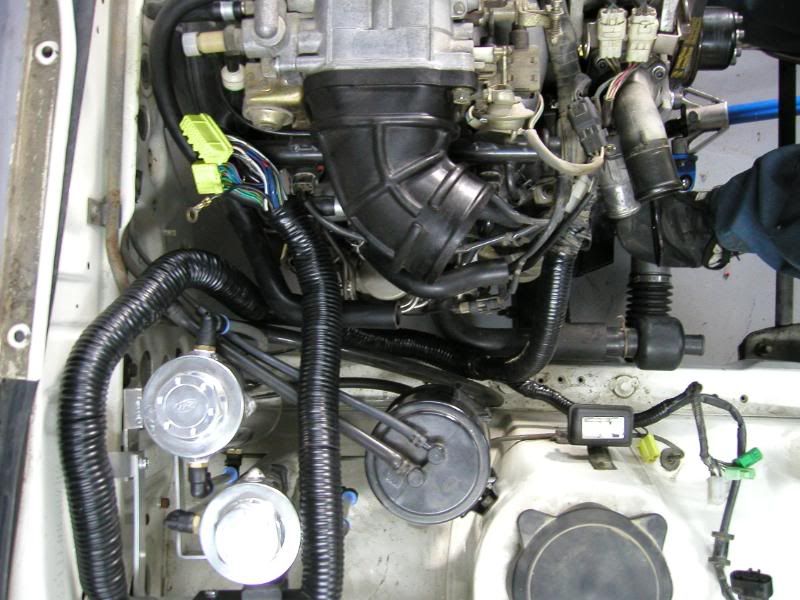
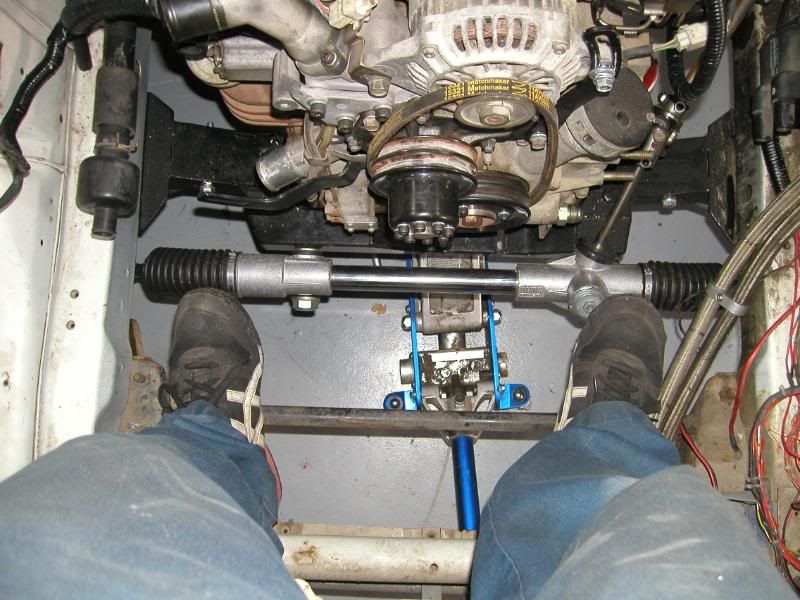
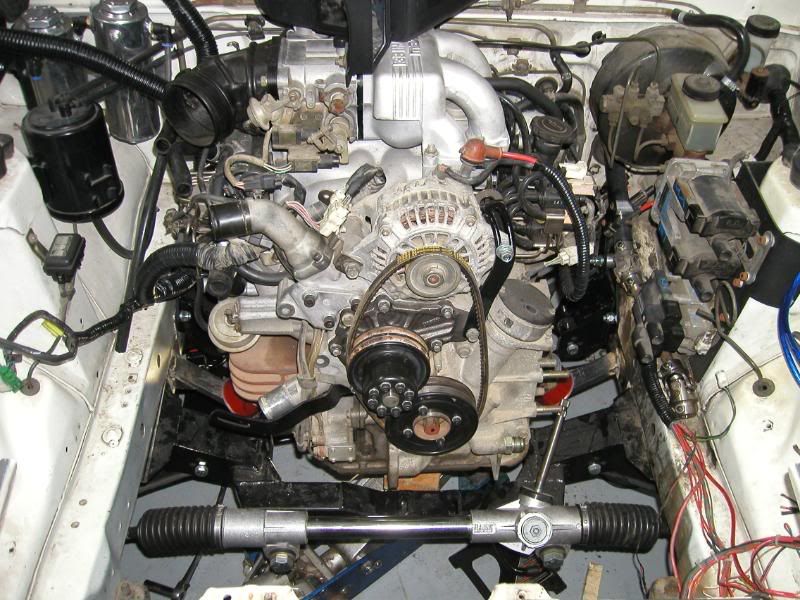
Some front and side views
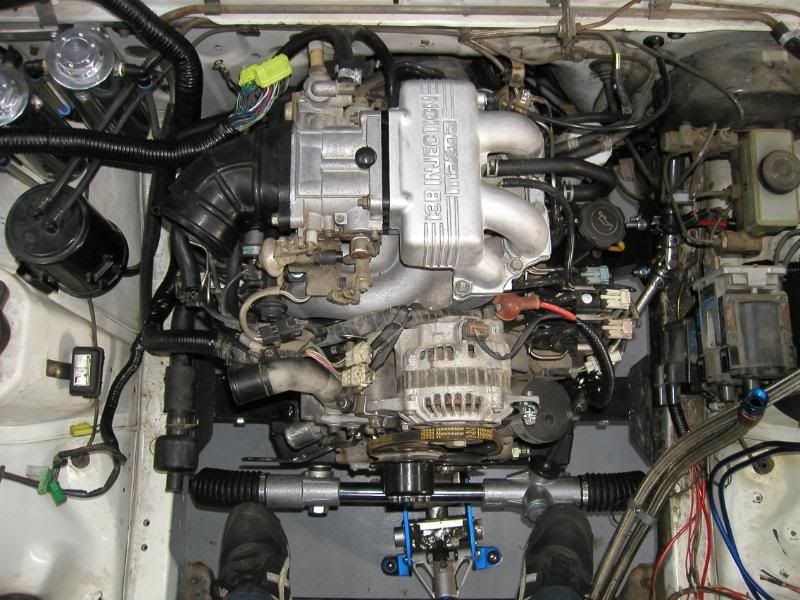
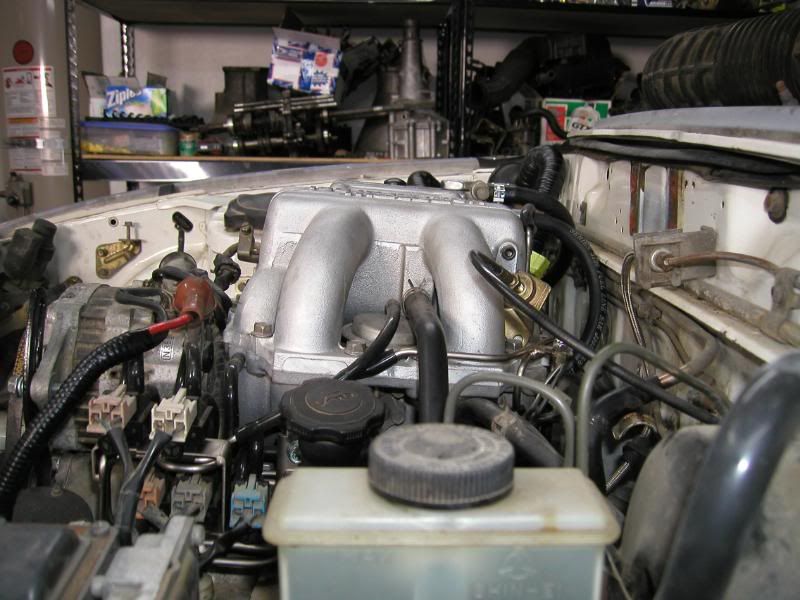
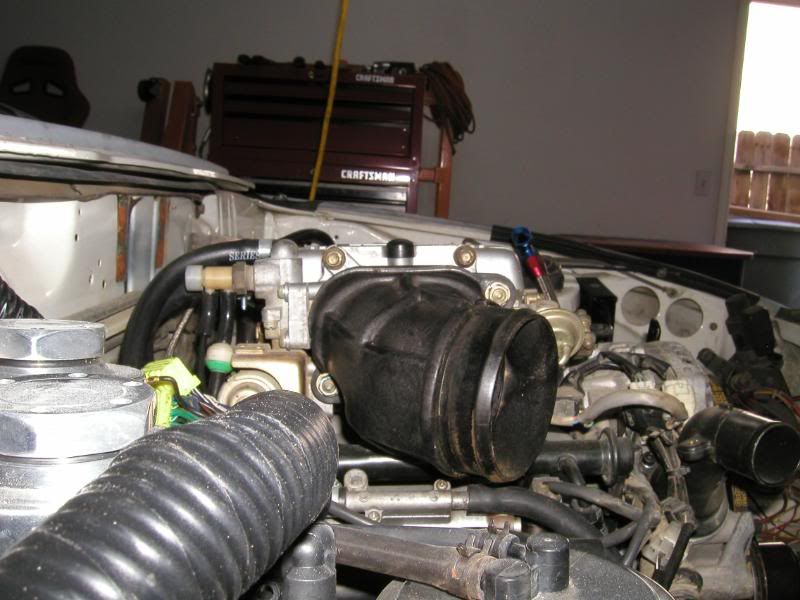
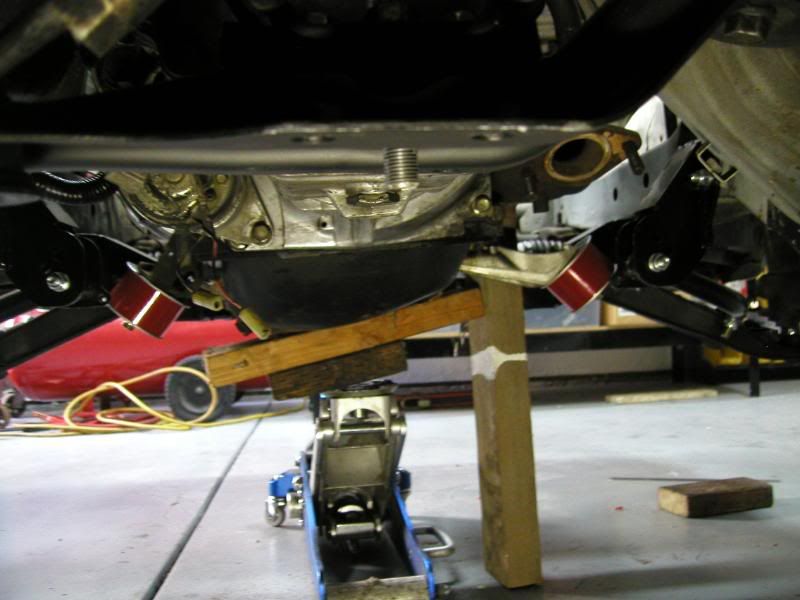
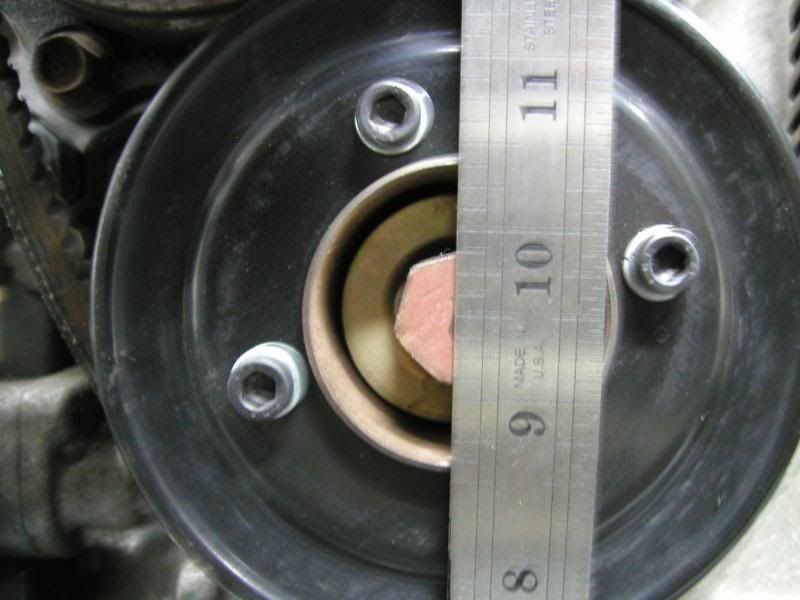
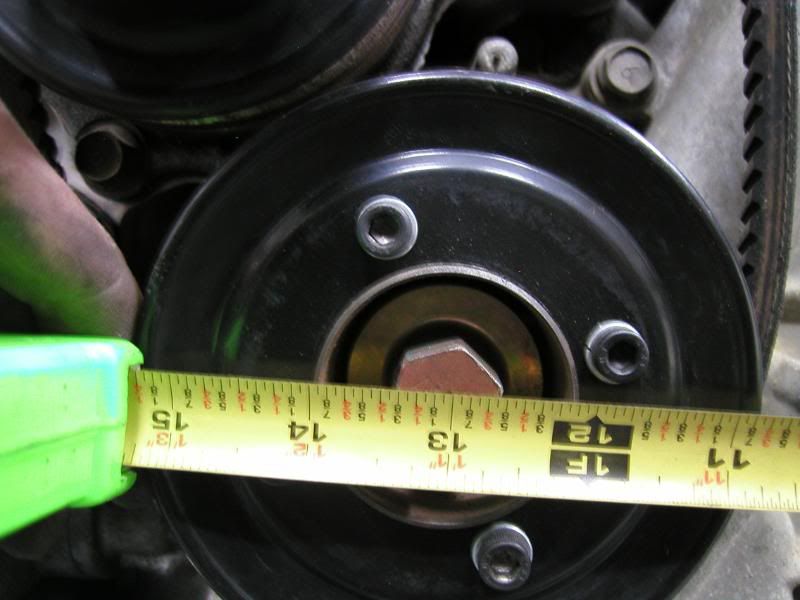
Well tell me what you guys think. I have to go pick up some screw type jack stands later so I can make fine adjustments to the drivetrain and have it completely solid. Then I can start making the brackets. Also hope to hear billy's opinion on the placement or anyone else's that has seen a lot of FC engine's in the FB chassis. Some things to note are that the exhaust manifold (stock) is almost completely parallel to the frame rail at this point. It seems to be in the right place according to the measurements given to me by billy. Just a slightly different sideways measurement. I have a bit more than he said his was measured to. Given the locations per measurement per his instructions. Other than that I think in my personal opinion it's about as good as it gets since the FC engine is a bit taller overall. The pan clearance is good just a bit below the subframe. Some of the pictures make it look worse than it is. Each picture was taken with different things in mind and it's really hard to get a picture or two that shows what the human eye sees.
Well tell me what you guys think. I have to go pick up some screw type jack stands later so I can make fine adjustments to the drivetrain and have it completely solid. Then I can start making the brackets. Also hope to hear billy's opinion on the placement or anyone else's that has seen a lot of FC engine's in the FB chassis. Some things to note are that the exhaust manifold (stock) is almost completely parallel to the frame rail at this point. It seems to be in the right place according to the measurements given to me by billy. Just a slightly different sideways measurement. I have a bit more than he said his was measured to. Given the locations per measurement per his instructions. Other than that I think in my personal opinion it's about as good as it gets since the FC engine is a bit taller overall. The pan clearance is good just a bit below the subframe. Some of the pictures make it look worse than it is. Each picture was taken with different things in mind and it's really hard to get a picture or two that shows what the human eye sees.
03-14-08, 08:23 PM
#180
It's been covered but because the mounting to me is inferior. That's the short answer. It makes it harder to work on for one. Front of the engine is more cramped with parts. I'd rather have cast iron bearing the weight of the engine than the aluminium with studs or bolts in it. Sooner or later you won't be able to buy SE covers and oil pans. The engine is better balanced on the mounts being mounted from the center allow better weight diustribution on the mounts. I could go on and on but I think you get the idea. Not to mention if it was such a good design why did mazda change it? They didn't have to so there is probably a reason or reasons. I'm sure most of them have to do with what I already said.
One great example is say you bolt on your front cover with fresh silicone and a new gasket right? Get you pan on. bolt up the stock fb bracket. Bolt the mounts on and set the engine down. Seems like your golden. I'm not convinced. So over time the 4 or 5 bolts on the front cover move to the top of the holes in the cover which of course stretches the seal and silicon. Hence causing weepage. Not to mention aluminium is not as strong and the bolt pattern for the front cover is all close together and the weight is twisting around a almost pivot point in the middle of the engine. Where with FC mounts the weight is trapped between the mounts. Notice all engines in the wold that are of a rwd configuration are like an FC? Makes sense to me. I'm sure lots of people never have problems or at least not any they will tell you about.
Another quick thing to think about is I can go grab an engine out of an FC and just drop it in once the brackets are made. What will everyone else be doing? Unbolting oil pans and front cover and this and that. transfering parts between engines. I've been a mechanic for a long time and there is nothing more tedious and time consuming than transferring parts between engines when doing an R and R.
So a bit more up front cost will be more than worth it in the long run. This is all my opinion take it or leave it. I'd bet good money if you had a set of brackets to bolt a stock FC motor in your car for let's say a price of $150 you'd buy them and just bolt it in instead of disassembling your brand new motor and reassembling it first. I know I would.
03-14-08, 10:18 PM
#181

This is such a great idea! You might not think it is, but I think this is EASIER then messing with the front cover and oil pan!! I really wish I could have done this to my car. Hopefully I'll have funds available and the parts will still be made when I've put my time in. Good luck, I'll be watching this carefully.
PS: $150 for brackets?? Yeah!! I would have gladly paid that.
PS: $150 for brackets?? Yeah!! I would have gladly paid that.
03-15-08, 01:40 AM
#182
This is such a great idea! You might not think it is, but I think this is EASIER then messing with the front cover and oil pan!! I really wish I could have done this to my car. Hopefully I'll have funds available and the parts will still be made when I've put my time in. Good luck, I'll be watching this carefully.
PS: $150 for brackets?? Yeah!! I would have gladly paid that.
PS: $150 for brackets?? Yeah!! I would have gladly paid that.
I will post pics of the project. But I'm not going to give out a mechanical drawing of the product so someone can run out and start making them before a professional fabricator can confirm the design as valid. All I can do is build them using common sense and by what I know of mechanical engineering. Not to mention the prototype is never very pretty compared to the final design on anything.
I'm glad you would have bought them. I was just telling Billy today I would have bought them if they existed already. See Billy I told you. lol! Just kidding he knows already people would have bought them if they exsisted. He's very busy and works on a lot of projects at once and any one project is time consuming if you want a good end result. Like the steering rack conversion for example. I'm sure there were many many man hours in that prototype.
I love your sig picture too. Probably one of the first things I'll do when the car is completed a nasty burnout!
03-16-08, 01:00 PM
#183
Well yesterday was a bust as far as time goes. I spent somewhere around 5 hours trying to be able to weld for more than 2 seconds at a time. It's a cheap welder but after yesterdays fight i think I won. I now know WAY more than I ever wanted to know about MIG welders. I thought I might have to kill myself at one point there. Then the store closed before I could get a welding helmet. So I got one this mornig. It now can lay a decent bead. At first I thought it was me besides the wire jambing problem but the wire wasn't coming out smooth like it should so that why I was getting little bursts of popping. Now it sounds like a frying pan like it should. That 5 hours also included two trips to the hardware store for various parts. So now I'm ready to start I think. Should have dealt with the welder ages ago when my buddy first gave it to me. I just never got around to it.
 03-16-08, 05:18 PM
#185
Still seems like a waste of time to me. There are guys making over 700whp mounted throught the front cover in a FB, and your S4N/A isn't makin 1/4th the power. I honestly think you're wasting time and money fixing something that has never been a problem.
03-16-08, 06:33 PM
#186
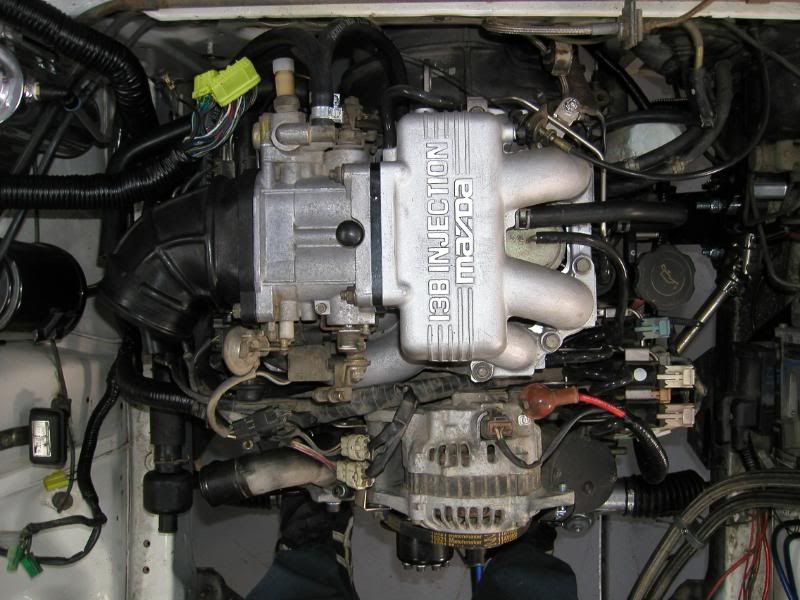
It's a S5 engine, which has the electric OMP which can't be bypassed if you want to retain the stock ECU. Some have modified the front cover to make use of it, but some of us (me) are better at working/welding steel and found it easier to make a little subframe to mount the engine using the FC mounts...
03-16-08, 08:06 PM
#187
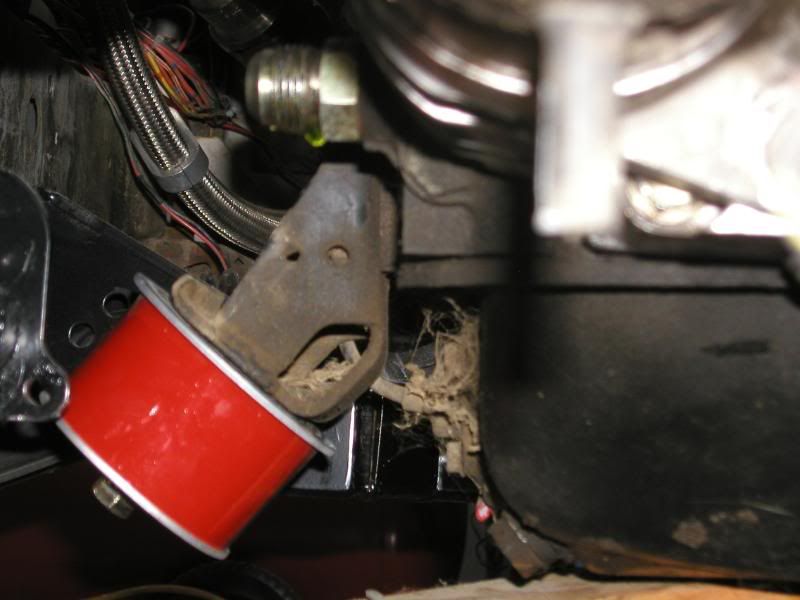
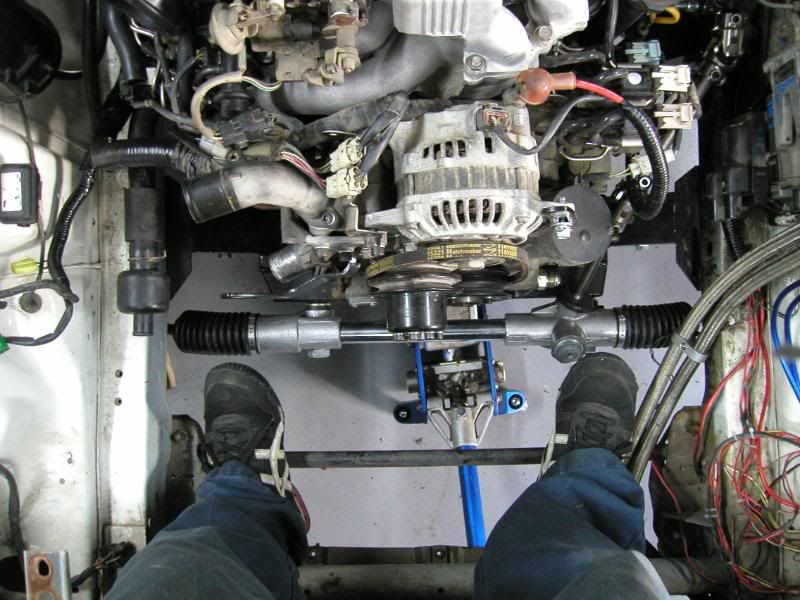
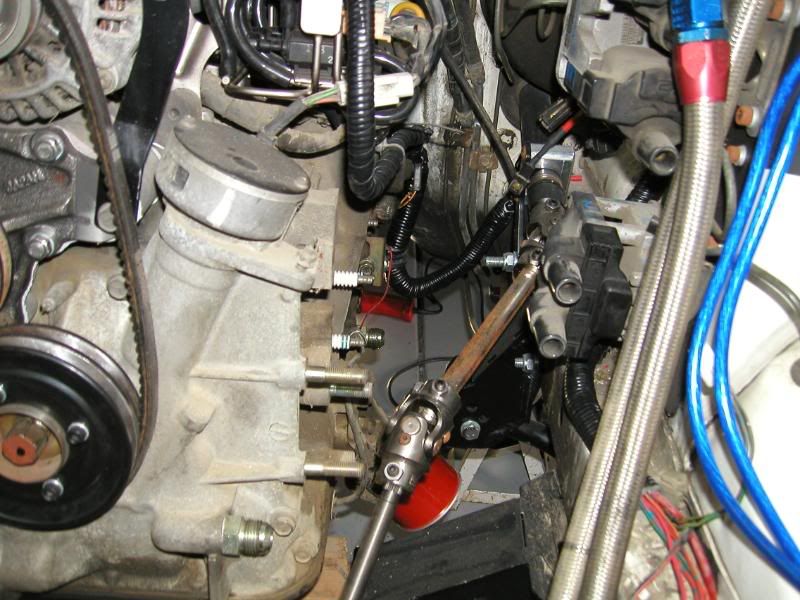
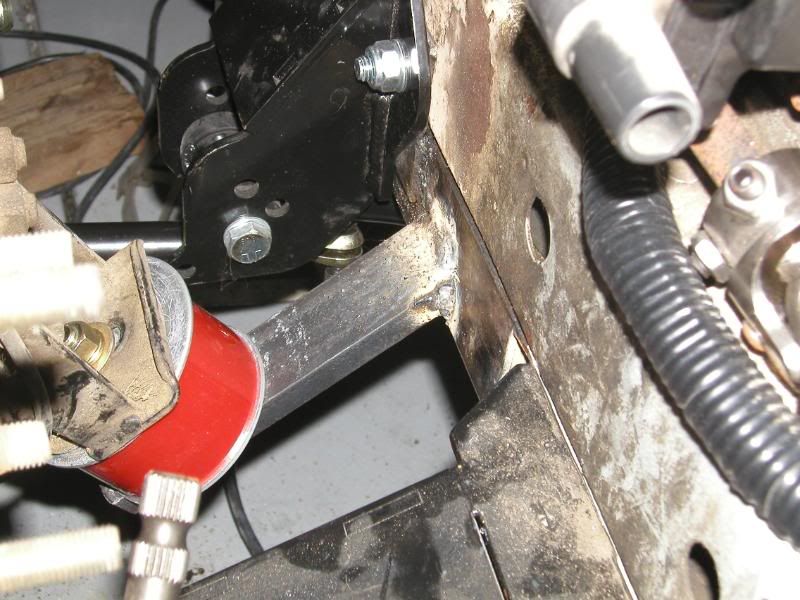
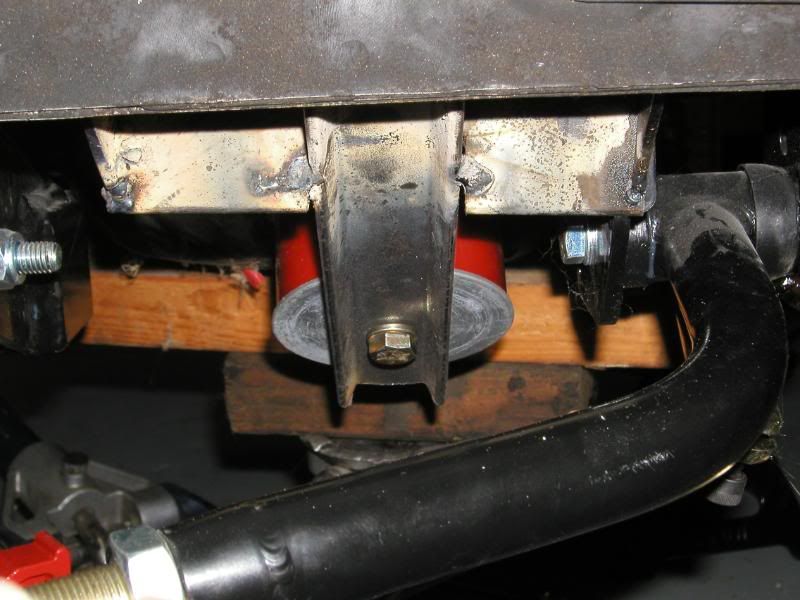
Anyways here's the pasenger side prototype. The subframe is lowered out of the way for clarity. I needed a break so I figured I'd post this up.
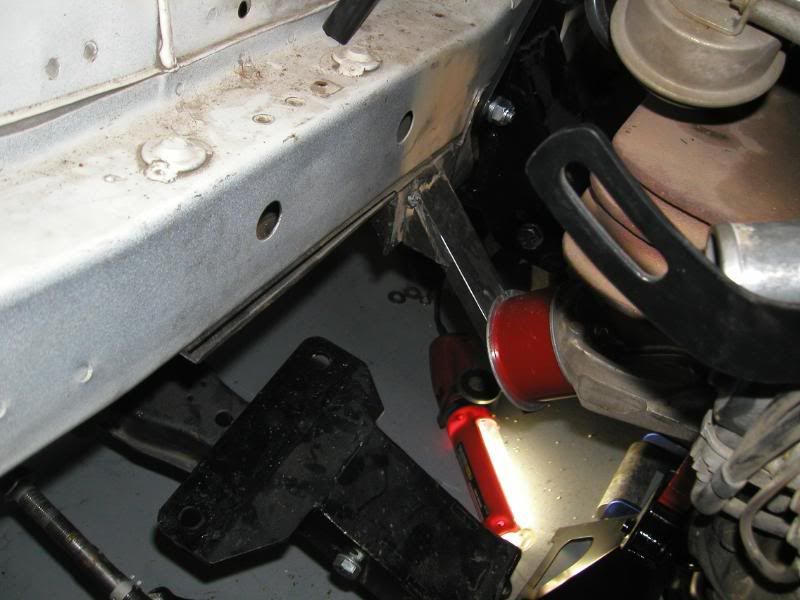
Can you find the extra hole in this picture? I was blind when I drilled it I guess. It's near the rear subrame bolt. What an idiot!
I'm trying to leave room for where I think most of the stock steering would be but I'm not sure how great a job I'm doing. I think a stock car would require a variation on what I have going. The sub frame sandwiches the front part of the bracket. I'm starting to wonder if I should have used 3/16 inch steel insead of 1/8. There's no load on the bracket in the picture as the welding I did is just to hold it together to have someone that welds weld it. The metal is bonded but as you can tell it's a MIG with no gas. The back part is sandwiched between the rear lower control arm bracket and I let teh angle iron out to far from the frame so it looks a bit funky and isn't perfectly straight up. Close but no cigar. I just squished it in there for now with the through bolts. I also just shimed the top of the bracket for the rear lower control arm for now with a washer as I didn't have a big enough piece of plate to copy billy's bracket. Although that would be ideal of course. So far not too bad it could be prettier but all the holes line up with reletive ease so that's neat.
 03-16-08, 08:52 PM
#189
Lookin good skidtron, Similar to what I made, but I didn't take the stock steering into consideration, I'll never go back to it. I finished switching the T2 front cover back on today, and put my center iron mount subframe to work, rocked the engine back and forth, and it seems pretty solid, real test will be a bumpy road, or a hard launch, but we'll see. I ordered some Mazdaspeed competition mounts, once those are installed I'll take some pics of it for you.
03-17-08, 01:52 AM
#190
Lookin good skidtron, Similar to what I made, but I didn't take the stock steering into consideration, I'll never go back to it. I finished switching the T2 front cover back on today, and put my center iron mount subframe to work, rocked the engine back and forth, and it seems pretty solid, real test will be a bumpy road, or a hard launch, but we'll see. I ordered some Mazdaspeed competition mounts, once those are installed I'll take some pics of it for you.
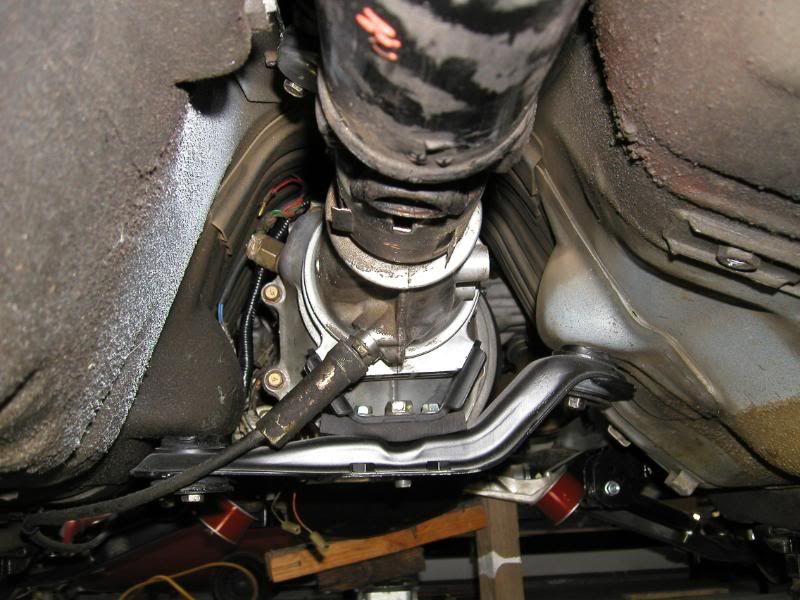
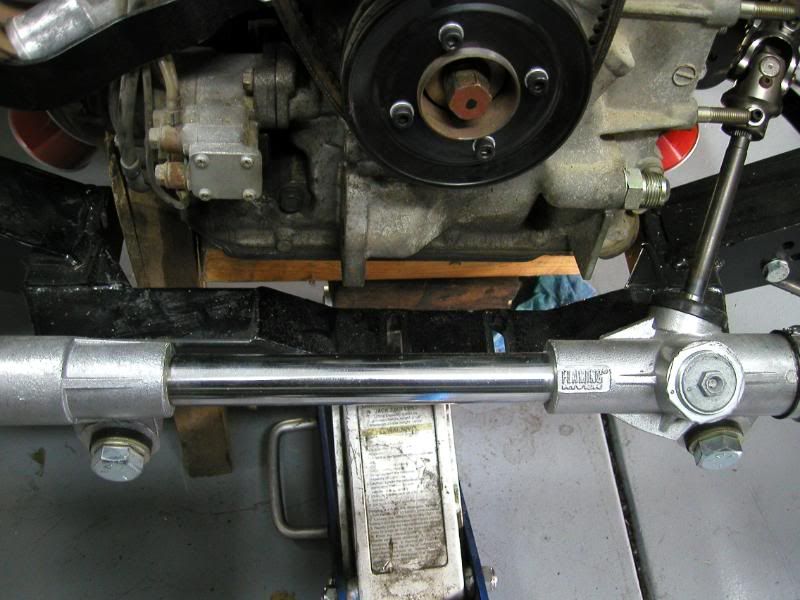
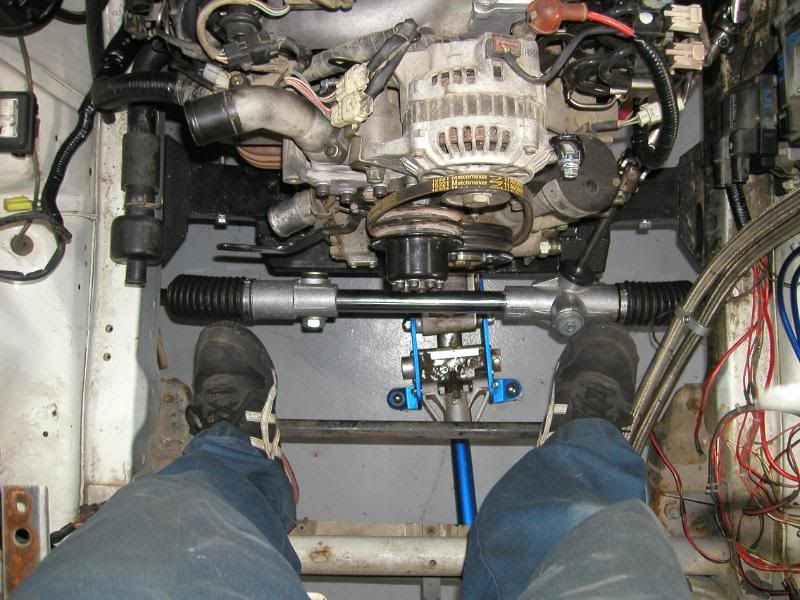
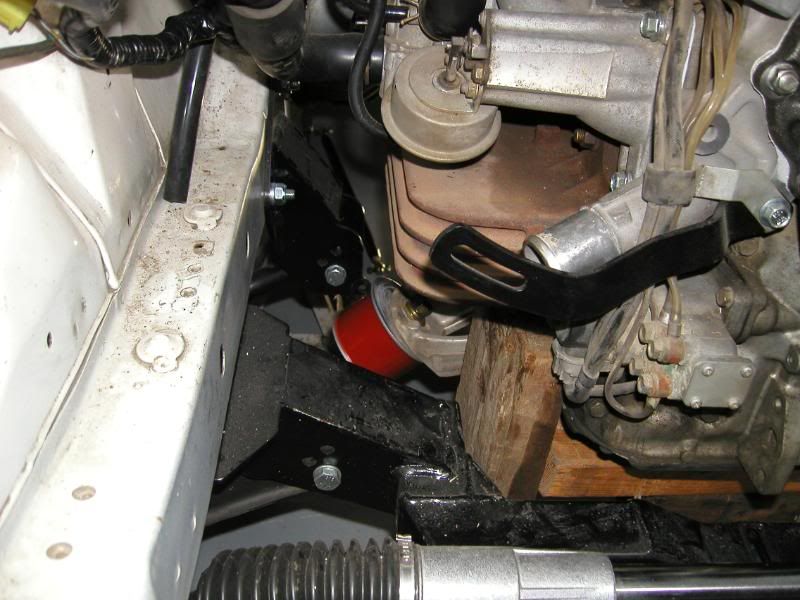
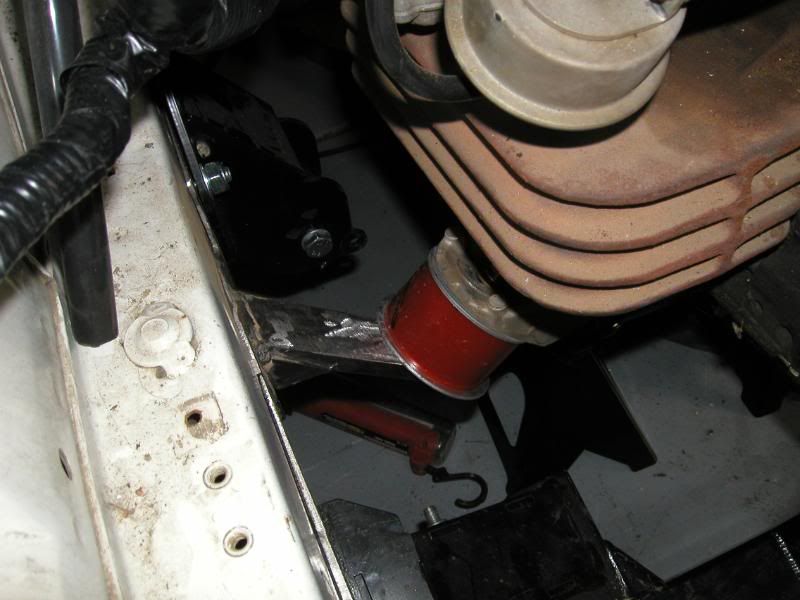
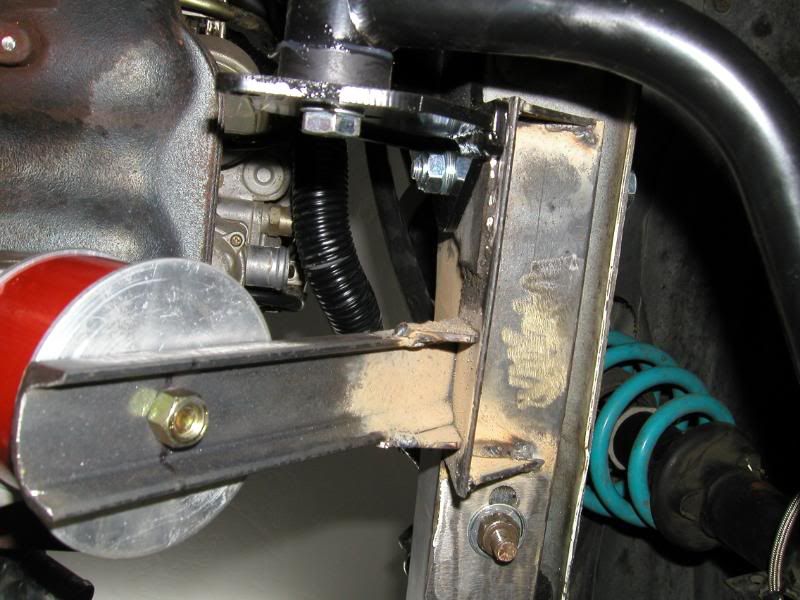
Here's the driver's side prototype I just finished.
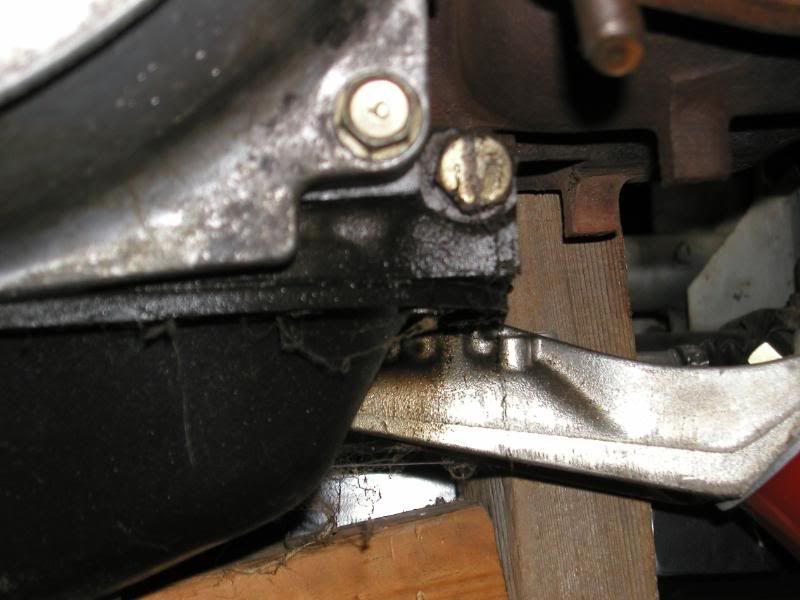
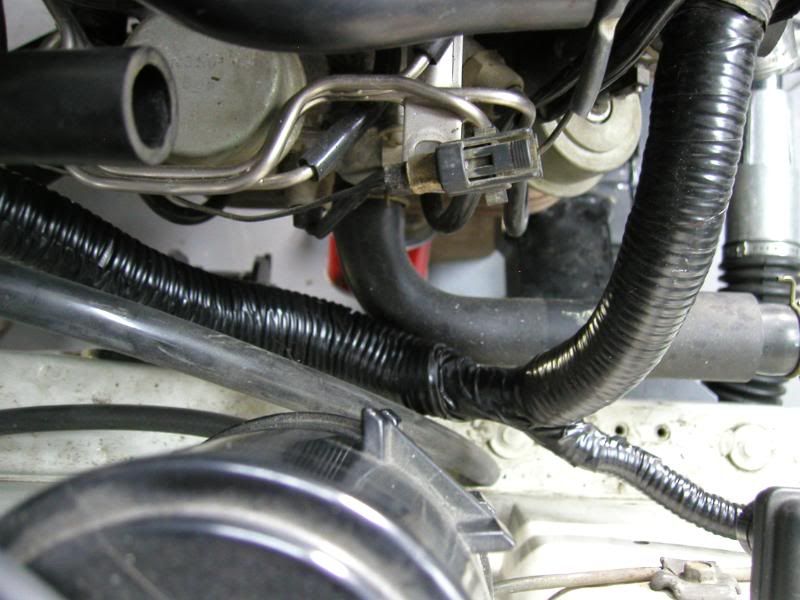
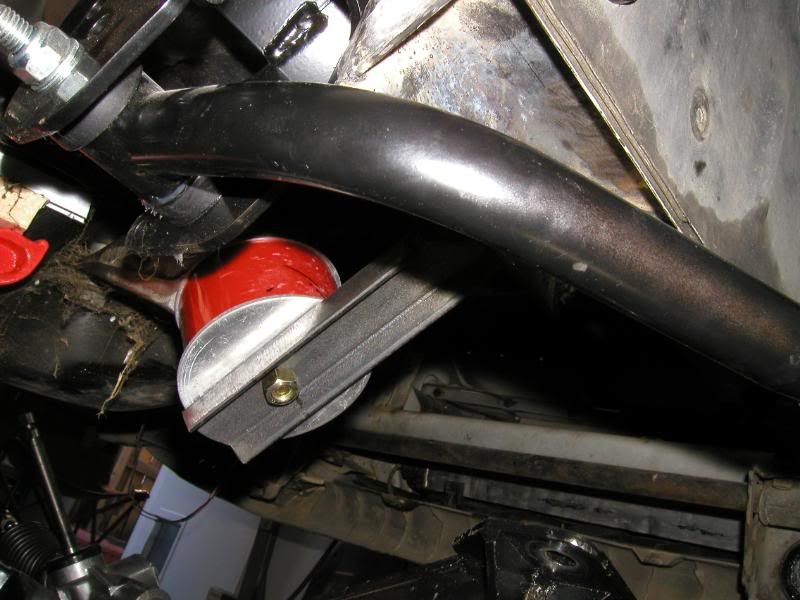
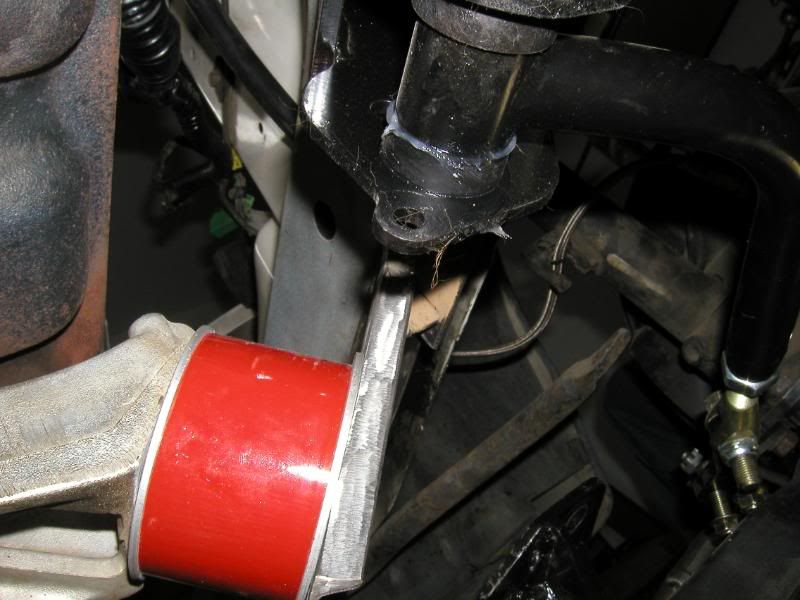
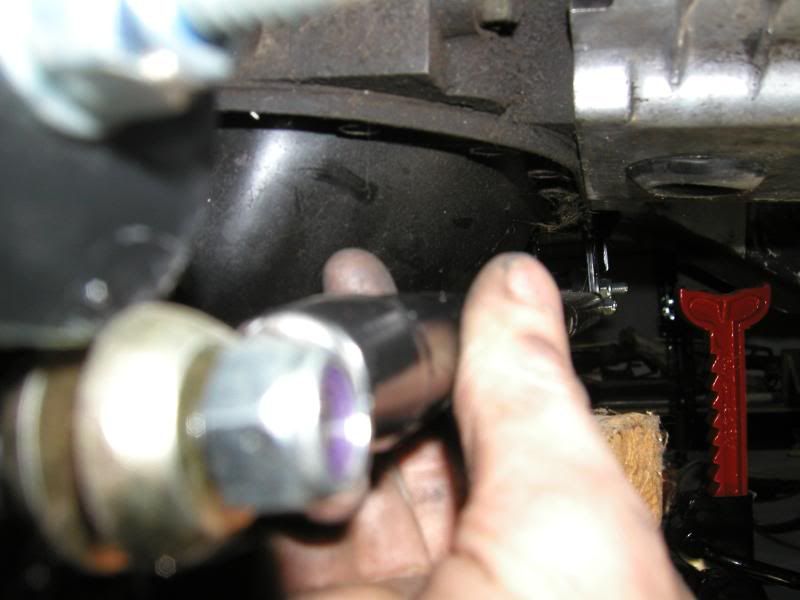
Here's a pic of the lower link for you billy. This is hard to get a good shot of it. The oil pan is on the left.

Some more of the driver's side
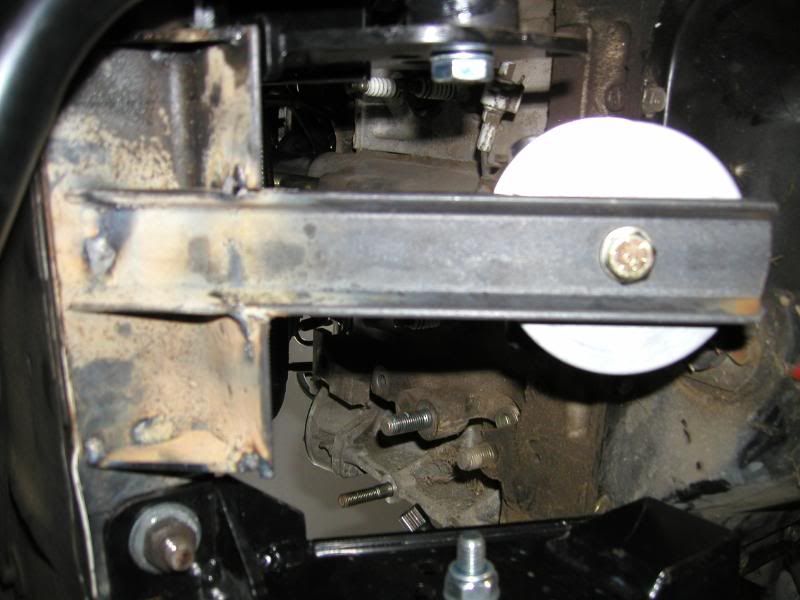
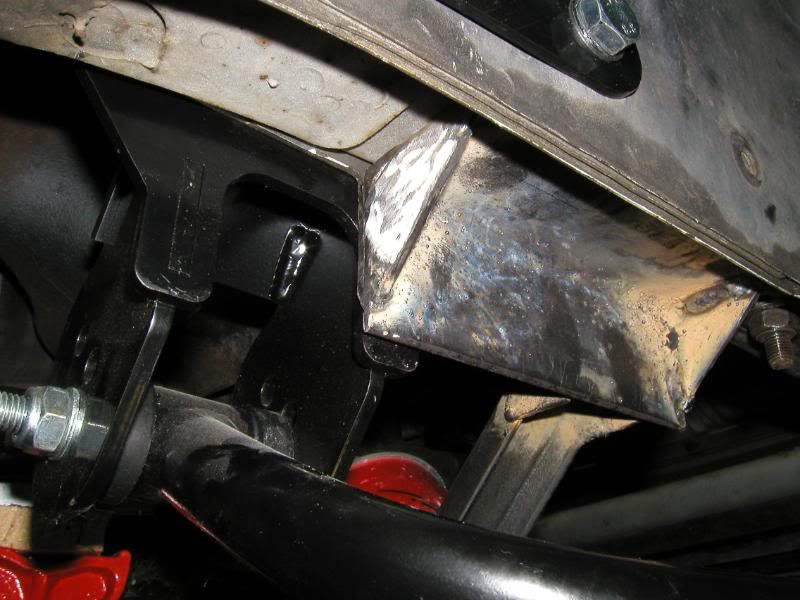
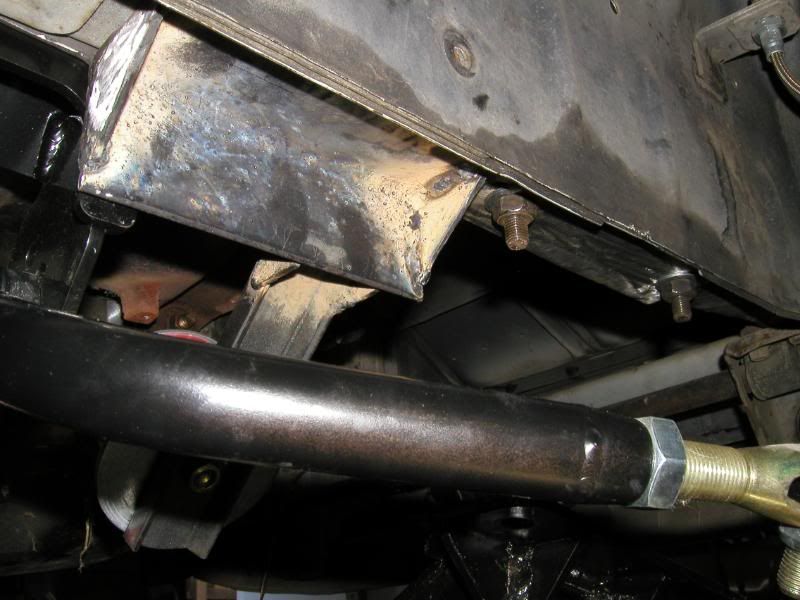
Some more for billy these are pretty close
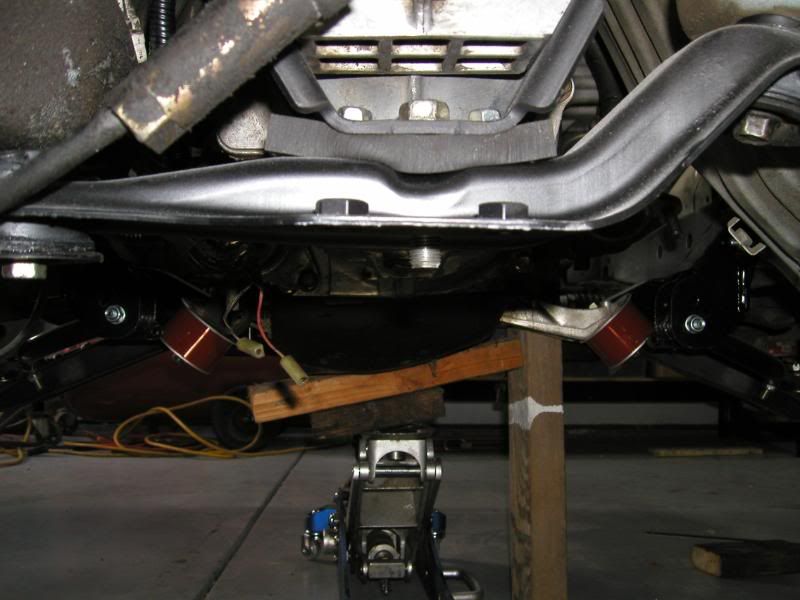
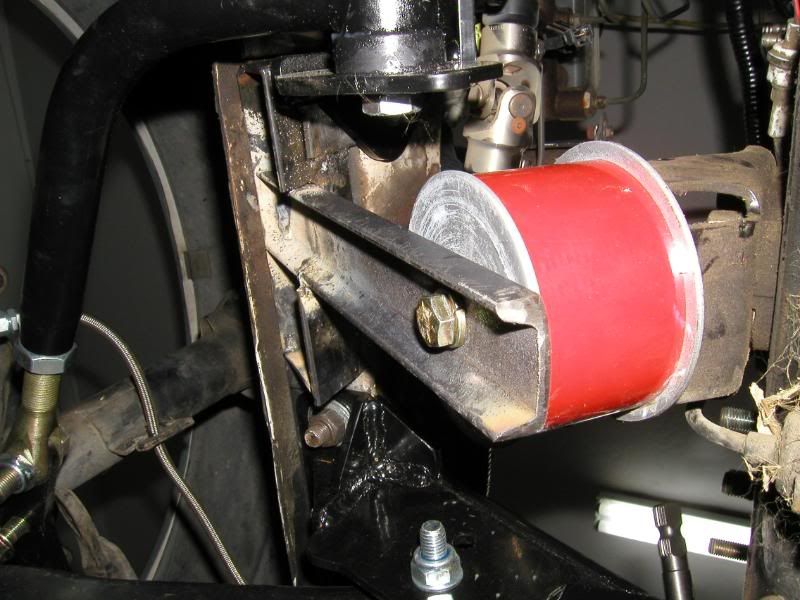
Some of it sitting on the mounts with no help from the jack at all. Even with my horrible welding and the rest of the welding incomplete. I think once they are finished up they will be pretty stout.
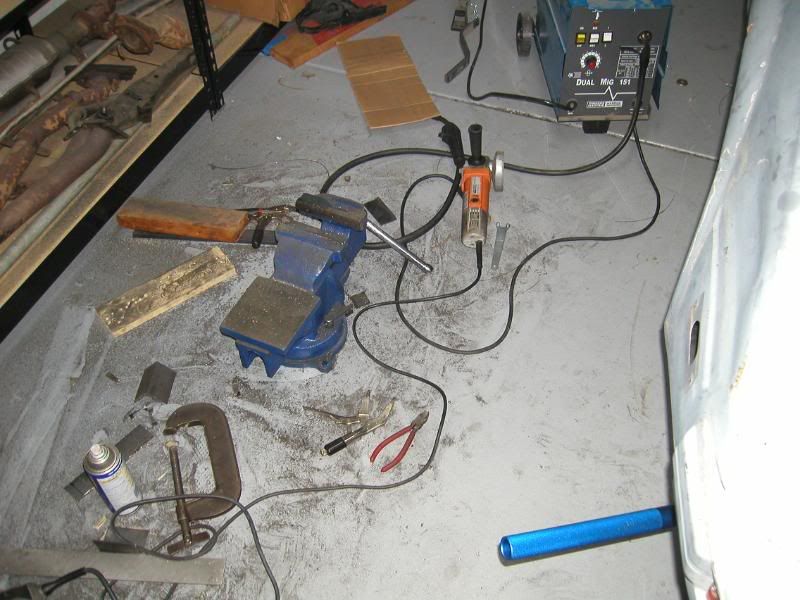
My big mess and the little turd that could in the background. It's not the greatest welder but the welds didn't break when I put the engine on them so it's gotta be decent I guess.
There's still a little bit of flex to them at this point. The engine dips about 1/4 full weight. But only about 10 percent of the welding is finished at this point so I'm not surprised and Some of it is getting boxed in at the end so it should lose that flex I'm sure. But not too bad overall for a guy that can't weld and his first time trying to build engine mounts. I will get them TIGed next and then clean them up a bit. Hopefully tomorrow evening they will go back in the car and the flex will be gone. They are built off of angle iron so I would think the flex is only coming from the lack of welding on the piece that runs out to the mount bushing. We'll see!
03-17-08, 02:03 AM
#191
Probably never! just kidding I'm sure it will be done in the next couple months. Hopefully! I can tell I will miss some autocross events at the begining of the season..........................
Last edited by Skidtron; 03-17-08 at 02:13 AM.
03-17-08, 09:30 AM
#194
Lookin good! Yeah, you should definatly tie the two mounts together somehow. I Noticed some flex in my mounts before adding the cross brace, now they seem very solid. I have to "offset" the cross brace in order to clear the drain plug, and keep it from being a lot lower than the oil pan. I'll try to get some pictures tonight. I still have to address the rack/pinion kits tie bar as well, probably just drill some holes for it on the back of the rear control arm brackets or something....
03-17-08, 01:14 PM
#195
Engine mount looks realy good, nice work. It takes me less than 2 minutes to change every jet in my carb, I'd like to see some one tune a stock ecu in less time. Unless you're running stand alone with preoaded maps. I can retune my car faster than any EFI guy out there. And I'm carbureted because if you've ever taken a physics class a properly tuned carb in a NA car will ALWAYS make more peak HP than any fuel injection car. I don't have time to explain it, and I don't want to hijack your thread, but if you want to know more search it's been discussed before.
03-17-08, 02:18 PM
#196
Properly tuned carb makes more peak HP than EFI?
I've always heard it the other way around. Something about choking the airstream to create pressure drop to draw fuel thru, an auxiliary venturi right in the middle of airflow, and load based mixture adjustment.
I've always heard it the other way around. Something about choking the airstream to create pressure drop to draw fuel thru, an auxiliary venturi right in the middle of airflow, and load based mixture adjustment.
 03-17-08, 10:34 PM
#200
Yes there is stuff in the way, but that's nothing in compairison to any type of AFM. Just past the choke is a huge low pressure zone and that causes the fuel to atomize and rush out of the float bowl. When that happens there is a huge drop in air intake temps. I'm talking 50-70* drop in intake temps and that is where the extra power comes from. My last FB had a ported S5 block and stock turbo blowing through a weber 45DCOE, without and intercooler after a few hard runs I would have ice on my intake manifold and this is on nights when ambiant air temperature was like 55*. When the car was still NA there was even more ice on the mani. Now this is peak power I'm talking about here. It's much easier to have a broder, flater, and wider power band with the fine tuneing of EFI, but a perfectly tuned carb will always make more power than a perfectly tuned EFI system.