
RE-Speed steering kit! It's here!


Weren't you suppose to switch around the lower control arms (driver to passenger side and the other way around)? I'm pretty sure thats what it says in the intructions that Billy gave. Might have something to do where the the piece of metal is on the Lower control arm for the steering stops.
Although that would be fun and quite easy to do. No. Sorry no 4G63 for this. Just a NA S5 for now.
4G63 would make for a very powerful cheap car though. 500 hp on a stock block wouldn't suck. Those are some tuff bastards. I thought about this at one time not for this car but thought about buying a car just for that and decided against it altogether. It just wouldn't be the same without AWD. Ya I know I could make it AWD in a RX don't get me started I already decided against it.
Jerk!
Now I'm thinking about it again.......
 ive already got my chasis lined up for a SR....71 240z
also, the S5 NA motor would be AWSOME in a first gen. esspecially if you keep the FI. it shouldnt be that hard to wire in the S5 ECU. going FI or carb?
Thread Starter
Joined: Sep 2005
Posts: 532
Likes: 1
From: Abilene, TX
dont worry, ive researched a lot of options into a SA/FB. the 4G being one of them. the other main one is the SR. i had decided on a 4G63 then a buddy of mine convinced me to try a boosted rotary first. that buddy would be the guy who designed that rack of yours. so ill be trying a S5 T2 swap when i can afford it. more than likely ill stick with some form of a rotary in my SA. so now ill need to sometime get another chasis of some sort for a 4G ive already got my chasis lined up for a SR....71 240z
also, the S5 NA motor would be AWSOME in a first gen. esspecially if you keep the FI. it shouldnt be that hard to wire in the S5 ECU. going FI or carb?
ive already got my chasis lined up for a SR....71 240zalso, the S5 NA motor would be AWSOME in a first gen. esspecially if you keep the FI. it shouldnt be that hard to wire in the S5 ECU. going FI or carb?
A SR powered Z huh? It will be fun. Do yourself a favor and get the head ported before you even start as well as switching to top feed injectors. The injectors are a fraction of the cost of side feeds and you only have to buy the rail once. Not to mention the possibility of the bottom o-ring failing and flooding the engine with fuel. I look at it like why even bother? Some guys like tehm cause they can be adjusted. who cares it costs a lot and you can't argue with 200 bucks for four top feeds in almost any size you want. Buy a real ecu don't use the stock one and get rid of the airflow meter. All that is more important than the turbo or the intercooler. Just my thoughts though.
Weren't you suppose to switch around the lower control arms (driver to passenger side and the other way around)? I'm pretty sure thats what it says in the intructions that Billy gave. Might have something to do where the the piece of metal is on the Lower control arm for the steering stops.
Thread Starter
Joined: Sep 2005
Posts: 532
Likes: 1
From: Abilene, TX
Alright today was much nicer and I got quite a bit done. Even though I didn't get much time to work. The car is coming along nicely and I took a decent amount more of pictures. I also found out the bad news about my radiator needing to have it's mounts modified for it to fit. It will fit but it's going to be on the tight side. I kinda figured this would happen since ISC puts it back as far as they do which is great for weight distribution and all that but I'll have to move it forward a couple of inches to clear the rack and the swaybar. Here goes.............
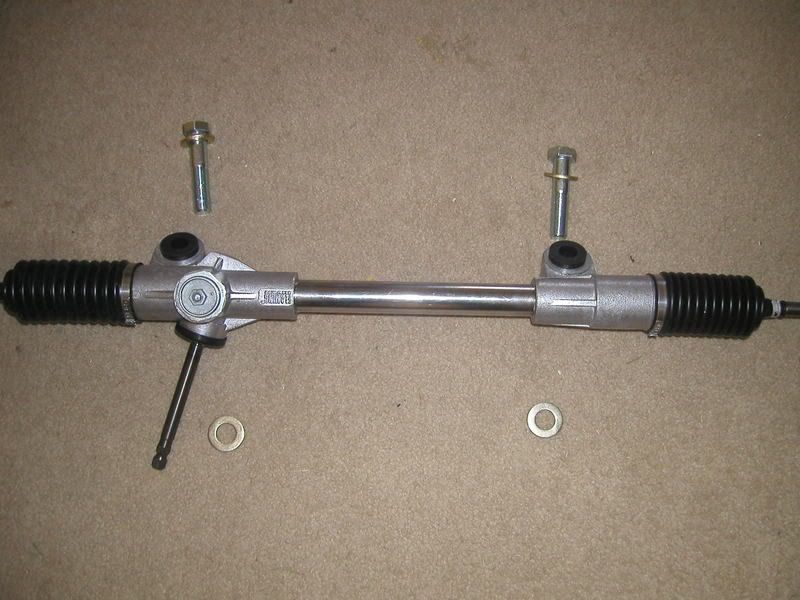
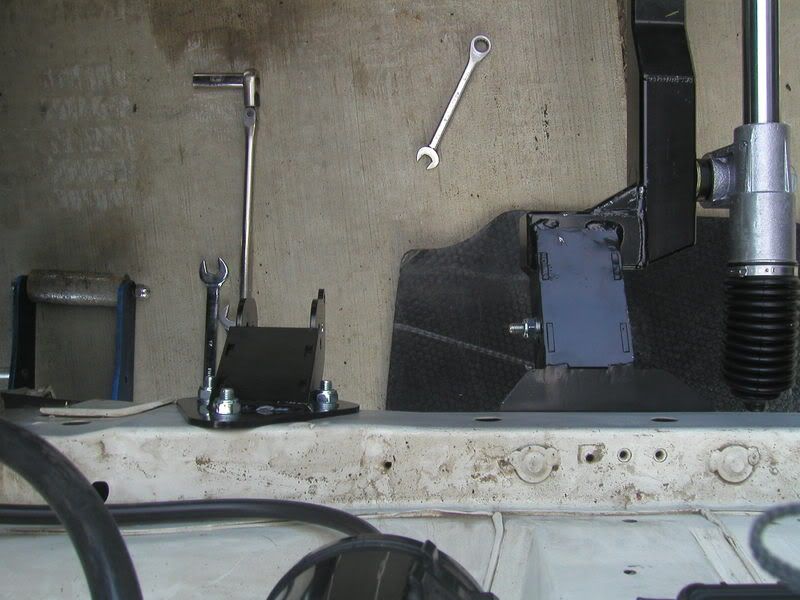
First pic is of the rack and it's hardware. It comes with the polyurethane bushings.
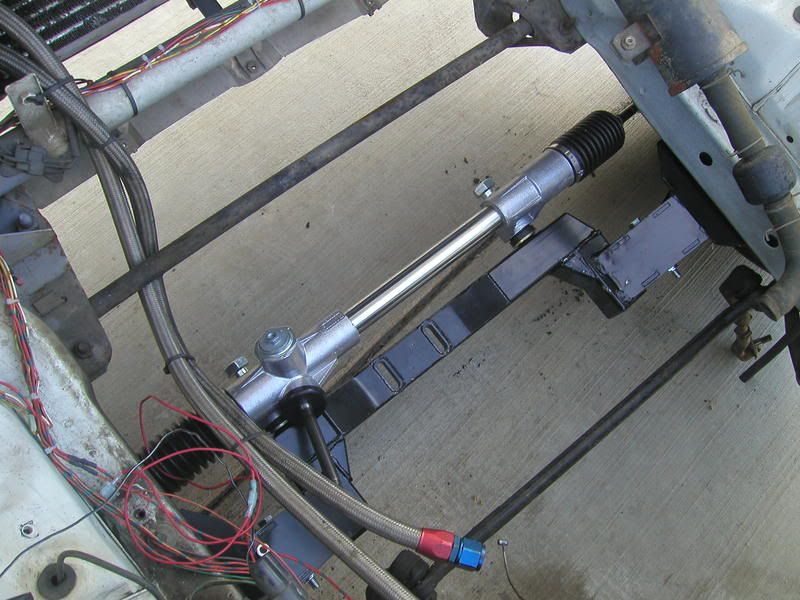
Next is of it bolted on loosely for a test fit of the radiator
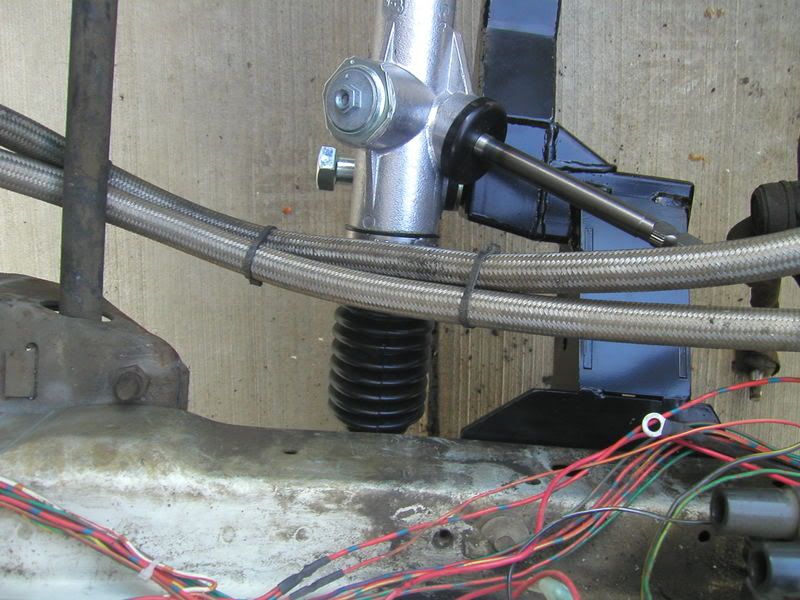
This one is of the oil cooler lines which are going to be rerouted when more things are established since they would obviously saw right through that nice new steering boot.
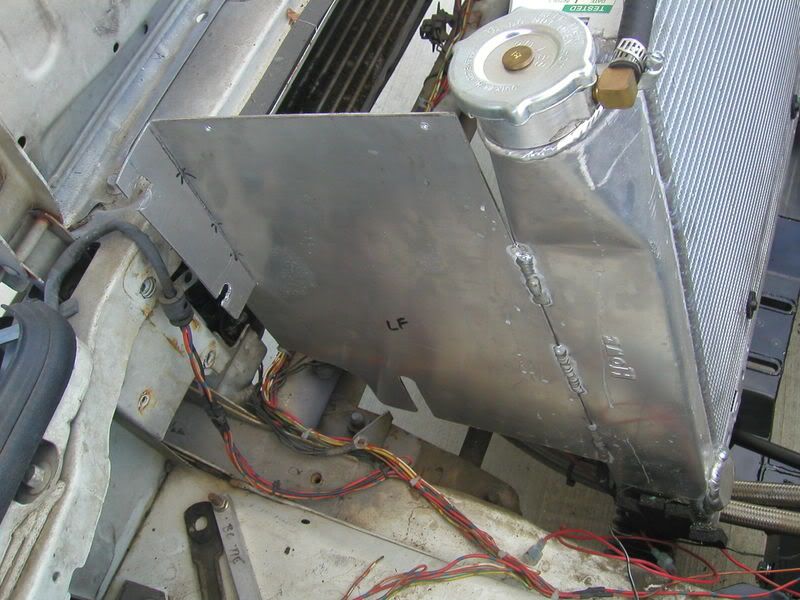
One pic of the driver's side of the radiator. This is with the radiator sitting on to of the rack. You can see the problem. It's pretty obvious.
Another of the radiator bottom
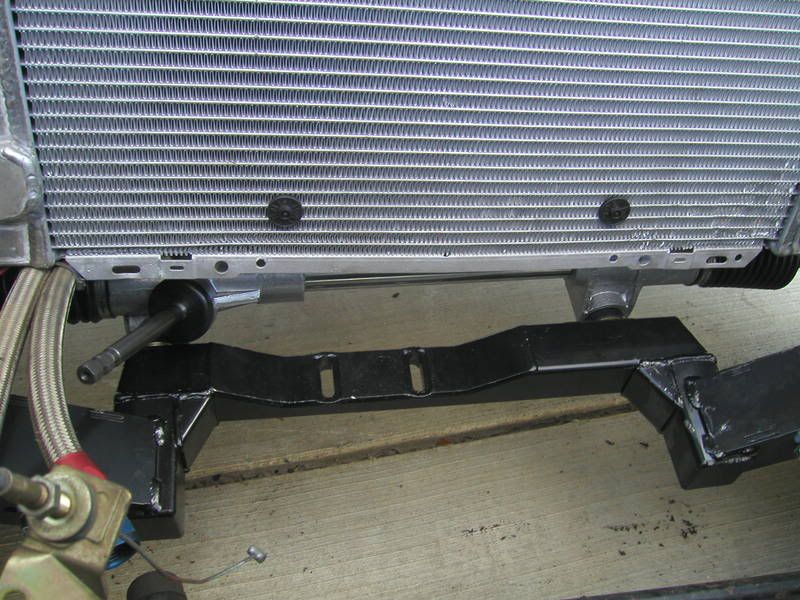
passenger side of radiator is closer due to the pinion of the rack on the driver's side. This won't due.

Pic of the height of the radiator core

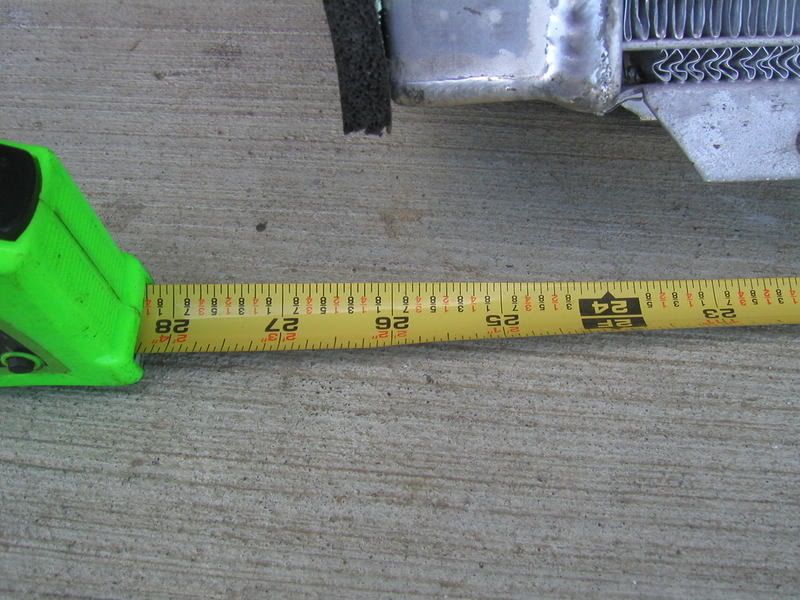
Pic of the overall length of the radiator. It's huge!
A quick side not these are the modified tanks I'll be using plus the rotary aviation oil metering pump adapter. One tank is for coolant one is for oil for the oil metering pump. They have both been modified in the same manner. Taking the nipple off the top and adding it to the bottom. So the coolant tank is not a coolant catch can but actually finctions as a resivour like stock. Plus my stock one looks horrible. The oil tank feeds the oil metering pump by gravity so it's easy to see how it will come out of the bottom to feed the pump. This will allow the use of two stroke oil and then I can use synthetic in the engine.
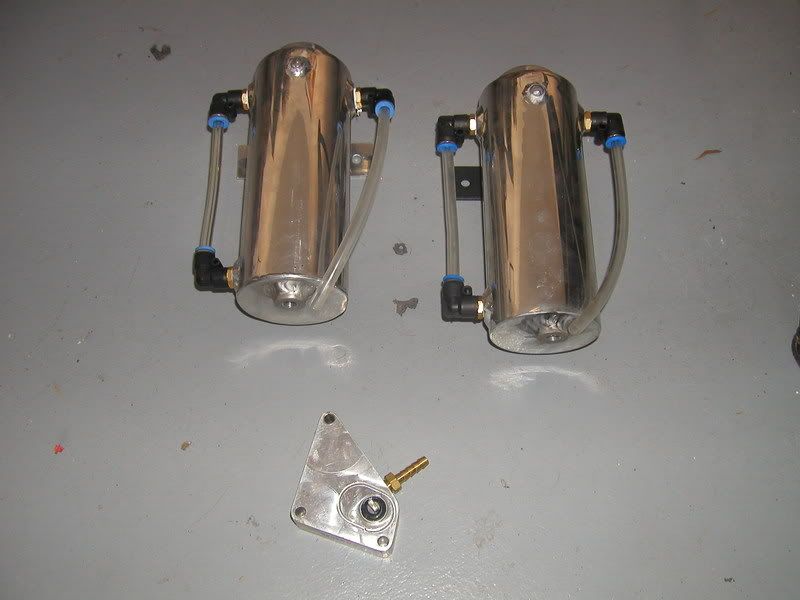
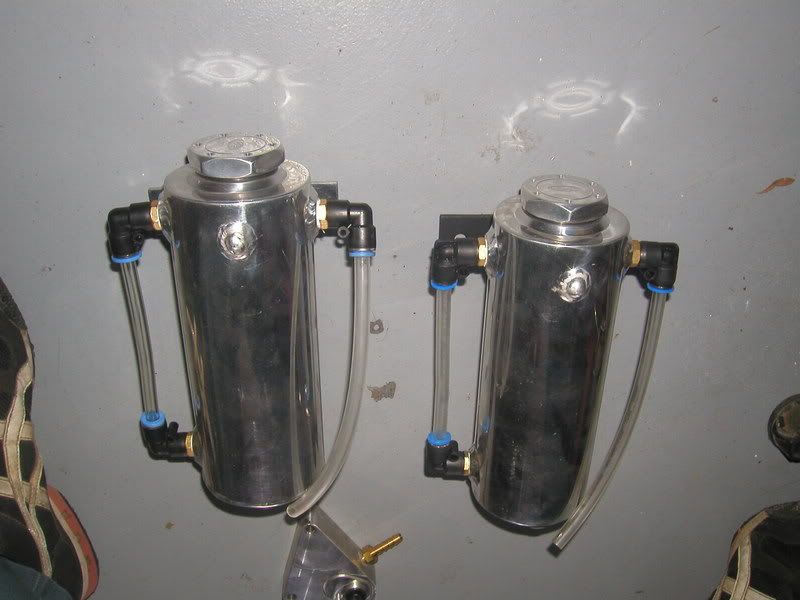
another of the tanks
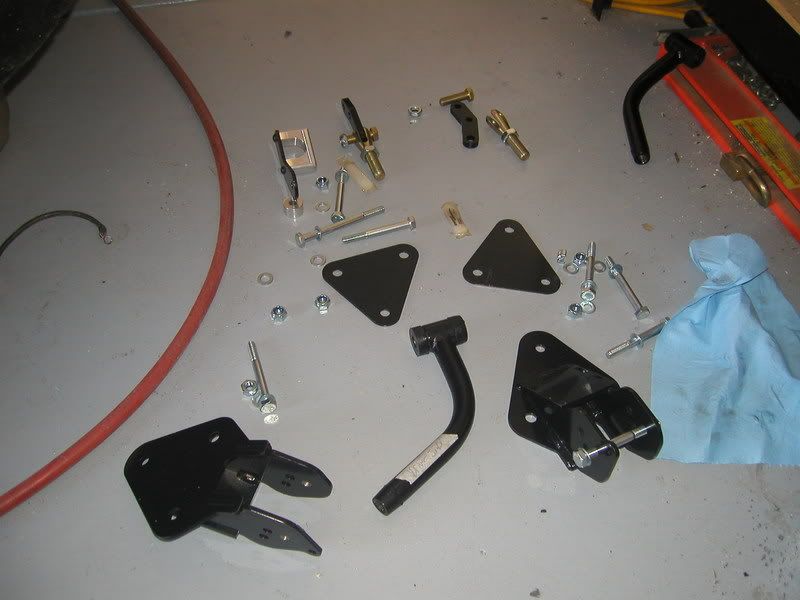
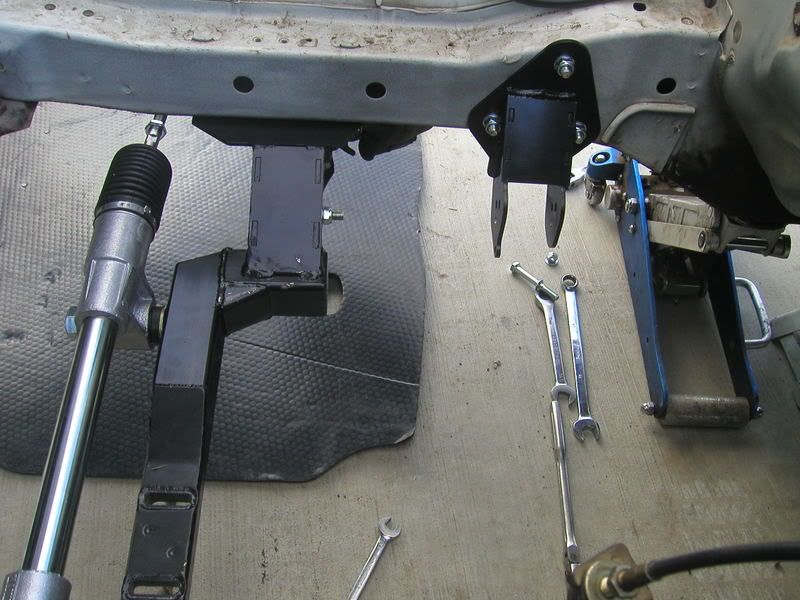
Picture of the new lower rear control links / arms before assembly and their hardware. An interesting thing to note is that they use the same energy suspension bushings as the stock lower control arms so getting replacements will be simple if something bad happens to them. Billy is smart.
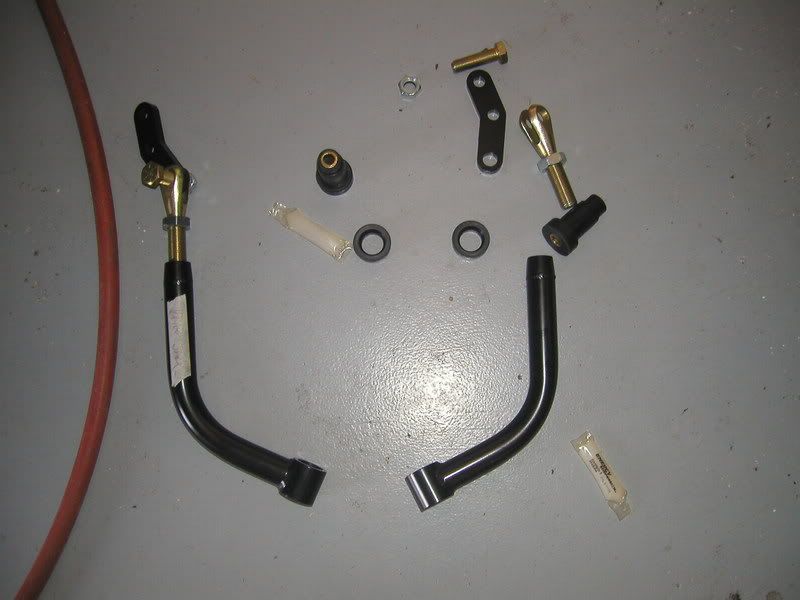
A picture of the rear control arm brackets and their hardware
Picture of the front of the car with the old steering linkage hanging down. That crap has got to go! Also a broken Honda motor in the foreground that I got for free hopeing it was still good enough to put in my daily driver civic. Bent valves! *****.
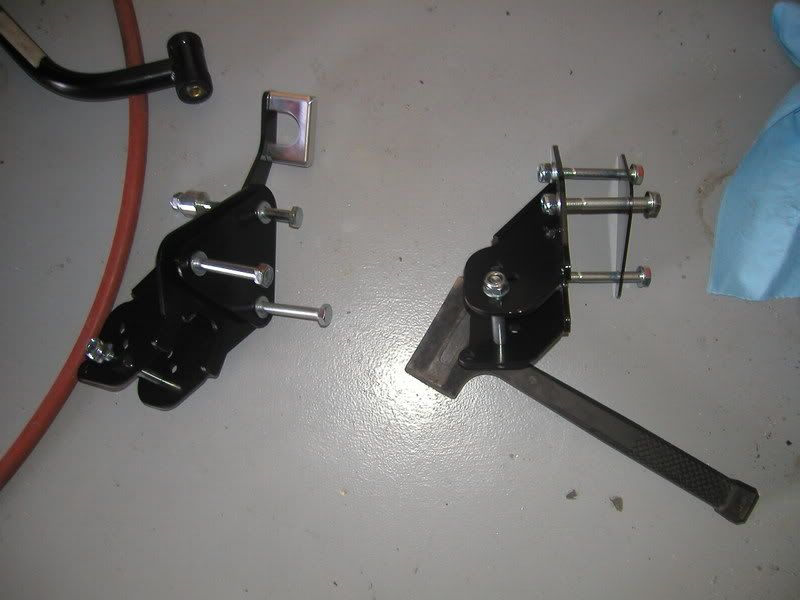
Another pic of the new control arms and brackets. the bushings installed in the arm this time and the hardware all apart
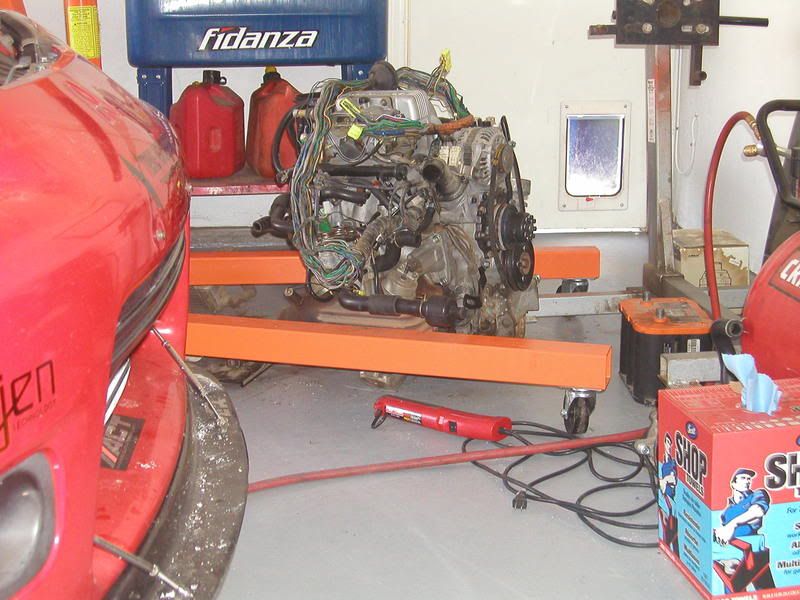
Pic I took when I was smoking a cigarette on a break of the S5 motor that will be living in my 7 soon. And the dreaded DSM.
One of the idler arm unbolted and the bolts on the ground there.
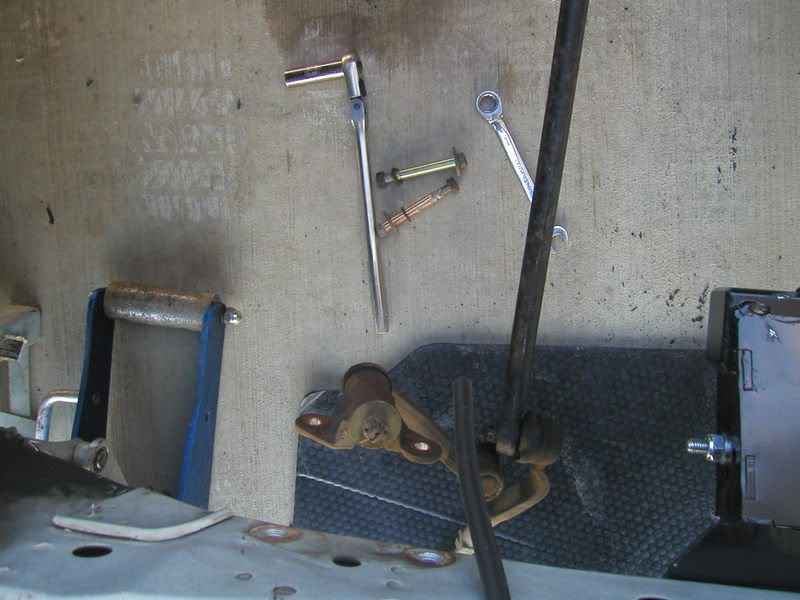
steering linkage off the car. i just removed it from the pitman arm and left the steering box behind

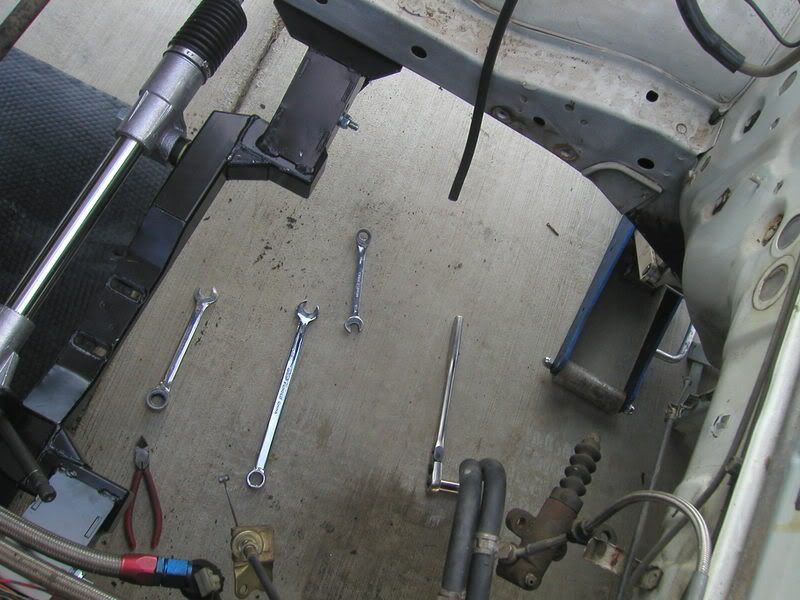
A pic with the linkage gone. It seems like there is so much room in there now
pic of the outside metal plate of the rear lower control arm bracket.
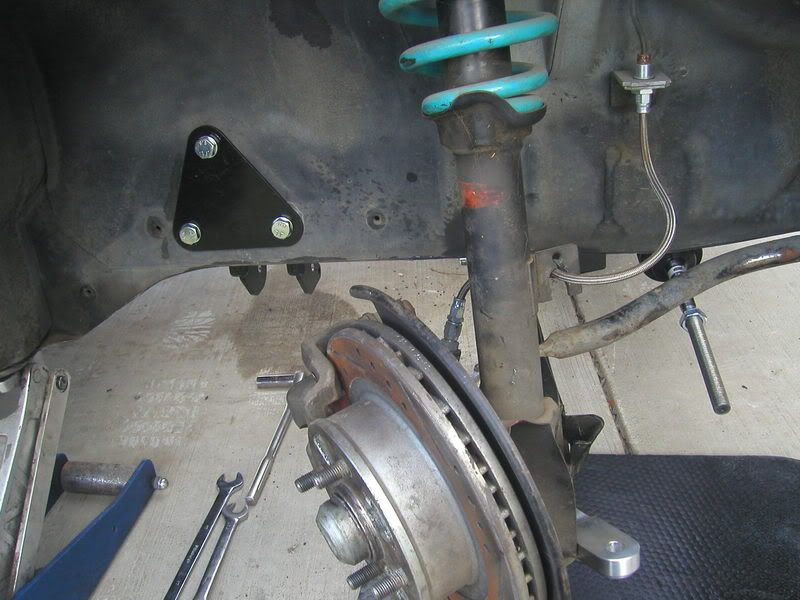
Bracket installed pic from the inside
First pic is of the rack and it's hardware. It comes with the polyurethane bushings.
Next is of it bolted on loosely for a test fit of the radiator
This one is of the oil cooler lines which are going to be rerouted when more things are established since they would obviously saw right through that nice new steering boot.
One pic of the driver's side of the radiator. This is with the radiator sitting on to of the rack. You can see the problem. It's pretty obvious.
Another of the radiator bottom
passenger side of radiator is closer due to the pinion of the rack on the driver's side. This won't due.
Pic of the height of the radiator core
Pic of the overall length of the radiator. It's huge!
A quick side not these are the modified tanks I'll be using plus the rotary aviation oil metering pump adapter. One tank is for coolant one is for oil for the oil metering pump. They have both been modified in the same manner. Taking the nipple off the top and adding it to the bottom. So the coolant tank is not a coolant catch can but actually finctions as a resivour like stock. Plus my stock one looks horrible. The oil tank feeds the oil metering pump by gravity so it's easy to see how it will come out of the bottom to feed the pump. This will allow the use of two stroke oil and then I can use synthetic in the engine.
another of the tanks
Picture of the new lower rear control links / arms before assembly and their hardware. An interesting thing to note is that they use the same energy suspension bushings as the stock lower control arms so getting replacements will be simple if something bad happens to them. Billy is smart.
A picture of the rear control arm brackets and their hardware
Picture of the front of the car with the old steering linkage hanging down. That crap has got to go! Also a broken Honda motor in the foreground that I got for free hopeing it was still good enough to put in my daily driver civic. Bent valves! *****.
Another pic of the new control arms and brackets. the bushings installed in the arm this time and the hardware all apart
Pic I took when I was smoking a cigarette on a break of the S5 motor that will be living in my 7 soon. And the dreaded DSM.
One of the idler arm unbolted and the bolts on the ground there.
steering linkage off the car. i just removed it from the pitman arm and left the steering box behind
A pic with the linkage gone. It seems like there is so much room in there now
pic of the outside metal plate of the rear lower control arm bracket.
Bracket installed pic from the inside
Thread Starter
Joined: Sep 2005
Posts: 532
Likes: 1
From: Abilene, TX
Another of the inside different angle
horn button removed. Although not nesseccary for everyone. It just makes it easier for my steering wheel puller to get in there.
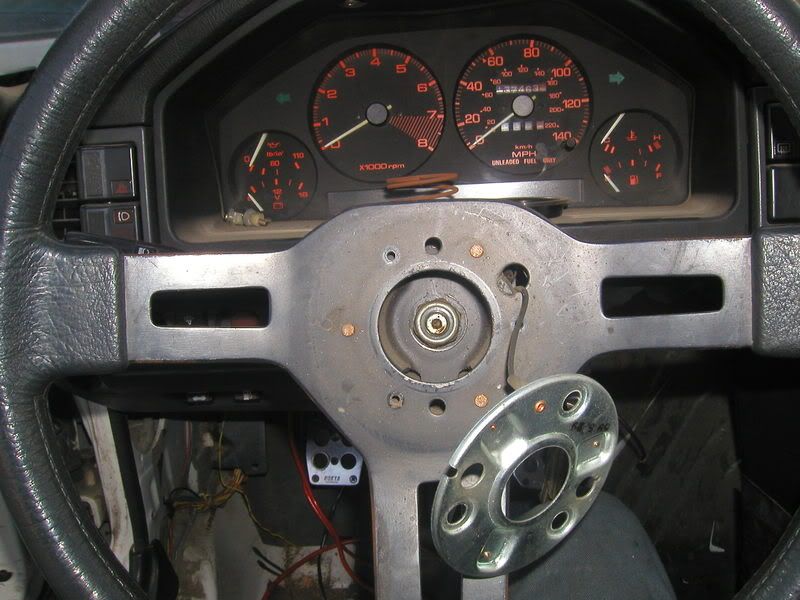
Steering wheel removed and out of the way. Also this reveals why my turn signal cancel has never worked on this car. Just one more thing to replace. Yeah! you probably noticed there is no wiper controls right? Because my wipers are controled by a switch in the center console. Middle off, down is low wipers , and up is the high setting. I don't have to use them much here and would rather not hit the stock when it's by the steering wheel. Plus it makes the wiring simpler and I don't have the CPU to do the intermittent part anymore anyways.
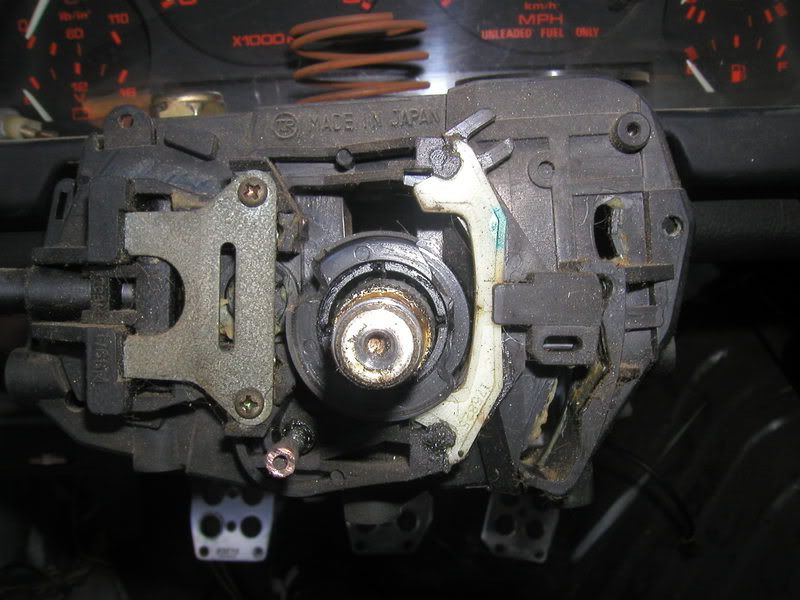
And this is where I left off today since i was getting cold and hungry like a little orphan. The housing removed. Tomorrow I should be tackling the steering box remova and the steering linkage modification. Hopefully nothing else is broken. So far so good and everything has fit without a single issue so far. I'm excited as each time I work on it the car gets better.
horn button removed. Although not nesseccary for everyone. It just makes it easier for my steering wheel puller to get in there.
Steering wheel removed and out of the way. Also this reveals why my turn signal cancel has never worked on this car. Just one more thing to replace. Yeah! you probably noticed there is no wiper controls right? Because my wipers are controled by a switch in the center console. Middle off, down is low wipers , and up is the high setting. I don't have to use them much here and would rather not hit the stock when it's by the steering wheel. Plus it makes the wiring simpler and I don't have the CPU to do the intermittent part anymore anyways.
And this is where I left off today since i was getting cold and hungry like a little orphan. The housing removed. Tomorrow I should be tackling the steering box remova and the steering linkage modification. Hopefully nothing else is broken. So far so good and everything has fit without a single issue so far. I'm excited as each time I work on it the car gets better.
The column modification isn't that difficult, you are coming along nicely, nice to have shiny new parts in there right?
I'm not sure what I'm gonna do about my oil lines, but same problem they are right on top of the steering boot.... too bad.
Have fun with the rest of the install!
I'm not sure what I'm gonna do about my oil lines, but same problem they are right on top of the steering boot.... too bad.
Have fun with the rest of the install!
Thread Starter
Joined: Sep 2005
Posts: 532
Likes: 1
From: Abilene, TX
How's your carputer coming? And what program are you using to run "gauges" on screen?
Thread Starter
Joined: Sep 2005
Posts: 532
Likes: 1
From: Abilene, TX

Looking Good!
-billy
The Guages on the carputer is through Megatune (The megasquirt Software) Basically any standalone will give you some sort of guage configuration like that.
Billy ... Thanks for adding a couple more things to my list. You're website is just full of goodies.
Billy ... Thanks for adding a couple more things to my list. You're website is just full of goodies.
I want to do the same with the REPU project. It will have a megasquirt and I had hoped to use the carputer for tuning and some gauge information. Along with MP3 and such, seems like it would be able to replace a good bit of the electronics of a daily driver with one piece.
-billy

Full Member
Joined: Feb 2003
Posts: 60
Likes: 0
From: Wichita, Kansas
You just got to love pics of new parts layed out on the living room carpet. This kits looks very cool. I would love to replace the wondersteer. I wish it would have been out before I put on a brand new Racing Beat front sway bar. It looks like I would not need it any longer with this kit installed.
I am paying attention to your carputer project.
I want to do the same with the REPU project. It will have a megasquirt and I had hoped to use the carputer for tuning and some gauge information. Along with MP3 and such, seems like it would be able to replace a good bit of the electronics of a daily driver with one piece.
-billy
I want to do the same with the REPU project. It will have a megasquirt and I had hoped to use the carputer for tuning and some gauge information. Along with MP3 and such, seems like it would be able to replace a good bit of the electronics of a daily driver with one piece.
-billy

Joined: Feb 2006
Posts: 3,162
Likes: 1
From: London, Ontario, Canada
Your still going to need a front sway bar, the kit does not replace the anti-roll bar, just the steering assembly and crossmember.

Full Member
Joined: Nov 2006
Posts: 152
Likes: 0
From: san francisco
Something like these should work. Bought em from the wankler on here a couple weeks ago,great guy said he got them from sevens only.
Kit looks great and I can add this to my RESPEED outfit. Now gotta see what color matches my engine bay. Nice work I'm sold.
Kit looks great and I can add this to my RESPEED outfit. Now gotta see what color matches my engine bay. Nice work I'm sold.
Thread Starter
Joined: Sep 2005
Posts: 532
Likes: 1
From: Abilene, TX
That looks pretty decent. I'll probably copy that and add a bracket as well. I'm waiting for the new photos to upload to photobucket as I type this. Today did not go well. Not well at all.
Thread Starter
Joined: Sep 2005
Posts: 532
Likes: 1
From: Abilene, TX
Well here goes. I am so ******* mad right now I can't even think!
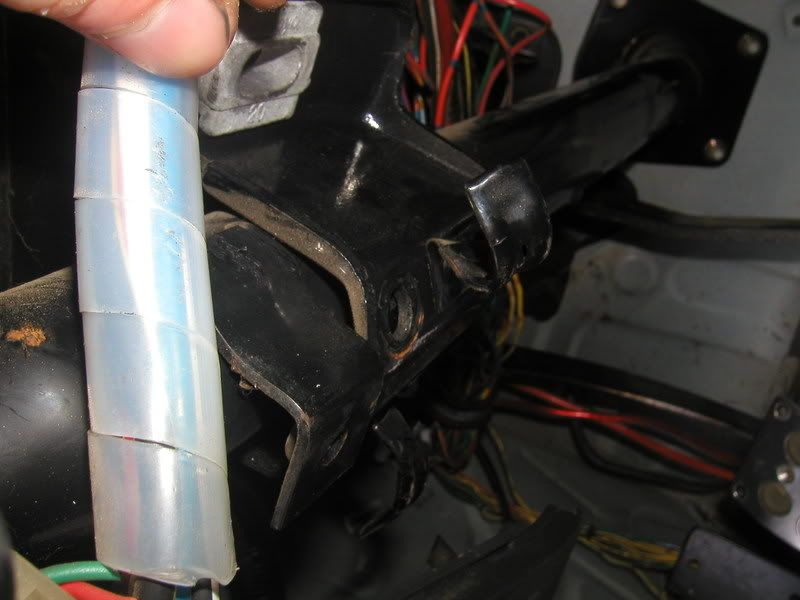
First problem was minor and I could care less about it. Super easy to get around. In this picture you can see a bracket that my stupid *** car has that doesn't allow me to slide the whole assembly out while leaving the bracket to the steering box mounted. No big deal just a bit of extra measuring and it's easy to get around.
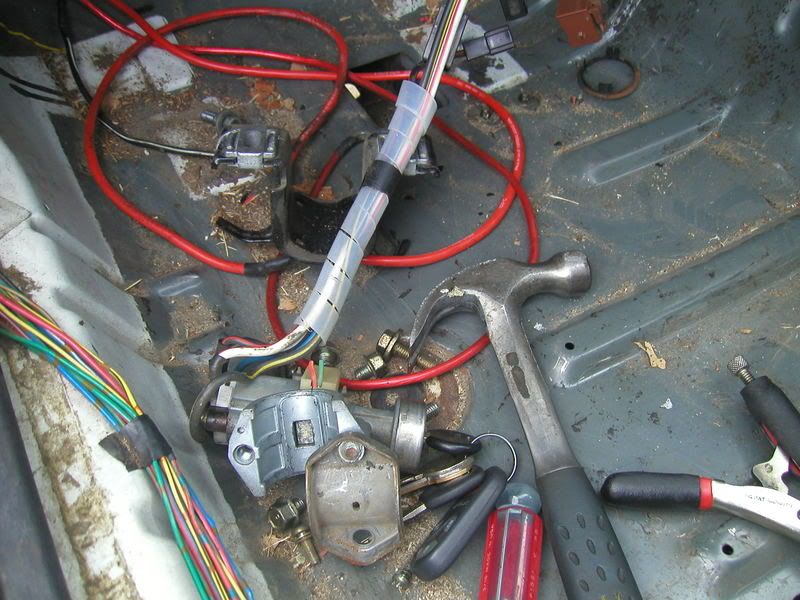
Next was my stuborn ignition housing bolts. One came out ok and the other wouldn't budge. That was a fun 20 minutes wasted. Got that little bitch though here's a picture of it on the floor board. It wasn't really that bad I've just never had so much trouble with one. This was the hardest one I've done out of the dozens I've done in cars before. FUN!
Another pic of the steering column from below. Again you can see the little bracket.
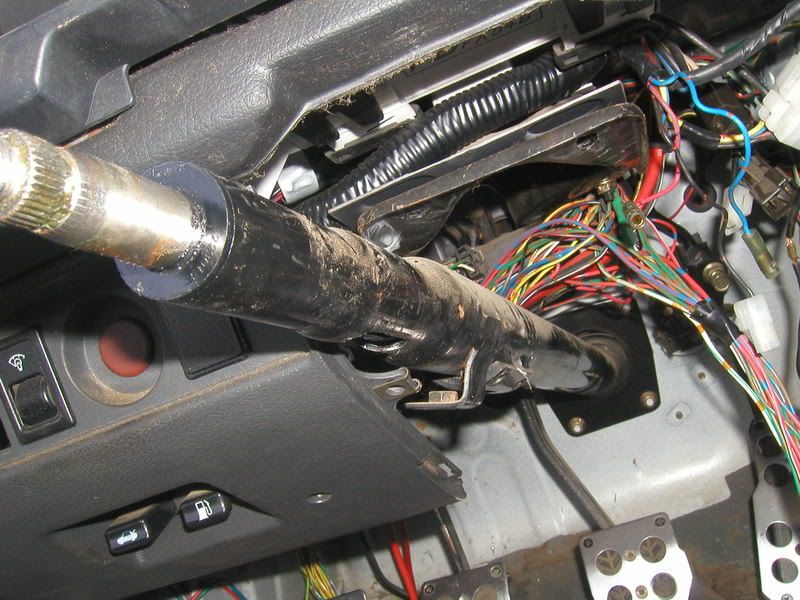
This evil device reomved from the car. It's easy to remove if you don't have a motor. I did not have to remove the crossmember since there was no motor in the car.
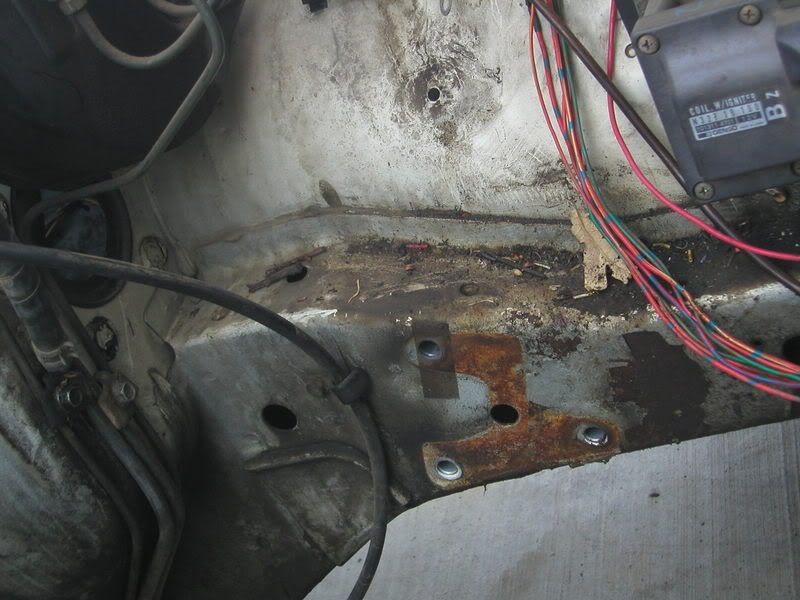
Picture of my frame rail I need to clean up and repaint before the new stuff goes in
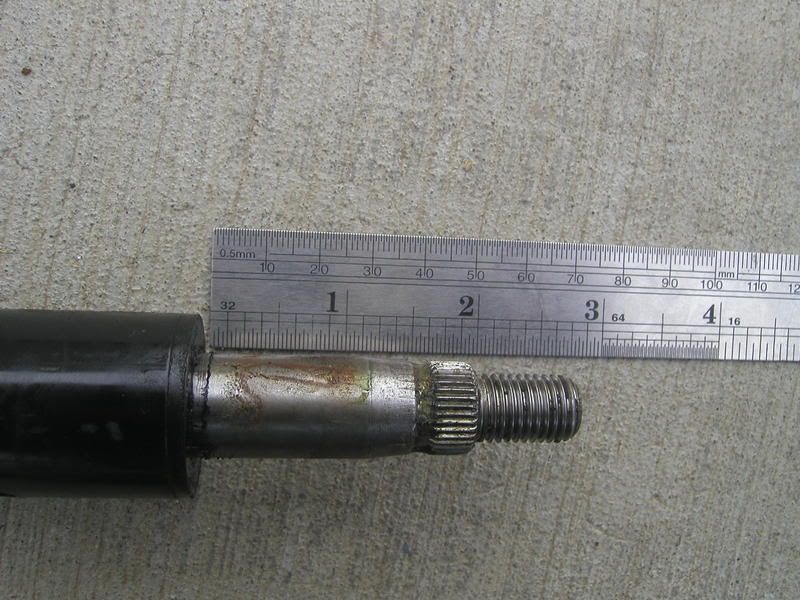
A picture of my measurement so I can insure I have the proper amount of shaft exposed after reassembly. approx. 2 1/2 inches or about 64mm
Another of the bracket. I'm sure my car is probably the only rx-7 in the world with it. My car's are always a bitch about something.

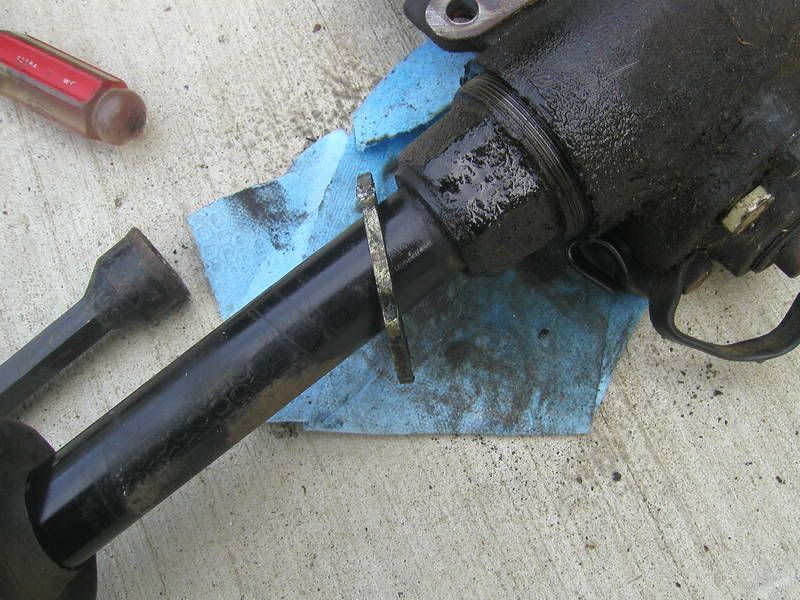
Pic of the ring removed. Kinda a pain in the *** but nothing a screwdriver and hammer couldn't fix. Oh and a lot of wd-40. I still was not even the slightest bit mad at this point
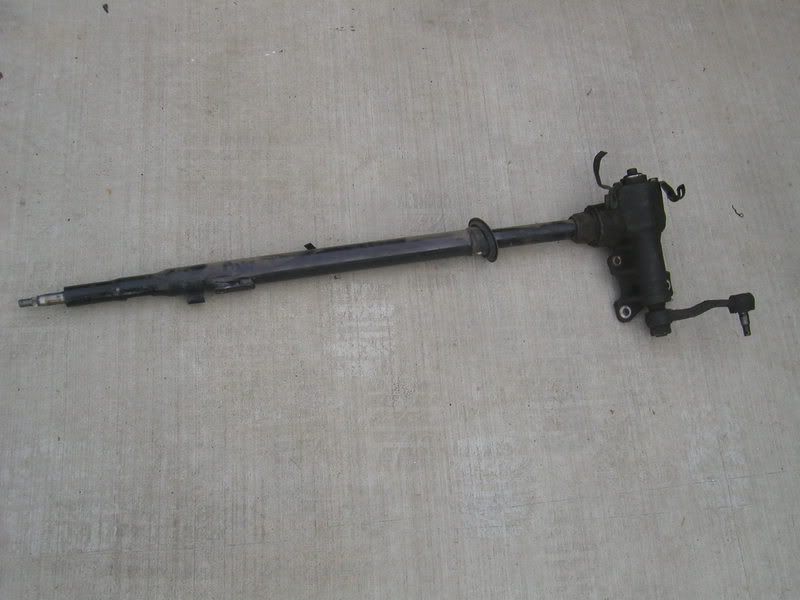
Picture of the steering pinion removed. It was no problem at this point

One with the outter housing removed. Still not mad yet
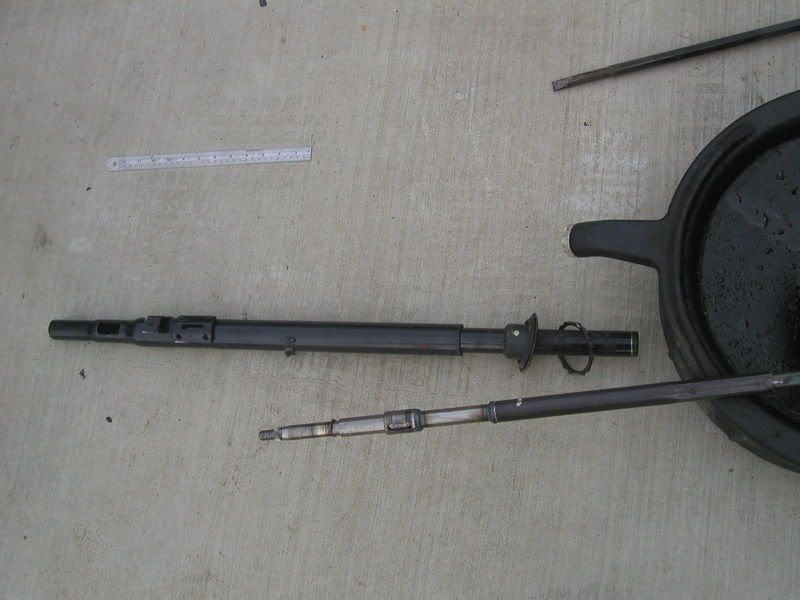
And here it is the biggest mother ******* bastrd *** in the whole world. **** I hate this thing. It figures I'm sure my car will be the only one ever to be magically fused together. This **** will not seperate. ****!!! I hate this thing. God dammit there are not even words for how mad this makes me. It moved about an 1/8 of and inch then is somehow magically fused to the upper part. As you can see from the picture I beat the living **** out of this thing and it did not even budge anymore. Yes I drilled out the plastic but I'm sure it would have sheared off with this much force anyways. I fucked with this thing for about 2 hours and got nowhere. I have no clue why it won't come off. If it would at least come off I could fix the mushroomed end with a grinder and some files. ******* bitch *** mother *****. **** **** ****!!! I just wanted to throw this thing through the windsheild. You have no idea.
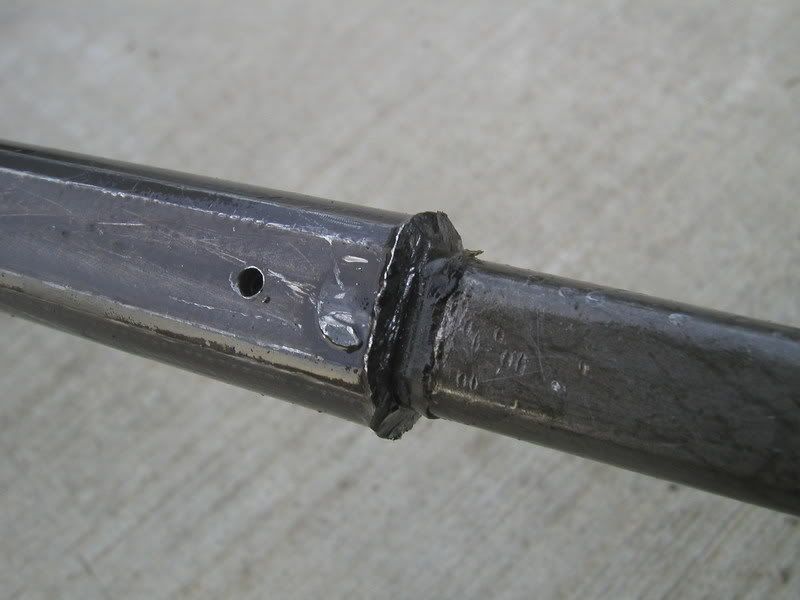
Anyone got an upper steering shaft they will sell me? I will probably go to the junk yard and buy another one and it will probably slide right out. I'm sure it's just mine because I'm so ******* lucky everytime I want to fix the car it costs me a small fortune. If this was a customers car it probably would have fallen out by it's self. And what is that ******* wire attached to the side of the steering shaft???? I have no clue. maybe a piece of that shitbag wire is jambing it up???? I have no idea but I'm mad as ****.
p.s. sorry for all the swearing.
First problem was minor and I could care less about it. Super easy to get around. In this picture you can see a bracket that my stupid *** car has that doesn't allow me to slide the whole assembly out while leaving the bracket to the steering box mounted. No big deal just a bit of extra measuring and it's easy to get around.
Next was my stuborn ignition housing bolts. One came out ok and the other wouldn't budge. That was a fun 20 minutes wasted. Got that little bitch though here's a picture of it on the floor board. It wasn't really that bad I've just never had so much trouble with one. This was the hardest one I've done out of the dozens I've done in cars before. FUN!
Another pic of the steering column from below. Again you can see the little bracket.
This evil device reomved from the car. It's easy to remove if you don't have a motor. I did not have to remove the crossmember since there was no motor in the car.
Picture of my frame rail I need to clean up and repaint before the new stuff goes in
A picture of my measurement so I can insure I have the proper amount of shaft exposed after reassembly. approx. 2 1/2 inches or about 64mm
Another of the bracket. I'm sure my car is probably the only rx-7 in the world with it. My car's are always a bitch about something.
Pic of the ring removed. Kinda a pain in the *** but nothing a screwdriver and hammer couldn't fix. Oh and a lot of wd-40. I still was not even the slightest bit mad at this point
Picture of the steering pinion removed. It was no problem at this point
One with the outter housing removed. Still not mad yet
And here it is the biggest mother ******* bastrd *** in the whole world. **** I hate this thing. It figures I'm sure my car will be the only one ever to be magically fused together. This **** will not seperate. ****!!! I hate this thing. God dammit there are not even words for how mad this makes me. It moved about an 1/8 of and inch then is somehow magically fused to the upper part. As you can see from the picture I beat the living **** out of this thing and it did not even budge anymore. Yes I drilled out the plastic but I'm sure it would have sheared off with this much force anyways. I fucked with this thing for about 2 hours and got nowhere. I have no clue why it won't come off. If it would at least come off I could fix the mushroomed end with a grinder and some files. ******* bitch *** mother *****. **** **** ****!!! I just wanted to throw this thing through the windsheild. You have no idea.
Anyone got an upper steering shaft they will sell me? I will probably go to the junk yard and buy another one and it will probably slide right out. I'm sure it's just mine because I'm so ******* lucky everytime I want to fix the car it costs me a small fortune. If this was a customers car it probably would have fallen out by it's self. And what is that ******* wire attached to the side of the steering shaft???? I have no clue. maybe a piece of that shitbag wire is jambing it up???? I have no idea but I'm mad as ****.
p.s. sorry for all the swearing.
Thread Starter
Joined: Sep 2005
Posts: 532
Likes: 1
From: Abilene, TX
Also if anyone has any suggestion for seperating this it would be appreciated. But I tried many things that I didn't bother to put in my post. I may chop saw the lower part off close to the worm gear bend the end at a 90 degree angle in my press. Hold it with a vise and use a slide hammer on the treaded portion of the shaft. But more than likely this will result in not having threads anymore on the shaft. That would be fun too.