
Pics of my center console progress

Thread Starter
WWW.SUPERCHARGED-RX7.COM
Joined: Jan 2006
Posts: 481
Likes: 1
From: illinois
Pics of my center console progress
So I got another console and decided to do this to it. It came out pretty bad ***:
Here, I cut the part I needed, measured and trimmed my console. Held in place with my glue gun, then I epoxied it.
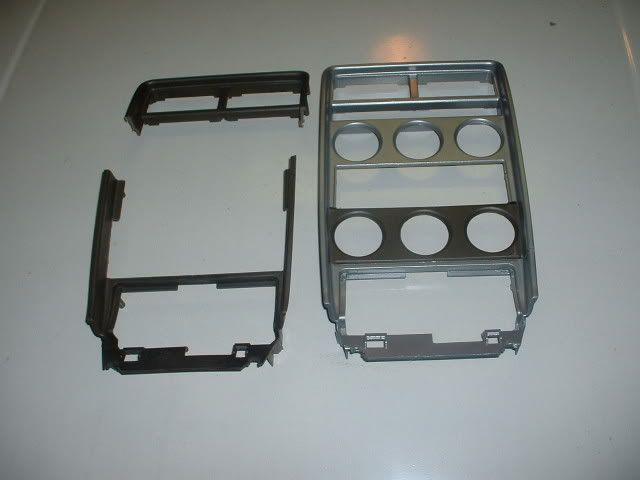
Filled and sand smooth.
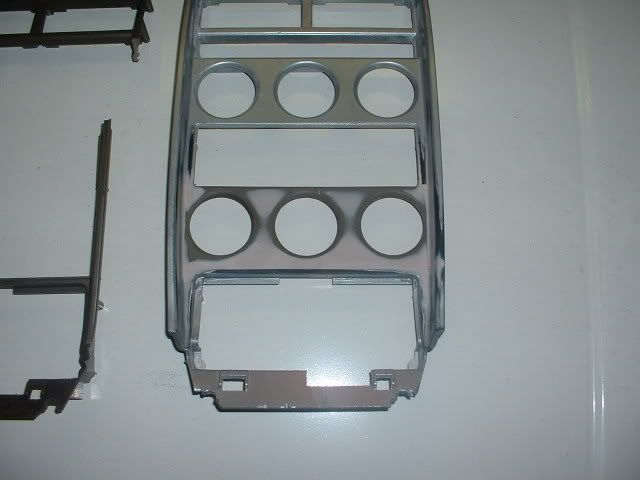
I used high build primer to cover any small imperfections and sand scratches that I couldn't get into. I then sanded again, then used a glazing compound, sanded, then primered again.
As a base I used arctic silver, then 2 coats of ppg clear. I will let that bake under the sun for 24 hours, then I will sand with a fine sand paper and re coat it.
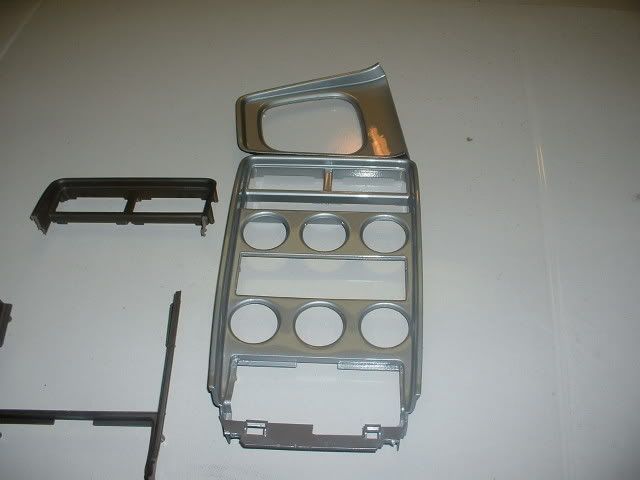
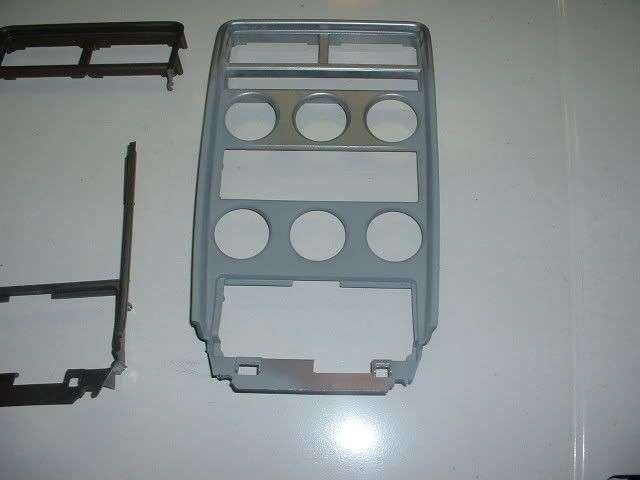
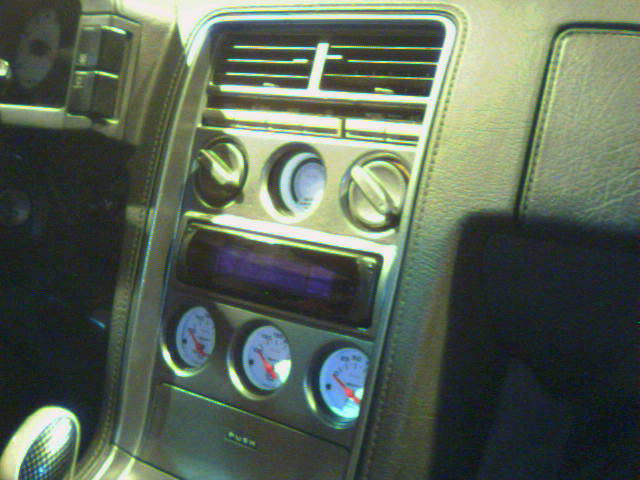
I wanted my gauges to sit behind the holes like the top piece where the clock used to be, so that's why I opted for this method. I also wanted a smooth and long lasting shinny finish.
Here, I cut the part I needed, measured and trimmed my console. Held in place with my glue gun, then I epoxied it.
Filled and sand smooth.
I used high build primer to cover any small imperfections and sand scratches that I couldn't get into. I then sanded again, then used a glazing compound, sanded, then primered again.
As a base I used arctic silver, then 2 coats of ppg clear. I will let that bake under the sun for 24 hours, then I will sand with a fine sand paper and re coat it.
I wanted my gauges to sit behind the holes like the top piece where the clock used to be, so that's why I opted for this method. I also wanted a smooth and long lasting shinny finish.
all I can say is WOW man, a lot of sweat blood and tears went into that and it looks amazing! Looks very professional and I love the color you painted it! Keep up the good work and def post some pics of the finished product.
Ryan
Ryan

Trending Topics


Exceptionally nice work. I officially award you the 1st gen tightass creativity award for the month for inventing and producing a simple and inexpensive solution for our cars using your gray matter and talent, instead of the checkbook.
Looking at the attention to detail you have shown on the rest of the car, this will make a very nice addition, both in appearence and function.
I now bow to the Queen. Keep up the fine work.
Looking at the attention to detail you have shown on the rest of the car, this will make a very nice addition, both in appearence and function.
I now bow to the Queen.
Keep up the fine work.

What?
Joined: Sep 2003
Posts: 3,833
Likes: 1
From: CT
I did almost the same thing, except I made mine out of ABS plastic.


I just added a Cyberdyne voltmeter where the clock was. I could not figure out how to rear mount the gauges. I think may have to take the trim ring off of them to flush them from behind. I don't want to take the gauges apart.
Good job!
I just added a Cyberdyne voltmeter where the clock was. I could not figure out how to rear mount the gauges. I think may have to take the trim ring off of them to flush them from behind. I don't want to take the gauges apart.
Good job!
Admitted Sevenaholic
Joined: Feb 2001
Posts: 1,910
Likes: 0
From: Ashland, OH
Looks great! and somewhat familiar  I went and molded in the surround for the radio also while I was at it. How did you mount your gauges behind it? I made a metal plate that screws to the stock holes in the back and pre mount them on it before installation.
Like everything else on your car, great job!

I went and molded in the surround for the radio also while I was at it. How did you mount your gauges behind it? I made a metal plate that screws to the stock holes in the back and pre mount them on it before installation.Like everything else on your car, great job!
Thread Starter
WWW.SUPERCHARGED-RX7.COM
Joined: Jan 2006
Posts: 481
Likes: 1
From: illinois
Originally Posted by Max7
Looks great! and somewhat familiar I went and molded in the surround for the radio also while I was at it. How did you mount your gauges behind it? I made a metal plate that screws to the stock holes in the back and pre mount them on it before installation.
Like everything else on your car, great job!
I went and molded in the surround for the radio also while I was at it. How did you mount your gauges behind it? I made a metal plate that screws to the stock holes in the back and pre mount them on it before installation.Like everything else on your car, great job!
Props to Max7 for the idea.
Thanks everybody for the compliments!
A little hard work always pays off.
Thread Starter
WWW.SUPERCHARGED-RX7.COM
Joined: Jan 2006
Posts: 481
Likes: 1
From: illinois
Originally Posted by rotor vs. piston
To bad you're already married!!! 
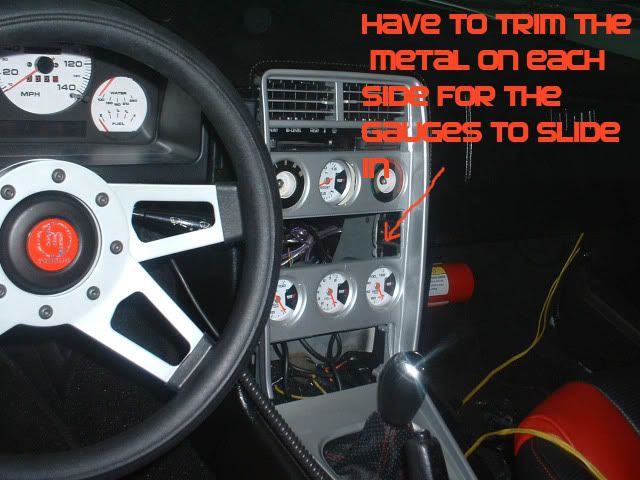
Well I got my gauges in place. I have to trim the metal on the sides that holds the radio just a bit inorder to get them in with the whole console. Ahh it can wait till tomorrow, too tired.
John, check out the attachment. My bracket keeps them from sliding and the hardware that came with the gauges keep them snug. I think this is the way Max did his with the stock screw holes.
Thread Starter
WWW.SUPERCHARGED-RX7.COM
Joined: Jan 2006
Posts: 481
Likes: 1
From: illinois
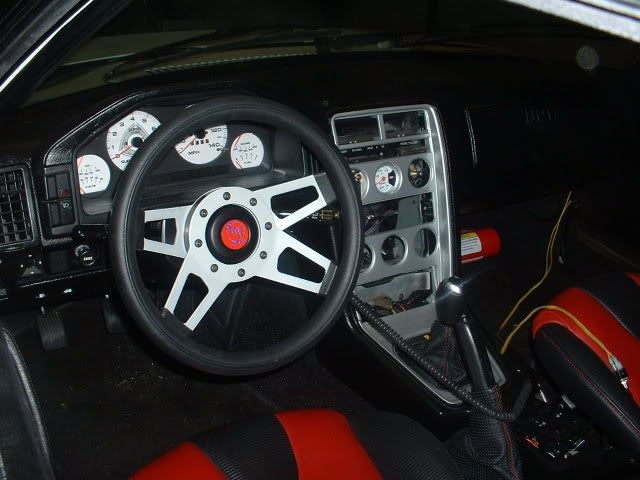
My new gauges to match

I took the needles off and scraped the faded paint off the bottom with an exacto knife. I then painted the bottom of the needles with some orange finger nail polish, after it dried I followed with white fingernail polish to trap the orange light from bleeding onto the gauges. Looks great and they light up nice at night.
I took the needles off and scraped the faded paint off the bottom with an exacto knife. I then painted the bottom of the needles with some orange finger nail polish, after it dried I followed with white fingernail polish to trap the orange light from bleeding onto the gauges. Looks great and they light up nice at night.

Thread Starter
WWW.SUPERCHARGED-RX7.COM
Joined: Jan 2006
Posts: 481
Likes: 1
From: illinois
Originally Posted by 3rd and final 7
i like the gauges too did you get them from scott ?!
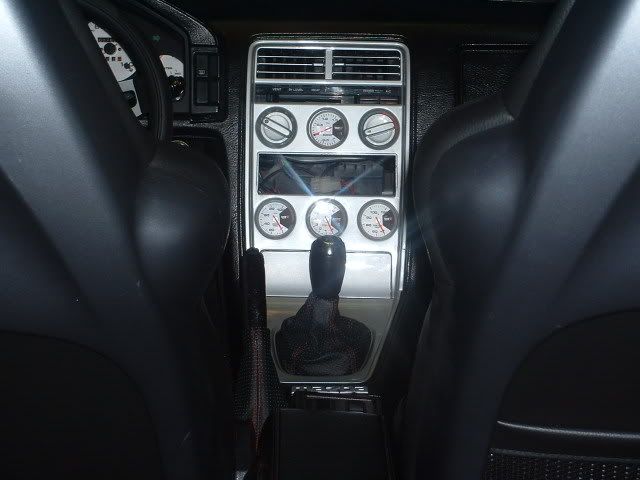
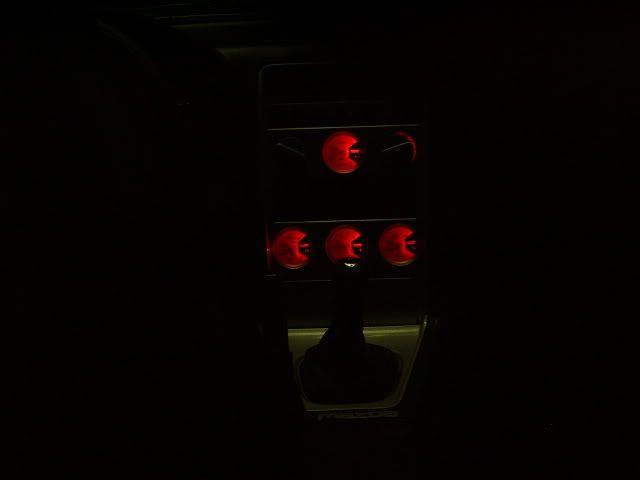
Here's the finished product:
Nice Job. Looks eerily familiar as well.
By the way - I would not trust your engine/car to small 'off brand' gauges.
they are notoriously inaccurate.
Even autometer gauges have some lines that I wouldn't trust either.
By the way - I would not trust your engine/car to small 'off brand' gauges.
they are notoriously inaccurate.
Even autometer gauges have some lines that I wouldn't trust either.