
How to find TDC?

Regardless of where the alignment mark is or was on the pully if molested or not, if you follow this method youll be at TDC, once there mark your pully for TDC and erase the other marks???
Ray,
Sorry about the confusion but people have different methods in finding TDC. To elimnate the confusion, I will refer you to the "flywheel" method.
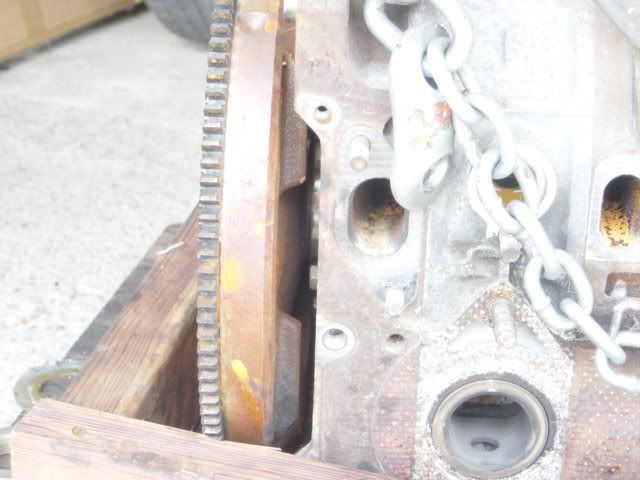
1. Remove the inspeciton plate located on the passenger side engine where the engine and tranny meets.
2. Rotate the e-shaft using a 19mm socket in the front pulley.
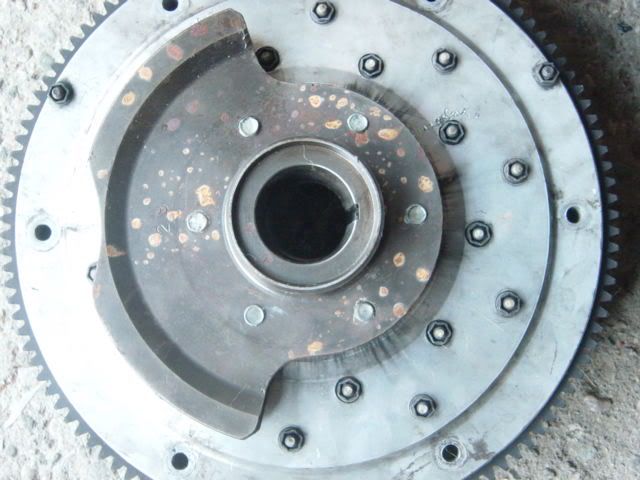
3. Using the flywheel, line up the flat side of the flywheel (back) with the engine block.
Pix A: S5 flywheel but all stock flywheels has a flat side.
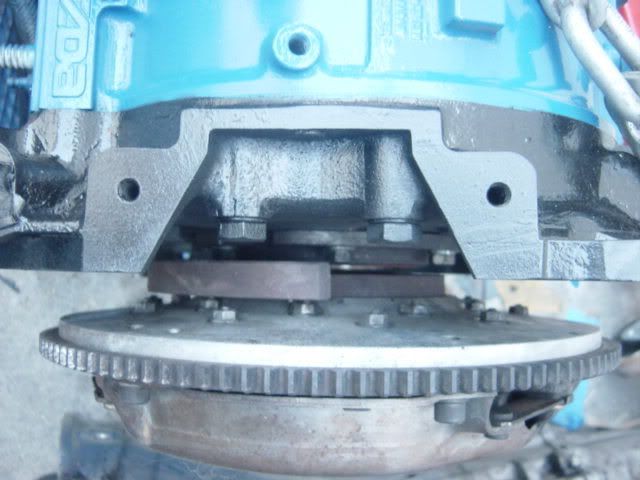
Pix B: This is a stock pre-RX-712-A engine and flywheel but it has same result.
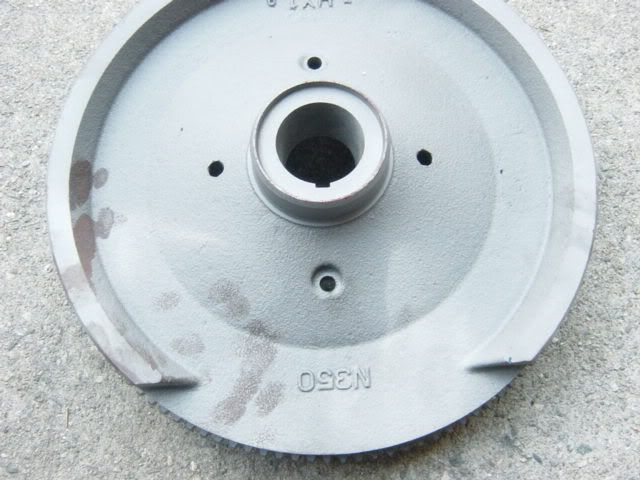
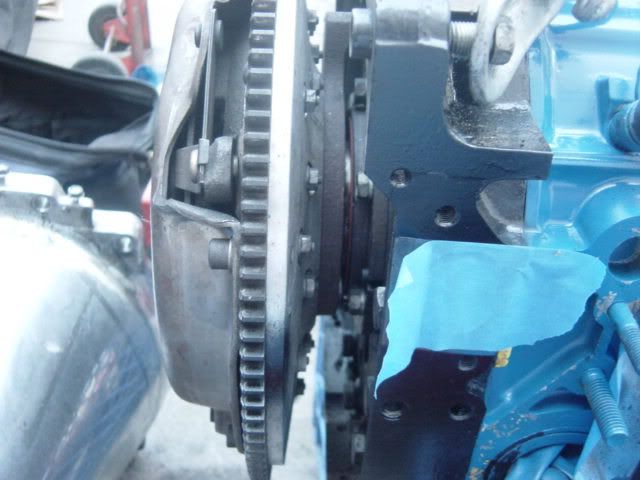
4. Once step #3 is done, look at your front pulley. The notch should be at the pointer.
****If its not the same as the above pix, that pulley has been molested. So, remove the 4 10mm bolts, and re-install the pulley with the notches @ 12:00 position.

SUB-TOPIC for aluminum or lightened steel flywheels including automatic trannies:
Remove inspection plate on top of bellhousing/engine. Rotate the engine until the tip of the rear counterweight is visible That should get you to TDC.
Sorry about the confusion but people have different methods in finding TDC. To elimnate the confusion, I will refer you to the "flywheel" method.
1. Remove the inspeciton plate located on the passenger side engine where the engine and tranny meets.
2. Rotate the e-shaft using a 19mm socket in the front pulley.
3. Using the flywheel, line up the flat side of the flywheel (back) with the engine block.
Pix A: S5 flywheel but all stock flywheels has a flat side.
Pix B: This is a stock pre-RX-712-A engine and flywheel but it has same result.
4. Once step #3 is done, look at your front pulley. The notch should be at the pointer.
****If its not the same as the above pix, that pulley has been molested. So, remove the 4 10mm bolts, and re-install the pulley with the notches @ 12:00 position.
SUB-TOPIC for aluminum or lightened steel flywheels including automatic trannies:
Remove inspection plate on top of bellhousing/engine. Rotate the engine until the tip of the rear counterweight is visible That should get you to TDC.
Wacky,
I need to clarify on the aluminum flywheel situation,
When I remove the inspection plate from the top of the motor, am I looking for the flat spot of the counter weight or the actual "tip" that starts before the flat portion. Also, if looking at the motor from the "rear" of the car, is the keyway at 9 o'clock position as in your photo thus the starting "point" of the counter weight is at 12 o'clock?
Thanks again for all your help
Joe
I had a feeling about that someone will be asking. Once the flywheel is installed, the key should be facing the same direction as the front key. Looking at the flywheell from the tranny side, it should be at 3:00. Again, thats "rear view." Now for top view though the inspection plate (again, top of the bellhousing) the flat side of rear counterweight will be facing the exhaust side. On similar note, the tip should be in between the two engine bolts. Im glad I took px of my newly acquired engine. It has a aluminum flywheel instead of lightened steel. 
Top view:
Side view:
Top view:
Side view:

I tried Jeff's wire method and it didn't work, it was a mess. The only thing I can figure is what you see in this gif:

As the rotor rotates there are three apex seals, and only one belongs to TDC. It's a pig in a poke, you've got a 33% chance of getting the right one. I was hoping for a bit more precision.
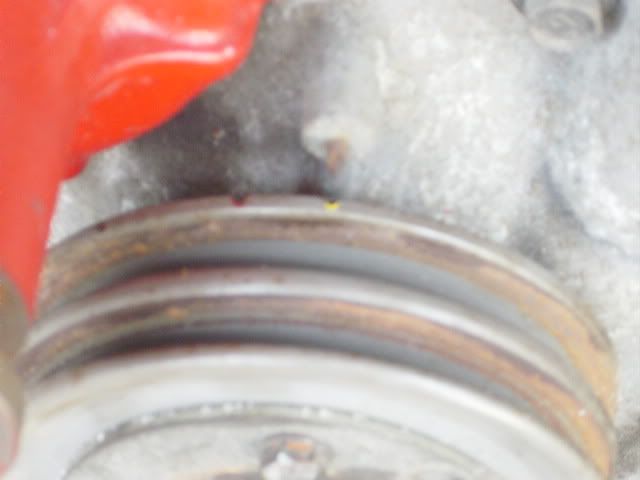
So then I went looking at the flywheel and Wacky's "driver's side inspection panel". This wasn't a simple proposition on my car since the intake manifold is in the way:

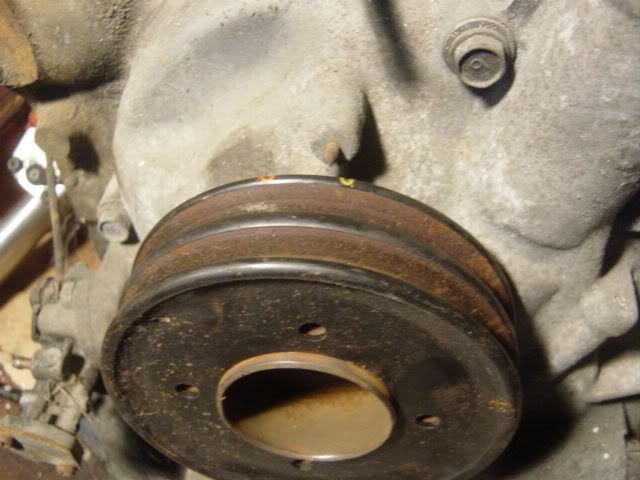
So instead I used the top inspection hole to find "TDC", the point at the middle of the flat place that Wacky was talking about:

Then I rotated the engine 90 degrees counterclockwise, so that the flat part would be in line with the engine casing, as in Wacky's instructions (a certain amount of Jeff's imagination is needed here, since we can't actually see the flywheel through the passenger's side inspection panel in this case):

Then put the dizzy in and set it to point at L1.
It worked, I got the timing back. Now I need to figure out how to tune my stripped down Nikki, which I'm beginning to think is not going to work.
Thanks Guys!
Ray
As the rotor rotates there are three apex seals, and only one belongs to TDC. It's a pig in a poke, you've got a 33% chance of getting the right one. I was hoping for a bit more precision.
So then I went looking at the flywheel and Wacky's "driver's side inspection panel". This wasn't a simple proposition on my car since the intake manifold is in the way:
So instead I used the top inspection hole to find "TDC", the point at the middle of the flat place that Wacky was talking about:
Then I rotated the engine 90 degrees counterclockwise, so that the flat part would be in line with the engine casing, as in Wacky's instructions (a certain amount of Jeff's imagination is needed here, since we can't actually see the flywheel through the passenger's side inspection panel in this case):
Then put the dizzy in and set it to point at L1.
It worked, I got the timing back. Now I need to figure out how to tune my stripped down Nikki, which I'm beginning to think is not going to work.
Thanks Guys!
Ray
Last edited by ray green; Jun 7, 2007 at 09:49 PM.
I had a feeling about that someone will be asking. Once the flywheel is installed, the key should be facing the same direction as the front key. Looking at the flywheell from the tranny side, it should be at 3:00. Again, thats "rear view." Now for top view though the inspection plate (again, top of the bellhousing) the flat side of rear counterweight will be facing the exhaust side. On similar note, the tip should be in between the two engine bolts. Im glad I took px of my newly acquired engine. It has a aluminum flywheel instead of lightened steel.
Top view:
Side view:
Top view:
Side view:

That is the best help I have reieved to date, such clarity and PICS to boot...
Thanks again
Joe
 Interesting to know. I got it to work the first time I tired it because I invented it.
  Anyway, glad you got your TDC figured out.
Well Jeff I'm not sure if it was the wire method or me that failed. This is what I did: I found the apex seal with the wire in the L2 plug hole, then checked the L1 hole with the wire to confirm I was on the rotor face. Then I pointed the dizzy button at dizzy position L1. The timing was lousy.
If you look at this animation:
http://upload.wikimedia.org/wikipedi...le_anim_en.gif
it looks to me like only one of the apex seals corresponds to TDC. So you do have a 33% chance of getting it right the first time. If not, you should still be able to find the right apex seal in the L2 hole by repeating the wire procedure once or twice until you get the right seal lined up with the L2 spark plug hole.
So thanks Wacky and Jeff for the rotary education, if I've still got anything wrong please let us know.
Ray
Hmm, all the apex seals will point to TDC. It just depends on their position in the in the engine. Heh.
The wire method is best for installing a pulley. Then once the pulley is on right, you can stab the dizzy with confidence. You shouldn't try to correctly static time the dizzy with just the wire method.
The wire method is best for installing a pulley. Then once the pulley is on right, you can stab the dizzy with confidence. You shouldn't try to correctly static time the dizzy with just the wire method.
With the wire method, as long as you feel the rotor in the front housing and none in the rear, that wil give you an idea that you're on the right track.
Line up the notches and PAY ATTENTION to the 10mm bolt near 12:00 position.
If that notches are nowhere near the timing pointer, refer to my other post on molested pulleys.
Line up the notches and PAY ATTENTION to the 10mm bolt near 12:00 position.
If that notches are nowhere near the timing pointer, refer to my other post on molested pulleys.
Hey wacky is this right? I am having some tuning issues and am still kinda scrathcing my head with this ****. cuz your method and jeffs i still think contradict.

lol. of course there will be a slightly difference. 12-A timing notch is exactly at 0 whereas with 13-B it varies, it could be 10 or whatever. Thats why I mentioned several times before that you have to look at the 10mm bolt. 
Honestly, I feel that you dont understand the idea behind the "flywheel" and "spark plug" tricks. Just for clarification, either of the tricks will ensure that the front rotor is in the right position. If the timing marks are on top, then your next step is to line it up; if not, see prior posts on molested pulleys. Then line up the marks on the distributor gear and housing, and drop it in. I have been doing this for over a decade and it never fails me. If it doesnt work for you, then there is a missing piece to your puzzle.
"Then line up the marks on the distributor gear and housing, and drop it in"
Wacky, this obvious step might be a source of a problem I'm having.
Does this mean that you point the rotor button to L1 when the dizzy is in place and the adjustment plate is located over the tightening hole? Or is there something more to it?
Thanks
Ray
Wacky, this obvious step might be a source of a problem I'm having.
Does this mean that you point the rotor button to L1 when the dizzy is in place and the adjustment plate is located over the tightening hole? Or is there something more to it?
Thanks
Ray

Thread
Thread Starter
Forum
Replies
Last Post
Jeff20B
1st Generation Specific (1979-1985)
73
Sep 16, 2018 07:16 PM
Apoc3D
2nd Generation Specific (1986-1992)
10
Sep 5, 2015 10:24 AM