When you click on links to various merchants on this site and make a purchase, this can result in this site earning a commission. Affiliate programs and affiliations include, but are not limited to, the eBay Partner Network.
Thought I would share a recent repair of my 1984 GSL-SE oil cooler.
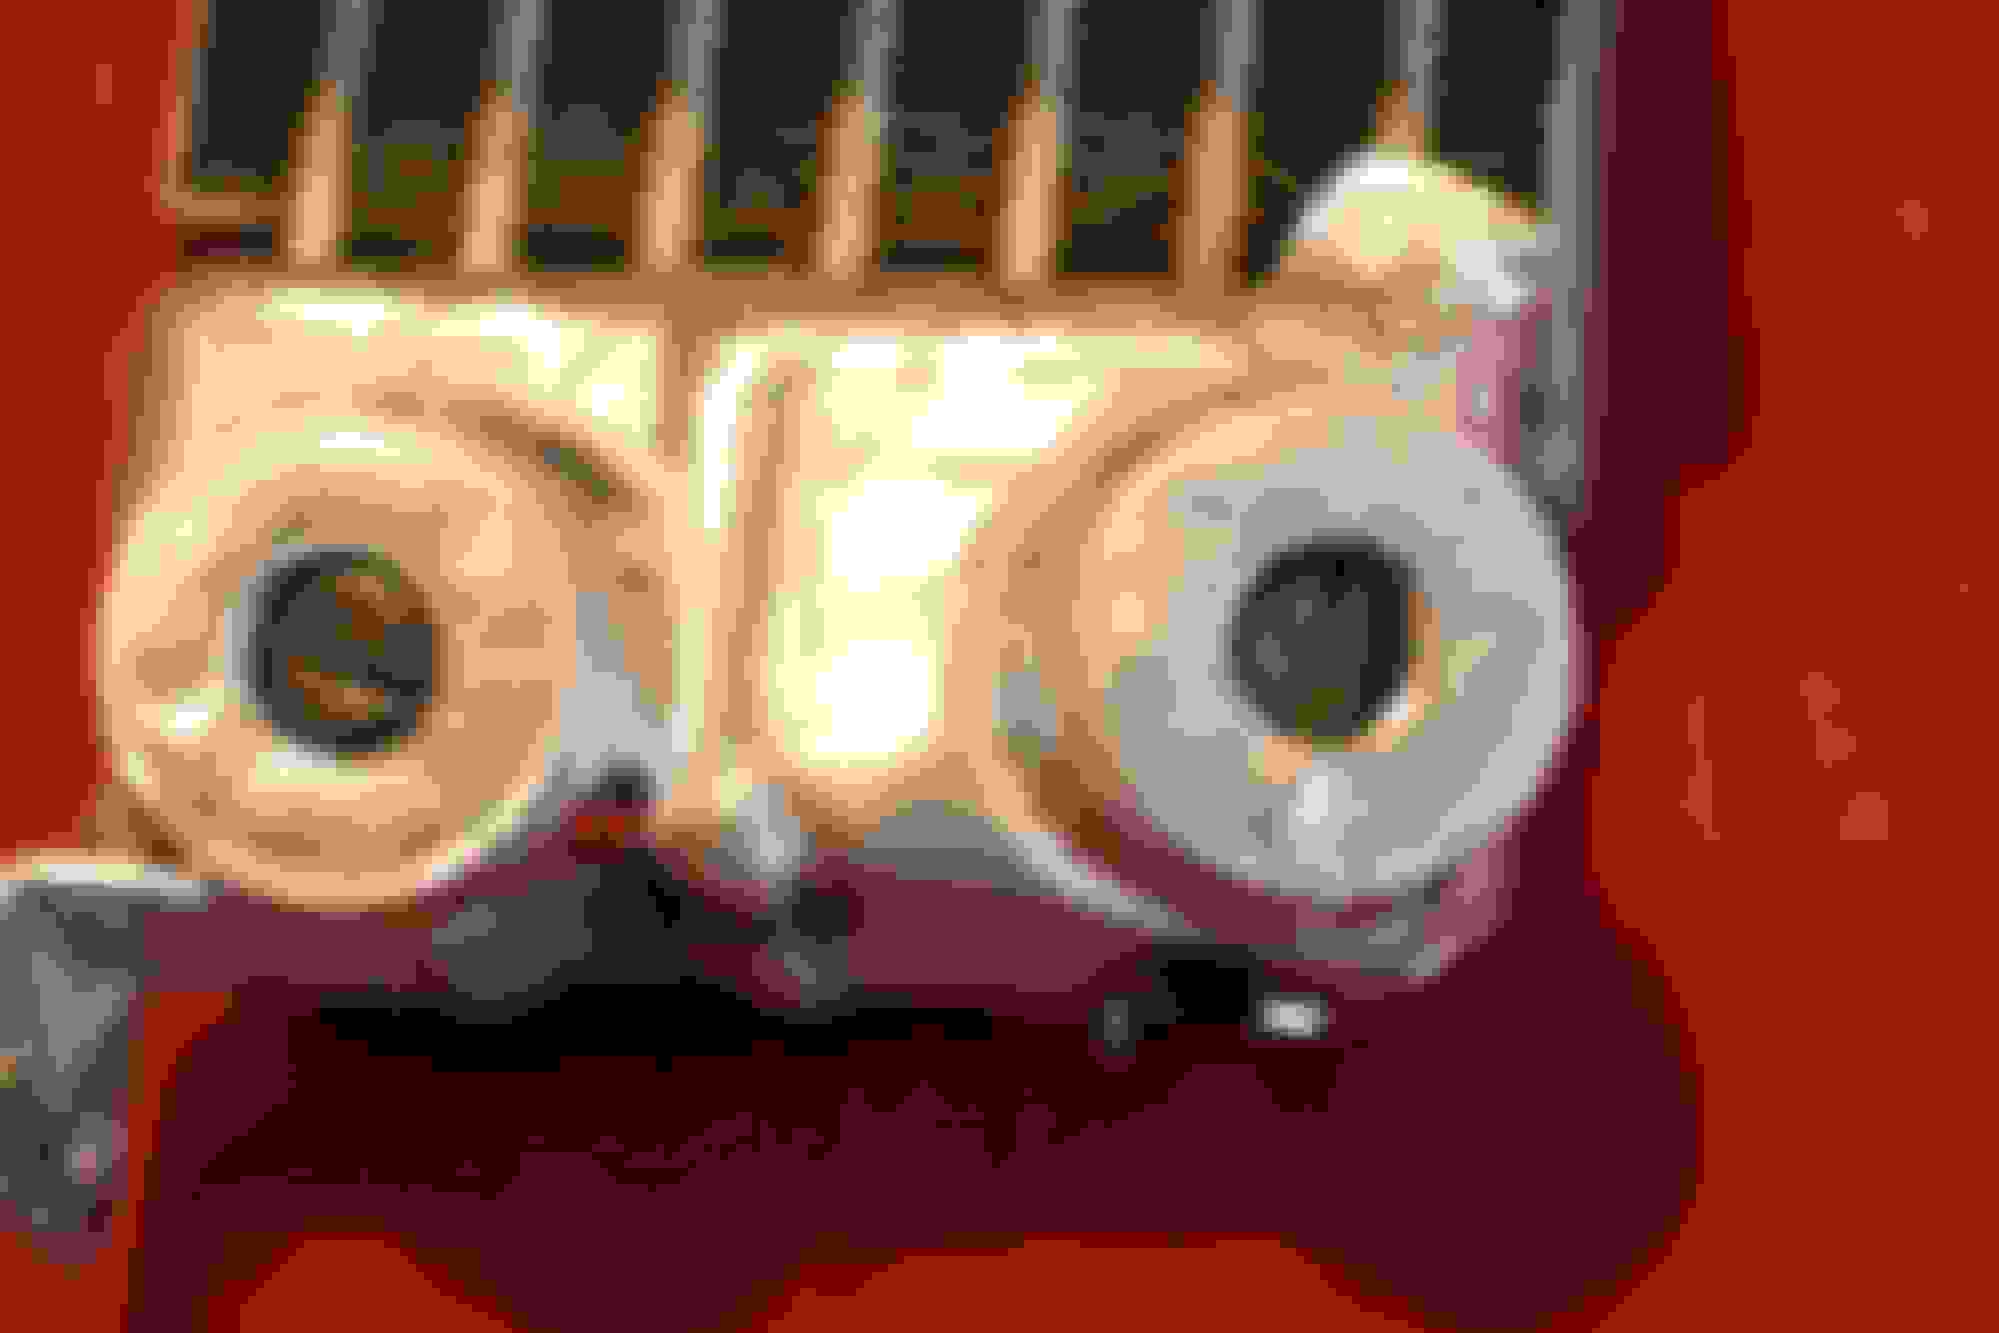
The lower fitting had cracked from the face where the crush washer sits to a half inch down the side. This repair keeps the possibility of getting metal chips into the cooler to a minimum.
The parts used were
1. 16 X 1.5 Tap
2. A 6061 Aluminum pipe 1.49 O.D, .982-.992 I.D. sourced off the shelf from the local metal vendor.
3. A 16 X 1.5 Bolt, ACE is the place
4. 1 gallon of Acetone
5. New Crush washers
6. Can of "The Right Stuff sealant"
Two plugs were made and slotted from a 16 X 1.5 bolt to insert into the cooler when the fittings were removed. Used to prevent FOD while sanding down the welds.
The aluminum pipe was cut to length leaving a little a little protrusion beyond where the crush washer sits. Then I used some files and a sander with 80 grit paper to shape the sides that but up against the oil cooler body. Once they sit up against the body nicely with a good area around for welding they were set up in a vise and i decked the face that with sit even with the crush washer with a sander, I used 80 grit.
After welding from various angle views. The sleeve bottoms are welded completely. The crack was welded and the top welded. The tops will be sanded to allow for the crush washer to seat properly. The upper thread had some weld that was cleaned up with the TAP.
"NOTE" Remove oil cooler thermostat prior to welding. Flush the cooler with Acetone to remove any oil residue.
Last edited by Tripple 7's; Sep 8, 2018 at 01:46 AM.
Reason: NOTE added
The fittings were installed using a bead of "The Right Stuff' sealant in a can. The threads were coated along with above and below the crush washer. The Factory had used a sealant as well, noted during removal of the fittings. This only adds to leakage protection of the crush washers, any excess was wiped away. This was also done on the thermostat plug.
Crush washers were sourced from the local parts store
Dorman P/N 095-002 16 mm washers for the fittings 2 qty needed
Dorman P/N 66222 Washer assortment, contains one that fits the thermostat plug.
Installation into the car was the same as removal and no interference noted from the sleeved fittings. Zero leakage noted as well
Last edited by Tripple 7's; Sep 8, 2018 at 02:00 AM.
Reason: washer numbers added
That's a great way to beef up the bungs on the oil cooler. The repair was executed very well! The only question I have is how much difference is there in the height of the new bungs versus the old bungs? The reason I ask is I hope the extra height does not cause the oil cooler lines to want to bunch up at any spot. You can always make your own if this is the case. I don't think you'll have an issue with that cooler leaking at the bungs ever again!
That's a great way to beef up the bungs on the oil cooler. The repair was executed very well! The only question I have is how much difference is there in the height of the new bungs versus the old bungs? The reason I ask is I hope the extra height does not cause the oil cooler lines to want to bunch up at any spot. You can always make your own if this is the case. I don't think you'll have an issue with that cooler leaking at the bungs ever again!
The bungs are still at the same height, that was not changed. just the O.D. with the sleeve.
Very cool repair to see, nice work! While many would just go out and replace the part, you went above and beyond here. These types of fixes are always very pleasing for classic car guys to see.
I debated buying a new cooler at $550, a new one has the same weak spot and figured i had nothing to loose trying to fix the old one.
Great job, great thinking and great thread.. I had a radiator shop weld one of mine many moons ago and it lasted about 8 more years before it cracked again, at that point I broke down and bought a new one. I think I still have the old one though and your idea may help me repair it for future use.
had to weld repair on my cooler as well.. I machined some new bosses that I planned to cut old ones off and reweld new ones on... same theory prob more work... 2 years later I come across this repair... hhaha... luckily the first repair I tried on a replacement cooler (same issue) I was able to dremel along cracked area, clean clean clean with liberal use of heat and acetone... then weld along cracks etc... thankfully mine to this day isnt leaking so I havent modified my original one with the new bosses