
What did you do to your FB today?

Wait 'til you see it in the car. I've decided to go light steel on this instead of aluminum. It's supposed to be a daily driver. The 215mm pressure plate looks better too.  That 225mm in the pic is all rusty. Low mileage; the 215mm is lower mileage though. I'll just save the 225mm for something else.
Yeah, like a bronze. It is Dupli•Color� DE1651 CAST COAT IRON engine enamel with ceramic.
Nice job on the hot start assist fix. I have an FB one around here, but I know it's not technically accurate on an SA. Plus you like it more if you fix it yourself.
That 225mm in the pic is all rusty. Low mileage; the 215mm is lower mileage though. I'll just save the 225mm for something else.Yeah, like a bronze. It is Dupli•Color� DE1651 CAST COAT IRON engine enamel with ceramic.
Nice job on the hot start assist fix. I have an FB one around here, but I know it's not technically accurate on an SA. Plus you like it more if you fix it yourself.
I like the "icey" one too Jeff...
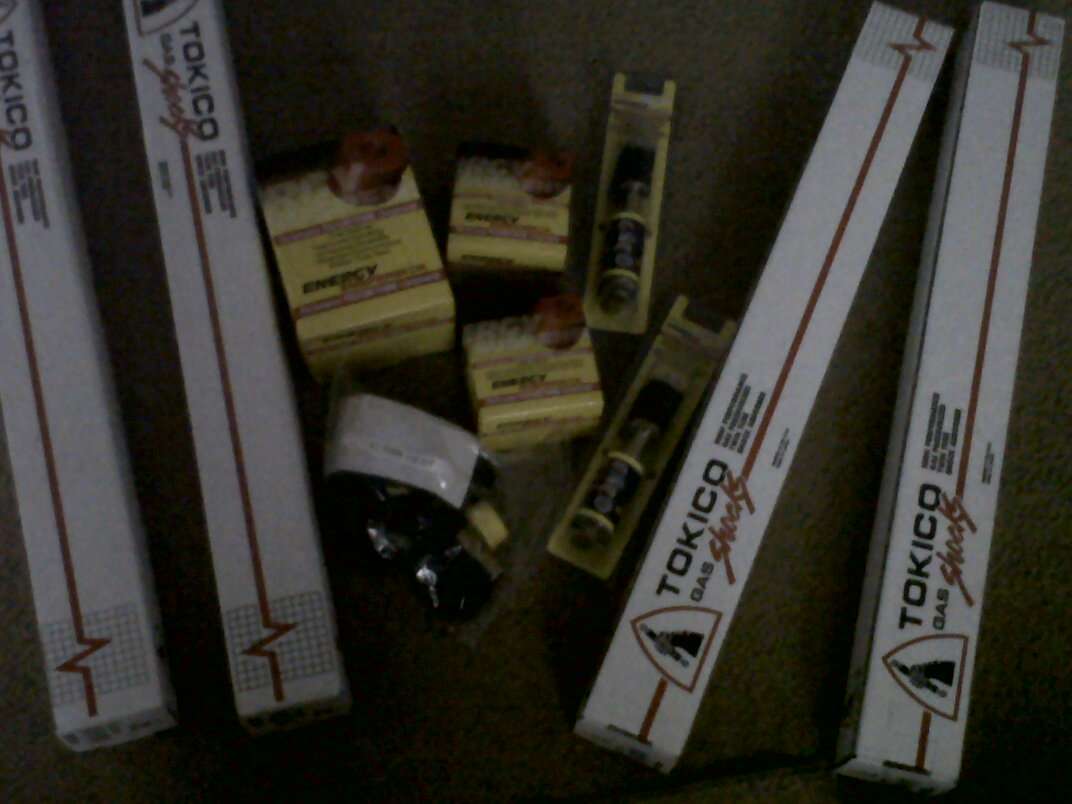
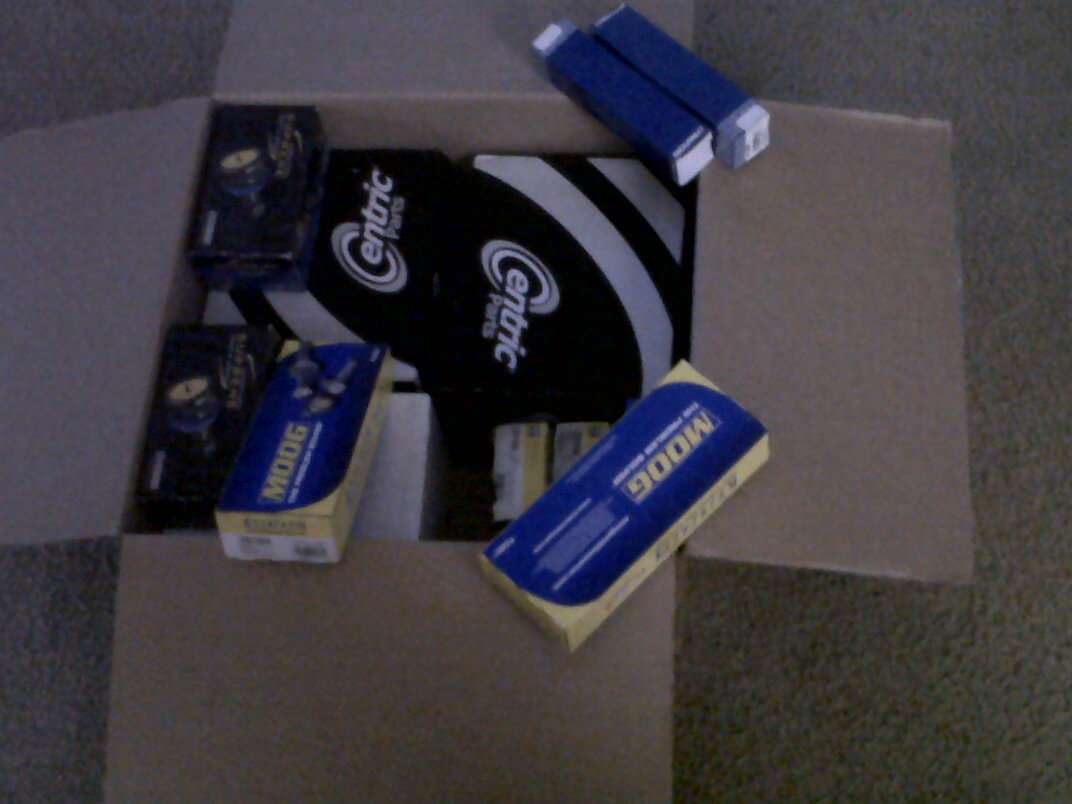
as for what did I do to the fb today...well physically nothing except recieve some packages for it.
By cfamilyfix at 2012-05-02
By cfamilyfix at 2012-05-02
all new bushings shocks struts tie rods adjusters ball joints etc...still need some strut tops, but kinda want camber plates but am undecided ...the more I deal with Sam at RE-Speed the more I want to buy more things from them...lol
here's a question...I am using RB springs with Tokico blue's...can I even use the camber plates re speed sells with these or do I have to go coil over????
Joined: Feb 2006
Posts: 3,162
Likes: 1
From: London, Ontario, Canada
Got the tires mounted and though one of the front inner barrels had a bit of a bend in it it seems to have been happy with one weight on the balancer. We will see when it gets some road use if it's bad enough to warrant replacing. Got the axle seals pressed in, 5-bolt axles installed, TII brakes all around bolted up with fresh Hawk HP+ pads which will likely destroy my nicely polished lips. Good thing I like cleaning my car. Got them bled and was hoping to get the wheels on and at least get the *** end back on pavement but the pedal is still soft so I bought more fluid and will be going through it again. Hopefully there isn't a leak in the master. I've heard of other TII brake swappers having a soft pedal to start but it firms up so fingers crossed. After a test fit the rear wheels are sticking past the fenders so they are really going to need a roll/pull and I can probably get the front sitting right with a touch of camber. It's gonna be FUN!! Can't wait to drive her this year.
Joined: Aug 2010
Posts: 1,416
Likes: 5
From: East Palestine, Oh
muffler strap broke the day before my RB muffler gets here. Which resulted in it bumping the ground, which then CRACKED my header! Got it all welded up and fixed, re installed, ran it with just the header for a min to **** off the neighbors and re installed the rest of the exhaust
tonight: install RB muffler
tonight: install RB muffler
Joined: Jun 2008
Posts: 8,376
Likes: 30
From: Chino Hills, CA
I got most of the way through cleaning & testing the ratsnest. Gotta pick up some pipe cleaners today so I can rod out the interiors.
I found one solenoid valve that had gone bad (the blue one, 'Relief Solenoid' which controls part of the Secondary Air system - - coil failed open) but luckily I still have a couple spare good ones for SA's; they changed the mounting arrangements on FBs. So I got the spare cleaned up and swapped into my shiny blue frame for it.
I also made a pickup at AutoZone in prep for refill day; oil, gear lube, fuel filter (need to drain the tank, too), some fuel hose.
I have a real interesting package coming from an on-line vendor, it's supposed to contain a part that's been NLA for many years, yet suddenly showed up as available on their website at an almost-reasonable price.
I don't want to say too much about it until it shows up and proves out to be what it says it is - - these guys have sometimes had issues with correct application info. If it does pan out, I will spread the word, as a few other folks here may well want one. Film at 11!
I don't want to say too much about it until it shows up and proves out to be what it says it is - - these guys have sometimes had issues with correct application info. If it does pan out, I will spread the word, as a few other folks here may well want one. Film at 11!


Originally Posted by cfamilyfix
I like the "icey" one too Jeff...
Just found out this evening my brother wants his 5" SC back. Crud. Oh well, it means the REPU gets an S5 turbo now! I'm kind of excited about that. It was fun to borrow it for a couple of years to play around with it, but I know it can never give me the power I'm lookng for.
I've decided I'd like to take my projects in a specific direction. Whatever HP they came stock with, double it.
The GLC Sport came stock with up to 60HP. Is that right? Some sources say 50-something. So I'm looking to make at least 120HP! Pretty easy with a 74 ported 13B. For example the 74 REPU had 110HP and 117 torque. The 76 Cosmo had 110HP and 120 torque. They also had thermal reactors and points ignition. All my stuff has DLIDFIS and a free flowing exhaust. So just those two upgrades alone are good for a few HP over stock. I think the GLC will meet my expectations.
What do you think?The baja has a 76 Cosmo-based engine. Again ignition upgrades and soon will have a free flowing 2.5" exhaust. This should push it up to 120HP I'd think. Perfect considering the stock VW beetle 1600 dual port made from 48 to 55HP. Did I get that right? 55HP on a good day? Yeah my old 1600 had seen better days and had an undersized carb meant for a 1500 single port. SO I never got to experience even stock power levels. Man this 13B is going to be over twice as powerful! I hope the CVs and clutch can handle it! No need for a turbo in this thing! What was I thinking, thinking a turbo would be necessary? Oh right, it's the only way to get enough muffling back there. Here's to hoping the two 4x9 magnaflows will be enough.
Next up is the REPU. With its 110HP stock, I need to make 220HP. I know the Camden can't even come close. Only 84stock ever got that high at 227HP which set a record. He had to do a lot to get that much. But I guess an S5 turbo makes that kind of power easily? Some guys are getting 300HP on theirs. Steve for example gets 300 and it passes emissions, but he's got a full 3" exhaust and EFI. I just want to blow through a Nikki and not use an IC. I'll use a 3" downpipe for fast spool but want to go 2.5" for the presilencer back (because I already have the components). Heck PercentSevenC is boosting up to 10 psi and making who knows how much HP without an IC. Probably at least 200 but maybe more. Kinda dangerous. I don't need to push mine that much so I'll probably stick with 6 or 7 psi and call it good. Not sure how much power that'll net, but I know the SCs make less power at the same boost level. Right now the SC feels perfect at low RPM but every time I've tried these SCs, they always dissappoint as RPMs rise (partially from the air filter, but even running without a filter still leaves me wanting). It is a nice bolt-in solution, but when you're me, bolting things in is too easy.
Anything else? Oh the MG Midget recently got a mild streetported 13B with an S4 NA assembly and aluminum flywheel. I don't know what HP these cars came stock with, but the 13B is getting an RB 600 Holley and a full long primary exhaust (my most ambitious yet under this tiny car - seeking 86 to 90 inches). According to RB, the single pipe exhaust makes 22% more HP depending on the original thermal reactor or manifold, and the long primary makes 5% over that. The Holley makes 40HP more on the 74 ported 13B with a 465 carb. They don't say how much the 600 will do on a streetport, but we can assume it's more than that. So doing some quick and dirty calculations, this setup might be good for 160 to 170HP but possibly more. Is that twice what a stock MG Midget would make? I need to go look it up.
Ok I looked up what the MG had stock. The home market got 65BHP. The US-sepc ones were loaded down with air pumps, EGR valves and catalytic convertors dropping power to 50HP. So all I really need power wise is to double 65HP. That should be easy enough with a streetport and Holley.
It's too late to edit so I'll just make a new post. I did a little more digging and it seems the 1275 cc engine produced an impressive 65 horsepower and 72 foot-pounds of torque! But this was the early non-emissions controlled engine. Mine had the 1500 which you'd think made a whole lot more HP and torque but it was loaded down with emissions junk and detuned. So maybe the 1500 still made 65HP and 72 torque like the smaller engine, but I don't know. Either way 65 and 72 x 2 is my current goal.
hmm... Can I get 144 torque? I know ported rotaries tend to get peaky and have much higher HP numbers than torque numbers, simply due to higher RPM past 5252 they're capable of. But I need to make sure I can double the stock numbers with this setup.
The three things I've changed/modified from stock are ports, intake and exhaust. Looking up stuff on RB's website, they say streetporting averages 20 percent. Well, my streetports are a bit less agressive than RB's. RB's are 60 degrees closing and slightly earlier oepning while mine are 55 degrees closing and stock opening (compared with 50 for 74 spec and 40 for 12A spec). My exhaust ports open at stock and close not quite as far as T2 spec. RB's open sooner than stock and close probably around T2 spec. So better take that 20% and decrease it slightly. Let's go 18% for now.
Next we;ve got the intake setup. I ca't fit one of RB's nice aluminum Holley manifolds but what I do have is an adaptor on a reverse runner manifold. The rev runner mani flows at least as much as RB's on primaries, if not more, but not as much in the secondaries. Thats ok. As for power, RB says the 465 will do 40% more than stock. They don't say what the 600cfm will do on a streetport, but we can assume it's more than just 40%. Then again my manifold can't match the high RPM flow capability, only the low RPM stuff, so we'll say 40%.
Lastly we have exhaust. Exhaust ports probably aren't as big as RB's and that's ok. The primaries will follow RB's rules of 90 inches, then collect at 30 degrees into 2.5". This will flow plenty. The 22+5% over stock can be averaged to 25%.
So what are my findings? Did I reach my goal? Well, let's see. Looking at a stock Cosmo engine that came with a reverse runner manifold, we get 110HP at 6k and 120 torque at 4k. I want 130 HP and 144 torque, and that's just on the 1275cc engine. I still don't know what the 1500 actually did.
Hold on, before I go any further, I've determined my mild streetport only added 18%, not quite 20% but I wanted driveability so I left the opening timing alone. But maybe we can slightly increase it back to 20% because I also went with S4 NA rotors which are lighter than old schools and an aluminum flywheel which frees up HP so maybe we can give a free couple of percentage points to the porting number and bring it back up to 20%? I know a light flywheel doesn't add HP, but it frees it up so a chassis dyno will read higher than if you had a stock flywheel. So yeah, let's say 20% because it makes the math easier.
20% over 110HP is 22HP in porting
40% over 110HP is 44HP in intake
25% over 110HP is 27.5HP in exhaust
I like to add 5HP in ignition because if you can clearly notice a difference in the way it drives, it's obviously adding more than just 5HP, but let's keep things conservative.
110 + 22 + 44 + 27.5 + 5 = 208.5HP.
Over 200HP? Um, is that right? Well now I see why RE was calling their streetported setups the turbo alternative. I never believed it though. I can't believe what I just added up here either. over 200? Really?
Sorry for making another post. I just found the power levels I was looking for. The 1500 made:
Power 65 bhp / 48 KW @ 5500 rpm
Torque 111 Nm / 82 ft lbs @ 3000 rpm
That's a lot of torque. Must have had a long stroke. The PO was right when he said it was like a tractor engine.
So doubled, the torque is 164. Glad I decided on the streetported setup rather than just a stock port. I might want to swap to a light steel flywheel if the aluminum turns out light in the launches.

Team SR
Joined: Sep 2005
Posts: 202
Likes: 0
From: Loxahatchee, FL
Joined: Jun 2008
Posts: 8,376
Likes: 30
From: Chino Hills, CA
OK, the parts news I was talking about is confirmed:
Rear-bowl floats (improperly called 'secondary' by parts stores) for Nikki carbs have been NLA for years.
But suddenly, Black Dragon has a source. I was thumbing through the website looking for a receiver-drier for my AC, when I noticed that the carb drawing was showing availability on BOTH floats for the first time since I've shopped there.
Naturally, they are charging double what the commonly-available front floats sell for. But they actually have them available.
I ordered one with a couple other things I was looking for, and sure enough, it's the proper part:

On the right is front-bowl float, GP Sorensen available from AutoZone and a dozen other places all the time.
On the left is a rear-bowl float, brand new, from Woods (Made in USA), via Black Dragon.
Tang design is slightly different, but seems to match the old OEM floats I have more closely than does the Sorensen.
So, folks... a Woods # FL101 float is now out there for any ailing Nikkis that haven't seen new floats in decades. Part number 56-411 from Black Dragon - - wonder if there are others selling them?

Joined: Feb 2006
Posts: 3,162
Likes: 1
From: London, Ontario, Canada
Thanks to the feet of a cute lil asian girl I was able to get the brakes bled to my satisfaction. Also checked to make sure each was applying pressure since I decided against rebuilding the used calipers I put on. They all clamp when asked. Put the two rear wheels on and would have done the fronts if not for the fact my lug nuts have a plastic insert at the bottom and one lug's insert is broken and not allowing it to go all the way down the stud. Sadly they are only available in packs of 4, so I might just get a generic lug to do the job. The center covers will hide it anyway.
Joined: Aug 2011
Posts: 3,078
Likes: 42
From: Cambridge, Minnesota
Hey, haven't heard from you in a while! I'm sorry about the turkey, I had a close call with hitting one today as well. Hope it goes well and turns out in the end!
Mine hadn't driven in about a week. Now, she's running fine
I fixed my fussy master and slave cylinders so my clutch is working. Going to swap in the rebuilt carb as soon as time allows. Then off to modding my Nikki!
Now, out for a sunset cruise
Mine hadn't driven in about a week. Now, she's running fine
I fixed my fussy master and slave cylinders so my clutch is working. Going to swap in the rebuilt carb as soon as time allows. Then off to modding my Nikki!
Now, out for a sunset cruise
Rebuilt my clutch master for the last time. I found a metal piston kit at rockauto. Swapped out the old rusty long studs for some slightly shorter studs and nicer nuts. Also made a water tight gasket out of tool chest liner because I think rain was leaking in past the edge. The Haynes manual says to use RTV. Nope. Got it in then it started to rain. I'll have a helper available tomorrow so I'l bleed it then.
I found a metal piston kit at rockauto. Swapped out the old rusty long studs for some slightly shorter studs and nicer nuts. Also made a water tight gasket out of tool chest liner because I think rain was leaking in past the edge. The Haynes manual says to use RTV. Nope. Got it in then it started to rain. I'll have a helper available tomorrow so I'l bleed it then.

Full Member
Joined: Aug 2009
Posts: 79
Likes: 0
From: Albuquerque NM
So it turns out that I'm gonna need a fuel pump and an ignition switch now  . O the fun of fixing one thing then another breaks. The ignition was fine till I replaced me turn signal switch. I'm guessing the fuel pump was bad the whole time. O well anyone know where I can get these parts on the cheap. I'm moving at the end of the month and would like to have it running when I move.
. O the fun of fixing one thing then another breaks. The ignition was fine till I replaced me turn signal switch. I'm guessing the fuel pump was bad the whole time. O well anyone know where I can get these parts on the cheap. I'm moving at the end of the month and would like to have it running when I move.


Joined: Jun 2008
Posts: 8,376
Likes: 30
From: Chino Hills, CA
All except the carburetor now assembled. Filling fluids and draining the fuel tank of gas left over from SevenStock (& replacing fuel filter) this morning, then it's carb rebuild time.
With a little luck, should be starting up by next weekend or before.
With a little luck, should be starting up by next weekend or before.
Joined: Mar 2001
Posts: 31,857
Likes: 3,243
From: https://www2.mazda.com/en/100th/
lmao! the gas in peepers is from sevenstock too, 2009.... although i think i topped it off shortly after? it still says full after 2 track days, so the P port magically doesn't use fuel?
Joined: Jun 2008
Posts: 8,376
Likes: 30
From: Chino Hills, CA
Well, mainly I want to drain the tank because I want to drop it out and replace the soft lines, which as far as I'm aware have never been changed.
I was actually starting to take the filler neck screws out to start that job one evening a couple years back, literally had the screws in my hand, when I got the call about my Dad being very sick & I should fly out to Iowa ASAP. Long story short, he passed just a few weeks later. Never did get back to dropping the tank.
I also want to check out the Vapor Valve on top the tank where the vent line originates; I have my suspicions that it may be the source, or a contributor, to my previous flooding problems.
So, Today... today I finished with fluid fills, only to discover partway into the coolant fill that I had forgotten something:


Yeah, that made itself known just as I was starting to add the second gallon. Hopefully, that was my one and only "DUH!" for this build.
Got that dealt with, got the trans filled (hate that job), then decided to start into the carb before messing with the tank.
As of this moment, carb is 100% disassembled, 95% cleaned for reassembly, new floats and needles standing by. Everything else is in the bay and ready.

Haven't set the hood yet, as it's just so much easier to work under there with it gone - - better light, for one thing. Undertray will also wait, for better leak detection at startup. Even the battery's in and charged, though not connected yet.
State of the Crate:


I was actually starting to take the filler neck screws out to start that job one evening a couple years back, literally had the screws in my hand, when I got the call about my Dad being very sick & I should fly out to Iowa ASAP. Long story short, he passed just a few weeks later. Never did get back to dropping the tank.
I also want to check out the Vapor Valve on top the tank where the vent line originates; I have my suspicions that it may be the source, or a contributor, to my previous flooding problems.
So, Today... today I finished with fluid fills, only to discover partway into the coolant fill that I had forgotten something:
Yeah, that made itself known just as I was starting to add the second gallon. Hopefully, that was my one and only "DUH!" for this build.
Got that dealt with, got the trans filled (hate that job), then decided to start into the carb before messing with the tank.
As of this moment, carb is 100% disassembled, 95% cleaned for reassembly, new floats and needles standing by. Everything else is in the bay and ready.
Haven't set the hood yet, as it's just so much easier to work under there with it gone - - better light, for one thing. Undertray will also wait, for better leak detection at startup. Even the battery's in and charged, though not connected yet.
State of the Crate:

