Project Stimulis Check Paint Job

Thread Starter
Joined: Aug 2006
Posts: 904
Likes: 4
From: Vancouver, WA
Project Stimulis Check Paint Job
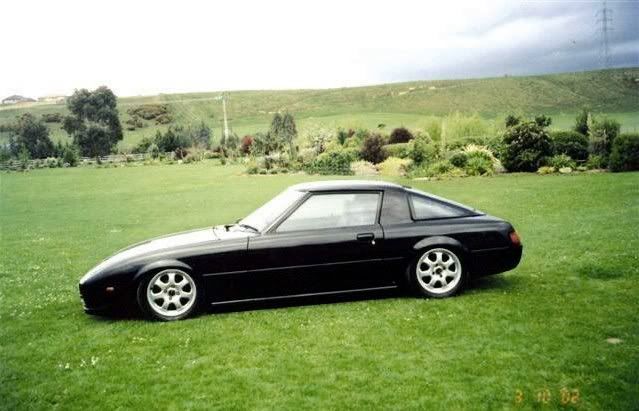
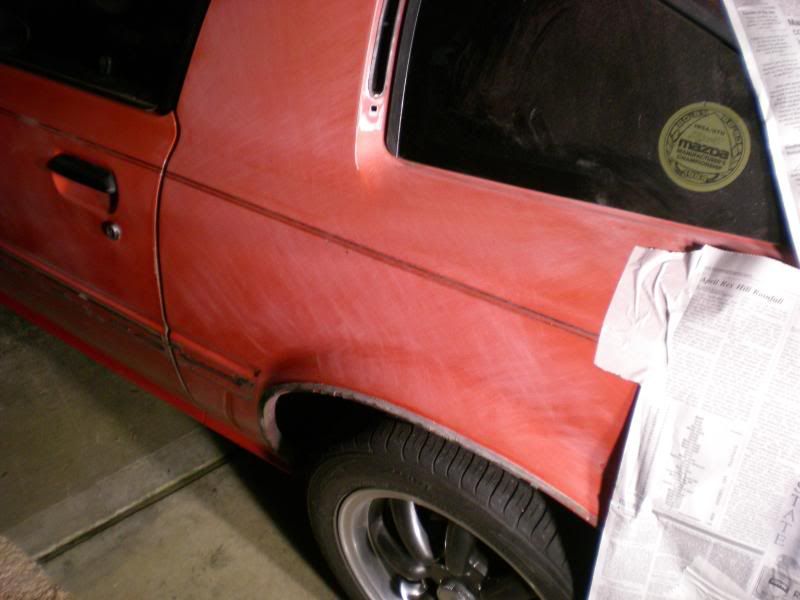
So were all getting our checks and I am going to get my car painted. The paint is in ok shape, but has some issues. It looks great from 15 feet away, but its time to take care of the details.
I live with to body guys who know how to do body work so they will help me with the prep work and then Im taking it to get professionally done after we get all the details taken care of.
I will be posting the progress here and the final product. I know there are a few of these threads, but i thought I'd ask if there is anything specific you guys want shown or documented? Just let me know!


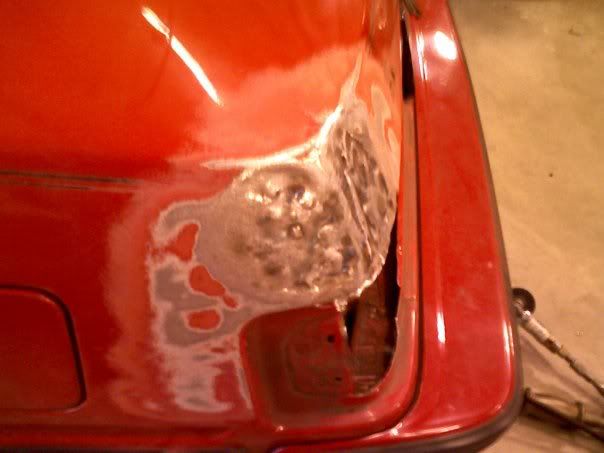
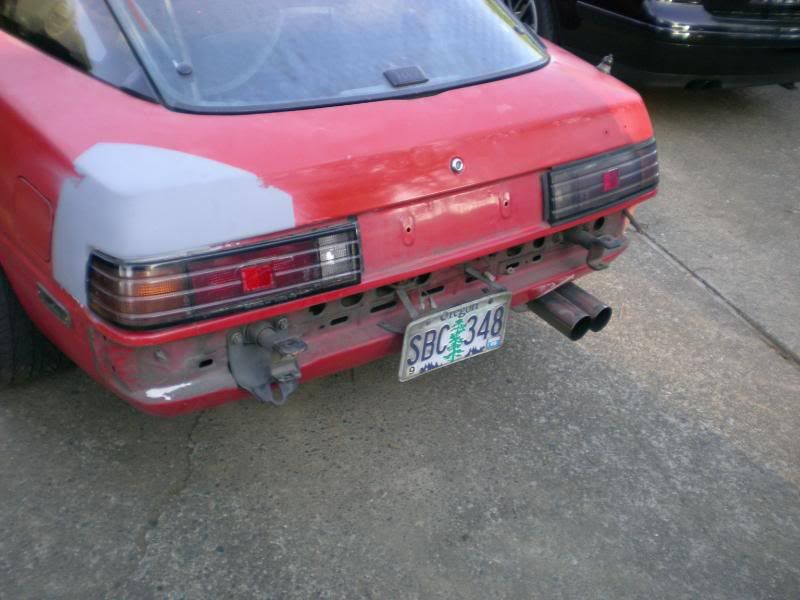
And here is the damage....


I live with to body guys who know how to do body work so they will help me with the prep work and then Im taking it to get professionally done after we get all the details taken care of.
I will be posting the progress here and the final product. I know there are a few of these threads, but i thought I'd ask if there is anything specific you guys want shown or documented? Just let me know!
And here is the damage....
Thread Starter
Joined: Aug 2006
Posts: 904
Likes: 4
From: Vancouver, WA
the plan is to use a hydraulic dent puller and do as much as we can with that. The cheapest quote i got was $300, but i'll get it done for $50.
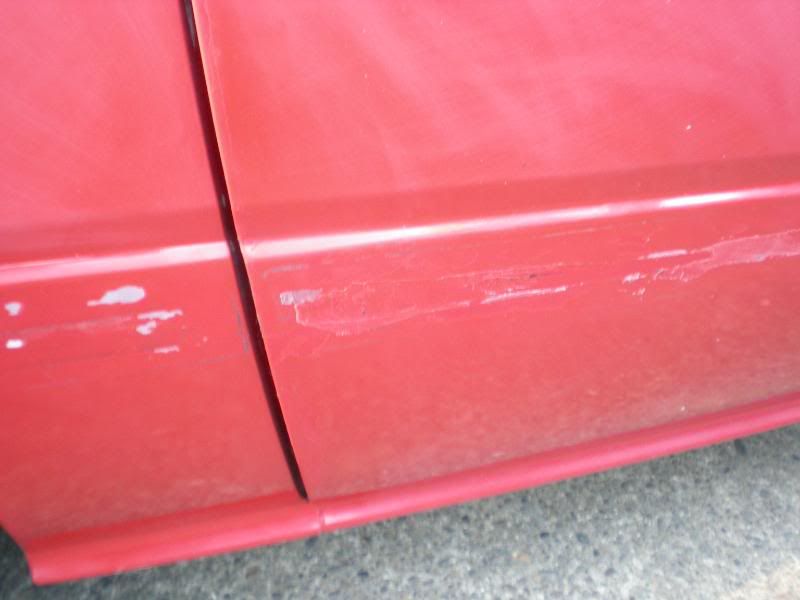
The rest of the body work should just be sanding and filling some small dimples. And that weird clearcoat flaking on the door. It looks like some chemical was sprayed on there and it was dissolved.
The rest of the body work should just be sanding and filling some small dimples. And that weird clearcoat flaking on the door. It looks like some chemical was sprayed on there and it was dissolved.

I wonder if you can get a 1-2" dowel rod from the inside onto the backside of that dent? Then a little whack whack here and whack whack there and you might be able to knock it out close to original.
That's how I did this dent in my front fender.
Before:

After:


That's how I did this dent in my front fender.
Before:
After:
Trending Topics

Yo tallbozo! Do you know what caused such deep dent in that isolated area? Interesting. Lucky it didn't crack and smash your brakelights. Hope you can successfully poke or cut it out.
Thread Starter
Joined: Aug 2006
Posts: 904
Likes: 4
From: Vancouver, WA
Thread Starter
Joined: Aug 2006
Posts: 904
Likes: 4
From: Vancouver, WA
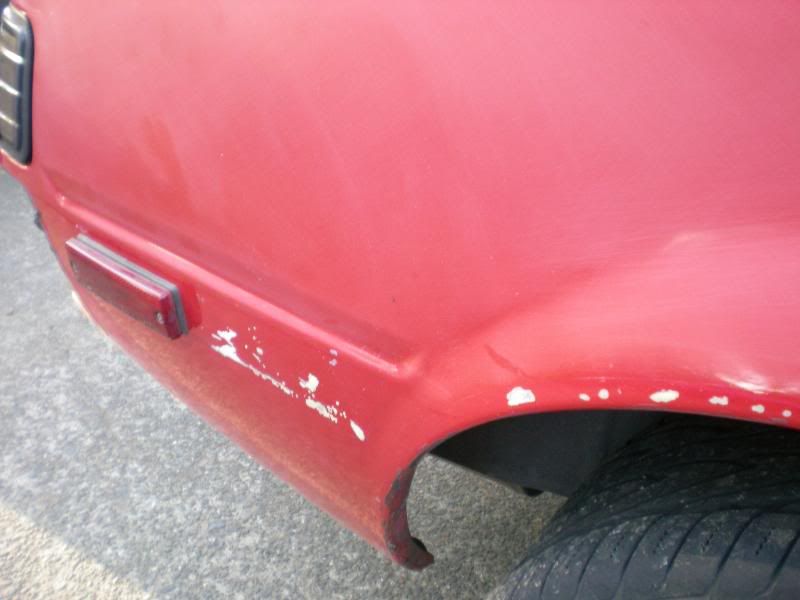
Well I bought it that way and he said that he forgot to put the ebrake on and it backed into a garbage can. It is a 2 stage dent and I live with 2 body guys who have a few ideas for it. 1. would be to cut it out and reweld a new piece all together or use a hydraulic jack and pull it out on side at a time....shouldnt be too bad, but we"ll see!
Junior Member
Joined: Apr 2008
Posts: 14
Likes: 0
From: south carolina
black nasty fixer upper
hey saw ur dents and ur flaking clear i work at a car dealership wher ei get cars in like that all the time mi car was a horrid dent monster till i went to work on it one day but wat u need to get done first is take ur lights out if ur friends arent already gonna do this move the carpet outta the way and take either a ong rod with a flat end and a mini sledge hammer (dis is da quick n easy way to do it wont cost u **** really) position the rod with the flat end towards the end of the dent nearest the gs symbol u dont wanna start n da middle itll jus stress da dent out n slowly beat it out its gonna take som time but go slow once uve got it close go n get som 40 grit sandpaper n scratch the surface focus on where da rust is cuz da **** will *** bak on u and sand the area u mite need like 5 or 8 sheets of it then get a lil bondo and cover it up sand it smooth first with 80 grit then 180 get som shake can primer n cover it up this can be done in like an hour for your hood ur gonna neeed all the clear knocked off u can take it to a car wash take the air blower n blow all the clear off its easy n itll freak u out how all that **** **** off then jus sand it down with some 320 fix any lil spots n hav som one toss som paint on it
hope ive been of som assitstance if u got any question jus ask me thanx skillz
hope ive been of som assitstance if u got any question jus ask me thanx skillz

Rotary Enthusiast
Joined: Dec 2007
Posts: 1,079
Likes: 0
From: Texas
Nice plan.
I painted Rusty with Primer this spring to stop corrosion. I was thinking about
something silly. Buying the 8 pack of 2oz House of Kolor Kameleon and airbrushing it lol.
It's gonna look like one of those New Zeland paint jobs (Rusty not yours).
As far as the back of yours it's not too bad might want to find a junk FB and get that section cut off then wielded back on to your ride. Also consider painting interior and exterior hidden surfaces with POR 15 to seal against corrosion.
Thread Starter
Joined: Aug 2006
Posts: 904
Likes: 4
From: Vancouver, WA
Im not too worried . My roommate is a fabricator and is welding his own gas tank for his bike, so I think a little dent wont be a problem for him. We should be working on it tonight and the filler and sanding blocks should be in tomorrow so I can start on the rest of the car.
Thread Starter
Joined: Aug 2006
Posts: 904
Likes: 4
From: Vancouver, WA
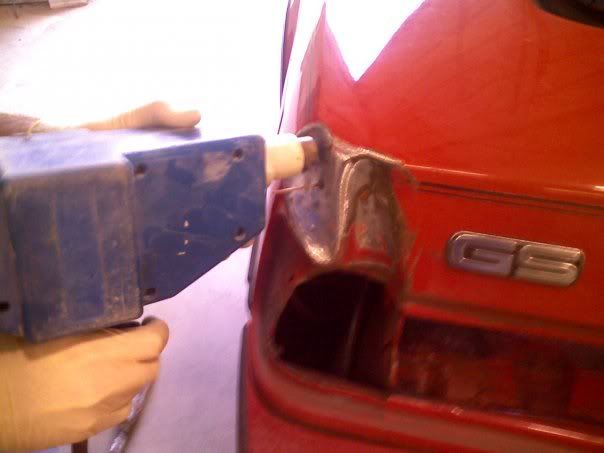
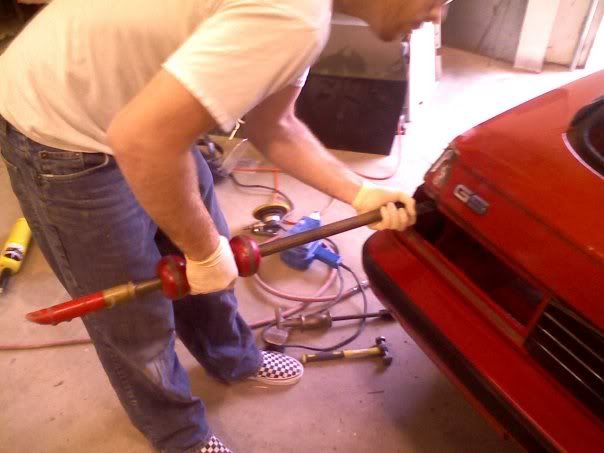
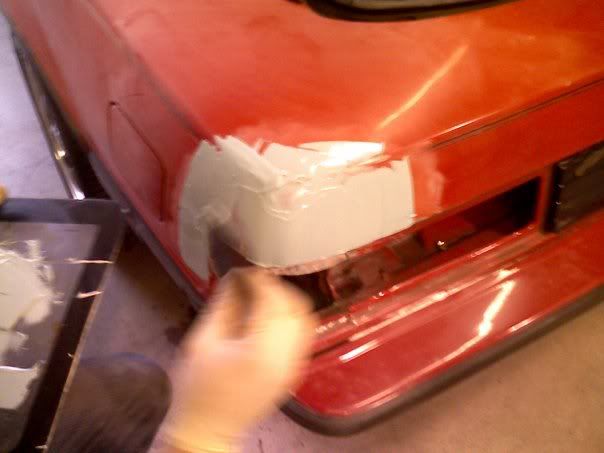
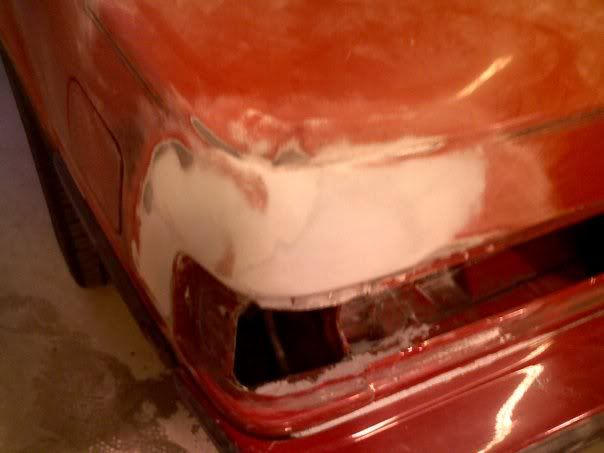
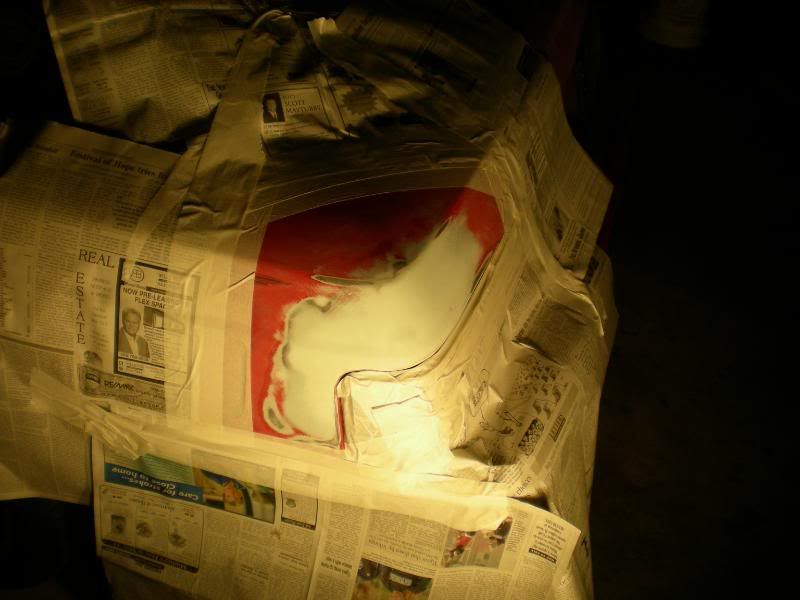
So that nasty dent is gone. My roommate and i went down to his shop that he works at and went to town. It only took 2 hours to do and im very happy with the results.
He first ground down the metal and used a stud gun and worked out the dent. Then using two different slide hammers he pulled it out more. Then tapped and finished it out with a hammer. Then some fiberglass filler, filler, and icing and it is done. We then sprayed some primer down to make sure it stays safe till paint.
Here's the pictures and Im really happy how well and easy it turned out.
Thread Starter
Joined: Aug 2006
Posts: 904
Likes: 4
From: Vancouver, WA
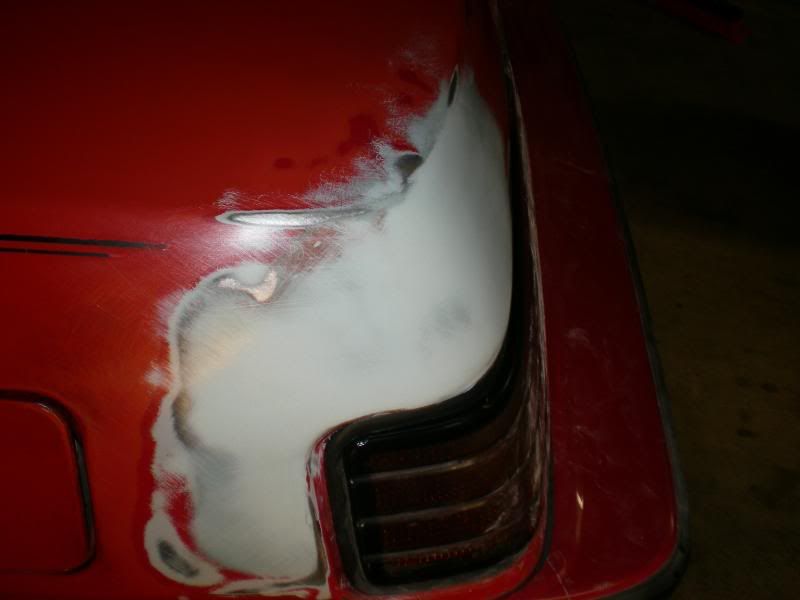
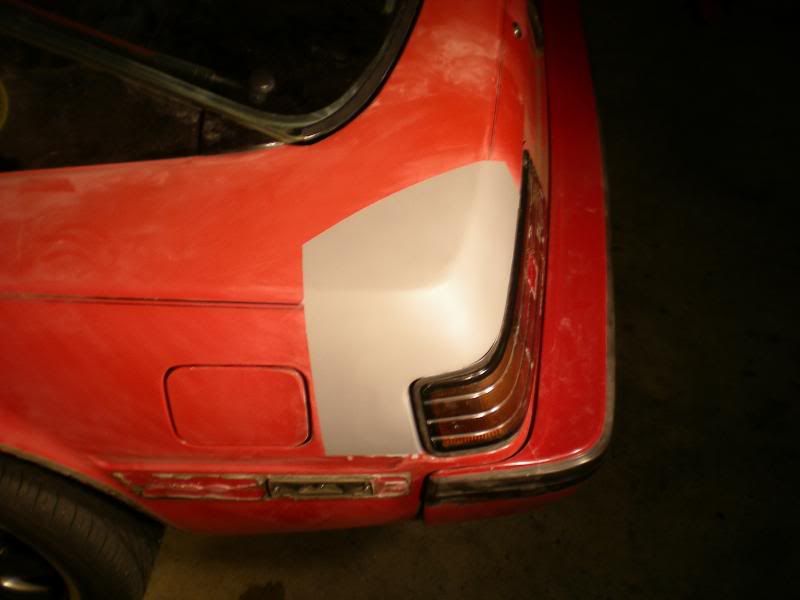
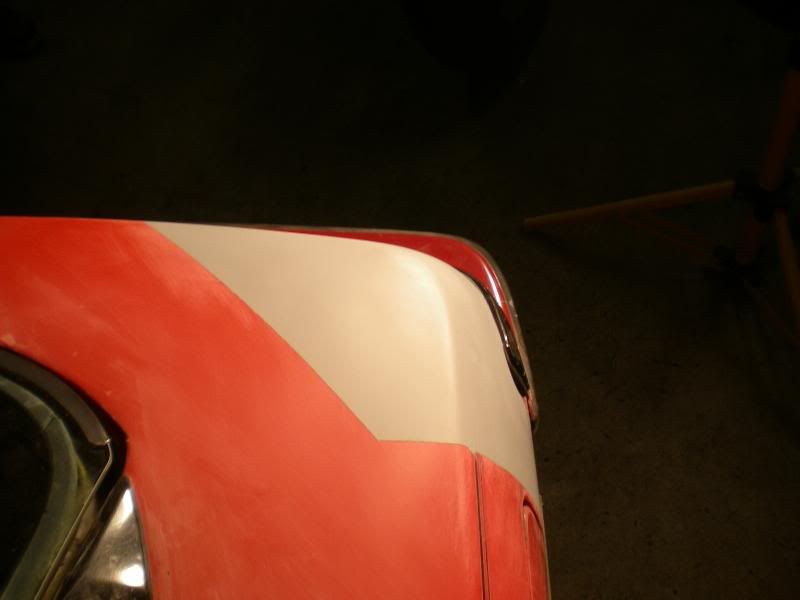
And then I started working on the paint. I found out that the fenders and roof have been repainted without clear. It is all scuffed down and i removed all the trim. Next week the filler, icing, and eraser wheel for the trim will be here. I'm throwing the idea around about doing a roll pan in the rear and going trimless and shaving almost everything like badges, key holes. And then replacing the rear piece between the taillights with metal that then blends in with the roll pan.
I live with a great metal fabricator so this should be some fun. I'll keep you posted with more as it comes!
I live with a great metal fabricator so this should be some fun. I'll keep you posted with more as it comes!
good job with the dent. are you going to have eyless entry with a stashed button incase the battery dies or you loose the remote?
let me know how the hell you get the side molding off if you dont use sanding.
let me know how the hell you get the side molding off if you dont use sanding.
Thread Starter
Joined: Aug 2006
Posts: 904
Likes: 4
From: Vancouver, WA
Yeah my friend who did the bodywork just put suicide doors on a 79 Impala and those doors are keyless entry with everything shaved. He put the release cable in the fenderwells and it works great so I might do that. My roommate has alot of good experience that is going to make this project fun....and practically free
My friend showed me a rubber wheel that pretty much erases it all. They are about $25 a pop but they work great. I should be getting those in the mail here soon. I ordered it from my friend's shop, so when i get it I'll be sure to give part numbers for ya
My friend showed me a rubber wheel that pretty much erases it all. They are about $25 a pop but they work great. I should be getting those in the mail here soon. I ordered it from my friend's shop, so when i get it I'll be sure to give part numbers for ya
Thread Starter
Joined: Aug 2006
Posts: 904
Likes: 4
From: Vancouver, WA
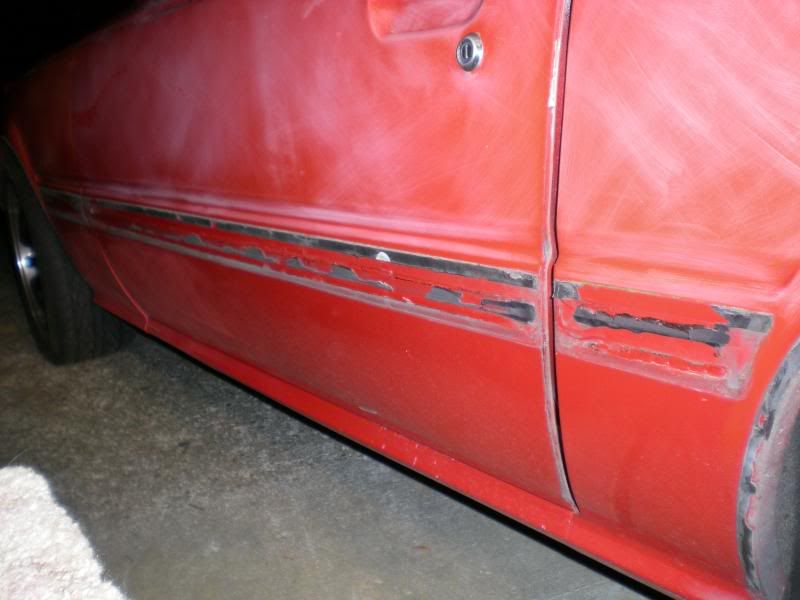
So I went down to my other friend's shop to work on getting that nasty adhesive off from the moldings. We used a rubber eraser wheel for most of it, and a razor for some of it. Then with a little lacquer thiner we removed all the smears. I then got the rear bumper off and am going to the metal shop tomorrow to get some sheet metal and 3/4" square tubing for the rear roll pan that Im gonna have.
Also the plan is to recess the side marker lights and maybe get a front air dam.
Here is where I am today


Also the plan is to recess the side marker lights and maybe get a front air dam.
Here is where I am today