(INTERIOR) Had to do it to - Another Tan interior going to be painted


Thread Starter
Banned. I got OWNED!!!
iTrader: (2)
Joined: Oct 2004
Posts: 6,122
Likes: 1
From: London, Ontario
(INTERIOR) Had to do it to - Another Tan interior going to be painted
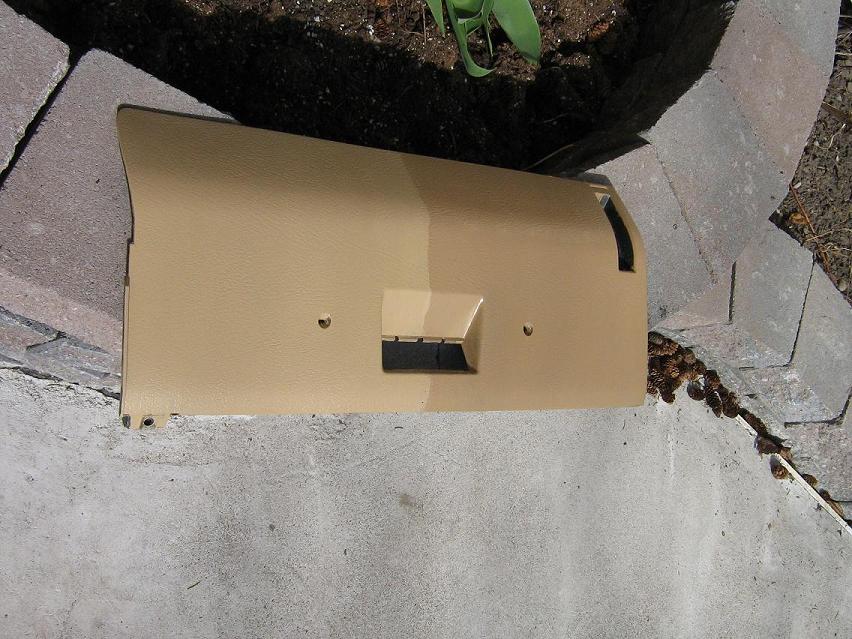
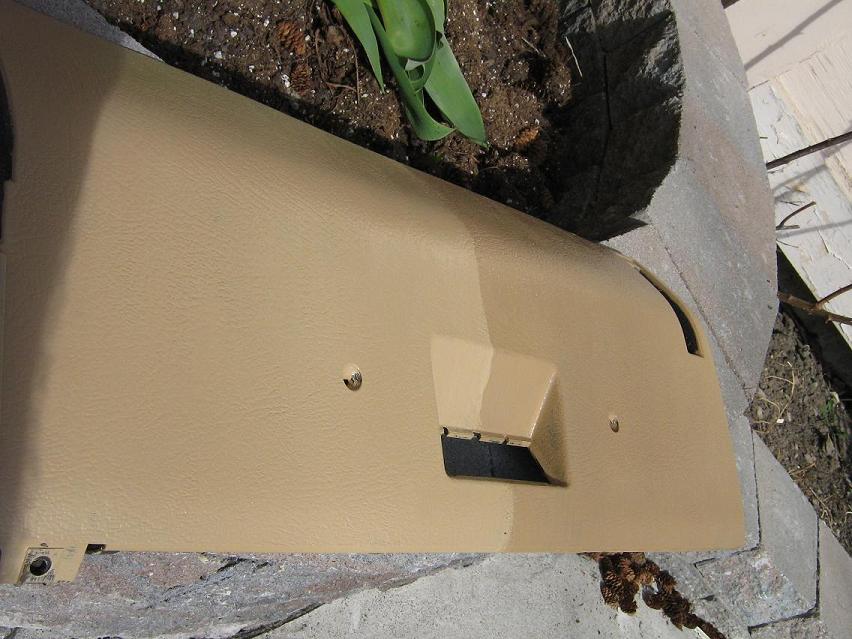
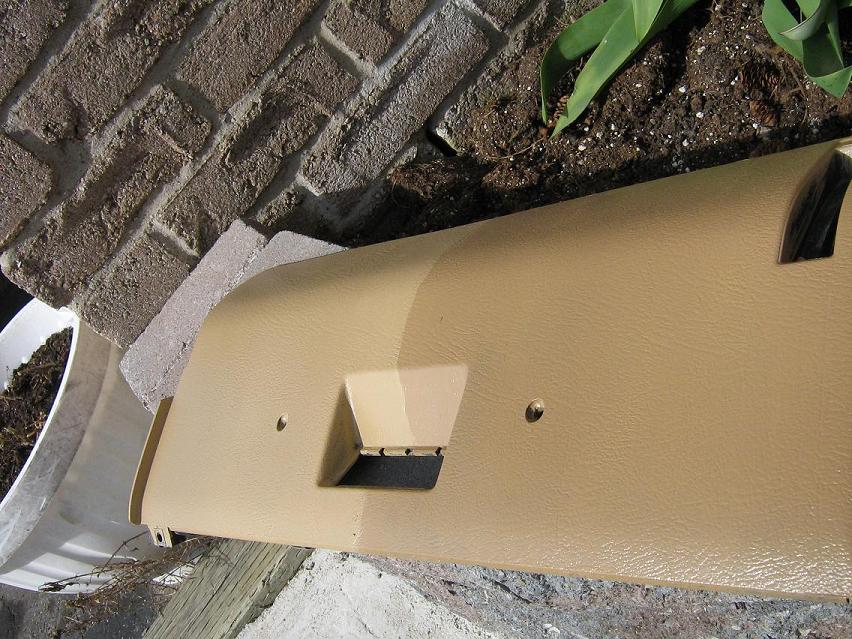
I can't remember who had that thread of going to tan, but that really got me aff my *** and started this project. Phase one picking the colors. The lighter color is a GM Lt. Camel, and the darker one is a Ford Saddle color. This is just a spare piece that I had that was originally grey, please don't judge the quality of the painting as i just brushed it on since i just got a couple samples from them. This is a dupont paint and I'm actually very well pleased with it. I tryed scracthing it yesterday after it was all dried out, and didn't show a single sign of scratch and I was going pretty hard at it too. The gloss level is just medium I don't think I would take it any higher than that.
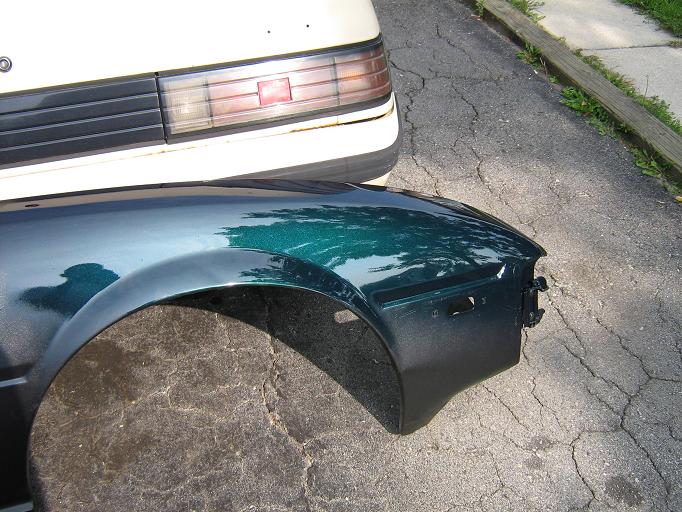
Also a reminder to people this is going to be my exterior color. It's a McLaren SLR green. Let me know what you think of it as a combo.


Also a reminder to people this is going to be my exterior color. It's a McLaren SLR green. Let me know what you think of it as a combo.
Joined: Feb 2006
Posts: 3,162
Likes: 1
From: London, Ontario, Canada
Paint quality is good for a brush on job. I'd go with the lighter of the two. Try holding the painted panel up against the fender to see how well they compliment each other.
Looking very good Sam. I like your color choices. Before you finalize the interior paint color, make sure you can find cloth/vinyl and carpet in matching colors. It pleases me to no end that the shell I've worked so hard on will recieve this quality of a restoration. If you can 2-tone the vinyl/fabric on the door panels and seats and go with a slightly darker tan for the carpet, you will have a very sharp looking overall package.
Personally, I would limit the painted surfaces to one color only and use the soft goods in a couple of slightly different colors for the accents Body color is a great choice too..
Personally, I would limit the painted surfaces to one color only and use the soft goods in a couple of slightly different colors for the accents Body color is a great choice too..

FB+FC=F-ME
Joined: Jul 2004
Posts: 3,353
Likes: 5
From: Rohnert Park CA
Ive always had a soft spot for tan interiors on sportscars.
Go with the lighter color,it looks better and will go great with that deep green paint.The darker brown is more akin to a luxury car,I think.The light one is very close to the color I choose for my seats....Only tough part is keeping it clean.
Go with the lighter color,it looks better and will go great with that deep green paint.The darker brown is more akin to a luxury car,I think.The light one is very close to the color I choose for my seats....Only tough part is keeping it clean.
https://www.rx7club.com/1st-generation-specific-1979-1985-18/interior-change-637794/
The dash is going to be the fun part. :-)
The dash is going to be the fun part. :-)
Thread Starter
Banned. I got OWNED!!!
iTrader: (2)
Joined: Oct 2004
Posts: 6,122
Likes: 1
From: London, Ontario
Thanks guys for all the comments.
Trochoid, we'll see when the fabric samples come in from 1aauto.
rx7doctor, I already have all the interior pieces out including the dash, so its only down hill from here hopefully
Steve84gs_tII, Well see this is actually the list that i had in mind of doing the darker color:
Door Pull Cups
Door Scratch pad
Door Pull arm
door lock
Door center section
Door Map compartment
Air Vents
Air vent switch ****
Shifter ****
Handbrake pull top part
Arm rest Lid
Side guage cluster switches
Glove box lock
Passenger Lower air vent
Seat belt top and bottom
Steering Wheel???
So as you can tell i planned on accenting the stuff that is basically heavily used in the darker color so that I'm not cleaning things up everyday. Also it would be center section of the seat color.
Sam, if you're going to all of this effort to do a color change, you know what you need to do, right? Lots of pics and a step by step write up.
If you have the materials on hand when I get there, fabric, vinyl and carpet, I can show you how to redo your door panels, headliner, B-pillar trim and bin covers. You will need to have a heavy duty sewing machine handy too. Yes, this old fart can half-assed sew too, lol.
If you have the materials on hand when I get there, fabric, vinyl and carpet, I can show you how to redo your door panels, headliner, B-pillar trim and bin covers. You will need to have a heavy duty sewing machine handy too. Yes, this old fart can half-assed sew too, lol.
Trending Topics
Thread Starter
Banned. I got OWNED!!!
iTrader: (2)
Joined: Oct 2004
Posts: 6,122
Likes: 1
From: London, Ontario
Hey scott ... i planned on doing step by step picture how to of it ... I will have to see about fabrics and stuff first. As for sawing machine we have one ... not sure how heavy duty it is though

Thread Starter
Banned. I got OWNED!!!
iTrader: (2)
Joined: Oct 2004
Posts: 6,122
Likes: 1
From: London, Ontario
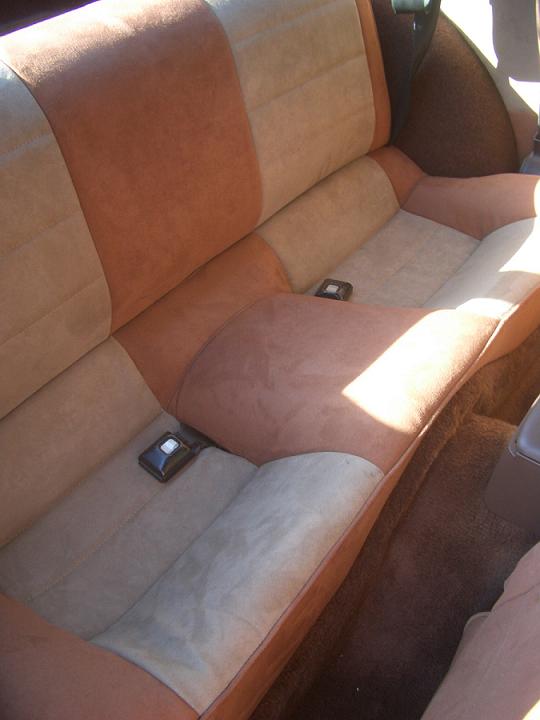
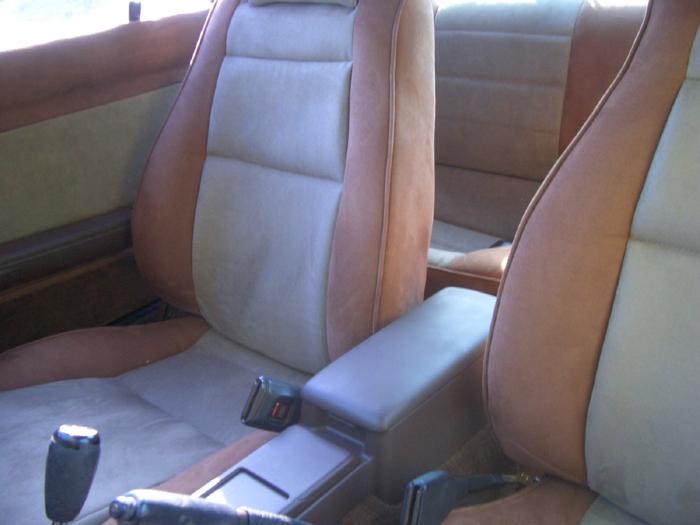
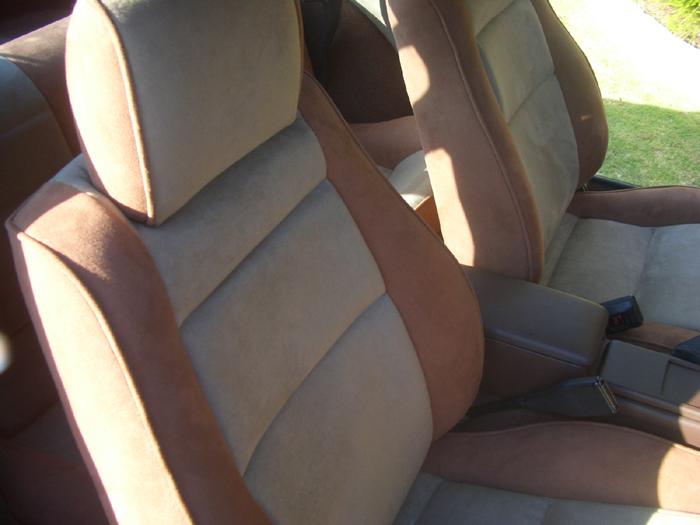
Thanks guys ... I will be going today and trying to pick a fabric and vynil colors. If I do everything in fabri, i think that I would like to have in done in a suede like material. These are a few pictures from a member in australia that had them done like that, but obivously not those colors.

Junior Member
Joined: Mar 2007
Posts: 28
Likes: 0
From: Albuquerque
Looks good, I would definently go with the lighter tan for your main. I might try something either a different color or darker of a brown for the accents. The two browns are a bit close together for main/accent purposes in my opinion.
Thread Starter
Banned. I got OWNED!!!
iTrader: (2)
Joined: Oct 2004
Posts: 6,122
Likes: 1
From: London, Ontario
Hey here more updates ... so i've started doing the back. I'm ahving a little bit of a mix ideas about the 2 tones right now ... I'm thinking maybe doing it with a dark gunmetal like color, or even balck ... like the seats would be kinda like this:

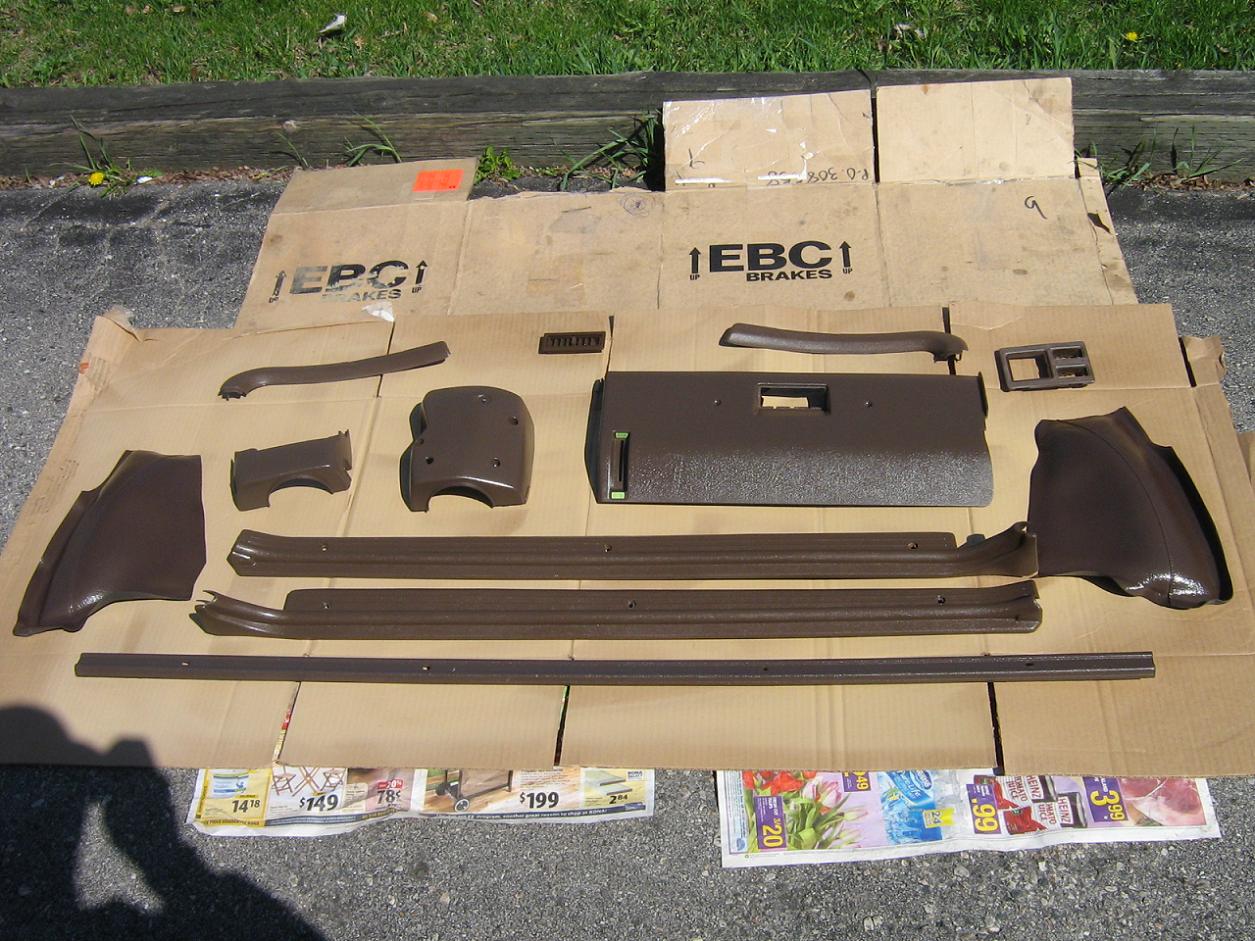
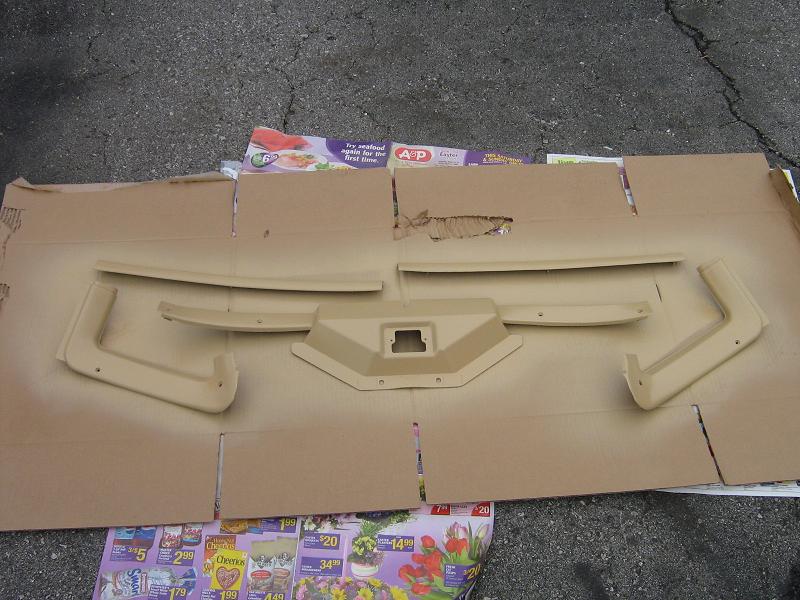
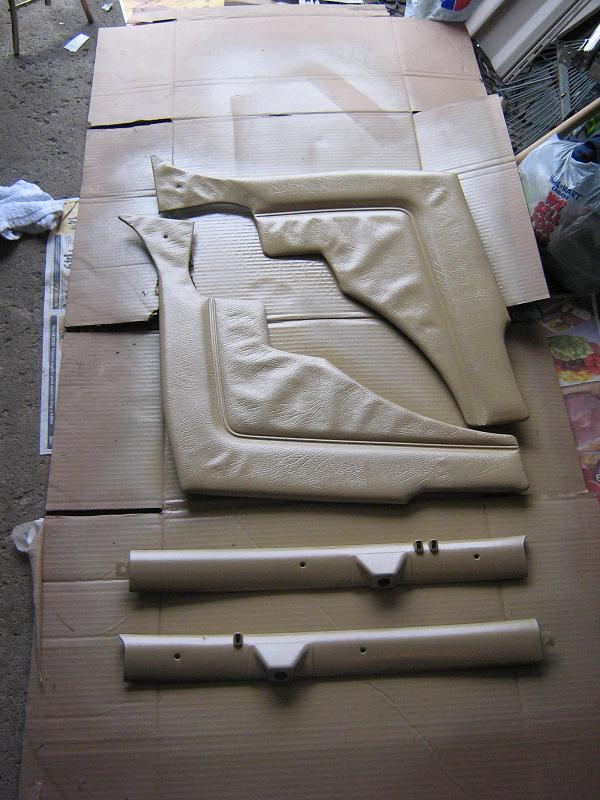
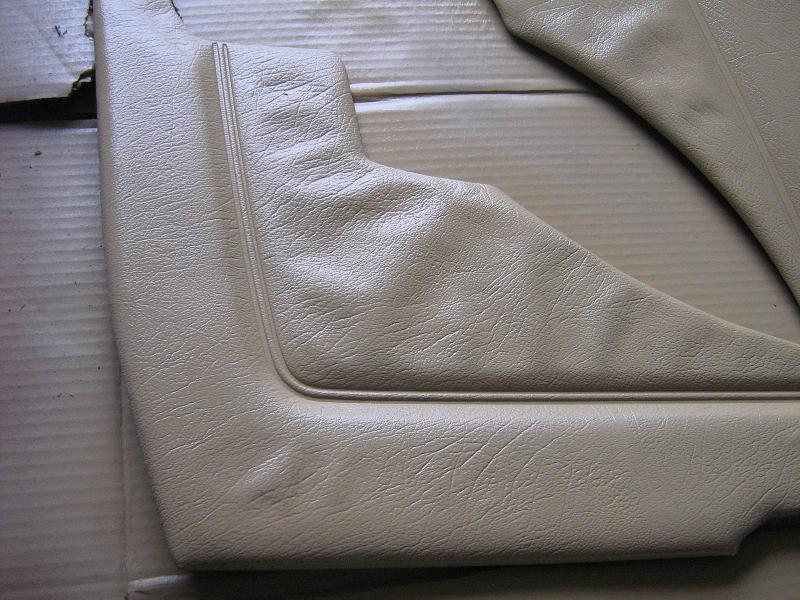
Let me know what you guys think. Also, here some pictures of some of the stuff that i've got done today. Let me know how things are looking. Also I should say so far i've spent about 120$CA that included 2 spray bottles of the Dupont color, 2 SEM vynil and plastic adhesive spray cans, one Quart of SEM Vynil and Plastic Prep, 1 bottle of sunlight dish soap from dollar store obviously lol, and 6 new white towels for 2$ also from dollar store. I'm pretty sure that the adhesive and prep will be more than enough to do the whole car. The only one i'm not too sure about is the paint itself. I might need just one more at the most. they're about 30 bucks each.
Now to prep the parts this is what i did, I first took the sunlight soap and poured some on all the parts then i went at first with a platic brush, that didn't seem to do much, so i moved to a brass brush and that did alot better work (don't worry about fine scratches because you'll be sanding it later anyway). So after i did that, I rinsed all the part till dry. Then i took a new cloth and poured from of the SEM cleaner, and went through all the parts, then rinsed. After that, I went by the label and wet sanded the parts with 400 grit paper, after that more cleaner. From there i let them air dry. Now comes the fun part, spray the adhesive in one light coat, and then let it sit for 5 minutes, once flashed, apply one full wet coat and let it dry for 15 minutes, from there apply paint before the adhesive fully dries to keep its flexible properties. Spray in light coats (i had to go around i think 4/5 time before they were fully covered, this will help maintain the pattern on the plastic piece better as your not filling the holes in.

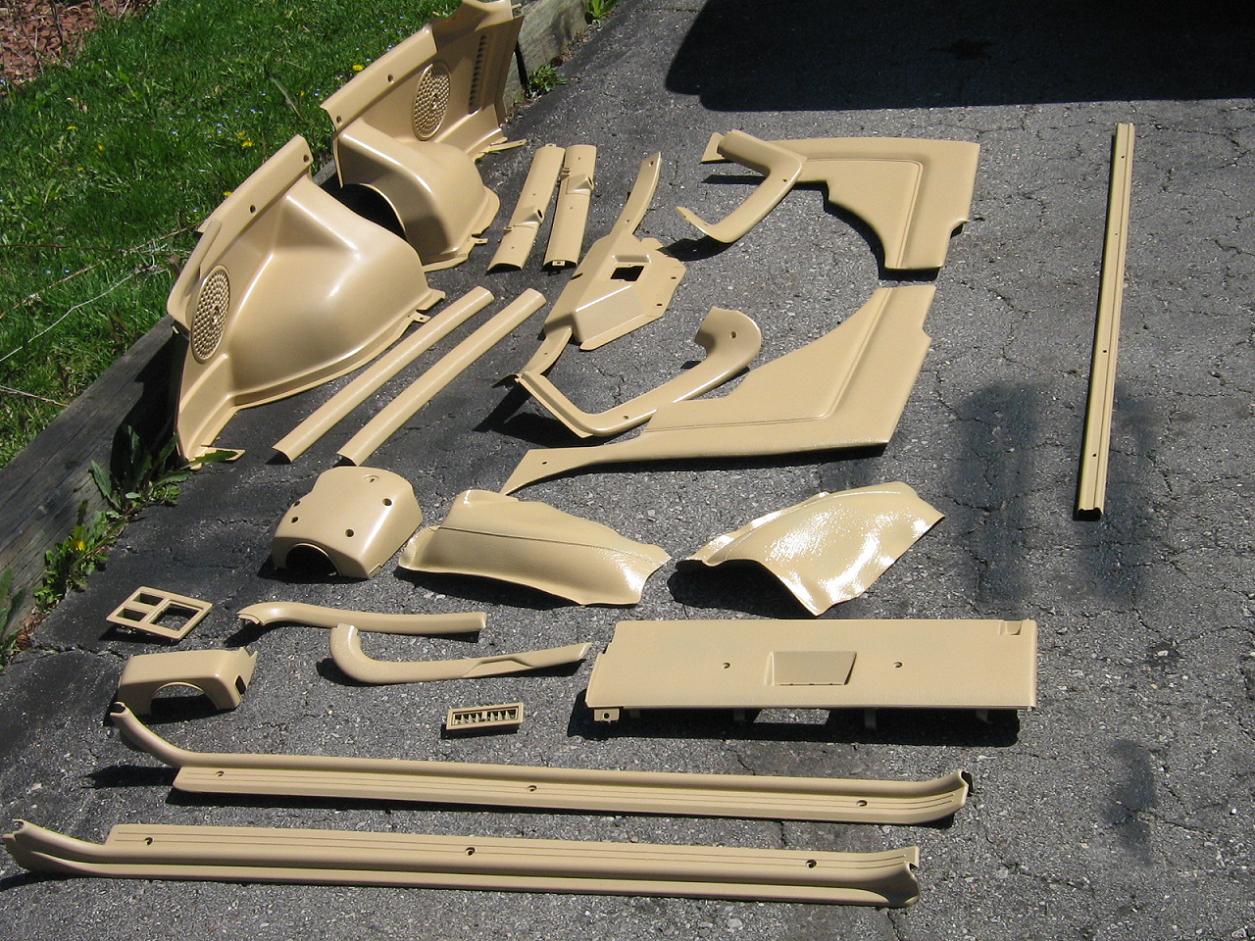
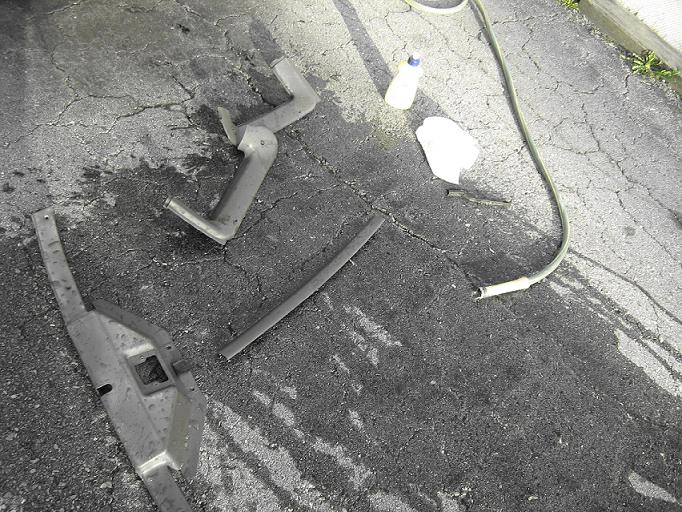
Also for reference this is what the parts looked like prior to painting this is still in stage one ... cleaning.
Let me know what you guys think. Also, here some pictures of some of the stuff that i've got done today. Let me know how things are looking. Also I should say so far i've spent about 120$CA that included 2 spray bottles of the Dupont color, 2 SEM vynil and plastic adhesive spray cans, one Quart of SEM Vynil and Plastic Prep, 1 bottle of sunlight dish soap from dollar store obviously lol, and 6 new white towels for 2$ also from dollar store. I'm pretty sure that the adhesive and prep will be more than enough to do the whole car. The only one i'm not too sure about is the paint itself. I might need just one more at the most. they're about 30 bucks each.
Now to prep the parts this is what i did, I first took the sunlight soap and poured some on all the parts then i went at first with a platic brush, that didn't seem to do much, so i moved to a brass brush and that did alot better work (don't worry about fine scratches because you'll be sanding it later anyway). So after i did that, I rinsed all the part till dry. Then i took a new cloth and poured from of the SEM cleaner, and went through all the parts, then rinsed. After that, I went by the label and wet sanded the parts with 400 grit paper, after that more cleaner. From there i let them air dry. Now comes the fun part, spray the adhesive in one light coat, and then let it sit for 5 minutes, once flashed, apply one full wet coat and let it dry for 15 minutes, from there apply paint before the adhesive fully dries to keep its flexible properties. Spray in light coats (i had to go around i think 4/5 time before they were fully covered, this will help maintain the pattern on the plastic piece better as your not filling the holes in.
Also for reference this is what the parts looked like prior to painting this is still in stage one ... cleaning.
Excellent job so far Sam, keep up the good work, Btw for those of you considering doing this, follow the manufacturer's instructions to the letter The only thing I would do differently is use 0000 steel wool or a scotch brite pad, (the green one) instead of the 400 grit sand paper. Then wipe the surface down with prepsol and a tack cloth followed by the adhesion promoter. That will clean and eliminate any dust bunnies and left over sanding dust in the texture.
Thread Starter
Banned. I got OWNED!!!
iTrader: (2)
Joined: Oct 2004
Posts: 6,122
Likes: 1
From: London, Ontario
on todays list:
Rear speaker covers, trim piece inbetween seats and 1/4 glass, plastic trim goes along side of the hatch window ... and all i see what all i can pull out of the way right now will be posting pictures in a few hours
Rear speaker covers, trim piece inbetween seats and 1/4 glass, plastic trim goes along side of the hatch window ... and all i see what all i can pull out of the way right now
will be posting pictures in a few hours

Senior Member
Joined: Apr 2001
Posts: 269
Likes: 0
From: Bay Area
What made you decide to go with the Dupont product(s) over the ColorBond people here rave so much about? If I get my stupid dash out and clean up my plastics, depending on their overall condition, I may be looking to refinish them as well. If I do so, I may as well consider other colors, though I like the gray too. 
Thread Starter
Banned. I got OWNED!!!
iTrader: (2)
Joined: Oct 2004
Posts: 6,122
Likes: 1
From: London, Ontario
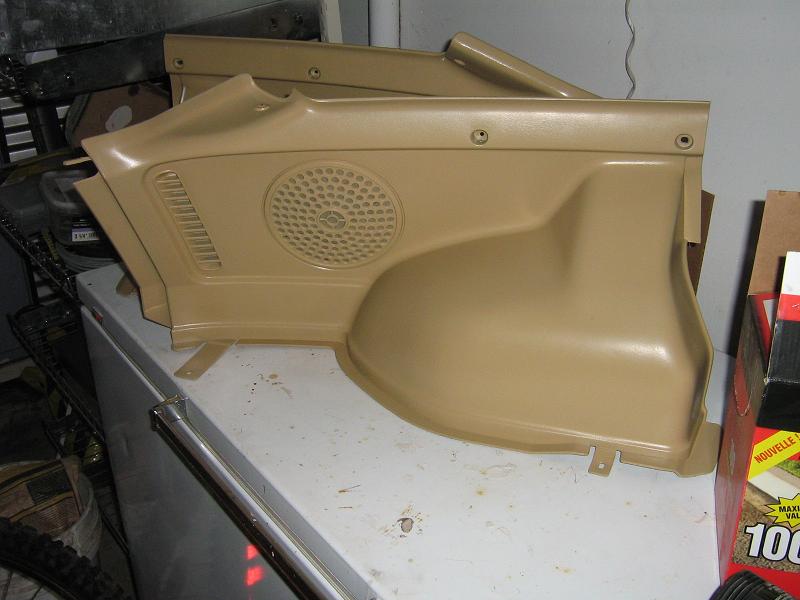
The Progress as promised:
I'll get some better shots when the sunlight hits up a bit better. As for why i choose dupont as oppose to color bond or SEM (which i think is the bigger one) I really don't know. i did test it out as you would of seen at first and I was really pleased with how scratch resistance it is. And dupont is usually a pretty good company so i decided the heck with it. We'll see how good it holds up though.
BTW ... already used up one full can and working on the second looks like I will be picking up a couple more at the rate i'm going. just thought i'd share this so that anyone that is hoping on doing this project knows what to expect to pay for a full car.
Thread Starter
Banned. I got OWNED!!!
iTrader: (2)
Joined: Oct 2004
Posts: 6,122
Likes: 1
From: London, Ontario
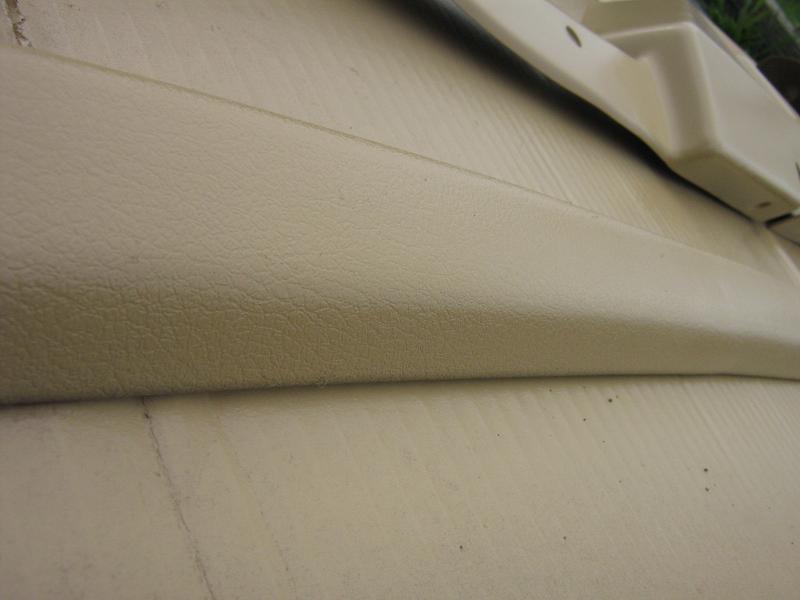
got a little chance to play around with the vynil just a few minutes ago, and I'm pleased to say that it is as they say, flexible. When i sprayed the platic pieces from with the adhesive from SEM ... it would always look dry looking after the 15 minutes that they tell you to wait, but on vynil it actually kept wet look to it till the end of those 15 minutes. Also about the feel of the material it really doesn't feel like paint what so ever on the vynil pieces once again it is like advertised it feels like a leather feel. Obviously you can feel the difference between the real stuff and this, but what i mean by that is that it does produce a smooth like finish on it kinda like it did on the plastic pieces.
Thread Starter
Banned. I got OWNED!!!
iTrader: (2)
Joined: Oct 2004
Posts: 6,122
Likes: 1
From: London, Ontario
Almost forgot to mention this ... i can't find the link that i read it from, but they recommended that you heat up the vynil pieces a little bit with a heat gun (I have a low/high one at home) and used the low heat setting to go over the engine panel. Not sure if it contributed to much, but I did it just incase... whats another 5 minutes?
Thread Starter
Banned. I got OWNED!!!
iTrader: (2)
Joined: Oct 2004
Posts: 6,122
Likes: 1
From: London, Ontario
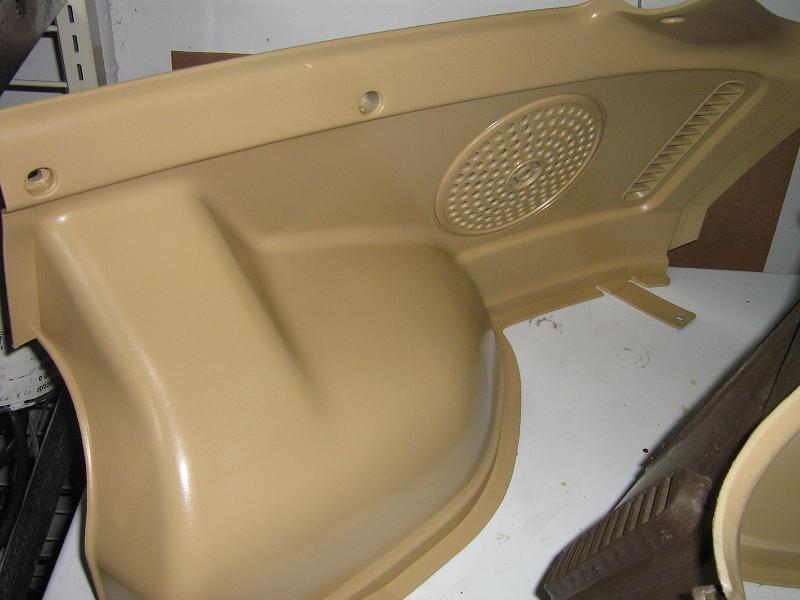
So i did a few more things, I have some before and after pics also pics of all the parts that i've done so far. The rear wheel well cover look a little wet because they still were at the time