
Cluster issues? My solution...Speedhut gauges retro fit.


Thread Starter
Joined: Feb 2003
Posts: 3,393
Likes: 0
From: Austin, Tx
Cluster issues? My solution...Speedhut gauges retro fit.
I had the same issue with my gauges that some of you have, no speedo, tach or odometer. I did a lot of research on repairing it myself or getting it repaired by some one. I was afraid that I was going to pay some one $230+ for it to have a chance to fail again. While I was researching a fix, I came across Speedhut gauges. At first I was a bit hesitant about this because I didn't want it to look after market. I was shown a few option on how to mount them but it wasn't till I was referred to another forum that I'm not going to mention. He's also a member her (halfspec). He gave me the details on how to mount the gauges and make them look OEM. He is doing an LSX swap so he doesn't need a boost gauge. I don't want to have gauge pods in my interior since I want to have the cleanest looking interior I can achieve.
I contacted Speedhut with a lot of questions and they were very helpful in making my decision. The hardest part was choosing a finish I wanted. With Speedhut gauges, if you dream it, they can pretty much make it. All you have to do is make a rough design and they will match it to the best of their ability. They make OEM gauges for a few manufactures(Ford GT use these gauges) and kit car (Factory Five Racing being one of them). I did a few renderings of what I had on mind but I was afraid that I might get tired of looking at colorful gauges and might grow old on me. These are a few design I though about.


At the end I decided to keep it clean and simple and try to stick to the OEM look. So I went with the Black back ground and red lettering. When I placed my order and sent them the design I wanted, they were quick and sent me a proof the next day to see if it was to my liking.

I place my order of five gauges, Tach, Speedo, Oil Pressure, Boost and Temp. For fuel I got a Auto Meter digital gauge that I will installed where the warning lights are on the right side.
Today I got my gauges and I was impressed with the quality. This picture do no justice to the finish of them.

Here are some detailed picture of each gauge and they associated parts.
Tach

My speedo function by GPS. These are a bit more expensive but when I was reading how to set up I said NO. It was too much of a hassle so I opt for the GPS unit. Don't mind the purple dots, that's from the flash.

The other great thing about the gauges is that I could get my mileage programmed. I got tired of writing my mileage on paper every day.

Oil pressure. I had to order an adapter for the oil pressure sender to fit where the OEM one is at. I got it from Summit Racing.

Temp gauge. It is going on the TB line. I got the T from Lowes "Motorsports"

Boost

The gauges break down for ease of custom installation and they are very shallow too.

They mount by a ring that screws in

I contacted Speedhut with a lot of questions and they were very helpful in making my decision. The hardest part was choosing a finish I wanted. With Speedhut gauges, if you dream it, they can pretty much make it. All you have to do is make a rough design and they will match it to the best of their ability. They make OEM gauges for a few manufactures(Ford GT use these gauges) and kit car (Factory Five Racing being one of them). I did a few renderings of what I had on mind but I was afraid that I might get tired of looking at colorful gauges and might grow old on me. These are a few design I though about.
At the end I decided to keep it clean and simple and try to stick to the OEM look. So I went with the Black back ground and red lettering. When I placed my order and sent them the design I wanted, they were quick and sent me a proof the next day to see if it was to my liking.
I place my order of five gauges, Tach, Speedo, Oil Pressure, Boost and Temp. For fuel I got a Auto Meter digital gauge that I will installed where the warning lights are on the right side.
Today I got my gauges and I was impressed with the quality. This picture do no justice to the finish of them.
Here are some detailed picture of each gauge and they associated parts.
Tach
My speedo function by GPS. These are a bit more expensive but when I was reading how to set up I said NO. It was too much of a hassle so I opt for the GPS unit. Don't mind the purple dots, that's from the flash.
The other great thing about the gauges is that I could get my mileage programmed. I got tired of writing my mileage on paper every day.
Oil pressure. I had to order an adapter for the oil pressure sender to fit where the OEM one is at. I got it from Summit Racing.
Temp gauge. It is going on the TB line. I got the T from Lowes "Motorsports"
Boost
The gauges break down for ease of custom installation and they are very shallow too.
They mount by a ring that screws in
Thread Starter
Joined: Feb 2003
Posts: 3,393
Likes: 0
From: Austin, Tx
They also sent me a "power distribution" wiring to connect the lighting control and power to one source for ease of installation.

This is my fuel gauge. I have to take the bezel off to get a clean mount.

This is my guinea pig cluster. I got this to be able to hack and in case I mess up I have another one to use.

My Speedhut gauges cost me $800 but I think it is a worth investment considering that you can have the gauge to look any way you want them. I did consider doing the a Spirit R copy but I stuck to the OEM look.
Keep an eye on this thread. I will start tomorrow to retro fit them on the OEM cluster.
This is my fuel gauge. I have to take the bezel off to get a clean mount.
This is my guinea pig cluster. I got this to be able to hack and in case I mess up I have another one to use.
My Speedhut gauges cost me $800 but I think it is a worth investment considering that you can have the gauge to look any way you want them. I did consider doing the a Spirit R copy but I stuck to the OEM look.
Keep an eye on this thread. I will start tomorrow to retro fit them on the OEM cluster.


Thread Starter
Joined: Feb 2003
Posts: 3,393
Likes: 0
From: Austin, Tx
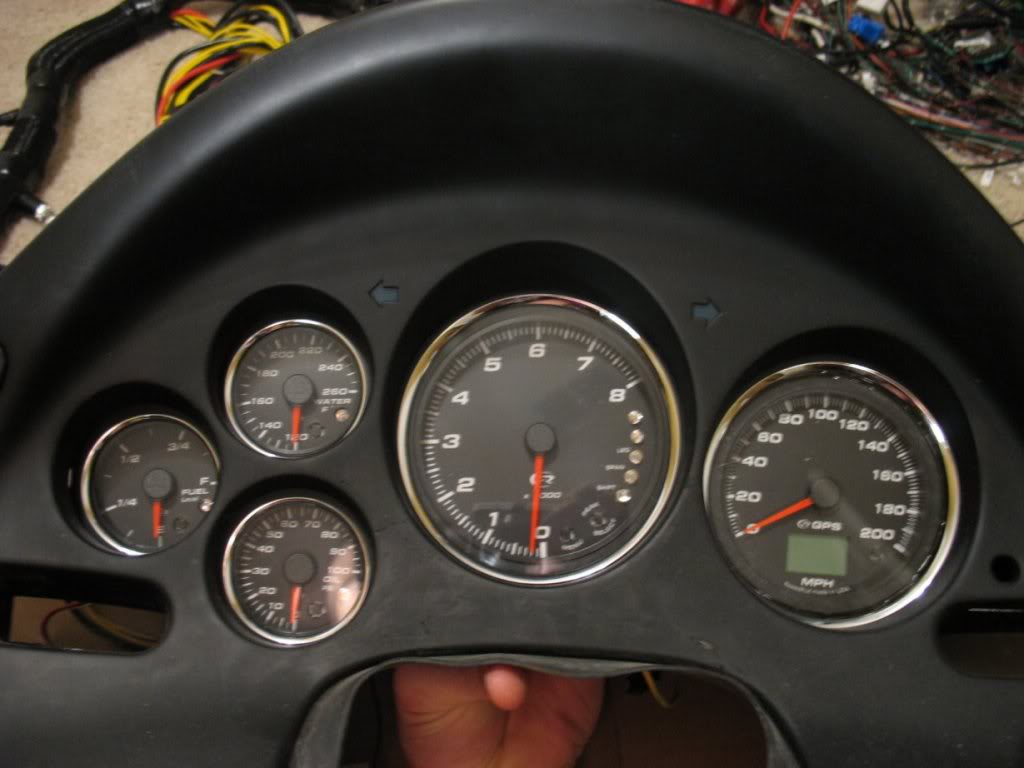
This is the finish look I want to achieve. I hope halfspec doesn't mind me using his pictures. They way he did his and explained to me, its simple. I might have a simpler way that I'm going to try out first though.

Trending Topics
Thread Starter
Joined: Feb 2003
Posts: 3,393
Likes: 0
From: Austin, Tx
Lane has been very helpful on this and he has pretty much walking me through this retro fit and made it very simple for me to do. I will not get as detailed as he did with the wiring (at least not yet  ) but I'm using most of his ideas.
One thing I forgot to mention about Speedhut. If you want o change the look of the gauge faces, you can send your gauges to them and they will take car of that. I forgot to ask how much they ask for them to do this though.
) but I'm using most of his ideas.One thing I forgot to mention about Speedhut. If you want o change the look of the gauge faces, you can send your gauges to them and they will take car of that. I forgot to ask how much they ask for them to do this though.


Thread Starter
Joined: Feb 2003
Posts: 3,393
Likes: 0
From: Austin, Tx

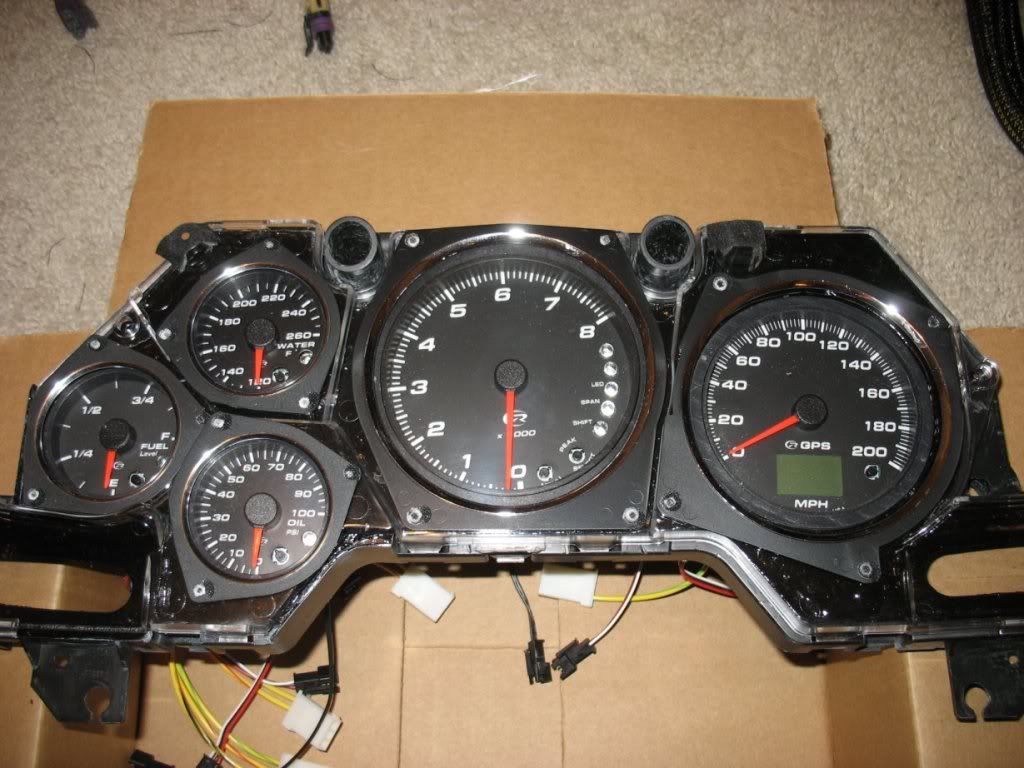
For some reason my Speedo picture isn't working so I posted a new one. I will put the GPS antenna on the little "bridge" between the front window defroster running the wiring under the dash. The gauges are 4" for the Speedo and Tach then 2 1/16" for the rest of them.
you should not need it out in the open like that, my suggestion is to leave it under the dash and confirm its working before putting it out in the open.
I install GPS speedos in boats all the time and its not required to be out in the open. A short delay is normal for them so dont take that as a issue with its mounting position
Looking great Rick! The gauge color combo looks really good! I'm pretty jealous! I chose stock looking colors because at first I was only planning on doing my oil and coolant gauges. I'm wishing I had gone with yellow lettering and backlight though. I'm subscribing to your thread and eagarly looking forward to seeing your progress 
Lane
PS
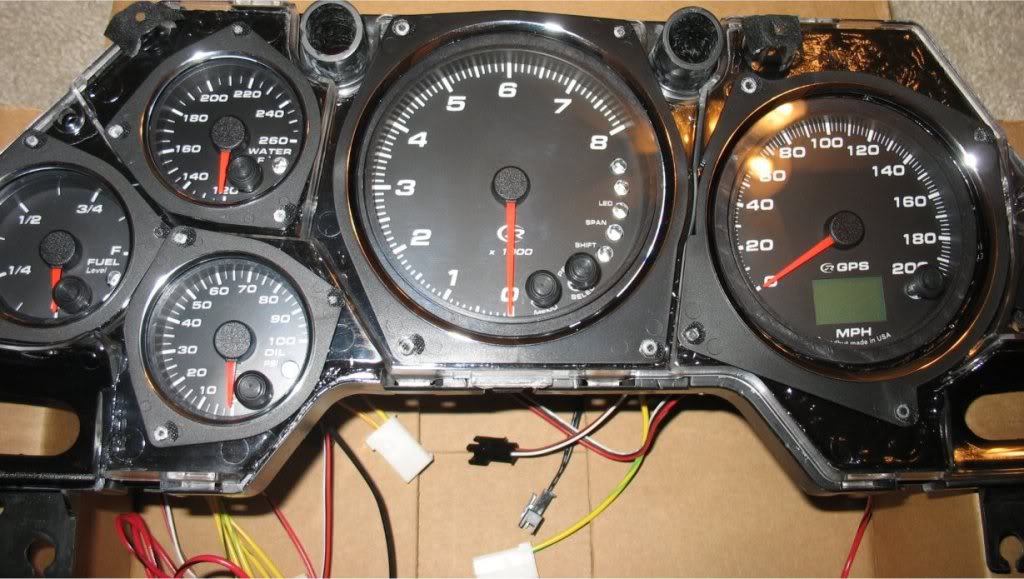
You are welcome to post any pictures from my build thread you want. Here's one of the cluster when I finished. The only difference being is that the programming buttons are installed in the stock glass face
Lane
PS
You are welcome to post any pictures from my build thread you want. Here's one of the cluster when I finished. The only difference being is that the programming buttons are installed in the stock glass face

It's not too bad. I believe ProjectD was able to still use most of his existing wiring because he didn't touch his rear PCB.
I took a more drastic approach and did this:
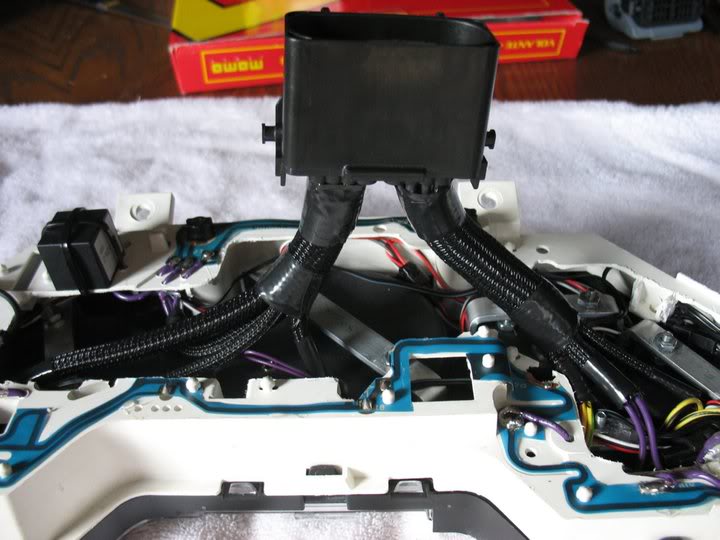
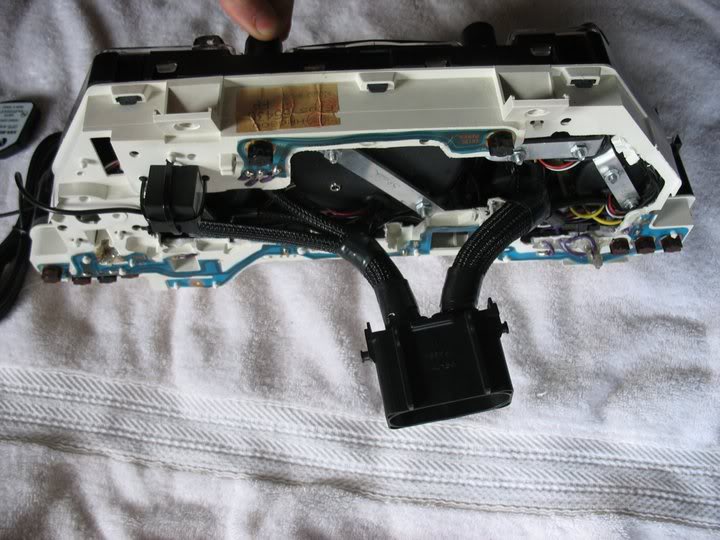
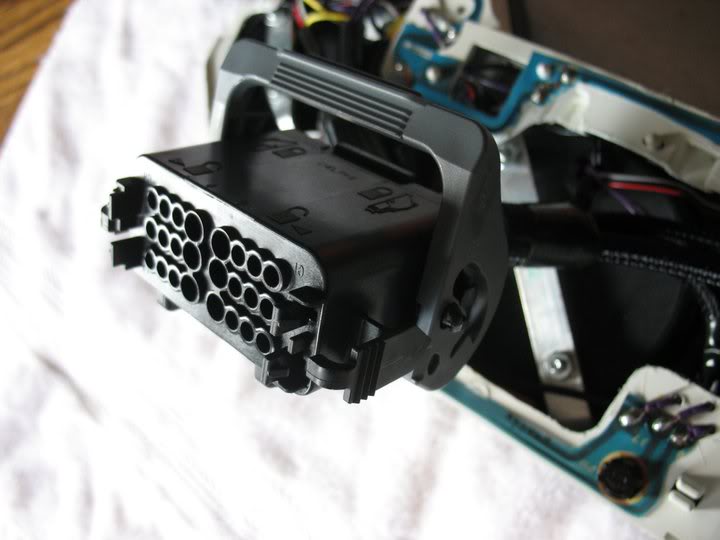
I wired in a 24pin Delphi GT Lever Lock series connector in so that my cluster is a one plug affair. My instrument harness was completely rewired to accommodate this change.
My build thread has a lot of info on my wiring and the cluster mod, but its on another forum. I'll post it over here some day, but if anyone is interested in seeing it now, PM me and I'll send you the address
Lane
I took a more drastic approach and did this:
I wired in a 24pin Delphi GT Lever Lock series connector in so that my cluster is a one plug affair. My instrument harness was completely rewired to accommodate this change.
My build thread has a lot of info on my wiring and the cluster mod, but its on another forum. I'll post it over here some day, but if anyone is interested in seeing it now, PM me and I'll send you the address
Lane
Thread Starter
Joined: Feb 2003
Posts: 3,393
Likes: 0
From: Austin, Tx
Thread Starter
Joined: Feb 2003
Posts: 3,393
Likes: 0
From: Austin, Tx
It isn't hard at all. My kit came with a distribution wiring kit for power and lighting. So you only need to tap into one power source and one lighting source then plug all your gauges to the "distribution block". Then you just put your new sensors (in my case boost. temp and oil pressure) in the engine and plug them to the gauge. For the tach just tap into the tach signal that comes from the ECU. Then follow the instructions and set your tach. The speedo only power and lighting is required because it gets it speed signal from GPS.